Craving a simple yet delicious snack? These Frozen Peanut Butter Yogurt Bites are the answer! With just a handful of ingredients, you can whip up a tasty treat perfect for kids and adults alike. In this guide, I’ll take you through the easy steps to create these irresistible bites, plus tips for customization and storage. Get ready to indulge without the guilt—let’s dive into this fun recipe!
Ingredients
List of Required Ingredients
– 1 cup plain Greek yogurt
– 1/2 cup creamy peanut butter
– 2 tablespoons honey or maple syrup
– 1 teaspoon pure vanilla extract
– A pinch of sea salt
– Optional toppings: mini chocolate chips or finely chopped nuts
To make these Frozen Peanut Butter Yogurt Bites, gather the ingredients first. You need plain Greek yogurt and creamy peanut butter. The yogurt gives a nice tang, while the peanut butter adds creaminess. Honey or maple syrup sweetens the mix. Use pure vanilla extract for a rich flavor. A pinch of sea salt brings out all the tastes.
You can add toppings if you like. Mini chocolate chips give a sweet crunch. Finely chopped nuts add texture and flavor. Feel free to mix and match these ingredients based on your taste. The key is to enjoy the process and make it your own!
Step-by-Step Instructions
Preparation Steps
1. In a medium bowl, combine:
– 1 cup plain Greek yogurt
– 1/2 cup creamy peanut butter
– 2 tablespoons honey or maple syrup
– 1 teaspoon pure vanilla extract
– A pinch of sea salt
Mix these ingredients well. Make sure the mixture is smooth and creamy.
2. Prepare your mini muffin tin or silicone ice cube tray. You can line each cup with parchment paper or use mini cupcake liners. This helps with easy removal later.
3. Fill each cup with the yogurt mixture. Aim to fill them about 3/4 full. This allows room for the yogurt to expand as it freezes.
Freezing Process
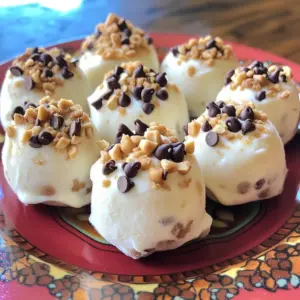
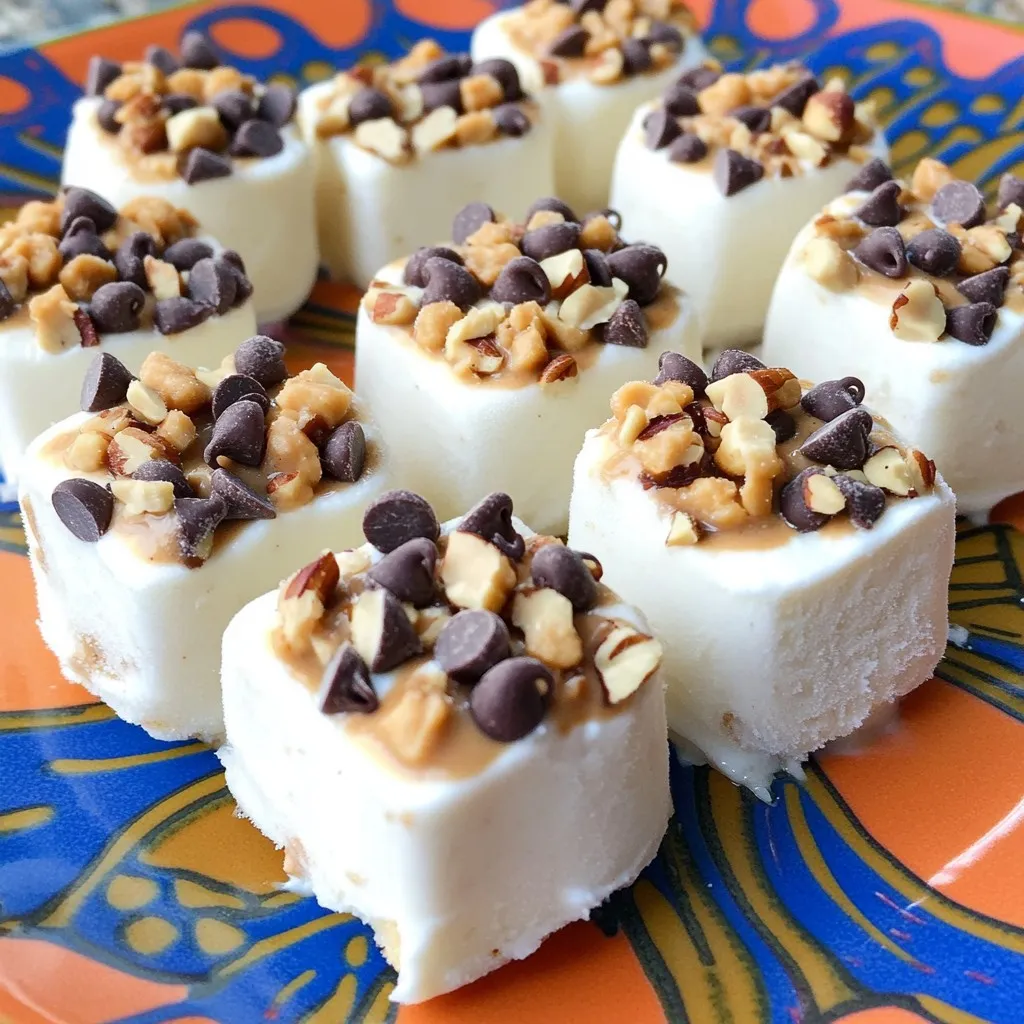
1. After filling the cups, it’s time for toppings. Add mini chocolate chips or finely chopped nuts on top of each filled cup. This adds flavor and crunch.
2. Place the tray in the freezer. Let the yogurt bites freeze for 2-3 hours. They should be firm and solid.
3. Once frozen, gently remove the yogurt bites from the tray. If you used a muffin tin, run a butter knife around the edges to help loosen them. Then lift them out carefully.
Tips & Tricks
Optimizing Texture and Flavor
To make the best Frozen Peanut Butter Yogurt Bites, start with a smooth mixture. Mix the Greek yogurt and peanut butter until there are no lumps. This step is key. A creamy texture makes each bite enjoyable. If you want to tweak the sweetness, try honey or maple syrup. Honey gives a warm flavor, while maple syrup offers a unique taste. You can use either, depending on what you like!
Presentation Ideas
Serving your yogurt bites in fun dishes can impress your guests. Choose a bright plate or a cute cupcake box for a pop of color. This makes the dessert look exciting and tasty. If you want to gift these treats, think about creative packaging. Use small jars or treat bags tied with ribbons. This adds a personal touch and makes your gift stand out!
Variations
Flavor Combinations
You can easily switch up the flavor of your bites. One fun idea is to swap peanut butter for almond butter. Almond butter gives a nutty twist that many enjoy. The taste changes, but the creaminess stays.
Another tasty option is to add fruits like banana or berries. Slicing bananas into small pieces adds a sweet touch. You can mix in blueberries or strawberries for a burst of flavor and color. Just add the fruit to the yogurt mix before freezing.
Dietary Adjustments
If you want to make these bites dairy-free, choose dairy-free yogurt. There are many brands that taste great and work well in this recipe. Look for options made from almonds or coconuts.
For those wanting to cut back on sugar, consider low-sugar variations. You can use sugar-free sweeteners instead of honey or maple syrup. Just remember to adjust the amount to keep the taste balanced.
Storage Info
Best Practices for Freezing
Store your frozen peanut butter yogurt bites in airtight containers. This keeps them fresh and prevents freezer burn. Choose a container that is the right size to limit air inside. If you have extra space, add a piece of parchment paper between layers. This helps avoid sticking.
For the best taste, eat the yogurt bites within two weeks. After that, they may lose flavor and texture.
Thawing and Serving Tips
To thaw the yogurt bites, simply leave them at room temperature for about 10 minutes. This softens them enough to enjoy. You can also microwave them for a few seconds on low power. Just be careful not to overdo it!
For serving, I love to arrange the bites on a colorful plate. It makes them look even more inviting. You can also add fresh fruit or a drizzle of honey on top for extra flair. These bites are great for snacks, dessert, or gatherings!
FAQs
Common Questions about Frozen Peanut Butter Yogurt Bites
Can I use low-fat yogurt?
Yes, you can use low-fat yogurt. It will still taste great. Just make sure it is plain Greek yogurt for the best texture.
How long do these bites last in the freezer?
These yogurt bites last up to two weeks in the freezer. To keep them fresh, store them in an airtight container.
Can I use crunchy peanut butter instead of creamy?
Yes, crunchy peanut butter works well. It adds a fun texture to each bite. Just keep in mind the bites might be a bit harder to mix.
Are there any nut-free alternatives?
You can use sun butter or soy nut butter as nut-free options. They provide similar taste and texture without peanuts.
How can I make them vegan-friendly?
To make these bites vegan, swap Greek yogurt for a dairy-free yogurt. Use maple syrup instead of honey. This way, you keep the flavor while meeting vegan needs.
You now know how to make tasty frozen peanut butter yogurt bites. With Greek yogurt, peanut butter, and sweetener, you create a healthy treat. By following the steps and tips, you optimize flavor and texture. Feel free to customize these bites with your favorite toppings and flavors. Store them well for easy access to snacks. Enjoy making and sharing this delicious treat with family and friends. Discovering new variations can make snacking fun and exciting!