If you’re craving a warm, satisfying meal, Japanese Chicken Katsu Bowls should be on your list. This dish combines crispy chicken, fluffy rice, and fresh veggies topped with savory tonkatsu sauce. I’ll guide you through simple steps to make this comforting bowl at home. Get ready for a flavor-packed experience that’s fun to create and even more enjoyable to eat. Let’s dive into the details of this delightful recipe!
Ingredients
Main Ingredients for Japanese Chicken Katsu Bowls
– 2 boneless, skinless chicken breasts
– 1/2 cup all-purpose flour
– 2 large eggs, beaten until smooth
– 1 cup panko breadcrumbs (Japanese-style)
– Vegetable oil for frying
– Salt and freshly cracked pepper to taste
For the chicken katsu, I start with fresh chicken breasts. I like to flatten them for even cooking. A little salt and pepper adds good flavor. The breading needs three key parts: flour, beaten eggs, and panko breadcrumbs. The panko gives it that crispy texture we love.
Fresh Ingredients for Serving
– 2 cups cooked white rice (or sushi rice, preferably slightly warm)
– 1 cup finely shredded cabbage (can use green or purple for color)
– 1 ripe avocado, sliced into wedges
– 1/4 cup sliced green onions (scallions)
– 1 tablespoon sesame seeds, toasted for added flavor
– Tonkatsu sauce, for drizzling (can be store-bought or homemade)
– Optional garnish: pickled radish or pickled ginger for a pop of flavor
For serving, I use warm white or sushi rice as the base. I love adding fresh cabbage for crunch and color. Sliced avocado gives a creamy touch. Green onions and sesame seeds finish it off with flavor and flair. Don’t forget the tonkatsu sauce! It brings everything together with its rich taste. If you want, add pickled radish or ginger for an extra zing.
Step-by-Step Instructions
Preparing the Chicken
To start, you need to prepare the chicken. First, take each chicken breast and place it between two sheets of plastic wrap. Use a meat mallet or rolling pin to gently flatten them. Aim for about 1/2 inch thickness. This step helps the chicken cook evenly and stay tender.
Next, season both sides of the chicken breasts with salt and freshly cracked pepper. This simple seasoning enhances the flavor and sets a tasty base for the dish.
Breading Process
Now, let’s set up the breading station. You need three shallow dishes: one with flour, one with beaten eggs, and one with panko breadcrumbs. This setup makes breading fast and easy.
Begin the breading by dredging each chicken breast in the flour. Be sure to coat it evenly. Shake off any extra flour, then dip the chicken in the beaten eggs. Make sure the chicken is fully covered. Finally, press the chicken into the panko breadcrumbs. This gives it that crispy, crunchy texture we all love.
Cooking the Chicken
For frying, heat about 1/2 inch of vegetable oil in a large skillet over medium-high heat. To check if the oil is ready, drop in a small piece of bread. If it sizzles right away, it’s good to go.
Carefully place the breaded chicken breasts into the hot oil. Cook them for about 4-5 minutes on each side. Look for a lovely golden brown color and ensure the internal temperature reaches 165°F (74°C) for safety. Once done, transfer the chicken to a plate lined with paper towels to soak up any extra oil. Let it cool for a couple of minutes, then slice it into bite-sized strips.
Assembling the Bowls
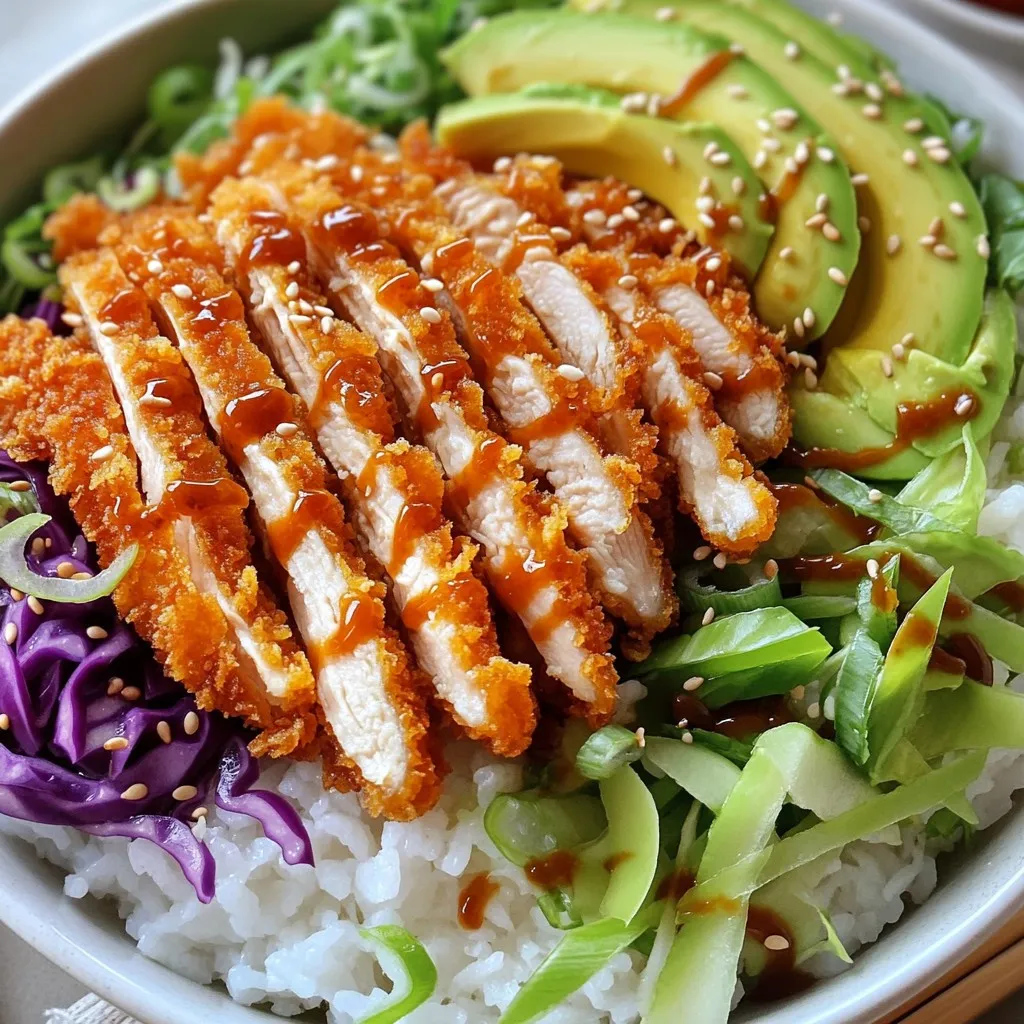
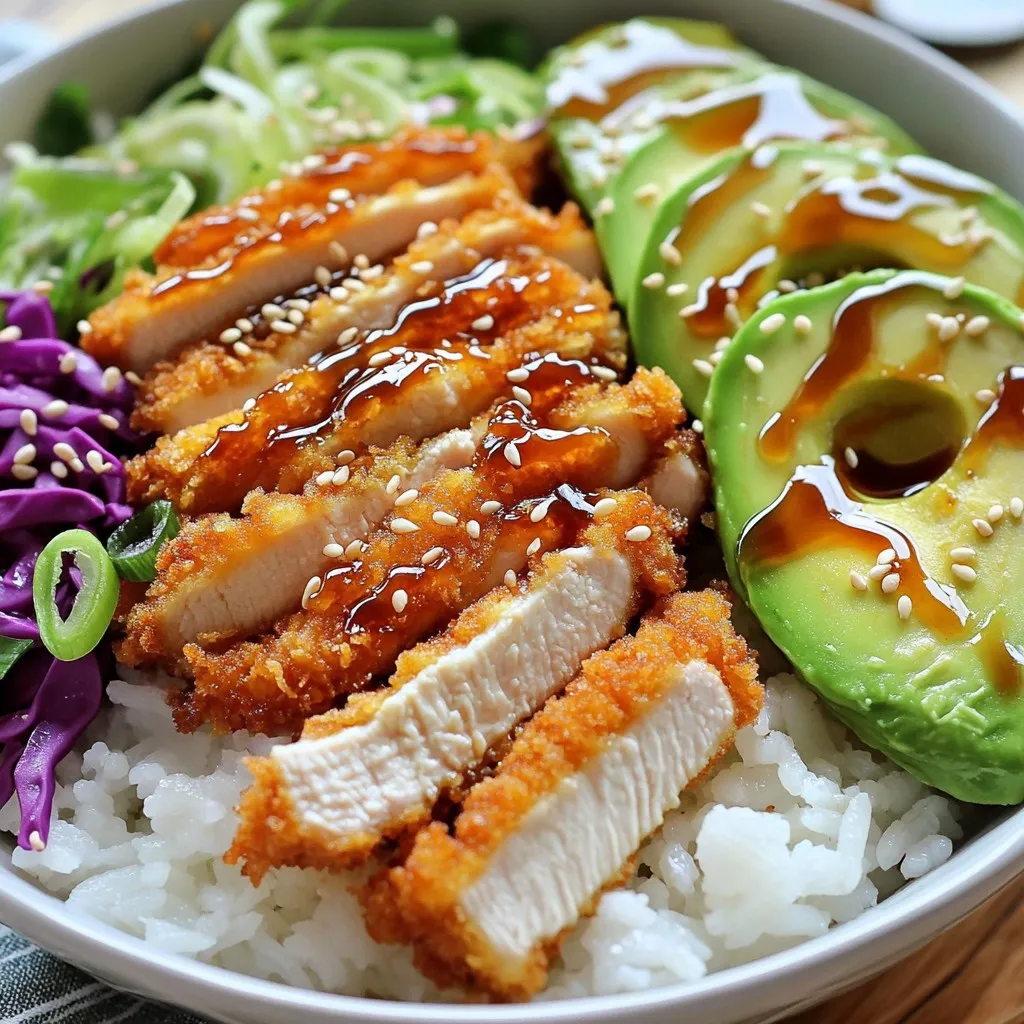
Now it’s time to assemble your bowls. Start with a generous layer of warm cooked white rice. This is the base for your meal. Neatly arrange the sliced chicken katsu over the rice. Add a colorful mix of shredded cabbage and avocado slices for freshness.
Drizzle a good amount of tonkatsu sauce over the chicken. This sauce adds a rich, tangy flavor that ties everything together. For the final touch, sprinkle toasted sesame seeds and sliced green onions over the top. These add color and a nice crunch.
If you like, serve with pickled radish or pickled ginger on the side. These add an extra burst of flavor and a delightful crunch to your Chicken Katsu Bowls.
Tips & Tricks
Perfecting the Chicken Katsu
To ensure a crispy texture, follow these steps:
– Flatten the Chicken: Use a meat mallet to gently pound the chicken breasts to about 1/2 inch thick. This helps them cook evenly.
– Breading Process: Dip the chicken in flour, then eggs, and finally panko breadcrumbs. Press the breadcrumbs firmly for a better crust.
To cook the chicken evenly, maintain the oil temperature. Heat the oil until it’s hot, but not smoking. This keeps the chicken from absorbing too much oil, which can make it soggy.
Presentation Ideas
Arranging ingredients attractively makes your bowl more inviting. Start with a base of warm cooked rice. Layer the sliced chicken on top, then add shredded cabbage and avocado.
For garnishing, sprinkle toasted sesame seeds and sliced green onions over the dish. You can also add pickled radish or pickled ginger on the side for an extra pop of color and flavor.
Alternative Serve Suggestions
Pair your Chicken Katsu Bowl with a side of miso soup or a fresh salad. The warmth of miso soup balances the crispy chicken. A salad adds a refreshing crunch and complements the meal well.
Variations
Alternative Proteins
You can switch the chicken for pork or tofu. Pork katsu has a rich flavor. It cooks the same way as chicken. Just watch the cooking time. Tofu katsu is a great choice too. Use firm tofu and press it to remove extra water. Then, coat and fry it just like chicken. This way, you can enjoy a tasty meal that fits your diet.
Different Rice Options
You can use different grains instead of white rice. Quinoa is a healthy swap. It adds a nutty flavor and is rich in protein. Brown rice is another great option. It has more fiber and a chewy texture. If you want something lighter, try cauliflower rice. It cooks quickly and is low in carbs. Each grain gives a new twist to the bowl.
Flavor Enhancements
Spice up your katsu bowl with new flavors. Add chili flakes for heat or drizzle sriracha for a kick. You can mix tonkatsu sauce with mayonnaise for a creamy sauce. This adds richness and depth. For a tangy touch, try a splash of citrus juice. Lime or yuzu juice brightens up the dish. These enhancements make your meal exciting and unique.
Storage Info
Storing Leftovers
To keep your Chicken Katsu Bowls fresh, store them in the fridge. Use airtight containers. Always cool the chicken before putting it away. This helps keep the rice and veggies fresh. You can store leftovers for up to three days. Make sure to separate the chicken from the rice to keep it crispy.
Reheating Instructions
When you want to eat your leftovers, use the oven for the best taste. Preheat your oven to 375°F (190°C). Place the chicken on a baking sheet. Heat for about 10-15 minutes. This keeps the chicken crispy. If you use the microwave, the chicken might get soggy. Heat the rice separately in the microwave for a minute or until warm.
Freezing Tips
If you want to save your Chicken Katsu Bowls for later, freezing is a great option. First, let the chicken cool completely. Wrap it tightly in plastic wrap, then place it in a freezer bag. You can freeze the chicken for about three months. For rice, store it in a separate airtight container. When ready to eat, thaw in the fridge overnight before reheating.
FAQs
What is Chicken Katsu?
Chicken katsu is a crispy, fried chicken dish from Japan. It features boneless chicken breasts coated in panko breadcrumbs. The word “katsu” means cutlet in Japanese. Traditionally, this dish uses pork, but chicken is now popular worldwide. It is often served with rice, shredded cabbage, and tonkatsu sauce. This sauce adds a rich, tangy flavor that complements the crunchy chicken.
Can I make this dish gluten-free?
Yes, you can make chicken katsu gluten-free. Use gluten-free flour instead of regular flour. For the breadcrumbs, choose gluten-free panko or crushed rice cereal. These substitutes keep the texture crispy. Ensure that the tonkatsu sauce is also gluten-free. Many brands offer gluten-free options.
How can I make homemade tonkatsu sauce?
You can whip up a simple tonkatsu sauce at home. Here’s a quick recipe:
– 1/4 cup ketchup
– 2 tablespoons soy sauce (or gluten-free soy sauce)
– 1 tablespoon Worcestershire sauce
– 1 tablespoon sugar
– 1 teaspoon mustard
Mix all these ingredients in a bowl. Taste and adjust the sweetness or tanginess as you like. This sauce will be a perfect drizzle over your chicken katsu.
What can I serve with Japanese Chicken Katsu Bowls?
You can serve a variety of sides with chicken katsu bowls. Some great options include:
– Miso soup for a warm, savory pairing
– A simple green salad with sesame dressing
– Steamed or sautéed vegetables for color and nutrition
– Pickled radish or pickled ginger for a zesty crunch
These sides enhance the meal and add more flavor to your chicken katsu bowl.
Japanese chicken katsu bowls are simple yet delicious. This dish features crispy chicken, seasoned rice, and fresh veggies. We explored step-by-step instructions for preparing, cooking, and assembling your bowl. Tips for achieving perfect results and attractive presentation made cooking even easier. You can customize your meal with different proteins or rice options. Store and reheat leftovers for future enjoyment. This dish brings warmth and flavor to your table, making it a great meal choice any day. Enjoy crafting your own katsu bowls!
