WANT TO SAVE THIS RECIPE?
Looking for a simple snack that’s tasty and healthy? No-bake granola bars are the answer! With just a few key ingredients, you can whip up these delicious treats in no time. I’ll guide you through the easy steps to create your own bars packed with flavor and nutrition. Whether you’re busy or want a fun kitchen project, these bars are perfect for any occasion. Let’s get started!
Why I Love This Recipe
- Quick and Easy: This no-bake recipe comes together in just 10 minutes, making it perfect for a fast snack or a last-minute treat.
- Nutritious Ingredients: Packed with rolled oats, nuts, and chia seeds, these bars are not only delicious but also provide a great source of energy and nutrients.
- Customizable: You can easily swap out the nuts or sweetener to suit your taste preferences or dietary needs.
- Perfect for Meal Prep: These bars are ideal for preparing ahead of time, making them a convenient grab-and-go snack throughout the week.
Ingredients
Main Ingredients for No-Bake Granola Bars
– 2 cups rolled oats
– 1 cup almond butter (or substitute with smooth peanut butter)
– 1/4 cup honey (or maple syrup for a vegan option)
– 1/2 cup dark chocolate chips
– 1/2 cup mixed nuts (such as walnuts, almonds, or pecans), coarsely chopped
– 1/4 cup chia seeds
– 1/2 teaspoon pure vanilla extract
– Pinch of sea salt
These ingredients create a tasty and healthy snack. I love using rolled oats as the base. They add great texture and fiber. Almond butter or peanut butter gives the bars their rich flavor and helps bind the mix.
For sweetness, honey works well, but maple syrup is a great vegan option. Dark chocolate chips add a sweet touch, while mixed nuts boost crunch and healthy fats. Chia seeds are tiny but mighty, adding fiber and protein. The vanilla extract gives a warm flavor, and a pinch of sea salt balances everything.
You can customize these ingredients to suit your taste. Want a nut-free version? Just skip the nuts. Prefer dried fruit? Toss in some raisins or cranberries. The choice is yours!

Step-by-Step Instructions
Preparing the Baking Dish
Line an 8×8 inch square baking dish with parchment paper. Let the paper hang over the edges. This helps you lift the bars out later. It also keeps the bars intact for serving.
Combining the Wet Ingredients
In a medium saucepan, melt the almond butter and honey over low heat. Stir until smooth. Remove from heat and mix in vanilla extract and a pinch of sea salt. This adds great flavor to your bars.
Mixing the Dry Ingredients
In a large bowl, combine rolled oats, chopped nuts, dark chocolate chips, and chia seeds. Use a spoon to mix well. Make sure everything is evenly spread. This is key for a tasty bite.
Incorporating Wet and Dry Ingredients
Pour the warm almond butter mixture over the dry ingredients. Use a sturdy spatula or your hands to mix. Stir until everything is sticky and well-coated. This step is vital for binding the bars.
Pressing Mixture into the Dish
Transfer the mixture into the lined baking dish. Use the back of a spatula or your hands to press down firmly. Make sure to fill the corners. A tight pack helps the bars stay together.
Chilling the Bars
Cover the dish with plastic wrap or a lid. Place it in the fridge for 1-2 hours. Chilling helps the bars firm up. They need to hold their shape when cut.
Cutting and Serving Suggestions
Once firm, lift the mixture out using the parchment paper. Place it on a cutting board. Slice into bars or squares as you like. For a nice touch, arrange them on a platter. Enjoy your tasty homemade treats!
Tips & Tricks
Customization Options
You can switch up the nut butter in this recipe. Almond butter is great, but smooth peanut butter works too. If you want a nut-free option, use sunflower seed butter instead. You can also change the sweetener based on what you like. Honey is sweet and sticky, while maple syrup adds a nice flavor for vegans.
Storage Tips
Keeping your bars fresh is easy. Store them in an airtight container at room temperature for a week. If you want them to last longer, put them in the fridge. For best results, separate layers with parchment paper to avoid sticking. If they crumble, try packing them tighter next time.
Enhancing Flavor and Texture
You can add fun mix-ins to your bars. Dried fruits like cranberries or apricots add sweetness and chewiness. Seeds like pumpkin or sunflower give a nice crunch. For a special treat, drizzle some melted chocolate or nut butter on top. It adds a lovely touch and makes them look fancy!
Pro Tips
- Store in the Right Place: Keep your granola bars in an airtight container at room temperature for up to a week or in the refrigerator for longer freshness.
- Customize Your Nuts: Feel free to experiment with different types of nuts or seeds according to your taste preference or dietary needs.
- Sweetness Level: Adjust the amount of honey or maple syrup based on your sweetness preference; you can add more or less according to your taste.
- Extra Crunch: For added texture, consider toasting the oats or nuts before mixing; this enhances the flavor and provides a delightful crunch.
Variations
Vegan No-Bake Granola Bars
You can easily make these bars vegan. Just swap honey for maple syrup. Use all plant-based ingredients like almond butter. They taste great, and you can enjoy them without any animal products. Maple syrup adds a sweet, rich flavor. This option makes the bars suitable for everyone.
Gluten-Free Options
If you need gluten-free snacks, these bars are perfect. Just make sure to use certified gluten-free oats. Most nut butters, like almond and peanut, are also gluten-free. This way, you can enjoy your bars without worrying about gluten.
Protein-Packed Variations
Want to boost the protein in your bars? Add a scoop of protein powder. You could also mix in seeds like pumpkin or hemp. These additions make your granola bars a great snack for energy and nutrition. They help keep you full longer, too.
Storage Info
Best Storage Methods
To keep your no-bake granola bars fresh, use airtight containers. This method helps keep them from drying out. You can stack them neatly in the container. This way, they stay moist and tasty when you grab one for a snack.
Shelf Life
No-bake granola bars can last up to two weeks when stored correctly. If you keep them in an airtight container, they stay fresh longer. You might notice that the flavor can change over time, but they should still taste good.
Freezing Options
Freezing is a great way to save extra bars. To freeze, wrap each bar in plastic wrap. Then, place them in a freezer-safe bag or container. When you’re ready to eat, just take out a bar and let it thaw in the fridge. This way, you can enjoy your favorite snack anytime!
FAQs
Can I use different types of nuts?
Yes, you can switch nuts in this recipe. I suggest using walnuts, almonds, or pecans. Each nut adds a unique flavor and texture. You could also try cashews or hazelnuts for a fun twist. Just make sure they are coarsely chopped to mix well.
How do I prevent my granola bars from crumbling?
To keep your bars from falling apart, pack them tightly. Use your hands or a spatula to press the mixture firmly into the dish. The more you press, the better they stick together. Also, ensure the nut butter and honey are warm when mixing. This helps everything bind better.
Are no-bake granola bars healthy?
Yes, these bars are packed with good ingredients. Rolled oats provide fiber and energy. Almond butter offers healthy fats and protein. Chia seeds add omega-3s, while dark chocolate gives a sweet touch without too much sugar. Overall, they make a wholesome snack.
Can I make these granola bars ahead of time?
Absolutely! You can make these bars in advance. Just let them chill in the fridge for at least 1-2 hours. Store them in an airtight container to keep them fresh. They will last up to a week. Enjoy them as a quick snack or breakfast option!
In this post, we explored how to make no-bake granola bars. We covered essential ingredients like oats, nut butter, and sweeteners. You learned the step-by-step methods for preparing and chilling your bars. I shared tips for customization, storage, and flavor enhancement.
No-bake granola bars are easy, tasty, and perfect for quick snacks. You can enjoy healthy treats made just the way you like them. So, get creative in the kitchen and make your own delicious bars toda
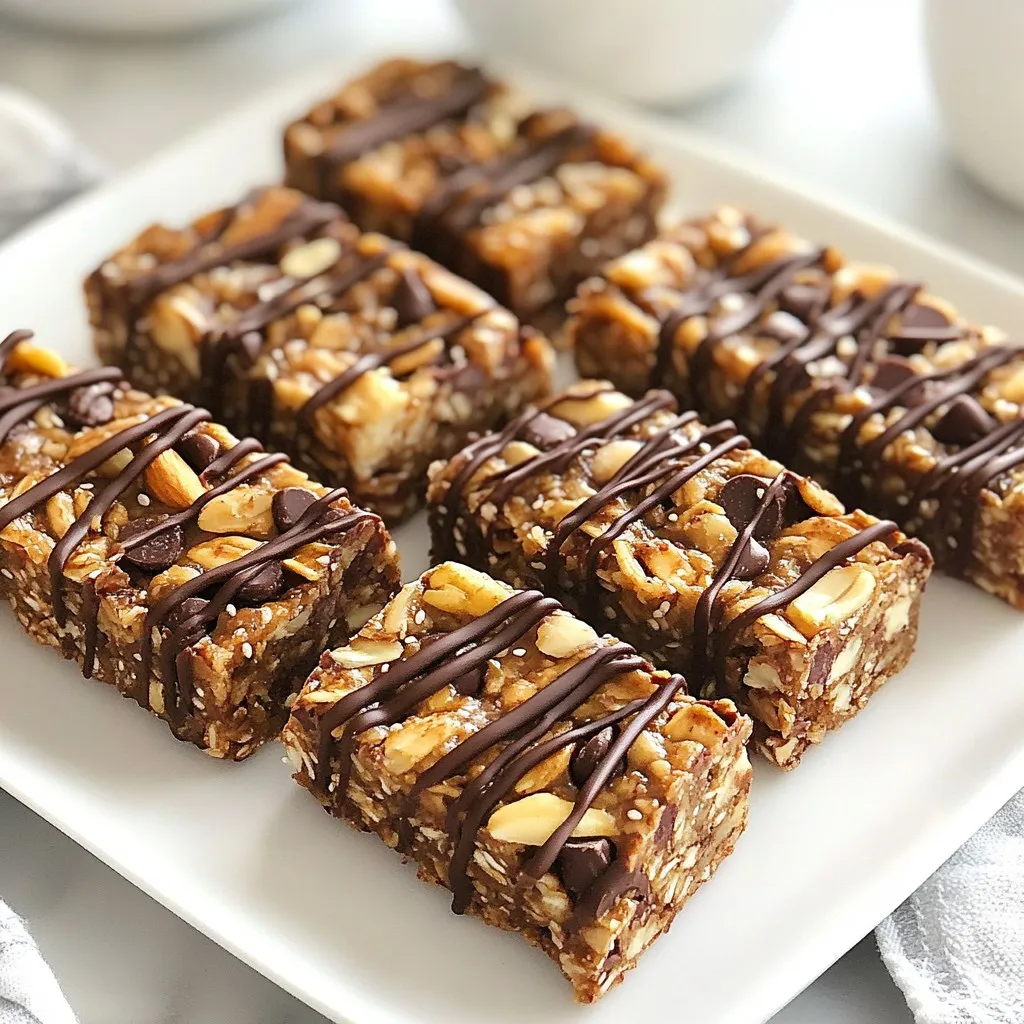
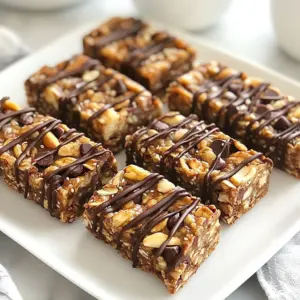
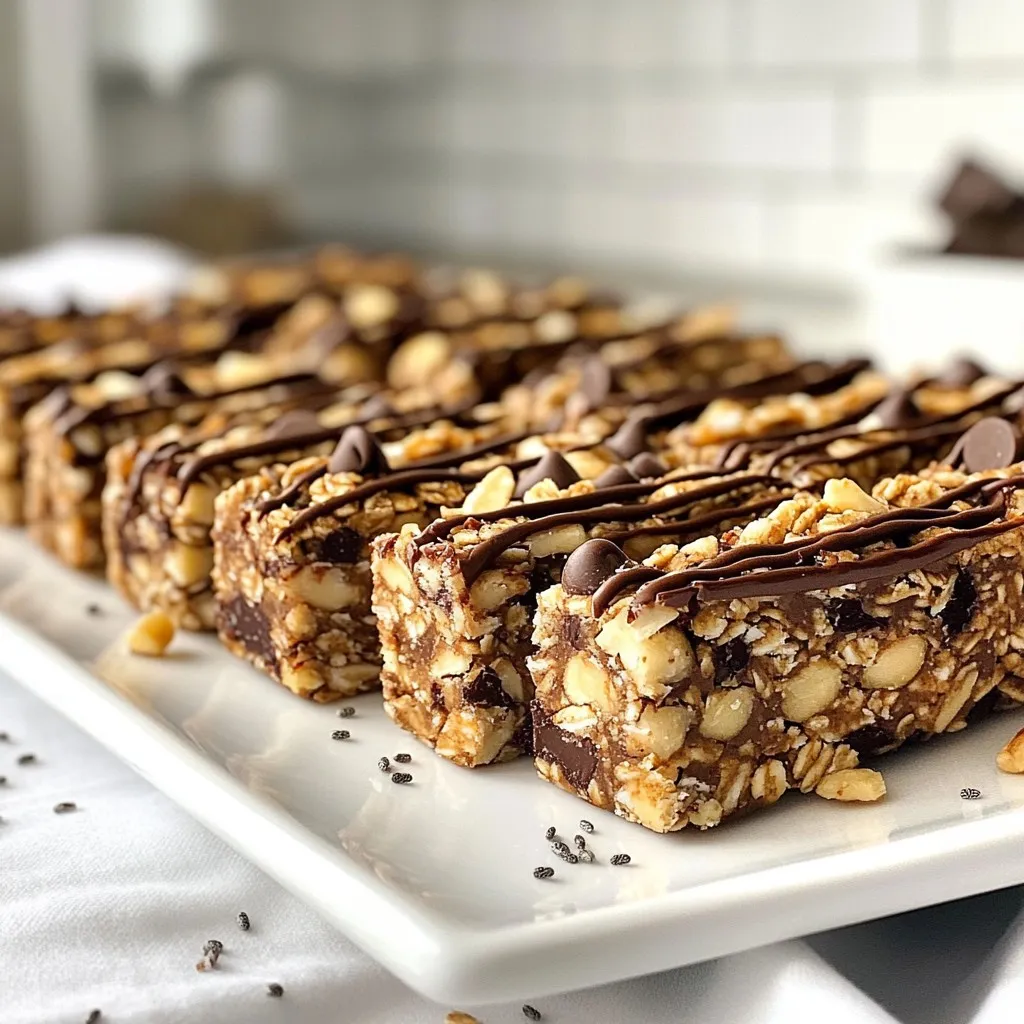
Nutty Chocolate Bliss No-Bake Granola Bars
Delicious no-bake granola bars packed with nuts and chocolate.
Course Snack
Cuisine American
Servings 12
Calories 200 kcal
- 2 cups rolled oats
- 1 cup almond butter (or substitute with smooth peanut butter)
- 0.25 cup honey (or maple syrup for a vegan option)
- 0.5 cup dark chocolate chips
- 0.5 cup mixed nuts (such as walnuts, almonds, or pecans), coarsely chopped
- 0.25 cup chia seeds
- 0.5 teaspoon pure vanilla extract
- 1 pinch sea salt
Prepare the Baking Dish: Begin by lining an 8x8 inch square baking dish with parchment paper, allowing some paper to hang over the edges for easier removal later. This will keep your bars intact and make serving a breeze.
Combine the Wet Ingredients: In a medium saucepan, set over low heat, combine the almond butter and honey. Stir gently until the mixture melts and becomes smooth, ensuring there are no lumps. Once melted, remove the saucepan from heat and stir in the pure vanilla extract and a pinch of sea salt for flavor enhancement.
Mix the Dry Ingredients: In a large mixing bowl, combine the rolled oats, coarsely chopped nuts, dark chocolate chips, and chia seeds. Use a spoon or spatula to mix the ingredients well until they are evenly distributed.
Combine and Mix: Pour the warm almond butter mixture over the dry ingredients in the bowl. Using a sturdy spatula or your clean hands, stir the mixture vigorously until all components are thoroughly coated and the mixture feels sticky. This step is crucial for binding the bars together.
Press into the Dish: Transfer the sticky mixture into the prepared baking dish. With the back of a spatula or your hands, press down firmly and evenly, making sure to fill the corners and flatten the top. The more tightly you pack them, the less likely they are to crumble apart.
Chill: Cover the dish with plastic wrap or a lid and place it in the refrigerator. Allow it to chill for at least 1-2 hours, or until the mixture is firm enough to hold its shape.
Cut and Serve: Once firm, remove the granola mixture out of the dish by lifting with the overhanging parchment paper. Place it on a cutting board and slice into bars or squares according to your preference.
For an appealing presentation, arrange the granola bars neatly on a decorative platter. You may optionally drizzle melted chocolate over the top or sprinkle with additional chopped nuts for an extra flair.
Keyword granola bars, healthy, no-bake, snack
WANT TO SAVE THIS RECIPE?