WANT TO SAVE THIS RECIPE?
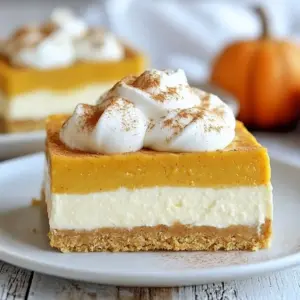
Fall is here, and what better way to celebrate than with a No-Bake Pumpkin Cheesecake Bar? These bars are creamy, spiced, and super easy to whip up! You don’t need to turn on the oven to enjoy this tasty treat. Join me as I guide you through a simple recipe that’s perfect for any gathering. You’ll impress your friends and enjoy every delicious bite! Let’s dive in!
Why I Love This Recipe
- Effortless Delight: These no-bake pumpkin cheesecake bars are incredibly easy to make, requiring minimal effort for maximum flavor.
- Seasonal Flavor: Embrace the essence of fall with the rich and warm flavors of pumpkin and spices in every bite.
- Creamy Texture: The combination of cream cheese and whipped cream creates a light and fluffy texture that melts in your mouth.
- Perfect for Sharing: Cut into squares, these bars are easy to serve and share at gatherings, making them a crowd-pleaser.
Ingredients
List of Ingredients
– Graham Cracker Crust Ingredients
– 1 ½ cups graham cracker crumbs
– ¼ cup granulated sugar
– ½ cup unsalted butter, melted
– Cream Cheese Mixture Ingredients
– 16 oz cream cheese, softened at room temperature
– 1 cup powdered sugar
– 1 cup pumpkin puree (unsweetened)
– 1 teaspoon vanilla extract
– 1 teaspoon pumpkin pie spice
– 1 teaspoon fresh lemon juice
– Topping Ingredients
– 1 cup whipped cream (for topping)
– Extra pumpkin pie spice for garnish
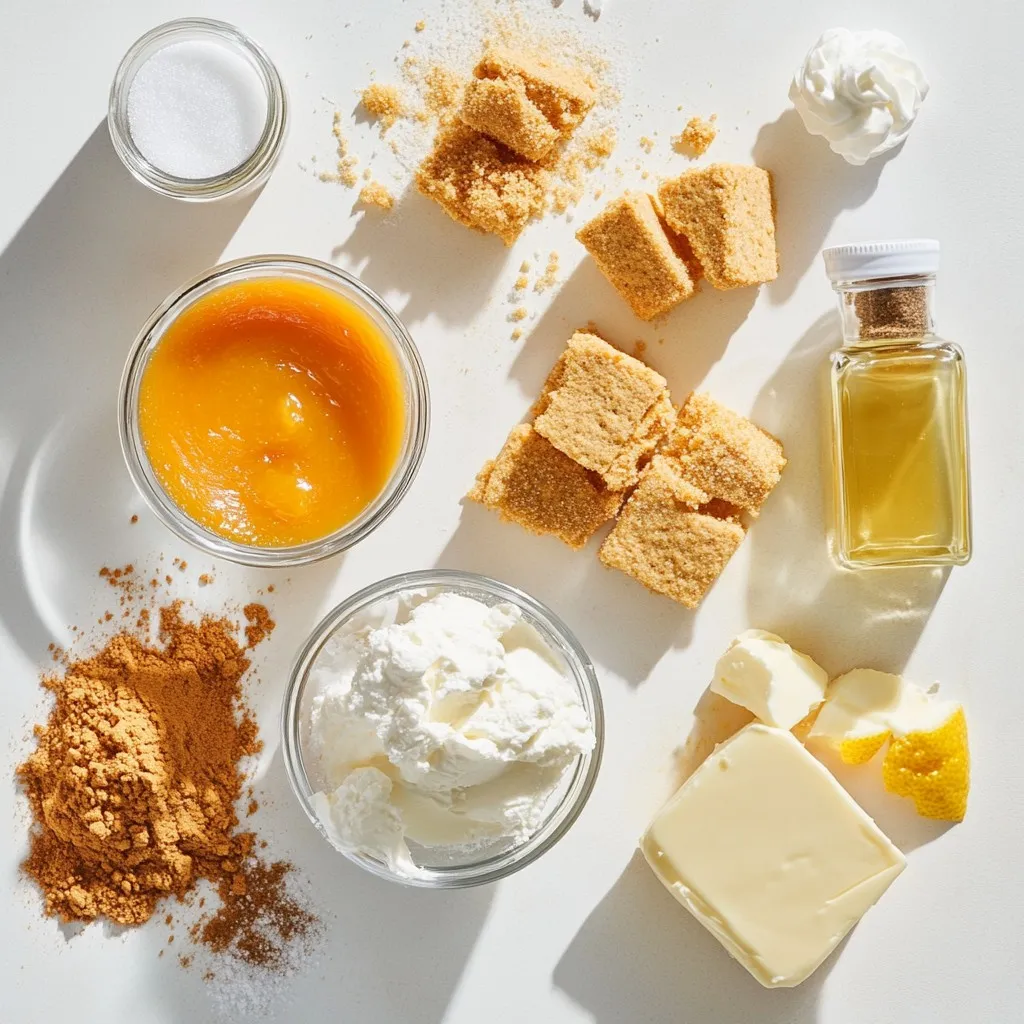
These ingredients create a delightful fall treat. The graham cracker crust is simple yet tasty. The cream cheese mixture is rich and flavorful with pumpkin and spices. The whipped cream topping adds a light touch that makes these bars shine. Each ingredient plays a key role in the overall taste and texture. Enjoy assembling these elements for a perfect no-bake dessert.
Step-by-Step Instructions
Preparing the Crust
Mixing Ingredients for Crust
Start by mixing 1 ½ cups of graham cracker crumbs and ¼ cup of granulated sugar in a medium-sized bowl. Pour in ½ cup of melted unsalted butter. Stir until the mix feels like wet sand.
Pressing Crust into Baking Dish
Next, take a lined 9×9-inch baking dish. Firmly press the crust mixture into the bottom. Use the back of a measuring cup or a spatula to create a flat layer. This step is key for a solid base.
Chilling the Crust
Place the dish in the refrigerator. Chill the crust for about 15 minutes. This helps it firm up before adding the filling.
Making the Cheesecake Filling
Creaming the Cream Cheese
In a large bowl, beat 16 oz of softened cream cheese with an electric mixer. Mix on medium speed until the cream cheese is smooth. Make sure there are no lumps left.
Adding Pumpkin and Spices
Gradually add 1 cup of powdered sugar to the cream cheese. Mix until smooth. Then, stir in 1 cup of pumpkin puree, 1 teaspoon of vanilla extract, 1 teaspoon of pumpkin pie spice, and 1 teaspoon of fresh lemon juice.
Folding in Whipped Cream
Now, carefully fold in 1 cup of whipped cream. Use a spatula to gently mix it in. Be careful not to deflate the light and airy texture.
Assembling the Cheesecake Bars
Pouring the Filling over the Crust
Pour the pumpkin cheesecake filling over the chilled crust. Use a spatula to spread it out evenly. This ensures every bite is delicious.
Smoothing the Top
Smooth the top of the filling to your liking. You can make it as flat or as swirly as you want.
Setting the Bars in Refrigeration
Cover the baking dish with plastic wrap. Refrigerate for at least 4 hours, but overnight is best. This allows the bars to set well and taste even better.
Tips & Tricks
Tips for Perfect No-Bake Cheesecake Bars
– Ensuring Smooth Cream Cheese Mixture
Start with room temperature cream cheese. Softening it helps blend easily. Mix it well until there are no lumps. This step is key for a creamy texture.
– Chilling Time Recommendations
Chill the crust for about 15 minutes first. Then, let the filled bars set for at least 4 hours. For best results, refrigerate overnight. This helps the flavors meld and firm up.
– Best Practices for Whipped Cream Folding
Use a spatula to fold in the whipped cream. Be gentle to keep the air in. This gives your dessert a light and airy feel.
Common Mistakes to Avoid
– Overmixing or Undermixing Ingredients
Overmixing can make the bars dense. Undermixing leaves lumps. Aim for a smooth, consistent mixture without overdoing it.
– Not Allowing Proper Setting Time
Rushing the chilling process can ruin your bars. They need time to set. If you skip this step, you’ll end up with a messy slice.
Pro Tips
- Chill the Cream Cheese: Make sure your cream cheese is properly softened to room temperature for a smooth filling. If it’s too cold, it can lead to lumps in the mixture.
- Graham Cracker Crust Tip: For an extra crispy crust, bake the graham cracker mixture in the oven for 10 minutes at 350°F (175°C) before chilling.
- Whipped Cream Incorporation: When folding in the whipped cream, use a gentle hand to maintain the light and airy texture of the cheesecake filling.
- Flavor Enhancement: For a deeper pumpkin flavor, consider adding a pinch of nutmeg or ginger to the filling along with the pumpkin pie spice.
Variations
Flavor Variations
You can change the flavors of your pumpkin cheesecake bars easily. Here are some fun ideas:
– Alternative Flavor Mix-ins: Try adding chocolate chips or crushed nuts for a twist. You can use caramel sauce for a sweet touch, too.
– Different Spice Combinations: If you want a new taste, swap pumpkin pie spice for cinnamon or nutmeg. This can give your bars a unique flavor profile.
Dietary Adjustments
You can also adjust this recipe for special diets. Here’s how:
– Gluten-Free Options: Replace graham crackers with gluten-free cookies or oats. This keeps the crust tasty and safe for gluten-free eaters.
– Low-Sugar Substitutions: Use a sugar substitute like Stevia or monk fruit to make a low-sugar version. This change allows you to enjoy the bars without all the sugar.
These variations let you make the recipe fit your needs and preferences. Enjoy creating your perfect pumpkin cheesecake bars!
Storage Info
Best Practices for Storing Bars
To keep your no-bake pumpkin cheesecake bars fresh, store them in the fridge. Place the bars in an airtight container. This will help preserve their creamy texture and flavor. If you do not have a container, cover the baking dish with plastic wrap tightly.
For longer storage, you can freeze the bars. Cut them into squares first. Wrap each square in plastic wrap and place them in a freezer-safe bag. This helps prevent freezer burn. They will keep well for up to three months in the freezer.
Shelf Life
How Long Do They Last in the Fridge?
These cheesecake bars can last in the fridge for about five days. Make sure to check for any signs of spoilage before you eat them.
Signs of Spoilage
Look for changes in smell, texture, or color. If the bars smell sour or have a watery layer on top, it’s best to toss them. Always trust your senses when it comes to food safety.
FAQs
Can I use fresh pumpkin instead of canned?
Yes, you can use fresh pumpkin! Fresh pumpkin has a brighter taste. It may also have a different texture. Canned pumpkin is smoother and easier to use. Fresh pumpkin needs to be cooked and pureed first. Both options work, but canned is quicker.
How do I cut the cheesecake bars neatly?
To cut the cheesecake bars neatly, chill them well. Use a sharp knife for straight cuts. Dip the knife in warm water before each cut. Wipe it clean between cuts. This helps keep the edges clean. Using a ruler can help keep your pieces even.
Can I make these bars ahead of time?
Absolutely! You can make these bars a day or two ahead. They store well in the fridge. Just keep them covered to avoid drying out. If you want to freeze them, do so before adding the whipped cream. They will last up to three months in the freezer.
In this post, we explored how to make delicious no-bake cheesecake bars. I shared the ingredients needed, like the graham cracker crust and the creamy filling. You learned the step-by-step process, along with tips for making it perfect every time. I also covered possible flavor variations and storage tips.
Remember, these bars are easy to make and fun to share. Don’t be afraid to try new flavors or extras. Enjoy making something tasty that everyone will lov
No-Bake Pumpkin Cheesecake Bars
Delicious and creamy pumpkin cheesecake bars that require no baking, perfect for fall gatherings.
Course Dessert
Cuisine American
Servings 12
Calories 250 kcal
- 1.5 cups graham cracker crumbs
- 0.25 cups granulated sugar
- 0.5 cups unsalted butter, melted
- 16 oz cream cheese, softened at room temperature
- 1 cups powdered sugar
- 1 cups pumpkin puree (unsweetened)
- 1 teaspoon vanilla extract
- 1 teaspoon pumpkin pie spice
- 1 teaspoon fresh lemon juice
- 1 cups whipped cream (for topping)
- Extra pumpkin pie spice for garnish
In a medium-sized mixing bowl, combine the graham cracker crumbs and granulated sugar. Pour in the melted butter and mix until the texture resembles wet sand.
Firmly press the mixture into the bottom of a lined 9x9-inch baking dish to create the crust. Use the back of a measuring cup or a flat spatula to ensure an even and compact layer. Chill the crust in the refrigerator for about 15 minutes to set.
In a large mixing bowl, beat the softened cream cheese using an electric mixer on medium speed until it becomes smooth and creamy, ensuring there are no lumps.
Gradually add the powdered sugar, continuing to mix until fully integrated and smooth.
Incorporate the pumpkin puree, vanilla extract, pumpkin pie spice, and lemon juice into the cream cheese mixture. Mix until the batter is completely smooth and well combined.
Carefully fold in the whipped cream using a spatula. Gently incorporate it until there are no visible white streaks, being mindful not to deflate the mixture.
Pour the luscious pumpkin cheesecake filling over the chilled crust, using a spatula to smooth the top to your desired finish.
Cover the baking dish with plastic wrap and refrigerate for at least 4 hours, or preferably overnight, allowing the bars to set properly.
Once the cheesecake has set, carefully lift the bars out of the pan using the edges of the parchment paper. Cut into squares for serving.
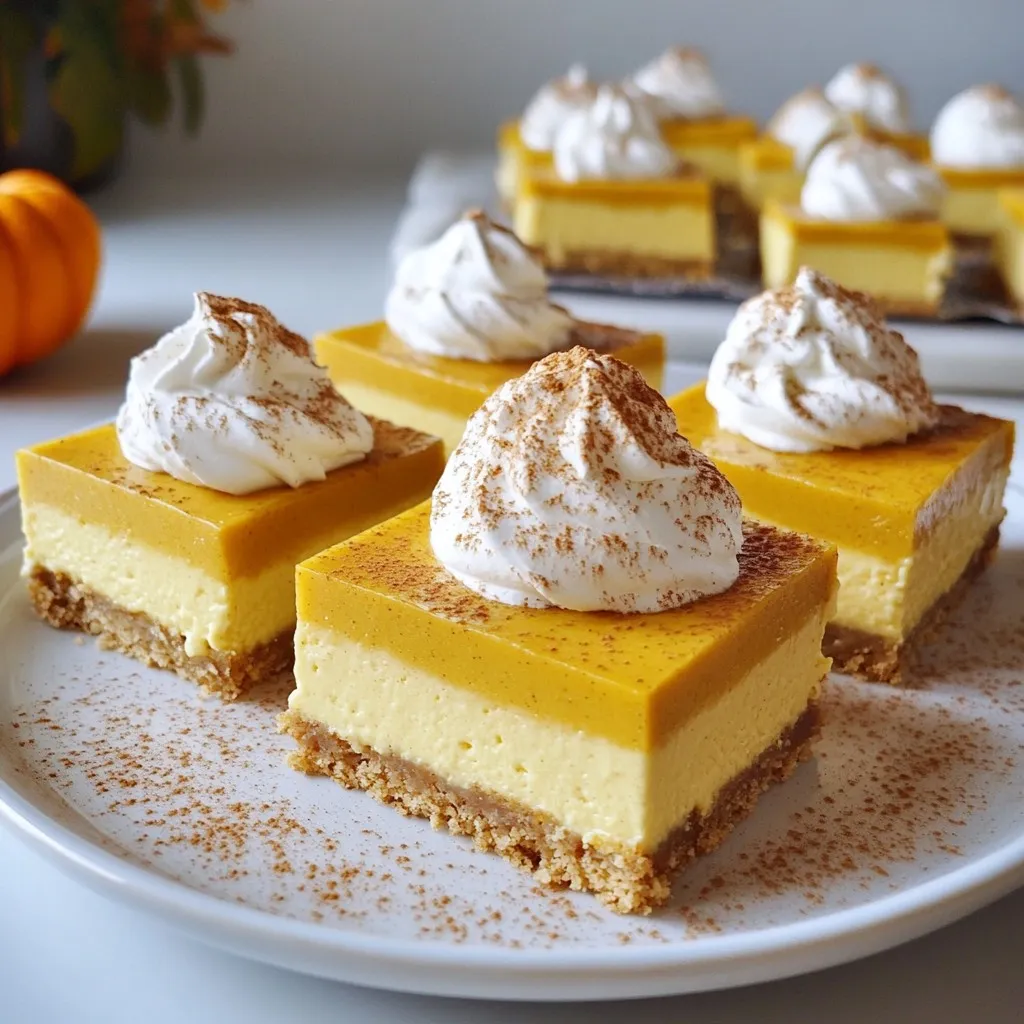
For a delightful presentation, top each square with a generous dollop of whipped cream and a sprinkle of pumpkin pie spice.
For an elegant presentation, garnish each slice with whipped cream and a sprinkle of pumpkin pie spice.
Keyword cheesecake, dessert, fall, no-bake, pumpkin
WANT TO SAVE THIS RECIPE?