
Are you craving a quick and delicious snack? Look no further than these Cheesy Garlic Butter Bombs! In just a few simple steps, you can create mouthwatering bites filled with gooey mozzarella and fresh garlic. Perfect for parties or a cozy night in, these bombs promise cheesy goodness with every bite. Dive into my easy recipe and impress your friends and family with a tasty treat they won’t forget!
Ingredients
Main Ingredients
– 1 can of refrigerated biscuit dough (8 biscuits)
– 1 cup shredded mozzarella cheese
– 1/2 cup unsalted butter (1 stick), melted
Flavor Enhancers
– 4 cloves garlic, minced
– 1 teaspoon dried Italian herbs (oregano, basil, thyme)
– 1/4 teaspoon red pepper flakes (optional)
Garnishes
– 1/4 cup fresh parsley, finely chopped
– Salt, to taste
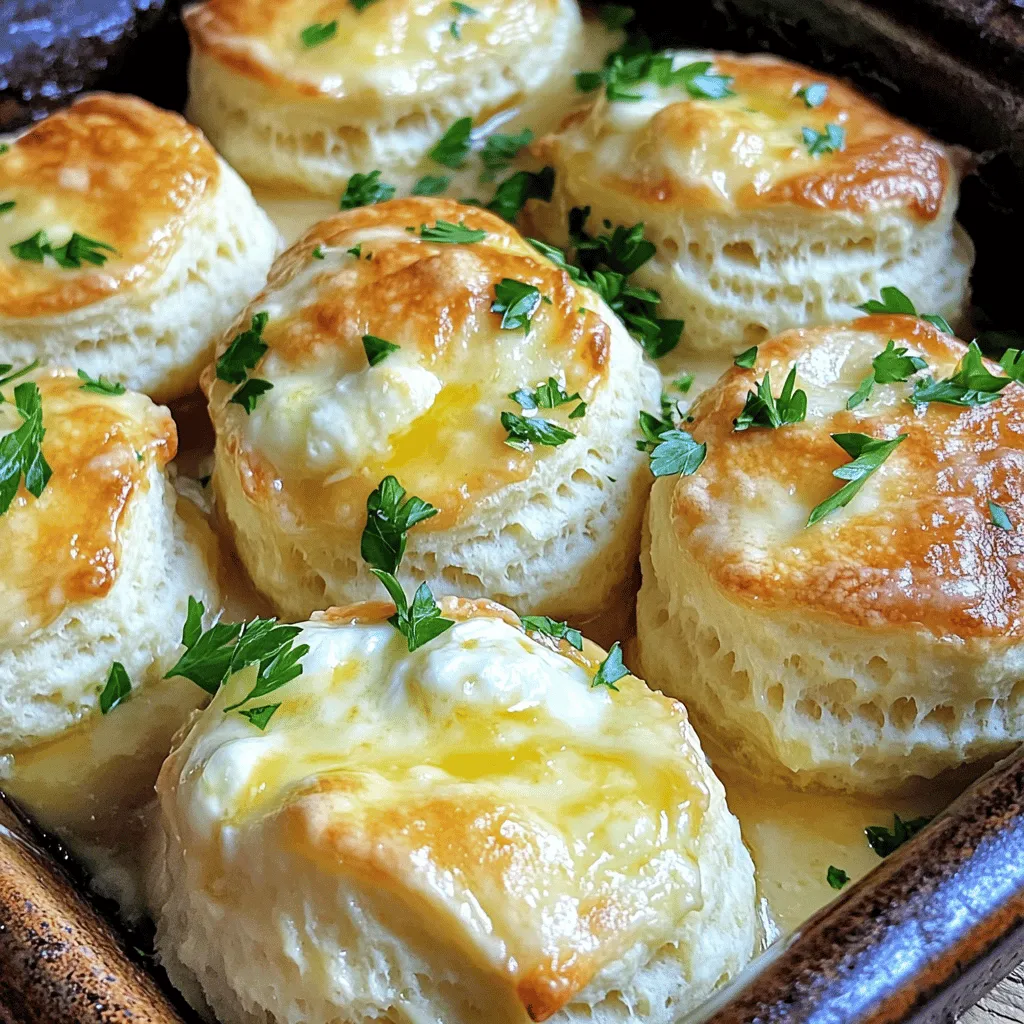
Gather these simple ingredients to make Cheesy Garlic Butter Bombs. The biscuit dough serves as a fluffy shell, while the melted butter, garlic, and herbs create an amazing flavor. The mozzarella cheese inside creates that melty goodness we all crave. You can add the red pepper flakes if you like a little heat. Fresh parsley adds color and a fresh taste.
This recipe is easy and quick. You’ll enjoy each bite of these cheesy treats. For the full recipe, check out the details above.
Step-by-Step Instructions
Preparation
– Preheat oven to 375°F (190°C).
– Prepare baking dish (grease or line with parchment paper).
Begin by heating your oven to 375°F (190°C). This is the perfect temperature to make the bombs rise and become golden. While the oven warms, get your baking dish ready. You can grease it lightly or line it with parchment paper. This helps with easy cleanup later.
Mixing the Garlic Butter
– Combine melted butter, minced garlic, herbs, red pepper flakes, and salt in a bowl.
Next, let’s mix the garlic butter. In a small bowl, pour in your melted butter. Add the minced garlic, dried Italian herbs, red pepper flakes, and a pinch of salt. Stir well until everything is combined. The smell will be amazing! This garlic butter will give your bombs lots of flavor.
Assembling the Bombs
– Flatten biscuit dough, add cheese, seal the edges, and place in the dish.
Now it’s time to make the bombs. Open the can of biscuit dough and take out each biscuit. Use your hands to flatten each one gently, creating a small disc. Place about a tablespoon of shredded mozzarella cheese in the center of each disc. Carefully fold the edges of the biscuit over the cheese, pinching them to seal. Make sure there are no gaps, or your cheese will leak out while baking.
Place the sealed biscuit bombs seam side down in the prepared dish. Once all the bombs are in, drizzle the garlic butter mixture over each one. This step is key; it adds flavor and helps them brown nicely.
Bake in the oven for 15 to 20 minutes. Wait until they are golden brown and puffed up. For a crispy top, you can broil them for 1 to 2 minutes. Just watch closely to avoid burning.
After baking, sprinkle fresh parsley on top for a nice touch. Serve these cheesy garlic butter bombs warm. For an extra treat, have some marinara sauce on the side for dipping. Enjoy!
For the full recipe, check the recipe section above.
Tips & Tricks
Achieving the Perfect Texture
To make fluffy and golden biscuits, follow these tips:
– Use cold ingredients: Cold butter helps keep the biscuits light.
– Don’t overmix: Mix until just combined. Overmixing makes them tough.
– Check oven temp: An accurate oven temperature ensures even baking.
For an extra crispy top, try broiling them. After baking, set your oven to broil. Watch closely and broil for 1-2 minutes. This step adds a great crunch!
Serving Suggestions
Serve your Cheesy Garlic Butter Bombs warm. They pair perfectly with marinara sauce. Place a small bowl of marinara in the center of your serving tray. This makes for easy dipping.
For gatherings, try using a rustic wooden platter. Arrange the bombs in a circle. Add fresh parsley on top for color. This simple touch makes your dish more inviting.
Customization Ideas
You can easily change the flavors of your bombs. Try adding different cheeses like cheddar or parmesan. Each cheese gives a unique taste.
Want to make them heartier? Add cooked vegetables like spinach or bell peppers. You can also add meats like cooked bacon or sausage. Customize them to match your taste! For the full recipe, check the details above.
Variations
Spice Level Adjustments
You can change the heat by adding red pepper flakes. If you like it spicy, add more. For less heat, use less or skip it. This way, you can make each batch just right for your taste.
Healthier Alternatives
If you want a healthier twist, try whole wheat biscuit dough. It gives a nice nutty flavor and more fiber. You can also use low-fat cheese. This cuts the fat but keeps the cheesy goodness. Both options are simple swaps for a guilt-free treat.
Dairy-Free Options
For a dairy-free version, use dairy-free cheese. Many brands offer great taste without dairy. You can also swap out butter for vegan butter. This way, you keep all the flavor and still enjoy the dish.
Check out the Full Recipe for more ideas and tips!
Storage Info
Short-term Storage
To store leftovers, let them cool down first. Place them in an airtight container. Store the container in the fridge. They will stay fresh for up to three days. When you want to eat them, check their smell before reheating. If they have an off odor, it is best to throw them away.
Long-term Storage
You can freeze cooked or uncooked Cheesy Garlic Butter Bombs. If freezing uncooked bombs, wrap each in plastic wrap. Place them in a freezer bag and seal tightly. They will last for up to two months. For cooked bombs, let them cool fully. Then, place them in an airtight container or freezer bag. Label the bag with the date before freezing.
Reheating Guidelines
To reheat, use your oven for best results. Preheat the oven to 350°F (175°C). Place the bombs on a baking sheet. Heat for about 10-15 minutes until warm. If you prefer the microwave, use a low power setting. Microwave them for 20-30 seconds at a time until warm. Avoid overheating to keep them soft and tasty.
FAQs
How do I ensure the filling doesn’t ooze out?
To keep the cheesy goodness inside, you need to seal the biscuit dough well. After you flatten each biscuit, add the cheese in the center. Pull the dough edges up around the cheese. Pinch the dough tightly to seal it. Make sure there are no gaps. You want a strong seal. This way, the melted cheese stays in when you bake them.
Can I make Cheesy Garlic Butter Bombs ahead of time?
Yes, you can prepare these bombs in advance! You can assemble them and then cover them tightly with plastic wrap. Store them in the fridge for up to 24 hours. This makes it easy for a quick bake later. Just remember to let them sit at room temperature for about 10 minutes before baking. This helps them cook evenly.
What are some good dipping sauces to serve?
Dipping sauces can add fun to your cheesy garlic butter bombs. Here are some tasty options:
– Marinara Sauce: Classic and flavorful.
– Ranch Dressing: Creamy and zesty.
– Garlic Butter Sauce: For more garlic goodness.
Feel free to mix and match to find your favorite!
How long do leftovers last?
If you have leftovers, store them in an airtight container. They will last up to three days in the fridge. To reheat, place them in the oven at 350°F (175°C) for about 10 minutes. This keeps them warm and crispy. Enjoy your cheesy garlic butter bombs even after the first bite!
The Cheesy Garlic Butter Bombs are both simple and delicious. We explored the key ingredients, from biscuit dough to flavorful garlic butter. You learned how to prepare, assemble, and customize these tasty treats for any occasion.
Remember to experiment with different cheeses or spice levels. No matter how you enjoy them, these bombs will surely impress. Keep these tips in mind for great results and fun variations. Enjoy your cooking journey, and may your kitchen be filled with tasty smells!
