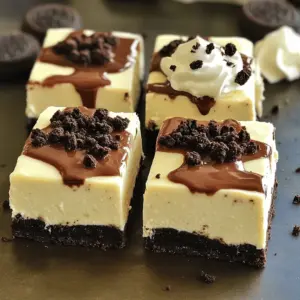
Craving something sweet but short on time? I’ve got just the treat for you! These No Bake Oreo Cheesecake Bars are simple, quick, and oh-so-delicious. With just a handful of ingredients like Oreo cookies and cream cheese, you can whip up a dessert that will impress any crowd. Follow my easy step-by-step guide, and you’ll have a perfect treat ready to enjoy in no time! Let’s dive in!
Ingredients
Main Ingredients
– 24 Oreo cookies, finely crushed
– 4 tablespoons unsalted butter, melted
– 16 oz cream cheese, softened to room temperature
– 1 cup powdered sugar
– 1 teaspoon pure vanilla extract
– 1 cup whipped cream (store-bought or homemade, preferably chilled)
– 8-10 Oreo cookies, coarsely chopped (for topping)
For these no bake Oreo cheesecake bars, you need a few key ingredients. The Oreo cookies form the base and add flavor. Cream cheese gives the filling its creamy texture. Whipped cream makes it light and fluffy. Each ingredient plays a big role in making this dessert taste great.
Measuring Tools and Equipment
– Mixing bowls
– Electric mixer
– Baking dish
To make these bars, you will need some tools. Mixing bowls help you combine ingredients. An electric mixer is key for beating the cream cheese smooth. A baking dish holds everything together while it chills. Having these tools ready makes cooking easier.
Optional Toppings
– Additional Oreo cookies
– Chocolate sauce
– Whipped cream
You can add toppings to make your bars extra special. More Oreo cookies on top add crunch. A drizzle of chocolate sauce can make it look fancy. Extra whipped cream adds a nice touch. These toppings let you customize your dessert to your taste.
Step-by-Step Instructions
Preparing the Crust
– First, take 24 Oreo cookies and crush them finely.
– Next, melt 4 tablespoons of unsalted butter.
– Combine the crushed Oreos and melted butter in a bowl.
– Stir until the mixture looks like wet sand.
– Transfer this mix into a lined 9×9-inch baking dish.
– Press the mixture firmly into the bottom of the dish.
Making the Cream Cheese Filling
– In a large bowl, beat 16 oz of softened cream cheese until smooth.
– This takes about 2-3 minutes.
– Gradually add 1 cup of powdered sugar and 1 teaspoon of vanilla extract.
– Mix on low speed until everything is smooth and creamy.
Assembling the Cheesecake Bars
– Carefully fold in 1 cup of chilled whipped cream into the cream cheese mix.
– Use a spatula to combine gently, keeping it light and airy.
– Pour this filling over the prepared Oreo crust.
– Spread the filling evenly across the crust.
– Sprinkle 8-10 coarsely chopped Oreo cookies on top.
– Gently press them into the filling to stick well.
– Chill the bars in the fridge for at least 4 hours to set.
– Once set, slice into bars and serve chilled for the best taste.
Tips & Tricks
Ensuring a Smooth Filling
To make the best filling, start with soft cream cheese. Beat it with an electric mixer for 2-3 minutes. This helps break up lumps. If you see lumps, keep mixing until smooth. When you add the powdered sugar, do it slowly. Mix on low speed to avoid a sugar cloud.
When folding in whipped cream, use a spatula. Start with a small amount of cream cheese mix, then gently fold in the rest. This keeps the filling light and fluffy. Avoid stirring too hard, or you might deflate it.
Perfecting the Crust Texture
Packing the crust tightly is key. If it’s loose, it can crumble when you cut the bars. Use the back of a measuring cup to press it down well. Aim for an even layer across the bottom of your dish.
If you want to switch things up, try using graham crackers or digestive biscuits for the crust. They bring a different flavor and texture, but still work great with the cheesecake filling.
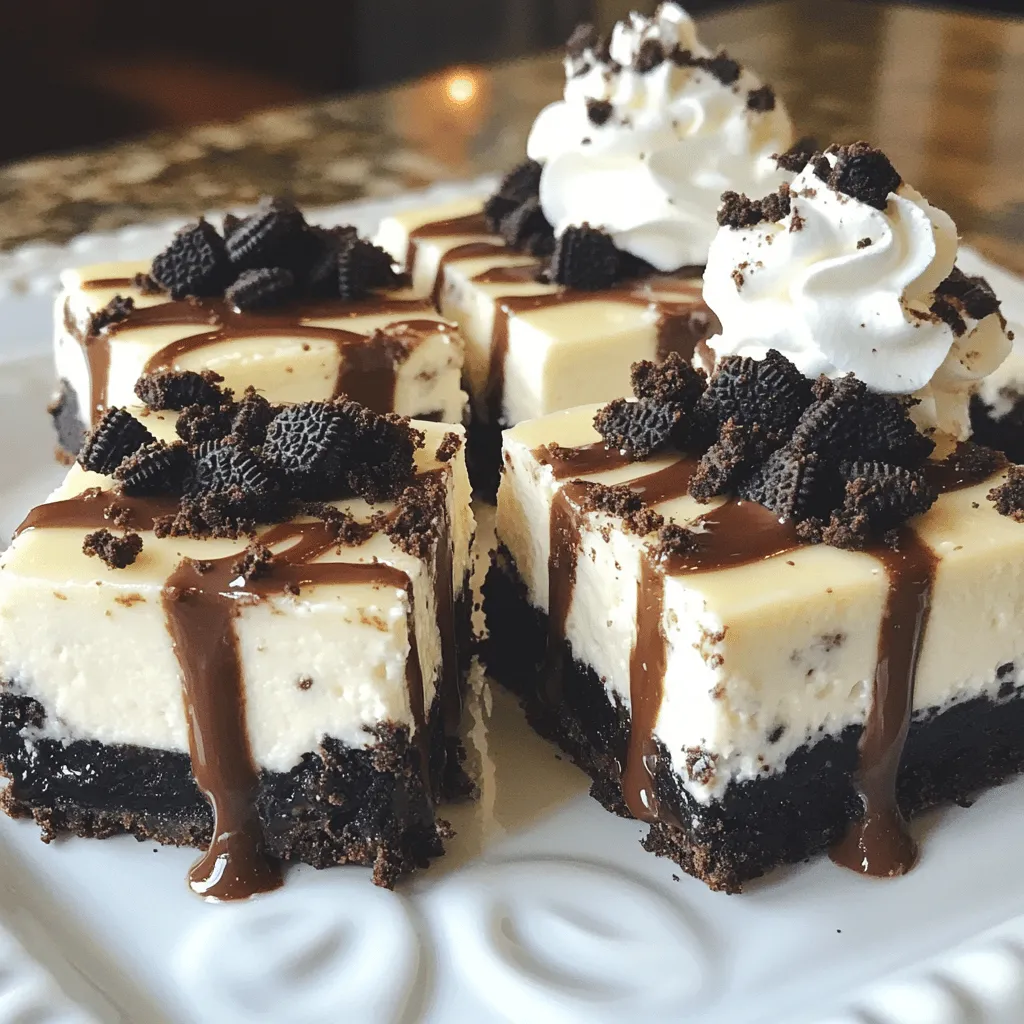
Serving Suggestions
For the best taste, serve the bars chilled. They hold their shape better this way, and the flavors shine.
Make it special by presenting the bars on a nice platter. Drizzle chocolate sauce over them for a fancy touch. You can also add dollops of whipped cream and sprinkle mini Oreos on top. This will impress your guests and make the treat look beautiful!
Variations
Flavor Variations
You can make these cheesecake bars even better by adding new flavors. Try adding peanut butter or chocolate for a rich twist. Mix in about half a cup of creamy peanut butter with the cream cheese for a nutty flavor. For chocolate lovers, melt some chocolate and fold it into the cream cheese filling. You can also add fresh fruit. Raspberries or strawberries add a fun burst of flavor. Just chop them up and fold them in before you pour the filling into the crust.
Dietary Substitutions
If you need vegan options, you can substitute the cream cheese. Look for vegan cream cheese at your store. For the whipped cream, use coconut cream or a vegan whipped topping. This way, you can enjoy these bars without dairy. If you need gluten-free options, swap the regular Oreo cookies for gluten-free ones. Many brands offer tasty gluten-free cookies that work well in this recipe.
Serving Size Adjustments
Maybe you’re hosting a big party? You can easily double the recipe. Just use a larger baking dish, like a 9×13 inch pan. This way, you’ll have enough bars for everyone to enjoy. If you want fewer bars, you can scale down the recipe. Try cutting the ingredients in half. This makes about six bars, perfect for a small gathering or a quick treat at home.
Storage Info
Best Storage Practices
To keep your No Bake Oreo Cheesecake Bars fresh, store them in the fridge. Place them in an airtight container. This helps prevent them from drying out or absorbing other smells. If you do not have a container, cover the dish tightly with plastic wrap. Make sure it touches the surface to keep air out.
Freezing Instructions
You can freeze the cheesecake bars for later enjoyment. Cut them into squares before freezing. Wrap each piece in plastic wrap, then place them in a freezer bag. This helps keep them fresh. When ready to eat, move them to the fridge to thaw overnight. For the best texture, eat them cold, not at room temperature.
Shelf Life
These cheesecake bars can last in the fridge for up to five days. Always check for signs of spoilage. If you see any discoloration or an off smell, it’s best to throw them away. Enjoy these delicious bars while they are fresh for the best taste!
FAQs
Can I make this recipe ahead of time?
Yes, you can make these cheesecake bars ahead of time. I recommend chilling them for at least 4 hours. This helps the bars set properly. If you plan to serve them later, cover them with plastic wrap. This keeps them fresh and prevents drying out. You can even make them a day before your event. Just remember to keep them in the fridge until you are ready to serve.
Can I substitute ingredients?
Absolutely! If you have allergies or preferences, there are several options. For cream cheese, you can use a dairy-free version. Look for brands that fit your needs. If you want a lighter filling, Greek yogurt can work too. For the Oreo cookies, gluten-free Oreos are available. This way, everyone can enjoy these bars.
What should I do if my filling is too runny?
If your filling turns out runny, don’t worry. This can happen if the cream cheese is too warm. To fix this, chill the filling for about 30 minutes. Then, whip some more whipped cream and fold it in gently. This can help thicken the mixture. If it’s still runny, let it chill longer once assembled. The cold will help it set better.
In this blog post, I shared how to make delicious cheesecake bars using Oreo cookies. You learned about the main ingredients, like cream cheese and whipped cream. You also discovered step-by-step instructions, including tips for a smooth filling and perfect crust.
Remember, you can adjust flavors and make dietary swaps, too. These bars are easy to store and freeze. Enjoy making this tasty treat at your next gathering!