If you love dessert but dread the oven, I’ve got you covered! These No-Bake Oreo Cheesecake Bars are easy to make and oh-so-delicious. With just a few simple ingredients, you can whip up a creamy, dreamy treat that will impress everyone. Join me as we dive into this delightful recipe that combines the rich flavor of Oreo cookies with smooth cheesecake. Let’s get started on your new favorite dessert!
Ingredients
To make No-Bake Oreo Cheesecake Bars, you need these simple items:
– 24 Oreo cookies, finely crushed
– 4 tablespoons unsalted butter, melted
– 16 oz cream cheese, softened to room temperature
– 1 cup powdered sugar, sifted
– 1 teaspoon pure vanilla extract
– 1 cup heavy whipping cream, chilled
– 6 Oreo cookies, roughly chopped, for garnish
These ingredients create a rich and creamy dessert. The crushed Oreos give a great base flavor. The cream cheese adds smoothness, while the heavy cream makes it light. You can find most of these items in any grocery store. If you want extra fun, add different toppings later!
Step-by-Step Instructions
Prepare the Crust
To start, take 24 Oreo cookies and crush them finely. You can do this using a food processor or by placing them in a bag and crushing them with a rolling pin. Then, melt 4 tablespoons of unsalted butter in a microwave. Combine the crushed cookies with the melted butter in a medium bowl. Mix until it looks like damp sand.
Form the Base
Next, grab a parchment-lined 9×9 inch baking pan. Transfer your cookie mixture into the pan. Use the back of a measuring cup or your fingers to press the mixture down firmly. This creates a solid base for your cheesecake. Place the pan in the refrigerator while you work on the filling.
Make the Filling
In a large bowl, beat 16 ounces of softened cream cheese using an electric mixer. It should become smooth and creamy. Gradually add 1 cup of sifted powdered sugar and 1 teaspoon of pure vanilla extract. Mix until everything is blended and fluffy.
Whip the Cream
In a separate chilled bowl, whip 1 cup of heavy cream on high speed. It should take about 3-5 minutes until stiff peaks form. Gently fold the whipped cream into the cream cheese mixture. Use a spatula and do it slowly to keep the mixture light and airy.
Add the Chunks
Now, take 6 roughly chopped Oreo cookies and gently fold them into the cheesecake filling. This adds great texture and flavor. Make sure they are evenly distributed throughout the mixture.
Assemble the Bars
Pour the cheesecake filling over the chilled Oreo crust in your baking pan. Spread it out evenly with a spatula. Smooth the top for a nice finish.
Chill
Cover the pan loosely with plastic wrap or aluminum foil. Place the pan in the refrigerator for at least 4 hours. This allows the cheesecake to set and firm up.
Serve
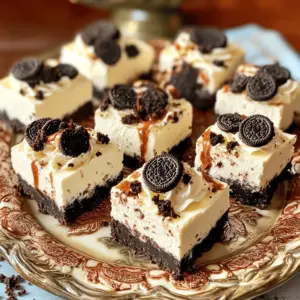
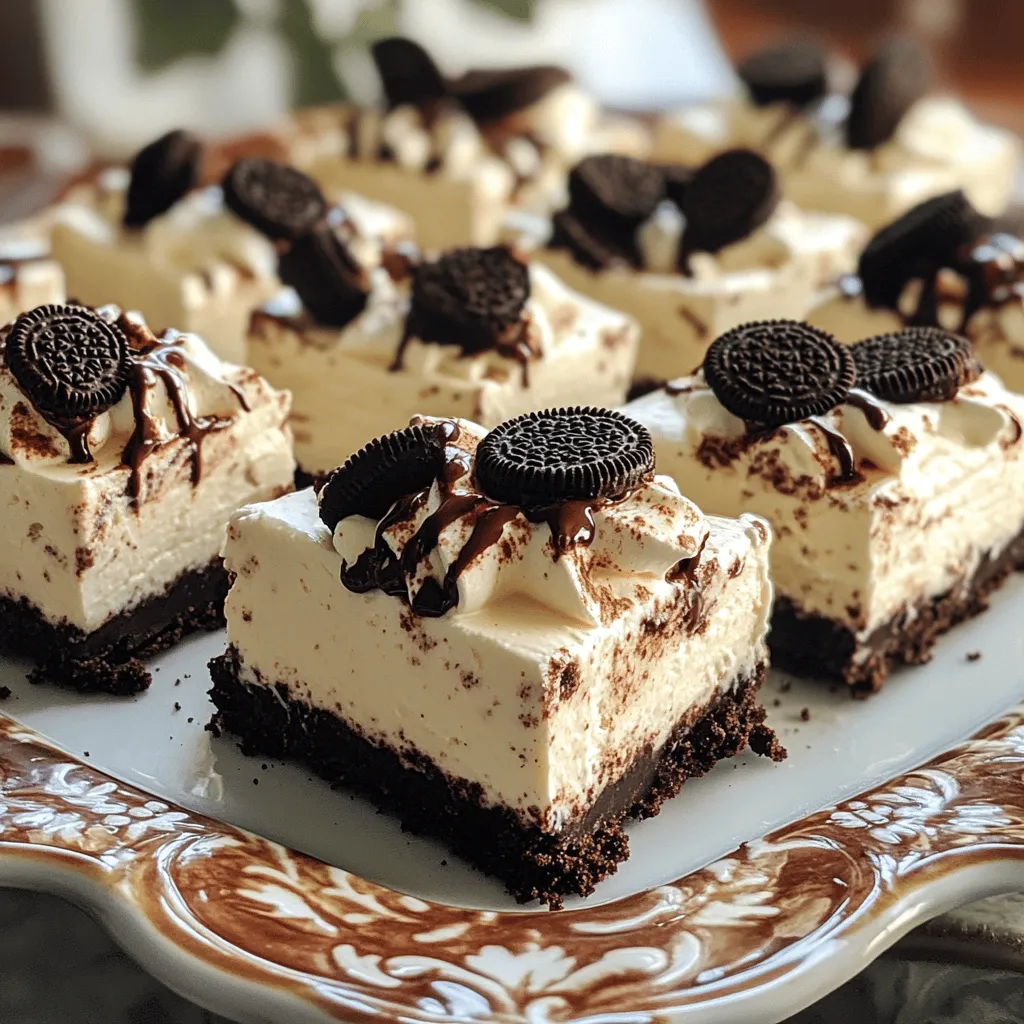
After chilling, lift the cheesecake out of the pan by holding the edges of the parchment paper. Use a sharp knife to cut it into equal bars. Wipe the knife between cuts for clean edges. For a nice touch, top each bar with a sprinkle of Oreo crumbs. Enjoy your delicious no-bake Oreo cheesecake bars!
Tips & Tricks
Keep Ingredients at Room Temperature
Using room temperature ingredients is key. Cream cheese blends better when it’s soft. Leave it out for about an hour. Your heavy cream should also be chilled, but not frozen. This will make it easier to whip.
How to Achieve Light and Fluffy Filling
To get a light and fluffy filling, whip your heavy cream until stiff peaks form. This usually takes 3 to 5 minutes. When you mix it into the cream cheese, fold gently. This way, you keep the air in the whipped cream and get a light texture.
Presentation Tips
For a gorgeous presentation, slice the bars carefully. Use a sharp knife and wipe it clean between cuts. This helps keep the edges neat.
– Decorative Serving Ideas:
– Arrange the bars on a nice platter.
– Drizzle chocolate sauce over the top.
– Sprinkle extra Oreo crumbs around the edges.
These small touches make your dessert look even more tempting.
Variations
Adding Different Flavors
You can easily change the flavor of your cheesecake bars. Try adding different cookies. Use peanut butter cookies for a nutty twist. You can also add caramel sauce to the filling for sweetness. A layer of crushed mint cookies gives a fresh taste. Experiment with lemon zest for a citrus kick. Each change makes the bars unique and fun!
Gluten-Free Option
Making gluten-free cheesecake bars is simple. Just swap regular Oreo cookies for gluten-free ones. Many brands offer gluten-free cookies that taste great. Make sure to check labels for any hidden gluten in the ingredients. The rest of the recipe stays the same, and you still get a creamy, delicious treat!
Vegan Adaptation
For a vegan version, you’ll need a few swaps. Use a vegan cream cheese made from nuts or soy. Instead of heavy cream, use coconut cream for richness. Replace butter with coconut oil. You can also use agave syrup instead of powdered sugar for sweetness. These changes keep the bars creamy and tasty while being plant-based. Enjoy a guilt-free dessert!
Storage Info
Best Practices for Refrigeration
To keep your no-bake Oreo cheesecake bars fresh, store them in the fridge. Use an airtight container to prevent them from absorbing any odors. If you don’t have one, cover the pan tightly with plastic wrap. This keeps moisture in and helps maintain the creamy texture.
How Long Will They Last?
These delicious bars last for about 4 to 5 days in the fridge. After that, they may lose their flavor and texture. Make sure to check for any signs of spoilage before serving. If they look or smell off, it’s best to toss them out.
Freezing Instructions
You can freeze these cheesecake bars for a longer shelf life. First, cut them into squares and wrap each piece in plastic wrap. Then, place the wrapped bars in a freezer-safe container. They can last up to 3 months in the freezer. To enjoy, thaw them in the fridge overnight before serving.
FAQs
Can I use different types of cookies?
Yes, you can use other cookies. Try chocolate chip or graham crackers. Each will give a unique taste. Just crush them the same way as Oreos. Remember, the flavor changes with different cookies.
What is the best way to cut cheesecake bars?
To cut the bars, use a sharp knife. Dip the knife in warm water before each cut. This helps make clean lines. Wipe the knife between cuts to keep them neat.
How can I make this recipe ahead of time?
You can easily prepare these bars a day in advance. Just keep them in the fridge until you are ready to serve. This actually helps the flavors blend better!
Can I add toppings to these cheesecake bars?
Absolutely! You can add toppings like chocolate sauce, whipped cream, or more crushed Oreos. Fresh berries or nuts also work well. Get creative and make them your own!
This post covered the key parts of making Oreo cheesecake bars. We discussed the ingredients you need and shared step-by-step instructions. I also offered tips for a great texture and ways to make different versions. Remember, using room temperature ingredients helps your filling stay light and fluffy.
With a few simple steps and great ideas, you can impress everyone with these delightful bars. Enjoy making them!