Craving a sweet treat that’s both delicious and healthy? You’ll love this Vegan Chocolate Peanut Butter Nice Cream! Made with simple ingredients like ripe bananas and peanut butter, this dairy-free dessert is easy to whip up. In just a few steps, you can enjoy a creamy treat that satisfies your chocolate cravings. Let’s dive into how to make this delightful snack that everyone will adore!
Ingredients
Main Ingredients
– 4 ripe bananas, sliced and frozen
– 1/2 cup unsweetened cocoa powder
– 1/2 cup natural peanut butter
– 1/4 cup maple syrup
– 1 teaspoon vanilla extract
– A pinch of sea salt
Optional Toppings
– Chopped nuts
– Shredded coconut
– Dark chocolate chips
In this recipe, ripe bananas are the star. They give the nice cream its smooth and creamy texture. Make sure the bananas are fully ripe. This means they should have brown spots. The more spots, the sweeter the flavor!
Next, we mix in unsweetened cocoa powder. This adds rich chocolate taste without added sugar. Natural peanut butter brings a nutty flavor and healthy fats. Choose a brand that has no added sugar or oils.
Maple syrup serves as our sweetener. You can add more or less, depending on your taste. Vanilla extract gives a warm, sweet note. Finally, a pinch of sea salt rounds out the flavors.
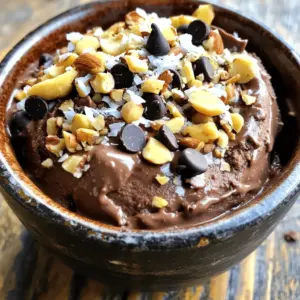
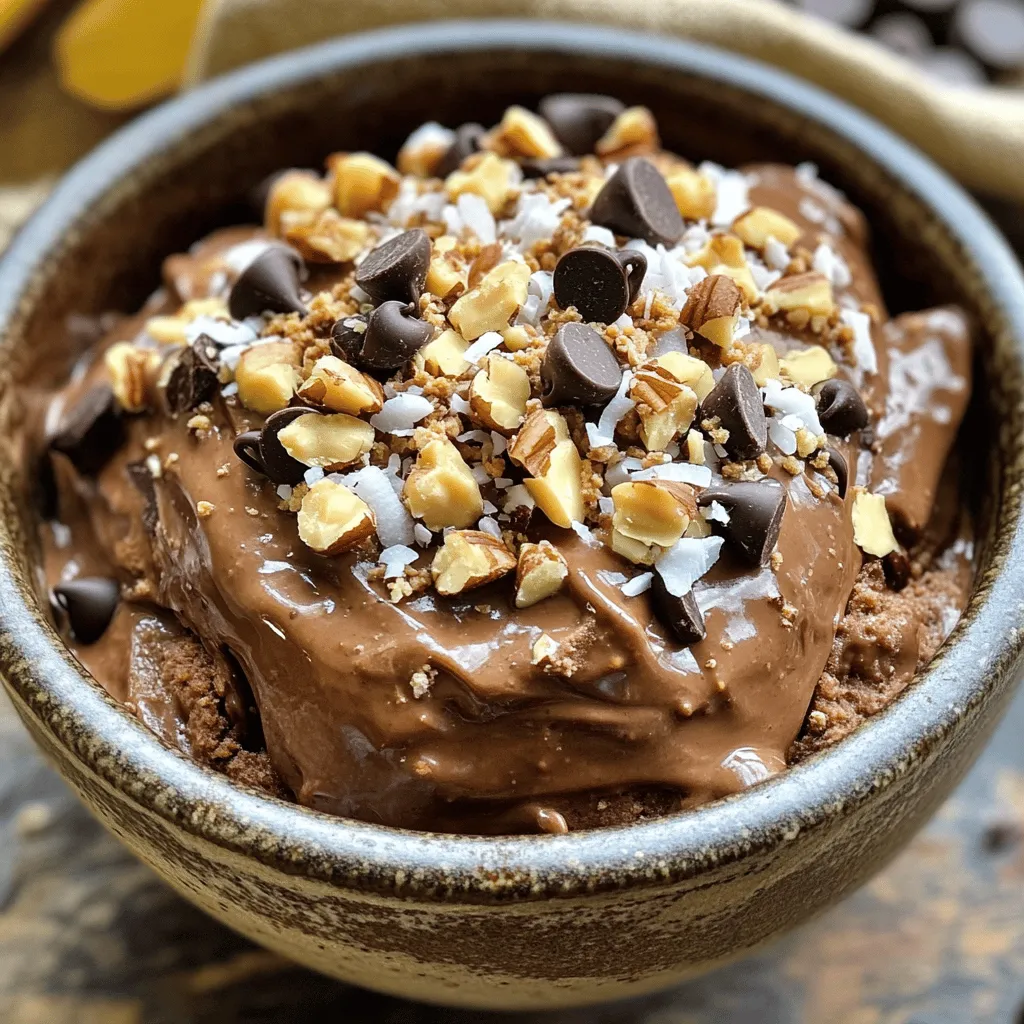
For toppings, you can choose chopped nuts for crunch, shredded coconut for a tropical twist, or dark chocolate chips for extra sweetness. Each option adds its own fun twist to the nice cream!
Step-by-Step Instructions
Preparing the Bananas
First, choose ripe bananas. Ripe bananas work best for this nice cream. Slice them into smaller pieces. This helps them freeze better. Place the slices in a single layer on a tray. Freeze them for several hours or overnight. The more frozen the bananas, the creamier the nice cream.
Blending the Mixture
In a strong blender, add your frozen banana slices. Next, add the unsweetened cocoa powder. Then, spoon in the natural peanut butter. Pour in the maple syrup and vanilla extract. Finally, sprinkle a pinch of sea salt. Blend on high for about 1-2 minutes. Stop to scrape down the sides if needed. The mixture should be smooth and creamy.
Adjusting the Sweetness
After blending, taste your nice cream. If it’s not sweet enough, add more maple syrup. Blend again to mix it well. Adjusting the sweetness ensures it fits your taste.
Freezing for Firmness
Once blended, transfer the nice cream to an airtight container. This step keeps the nice cream fresh. Place it in the freezer for 1-2 hours. This extra time gives it a firmer texture, making it easier to scoop.
Serving Suggestions
When ready to serve, scoop the nice cream into bowls or cones. You can make it fun by adding toppings. Try chopped nuts, shredded coconut, or dark chocolate chips. These extras will add flavor and crunch to your treat. Enjoy your delicious vegan chocolate peanut butter nice cream!
Tips & Tricks
Achieving Creaminess
To make your nice cream super creamy, start with ripe bananas. Ripe bananas have natural sweetness and a soft texture. Slice them into smaller pieces before freezing. This helps them blend more easily. Use a high-speed blender or a strong food processor. Blend the frozen bananas with the cocoa powder, peanut butter, and other ingredients. Stop the blender to scrape down the sides. This ensures a smooth mix.
Customizing Sweetness
You can easily adjust the sweetness of your nice cream. Start with 1/4 cup of maple syrup. After blending, taste your mixture. If it is not sweet enough, add more maple syrup. Blend again until it is well mixed. This way, you can make it just right for your taste buds.
Freezing Tips
If you have leftover nice cream, store it in an airtight container. This keeps the texture nice and prevents freezer burn. To maintain the best texture, avoid leaving it in the freezer for too long. When you want to enjoy it again, let it sit out for a few minutes before scooping. This makes it easier to serve.
Variations
Flavor Enhancements
You can boost the taste of your nice cream by adding a few drops of vanilla or almond extract. These extracts add depth and a nice aroma. If you want to switch things up, try using other nut butters. Almond butter or cashew butter can bring their own unique flavors to the mix.
Dietary Adjustments
If you aim to make your nice cream sugar-free, use ripe bananas for natural sweetness. You can also skip the maple syrup altogether. For those with nut allergies, simply swap peanut butter for sunflower seed butter. This nut-free option keeps the creamy texture without the allergens.
Seasonal Add-Ins
Fruits can give your nice cream a fresh twist. In summer, add ripe strawberries or blueberries. They blend well and add a fruity flavor. In the spring, try mixing in fresh mint. It gives a refreshing taste that pairs nicely with chocolate and peanut butter.
Storage Info
Best Storage Practices
To keep your nice cream fresh, store it in an airtight container. This helps prevent ice crystals from forming. Label the container with the date so you know when to use it.
Shelf Life
Your frozen nice cream lasts about 1 to 2 weeks. After that, it may lose its taste and texture. Look for signs of spoilage, like freezer burn or an off smell. If you see any, it’s best to toss it out.
Thawing Instructions
When you want to serve your nice cream, take it out of the freezer. Let it sit at room temperature for 5 to 10 minutes. This softens it for easier scooping. If you need it softer, leave it out a bit longer, but don’t let it melt completely. Enjoy your treat!
FAQs
Can I use other fruits besides bananas?
Yes, you can! While bananas give a creamy base, you can try other fruits. Frozen mango or avocado can work well too. These fruits add unique flavors and textures. If you switch fruits, adjust the sweetener to match the new fruit’s taste. For example, mango might need less maple syrup than bananas.
Is this recipe suitable for kids?
Absolutely! This nice cream is great for kids. It has no dairy and uses healthy ingredients. Bananas provide potassium, while peanut butter adds protein. Cocoa powder is rich in antioxidants. This treat is a fun way for kids to enjoy a dessert with good nutrition. They will love the taste!
How to make this recipe without a blender?
If you don’t have a blender, you can use a food processor. If you lack both, mash the bananas well. Then mix cocoa powder and peanut butter by hand. It will take longer but can still work. Use a fork to blend the ingredients until smooth. You might not get the same creaminess, but the flavor will still shine.
Can I make it in advance?
Yes, you can make this nice cream ahead of time! Prepare it and freeze it in an airtight container. It will stay fresh for up to two weeks. If you want to serve it later, take it out of the freezer 10-15 minutes before serving. This will help soften it for easy scooping.
This blog shared a simple and tasty nice cream recipe using ripe bananas and cocoa powder. We discussed how to blend, freeze, and serve it, plus tips to make it creamy and customize. Remember, you can swap ingredients and add toppings for fun flavors. Making this nice cream is easy, nutritious, and perfect for everyone. Try it out and enjoy your tasty treat!