Are you ready to bake a pumpkin cream cheese coffee cake that will leave everyone craving more? This tasty treat combines warm spices and creamy filling, making it perfect for cozy gatherings or a delicious morning boost. I’ll guide you through each step, from gathering ingredients to serving up slices. Let’s dive into this irresistible recipe and bring fall flavors to your kitchen!
Ingredients
Key Ingredients
– 1 cup pumpkin puree
– 1/2 cup cream cheese, softened
– 1/2 cup granulated sugar
– 1/2 cup packed brown sugar
– 3/4 cup vegetable oil
– 3 large eggs
– 1 teaspoon vanilla extract
– 2 cups all-purpose flour
– 1 teaspoon baking powder
– 1 teaspoon baking soda
– 1 teaspoon ground cinnamon
– 1/2 teaspoon ground nutmeg
– 1/4 teaspoon ground ginger
– 1/4 teaspoon salt
These key ingredients make the pumpkin cream cheese coffee cake rich and tasty. The pumpkin puree brings moisture and flavor. The cream cheese gives each bite a creamy touch. The mix of sugars creates a nice sweet base. The spices like cinnamon and nutmeg give warmth and depth. The flour and leavening agents help the cake rise and stay light.
Optional Ingredients
– 1/2 cup chopped walnuts
– Powdered sugar for dusting
Adding walnuts gives a nice crunch. If you want a sweeter finish, dusting with powdered sugar looks pretty and tastes great.
Ingredient Substitutions
– You can swap pumpkin puree for applesauce for a different flavor.
– Use Greek yogurt instead of cream cheese for a lighter option.
– If you need a nut-free version, leave out the walnuts or replace them with seeds.
These substitutions keep the cake delicious while adjusting to your needs.
Step-by-Step Instructions
Preparation Steps
First, preheat your oven to 350°F (175°C). Grab a 9×13 inch baking pan. Grease it with butter or cooking spray. Lightly dust the pan with flour to stop the cake from sticking. This step is key for easy serving later.
Mixing the Cream Cheese Batter
In a large bowl, mix the softened cream cheese, granulated sugar, and brown sugar. Use an electric mixer or a whisk. Beat the mixture until it is smooth and creamy. You want to avoid lumps. Next, add in the vegetable oil, pumpkin puree, eggs, and vanilla extract. Mix on low speed until everything is blended well.
In a separate bowl, whisk together the all-purpose flour, baking powder, baking soda, ground cinnamon, nutmeg, ginger, and salt. This helps spread out the leavening agents and spices. Gradually add these dry ingredients to the wet pumpkin mixture. Stir gently until just combined. If you like walnuts, fold them in now.
Baking and Cooling
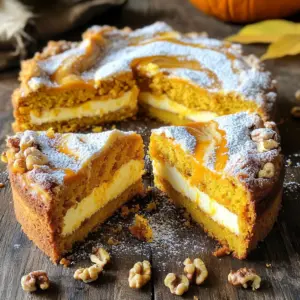
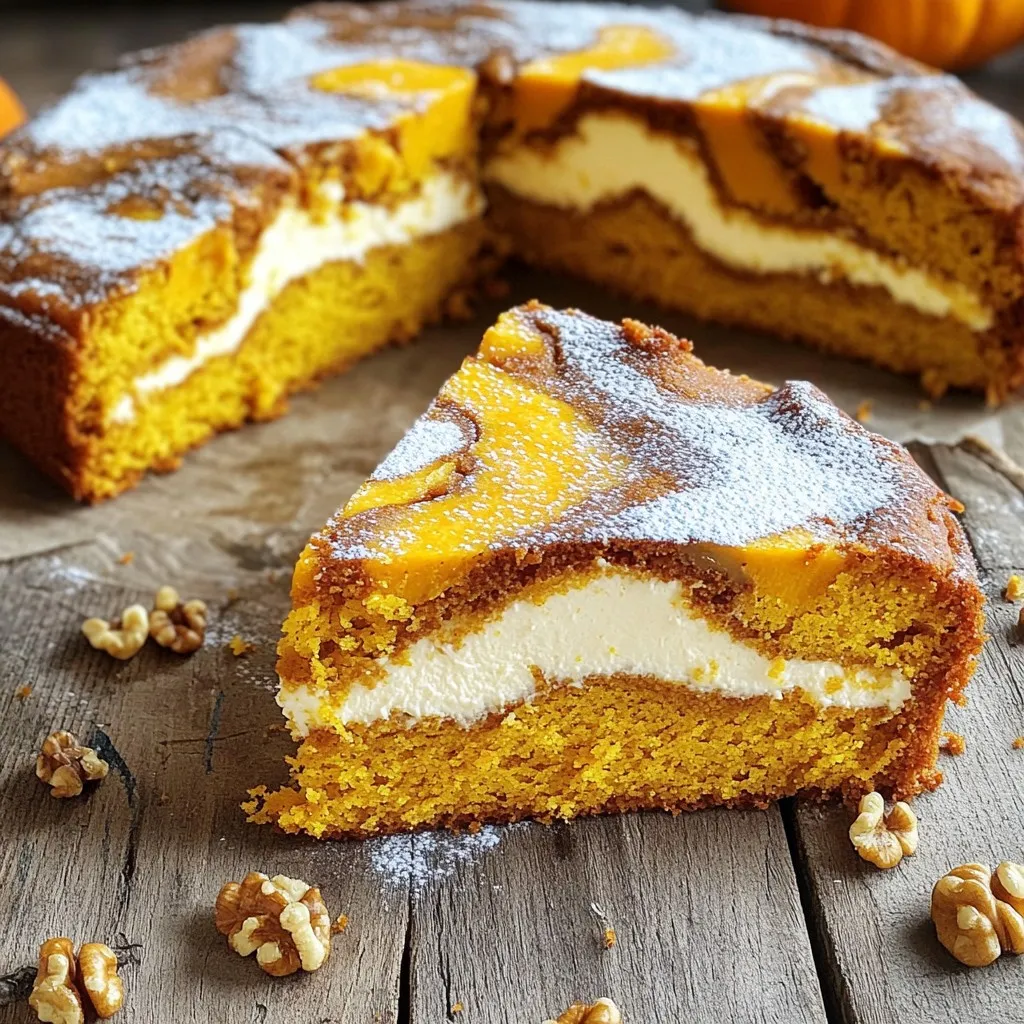
Pour half of the batter into your prepared baking pan. Use a spatula to spread it evenly. Spoon dollops of the cream cheese mixture over this first layer. Carefully pour and spread the rest of the batter on top. Use a knife or skewer to swirl the layers together. This creates a marbled look.
Now, place the pan in your preheated oven. Bake for 30 to 35 minutes. Check if it’s done by inserting a toothpick in the center. If it comes out clean, the cake is ready. After baking, let the cake cool in the pan for about 15 minutes. Then, transfer it to a wire rack to cool completely. If you want, dust it with powdered sugar for a sweet touch before serving.
Tips & Tricks
Best Practices for Mixing
Mixing is key to a great coffee cake. Start with soft cream cheese. It blends better. Use an electric mixer for best results. Mix cream cheese, granulated sugar, and brown sugar until smooth. This helps avoid lumps. When adding the wet ingredients, mix on low speed. This keeps the batter light and fluffy.
Achieving the Perfect Texture
To get that perfect texture, do not overmix. When you combine dry and wet ingredients, mix gently. Stir just until everything is combined. Lumps are okay! They will bake out. If you want extra moisture, use fresh pumpkin puree. It makes a big difference.
Presentation Tips
Your coffee cake should look as good as it tastes. After baking, let it cool for 15 minutes in the pan. Then, move it to a wire rack. This helps keep it from getting soggy. For a lovely finish, dust powdered sugar on top just before serving. It adds a nice touch. You can also place some walnuts on top for crunch. This makes it look fancy!
Variations
Gluten-Free Option
You can easily make this coffee cake gluten-free. Just swap all-purpose flour for a gluten-free blend. Make sure the blend has xanthan gum for the best texture. This change keeps the cake moist and fluffy.
Additional Flavor Add-ins
Want to jazz up your coffee cake? You can mix in chocolate chips or dried fruit. Chopped apples or cranberries add a nice twist. A pinch of allspice or cloves can also boost the flavor. These extras make each bite more exciting.
Layering Ideas
Layering is key to making this cake special. After pouring half the batter, add a layer of cream cheese. You can also drop dollops of fruit preserves or caramel sauce for extra sweetness. Swirl it gently for a beautiful marbled look. This not only tastes great but looks amazing too.
Storage Info
How to Store Leftovers
After enjoying your pumpkin cream cheese coffee cake, store leftovers in an airtight container. Keep it at room temperature if you plan to eat it within a couple of days. For longer storage, place it in the fridge. This helps keep the cake moist and fresh for up to five days.
Freezing Instructions
You can freeze this cake to enjoy later. First, let the cake cool completely. Then, wrap it tightly in plastic wrap, followed by aluminum foil. This double-wrapping prevents freezer burn. You can freeze the cake for up to three months. When you’re ready to eat, thaw it in the fridge overnight.
Shelf Life
The shelf life of your pumpkin cream cheese coffee cake depends on how you store it. At room temperature, it lasts about two days. In the fridge, it can stay good for about five days. If frozen, enjoy the cake within three months for the best flavor.
FAQs
Can I use fresh pumpkin instead of puree?
Yes, you can use fresh pumpkin. First, cook the pumpkin until soft. Then, blend it until smooth. Make sure to drain any excess water before adding it to the batter. Fresh pumpkin gives a nice, natural flavor. It may also add a bit of texture, but it works great!
How do I know when the coffee cake is done?
To check if your coffee cake is done, insert a toothpick into the center. If it comes out clean, the cake is ready. You can also lightly press the top with your finger. If it springs back, it’s done. Keep an eye on the edges; they should be slightly golden.
Can I make this recipe ahead of time?
Absolutely! You can prepare the batter the night before. Store it in the fridge, and bake it in the morning. Alternatively, bake the coffee cake in advance. Let it cool completely, then wrap it tightly. This way, it stays fresh and moist for a few days.
This blog post covered key ingredients and their substitutes for your coffee cake. We also explored step-by-step instructions for preparation, mixing, and baking. I shared tips for mixing and achieving a great texture. You learned about variations, like gluten-free options and flavor add-ins. Lastly, I discussed storage info to keep leftovers fresh.
Think of these points as a guide to boost your baking skills. Try new ideas and enjoy the process!