Easy Chicken & Rice Bowls with Creamy Garlic Sauce Recipe
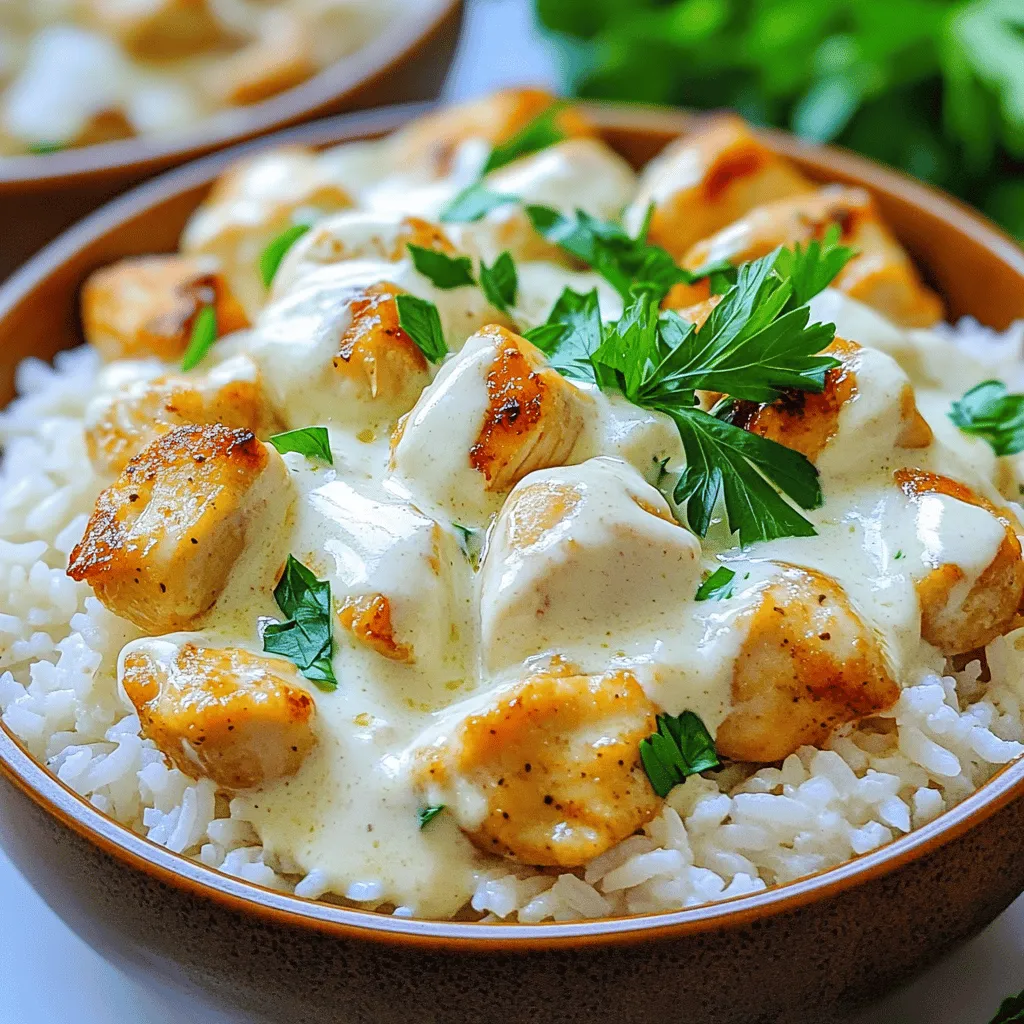
Looking for a quick and tasty dinner? My Easy Chicken & Rice Bowls with Creamy Garlic Sauce will save you time and impress your family. With just a few simple …
Looking for a quick and tasty dinner? My Easy Chicken & Rice Bowls with Creamy Garlic Sauce will save you time and impress your family. With just a few simple …
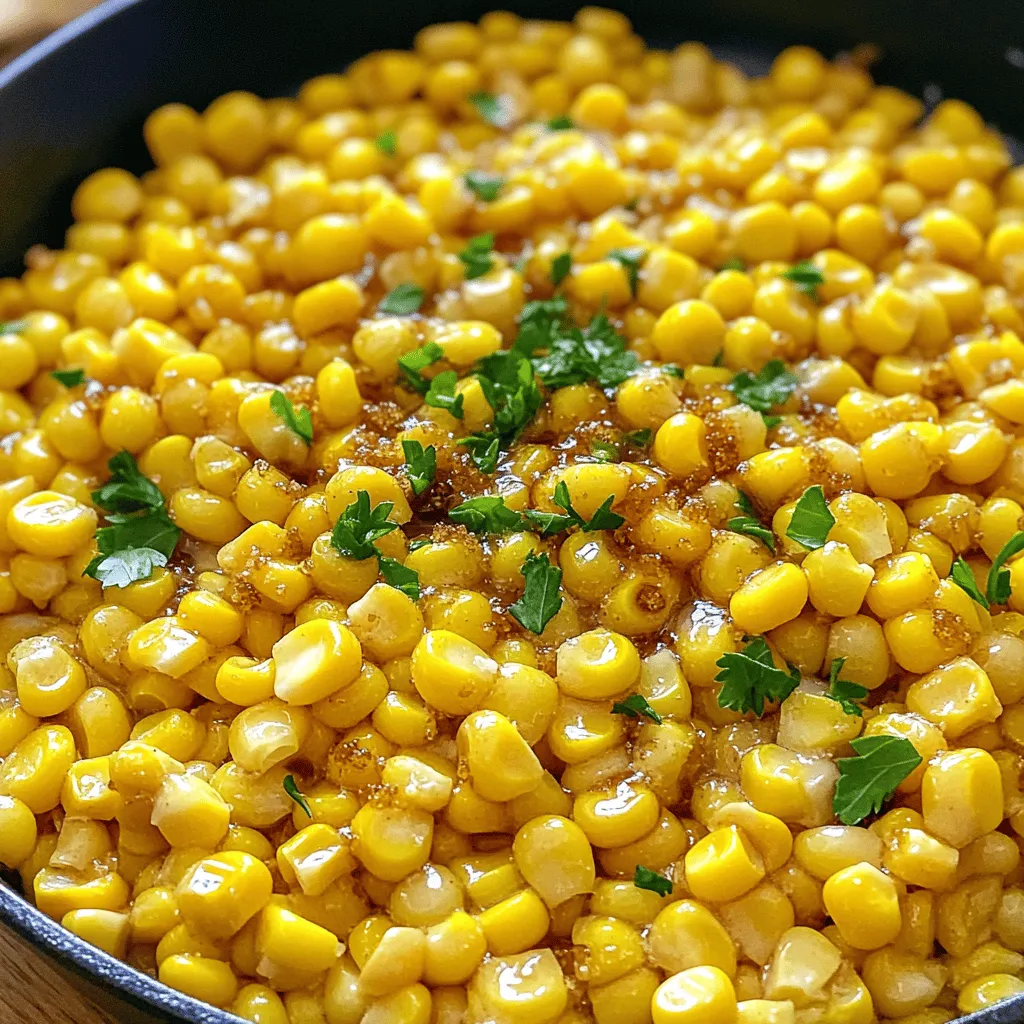
Looking for a side that’s both savory and sweet? Honey Butter Skillet Corn is your answer! This dish transforms simple corn into a delightful treat with just a few easy …

Looking for a quick and tasty dinner? You’re in the right place! One-skillet ground beef and potatoes is a simple dish that packs a punch in flavor. With just a …
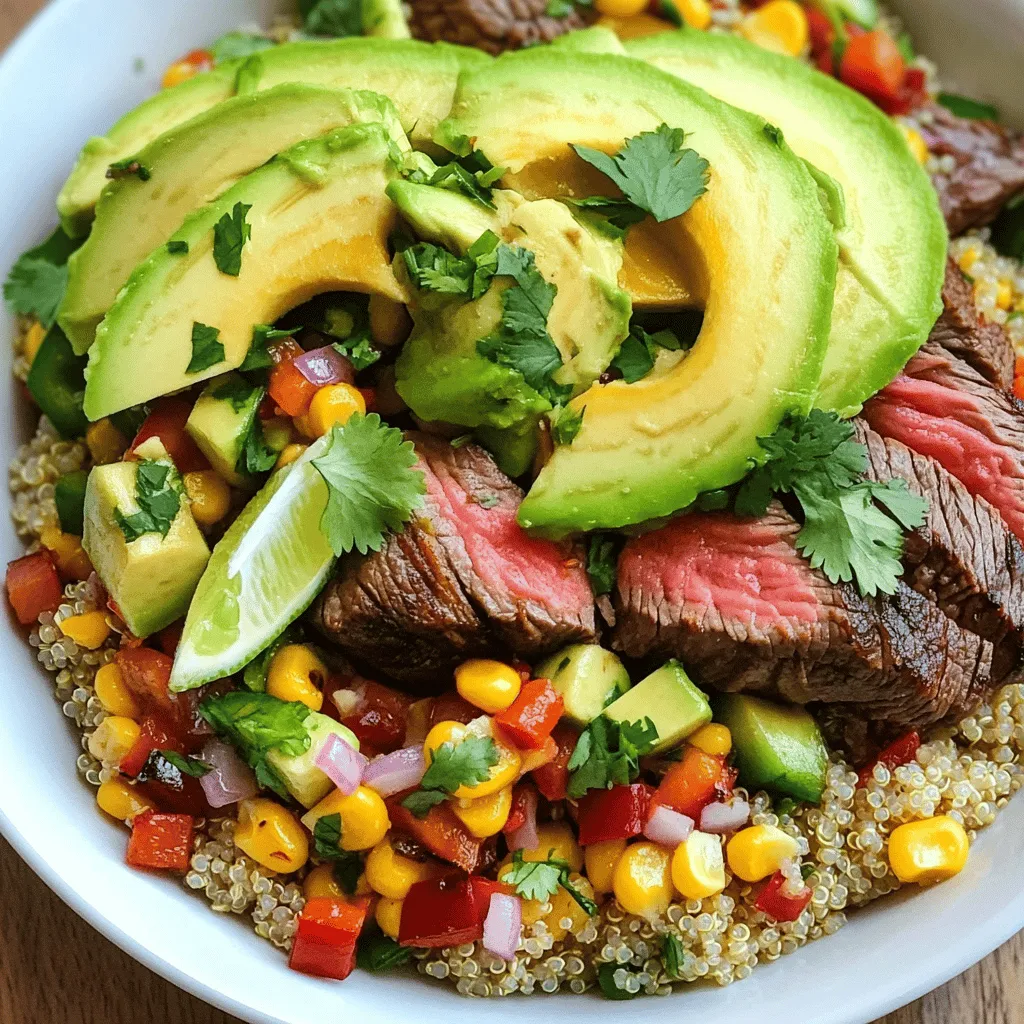
Welcome to the delicious world of the Steak, Avocado, and Roasted Corn Bowl Delight! If you crave bold flavors and a nourishing meal, this dish is for you. Imagine juicy …

Are you ready to spice up your snack game? Louisiana Voodoo Fries are a crispy, flavorful treat you won’t want to miss. Imagine perfectly baked fries, jazzed up with cheese, …
![To make the best no-bake banana pudding cheesecake delight, gather these simple ingredients: - 1 cup graham cracker crumbs - 1/4 cup unsalted butter, melted - 2 cups cream cheese, softened to room temperature - 1 cup powdered sugar - 1 teaspoon pure vanilla extract - 2 cups heavy whipping cream - 2 ripe bananas, sliced into thin rounds - 1 package (3.4 oz) instant vanilla pudding mix - 2 cups cold milk - 1 teaspoon fresh lemon juice (to prevent banana browning) - Whipped cream, for topping - Extra banana slices and vanilla wafer cookies, for garnish These ingredients are easy to find. You can usually get them at your local grocery store. I love how each item plays a role in creating a rich and creamy dessert. The graham cracker crumbs give a nice crunch, while the cream cheese adds a smooth texture. Bananas bring sweetness, and the whipped cream tops it off perfectly. Make sure your cream cheese is at room temperature. This helps it blend smoothly. The heavy cream must be chilled. It whips up better when it's cold. Using fresh bananas ensures that your cheesecake will have the best flavor. For more details on how to combine these ingredients into a delightful dessert, check out the Full Recipe. - Combine graham cracker crumbs and melted butter. - Press mixture into a 9-inch springform pan. - Chill crust in the refrigerator. Start by mixing the graham cracker crumbs with the melted butter. This creates a rich, buttery base. Press the mixture firmly into the bottom of your springform pan. Make sure it’s even and compact. Then, pop it into the fridge to chill while you work on the filling. - Beat softened cream cheese until smooth. - Mix in powdered sugar and vanilla extract. Next, grab a large bowl and add your softened cream cheese. Beat it until it’s creamy and smooth. Then, slowly mix in the powdered sugar and vanilla extract. This will give your filling a sweet and smooth flavor. - Beat heavy cream until stiff peaks form. - Carefully fold whipped cream into cream cheese mixture. Now, take a separate bowl and pour in the heavy cream. Beat it until you see stiff peaks. This means the cream can hold its shape well. Gently fold this whipped cream into your cream cheese mixture. Be careful not to deflate the cream. This step makes your cheesecake light and fluffy. - Whisk together pudding mix and cold milk. - Let it thicken for about 5 minutes. In another bowl, whisk together the pudding mix and cold milk. Mix until it is smooth. Let it rest for about five minutes. It will thicken as it sits, which is important for the texture of your cheesecake. - Fold thickened pudding into cream cheese mixture. - Drizzle lemon juice over banana slices and fold in gently. Once the pudding is thick, fold it into the cream cheese mixture. This will blend the flavors nicely. Next, slice your bananas and drizzle lemon juice over them. This keeps them from turning brown. Gently fold the banana slices into the cheesecake mixture, being careful not to break them apart. - Pour cheesecake filling over chilled crust. - Smooth top and refrigerate for at least 4 hours. Finally, take your chilled crust from the fridge. Pour the cheesecake filling over it, smoothing out the top with a spatula. Cover your cheesecake and place it back in the fridge. Let it chill for at least four hours. This allows it to set properly. You can find the Full Recipe for more detailed steps! To get the best texture for your cheesecake, start with room-temperature cream cheese. This makes mixing easy and smooth. When you whip the cream, do it until you see stiff peaks. Then, fold the whipped cream into the cream cheese mixture gently. This keeps your cheesecake light and airy. When it's time to serve, add a generous layer of whipped cream on top. This makes it look delicious! For extra flair, garnish with banana slices and a few vanilla wafers. They add nice color and crunch to your dessert. One big mistake is skipping the chilling time. Don’t rush this step. Letting the cheesecake chill helps it set properly. Another common error is overmixing the whipped cream. This can deflate the cream and make your cheesecake dense. Mix carefully to keep the fluffiness. {{image_4}} You can change the taste of your cheesecake easily. For a peanut butter twist, add peanut butter to the filling. This gives a rich and nutty flavor that complements the bananas well. Another fun idea is to mix in cocoa powder. This makes a chocolate banana pudding cheesecake. The chocolate adds depth, and it's a delightful surprise. If you need a gluten-free option, use gluten-free graham crackers. This keeps the crust tasty while catering to dietary needs. For those who want a dairy-free treat, you can swap coconut cream for the cream cheese. It adds a tropical note that works wonderfully with bananas. Want to serve a crowd? You can scale the recipe up or down. Just adjust the ingredients based on how many people you have. For a fun twist, use mini springform pans. These create individual cheesecakes, perfect for parties or special events. Everyone loves their own little dessert! For the full recipe, check out [Full Recipe]. To keep your no-bake banana pudding cheesecake fresh, store leftovers in an airtight container in the refrigerator. This helps seal in moisture and flavor. If you want to save some for later, you can freeze the cheesecake for up to 2 months. Just wrap it well to prevent freezer burn. If you freeze your cheesecake, thaw it in the refrigerator overnight. This gentle method helps maintain its creamy texture. Always serve it chilled for the best taste and enjoyment. For the best flavor and freshness, consume the cheesecake within 3-5 days. After this period, the bananas may start to brown, and the texture can change. Trust me, you want to enjoy this dessert at its peak! To keep your bananas fresh, drizzle lemon juice over the slices. This simple step slows browning and keeps your cheesecake looking great. Yes! This cheesecake is great to make a day in advance. Just make sure you chill it properly. If you don’t have graham crackers, use digestive biscuits or make your own cookie crumbs. Both will work well for the crust. Let the cheesecake chill for at least 4 hours in the refrigerator. This helps it set properly for the best texture and taste. This banana pudding cheesecake combines simple ingredients and easy steps for a tasty treat. You learned how to make the crust, filling, and layers, plus tips to avoid common mistakes. Remember, chilling the cheesecake is key to its success. Feel free to try variations to suit your taste. Enjoy making this dessert and sharing it with friends or family. It’s sure to delight everyone!](https://tastednest.com/wp-content/uploads/2025/06/6586dfc5-1aa1-4bfd-a95b-e7b9823c89f2.webp)
Looking for an easy, no-bake dessert that impresses? You’ve found it! This Best Recipe For No Bake Banana Pudding Cheesecake Delight combines rich flavors and creamy texture without the oven …
![The key to a great Honey Sriracha Salmon Bowl lies in fresh and quality ingredients. Here’s what you’ll need: - 2 salmon fillets - 2 tablespoons honey - 2 tablespoons Sriracha sauce - 1 tablespoon soy sauce - 1 teaspoon sesame oil - 1 cup jasmine rice - 2 cups water - 1 cup broccoli florets - 1 red bell pepper, thinly sliced - 1 avocado, sliced - 2 green onions, chopped - Sesame seeds, for garnish - Salt and pepper, to taste Each ingredient plays a role in creating the perfect balance of sweet and spicy flavors. The salmon gives a rich, buttery taste. The honey and Sriracha blend brings a sweet heat that elevates the dish. Jasmine rice serves as a fluffy base, while fresh vegetables add crunch and color. When you gather these ingredients, focus on their freshness. Fresh salmon should have a bright, clean scent. The veggies should look vibrant and crisp. This attention to detail ensures your meal will not only taste great but also look appealing. For the complete preparation process, check out the Full Recipe. This recipe will guide you through each step to create a delicious and satisfying meal. To start, gather your ingredients for the marinade. In a small bowl, whisk together: - 2 tablespoons honey - 2 tablespoons Sriracha sauce - 1 tablespoon soy sauce - 1 teaspoon sesame oil - A pinch of salt and pepper Mix until everything blends well. This mixture brings sweet and spicy flavor. Next, take your two salmon fillets. Place them in a shallow dish and coat them with the marinade. Make sure each fillet is evenly covered. Let it sit for a few minutes to soak up the flavor. Now, it’s time to cook the salmon. Preheat your oven to 375°F (190°C). Line a baking sheet with parchment paper. Place the salmon fillets skin-side down on the sheet. Use a brush to apply the leftover marinade on top of the salmon. Bake the salmon for 12-15 minutes. It’s done when it flakes easily with a fork. Keep an eye on it so it doesn’t overcook. While the salmon bakes, rinse 1 cup of jasmine rice under cold water. This step removes extra starch. In a medium saucepan, combine the rinsed rice and 2 cups of water. Bring it to a boil over medium-high heat. Once boiling, reduce the heat to low. Cover the saucepan and let it simmer for 15 minutes. After that, fluff the rice with a fork. For the broccoli, place 1 cup of florets in a steamer basket. Steam them for about 4-5 minutes until tender-crisp. You can also use a microwave. Just cover the florets with a damp paper towel and microwave for 2 minutes. You now have your salmon, rice, and vegetables ready! For the full recipe, check out the link. For the best flavor, marinate your salmon for at least 30 minutes. This time allows the salmon to absorb the honey and Sriracha mixture. If you're short on time, even 15 minutes can make a difference. You can also try alternative sauces like teriyaki or a garlic-soy blend. These options add a unique twist to your dish. To avoid overcooking salmon, keep an eye on the clock. Bake it for 12 to 15 minutes at 375°F (190°C). The salmon should flake easily with a fork when it’s done. For perfect rice, rinse jasmine rice well before cooking. This step helps remove extra starch. Cook it on low heat for 15 minutes, and don’t peek until it’s time to fluff it with a fork. When assembling your bowls, start with a scoop of rice as the base. Neatly place the salmon fillet on top. Next, arrange steamed broccoli, sliced red bell pepper, and avocado around the salmon. This way, each ingredient shines. For garnishing, sprinkle green onions and sesame seeds on top. It adds color and a nice crunch. Serve in deep bowls to showcase the vibrant colors of your meal. For the full recipe, check here: [Full Recipe]. {{image_4}} If you want to change things up, try different proteins. Tofu is a great choice for a vegan version. Just marinate it like the salmon. Chicken is another option. It works well with the honey Sriracha sauce too. You can also switch out the veggies. Broccoli and red bell pepper are tasty, but other options shine too. Try snap peas, carrots, or even spinach. They add color and flavor to your bowl. Want to kick it up a notch? Add spices like garlic powder or ginger. These enhance the sauce's taste. You can also explore other sauces. A drizzle of lime juice can brighten the dish. Finding the right sweet and savory balance is key. If you love heat, add more Sriracha. For a sweeter note, increase the honey. Adjust to your liking for a perfect bite. Think outside the bowl! Serve with a side of edamame or a crisp salad. These add freshness and crunch. Creating bowl combinations can be fun. Mix in cooked quinoa or farro for a twist. Layer in different veggies for color and taste. Let your creativity shine! For the full recipe, check the [Full Recipe]. To store leftovers safely, first let the bowls cool to room temperature. Then, place them in airtight containers. You can keep them in the fridge for up to three days. If you want to save them for longer, consider freezing the salmon and rice separately. When reheating, use the oven or microwave. For the oven, preheat it to 350°F (175°C). Place the salmon in a baking dish, cover it with foil, and heat for about 10-15 minutes. If you use the microwave, heat in short intervals to avoid overcooking. Each ingredient has a different shelf life. Fresh salmon lasts about one to two days in the fridge. Cooked salmon can last up to three days when stored well. Jasmine rice stays good for about four to five days cooked. Broccoli can last around three to five days in the fridge when fresh. When checking for spoiled ingredients, look for off smells, discoloration, or a slimy texture. If you see any of these signs, it’s best to toss it out. Keeping your ingredients fresh helps you enjoy your Honey Sriracha Salmon Bowls at their best! Can I use frozen salmon? Yes, you can use frozen salmon. Just make sure to thaw it first. This will help the salmon cook evenly. You can leave it in the fridge overnight or use the microwave. Always check if the fish is cooked through before serving. How spicy is this dish? The spice level depends on how much Sriracha you use. I find that two tablespoons give a nice kick without being too hot. However, you can adjust the Sriracha to your taste. If you're worried about spice, start with less and add more if you like. Health benefits of ingredients Honey adds sweetness and antioxidants. Salmon is rich in omega-3 fatty acids, which are good for your heart. Broccoli has vitamins C and K, while avocado provides healthy fats. Jasmine rice is a great source of energy, making this meal balanced and nutritious. Breakdown of calories and nutrients per serving Each serving contains approximately 500 calories. You get about 30 grams of protein from the salmon. The bowl also includes 45 grams of carbs from the rice and 20 grams of fat from the avocado and sesame oil. This meal keeps you full and satisfied. Tips for preparing ahead of time You can prepare the marinade a day in advance. Just store it in the fridge. Cook the rice and steam the broccoli ahead of time. This saves you effort on busy nights. Storing components separately vs. assembled Store the salmon, rice, and veggies separately. This keeps everything fresh. When you're ready to eat, just assemble the bowl. Reheat each component gently to avoid overcooking. This way, your meal tastes fresh and delicious. You learned how to make a tasty honey Sriracha salmon bowl. We covered the needed ingredients, preparation steps, and cooking tips. You can mix it up with different proteins and vegetables. Remember, a good marinade can change the dish completely. Store your leftovers safely to enjoy later. Overall, this dish is simple, healthy, and fun to make. Try it out and impress your family or friends with your cooking skills!](https://tastednest.com/wp-content/uploads/2025/06/f00ddf1b-d4b7-43fd-b243-58841f772fb6.webp)
Are you ready for a meal that’s both sweet and spicy? Honey Sriracha Salmon Bowls deliver a flavorful punch, making dinners exciting again! With tender salmon, perfectly cooked jasmine rice, …
![- Baguette - Shrimp - Garlic - Avocado - Olive Oil - Lemon Juice - Red Pepper Flakes - Seasoning (Salt & Pepper) - Garnish (Fresh Parsley) - Additional Toppings - Seasoning Variations Gathering the right ingredients is key to making Garlic Shrimp Crostini with Avocado. First, grab a baguette. It adds a crunchy base that holds all the flavors. Next, use fresh shrimp. They should be peeled and deveined for the best taste. Garlic adds a nice punch, so don’t skimp on it. For the creamy layer, pick a ripe avocado. It should feel slightly soft. Olive oil brings richness to the dish, while lemon juice adds brightness. If you like a bit of heat, red pepper flakes work great. Don’t forget salt and pepper to taste. Fresh parsley makes a lovely garnish that adds color and flavor. You can get creative with optional ingredients. Adding toppings like feta cheese or diced tomatoes can enhance the crostini. Seasoning variations like smoked paprika or cumin can bring different flavor notes. Explore these options to make it your own. For the full recipe, check the detailed instructions. - Preheat the Oven Start by preheating your oven to 400°F (200°C). This heat will help toast the bread perfectly. - Prepare the Baguette Lay the sliced baguette pieces on a baking sheet. Make sure they are in a single layer. Use a pastry brush to coat each slice with a bit of olive oil. This will make them crisp and tasty. - Toast the Bread Place the baking sheet in the oven. Toast the bread for about 5-7 minutes. Keep an eye on them until they turn a golden brown. Once they look perfect, take them out of the oven and let them cool a bit. - Sauté the Garlic In a large skillet, heat 2 tablespoons of olive oil over medium heat. Add the minced garlic and stir it often. Cook until it smells great and turns golden, which should take about 1 minute. - Cook the Shrimp Now, add the peeled and deveined shrimp to the skillet. Season with salt, pepper, and optional red pepper flakes if you like heat. Cook the shrimp for 2-3 minutes on each side. Look for them to turn pink and opaque. Be careful not to overcook them! - Combine with Lemon Take the skillet off the heat. Drizzle fresh lemon juice over the shrimp and toss gently. This adds a bright, fresh flavor. - Mash the Avocado In a mixing bowl, take your diced avocado. Mash it lightly with a fork, leaving some chunks for texture. Season with salt and pepper to bring out the taste. - Assemble the Crostini Take each toasted baguette slice and spread a generous layer of mashed avocado on top. Then, add the garlic shrimp mixture. Let some shrimp hang over the edges for a nice look. - Garnish and Serve Finish each crostini with a sprinkle of freshly chopped parsley. This adds color and freshness. Serve them right away for the best taste. For the full recipe, check the details above. - Avoid Overcooking: Shrimp cook fast. Cook them for just 2-3 minutes on each side. You want them pink and opaque. Overcooked shrimp become tough and rubbery. Keep a close eye on them. - Use Fresh Shrimp: Fresh shrimp taste best. Look for shrimp that smell like the ocean. Avoid shrimp with a strong fishy smell. Fresh shrimp will have a firm texture and a nice sheen. - Selecting Ripe Avocados: Choose avocados that yield slightly to gentle pressure. A ripe avocado should feel soft but not mushy. If it's too hard, wait a few days for it to ripen. - How to Mash Avocado: Cut the avocado in half and remove the pit. Use a fork to mash it slightly. Leave it a bit chunky for texture. Season with salt and pepper to bring out the flavor. - Plating Ideas: Arrange the crostini on a large platter. You can stack them slightly for an inviting look. Add lemon wedges for a pop of color and zest. - Pairing Drinks: Serve with a crisp white wine, like Sauvignon Blanc. The wine's acidity pairs well with the shrimp and avocado. You can also try a light beer for a refreshing option. Check out the Full Recipe for complete instructions and tips! {{image_4}} Adding Spices You can spice up your garlic shrimp crostini in fun ways. Try adding smoked paprika for a warm flavor. A dash of cayenne pepper gives a nice heat. Experiment with herbs like thyme or oregano for extra depth. Each spice adds a twist to the classic taste. Using Different Seafood If shrimp isn’t your favorite, use scallops or crab instead. Both pair well with garlic and avocado. You can also try fish like salmon. Just make sure to adjust the cooking time. Each seafood option brings a unique flavor to the dish. Gluten-Free Alternatives To make this dish gluten-free, swap the baguette for gluten-free bread. Many brands offer tasty alternatives that crisp up well. You can also use crackers made from rice or corn. These options keep the crunch and flavor while being gluten-free. Vegan Options For a vegan twist, replace shrimp with marinated mushrooms. Sauté them with garlic for a rich taste. Instead of avocado, think about using a creamy spread made from nuts. This keeps the crostini delicious and friendly for plant-based eaters. Tapas Style Serve the crostini as small bites at a party. Cut the baguette into smaller pieces for easy sharing. This style encourages guests to mix and mingle. You can add a variety of toppings to each piece for fun. Platter Presentation For a more formal touch, arrange the crostini on a large platter. Layer them with fresh herbs and lemon wedges. This makes the dish look inviting and colorful. Guests will appreciate the lovely display as much as the taste. For the full recipe, check [Full Recipe]. To keep your garlic shrimp crostini fresh, store the components separately. Place the shrimp and avocado in airtight containers. This prevents sogginess. You can keep the shrimp in the fridge for up to two days. The mashed avocado lasts about one day before browning. For best results, reheat shrimp in a skillet. Heat it over low heat until warmed through. Avoid using a microwave, as it can make the shrimp tough. If you have leftover crostini, reheat them in the oven at 350°F for 5-7 minutes. This helps restore their crispness. You can freeze the shrimp, but I do not recommend freezing the crostini. Freezing alters their texture. To freeze shrimp, place them in a freezer bag. Remove as much air as you can. They can last up to three months in the freezer. When ready to use, thaw them in the fridge overnight. To make Garlic Shrimp Crostini with Avocado, follow these simple steps: 1. Preheat your oven to 400°F (200°C). 2. Slice a baguette into thick pieces and coat them with olive oil. 3. Toast the bread in the oven for 5-7 minutes until golden brown. 4. In a skillet, heat olive oil and sauté minced garlic until fragrant. 5. Add peeled shrimp, season, and cook until pink. 6. Drizzle lemon juice over the shrimp. 7. Mash a ripe avocado and season it. 8. Spread the avocado on the toasted bread and top with shrimp. 9. Garnish with parsley and serve. You can find the full recipe at the start of this article. You can use various seafood options if you want a change from shrimp: - Scallops are a great alternative. They cook quickly and add a sweet flavor. - Cooked lobster pieces also work well. They give a rich taste. - For a lighter option, try crab meat. It adds a nice touch. - If you prefer non-seafood, use grilled chicken or even marinated tofu for a veggie option. Yes, you can prepare parts of this dish in advance. Here are some tips: - Toast the baguette slices ahead of time. Store them in an airtight container. - Cook the shrimp and let it cool. Store it in the fridge for up to a day. - Mash the avocado just before serving. This keeps it from browning. - Assemble the crostini right before serving for the best taste and texture. Choosing the right avocado is key for great flavor. Here’s how: - Look for avocados that yield slightly when you press them. This means they are ripe. - Avoid avocados with dark spots or dents. These can indicate overripeness. - If they are not ripe, leave them at room temperature for a few days. - Once ripe, store them in the fridge to slow down the ripening process. Pairing wine with Garlic Shrimp Crostini can enhance your meal. Here are some great options: - A crisp Sauvignon Blanc complements the shrimp’s flavors. - A light Pinot Grigio also works beautifully. It’s refreshing. - For red wine lovers, try a light-bodied Grenache. It won't overpower the dish. - Sparkling wine or Prosecco can add a festive touch to your dinner. This blog post gave you a clear look at making Garlic Shrimp Crostini with Avocado. You learned about key ingredients, step-by-step instructions, and useful tips. Remember to pick ripe avocados and avoid overcooking shrimp. Explore flavor variations to make this dish your own. Whether for a party or a cozy night in, these crostini will impress. Enjoy the process of creating a delicious and fresh appetizer!](https://tastednest.com/wp-content/uploads/2025/06/7c61e541-3b93-4f6f-a529-6ce01343a354.webp)
Craving a fresh and tasty appetizer? You’re in the right place! My Garlic Shrimp Crostini with Avocado is a simple yet elegant dish that brings bold flavors to your table. …
. This recipe takes about 15 minutes to prepare and 15-20 minutes to bake. You will have 12 mini cheesecakes ready to enjoy. These mini lemon raspberry cheesecakes blend sweet and tangy flavors. They are easy to make and perfect for any occasion. The balance of creamy cheesecake and fresh berries makes each bite delightful. I love how simple the steps are, and you will too. The crust is buttery and crunchy, while the filling is smooth and rich. Once you bake these, let them cool before chilling in the fridge. This will help them set correctly. You can serve them with extra raspberries and lemon zest for a pop of color. Enjoy! This blog post outlined how to make delicious mini cheesecakes with fresh raspberries. You learned about the ingredients, step-by-step instructions, and tips for a perfect texture. We also explored variations and answered common questions. Making these mini cheesecakes is simple and rewarding. They are fun desserts for any occasion. Try customizing them with your favorite fruits. Enjoy your baking, and share these tasty treats with friends and family!](https://tastednest.com/wp-content/uploads/2025/06/cb3aa9f9-9103-41ec-a3f4-e745bae4aeb3.webp)
Craving a burst of flavor that’s both delightful and easy to make? Mini Lemon Raspberry Cheesecakes are your answer! These bite-sized treats combine creamy cheesecake with zesty lemon and fresh …
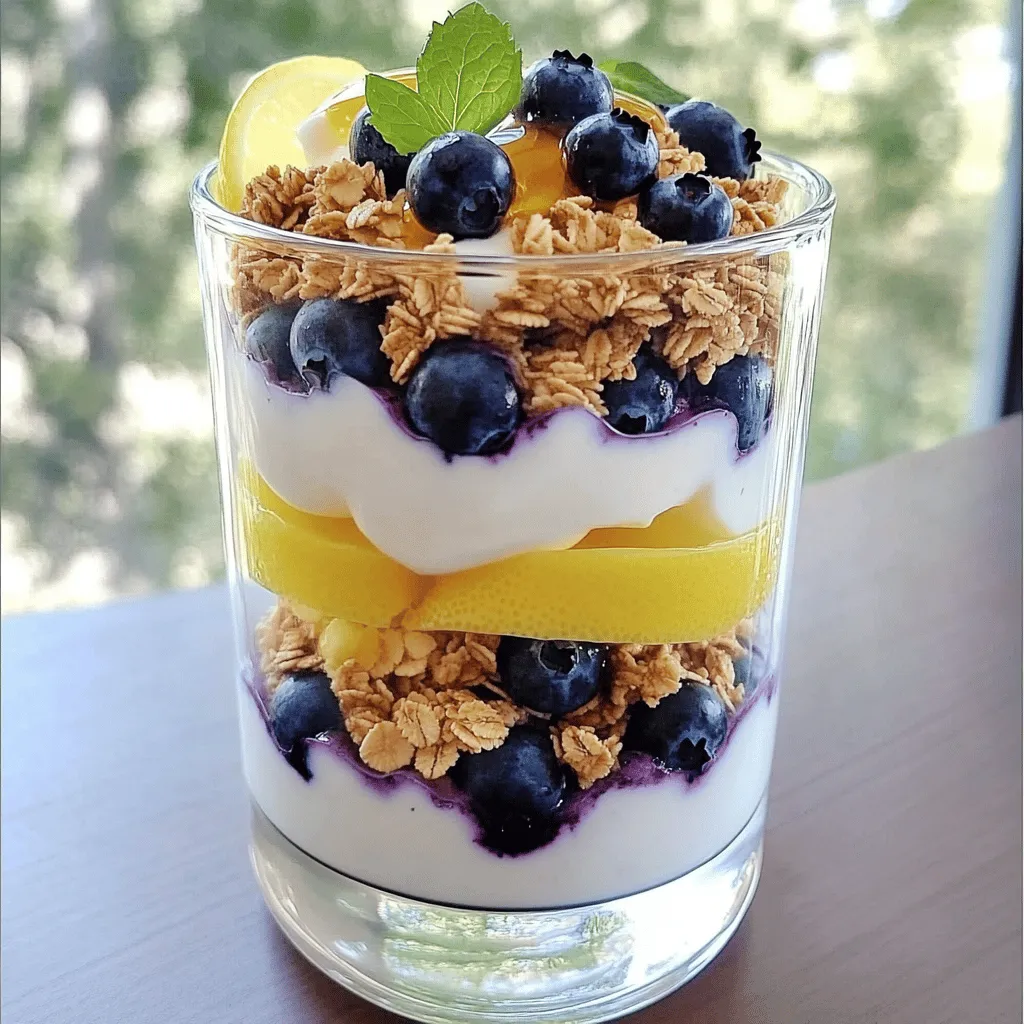
Are you ready to elevate your breakfast game? This Best Blueberry Yogurt Recipe is simple, creamy, and packed with flavor. You’ll love how fresh blueberries blend with rich Greek yogurt …