Best Cinnamon Roll French Toast Bites Delightful Treat

Are you ready to indulge in a sweet twist on breakfast? These Best Cinnamon Roll French Toast Bites are your perfect treat! Imagine soft, warm bites packed with cinnamon flavor, …
Are you ready to indulge in a sweet twist on breakfast? These Best Cinnamon Roll French Toast Bites are your perfect treat! Imagine soft, warm bites packed with cinnamon flavor, …
![- 20 jumbo pasta shells - 1 pound ground beef - 1 cup ricotta cheese - 1 cup mozzarella cheese, shredded - 1/2 cup parmesan cheese, grated To make the best stuffed shells with ground beef, start with jumbo pasta shells. These shells are large and perfect for holding the filling. Ground beef adds a rich flavor and protein. For the cheese, use a mix of ricotta, mozzarella, and parmesan. These cheeses create a creamy and cheesy filling. - 1 teaspoon Italian seasoning - Salt and pepper, to taste - 3 cups marinara sauce Seasonings are key to tasty stuffed shells. Italian seasoning brings warmth and depth. Salt and pepper balance the flavors. Marinara sauce adds moisture and a tangy taste. Use a good quality marinara for the best results. - Fresh basil for garnish - Additional vegetables like spinach or bell peppers You can customize your stuffed shells. Fresh basil adds a bright touch and flavor. Chopped spinach or diced bell peppers can boost nutrition. These add-ins make your dish unique and colorful. For the full recipe, check out the instructions in the recipe section. - Preheat the oven to 375°F (190°C). This step is key for even cooking. - Cook 20 jumbo pasta shells according to the package. Make sure they are al dente. Drain them and put them on a greased baking sheet to avoid sticking. - In a large skillet, heat over medium. Add 1 pound of ground beef, 1 small chopped onion, and 2 minced garlic cloves. Cook until the beef is browned and the onion is clear, about 7-8 minutes. Drain any extra fat. - In a mixing bowl, combine 1 cup ricotta cheese, 1 cup shredded mozzarella, 1/2 cup grated parmesan, 1 large egg, 1 teaspoon Italian seasoning, and a pinch of salt and pepper. Mix until smooth and creamy. - Stir in the cooked beef mixture into the cheese blend. Make sure it is well combined for maximum flavor. - Carefully fill each cooked shell with the beef and cheese mixture. Don’t overfill, but make them generous. - In a large baking dish, spread 1 cup of marinara sauce. Place the stuffed shells on top. Pour the rest of the marinara sauce over them, ensuring they are covered well. - For extra cheesy goodness, sprinkle more mozzarella on top. Cover the dish tightly with aluminum foil. This prevents the cheese from browning too fast. - Bake in the oven for 25 minutes. Remove the foil and bake for another 10 minutes, until the cheese is bubbly and golden. - Let the dish cool for a few minutes before serving. Garnish with fresh basil leaves for a lovely touch. For the full recipe, check [Full Recipe]. To stuff the shells without a mess, use a small spoon. A piping bag also works well. Fill each shell until it is just full. Don't overstuff them. This keeps the filling inside while baking. For a creamy filling, mix the ricotta cheese with the egg and spices. Use fresh mozzarella for a rich taste. Blend these together until smooth. This will help the filling stay soft and delicious. Cover the baking dish with foil while it bakes. This stops the cheese from browning too fast. After 25 minutes, take off the foil. Bake for another 10 minutes to get that golden color. To ensure cheesy goodness, add extra mozzarella on top before baking. This melts into a tasty, gooey layer. For serving, place the stuffed shells on individual plates. Drizzle extra marinara sauce around each plate. This adds color and flavor. Garnish with fresh basil leaves for a bright touch. You can also sprinkle some parmesan cheese on top. These small details make your dish look and taste great. {{image_4}} You can swap ground beef with turkey or sausage for a lighter meal. This change keeps the dish tasty while cutting down on fat. If you want to go fully vegetarian, try using mushrooms or lentils. You can also stuff the shells with spinach and ricotta for a fresh take. Both options add a nice twist and flavor. Adding spices can boost the taste. Try red pepper flakes for heat or smoked paprika for depth. You might also mix in chopped bell peppers for a crunchy texture. Switching up the cheese types can change things too. Use goat cheese for tang or feta for a salty kick. These small tweaks can make your dish unique and exciting. If you’re short on time, use an Instant Pot. Just layer the shells and sauce, and let it work its magic. A slow cooker is great for a set-and-forget meal. Simply combine everything and let it cook low and slow. If you want to save some for later, freezing works well. Stuff the shells, cover them with sauce, and freeze before baking. This way, you can enjoy a homemade meal anytime. To store your stuffed shells, let them cool first. Place them in an airtight container. This keeps them fresh and tasty. You can store them in the fridge for up to three days. If you want them to last longer, freezing is a great option. You can freeze stuffed shells both before and after baking. If you freeze them before baking, place them in a single layer on a baking sheet until firm. Then, pack them in a freezer-safe bag. If they are baked, allow them to cool completely before freezing. For the best taste, use them within three months. When it comes to reheating, you can use a microwave or an oven. The oven gives the best results, keeping the shells crispy. Preheat the oven to 350°F (175°C). Cover the dish with foil to keep them moist. Heat for about 20 minutes. If using a microwave, place a damp paper towel over the shells. This helps keep them from drying out. Remember to be gentle when handling the shells, so they stay intact. For more details on making these stuffed shells, refer to the Full Recipe. Can I make stuffed shells ahead of time? Yes, you can! Prepare the stuffed shells up to a day before. Just cover them tightly and store them in the fridge. When you are ready to bake, add a few extra minutes to the cooking time. What can I serve with stuffed shells? Stuffed shells pair well with a simple salad. A green salad with vinaigrette works great. You can also serve garlic bread on the side for a complete meal. Why did my stuffed shells break? Stuffed shells may break if they are overcooked. Cook the shells until they are just al dente. Also, be gentle when handling them. How do I keep the filling from leaking out? Make sure to fill the shells carefully. Overstuffing can cause leaks. Also, cover the shells with sauce before baking. This keeps the filling moist and secure. Are stuffed shells healthy? Stuffed shells can be part of a balanced diet. They provide carbs from pasta, protein from beef, and calcium from cheese. However, watch your portion size. Can I make a gluten-free version? Absolutely! Use gluten-free pasta shells. Most fillings are already gluten-free. Always check your sauce and cheese labels to ensure they match your needs. Stuffed shells are a fun and tasty dish. We covered the key ingredients like jumbo pasta, ground beef, and different cheeses. You learned how to prepare, fill, and bake them perfectly. Tips for storing and reheating help you enjoy leftovers later. You can even try variations to fit your taste. Remember, cooking is all about experimenting. Don’t be afraid to make it your own! Enjoy the process and share your stuffed shells with family and friends. Happy cooking!](https://tastednest.com/wp-content/uploads/2025/06/8b52d81e-f0fa-46d3-a68e-e65e92bc5409.webp)
Are you ready to impress your family with a delicious meal? My Best Stuffed Shells with Ground Beef Delight Recipe will do just that! This dish combines jumbo pasta shells, …

Are you ready to indulge in a sweet, creamy delight? The BEST Cheesecake Crescent Rolls Casserole combines the warm, flaky layers of crescent rolls with a rich cheesecake filling. Whether …

If you’re craving a quick and tasty meal, you’ll love these Cheesy Garlic Chicken Wraps! This easy recipe combines juicy chicken, rich cheese, and savory garlic all in a soft …
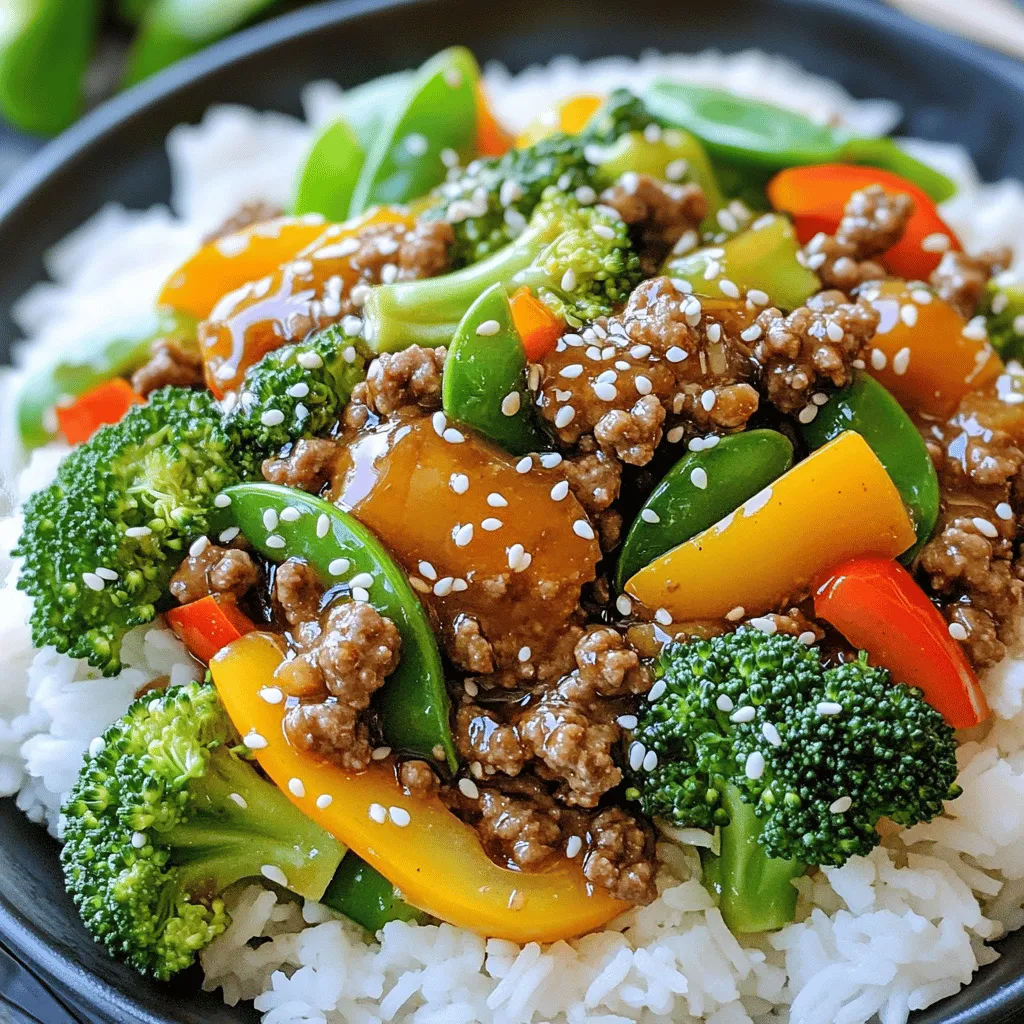
Get ready for a flavor-packed dinner that’s quick and easy to make! This Honey Garlic Ground Beef Stir-Fry uses just a few simple ingredients like ground beef, honey, and fresh …
![When making Cheesy Taco Pasta, freshness matters. Here’s a list of what you need: - 8 oz elbow macaroni - 1 lb ground beef or turkey - 1 packet taco seasoning - 1 can black beans - 1 cup corn - 1 cup diced tomatoes - 2 cups shredded cheddar cheese - 1 cup milk - 1 tablespoon olive oil - Salt and pepper - Fresh cilantro for garnish Each ingredient plays an important role. The elbow macaroni gives a nice bite. The ground beef or turkey provides protein and richness. Taco seasoning adds that signature flavor. Black beans boost fiber, while corn and tomatoes add sweetness. Cheddar cheese makes it creamy and cheesy, which is what we love! Use good-quality cheese for the best melt. I recommend fresh cilantro for a pop of flavor. Fresh herbs elevate the dish and make it look pretty. For the [Full Recipe], follow the steps carefully to get the best results. Each ingredient enhances the overall taste and texture of this cozy meal. - Bring a large pot of salted water to a boil. - Add 8 oz of elbow macaroni. Cook the macaroni until al dente, about 7-8 minutes. - Once cooked, drain the pasta in a colander and set it aside. - In a large skillet, heat 1 tablespoon of olive oil over medium heat. - Add 1 lb of ground beef or turkey to the skillet. Cook the meat for about 5-7 minutes. - Stir occasionally, breaking the meat into smaller pieces. When it browns, it’s ready. - If there's extra grease, carefully drain it from the skillet. - Sprinkle the taco seasoning over the browned meat. Stir well for about 1-2 minutes. - This lets the spices coat the meat and gives a great aroma. - Now, mix in 1 can of rinsed black beans, 1 cup of corn, and 1 cup of diced tomatoes. - Combine the cooked macaroni with the mixture. - Carefully pour in 1 cup of milk and stir until everything is mixed well. - Gradually add 2 cups of shredded cheddar cheese to the skillet. Stir until the cheese melts and creates a creamy texture. - If the dish is too thick, add more milk a splash at a time. - Taste the dish and adjust with salt and pepper as needed. By following these steps, you will create a delicious Cheesy Taco Pasta. For those who want to follow my detailed approach, you can check the Full Recipe for more guidance! To make your Cheesy Taco Pasta creamy, adjust the milk. Start with 1 cup, then add more if needed. This helps you control the thickness. If it’s too thick, add a splash more. Aim for a smooth and creamy texture. To avoid clumping cheese, add it slowly. Stir it in gradually while the pasta is hot. This melts the cheese evenly and keeps it from clumping. If you notice clumps, add a bit more milk and stir well. For a beautiful presentation, serve the Cheesy Taco Pasta in deep bowls. Sprinkle fresh cilantro on top for color. You can also add a handful of tortilla chips on the side. They add a nice crunch and a fun element to the meal. To boost flavor, think about adding spices. Cumin and paprika work well. Just a pinch can elevate the dish. You can also try a dash of hot sauce for some heat. Using fresh herbs adds brightness. Chopped cilantro or green onions make great garnishes. They not only taste good but also look nice. A little freshness goes a long way in enhancing your dish. For the full recipe, check out Cheesy Taco Pasta Delight. {{image_4}} You can easily switch up the protein in Cheesy Taco Pasta. Ground turkey or chicken works great. These options cut down on fat while still packing flavor. You can also make it vegetarian. Try using mushrooms or lentils instead of meat. Both add texture and a nice earthiness to the dish. Cheese is key in this recipe. While cheddar is a classic choice, you can explore different cheeses for extra flavor. Monterey Jack or pepper jack can bring a fun twist. If you need a dairy-free option, there are many great substitutes. Look for vegan cheeses made from nuts or soy. They melt well and taste delicious, too. If you're avoiding gluten, don't worry! There are many gluten-free pasta options available. Look for ones made from rice or chickpeas. These work well in any pasta dish. You can also experiment with different pasta shapes. Fusilli or penne can add fun to your meal. Just remember to cook them according to package instructions for the best results. To keep your Cheesy Taco Pasta fresh, let it cool first. Place the pasta in airtight containers. Use glass or BPA-free plastic containers. Label the containers with the date. Store them in the fridge for up to three days. When ready to enjoy leftovers, reheat gently. You can use a microwave or a stovetop. For the microwave, place the pasta in a bowl. Cover it with a damp paper towel. Heat in 30-second bursts, stirring in between. On the stovetop, add a splash of milk to a pan. Heat over low heat, stirring often. This keeps the flavors bright. To freeze Cheesy Taco Pasta, first cool it completely. Transfer it to freezer-safe bags or containers. Remove as much air as possible. Label the bags with the date. You can freeze it for up to three months. To thaw, move it to the fridge overnight. For quick thawing, use the microwave on the defrost setting. Reheat as mentioned above. Enjoy the same great taste, even from frozen! For the full recipe, check out the earlier section. Yes, you can make Cheesy Taco Pasta ahead of time. First, cook the pasta and mix all the ingredients. Then, store it in an airtight container in the fridge. It stays good for about three days. When you’re ready to eat, just reheat it on the stove or in the microwave. Add a splash of milk if it seems dry. This makes meal prep easy and saves time on busy days. Cheesy Taco Pasta can be spicy, depending on your taco seasoning. If you want a milder taste, use a low-heat seasoning or reduce the amount. You can also add sour cream or yogurt to cool it down. For those who enjoy heat, try adding jalapeños or hot sauce. Adjust the spice to fit your taste, and enjoy your perfect bowl. You can add many veggies to Cheesy Taco Pasta. Consider these options: - Bell peppers - Zucchini - Spinach - Onions To incorporate them seamlessly, chop the veggies small. Sauté them with the meat for best results. This way, they blend well into the dish. You get more nutrition without losing flavor! This blog post covered the key steps for making Cheesy Taco Pasta. We explored ingredients, cooking methods, and variations. With this recipe, you can enjoy a tasty meal that fits many diets. Remember to customize it to your taste, whether it’s choosing protein or adjusting spice levels. Utilize the tips for storage and reheating to enjoy leftovers seamlessly. Dive in and make this dish your own. Your family will love it!](https://tastednest.com/wp-content/uploads/2025/06/e667c0f8-ad15-472f-9754-b550d87398bc.webp)
Looking for a quick and tasty dinner? Cheesy Taco Pasta is your answer! This simple comfort meal combines noodles with savory ground meat, beans, and vibrant spices. In just a …
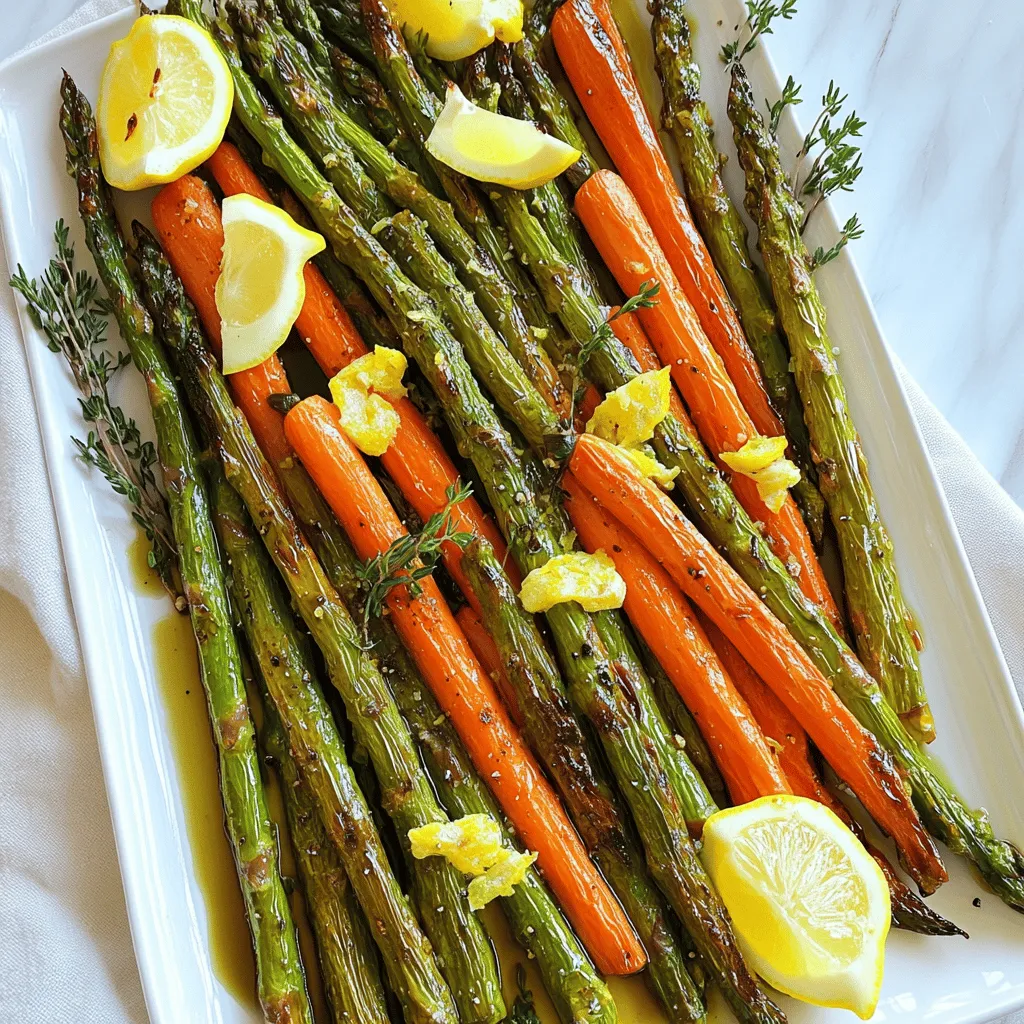
Looking to elevate your veggie game? Roasted asparagus and carrots are not only tasty but also packed with nutrients. This dish is simple and fits any meal. I’ll guide you …
![To make the best cheeseburger soup, gather these simple ingredients: - 1 pound ground beef - 1 medium onion, finely diced - 2 cloves garlic, minced - 2 medium carrots, finely diced - 2 celery stalks, finely diced - 4 medium potatoes, peeled and cubed - 4 cups beef broth - 1 tablespoon ketchup - 1 tablespoon yellow mustard - 1 teaspoon Worcestershire sauce - 1 teaspoon smoked paprika - Salt and pepper to taste - 2 cups sharp cheddar cheese, shredded - 1 cup whole milk - 1/2 cup sour cream - 3 green onions, thinly sliced Each ingredient plays a key role. The ground beef gives a rich flavor. The onions and garlic add depth and aroma. Carrots and celery bring sweetness and crunch. Potatoes make the soup hearty and filling. The beef broth serves as a savory base. Ketchup and mustard lend that classic cheeseburger taste. Worcestershire sauce adds a tangy kick, while smoked paprika gives warmth. The cheese, milk, and sour cream make it creamy and delicious. Finally, green onions add a fresh touch as a garnish. For the full recipe, check out the detailed steps to create this creamy and hearty delight. Start with a large pot or Dutch oven. Heat it over medium heat. Add the ground beef. Cook it for about 5-7 minutes. Use a spatula to break it up as it cooks. Look for it to turn brown and fully cooked. If you see excess fat, drain it out carefully. This step adds flavor to your soup. Next, add the diced onion and minced garlic to the pot. Sauté for about 3-4 minutes. You want the onion to turn soft and fragrant. Then, mix in the diced carrots and celery. Cook these for 4-5 minutes. Stir them often until they start to soften. Now, add the cubed potatoes. Pour in the beef broth along with the ketchup, mustard, Worcestershire sauce, and paprika. Stir everything together well. Bring the soup to a boil. Once boiling, lower the heat and let it simmer uncovered for 15-20 minutes. The potatoes should be fork-tender by now. After the potatoes are cooked, it's time to add creaminess. Stir in the shredded cheddar cheese, milk, and sour cream. Keep stirring until the cheese melts completely. This will make your soup rich and smooth. Taste it and add salt and pepper as needed. Let it simmer for another 5 minutes. This helps the flavors blend nicely. When ready, serve hot in bowls. Top with sliced green onions for a fresh touch. Enjoy this creamy and hearty delight from the Full Recipe! Prepping your vegetables ahead of time makes cooking easier. Chop your onions, carrots, and celery before you start. This helps you stay organized and focused. You can also enhance flavor with seasonings. Adding smoked paprika brings a nice depth. A bit of Worcestershire sauce adds umami too. Don’t forget salt and pepper; they are key to a tasty soup. Pairing this soup with crusty bread or a fresh salad makes a great meal. The bread soaks up the creamy soup nicely. A side salad adds crunch and freshness. You can also sprinkle extra cheese on top for a fun twist. To make this soup, you’ll need some basic kitchen tools. A large pot or Dutch oven is essential for cooking. A good knife helps with chopping vegetables. A spatula or wooden spoon is great for stirring the soup. Finally, have a ladle ready for serving your delicious cheeseburger soup. For the complete recipe, check out the [Full Recipe]. {{image_4}} To make your cheeseburger soup spicy, add jalapeños. Chop them finely and stir them in when you cook the onions. You can also add a dash of hot sauce for extra kick. This twist gives the soup a fun heat that many will love. If you want more flavors, try adding chili powder or crushed red pepper flakes. For those who enjoy veggies, you can create a vegetarian version. Replace the ground beef with cooked lentils or black beans. Use vegetable broth instead of beef broth. Add more veggies like bell peppers or zucchini. This option keeps the heartiness while making it meat-free. You still get a rich flavor and creamy texture. Cheese is key in this soup. While sharp cheddar is great, feel free to mix it up. Try gouda for a smoky flavor or pepper jack for a spicy kick. You can even use cream cheese for an extra creamy base. Each cheese adds a unique taste and texture, so play around to find your favorite! For the full recipe, check out The Ultimate Cheeseburger Soup. I love keeping leftovers of this cheeseburger soup. To store them, let the soup cool first. Then, pour it into an airtight container. You can keep it in the fridge for up to three days. If you want to enjoy it longer, freezing is a great option. When you are ready to eat the soup again, reheat it on the stove. Pour the soup into a pot over medium heat. Stir occasionally until it heats through. You can also microwave it in a bowl. Heat it in short bursts, stirring in between. This way, you avoid hot spots. Freezing this soup is simple. After cooling, pour it into freezer-safe bags or containers. Leave some space at the top for expansion. It can last up to three months in the freezer. To enjoy it later, thaw it overnight in the fridge. Then, reheat it as mentioned above. For the full recipe, you can check the link provided earlier. Yes, you can use ground turkey. It will make the soup leaner. The flavor will change, but it's still tasty. Ground turkey cooks quickly. Just brown it like ground beef. If your soup is thick, add more broth or milk. Stir it well until you reach your desired consistency. You can also add water if needed. Just remember to taste and adjust the seasoning. Cheeseburger soup can last in the fridge for about 3 days. Store it in an airtight container. If you want to keep it longer, consider freezing it. Yes, you can make this soup in a slow cooker. Brown the meat first, then add all the other ingredients. Cook on low for 6-8 hours or high for 3-4 hours. Reheat the soup on the stove over low heat. Stir often to prevent sticking. You can also use the microwave. Heat in 30-second bursts, stirring in between. Enjoy your creamy and hearty delight! For the full recipe, check out the Ultimate Cheeseburger Soup. This blog post shared a simple recipe for cheeseburger soup. You learned about the key ingredients, cooking steps, and helpful tips. I also suggested variations for spicy or vegetarian options. Remember to use quality beef and fresh veggies for the best taste. Don’t forget to store leftovers correctly to enjoy later. With these steps, you can make a comforting, hearty soup that warms the soul. Enjoy cooking and sharing this dish with those you love. Happy cooking!](https://tastednest.com/wp-content/uploads/2025/06/b1916b86-d595-4249-9dfc-41db030cc2ff.webp)
Are you ready for a warm, creamy hug in a bowl? Welcome to my recipe for the best cheeseburger soup! This dish combines tender beef, hearty veggies, and cheesy goodness. …

If you’re craving a sweet treat that combines the rich flavors of cheesecake with fresh blueberries, you’re in for a delight! These Blueberry Cheesecake Swirl Cookies are easy to make …
![- 1 lb ribeye steak, thinly sliced - 1 large green bell pepper, sliced into strips - 1 large onion, sliced into half-moons - 4 slices provolone cheese - 2 tablespoons olive oil, divided - Salt and pepper to taste - 4 hoagie rolls These main ingredients create a classic Philly cheese steak. The ribeye steak gives a rich flavor and tender bite. The bell pepper and onion add sweetness and crunch. Provolone cheese melts beautifully, making each bite creamy. Hoagie rolls hold everything together, giving you a hearty sandwich. - 1 tablespoon Worcestershire sauce - Crushed red pepper flakes You can add Worcestershire sauce for a deeper taste. It adds a savory punch that pairs well with the steak. Crushed red pepper flakes bring heat if you desire a spicy kick. These optional ingredients let you customize your meal to your liking. When choosing ribeye steak, look for marbled fat. This fat makes the steak juicy and flavorful. Aim for bright red color without any brown spots. If possible, ask your butcher for thinly sliced steak. This saves you time and ensures even cooking. Always check the sell-by date to ensure freshness. Start by slicing the ribeye steak thinly. Thin slices help it cook fast. Use a sharp knife for clean cuts. Next, slice the green bell pepper into strips. Also, slice the onion into half-moons. Set all the veggies aside. This prep sets the stage for a great cheese steak. Heat a large skillet over medium-high heat. Add 1 tablespoon of olive oil. Wait until the oil shimmers before adding the sliced onions and peppers. Cook the veggies for 5-7 minutes. Stir them often until they soften and caramelize. Season with salt and pepper for flavor. Once done, transfer them to a plate and keep them warm. In the same skillet, add the other tablespoon of olive oil. Increase the heat a bit. Add the thinly sliced ribeye steak to the hot skillet. Sear the steak for 3-4 minutes. Stir often to brown it evenly. If you want, drizzle Worcestershire sauce over the steak in the last minute. This adds a nice flavor. Once browned, lower the heat and mix the veggies back in. Layer provolone cheese over everything. Cover the skillet for 2-3 minutes to melt the cheese. Now, you’re ready to fill your hoagie rolls. Slice them open but don’t cut all the way through. Use a slotted spoon to place the steak and cheese mix inside. If you like heat, sprinkle some crushed red pepper flakes on top before serving. Enjoy your delicious creation! For the full recipe, check out [Full Recipe]. To get the cheese just right, choose a good melting cheese. Provolone works well, but you can also try mozzarella. After you layer the cheese on the steak, cover the pan. This helps the cheese melt evenly. Let it sit for 2-3 minutes over low heat. You want the cheese to be gooey, not burnt. Adding Worcestershire sauce gives your steak a boost of flavor. It adds a nice umami taste that makes each bite special. You can also try adding garlic powder or onion powder for extra depth. For a spicy punch, sprinkle in crushed red pepper flakes. These simple tweaks can make your cheese steak pop! One common mistake is overcooking the steak. It should be tender and juicy, not dry. Make sure to slice the steak thinly. This helps it cook evenly and quickly. Also, don’t skip the veggies! Onions and bell peppers add sweetness and crunch. Finally, remember to season your meat well. A little salt and pepper go a long way in enhancing flavor. For the full recipe, check out the Ultimate Philly Cheese Steak. {{image_4}} You can swap out the ribeye steak for chicken or Portobello mushrooms. Chicken breast works well; just slice it thin. Cook it the same way as the steak. Portobello mushrooms give a great, meaty flavor. Slice them thick and sauté until tender. Both options make for a tasty twist on the classic Philly cheese steak. While provolone cheese is traditional, you have other options. Try mozzarella for a milder flavor. Cheddar adds a nice sharpness to the sandwich. Even pepper jack can spice things up! Mixing different cheeses can create a unique taste. Experiment with your favorites for a personalized touch. Want to boost nutrition? Add more veggies! Sliced mushrooms, spinach, or even jalapeños can enhance your cheese steak. Just sauté them along with the onions and peppers. This not only adds flavor but also makes your meal more colorful. You can enjoy a hearty, veggie-packed sandwich that pleases the palate. For the full experience, check out the Full Recipe. To keep your Easy Philly Cheese Steak fresh, let it cool first. Place the leftovers in an airtight container. Make sure to store them in the fridge. They will stay good for up to three days. If you have extra hoagie rolls, store them separately. This keeps them from getting soggy. When you’re ready to enjoy your leftovers, reheating is key. Use a skillet for the best flavor. Heat it over medium heat and add a splash of water. This creates steam and keeps the steak moist. Cook for about 5 minutes, stirring gently. You can also use a microwave, but be careful not to dry it out. Cover the dish with a damp paper towel to trap moisture. If you want to save some for later, freezing is a great option. First, let the steak cool completely. Then, pack it into freezer-safe bags. Squeeze out as much air as you can. It will stay fresh for about two months in the freezer. When you're ready to eat it, thaw it overnight in the fridge. Reheat it in a skillet for the best taste. For the full recipe, check the link! Yes, you can make Easy Philly Cheese Steak without Worcestershire sauce. The sauce adds a nice depth of flavor, but it is not necessary. You can simply skip it. The steak, peppers, and onions will still taste great. If you want more flavor, try adding soy sauce or a splash of vinegar instead. The best bread for Philly Cheese Steaks is a hoagie roll. These rolls have a soft inside and a crusty outside. They hold up well to the juicy filling. Other good options include Italian bread or a sub roll. Look for bread that is fresh and has a good shape for easy handling. To make your cheese steak spicier, add crushed red pepper flakes. You can sprinkle these on the filling before serving. Another option is to use spicy cheese, like pepper jack. You can also add hot sauce to your steak while cooking, which gives it a nice kick. The main difference is the cheese. A cheese steak usually uses provolone or American cheese. A cheese whiz steak uses cheese whiz, which is a processed cheese sauce. Cheese whiz is creamier and has a different flavor. Both are tasty, but they offer different experiences. In this article, we explored how to make an easy Philly cheese steak. We covered key ingredients like steak and cheese, plus helpful tips for selecting the best steak. I shared step-by-step cooking instructions and ways to enhance flavor. You learned about variations and storage options for leftovers. With these insights, you can now craft your perfect cheese steak. Enjoy the blend of flavors and textures, and don't hesitate to experiment with different ingredients!](https://tastednest.com/wp-content/uploads/2025/06/71479f54-1275-4356-906f-e2d7a2d9c1fa.webp)
Are you ready to make a mouthwatering Easy Philly Cheese Steak? This simple recipe will guide you step-by-step, ensuring you serve up a dish full of flavor. With a few …