Skip to content
  • GDPR Privacy Policy
  • Copyright Policy
  • Disclaimer
  • Terms & Conditions
Tasted Nest
  • Home
  • Appetizers
  • Desserts
  • Salads
  • Breakfast
  • Dinner
  • Privacy Policy
  • Contact
  • About

Chef Tavio

Garlic Butter Steak Bites & Potatoes Flavorful Delight

November 21, 2025April 20, 2025 by Chef Tavio
- 1 pound sirloin steak, cut into bite-sized cubes - 2 cups baby potatoes, halved - 4 tablespoons unsalted butter, divided Sirloin steak is a fantastic choice for this dish. It’s tender and holds flavor well. Cutting the steak into bite-sized cubes makes it easy to cook and eat. Baby potatoes add a nice texture and sweetness, making them the perfect side. Using unsalted butter gives you control over the salt in the dish, allowing the natural flavors to shine. - 4 cloves fresh garlic, minced - 1 teaspoon fresh rosemary, finely chopped - 1 teaspoon fresh thyme, finely chopped - Salt and black pepper, to taste Fresh garlic brings an incredible aroma and flavor to the steak bites. Rosemary and thyme add depth and earthiness, enhancing the overall taste. Seasoning with salt and black pepper is key. It brings out the savory notes in both the steak and potatoes. - 2 tablespoons olive oil - Fresh parsley, chopped, for garnish Olive oil helps to crisp the potatoes, giving them a nice golden color. Chopped parsley adds a fresh pop of color to your plate. It also brings a subtle flavor that brightens each bite. {{ingredient_image_2}} - Preheat your oven to 425°F (220°C). - In a bowl, mix halved baby potatoes with olive oil. - Season the potatoes with salt and black pepper. - Toss until they are well coated. - Spread the potatoes in a single layer on a baking sheet. - Roast for 25-30 minutes, flipping halfway through. - Heat a large skillet over medium-high heat. - Add 2 tablespoons of unsalted butter to the skillet. - Let the butter melt until it bubbles gently. - Season the steak cubes with salt and black pepper. - Carefully add the steak bites in a single layer. - Sear each side for 2-3 minutes until browned. - Transfer the cooked steak bites to a plate. - Lower the heat and add the remaining 2 tablespoons of unsalted butter. - Once melted, stir in minced garlic, chopped rosemary, and thyme. - Sauté for 1-2 minutes until the garlic is fragrant. - Return the seared steak bites to the skillet. - Toss gently in the garlic herb butter to coat. - Cook for an additional minute to meld the flavors. To get steak bites just right, cook them for about 2-3 minutes on each side. This timing helps them stay juicy and tender. Always season your steak before cooking. A mix of salt and black pepper works great. You can also add garlic powder for extra flavor. Spacing the potatoes on your baking sheet is key. Give them enough room to crisp up. If they touch, they will steam instead of roast. Flip the potatoes halfway through cooking. This step ensures they cook evenly and get that perfect golden brown color. Don’t be afraid to add your favorite spices or herbs. Paprika or Italian seasoning can give a nice twist. Fresh herbs like basil or oregano also work well. For dips, try a zesty garlic aioli or a creamy ranch. These sauces really enhance the dish and add a fun touch. Pro Tips Rest the Steak: Allow the seared steak bites to rest for a few minutes before serving. This helps the juices redistribute, resulting in a more tender bite. Use a Meat Thermometer: To achieve perfect doneness, use a meat thermometer. For medium-rare, aim for an internal temperature of 130-135°F (54-57°C). Customize the Herbs: Feel free to experiment with different herbs based on your preference. Fresh oregano or basil can add a unique flavor profile. Serve Immediately: For the best texture and flavor, serve the garlic butter steak bites immediately after cooking. This ensures they stay juicy and flavorful. {{image_4}} You can switch things up by using chicken instead of steak. Chicken thighs work well for this dish. Just cut them into bite-sized pieces and follow the same cooking steps. They will soak up the garlic butter flavor nicely. For a meat-free option, consider using mushrooms. Portobello or cremini mushrooms make a great replacement. Sauté them until they are tender and juicy. This will add a rich, earthy flavor to your meal. If you want a sweet twist, try using sweet potatoes. They add a hint of sweetness and a lovely color to your dish. Cut them into cubes and roast them just like baby potatoes. You can also prepare mashed or baked potatoes. For mashed potatoes, boil them until tender and mash with butter and garlic. For baked potatoes, simply poke holes, coat with olive oil, and bake until crispy. For a spicy kick, you can add some red pepper flakes to the garlic butter. This will give your steak bites a nice heat without overpowering the dish. When serving, think about different garnishes. You can use grated Parmesan cheese for extra flavor. A sprinkle of lemon zest can add a fresh twist too. These small changes can make your dish feel new and exciting! To store leftovers, let them cool down first. You want to prevent steam from building up in the container. Place the steak bites and potatoes in an airtight container. Store them in the fridge for up to three days. If you want to keep them longer, freezing is a great option. You can reheat steak bites in a skillet. Heat the skillet over medium heat. Add a bit of butter to keep them moist. Cook for about 3-4 minutes until they are warmed through. For potatoes, you can microwave them for 1-2 minutes. Check to make sure they stay crispy and warm. You can freeze both steak bites and potatoes. First, let them cool completely. Place them in freezer-safe bags, removing as much air as possible. They can last up to three months in the freezer. When ready to eat, thaw them overnight in the fridge. Reheat them in the skillet for the best texture. Cooking steak bites is quick! It takes about 10 minutes. Here's the breakdown: - Prep Time: 10 minutes for cutting and seasoning. - Cooking Time: 25-30 minutes for the potatoes, while the steak cooks in about 6-8 minutes. You can cook the steak bites while the potatoes roast. This way, everything is ready in about 40 minutes! Yes, you can make this dish ahead! Here are some best practices: - Potatoes: Roast them, let them cool, and store in the fridge. - Steak Bites: You can sear the steak and keep it in the fridge. Reheat the steak bites and potatoes together for a quick meal! Pair these steak bites with tasty sides! Here are some recommendations: - Salads: A fresh green salad adds crunch and freshness. - Vegetables: Steamed broccoli or asparagus complement the meal well. - Bread: Garlic bread or dinner rolls are great for soaking up the butter sauce. These sides enhance the flavors of the steak bites and potatoes! This blog covered how to make delicious Garlic Butter Steak Bites and crispy baby potatoes. From choosing the right ingredients to step-by-step cooking methods, I shared tips to enhance flavor and texture. Remember, you can swap proteins and change up potatoes for variety. Don’t forget to try the optional garnishes for extra flair. Enjoy creating this tasty dish and impress everyone at your table!

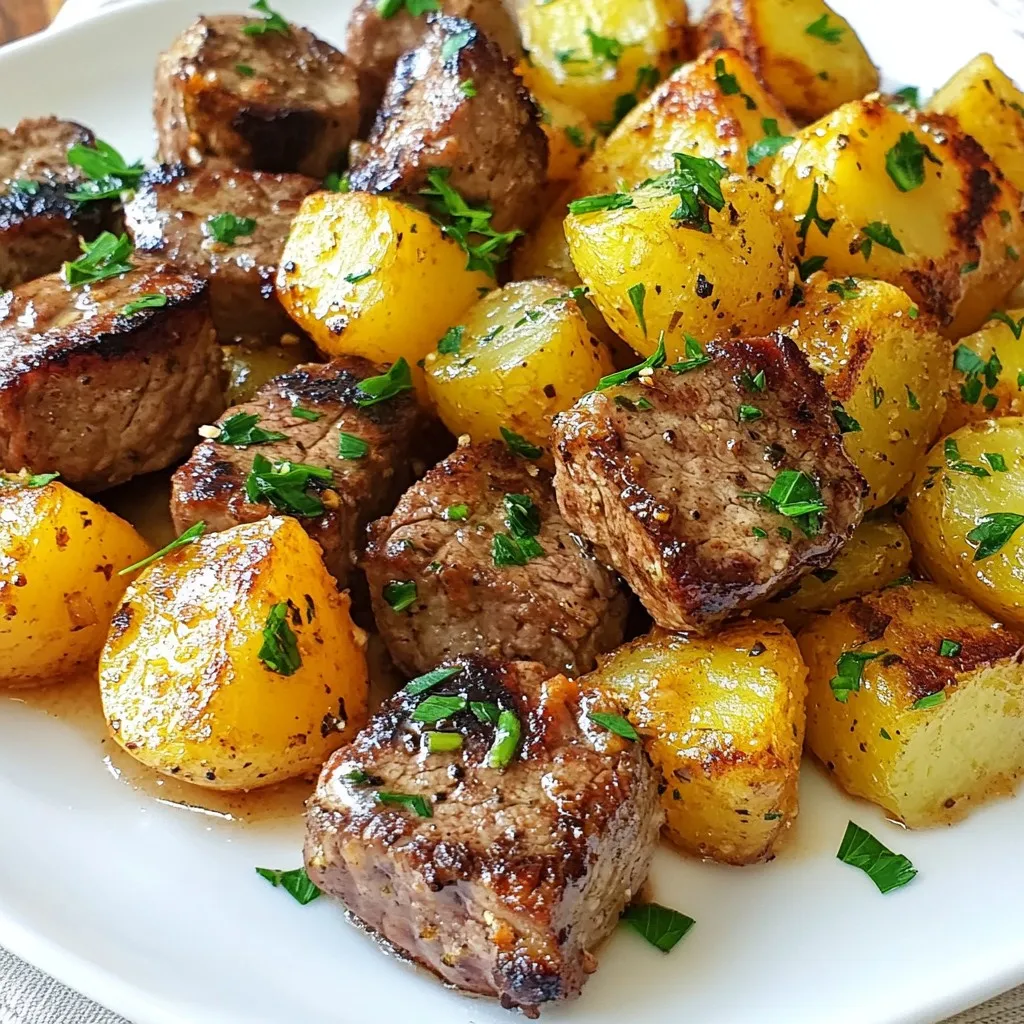
Craving a meal that’s quick, tasty, and full of flavor? You’re in for a treat with my Garlic Butter Steak Bites & Potatoes! This easy dish combines juicy steak and …

Read more

Categories Dinner

Cinnamon Roll Protein Crepes Delightful Healthy Treat

November 16, 2025April 20, 2025 by Chef Tavio
- 1 cup rolled oats (blended into flour) - 1 scoop vanilla protein powder - 2 large eggs - 1 cup almond milk (or any milk of your choice) - 1 tablespoon ground cinnamon - 1 tablespoon honey or maple syrup - 1 teaspoon vanilla extract - Pinch of salt These ingredients form the base of your crepes. Using rolled oats gives a hearty touch and adds nutrition. The protein powder helps to make your breakfast filling and satisfying. - 2 tablespoons cream cheese (softened at room temperature) - 1 tablespoon maple syrup - 1/2 teaspoon ground cinnamon This filling adds a creamy layer that enhances the cinnamon flavor. The cream cheese pairs well with the sweetness from maple syrup. - 1 large banana, sliced - 2 tablespoons chopped pecans (optional) - Extra maple syrup for drizzling Adding sliced bananas gives freshness and a nice texture. Chopped pecans add crunch, making every bite delightful. A drizzle of maple syrup ties everything together, making it a sweet treat. {{ingredient_image_2}} To make oat flour, take 1 cup of rolled oats. Place the oats in a blender. Blend them on high until they turn into a fine flour. This oat flour will be the base for your crepes. It is easy to make and keeps the crepes healthy. In a mixing bowl, add the oat flour, 1 scoop of vanilla protein powder, and 2 large eggs. Pour in 1 cup of almond milk. You can use any milk you like. Next, add 1 tablespoon of ground cinnamon, 1 tablespoon of honey or maple syrup, and 1 teaspoon of vanilla extract. Mix all these ingredients with a whisk until the batter is smooth. Let it rest for about 10 minutes. This resting time helps thicken the batter. Heat a non-stick skillet over medium heat. Once hot, pour about 1/4 cup of the crepe batter into the pan. Tilt the pan gently in a circular motion. This helps the batter coat the bottom evenly. Cook the crepe for 2-3 minutes. Look for the edges to lift and the bottom to turn golden-brown. Carefully flip the crepe and cook for another minute. Repeat this with the rest of the batter. Stack the cooked crepes on a plate. Take one crepe and spread a generous layer of the cream cheese filling on one half. Fold the crepe over to cover the filling. This creates a lovely pocket of flavor inside. Place the filled crepes on a serving plate. Top with sliced bananas and chopped pecans if you like. Drizzle extra maple syrup over the top for a sweet finish. Enjoy each delightful bite of your Cinnamon Roll Protein Crepes! To make the best crepes, start with a smooth batter. Ensure your oat flour is fine. Let the batter rest for about 10 minutes. This helps the crepes cook evenly. Use a non-stick skillet at medium heat. This keeps the crepes from sticking. Pour just enough batter to cover the pan. Tilt the pan gently to spread it out. Cook until the edges lift, then flip carefully. You can swap almond milk for any milk you like. Cow's milk or oat milk works great too. If you don't have protein powder, try using ground nuts. For a dairy-free option, use vegan cream cheese. Maple syrup can be replaced with agave nectar or honey. For fluffier crepes, beat your eggs well before mixing. This adds air to the batter. Cooking on low heat can help them rise a bit. Make sure your skillet is hot before adding the batter. This gives a nice golden color to your crepes. If you want to stack them, place parchment paper in between. This keeps them from sticking together while you cook. Pro Tips Use Fresh Ingredients: Always opt for fresh eggs and high-quality maple syrup for the best flavor in your crepes. Rest the Batter: Allowing the batter to rest for about 10 minutes helps to achieve a smoother consistency and better texture in the cooked crepes. Heat Control: Make sure your skillet is at the right temperature before adding the batter. If it’s too hot, the crepes will burn; too cool, and they won’t cook properly. Experiment with Fillings: Feel free to get creative with the fillings! Nut butters, fresh fruits, or yogurt can all be delicious alternatives to the cream cheese filling. {{image_4}} You can change the flavor of your crepes easily. Try adding cocoa powder for a chocolate twist. A few tablespoons of pumpkin puree can give a fall vibe. For a fruity taste, add mashed berries or pureed peaches to the batter. Adjust the sweetness with flavored syrup or sweetener. To make these crepes gluten-free, ensure your oats are certified gluten-free. Blend the oats as mentioned in the recipe. For a vegan option, swap the eggs with flaxseed meal. Mix 1 tablespoon of flaxseed with 2.5 tablespoons of water and let it sit until it thickens. Use plant-based cream cheese for the filling. You can get creative with fillings. Nut butters, like almond or peanut, add great flavor and protein. Swap cream cheese for Greek yogurt mixed with honey. For toppings, try fresh berries, chopped nuts, or shredded coconut. A sprinkle of cinnamon or a dash of vanilla can boost the taste even more. To keep your leftover crepes fresh, stack them neatly with parchment paper between each one. Place the stack in an airtight container. Store them in the fridge for up to three days. This method helps prevent them from sticking together and keeps them soft. When you're ready to enjoy your crepes again, heat a non-stick skillet over low heat. Place the crepe in the skillet and heat it for about 1-2 minutes on each side. You can also warm them in the microwave for about 15-20 seconds. Just be careful not to overheat them, or they may become tough. If you want to save crepes for later, freezing is a great option. Lay each crepe flat on a baking sheet and freeze them for about an hour. Once frozen, stack them with parchment paper and put them in a freezer bag. They can last up to two months in the freezer. When you want to eat them, just thaw in the fridge overnight and reheat as mentioned above. Yes, you can make these crepes ahead of time. Cooked crepes can be stored in the fridge for 2-3 days. Just stack them with parchment paper between each crepe to keep them from sticking. When ready to eat, simply reheat them in a skillet or microwave. If you don’t have almond milk, you can use any milk you like. Options include oat milk, soy milk, or regular cow's milk. Each will give a slightly different taste, but all work well in this recipe. To make the crepes sweeter, add more honey or maple syrup to the batter. For less sweetness, reduce the amount of sweetener. You can also skip the filling sweetener if you want a more savory taste. Absolutely! These crepes are perfect for meal prep. You can make a batch and store them in the fridge. Just reheat them for a quick breakfast or snack. Fill them right before serving for the best flavor. Yes, you can easily double or triple the batter. Just keep the same ratios for all ingredients. This way, you can enjoy more crepes without extra work! In this post, we explored how to make delicious cinnamon roll protein crepes. I shared the key ingredients, including oat flour and tasty fillings. You learned step-by-step instructions, from making the batter to cooking the crepes. We covered helpful tips for perfect texture and flavor variations to suit your needs. With proper storage methods, you can enjoy these crepes later too. Now, you're ready to impress with this fun recipe. Enjoy making and tasting these crepes!

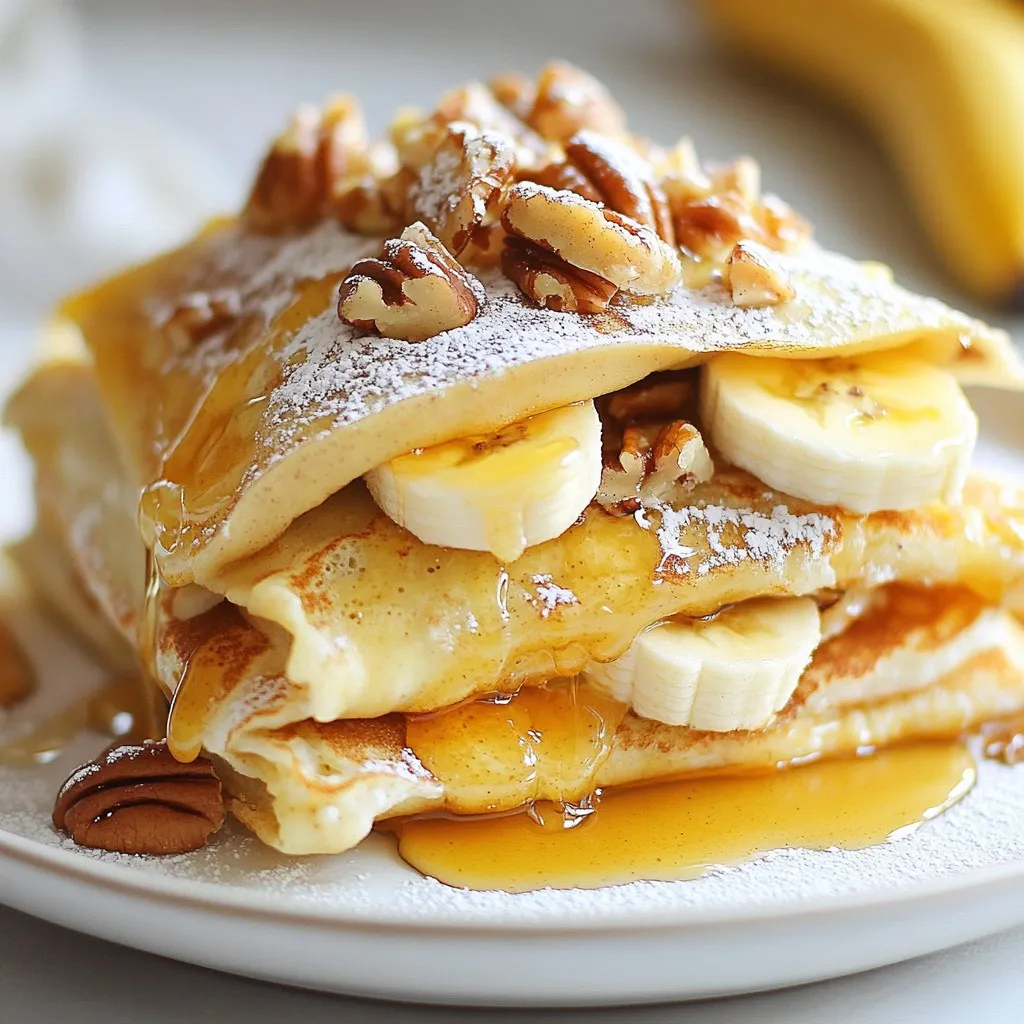
Are you craving a tasty treat that won’t derail your health goals? Look no further! My Cinnamon Roll Protein Crepes are a delicious blend of flavor and nutrition. Packed with …

Read more

Categories Breakfast

Easy Philly Cheesesteak Quick and Tasty Recipe

November 20, 2025April 20, 2025 by Chef Tavio
- 1 lb ribeye steak - 1 large onion - 1 large bell pepper - 4 slices provolone cheese - 4 hoagie rolls - Sliced mushrooms - Hot peppers - Olive oil - Salt and pepper The main ingredients are simple but key to a great cheesesteak. The ribeye steak gives the dish its rich flavor. Slice it thinly for the best texture. The onion and bell pepper add sweetness and crunch. Provolone cheese melts nicely, creating that gooey goodness we all love. Hoagie rolls hold everything together, making each bite a treat. Feel free to add sliced mushrooms for extra earthiness or hot peppers for a spicy kick. These optional add-ins let you customize your cheesesteak to your taste. For seasoning, olive oil helps cook the veggies and steak without burning. Salt and pepper enhance all the flavors. Just a pinch can make a big difference. {{ingredient_image_2}} 1. First, freeze the ribeye steak for about 30 minutes. This helps make slicing easier. 2. Once it's firm, use a sharp knife to cut the steak. Cut against the grain for tender strips. 1. Heat 1 tablespoon of olive oil in a large skillet over medium heat. 2. Add the thinly sliced onions and bell peppers. If you want, add sliced mushrooms too. 3. Sauté for 5-7 minutes until the veggies are tender and slightly caramelized. 4. Season with salt and pepper to taste and set them aside once cooked. 1. In the same skillet, add the remaining tablespoon of olive oil. Increase the heat to medium-high. 2. Add the thinly sliced steak and cook for about 3-5 minutes. Stir occasionally for even browning. 3. Season with salt and pepper to enhance the flavor. 1. Once the steak is browned, add the sautéed vegetables back to the skillet. 2. Mix everything well to ensure even heating. 1. Reduce the heat to low to melt the cheese. 2. Place the provolone cheese slices on top of the steak and veggie mix. 3. Cover and let it melt for about 2-3 minutes. 1. While the cheese melts, slice the hoagie rolls lengthwise. Do not cut all the way through. 2. If you like, lightly toast the rolls in a pan or under a broiler until crispy. 3. Generously scoop the steak and cheese mixture into each hoagie roll. Fill them well to enjoy every bite. Ribeye steak is the best choice for a Philly cheesesteak. It has great flavor and tenderness. Other cuts can be tougher and less tasty. Look for marbling, which adds juiciness. When sourcing meat, visit a local butcher or farmers market. Ask for high-quality ribeye. Fresh meat makes a big difference. To get that sweet, caramelized flavor, cook veggies slowly. Start with medium heat and use olive oil. Stir often to prevent burning. Aim for golden-brown edges on your onions and bell peppers. Add a pinch of salt to pull out the moisture. You can also add sliced mushrooms for extra taste. Layering is key for a great cheesesteak. Start with a base of steak, then add veggies on top. This keeps everything together. Use hoagie rolls that are soft but sturdy. Serve them on a wooden board for a nice touch. Add pickled hot peppers and crispy chips on the side for color and crunch. Pro Tips Chill for Better Slicing: Place the ribeye steak in the freezer for about 30 minutes before slicing. This firming process will allow for cleaner, thinner cuts, resulting in a more tender sandwich. Caramelize for Flavor: Sauté the onions and bell peppers until they are caramelized, which will enhance their natural sweetness and add depth to the overall flavor of your cheesesteak. Layer the Cheese: For an even melt, layer the cheese slices over the steak and vegetables, covering the mixture completely. This ensures every bite is rich and cheesy. Toast the Rolls: Lightly toasting the hoagie rolls adds a delightful crunch and helps prevent them from becoming soggy when filled with the juicy steak mixture. {{image_4}} If you want to change things up, try different cheeses. Provolone is great, but there are many options. Here are some substitutes you can use: - Mozzarella - Cheddar - Swiss Each cheese brings its own flavor. Cheddar adds sharpness, while mozzarella gives a nice stretch. You can mix and match these cheeses for fun flavor pairings. For instance, combine cheddar and provolone for a tasty blend. While hoagie rolls are classic, other types of bread work too. You can try: - French baguette - Ciabatta - Sourdough Feel free to explore gluten-free breads. Many brands offer rolls that taste great and hold up well. Just make sure they are sturdy enough for the filling. Toppings can make your cheesesteak special. Here are some ideas: - Sautéed mushrooms - Grilled onions - Jalapeños You can also spice things up with sauces. Try adding hot sauce or a drizzle of garlic aioli. These choices can add depth and excitement to your meal. To keep your Philly cheesesteak fresh, wrap each sandwich tightly in foil. This helps retain moisture and flavor. Place the wrapped sandwiches in an airtight container or a resealable plastic bag. Store them in the fridge. When you're ready to enjoy, try reheating in the oven. Set it to 350°F (175°C) and heat for about 10-15 minutes. This keeps the bread crisp and the cheese melty. If you have extra steak mixture, you can freeze it. Allow the mixture to cool first. Then, place it in a freezer-safe bag. Squeeze out as much air as possible. Label with the date. To thaw, move the bag to the fridge overnight. For reheating, warm it in a skillet over medium heat. This will help maintain texture and flavor. Leftover Philly cheesesteaks last about 3-4 days in the fridge. Always check for signs of spoilage. If you see mold or notice an off smell, it's best to toss it. You want to enjoy great food, not risk your health. The best meat for a Philly cheesesteak is ribeye steak. Ribeye is tender and flavorful. It has the right fat content to keep it juicy. If you can't find ribeye, use sirloin or flank steak as alternatives. Both options work, but they may not be as tender. Yes, you can make a cheesesteak without cheese. For a dairy-free option, try using avocado or hummus. Both add creaminess and flavor. You can also use vegan cheese if you want a closer taste to the original. For a vegetarian Philly cheesesteak, use mushrooms as the main ingredient. Sauté sliced mushrooms with onions and bell peppers. Add spices like smoked paprika or garlic powder for flavor. You can also use plant-based meat substitutes for a similar texture. Common toppings for a Philly cheesesteak include: - Sliced jalapeños - Fried onions - Mushrooms - Sweet peppers - Hot sauce - Ketchup These toppings add extra flavor and texture to your sandwich. Choose your favorites to personalize your meal! To make a great Philly cheesesteak, you need key ingredients like ribeye, onions, and bell peppers. Cooking them right brings out amazing flavors. You can add extras, like mushrooms or hot peppers, to suit your taste. Remember, good preparation and assembly make a big difference. Don't forget storage tips for leftovers. With variations in cheese and bread, you can customize your sandwich. Enjoy making your own perfect version of this classic dish. It’s simple, fun, and totally worth it.

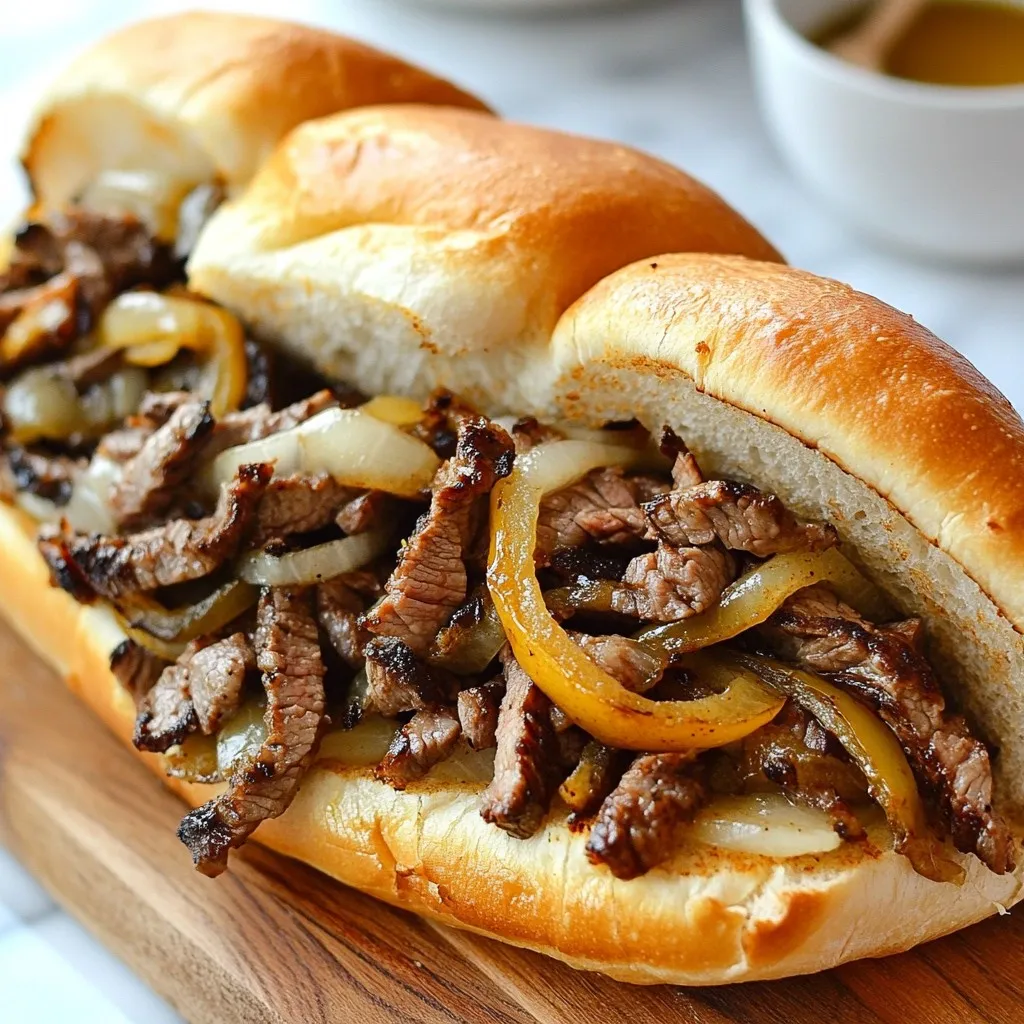
Craving a mouthwatering Philly cheesesteak but short on time? You’ve come to the right place! This easy recipe offers all the savory goodness you expect, using simple ingredients and quick …

Read more

Categories Dinner

Savory Chicken Sausage Broccoli Orzo Dinner Recipe

December 5, 2025April 18, 2025 by Chef Tavio
- 1 cup orzo pasta - 2 tablespoons olive oil - 2 chicken sausages, sliced into rounds - 2 cups broccoli florets, fresh - 2 cloves garlic, finely minced - 1 teaspoon Italian seasoning blend - 1 cup low-sodium chicken broth - 1/2 cup grated Parmesan cheese - Salt and freshly ground black pepper to taste - Fresh parsley, chopped (for garnish) When making Chicken Sausage Broccoli Orzo, the ingredients are simple yet full of flavor. You start with orzo pasta, which is small and cooks quickly. Olive oil adds richness and helps to sauté the sausage. Speaking of sausage, I like using chicken sausage for a lighter touch, but feel free to use your favorite type. Fresh broccoli gives a nice crunch, and it’s packed with nutrients. For flavor, you’ll need garlic, which brings warmth and aroma. Italian seasoning adds a blend of herbs that enhances the dish. Low-sodium chicken broth keeps it flavorful without being too salty. Parmesan cheese melts in to create a creamy texture, making every bite delicious. Don’t forget a pinch of salt and pepper to taste! Finally, a sprinkle of fresh parsley brightens up the dish and adds color. This mix of ingredients comes together to create a balanced and tasty meal. {{ingredient_image_2}} 1. Start by boiling a medium pot of salted water. 2. Once the water is bubbling, add 1 cup of orzo pasta. 3. Cook the orzo until it is al dente, usually about 8-10 minutes. 4. Drain the orzo in a colander and set it aside. 1. Heat 2 tablespoons of olive oil in a large skillet over medium heat. 2. Add 2 sliced chicken sausages to the skillet. 3. Sauté the sausage slices for about 4-5 minutes until they turn golden brown. 1. Mince 2 cloves of garlic and add them to the skillet. 2. Sauté the garlic for about 1 minute until it smells nice. 3. Toss in 2 cups of fresh broccoli florets. 4. Cook the broccoli for about 3-4 minutes until it is tender-crisp. 5. Sprinkle 1 teaspoon of Italian seasoning on top. 6. Pour in 1 cup of low-sodium chicken broth and bring it to a gentle simmer. 1. Stir in the cooked orzo and heat everything for a few minutes. 2. Remove the skillet from heat and fold in 1/2 cup of grated Parmesan cheese. 3. Mix until the cheese melts and blends into the dish. 4. Taste, then add salt and freshly ground black pepper as needed. 5. Serve hot, garnished with freshly chopped parsley. - Ensuring the orzo is perfectly al dente: Start with a large pot of salted water. When it boils, add the orzo. Check the package for cooking time and taste it a minute early. You want it firm yet tender, not mushy. - Preventing the garlic from burning: Add garlic to the skillet after the sausage is golden. Stir it for just a minute until it smells great. Keep the heat on medium to avoid burning. - Cooking broccoli for the right texture: Add fresh broccoli florets to the skillet after the garlic. Stir them for 3 to 4 minutes. Look for a bright green color and a tender-crisp feel. This keeps the broccoli fresh and flavorful. - Presentation tips for an appealing dish: Serve the orzo in warm bowls. Drizzle a bit of olive oil on top. Add extra cheese shavings for a nice touch. A sprinkle of fresh parsley also brightens up the dish. - Recommended side dishes or salads: Pair this dish with a simple green salad. A side of crusty bread is great for soaking up flavor, too. You can also serve it with roasted vegetables for added color and taste. - Overview of calories and nutrients per serving: This dish has about 400 calories per serving. It offers protein from the chicken sausage and fiber from the broccoli. The orzo adds carbohydrates for energy. - Health benefits of ingredients used: Chicken sausage is lean and packed with protein. Broccoli is full of vitamins C and K. Parmesan cheese adds calcium. Olive oil provides healthy fats. Together, they make a balanced meal! Pro Tips Perfectly Cooked Orzo: Make sure to cook the orzo until al dente to maintain its texture. It will continue to absorb liquid from the sauce, so avoid overcooking it initially. Flavor Boost: Enhance the dish by using homemade chicken broth instead of store-bought for a richer flavor. You can also add a splash of white wine for a delicious depth. Vegetable Variations: Feel free to swap out the broccoli for other vegetables such as spinach, bell peppers, or zucchini, depending on your preference or what's in season. Garnishing Tips: Adding a squeeze of fresh lemon juice just before serving brightens the dish, while extra cheese and herbs provide a beautiful finish. {{image_4}} You can switch up the sausage in this dish. Turkey sausage works well if you want a leaner option. It's just as tasty! You can also try plant-based sausage for a vegetarian twist. For vegetables, broccoli is great, but you can use other greens too. Spinach wilts down nicely, adding a fresh taste. Bell peppers bring a sweet crunch and color to your dish. Feel free to mix and match your favorites! Adding spices can change the whole flavor profile. A pinch of red pepper flakes gives it a nice kick. For a herby touch, try adding fresh basil or oregano. Both pair well with the chicken sausage and orzo. If you want a richer dish, a splash of cream works wonders. It makes the sauce creamy and smooth. Just stir it in just before serving for added luxury. To keep your Chicken Sausage Broccoli Orzo fresh, use an airtight container. This helps lock in flavor and moisture. Store it in the fridge right after it cools. It will stay fresh for about 3 to 4 days. If you want to keep it longer, consider freezing it. It can last up to 3 months in the freezer. Just make sure to label the container with the date. When you’re ready to eat, you can reheat your leftovers either in the microwave or on the stovetop. For the microwave, place it in a bowl and cover it. Heat it in short bursts, stirring in between. This keeps the orzo from drying out. If you prefer the stovetop, add a splash of chicken broth in a skillet. Heat it over low, stirring often. This method keeps it creamy and moist. Orzo is a small, rice-shaped pasta. It cooks quickly and adds a nice texture. You can use it in soups, salads, or main dishes like this one. Orzo absorbs flavors well, making it a great base for many meals. Yes, you can use frozen broccoli. Just make sure to thaw it before cooking. Frozen broccoli cooks faster than fresh, so add it to the skillet for a shorter time. This keeps it bright and crisp. To make this dish vegetarian, swap out chicken sausage for plant-based sausage. You can also use beans or lentils for protein. Add more veggies like bell peppers or spinach for flavor and texture. Yes, you can meal prep this recipe. Cook everything and let it cool. Store it in airtight containers in the fridge. It stays fresh for up to three days. Reheat it on the stove or in the microwave for a quick meal. This blog post shared a simple and tasty orzo pasta dish with chicken sausage and broccoli. We covered the ingredients, step-by-step cooking methods, tips, and storage advice. You can tweak the recipe by using different sausages or veggies. It’s great for meal prep and freezes well too. Enjoy crafting this delicious meal that fits your needs! Cooking can be fun and rewarding. Dive in and let your kitchen creativity shine!

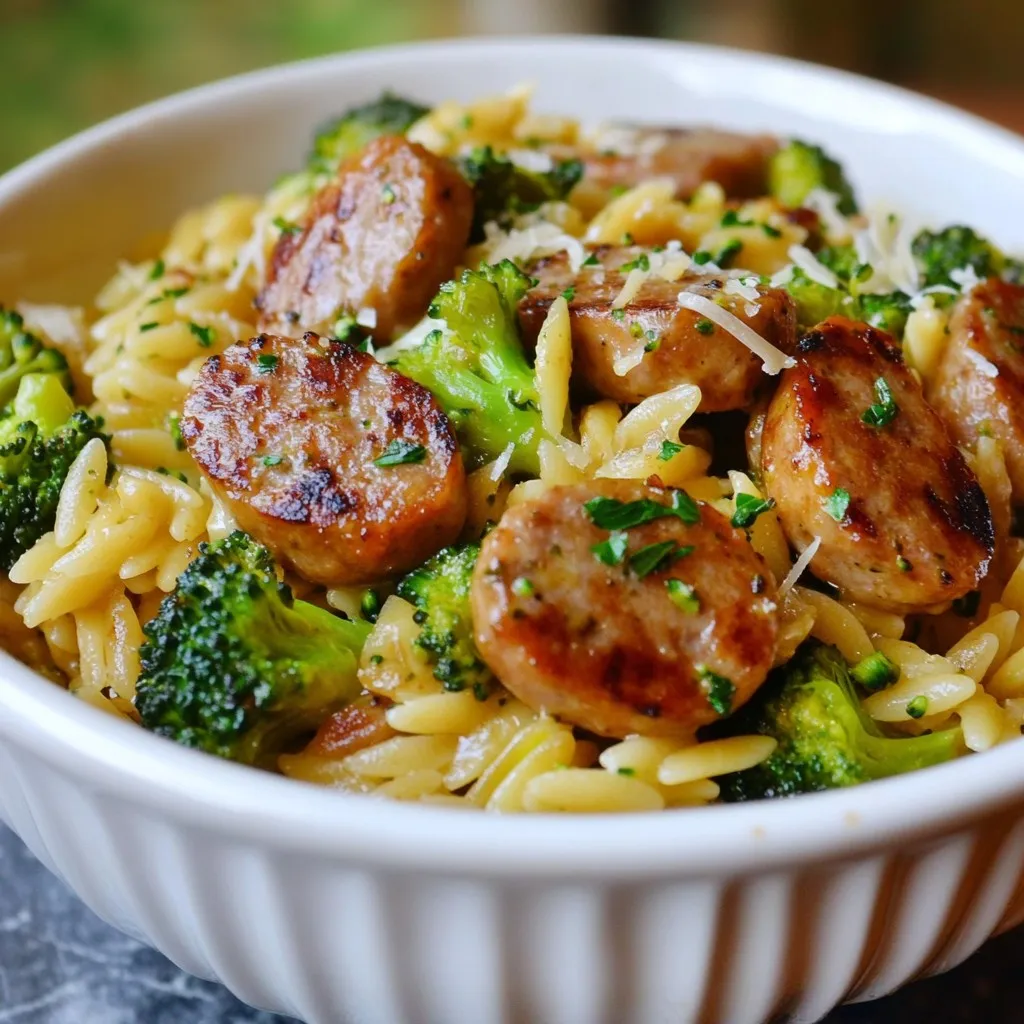
Looking for a quick and tasty dinner idea? Try my Savory Chicken Sausage Broccoli Orzo recipe! This dish mixes juicy chicken sausage with fresh broccoli and tender orzo for a …

Read more

Categories Dinner

Ingredient Cajun Chicken Pasta Flavorful and Easy Recipe

November 11, 2025April 18, 2025 by Chef Tavio
- 2 boneless, skinless chicken breasts - 2 tablespoons Cajun seasoning - 8 oz fettuccine pasta - 1 cup heavy cream - 1 cup cherry tomatoes - 1 bell pepper (red or yellow) - 1 small onion - 2 cloves garlic - 1 cup fresh spinach leaves - Salt and pepper to taste - Fresh parsley and Parmesan for garnish What is Cajun seasoning? Cajun seasoning is a blend of spices. It adds bold flavor and a bit of heat. You can buy it pre-made or mix your own. Common spices include paprika, cayenne, garlic powder, and onion powder. This seasoning is key for the dish's signature taste. Why fettuccine pasta? Fettuccine is flat and wide. This shape holds the creamy sauce well. It gives each bite a rich, satisfying texture. You can use other pasta, but fettuccine is the best choice for this recipe. What role does heavy cream play? Heavy cream makes the sauce rich and smooth. It balances the spices and adds depth. The cream helps create a luscious coating on the pasta. Using lighter cream will change the texture and taste. These ingredients come together to make a vibrant and flavorful meal. Enjoy cooking this easy and tasty Cajun chicken pasta! {{ingredient_image_2}} Season the Chicken: Start by cutting the chicken breasts into strips. Place the chicken in a bowl, then sprinkle with Cajun seasoning. Toss it well so each piece gets coated. Let it sit for a few minutes. This helps the flavor seep into the chicken. Cooking the Pasta: Fill a large pot with water and add a good pinch of salt. Bring the water to a rolling boil. Once boiling, add the fettuccine pasta. Cook it according to the package instructions, usually about 8-10 minutes. You want it al dente. After cooking, drain the pasta and set it aside. Sautéing the Chicken: In a large skillet, heat 2 tablespoons of olive oil over medium-high heat. When the oil is hot, add the marinated chicken strips. Cook them for 5-6 minutes. Make sure to stir occasionally. The chicken should turn golden brown and be cooked through. Once done, remove it from the skillet and set it aside on a plate. Sautéing Vegetables: In that same skillet, add 1 tablespoon of olive oil. Toss in the diced onion, sliced bell pepper, and minced garlic. Sauté these for about 3-4 minutes. Stir often. You want the veggies to become tender and fragrant. Combining All Ingredients: Lower the heat to medium-low. Pour in the heavy cream and stir to mix it well with the veggies. Add the halved cherry tomatoes and fresh spinach leaves. Cook just until the spinach wilts, about 2 minutes. Next, return the cooked chicken to the skillet. Add the drained fettuccine. Toss everything gently to coat the pasta in the creamy sauce. Season with salt and freshly cracked pepper to taste. Serving Suggestions: Serve the spicy chicken pasta in bowls. For a nice touch, garnish with freshly chopped parsley. Add a generous sprinkle of grated Parmesan cheese on top. You can also serve it with a slice of lemon for a pop of color and extra flavor. To spice up your Cajun chicken pasta, you can adjust the spice level. If you like it hot, add more Cajun seasoning. For a milder taste, use less. You can also mix in some red pepper flakes for extra heat. For added depth of flavor, consider using smoked paprika. It brings a warm, smoky taste that pairs well with the Cajun spices. A splash of lemon juice just before serving brightens the dish and adds a fresh kick. To keep your chicken juicy, do not overcook it. Cook the chicken only until it is golden and no longer pink inside. A quick tip is to let the chicken rest for a few minutes after cooking. This helps keep the juices locked in. When sautéing vegetables, cook them until they are tender but still crisp. Start with onions and peppers, then add garlic. This order allows the flavors to build without burning the garlic. Stir frequently to prevent sticking and ensure even cooking. Cajun chicken pasta pairs nicely with garlic bread or a fresh green salad. For wine, a chilled white, like Sauvignon Blanc, balances the spice well. To make your dish look great, garnish with fresh parsley and grated Parmesan cheese. A slice of lemon on the side adds a pop of color and flavor. Enjoy your meal with style! Pro Tips Marinate the Chicken: Letting the chicken marinate in Cajun seasoning for at least 15 minutes enhances the flavor and tenderness. Perfect Pasta: Cook the fettuccine just until al dente; it will continue to cook when mixed with the sauce, ensuring it doesn't become mushy. Add a Kick: If you love spice, consider adding a pinch of cayenne pepper to the cream sauce for an extra kick. Fresh Ingredients: Using fresh spinach and ripe cherry tomatoes not only enhances flavor but also adds vibrant color to your dish. {{image_4}} You can change a few ingredients for a healthier dish. Instead of heavy cream, try using Greek yogurt or cashew cream. These choices cut calories and add protein. They also keep the sauce creamy and tasty. For pasta, fettuccine works well, but you can swap it for whole wheat or gluten-free pasta. These options add fiber and fit different diets. Each pasta type brings its own charm to the dish. To mix things up, consider adding seafood. Shrimp or crawfish can give your Cajun chicken pasta a tasty twist. Just cook them along with the chicken for a savory bite. You can also add more veggies. Zucchini, mushrooms, or even corn can boost the flavor and color. They make the dish more colorful and nutritious. Play around with what you have on hand! In spring and summer, use fresh vegetables. Asparagus, peas, and bell peppers are great choices. They add crunch and brightness to the dish. When it gets hot, you might want a cold pasta dish. Just cook the pasta, let it cool, and toss it with a dressing. Add some cherry tomatoes and fresh herbs for a refreshing summer meal. It’s a fun way to enjoy the same flavors in a new way! To keep your Cajun chicken pasta fresh, store it in an airtight container. Make sure it cools down first before sealing. This helps prevent extra moisture and keeps the pasta from getting soggy. You can keep it in the fridge for about 3 to 4 days. If you notice any strange smells or colors, it’s best to toss it. If you want to freeze your Cajun chicken pasta, follow these steps. First, let the pasta cool completely. Next, place it in a freezer-safe container or bag. Make sure to remove as much air as possible to avoid freezer burn. It’s best to eat frozen pasta within 2 to 3 months. When ready to enjoy, thaw it overnight in the fridge. Reheat it gently on the stove or in the microwave. Add a splash of cream or water to help make the sauce smooth again. Can you make Cajun chicken pasta ahead of time? Yes, you can make Cajun chicken pasta ahead of time. Cook the dish and let it cool. Store it in an airtight container. When you’re ready to eat, just reheat it in a pan or microwave. This keeps the flavors strong. What if I don’t have Cajun seasoning on hand? If you lack Cajun seasoning, mix spices you have. Use paprika, garlic powder, and cayenne pepper. Combine these to get a similar flavor. Experiment with spices you enjoy. Is this recipe gluten-free? No, this recipe is not gluten-free because of the fettuccine pasta. To make it gluten-free, use gluten-free pasta. Many brands offer good options. Just cook it according to the package instructions. Can it be made dairy-free? Yes, you can make this recipe dairy-free. Substitute the heavy cream with coconut milk or a dairy-free cream. This keeps the dish creamy without dairy. Check the Cajun seasoning to ensure it’s dairy-free too. How to make a lighter version of this dish? To make a lighter version, use less cream or a lower-fat option. You can also add more veggies. Try using zucchini, broccoli, or bell peppers. This adds nutrition and taste. What to do if the sauce is too thick? If your sauce is too thick, add a little pasta water. Stir in small amounts until you reach the right consistency. This keeps the flavor while adjusting the sauce. Cajun chicken pasta is a tasty and easy dish to make. We covered essential ingredients like chicken, pasta, and Cajun seasoning. You learned step-by-step cooking methods, tips to enhance flavor, and fun variations. Remember to serve it with a side of fresh veggies or garlic bread for the best experience. With this knowledge, you can create a delicious meal that impresses everyone. Enjoy cooking, and make it your own!

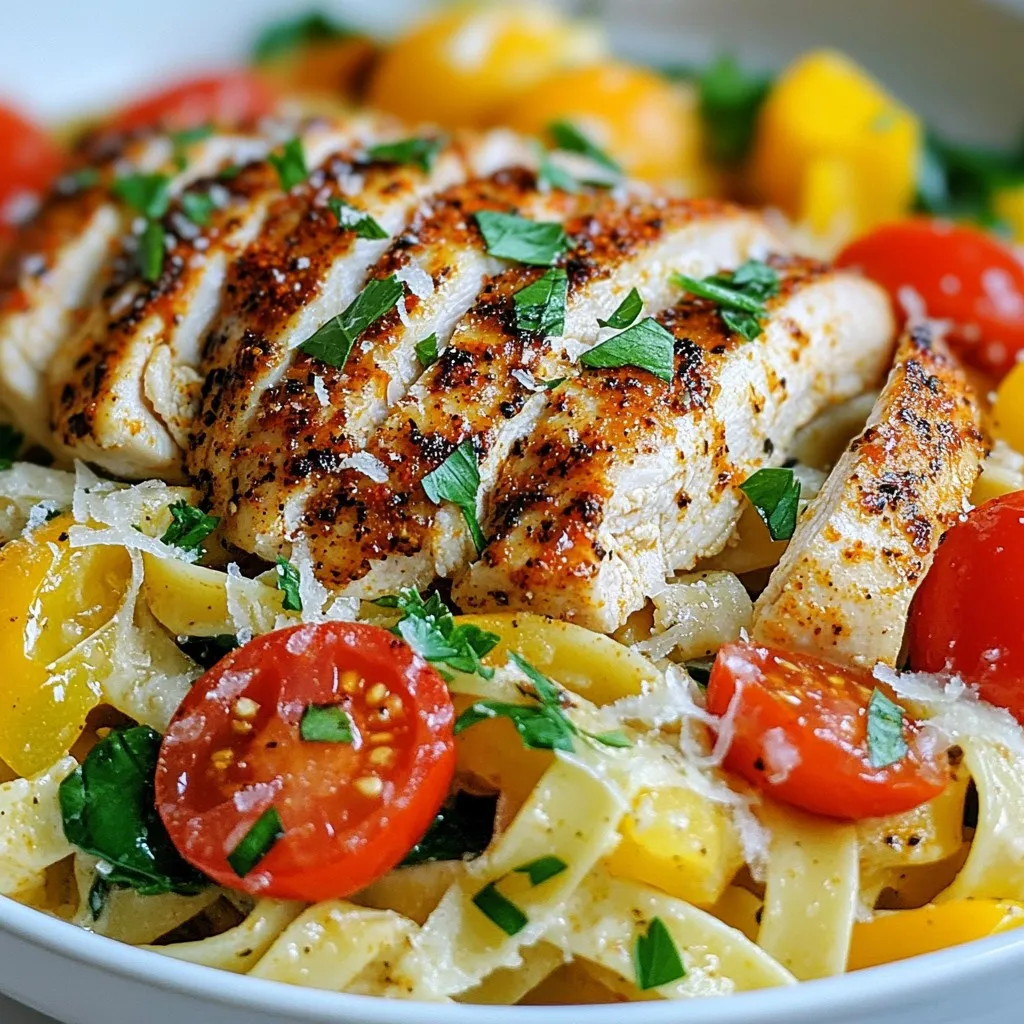
Are you ready to spice up your dinner routine? This flavorful Cajun Chicken Pasta is not only easy to make, but it will also wow your taste buds! Packed with …

Read more

Categories Dinner

Street Corn Pasta Salad Simple and Tasty Dish

December 2, 2025April 16, 2025 by Chef Tavio
- 8 oz. rotini pasta - 2 cups fresh corn kernels (or canned, well-drained) - 1 red bell pepper, diced - 1 small red onion, finely diced - 1 cup cherry tomatoes, halved - 1 ripe avocado, diced - 1/2 cup crumbled cotija cheese (or feta) - 1/4 cup fresh cilantro, chopped - 1/4 cup mayonnaise - 2 tablespoons fresh lime juice - 1 teaspoon chili powder - Salt and pepper to taste Use a standard measuring cup and spoons for accuracy. For pasta, weigh it if you want a perfect amount. Use a sharp knife for dicing vegetables. The corn should be fresh or canned but well-drained for best flavor. The cotija cheese adds a salty kick, while lime juice gives it a zesty touch. If you need a twist, swap rotini pasta for penne or bowtie. You can use frozen corn instead of fresh; just thaw it first. Instead of red bell pepper, try yellow or green for a different taste. If you don’t have cotija cheese, feta works well too. For a lighter version, replace mayonnaise with Greek yogurt. {{ingredient_image_2}} Start by boiling a large pot of salted water. Add the rotini pasta and cook it for 8 to 10 minutes. You want it to be al dente, which means it should still have a bite. After cooking, drain the pasta in a colander. Rinse it under cold water to stop the cooking. Set the pasta aside to cool. While the pasta cooks, chop your veggies. Dice the red bell pepper into small pieces. Finely chop the red onion. Carefully halve the cherry tomatoes. Finally, dice the ripe avocado. These fresh ingredients add color and crunch. If you use fresh corn, bring a small pot of water to a boil. Add the corn kernels and cook for 2 to 3 minutes. You want them tender but still crisp. After cooking, drain the corn and let it cool. If using canned corn, you can skip this step. In a small bowl, whisk together the mayonnaise, lime juice, and chili powder. Add a good pinch of salt and pepper. Mix until you have a smooth dressing. This dressing ties all the flavors together. In a large mixing bowl, combine the cooled rotini, corn, diced red bell pepper, chopped onion, halved cherry tomatoes, diced avocado, and cilantro. Crumble the cotija cheese on top. This mix brings together all the vibrant flavors. Drizzle the dressing over the salad. Gently toss everything together until coated. Taste it and adjust the salt and pepper if needed. Cover the bowl with plastic wrap and refrigerate for at least 30 minutes. This chilling time helps the flavors blend. To get the best texture, cook the rotini pasta just right. Follow the package time. Aim for al dente, which means it should be firm but not hard. Drain the pasta and rinse it with cold water. This stops the cooking and cools it down quickly. To boost the flavor, use fresh ingredients whenever you can. Fresh corn adds sweetness and crunch. Diced red bell pepper also brings a nice crunch and a pop of color. For a zesty kick, mix in lime juice. It brightens up the entire dish. Don’t forget the chili powder! Just a teaspoon gives a warm flavor. Adjust salt and pepper to your taste. Serve your pasta salad in a big, colorful bowl. This makes it look more inviting. Sprinkle extra cotija cheese on top for a creamy finish. Garnish with fresh cilantro leaves for a bright touch. Add lime wedges around the bowl for a fun, zesty option. This makes your dish eye-catching and ready for any party! Pro Tips Fresh Ingredients Matter: Using fresh corn will elevate the flavor of your pasta salad significantly. If fresh corn is not available, opt for frozen over canned for a better texture. Customize the Heat: Adjust the amount of chili powder to suit your spice preference. For an extra kick, consider adding diced jalapeños or a dash of hot sauce. Perfect Avocado: To keep the avocado from browning, add it right before serving. You can also toss the avocado chunks with a little lime juice to help maintain their vibrant color. Make Ahead: This pasta salad can be made a day in advance. The flavors meld beautifully as it sits, making it a great dish for meal prep or gatherings. {{image_4}} You can make this salad even more colorful and healthy. Add black beans for protein and fiber. Chopped cucumbers bring a nice crunch. Roasted red peppers add a sweet flavor. Try using different types of cheese, like goat cheese or mozzarella, for a twist. Fresh herbs like parsley or dill can also enhance the taste. If you want to add protein, grilled chicken or shrimp works well. You can also use canned chickpeas for a quick option. For a smoky flavor, try adding bacon bits. Tofu can be a great choice for a plant-based protein. Just make sure to cook it well to enhance its taste. To add some heat, mix in diced jalapeños or a few dashes of hot sauce. You can also increase the chili powder in the dressing. Try using smoked paprika for a deeper flavor. A sprinkle of cayenne pepper will certainly wake up your taste buds. Don’t forget that lime juice adds a nice tang. After you enjoy your Street Corn Pasta Salad, store any leftovers in the fridge. First, let the salad cool to room temperature. Then, place it in a container with a tight lid. This helps keep it fresh and tasty for later meals. Choose a glass or plastic container with a sealable lid for the best storage. Glass containers work well since they do not hold odors. If you use plastic, make sure it is BPA-free and safe for food storage. Remember, a container with a snug fit keeps the salad fresh longer. The salad can last about 3 to 5 days in the fridge. Always check for signs of spoilage before eating. If it smells off or looks strange, it's best to throw it away. Enjoy your salad while it's fresh for the best taste and texture! Yes, you can use frozen corn. Just thaw it first before adding it to the salad. Frozen corn is sweet and tender, making it a great choice. Plus, it saves time! You can keep leftovers in the fridge for up to three days. Just store the salad in an airtight container. The flavors will blend even more, making it tasty again. Absolutely! Making it ahead of time is a smart idea. Prepare the salad a day in advance and chill it in the fridge. This lets the flavors mix for a better taste. If you can't find cotija cheese, use feta cheese instead. Feta has a similar salty flavor and creamy texture. It works well in this salad and keeps it delicious. No, this recipe is not gluten-free due to the rotini pasta. You can easily make it gluten-free by using gluten-free pasta. This way, everyone can enjoy this tasty dish! This blog post covers all the key steps to make a great pasta salad. We went over the ingredients, how to cook and prepare them, and tips for perfecting the dish. You can add your favorite proteins or spices to make it unique. Remember to store leftovers properly for the best taste later. Making this salad ahead of time can save you effort. I hope these ideas help you create a delicious pasta salad your friends and family will love! Enjoy your cooking!

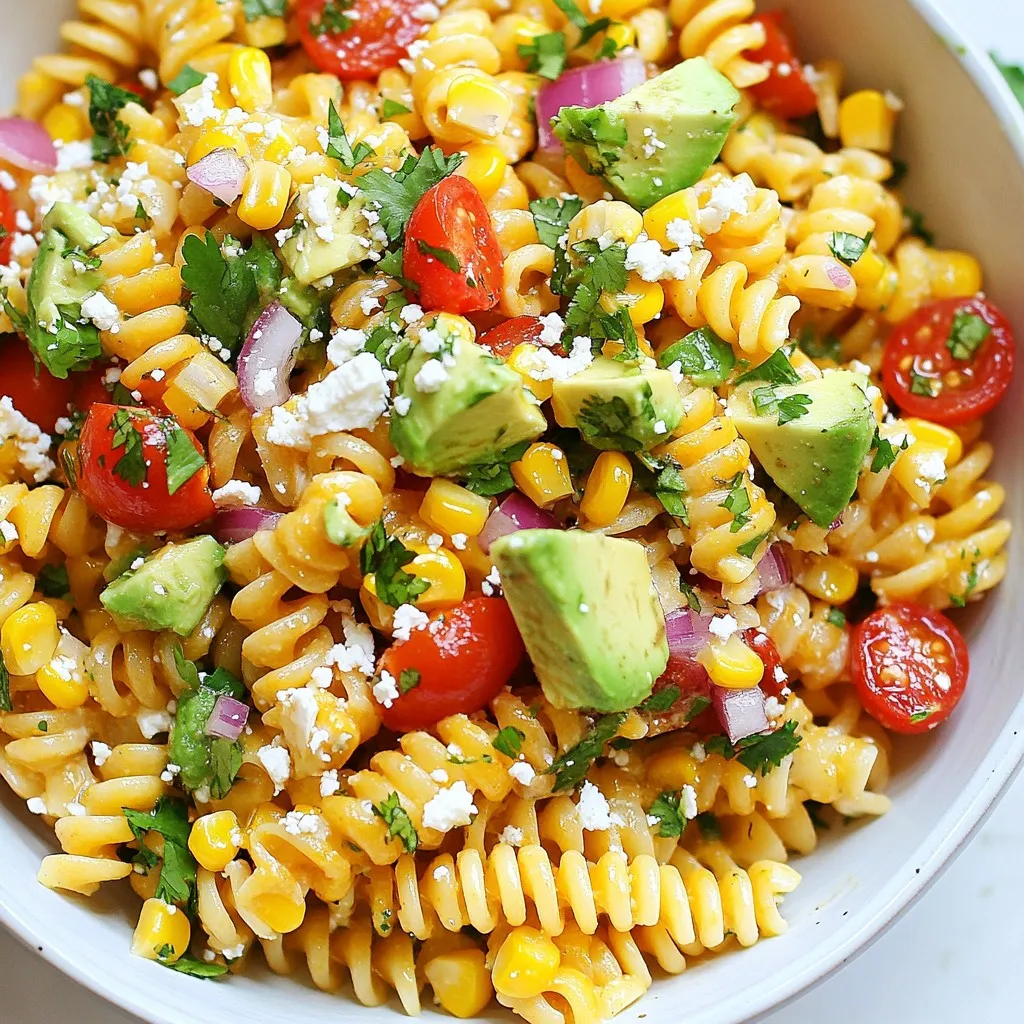
If you crave a fresh, tasty dish, let me introduce you to Street Corn Pasta Salad! This vibrant meal brings together sweet corn, tender pasta, and zesty flavors for a …

Read more

Categories Salads

Low-Carb Shrimp & Broccoli Skillet Flavor Boost

November 26, 2025April 16, 2025 by Chef Tavio
- 1 lb large shrimp, peeled and deveined - 4 cups broccoli florets - 3 tablespoons olive oil (divided) - 3 cloves garlic, finely minced - 1 teaspoon red pepper flakes - 2 tablespoons freshly squeezed lemon juice - Sea salt and freshly ground black pepper - 1/4 cup freshly grated Parmesan cheese - Fresh parsley, chopped, for garnish When making the low-carb shrimp and broccoli skillet, the flavor is key. You need fresh and bold tastes. The main stars are the shrimp and broccoli, but the added flavors bring this dish to life. First, the garlic and red pepper flakes add a warm kick. The garlic releases a rich aroma when sautéed. It only takes about 30 seconds to make it fragrant and golden. The red pepper flakes can be adjusted to your taste. If you like heat, add more! Next, the lemon juice brightens the dish. It balances the rich shrimp and the earthy broccoli. A splash of lemon lifts the flavors and makes them pop. Finally, if you want extra richness, sprinkle on Parmesan. It melts nicely and adds a creamy touch. Fresh parsley gives a burst of color and a fresh taste. All these ingredients work together to create a dish that is not only low in carbs but also full of flavor. Enjoy the blend of tastes and the health benefits it brings! {{ingredient_image_2}} - Heating the Skillet and Sautéing Garlic Heat 2 tablespoons of olive oil in a large skillet over medium heat. Wait until the oil is shimmering. Add minced garlic and red pepper flakes. Sauté for about 30 seconds. Stir constantly until the garlic smells great and is lightly golden. - Cooking Broccoli to Tender-Crisp Now, add 4 cups of broccoli florets to the skillet. Stir-fry for 4-5 minutes. You want the broccoli to be bright green and tender-crisp. This keeps a nice crunch in your dish. - Adding Shrimp to the Skillet Push the cooked broccoli to one side of the skillet. In the clear space, add 1 pound of large shrimp. Drizzle the remaining tablespoon of olive oil over the shrimp. - Seasoning and Cooking the Shrimp Season the shrimp with sea salt and black pepper. Cook for 3-4 minutes, flipping halfway through. The shrimp should turn pink and opaque when done. - Incorporating Lemon Juice and Cheese After cooking the shrimp, drizzle 2 tablespoons of lemon juice over the whole skillet. Gently toss all the ingredients together. This helps all the flavors mix well. - Final Toss and Garnishing If you want extra richness, sprinkle 1/4 cup of Parmesan cheese over the dish. Stir well until the cheese melts into the mix. Remove the skillet from heat and garnish with fresh chopped parsley before serving. For even cooking, heat your skillet well. Start with medium heat and add oil. This way, the shrimp and broccoli cook perfectly. When you add the garlic and red pepper flakes, stir often. This keeps the garlic from burning and adds great flavor. If you want more heat, add more red pepper flakes. Just remember, start small. You can always add more! Serve your shrimp and broccoli in a big bowl or on a nice platter. This makes it look inviting. To make it pop, add extra Parmesan on top. A lemon wedge on the side adds color and taste. Fresh parsley sprinkled on top makes your dish look fresh and bright. You can swap out the shrimp for chicken or tofu for a change. If you want fewer carbs, use zucchini noodles instead of pasta. For cheese, try low-fat options like mozzarella or cottage cheese. These swaps keep your dish healthy while still being tasty! Pro Tips Perfectly Cooked Shrimp: Make sure to cook the shrimp just until they turn pink and opaque. Overcooking can make them rubbery. Broccoli Crunch: To ensure your broccoli stays vibrant and crunchy, avoid overcooking. It should be tender but still have a bite. Flavor Boost: For an extra kick, consider adding a splash of white wine or chicken broth after sautéing the garlic. Serving Suggestion: Pair this dish with cauliflower rice or a simple green salad for a complete low-carb meal. {{image_4}} You can switch shrimp for chicken or tofu. Both options work well in this dish. - Substituting Chicken or Tofu: Use 1 lb of diced chicken breast. Cook it as you would the shrimp. For tofu, use firm tofu. Press it to remove water and cube it before adding it to the skillet. - Incorporating Other Seafood: Try scallops or salmon. Both seafood types pair nicely with broccoli. Adjust cooking times as needed. Scallops take about 3-4 minutes. Salmon will need about 5-6 minutes to cook through. Feel free to add more low-carb veggies. This keeps your meal interesting and nutritious. - Adding Other Low-Carb Vegetables: Consider zucchini, bell peppers, or asparagus. These veggies add color and taste. Chop them into bite-sized pieces and add them to the skillet with broccoli. - Seasonal Veggie Ideas: Use seasonal options like spinach or kale in the winter. Fresh green beans or snap peas work well in spring. They all enhance flavor and texture. Let’s explore ways to boost flavor in your dish. You can easily make it unique and tasty. - Experimenting with Different Herbs and Spices: Fresh herbs like basil or cilantro add freshness. You can also try smoked paprika or cumin for a twist. - Making it Creamy with Low-Carb Sauces: Incorporate a low-carb Alfredo sauce. This adds creaminess without extra carbs. You can make your own sauce or buy a ready-made option. Just stir it in before serving. To keep your Low-Carb Shrimp & Broccoli Skillet fresh, follow these tips: - Storing Leftovers in the Refrigerator Place the dish in an airtight container. It keeps well for up to three days. Make sure to cool it down before sealing. This prevents moisture build-up. - Freezing Tips for Long-Term Storage For longer storage, freeze in a freezer-safe container. It lasts up to three months. To maintain taste, avoid freezing with cheese. Add it fresh when reheating. To enjoy your dish again, reheating is key: - Best Methods to Reheat Without Compromising Texture Use a skillet over medium heat for best results. This helps keep the shrimp tender and broccoli crisp. You can also use the microwave but be careful not to overheat. - Recommended Cooking Times for Reheating Reheat on the stove for about 5 to 7 minutes. In the microwave, start with 1-2 minutes, stirring halfway through. Check for warmth before serving. Knowing how long to keep food is important: - How Long to Keep in the Fridge This dish stays fresh in the fridge for up to three days. After that, the quality may drop. - Signs of Spoilage to Watch For Look for a change in color or smell. If it smells off or looks slimy, it’s time to discard it. Safety first! Can I use frozen shrimp for this recipe? Yes, you can use frozen shrimp. Just make sure to thaw them first. Place them in cold water for about 15-20 minutes. This ensures they cook evenly. How do I adjust cooking time for different shrimp sizes? Larger shrimp take a bit longer to cook. If using jumbo shrimp, add an extra minute or two. Keep an eye on them. They should turn pink and opaque when done. What are the carb counts for this dish? This dish is low in carbs. Shrimp and broccoli have minimal carbs. A serving has about 5-7 grams of carbs. Perfect for low-carb diets! Is this recipe suitable for meal prep? Yes, this recipe is great for meal prep. Store it in airtight containers in the fridge. It stays fresh for up to three days. How can I make this dish spicier? Add more red pepper flakes to the skillet. You can also toss in some sliced jalapeños. Just remember, start small and taste as you go! Can I prepare this recipe in advance? Yes, you can prep some ingredients ahead. Chop the broccoli and mince the garlic. Keep them in the fridge until you're ready to cook. This saves time! This dish blends simple ingredients to create a healthy meal. You learned how to cook shrimp with broccoli, garlic, and spices. I shared tips to enhance flavor and presentation. You also have options for protein and veggies to fit your taste. Storing and reheating leftovers are made easy for your busy days. Enjoy experimenting with this recipe, and make it your own. Happy cooking!

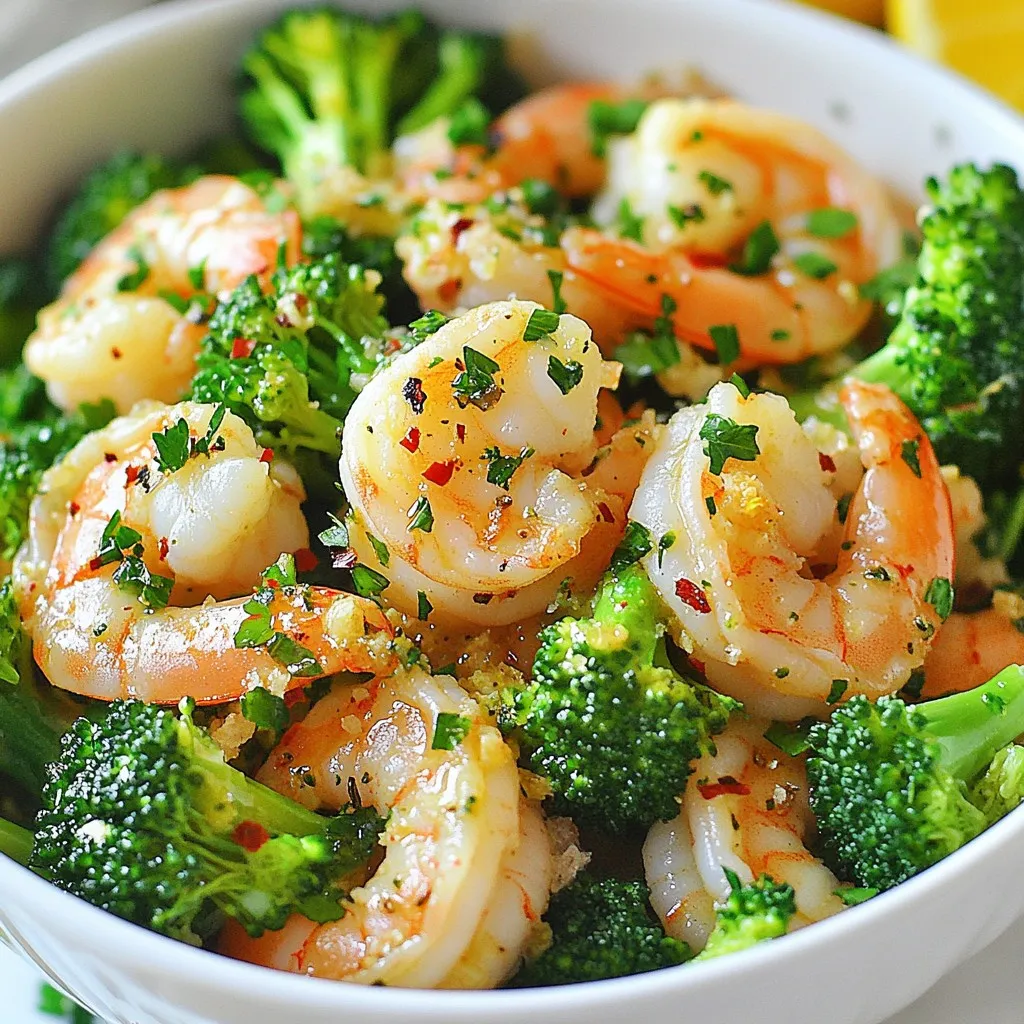
Are you ready to delight your taste buds with a dish that’s both nutritious and easy to make? My Low-Carb Shrimp & Broccoli Skillet is packed with flavor and perfect …

Read more

Categories Dinner

Ingredient No-Bake Brownie Bites Simple Recipe Guide

December 16, 2025April 15, 2025 by Chef Tavio
- 1 cup pitted dates - 1 cup walnuts - 1/2 cup unsweetened cocoa powder - 1/2 cup almond flour - 1/4 teaspoon sea salt - 1 tablespoon pure vanilla extract - 1/4 cup pure maple syrup - 1/2 cup dark chocolate chips To make these no-bake brownie bites, gather your essential ingredients first. Start with pitted dates. They add natural sweetness and help bind the mixture. Walnuts give a nice crunch and healthy fats. For richness, use high-quality unsweetened cocoa powder. Almond flour adds a nice texture while keeping it gluten-free. Sea salt enhances the flavor, so don’t skip it. Pure vanilla extract brings out the sweetness. Maple syrup or agave syrup adds more moisture and sweetness. Lastly, dark chocolate chips add indulgence. - Shredded coconut - Crushed nuts (pistachios or almonds) You can add some fun with optional ingredients. Shredded coconut gives a tropical twist. Crushed nuts like pistachios or almonds add crunch and flavor. These extras can make your brownie bites even more special. - Gluten-free options: Use gluten-free oats instead of almond flour. - Vegan alternatives: Maple syrup is already vegan. Use coconut oil instead of butter if needed. If you need substitutions, don’t worry! For gluten-free options, try gluten-free oats in place of almond flour. This keeps the bites tasty and safe for those with gluten sensitivities. If you want to make them vegan, you’re already on track with maple syrup. Swap butter for coconut oil in any other recipe you create. This way, everyone can enjoy these treats! {{ingredient_image_2}} - Start with 1 cup of pitted dates. Make sure they are soft and fresh. - Add 1 cup of toasted walnuts to the food processor. - Pulse the mixture until it has a crumbly texture. It should look like coarse sand. - Check for any large walnut pieces. If you find them, pulse again. - Next, add 1/2 cup of unsweetened cocoa powder. - Include 1/2 cup of almond flour for texture. - Sprinkle in 1/4 teaspoon of sea salt to enhance flavor. - Pour in 1 tablespoon of pure vanilla extract. - Add 1/4 cup of pure maple syrup for sweetness. - Blend until a sticky dough forms and all ingredients mix well. - Check if the dough feels dry or crumbly. - If it does, add a teaspoon of water and blend. - Keep adding water little by little until the dough holds together well. - Now, take 1/2 cup of dark chocolate chips. - Gently fold them into the dough by hand. Make sure they are evenly spread. - With clean hands, take small portions of the dough. - Roll them into bite-sized balls, about 1 inch wide. - Aim for uniform size to ensure even servings. - If you like, roll the bites in shredded coconut or crushed nuts. - This adds extra texture and flavor. - Place the rolled bites on a parchment-lined tray. - Refrigerate for at least 30 minutes to let them set. - Adjusting wetness of the dough: If your dough seems too dry, add a teaspoon of water. Blend well after each addition. You want a sticky and cohesive dough, not too wet. This balance keeps your bites from being crumbly. - Optimal cooling time: Chill the brownie bites for at least 30 minutes. This helps them firm up nicely. Longer chilling can enhance the flavor and texture too. - Presentation tips: For a beautiful display, arrange the bites on a fancy plate. Drizzle melted dark chocolate on top or sprinkle cacao nibs for extra flair. This makes them look even more tempting! - Pairing with beverages: Enjoy these brownie bites with a glass of almond milk or your favorite herbal tea. The rich flavors pair perfectly with a warm drink. - Using flavored extracts: Try adding almond or orange extract for a new twist. Just a drop can uplift the flavor in a fun way. - Adding spices or zests: Consider mixing in a pinch of cinnamon or orange zest. These simple additions can deepen the taste and make the brownie bites more exciting. Pro Tips Use Fresh Dates: Make sure to use soft and fresh pitted dates for the best sweetness and texture in your brownie bites. Toast Your Walnuts: Toasting the walnuts not only enhances their flavor but also adds a delightful crunch to the brownie bites. Quality Cocoa Powder: Opt for high-quality cocoa powder, as it significantly impacts the richness and overall taste of your brownie bites. Experiment with Coatings: Feel free to get creative with your coatings; try different nuts, seeds, or even a dusting of cocoa powder for unique flavors. {{image_4}} You can easily switch up the flavor of your brownie bites. Here are two fun ideas: - Mint chocolate brownie bites: Add a few drops of peppermint extract to the mixture. This gives a refreshing twist to your bites. The mint pairs well with chocolate, making them extra special. - Peanut butter swirl version: Mix in some creamy peanut butter while blending. This adds a rich, nutty flavor that complements the cocoa. You can also swirl it in after forming the bites for a beautiful look. Adjusting the texture can make your brownie bites even more exciting. Try these methods: - Adding seeds: Incorporate chia or flax seeds into the mix. They add crunch and boost nutrition. Just a couple of tablespoons will do! - Incorporating dried fruits: Toss in some chopped dried fruits like cranberries or apricots. They provide sweetness and chewiness, making each bite delightful. You can adapt the recipe to fit different diets. Here are some options: - Paleo-friendly options: Use almond butter instead of walnuts. This keeps it aligned with paleo guidelines while adding creaminess. - Nut-free alternatives: Replace nuts with seeds like sunflower or pumpkin seeds. They give a similar texture and flavor without using nuts. To keep your no-bake brownie bites fresh, store them in the fridge. Use an airtight container to keep them moist. They stay tasty for up to a week this way. If you want to save them longer, freeze them. Place the bites in a single layer on a baking sheet. Once they freeze, transfer them to a freezer bag. They can last for up to three months in the freezer. In the fridge, your brownie bites last about a week. To avoid spoilage, check for any signs of mold or unusual smells. If you notice any, it’s best to toss them. Always ensure they are sealed tightly. This keeps out moisture and other odors that can affect taste. If you have leftover brownie bits, don’t worry! You can use them in different ways. Crumble them over yogurt for added texture. Mix them into smoothies for a chocolatey boost. You can also use extra ingredients in other recipes. For example, walnuts and cocoa powder can enhance oatmeal or pancakes. Get creative and enjoy your treats in new ways! Yes, you can make these brownie bites without nuts. Instead of walnuts, try using seeds. Sunflower seeds or pumpkin seeds work well. You can also use rolled oats for a chewy texture. Just make sure to adjust the amount of almond flour. This keeps the bites moist and delicious. These brownie bites are packed with nutrients. Here’s a quick look: - Pitted Dates: High in fiber and natural sugars for energy. - Walnuts: Good source of omega-3 fatty acids, great for heart health. - Cocoa Powder: Rich in antioxidants, can boost mood. - Almond Flour: Low in carbs, high in healthy fats and protein. - Dark Chocolate Chips: Contains iron and magnesium, plus it tastes amazing! Eating these bites can satisfy your sweet tooth while providing health benefits. They do not have refined sugar and are a great snack option. The prep time for these brownie bites is about 15 minutes. After that, you need to chill them for at least 30 minutes. So, the total time is around 45 minutes. This makes them quick and easy to enjoy fresh! Yes, you can use other sweeteners in place of maple syrup. Agave syrup is a good choice. Honey can also work, but it isn’t vegan. If you want a lower-calorie option, consider using stevia or erythritol. Just adjust the amount to taste, as these may be sweeter than maple syrup. In this blog post, we explored how to make delicious brownie bites. I shared essential ingredients like dates, walnuts, and cocoa powder. You learned step-by-step instructions for mixing and forming the bites. We discussed tips for perfecting texture and ways to enhance flavors. I also covered variations and storage methods for your treats. In summary, these bites are easy to make and adaptable. Enjoy experimenting with flavors and share them with others. Your healthy snack can be a hit!

Craving a healthy treat that satisfies your sweet tooth? You’re in the right place! In this guide, I’ll walk you through a simple recipe for ingredient no-bake brownie bites. You …

Read more

Categories Desserts

Cozy Veggie Pot Pie Soup Comforting Dinner Treat

December 17, 2025April 14, 2025 by Chef Tavio
To make Cozy Veggie Pot Pie Soup, you'll need: - 2 tablespoons extra virgin olive oil - 1 medium onion, finely diced - 3 cloves garlic, minced - 2 medium carrots, peeled and diced - 2 stalks celery, diced - 1 cup potatoes, peeled and cut into small cubes - 1 cup green beans, trimmed and chopped - 1 cup corn kernels (fresh or frozen) - 1 cup peas (fresh or frozen) - 4 cups vegetable broth - 1 teaspoon dried thyme - 1 teaspoon dried rosemary - 1 teaspoon smoked paprika - 1 cup coconut milk - Salt and freshly ground black pepper to taste - Fresh parsley, roughly chopped (for garnish) - 1 sheet puff pastry (optional, for topping) You can add more fun to this soup with these: - Chopped bell peppers - Spinach or kale - Mushrooms, sliced - Your favorite herbs like basil or oregano If you don't have an ingredient, try these swaps: - Olive oil can be replaced with vegetable oil. - Coconut milk can be swapped for almond milk or heavy cream. - You can use any broth, like chicken or beef, if you prefer. - Frozen vegetables can work well in place of fresh ones. - Use any type of potatoes, like sweet potatoes, for a twist. Feel free to adjust based on what you have! This soup is forgiving and fun to customize. {{ingredient_image_2}} Start with fresh vegetables. Chop them into small, even pieces. This helps them cook evenly. First, heat 2 tablespoons of extra virgin olive oil in a large pot over medium heat. Once hot, add 1 medium onion, finely diced. Sauté for about 3-4 minutes until it becomes soft and clear. Next, stir in 3 cloves of minced garlic. Cook for another minute for a rich aroma. Now, add 2 medium carrots, peeled and diced, along with 2 stalks of diced celery. Cook these for another 5 minutes, stirring often to avoid sticking. After the veggies soften, it’s time to add more. Toss in 1 cup of peeled and cubed potatoes, 1 cup of chopped green beans, 1 cup of corn kernels, and 1 cup of peas. Mix everything well. Next, pour in 4 cups of vegetable broth. Add 1 teaspoon each of dried thyme, dried rosemary, and smoked paprika. Season with salt and pepper to taste. Increase the heat until it boils. Once boiling, reduce the heat to low. Let it simmer uncovered for about 20-25 minutes. Check that all the vegetables become soft. After simmering, it’s time for the magic. Stir in 1 cup of creamy coconut milk. Mix well and let it heat for another 5 minutes. If you choose to use puff pastry, preheat your oven according to the package instructions. Bake the pastry until it turns golden and puffy. Once baked, break it into pieces and serve it on top of your soup. This adds a nice crunch. Finally, serve the soup hot in bowls, garnishing each with chopped fresh parsley. Enjoy your cozy veggie pot pie soup! To make your Cozy Veggie Pot Pie Soup shine, focus on the base. Start with a good olive oil. Heat it until it shimmers. Sauté the onion until soft. This step builds a rich flavor. Next, add garlic for a fragrant touch. Don't rush it; let the garlic cook for just a minute. The herbs are key here. Use dried thyme and rosemary. These give the soup a warm, earthy taste. Smoked paprika adds a nice depth, too. Stir in the coconut milk last for creaminess and richness. It will tie all the flavors together. One common mistake is overcooking the vegetables. Keep an eye on them. They should be tender but not mushy. Adding too much salt early can also ruin your soup. Season gently, tasting as you go. Another mistake is using low-quality vegetable broth. A good broth makes a big difference. If your soup is too thin, don't worry! You can thicken it by stirring in a little more coconut milk or letting it simmer longer. Lastly, don’t forget the garnish! Fresh parsley adds color and a fresh taste. Serve your Cozy Veggie Pot Pie Soup in big bowls. It’s perfect for a chilly night. If you want a crunch, add puff pastry on top. Bake it until golden brown. Then break it into pieces for texture. You can pair the soup with crusty bread or a side salad. This makes the meal even heartier. For a fun twist, serve it with a dollop of sour cream or a sprinkle of cheese. Enjoy this comforting soup with family or friends! Pro Tips Use Seasonal Vegetables: Incorporating seasonal veggies not only enhances the flavor but also adds a variety of colors and nutrients to your soup. Adjust the Thickness: If you prefer a thicker soup, you can blend a portion of the soup until smooth before adding the coconut milk. Add Protein: For a heartier meal, consider adding cooked lentils or shredded rotisserie chicken to boost the protein content of your soup. Herb Substitutions: Fresh herbs can elevate the dish even more; try using fresh thyme and rosemary instead of dried for a fragrant finish. {{image_4}} You can easily boost the protein in your cozy veggie pot pie soup. Consider adding cooked lentils or chickpeas. These are great plant-based options that add texture and nutrition. If you prefer meat, try shredded chicken or turkey. Cook it separately and stir it in before serving. This way, you customize your meal to fit your diet. To make this soup dairy-free, use coconut milk as the recipe suggests. It adds creaminess without dairy. For a gluten-free version, skip the puff pastry or use a gluten-free alternative. Many stores offer gluten-free puff pastry. You can even serve the soup with gluten-free bread for dipping. Always check labels to ensure all ingredients fit your needs. This soup is fun to adapt with seasonal veggies. In spring, add asparagus or peas for freshness. Summer makes zucchini and bell peppers perfect choices. In fall, try sweet potatoes or butternut squash for a richer flavor. Winter is great for hearty root veggies like parsnips. Get creative and mix up the veggies based on what's in season for extra flavor and nutrients. After enjoying your Cozy Veggie Pot Pie Soup, store any leftovers in an airtight container. Make sure the soup cools down to room temperature first. This helps keep it fresh longer. You can keep it in the fridge for up to four days. If you want to savor the soup later, freezing is a great option. To reheat the soup, pour it into a pot over medium heat. Stir it often to help it warm evenly. Heat until it reaches your desired temperature. If the soup thickens while cooling, add a splash of vegetable broth or water while reheating. This keeps it creamy and delicious. Freezing the soup is simple and great for meal prep. Use a freezer-safe container or a heavy-duty freezer bag. Leave some space at the top of the container to allow for expansion. The soup can last in the freezer for up to three months. When ready to enjoy, thaw it in the fridge overnight before reheating. This makes a cozy meal easy to enjoy any time. Yes, you can make this soup ahead of time. It stores well in the fridge for 3-4 days. Just let it cool completely before placing it in a container. When you're ready to eat, simply reheat it on the stove. This makes it easy for busy weeknights. You can also freeze the soup. It will last up to three months in the freezer. Just remember to leave some space in the container for expansion. If your soup is too thin, you have a few options. First, you can mash some of the potatoes. This will help create a creamy texture. Another option is to add a cornstarch slurry. Mix one tablespoon of cornstarch with two tablespoons of cold water. Stir it into the soup and let it simmer until thickened. You can also add more coconut milk to enhance the creaminess. Absolutely! This soup is very flexible. You can use any vegetables you like. Try bell peppers, zucchini, or even mushrooms for a different flavor. Just make sure to cut them into similar sizes. This way, they will cook evenly. Seasonal veggies can add a fresh twist. Feel free to get creative with what you have on hand! This blog covered the key ingredients for soup, steps to make it, and tips for flavor. You learned how to prepare veggies, create a rich base, and add creaminess. I also shared common mistakes and serving ideas to enhance your dish. Remember, you can adjust the recipe with proteins or seasonal veggies. Store leftovers properly, and reheating is simple. With this guide, you can make tasty soup that suits your needs. Enjoy experimenting and have fun in your kitchen!

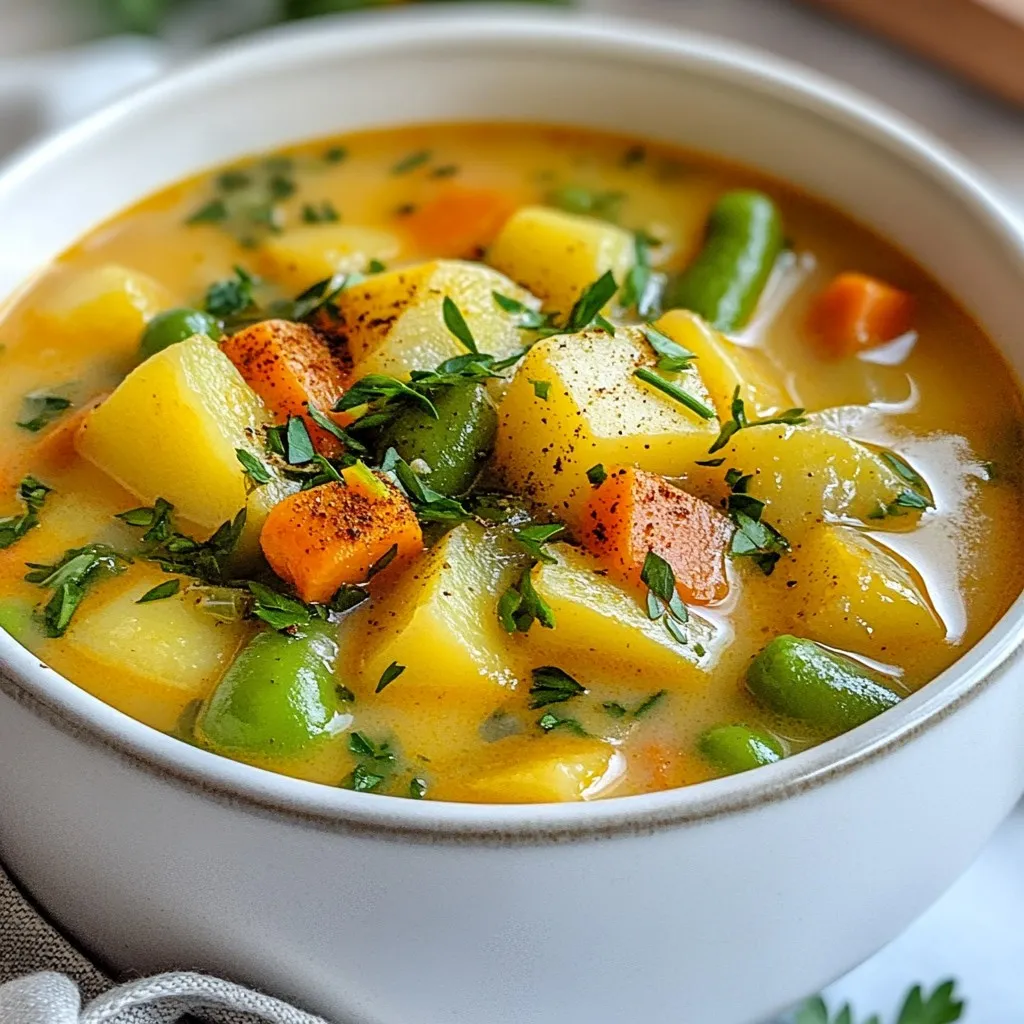
Warm up your dinner routine with my Cozy Veggie Pot Pie Soup. This soup captures all the warmth of a classic pot pie, packed with fresh veggies and creamy goodness. …

Read more

Categories Dinner

Churro French Toast Bites Tasty Sweet Snack Treat

November 26, 2025April 12, 2025 by Chef Tavio
- 6 thick slices of bread (brioche or challah recommended) - 3 large eggs - 1/2 cup whole milk - 1 teaspoon vanilla extract - 1 teaspoon ground cinnamon - 1 tablespoon granulated sugar - 1/2 cup granulated sugar (for coating) - 2 teaspoons ground cinnamon (for coating) - 1/4 cup unsalted butter, melted - Chocolate sauce for drizzling When I make Churro French Toast Bites, I love to use thick bread. Brioche or challah gives the best taste. The bread holds the egg mixture well. For the main mixture, I whisk together eggs, milk, vanilla, sugar, and cinnamon. This step is key. It makes the bites creamy and sweet. The vanilla adds a rich flavor. Next, I prepare the coating. Mixing sugar and cinnamon in a bowl makes it easy. This blend gives the bites their churro-like crunch. I melt some butter in a pan. It helps the bites fry up nicely. When I coat them in sugar, I make sure they are hot. This helps the sugar stick. If you want, you can drizzle chocolate sauce on top. It adds another layer of sweetness. Every bite bursts with flavor. Enjoy these tasty treats any time of day! {{ingredient_image_2}} First, grab a medium bowl. In this bowl, combine 1/2 cup of granulated sugar with 2 teaspoons of ground cinnamon. Stir the two until they mix well. This is your churro sugar, and it will add great flavor later! Next, take a large mixing bowl. Whisk together 3 large eggs, 1/2 cup of whole milk, 1 teaspoon of vanilla extract, 1 tablespoon of sugar, and 1 teaspoon of ground cinnamon. Whisk until the mixture is smooth and creamy. This is the key to a rich flavor in your bites. Now, take your 6 thick slices of bread. I recommend brioche or challah for the best taste. Cut each slice into bite-sized cubes, about 1 to 2 inches. Then, soak each cube in the French toast mixture for about 10 seconds. Make sure each piece is covered but not too soggy. Heat up a non-stick skillet or griddle on medium heat. Add a small amount of melted butter to coat the surface. Place the soaked bread cubes in a single layer. Fry them for about 2 to 3 minutes on each side. You want them golden brown and crispy. Work in batches if needed. Once the bites are cooked, move them straight to the bowl with churro sugar. Toss them gently until they are fully coated in the sugary cinnamon mix. This step is what makes them taste like churros! Finally, arrange the churro French toast bites on a fun platter. For a sweet twist, drizzle some melted chocolate sauce over the top. You can also stack them in a playful tower. Adding some fresh fruit like strawberries can make the dish pop! For the best Churro French Toast Bites, I recommend brioche or challah bread. These breads are thick and rich, which helps create a soft inside and crispy outside. They soak up the egg mixture well without falling apart. You can also try other thick breads, but avoid thin-sliced options. They won't hold the mixture as well. Frying in batches is key to even cooking. If your skillet is too crowded, the bites may steam instead of fry. Cook them in a single layer. Check the doneness by looking for a golden brown color on both sides. Each side should take about 2-3 minutes. Adjust the heat as needed to avoid burning. To make your bites extra special, consider adding fun toppings. Drizzle melted chocolate sauce for a sweet touch. You can also sprinkle extra cinnamon sugar on top for added flavor. For a colorful plate, add fresh fruit like strawberries or bananas. This not only looks good but also adds freshness to the dish. Pro Tips Choose the Right Bread: Using thick slices of brioche or challah adds a rich flavor and fluffy texture, making your French toast bites even more delightful. Control Soaking Time: Soak each bread cube for about 10 seconds to ensure they absorb the mixture without becoming overly soggy. Monitor Heat Levels: Cook the bites on medium heat to achieve a golden-brown exterior while ensuring the inside is cooked through without burning. Enhance with Toppings: Consider adding whipped cream, fresh fruit, or a dusting of additional cinnamon sugar for a stunning presentation and extra flavor. {{image_4}} You can make Churro French Toast Bites even more fun by adding seasonal flavors. For fall, try adding pumpkin spice to the egg mixture. Just mix in one teaspoon of pumpkin pie spice. This gives your bites a warm, cozy taste. In winter, add peppermint extract for a refreshing twist. Use just a few drops in the batter. These small changes can bring seasonal cheer to your treats. You don’t have to stick with the usual sugar and cinnamon. Get creative with different coatings! Try using flavored sugars like vanilla or even coconut sugar for a unique taste. Add a touch of cocoa powder to the cinnamon-sugar mix for a chocolate twist. You can also sprinkle chopped nuts on top for a crunchy finish. Experiment and find your favorite way to coat these bites! If you need a gluten-free version, don't worry! Swap regular bread for gluten-free bread. Look for brands that make thick slices. You can also use gluten-free flour to make the batter thicker. Mix one tablespoon of cornstarch with your egg mixture. This helps the bites hold together well. Enjoy your delicious churro French toast bites, no matter your dietary needs! To keep your churro French toast bites fresh, place them in an airtight container. You can refrigerate them for up to three days. If you want to save them for longer, freeze the bites. Just make sure they are completely cool before freezing. Use freezer-safe bags or containers for best results. To reheat your churro bites, use the oven or a skillet. For the oven, preheat to 350°F (175°C). Place the bites on a baking sheet and heat for about 10 minutes. This keeps them crispy. If you use a skillet, add a little butter and warm them over medium heat for a few minutes, turning occasionally. Both methods help keep the flavor and texture intact. When stored properly, churro French toast bites last about three days in the fridge. If frozen, they can last up to three months. Just remember to check for any signs of freezer burn before using frozen bites. Always enjoy them fresh for the best taste! Yes, you can prepare some parts ahead. Make the churro sugar mix and store it in a sealed container. You can also whisk together the eggs, milk, vanilla, and sugar. Keep this mixture in the fridge. Cut the bread into cubes right before cooking to keep it fresh. Cook the bites when ready to serve. This way, they stay warm and crispy. You have several options to replace eggs. You can use a banana, about 1/4 cup, mashed. Applesauce is another choice, with the same amount. For a more neutral flavor, try 1/4 cup of silken tofu, blended until smooth. Each option will help bind the mix, just like eggs do. Making churro sugar is super easy. In a medium bowl, mix 1/2 cup of granulated sugar with 2 teaspoons of ground cinnamon. Stir them together well. You want the sugar to have a nice cinnamon flavor. Set this mix aside for coating the bites after cooking. Yes, you can choose other breads. Brioche and challah work best for their soft texture. But you can also use sourdough or Texas toast. Just make sure the bread is thick. Thin bread may not hold up well when soaked. Each type will give a different taste and feel to your churro bites. In this article, I shared how to make delicious Churro French Toast Bites. I covered key ingredients, step-by-step instructions, and tips for serving. You learned about fun variations and how to store leftovers. Churro French Toast Bites are simple and fun to make. You can customize them and enjoy them any time. Try this recipe for a sweet treat that everyone will love.

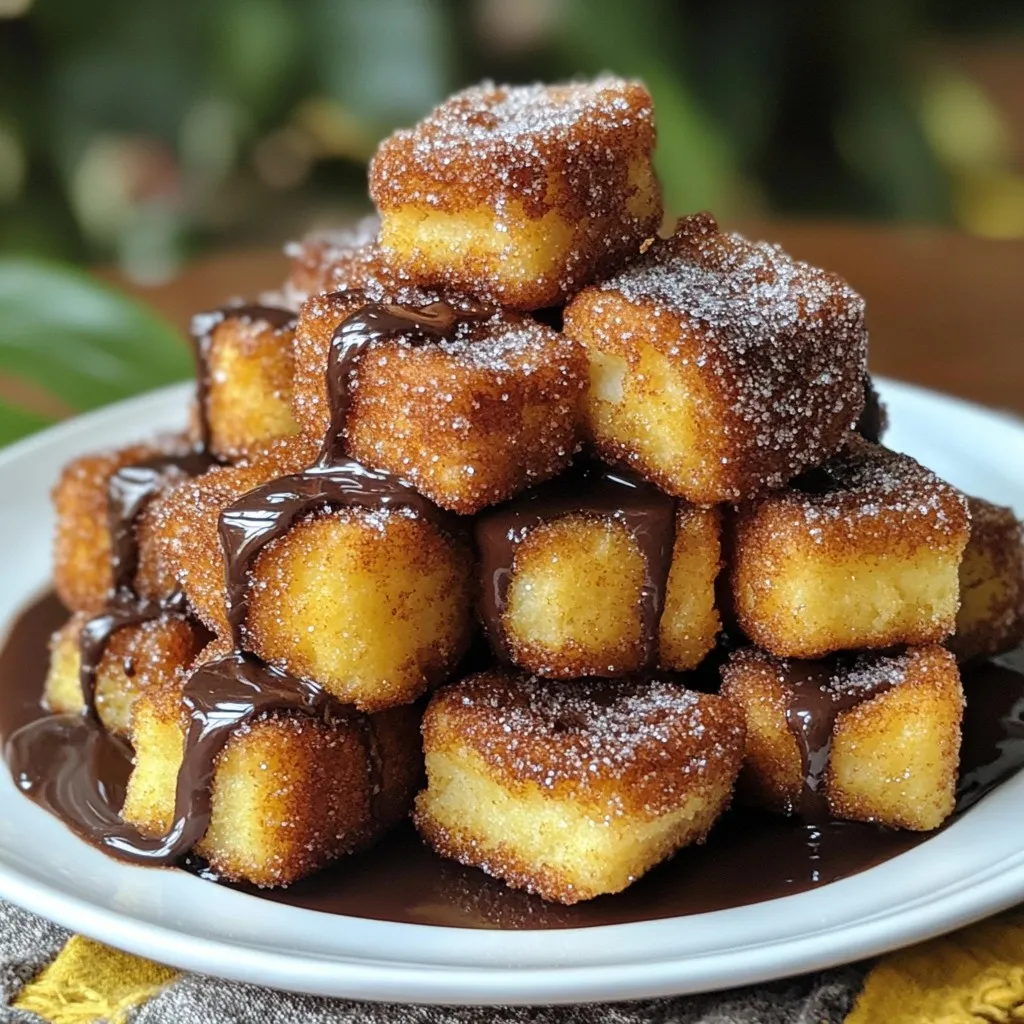
Are you ready to elevate your snack game? Churro French Toast Bites are the sweet treat you’ve been dreaming about. This tasty twist combines rich, fluffy bread with a delightful …

Read more

Categories Desserts
Older posts
Newer posts
← Previous Page1 … Page144 Page145 Page146 … Page162 Next →

TASTED NEST

Where Flavor Finds a Home 🍳🏡 — warm, simple, and crave-worthy recipes made for real life, from stovetop mornings to backyard dinners.

PAGES

Home About Contact Privacy Policy Terms & Conditions Cookie Policy GDPR Policy Copyright Policy Disclaimer

CATEGORIES

Appetizers Desserts Salads Breakfast Dinner
Copyright © 2025 Tasted Nest. All rights reserved.