Skip to content
  • GDPR Privacy Policy
  • Copyright Policy
  • Disclaimer
  • Terms & Conditions
Tasted Nest
  • Home
  • Appetizers
  • Desserts
  • Salads
  • Breakfast
  • Dinner
  • Privacy Policy
  • Contact
  • About

Chef Tavio

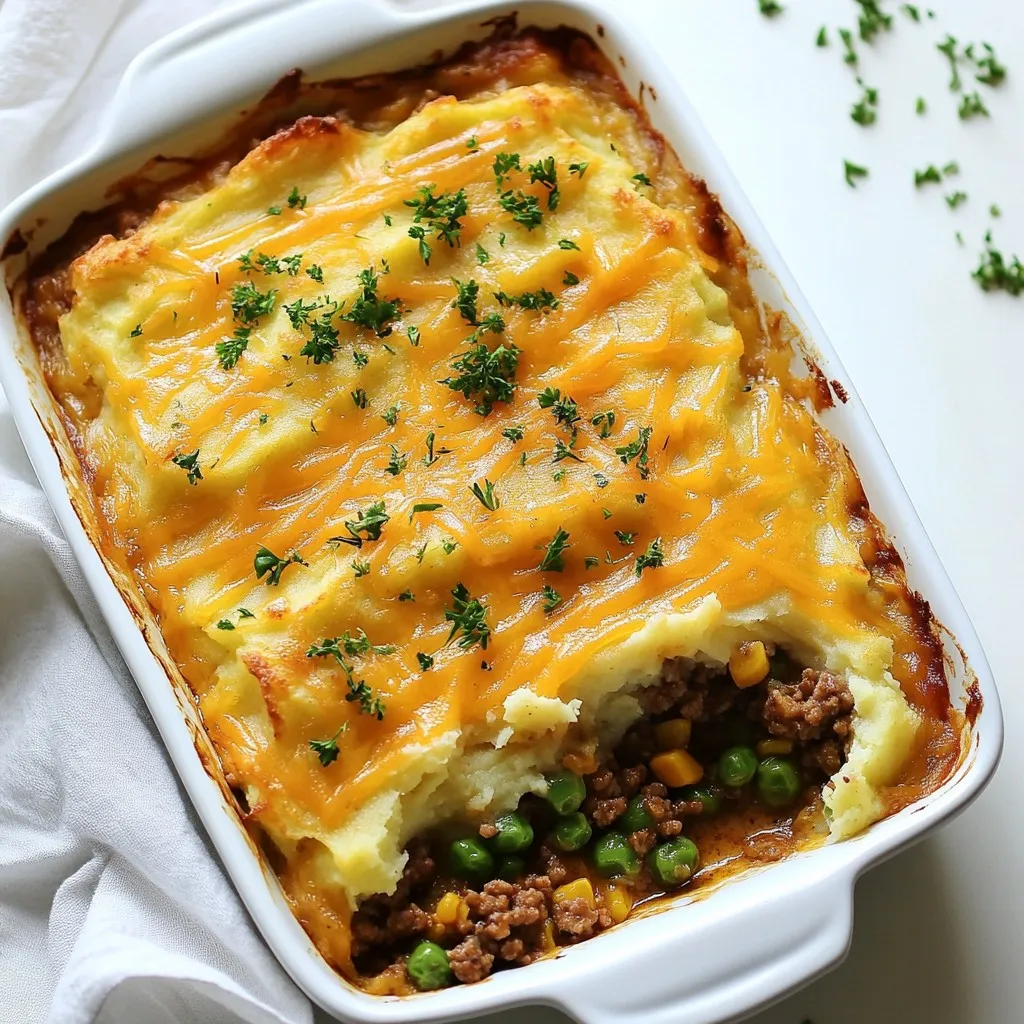
Ingredient Date Cookies Simple and Nutritious Treat

December 8, 2025April 2, 2025 by Chef Tavio
To make these tasty ingredient date cookies, you need the following items: - 1 cup pitted dates, finely chopped - 1 cup rolled oats - 1/2 cup almond flour - 1/2 teaspoon baking soda - 1/2 teaspoon ground cinnamon - 1/4 teaspoon salt - 1/3 cup coconut oil, melted - 1/4 cup honey or maple syrup - 1 teaspoon pure vanilla extract These ingredients work together to create a soft and chewy cookie. The dates add natural sweetness and a nice texture. You can change the recipe by adding these optional items: - 1/2 cup walnuts or pecans, chopped Adding nuts gives the cookies a nice crunch. You can also try different nuts based on your taste. If you need to make swaps, here are some ideas: - Instead of almond flour, use oat flour or all-purpose flour. - If you don’t have coconut oil, olive oil or butter works well. - Replace honey with agave syrup or another liquid sweetener. These swaps will still keep your cookies delicious and healthy. Feel free to get creative with what you have at home! {{ingredient_image_2}} Start by heating your oven to 350°F (175°C). This step is key for even baking. Next, take a baking sheet and line it with parchment paper. This keeps your cookies from sticking and makes cleanup easy. In a large bowl, add the rolled oats, almond flour, baking soda, ground cinnamon, and salt. Mix these dry items well. This ensures that the flavors blend nicely. Make sure there are no clumps in your mixture. In a separate bowl, take 1 cup of finely chopped dates. Mash them with a fork for about a minute. Aim for a creamy and sticky consistency. This will add natural sweetness and moisture to your cookies. Now, add the melted coconut oil, honey (or maple syrup), and pure vanilla extract to your mashed dates. Mix these wet ingredients until smooth. Once done, pour this mixture into the bowl with the dry ingredients. Stir everything together until combined well. If you like nuts, fold in 1/2 cup of chopped walnuts or pecans now. Using a tablespoon, scoop out cookie dough and drop it onto the lined baking sheet. Space each scoop about 2 inches apart. Gently flatten each cookie with the back of the spoon. Bake them in the oven for 10-12 minutes. Look for golden brown edges as a sign they are ready. After baking, let the cookies cool on the sheet for 5 minutes before moving them to a wire rack. This helps them set properly. To get the right cookie texture, use fresh dates. They should be soft and sticky. If your dates are dry, soak them in warm water for a few minutes. This helps them blend better. Use rolled oats instead of quick oats for a chewy bite. Adjust the baking time as needed. Keep an eye on the edges. They should turn golden brown. This means the cookies are ready. One common mistake is over-mixing the dough. Stir just until everything blends. Over-mixing can make cookies tough. Another mistake is skipping the cooling time. Letting cookies cool on the rack helps them firm up. Also, do not crowd the baking sheet. Space cookies about two inches apart. This allows them to spread evenly. After baking, let the cookies cool for five minutes on the sheet. This helps them set before moving. Afterward, transfer them to a wire rack. Let them cool completely to keep their texture. Store in an airtight container at room temperature. They should stay fresh for about five days. For longer storage, freeze them. They can last up to three months in the freezer. Pro Tips Chop Dates Finely: For better texture and easier mixing, ensure your dates are chopped finely before mashing them. Adjust Sweetness: Feel free to adjust the amount of honey or maple syrup based on your personal sweetness preference. Use Fresh Nuts: For enhanced flavor, toast your walnuts or pecans lightly before adding them to the dough. Store Properly: To keep your cookies fresh, store them in an airtight container at room temperature for up to a week. {{image_4}} To make vegan ingredient date cookies, simply swap out honey for maple syrup. This change keeps the cookies sweet and tasty. You can also replace coconut oil with vegan butter or any plant-based oil. Use these simple swaps to enjoy a cookie that fits your vegan diet. To create gluten-free ingredient date cookies, use gluten-free rolled oats and almond flour. These ingredients work together to give your cookies a soft texture. Always check that your oats are certified gluten-free. This way, you avoid any cross-contamination and enjoy your treat worry-free. If you need a nut-free cookie, skip the almond flour and use oat flour instead. You can make oat flour by blending rolled oats in a blender until they turn to powder. For the optional nuts, simply leave them out. The cookies will still taste great without them, and you will have a safe snack for everyone. To keep your baked Ingredient Date Cookies fresh, place them in an airtight container. This helps maintain their soft texture. You can stack them with parchment paper between layers. This prevents sticking. Keep the container in a cool, dry place. If you live in a warm area, store them in the fridge. They will last for up to one week. For best taste, eat them within a few days. If you want to save some dough for later, freezing is simple. First, scoop the cookie dough onto a baking sheet. Space the dough balls apart so they don’t stick together. Freeze them for about two hours until hard. Then, transfer the dough balls into a freezer-safe bag. Make sure to remove as much air as possible. You can freeze the dough for up to three months. When you’re ready to bake, just let the dough thaw in the fridge overnight before baking. Ingredient Date Cookies have a good shelf life. When stored correctly, they stay fresh for about one week at room temperature. If you store them in the fridge, they can last up to two weeks. If frozen, the cookies can last for three months. However, they taste best when eaten fresh. Enjoy them soon after baking for the best flavor and texture! Yes, you can use maple syrup or agave nectar. Both will keep the cookies sweet. If you want a lower-glycemic option, try coconut sugar. Just make sure to adjust the amount, as different sweeteners have different sweetness levels. The cookies will be ready when the edges turn a light golden brown. This usually takes around 10 to 12 minutes. They may look soft in the center. That’s okay! They will firm up as they cool. Absolutely! Chocolate chips can add a delicious twist. Simply fold in about 1/2 cup of chocolate chips with the nuts. This will give you a sweet and rich flavor that pairs well with the dates. Ingredient date cookies are simple and fun to make. We covered key ingredients, baking steps, and helpful tips. You learned about variations like vegan and gluten-free options too. These cookies are tasty and can fit many diets. Remember to store them properly for lasting freshness. Enjoy sharing your delicious creations with friends and family. Happy baking!

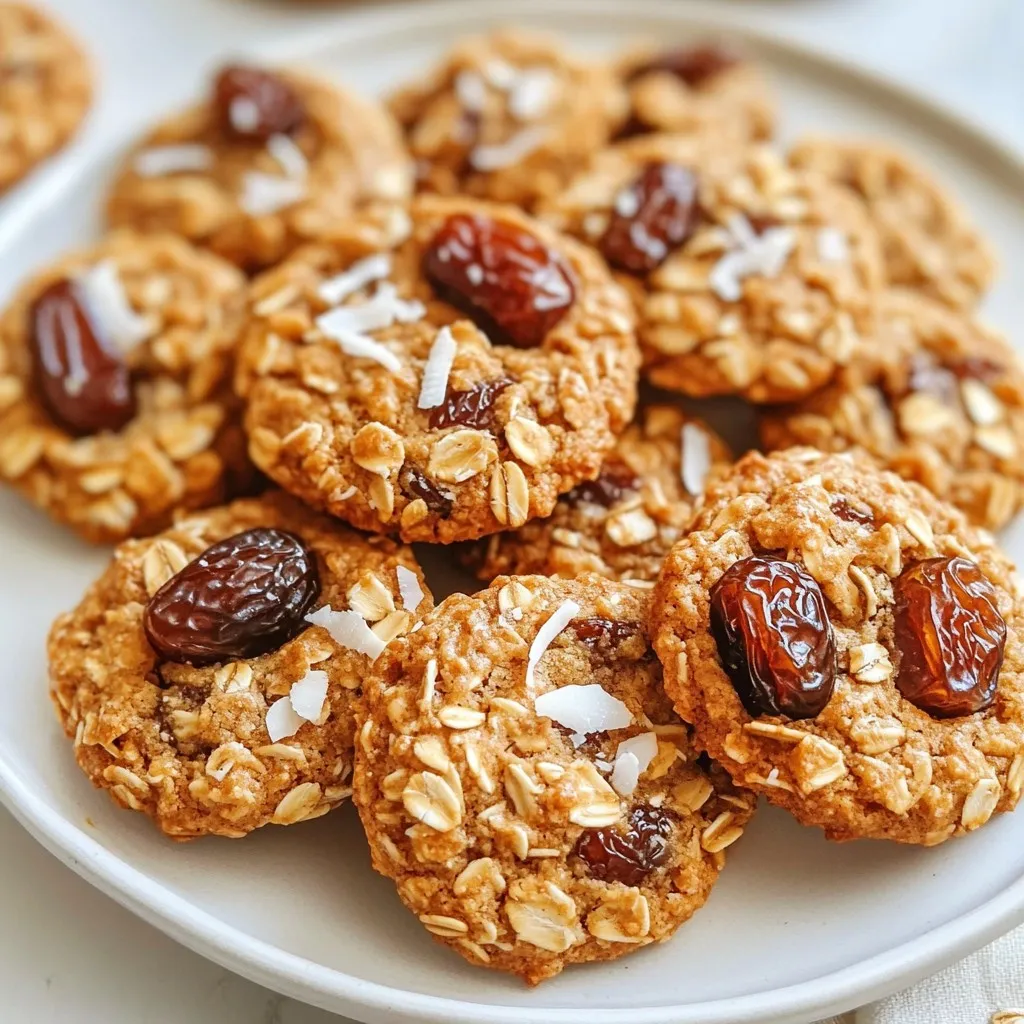
Looking for a simple and nutritious treat? Ingredient Date Cookies are your answer! Packed with flavor and healthy goodness, these cookies are easy to make and great for any occasion. …

Read more

Categories Desserts

Easy Chicken Enchiladas Simple and Tasty Recipe

November 18, 2025April 2, 2025 by Chef Tavio
To make tasty chicken enchiladas, gather these key ingredients: - 2 cups shredded cooked chicken (rotisserie works great!) - 1 cup black beans, rinsed and drained - 1 cup corn kernels (fresh, frozen, or canned) - 1 cup bell peppers, chopped (mix of red and green for color) - 1 teaspoon ground cumin - 1 teaspoon chili powder - ½ teaspoon garlic powder - ½ teaspoon onion powder - 1 cup enchilada sauce (store-bought or homemade) - 8 small flour or corn tortillas - 1 cup shredded cheese (cheddar or Monterey Jack) - Fresh cilantro, chopped (for garnish) - Sour cream (for serving) These ingredients create a vibrant flavor. The chicken and beans provide protein, while the corn and peppers add sweetness and crunch. You can enhance your enchiladas with some fun garnishes and sides: - Sliced jalapeños for heat - Avocado or guacamole for creaminess - Lime wedges for a zesty kick - Mexican rice or refried beans as side dishes - A fresh salad to balance the meal These options can add more flavor and texture to your dish. Mix and match to find your favorite combos! To make the cooking process smooth, here are some tools you will need: - Large mixing bowl for combining ingredients - Baking dish to hold enchiladas while baking - Measuring cups and spoons for accurate portions - Wooden spoon or spatula for mixing - Aluminum foil to cover the dish while baking Having the right tools makes cooking easier and more fun. You’ll be ready to whip up these enchiladas in no time! {{ingredient_image_2}} First, preheat your oven to 375°F (190°C). This heats the oven for baking. In a large bowl, mix 2 cups of shredded cooked chicken, 1 cup of black beans, 1 cup of corn, and 1 cup of chopped bell peppers. Add 1 teaspoon of ground cumin, 1 teaspoon of chili powder, ½ teaspoon of garlic powder, and ½ teaspoon of onion powder. Stir well until everything is combined. Grab a tortilla and place about ¼ cup of the chicken mixture in the center. Roll the tortilla tightly and place it seam-side down in a greased baking dish. Repeat this for all the tortillas. After arranging the rolled tortillas, pour 1 cup of enchilada sauce over them. Make sure each tortilla is covered. Next, sprinkle 1 cup of shredded cheese over the top. Cover the dish with aluminum foil to avoid burning. Bake the enchiladas for 20 minutes. After that, remove the foil and bake for another 10 minutes. This helps the cheese melt and turn golden. Once done, take the dish out and let it cool for a few minutes. Before serving, sprinkle fresh cilantro on top for a burst of flavor. Serve the enchiladas on a colorful plate. Drizzle with extra enchilada sauce and add a dollop of sour cream. This makes the dish look great and taste even better! Enjoy your meal! To keep your enchiladas moist, use enough sauce. Pour it over the tortillas before baking. This step is key. You want every tortilla to soak up the flavor. If you like, add some sauce inside the tortillas too. It makes each bite juicy and delicious. Rolling tortillas can be tricky. First, warm them slightly to make them flexible. This helps prevent tearing. Lay down about ¼ cup of the chicken mixture. Start at one end and roll tightly. Make sure to tuck in the sides as you roll. Place the seam side down in the baking dish. This keeps them from unrolling. Watch out for overfilling your tortillas. If they are too full, they won’t roll well. Also, don’t skip the sauce on top. It adds moisture and flavor. Lastly, avoid baking them too long. They should be bubbly and slightly golden but not dried out. Pay attention to these tips for the best enchiladas! Pro Tips Use Rotisserie Chicken: For a quick and flavorful option, shredded rotisserie chicken saves time and adds delicious seasoning to your enchiladas. Mix Your Cheeses: Combining cheddar and Monterey Jack cheese not only enhances the flavor but also creates a melty texture that pulls perfectly when served. Customize Your Fillings: Feel free to add other ingredients like diced zucchini, mushrooms, or jalapeños for a personal twist on the classic recipe. Let Them Rest: Allow the enchiladas to cool for a few minutes before serving; this helps the flavors meld and makes them easier to serve. {{image_4}} You can change the filling for your chicken enchiladas. Here are some ideas: - Vegetarian Option: Use black beans, corn, and extra veggies like zucchini or mushrooms. - Spicy Kick: Add diced jalapeños or hot sauce to the chicken mix. - Cheesy Goodness: Mix in cream cheese or ricotta for a creamy filling. - Protein Swap: Try ground turkey or beef for a different meat flavor. You can mix and match to find your favorite combination! The sauce can make or break your enchiladas. Here are some alternatives: - Green Sauce: Use green salsa or tomatillo sauce for a fresh taste. - Creamy Sauce: Try a white cheese sauce for a rich twist. - BBQ Sauce: For a fun fusion, use barbecue sauce instead of enchilada sauce. These sauces can add a unique flavor to your dish! You can easily adapt this recipe to fit various diets: - Gluten-Free: Use corn tortillas instead of flour ones. - Dairy-Free: Swap cheese for a dairy-free cheese or skip it altogether. - Low-Carb: Use lettuce wraps instead of tortillas for a lighter meal. These adjustments make it easy to enjoy enchiladas no matter your diet! To keep your leftover enchiladas fresh, place them in an airtight container. Make sure they cool down first. You can store them in the fridge for up to four days. If you want to keep them longer, freezing is a great option. To freeze enchiladas, let them cool completely. Wrap each one tightly in plastic wrap. Then, place them in a freezer-safe container or bag. They can last for up to three months in the freezer. When you are ready to eat them, just thaw in the fridge overnight. For the best taste, reheat enchiladas in the oven. Preheat the oven to 350°F (175°C). Place the enchiladas in a baking dish and cover with foil. Heat for about 20 minutes, or until they are warmed through. You can also microwave them, but the oven gives a better texture. Yes, you can use various tortillas. Flour tortillas are soft and easy to roll. Corn tortillas have a nice flavor but can break. If you want a gluten-free option, choose corn. They both work well in this recipe. You might need to warm corn tortillas first. This helps them stay intact while you roll them. To add heat, use spicy enchilada sauce. You can also mix in diced jalapeños or hot sauce. Adding more chili powder boosts spice too. If you like, sprinkle crushed red pepper on top before serving. Remember, start with a little spice. You can always add more! Many sides go great with chicken enchiladas. Consider serving them with rice or beans. A fresh salad adds a nice crunch. Guacamole or chips with salsa are popular choices too. You can also serve sour cream on the side. This helps cool down any heat from the enchiladas. You learned how simple it is to make easy chicken enchiladas. We discussed the best ingredients, Cooking tools, and step-by-step instructions. I shared tips to keep your enchiladas moist and tricks to avoid common mistakes. You can customize them or freeze leftovers for later. Explore different tortillas and sauces to make them your own. Now, you are ready to impress family and friends with your cooking skills and tasty meal. Enjoy every bite and have fun in the kitchen!

Looking for a simple way to spice up dinner? These Easy Chicken Enchiladas are the answer! With just a few basic ingredients and quick steps, you can create a meal …

Read more

Categories Dinner

Minute Creamy Tortellini Soup Quick and Easy Recipe

December 14, 2025March 31, 2025 by Chef Tavio
- 9 oz fresh refrigerated cheese tortellini - 4 cups rich vegetable broth - 1 cup heavy cream - 1 cup fresh spinach, roughly chopped - 1 cup diced tomatoes (fresh or canned) - 1 small onion, finely diced - 2 cloves garlic, minced - 1 teaspoon Italian seasoning blend - 1 tablespoon extra virgin olive oil - Salt and freshly ground pepper to taste To make Minute Creamy Tortellini Soup, gather these fresh and simple ingredients. The cheese tortellini brings a rich flavor and soft texture. I love using vegetable broth for a hearty base. Heavy cream adds creaminess, making the soup feel luxurious. Fresh spinach gives a nice pop of color and nutrients. Diced tomatoes add sweetness and balance. The onion and garlic create a fragrant base that enhances every bite. Italian seasoning brings warmth and depth, while olive oil adds richness. Don’t forget to season with salt and pepper for the perfect taste. - Grated Parmesan cheese - Fresh herbs For a special touch, I like to add grated Parmesan cheese on top. It melts beautifully and adds a salty flavor. Fresh herbs, like basil or parsley, can brighten the dish. They also add a lovely aroma. You can sprinkle them right before serving for an extra burst of freshness. Enjoy customizing your soup! {{ingredient_image_2}} - Sautéing Onion and Garlic Start by heating the olive oil in a large pot. Use medium heat until the oil shimmers. Add the finely diced onion. Cook it for about 3 to 4 minutes. You want it to soften and become transparent. Then, add the minced garlic. Stir it often for about 1 minute to avoid burning. You should smell the garlic’s lovely aroma. - Boiling Broth and Tortellini Next, slowly pour in the rich vegetable broth. Turn up the heat to bring it to a gentle boil. Once boiling, add the fresh cheese tortellini. Cook according to the package instructions, usually about 3 to 5 minutes. You’ll know it’s done when the tortellini float to the top and become tender. - Adding Cream, Spinach, and Seasoning Lower the heat to a simmer after the tortellini are cooked. Now, it's time to add the heavy cream, diced tomatoes, and chopped spinach. Sprinkle in the Italian seasoning. Stir well and let it warm for an additional 2 to 3 minutes. This step allows all the flavors to blend together nicely. - Adjusting Flavor After warming, taste the soup. Add salt and freshly ground pepper to suit your taste. This is your chance to make it just right for you. - Presentation Tips Serve the soup hot in vibrant soup bowls. For a pop of color, sprinkle freshly chopped basil on top. A drizzle of olive oil can also add flavor and visual appeal. - Recommended Serving Bowls Choose bowls that are deep enough to hold the soup well. Bright colors or fun designs can enhance the meal experience. Enjoy this hearty, creamy soup with friends or family! - Shortcuts for Busy Cooks Use fresh, refrigerated cheese tortellini. It cooks fast and tastes great. You can also use pre-diced onions and garlic to save time. Canned diced tomatoes work well, too. They add flavor without extra work. - Selecting Pre-Made Ingredients When picking vegetable broth, choose a low-sodium option. This lets you control salt better. Look for cream that is labeled "heavy" for the richest taste. Always check the expiration dates on fresh ingredients. - Recommended Seasoning Adjustments Taste your soup before serving. Adjust salt and pepper to suit your taste. If you want a kick, add a pinch of red pepper flakes. Replace Italian seasoning with your favorite herbs for a new twist. - Adding Fresh Herbs for Extra Flavor Fresh herbs make a big difference. Try adding chopped basil or parsley just before serving. They brighten the soup and add a pop of color. A squeeze of lemon juice can also enhance the flavors wonderfully. Pro Tips Fresh Ingredients Matter: Using fresh spinach and tomatoes enhances the flavor and texture of the soup, giving it a vibrant and wholesome taste. Customize Your Seasoning: Feel free to adjust the Italian seasoning blend according to your preference. Adding a pinch of red pepper flakes can introduce a nice kick! Perfectly Cooked Tortellini: To avoid overcooking, monitor the tortellini closely as they float to the surface. They are ready when tender but still firm to the bite. Garnish for Flavor: Besides Parmesan, consider adding a sprinkle of fresh herbs like basil or parsley before serving for an extra layer of flavor and color. {{image_4}} Using Different Types of Tortellini You can switch up the tortellini in this soup. Try using meat-filled tortellini, like sausage or chicken. These add rich flavors and protein. If you want a lighter option, go for spinach or mushroom tortellini. Each type brings its own taste, so feel free to experiment! Vegetable Options for Customization Adding veggies can make this soup even more tasty. You can toss in carrots, bell peppers, or zucchini. For a bit of crunch, consider adding peas or corn. Each vegetable adds a unique flavor and texture. Mix it up based on what you have at home. Making it Dairy-Free If you need a dairy-free version, replace the heavy cream with coconut milk or a nut-based cream. This keeps the soup rich while making it friendly for dairy-free diets. Just check that your tortellini is also dairy-free! Low-Carb Alternatives For a low-carb option, use cauliflower or zucchini noodles instead of tortellini. This gives you a similar texture without the carbs. You can also add more spinach or kale for bulk. These swaps keep the soup light and healthy while still being delicious. This creamy tortellini soup lasts for about 3-4 days in the fridge. Make sure to store it in an airtight container. Allow it to cool down before putting it in the fridge. This helps keep the soup fresh and tasty. When you're ready to eat, just heat it in a pot over low heat. You can freeze this soup for up to 3 months. To do this, let it cool completely. Then, pour it into freezer-safe bags or containers. Leave some space at the top for expansion. Remember to label the containers with the date! When you're ready to enjoy your frozen soup, thaw it in the fridge overnight. Reheat it on the stove over medium heat. Stir it often to keep it smooth. If the soup looks too thick after reheating, add a little broth or water. This will help bring back its creamy texture. What type of tortellini is best for soup? Fresh cheese tortellini works best for this soup. It cooks fast and adds rich flavor. You can use frozen tortellini if fresh is not available. Just increase cooking time by a minute or two. Can I make this soup ahead of time? Yes, you can! This soup keeps well in the fridge for about three days. Store it in an airtight container. When ready to eat, reheat on the stove or microwave. Just add a bit of extra broth to keep it creamy. How do I thicken the soup if desired? To thicken the soup, use a cornstarch slurry. Mix one tablespoon of cornstarch with two tablespoons of water. Stir this mixture into the soup while it simmers. Let it cook for a few minutes to thicken. Caloric Content Each serving of this soup has about 400 calories. This count can vary based on the exact ingredients used. Health Benefits of Ingredients - Cheese Tortellini: Provides protein and calcium. - Spinach: Packed with vitamins A, C, and K. - Tomatoes: Rich in antioxidants, good for heart health. - Garlic: May boost the immune system. - Heavy Cream: Adds richness and helps absorb nutrients. This soup is not just tasty; it also offers nutritional benefits. Enjoy a warm bowl filled with flavor and health! This blog post covered a tasty tortellini soup recipe. We explored key ingredients like cheese tortellini, fresh spinach, and hearty tomatoes. I shared step-by-step instructions for perfect preparation and tips for enhancing flavor. You learned about variations, storage tips, and answers to common questions. In conclusion, this soup is easy to customize. Enjoy the warm, rich flavors however you like. You can make this dish your own and impress family and friends. Happy cooking!

Looking for a quick and easy dinner idea? This Minute Creamy Tortellini Soup is your answer! Packed with rich flavors and fresh ingredients, it comes together in just minutes. Whether …

Read more

Categories Dinner

Single-Serve Edible Cookie Dough Simple Recipe Guide

November 30, 2025March 30, 2025 by Chef Tavio
To make your single-serve edible cookie dough, gather these ingredients: - 3 tablespoons all-purpose flour - 1 tablespoon unsalted butter, softened to room temperature - 1 tablespoon packed brown sugar - 1 tablespoon granulated sugar - 1/4 teaspoon pure vanilla extract - 1 tablespoon milk (dairy or plant-based) - 2 tablespoons mini chocolate chips - A pinch of fine sea salt These simple items make a rich cookie dough that you can enjoy right away. You can swap ingredients to fit your taste or needs: - All-purpose flour can be replaced with oat flour for a gluten-free option. - Use coconut oil in place of unsalted butter for a dairy-free version. - If you’re out of brown sugar, regular granulated sugar works too. - For milk, any plant-based milk like almond or soy can be used. These swaps keep your cookie dough tasty and enjoyable. Want to customize your cookie dough? Here are some fun add-ins to try: - Chopped nuts for a crunchy texture. - Sprinkles for a colorful touch. - Peanut butter or almond butter for a nutty flavor. - Dried fruit for added sweetness. Experiment with these options to create your perfect treat! {{ingredient_image_2}} To make single-serve edible cookie dough, start by gathering your ingredients. You need: - 3 tablespoons all-purpose flour - 1 tablespoon unsalted butter, softened - 1 tablespoon packed brown sugar - 1 tablespoon granulated sugar - 1/4 teaspoon pure vanilla extract - 1 tablespoon milk (dairy or plant-based) - 2 tablespoons mini chocolate chips - A pinch of fine sea salt First, take a small mixing bowl. Add the softened butter, packed brown sugar, and granulated sugar. Mix these together with a fork or a hand mixer. Aim for a creamy and light texture. This takes just a minute or two. Next, stir in the pure vanilla extract and milk. Mix until it is smooth and well-combined. In another bowl, sift the all-purpose flour and fine sea salt. This step helps break up any lumps. Slowly fold this flour mixture into your wet mix. Keep stirring until you form a rich, cohesive dough. When your dough is ready, gently fold in the mini chocolate chips. Ensure they are spread evenly throughout the dough. At this point, taste your cookie dough! If you want a sweeter treat, add a bit more granulated sugar. Mix it in and taste again if needed. For a fun presentation, scoop the cookie dough into a small bowl or a cute jar. Top it with a few extra mini chocolate chips. This makes it look even more inviting. You can also serve the cookie dough with fresh fruit slices, like strawberries or apples. This adds a nice crunch and freshness to each bite. Enjoy your single-serve edible cookie dough right away for the best experience! To get the best texture, use room temperature butter. This helps blend well with sugars. Mix until creamy for a smooth dough. If your dough is too dry, add a bit more milk. If it’s too wet, add a sprinkle of flour. The goal is a soft, not sticky dough. Taste your cookie dough before serving. If you want it sweeter, add more sugar. Start with just a little at a time. Mix well after each addition to avoid overpowering the flavor. You can use brown sugar for a richer taste or keep it simple with granulated sugar. Watch out for these common errors: - Using cold butter: This makes mixing hard. Always use softened butter for a smooth blend. - Skipping the salt: A tiny pinch enhances flavor. Don't skip it! - Overmixing the dough: This can make it tough. Mix just until combined. By following these tips, you’ll create a delightful single-serve edible cookie dough that’s perfect every time! Pro Tips Use Heat-Treated Flour: To make your cookie dough safe to eat, consider using heat-treated flour. Spread it on a baking sheet and bake at 350°F (175°C) for about 5 minutes to kill any bacteria. Experiment with Flavors: Feel free to customize your cookie dough by adding different extracts like almond or coconut for a unique twist. Mix-Ins Galore: Get creative with your mix-ins! Try adding nuts, dried fruit, or even crushed cookies to enhance the texture and flavor. Chill for Extra Firmness: If you prefer a firmer dough, chill your cookie dough in the refrigerator for about 15 minutes before serving. {{image_4}} You can change the taste of your edible cookie dough easily. For a nutty twist, try adding one tablespoon of your favorite nut butter. Almond or peanut butter works great. This adds creaminess and flavor. If you want a fun and colorful treat, add a tablespoon of funfetti sprinkles. They make your cookie dough look festive and exciting. You can also use flavored extracts like almond or hazelnut for a unique taste. The options are endless! You can modify this recipe to fit your diet. To make it vegan, swap the butter for coconut oil or a plant-based butter. Use a plant-based milk, like almond or oat milk, to keep it dairy-free. For gluten-free cookie dough, replace all-purpose flour with almond flour or gluten-free flour blend. This way, everyone can enjoy this tasty treat without worry. Get creative with your mix-ins! You can add chopped nuts, dried fruit, or even crushed cookies for extra texture. Try mini marshmallows for a s'mores vibe, or add a tablespoon of cocoa powder for a chocolate version. Feel free to experiment and find your favorite combinations. The best part is that you can make it just the way you like! If you have leftover cookie dough, store it in an airtight container. This keeps it fresh and tasty. Place the container in the fridge. Your cookie dough will stay good for about three days. If you want to enjoy it later, freezing is a better option. To freeze your cookie dough, scoop it into small portions. You can use a cookie scoop or spoon. Place the scoops on a baking sheet lined with parchment paper. Freeze them for about an hour until they are solid. Once frozen, transfer the scoops to a freezer-safe bag. This way, you can grab one when a craving hits! When stored correctly, cookie dough lasts well in the fridge or freezer. In the fridge, it’s best used within three days. In the freezer, it can last up to three months. For the best flavor and texture, always thaw the frozen dough in the fridge overnight before enjoying. This keeps it soft and easy to eat. Yes, you can eat this cookie dough raw! This recipe uses heat-treated flour, making it safe. You will enjoy the creamy texture and sweet taste without any worries. Just remember, it is meant for one serving, so share if you want! If you need a substitute for all-purpose flour, try using almond flour or oat flour. Both options work well and add unique flavors. You can also use a gluten-free flour blend if you want to keep it gluten-free. Just remember to adjust the amount, as some flours absorb more liquid than others. Making single-serve edible cookie dough takes just 5 minutes. You can whip it up quickly for a tasty treat any time. Just gather your ingredients and mix them together. In no time, you will have delicious cookie dough ready to enjoy! This blog post covered all you need for single-serve edible cookie dough. We reviewed essential ingredients and substitutions, explored step-by-step instructions, and shared helpful tips. You learned about flavor variations, storage methods, and common questions. Remember, you can customize your cookie dough to fit your taste or diet. Now, you can enjoy this treat with confidence. There is no wrong way to create your unique dessert!

Craving a sweet treat that you can whip up in minutes? Look no further! This guide teaches you how to make a simple, delicious single-serve edible cookie dough that’s safe …

Read more

Categories Desserts

Melty Chicken Avocado Melt Delightful and Easy Recipe

December 8, 2025March 29, 2025 by Chef Tavio
- 2 cups cooked chicken, shredded - 1 ripe avocado, mashed - 1 cup shredded mozzarella cheese - 1/2 cup cream cheese, softened - 1 tablespoon fresh lemon juice - 1/4 cup fresh cilantro, chopped - 1 teaspoon garlic powder - 1/2 teaspoon onion powder - Salt and pepper to taste - 4 slices of hearty sourdough bread (or whole wheat) To make the best Melty Chicken Avocado Melt, you need fresh ingredients. Start with cooked chicken. Shredded rotisserie chicken works great. It saves time and adds flavor. Next, grab a ripe avocado. This will give your melt a creamy texture. Then, you need shredded mozzarella cheese. It melts beautifully and ties everything together. For flavor, cream cheese adds richness. Fresh lemon juice brightens the dish. It keeps the avocado from browning too. Chopped cilantro brings freshness and a hint of spice. Lastly, season your filling! Garlic powder and onion powder enhance depth. Don’t forget salt and pepper to taste. Choose your bread carefully. Sourdough adds a nice crunch, but whole wheat is a healthy alternative. {{ingredient_image_2}} To start, grab a large mixing bowl. Add the following ingredients: - 2 cups cooked chicken, shredded - 1 ripe avocado, mashed - 1 cup shredded mozzarella cheese - 1/2 cup cream cheese, softened - 1 tablespoon fresh lemon juice - 1/4 cup fresh cilantro, finely chopped - 1 teaspoon garlic powder - 1/2 teaspoon onion powder - Salt and pepper to taste Next, mix all the ingredients well. You want a creamy texture. Make sure the chicken and avocado blend together. The cheese should be evenly mixed in. Taste the mixture and adjust the salt and pepper as needed. This filling will be rich and flavorful. Now it's time to cook! Preheat your non-stick skillet over medium heat. Once it’s hot, add 2 tablespoons of olive oil or butter. Let it melt and coat the skillet. Place two slices of your favorite bread on the skillet. Use hearty sourdough or any bread you like. Spoon half of the chicken and avocado mixture onto each slice. Spread it evenly for the best melt. Top with the other slices of bread to form sandwiches. Grill the sandwiches for about 3-4 minutes on one side. Look for a golden brown color and melted cheese. Carefully flip the sandwiches with a spatula. Grill the other side for another 3-4 minutes until it’s crispy and golden. Once the sandwiches are ready, take them out of the skillet. Let them cool on a cutting board for a minute. This makes slicing easier. Cut each sandwich in half to show off that melty filling. For a great presentation, serve the Melty Chicken Avocado Melts on a rustic wooden board. Add a few sprigs of fresh cilantro for color. You can also include a side of crunchy tortilla chips or a light salad. Enjoy these warm for the best flavor! To boost flavor, try these ideas: - Custom seasonings: Add more garlic powder or a dash of smoked paprika. - Fresh herbs: Toss in fresh basil or parsley for a vibrant taste. These simple changes can make your Melty Chicken Avocado Melt stand out. Getting the perfect crisp is key. Here are some tips: - Heat control: Start with medium heat. Too high can burn the bread. - Oil or butter: Use enough to coat the skillet. This helps achieve golden brown bread. Monitor your sandwiches closely for that crispy finish. Got leftovers? Here are some ideas: - Leftover chicken: Shred any cooked chicken you have. This saves time and adds flavor. - Extra avocado: Use it in salads or on toast for a healthy snack. For sides, consider crunchy tortilla chips or a light salad. They pair well with your melt! Pro Tips Use Fresh Ingredients: Always opt for the freshest chicken and ripe avocados to enhance the flavor and creaminess of your melts. Customize Your Cheese: Feel free to experiment with different cheeses such as cheddar or pepper jack for a unique twist on flavor and meltiness. Grill with Care: Keep an eye on the heat level while grilling to prevent burning. Adjust the heat as necessary for even cooking. Serve Immediately: For the best taste and texture, serve your Melty Chicken Avocado Melts right off the grill while they’re still warm and melty. {{image_4}} If you want to lighten up your Melty Chicken Avocado Melt, there are great options. You can swap regular cream cheese for low-fat cream cheese or even yogurt. Both will keep your filling creamy while cutting calories. For the bread, look for gluten-free options if you are avoiding gluten. Many brands offer tasty gluten-free bread that works well in this recipe. Want to add some excitement to your melt? Try adding crispy bacon for a savory crunch. You can also toss in fresh tomatoes for a juicy burst. If you like heat, consider adding diced peppers or jalapeños. These spicy additions will give your melt an extra kick that can make it even more enjoyable. Pair your Melty Chicken Avocado Melt with a light salad or warm soup. A fresh side salad adds crunch and color to your meal. For extra flavor, try serving it with unique dips. A zesty salsa or a creamy ranch dip can elevate the experience and keep things fun at the table. To keep your Melty Chicken Avocado Melt fresh, store leftovers in the fridge. Place your sandwiches in an airtight container. They should stay good for up to three days. If you want to save them longer, you can freeze them. Wrap each sandwich tightly in plastic wrap. Then, place them in a freezer-safe bag. They can last for up to three months in the freezer. When it's time to enjoy your leftovers, reheating them properly is key. To keep the texture nice, use a skillet. Heat the skillet over medium heat. Place the sandwich in the skillet and cover it with a lid. This helps the cheese melt without burning the bread. Grill for about 3-4 minutes on each side. If you prefer the microwave, it's quick but may not keep that crispy texture. Place the sandwich on a microwave-safe plate. Heat for about 30 seconds to 1 minute. Check if it’s warm enough, but be careful not to overcook it. Enjoy your melty delight! Yes, you can use canned chicken. Canned chicken is a quick option. It saves time during busy days. However, it may lack flavor and texture compared to fresh chicken. If you choose canned chicken, drain it well before mixing. You can add extra seasonings to boost flavor. You can use cheddar cheese as a substitute for mozzarella. Cheddar adds a sharper taste and melts well. If you're looking for a vegan option, try vegan cheese. Many brands offer great meltability that works well in this recipe. Just make sure it’s shreds for easy melting. To make this recipe vegan, swap the chicken for chickpeas or tempeh. Use vegan cream cheese and a plant-based cheese. Replace butter or olive oil with coconut oil or vegan butter. This way, you can enjoy a tasty melty sandwich without animal products. This blog post showed how to make a tasty chicken and avocado sandwich. We covered the key ingredients, like cooked chicken and ripe avocado. The steps for mixing, grilling, and serving are clear and easy. You also learned ways to personalize your sandwich with fun flavors and storage tips. In the end, this recipe is fun and simple. It’s a great way to enjoy good food with your loved ones. Try it out and make it your own!

Are you ready to savor the creamy goodness of a Melty Chicken Avocado Melt? This easy recipe combines tender chicken, ripe avocado, and gooey mozzarella for a taste explosion. With …

Read more

Categories Dinner

Keto Cinnamon Cream Cheese Roll-Ups Tasty Snack Idea

November 24, 2025March 29, 2025 by Chef Tavio
To make these tasty roll-ups, you'll need the following ingredients: - 1 cup almond flour - 1/4 cup cream cheese, softened - 2 large eggs - 1/4 cup erythritol (or any keto-friendly sweetener) - 1 teaspoon ground cinnamon - 1/2 teaspoon baking powder - 1/4 teaspoon salt - 1 tablespoon butter, melted (for brushing) - Additional cinnamon and sweetener for dusting If you want to switch up the sweetener, here are some options: - Stevia: Use a small amount as it's very sweet. - Monk fruit: A great low-carb sweetener with no calories. - Allulose: Tastes like sugar and has fewer carbs. Experiment with these to find the flavor you like best! You'll need a few tools to make this recipe easy: - Mixing bowls: One for dry and one for wet ingredients. - Rolling pin: For rolling out the dough. - Parchment paper: To prevent sticking. - Sharp knife: For slicing the roll-ups. - Baking tray: To bake your delicious treats. Gather all your equipment before you start cooking for a smooth process! {{ingredient_image_2}} First, preheat your oven to 350°F (175°C). This step is vital for a good bake. Next, line a baking tray with parchment paper. This prevents sticking and makes cleaning easy. In a large bowl, combine 1 cup of almond flour, 1/4 cup of erythritol, 1 teaspoon of ground cinnamon, 1/2 teaspoon of baking powder, and 1/4 teaspoon of salt. Mix well until no clumps remain. A thorough mix helps the roll-ups rise evenly. In a separate bowl, whisk together 1/4 cup of softened cream cheese and 2 large eggs. Keep whisking until the mixture is smooth and creamy. This smooth mix creates a nice texture in your dough. Gradually add the wet mix to the dry ingredients. Use a spatula or wooden spoon to combine them. Stir until a cohesive dough forms. It should feel slightly sticky but easy to handle. Transfer your dough to a clean surface. First, place it between two pieces of parchment paper. Using a rolling pin, roll the dough into a rectangle about 1/4 inch thick. This shape helps with even filling and rolling. In a small bowl, mix 1 tablespoon of melted butter, 1 tablespoon of erythritol, and 1 teaspoon of ground cinnamon. Stir until smooth. Spread this mixture evenly over the rolled-out dough. Make sure to reach the edges for full flavor. Starting from one edge, roll the dough tightly into a log shape. Pinch the seams to keep the roll together. Use a sharp knife to cut the log into 1-inch thick pieces. Arrange these slices cut-side up on your baking tray. Place the tray in your preheated oven. Bake for 15-20 minutes until the edges are golden brown. Keep an eye on them to avoid burning. Once they’re done, let the roll-ups cool for a few minutes. You can dust them with extra cinnamon and erythritol for a nice touch. To get the right dough, mix well. Combine almond flour and dry ingredients first. Make sure there are no lumps. When you add the wet mix, it should feel sticky but not too wet. If it’s too dry, add a little water. If it’s too wet, add more almond flour. This balance is key for great roll-ups. Taste your filling! If you want it sweeter, add more erythritol. You can also try different spices like nutmeg or vanilla. Adjusting sweetness is easy and fun. Just remember, the flavor should shine through the cream cheese and cinnamon. Make your roll-ups look special. Place them on a nice plate, cut-side up. A sprinkle of cinnamon on top adds charm. You can also add a dollop of whipped cream or chopped nuts. This makes your snack not just tasty but pretty, too! Pro Tips Use Room Temperature Ingredients: Ensure that your cream cheese is at room temperature before mixing. This will help achieve a smooth and creamy texture in the dough. Adjust Sweetness to Taste: Feel free to adjust the amount of erythritol or sweetener based on your personal preference for sweetness. Don't Overbake: Keep an eye on your roll-ups while baking. Remove them from the oven as soon as they turn golden brown to prevent drying out. Experiment with Fillings: Consider adding chopped nuts or unsweetened cocoa powder to the cinnamon filling for added flavor and texture. {{image_4}} You can boost the texture and nutrition of your roll-ups. Adding nuts or seeds is a great idea. Try mixing in chopped pecans or walnuts into the dough. This adds crunch and flavor. You can also sprinkle chia or flax seeds on the filling. These seeds add healthy fats and fiber. If you want a gluten-free option, almond flour is perfect. It’s already a main ingredient. You can also swap for coconut flour. But, use less coconut flour since it absorbs more moisture. Start with 1/4 cup and adjust as needed. Flavor your roll-ups in fun ways! For chocolate lovers, add cocoa powder to the dough. Start with 2 tablespoons and mix it in well. If you like vanilla, add a teaspoon of vanilla extract to the wet mixture. You can even try adding lemon zest for a fresh twist. Get creative and make these roll-ups your own! Store leftover Keto Cinnamon Cream Cheese Roll-Ups in an airtight container. Keep them in the fridge for up to five days. This helps maintain their soft texture. If they dry out, try adding a slice of bread to the container. It adds moisture back to the rolls. To freeze, wrap each roll-up tightly in plastic wrap. Place them in a freezer bag or container. They can last up to three months in the freezer. When you're ready to enjoy them, take out as many as you need. Let them thaw in the fridge overnight for best results. To reheat, preheat your oven to 350°F (175°C). Place the roll-ups on a baking sheet. Cover them with foil to keep them moist. Heat for about 10-15 minutes. You can also use a microwave. Heat each roll-up for 20-30 seconds. Enjoy them warm for a tasty snack! You can use coconut flour instead of almond flour. Use 1/4 cup of coconut flour in place of 1 cup of almond flour. Coconut flour absorbs more moisture, so add an extra egg or more cream cheese. This keeps the dough soft and easy to roll. Yes, you can use other keto-friendly sweeteners. Options include stevia, monk fruit, or allulose. Just remember to adjust the amount based on the sweetness level of the sweetener you choose. Always taste your filling to get it just right. To reheat, use an oven or an air fryer. Preheat your oven to 350°F (175°C). Place the roll-ups on a baking sheet and warm them for about 5 to 10 minutes. In an air fryer, set it to 300°F (150°C) for about 3 to 5 minutes. This keeps them soft and tasty. Each serving has about 2 grams of net carbs. This low-carb count makes them a great snack for a keto diet. Always check the specific brands of ingredients you use for the most accurate carb counts. You’ve learned how to make Keto Cinnamon Cream Cheese Roll-Ups from scratch. We covered ingredients, tools, and step-by-step instructions. I shared tips for making your roll-ups perfect, plus some fun variations to try. Remember, these rolls are easy to store and reheat. With this recipe, you can enjoy a tasty treat that fits your diet. You now have the tools to make it your own. Happy baking!

Craving a sweet snack that fits your keto diet? I’ve got just the thing! Keto Cinnamon Cream Cheese Roll-Ups are simple, tasty, and perfect for any time of day. With …

Read more

Categories Desserts

Weeknight Shepherd’s Pie Casserole Easy Comfort Meal

December 16, 2025March 28, 2025 by Chef Tavio
- 1 lb ground beef or lamb - 1 cup diced onions - 2 cups mixed frozen vegetables (carrots, peas, corn) - 1 cup beef broth - 1 tablespoon Worcestershire sauce - 1 teaspoon dried thyme - 1 teaspoon salt - ½ teaspoon black pepper - 4 cups creamy mashed potatoes (homemade or store-bought) - 1 cup shredded sharp cheddar cheese - Fresh parsley, chopped (for garnish) In this recipe, we use simple but tasty ingredients to create a warm dish. Ground beef or lamb is the star. It gives the casserole a rich flavor. I like using diced onions for sweetness and mixed frozen vegetables for ease. They add color and nutrients. For the seasonings, beef broth adds depth. Worcestershire sauce gives a savory punch. Dried thyme, salt, and black pepper enhance the taste. These ingredients come together to create a wonderful base for our casserole. The topping is key. Creamy mashed potatoes make it comforting. You can use homemade or store-bought. Topping it off with shredded sharp cheddar cheese adds that melty goodness we all love. Finally, a sprinkle of fresh parsley brightens it up and makes it look great. This combination makes the weeknight shepherd’s pie casserole a real crowd-pleaser! {{ingredient_image_2}} Preheat your oven to 400°F (200°C). This heat helps the casserole cook evenly. In a large skillet, add 1 pound of ground beef or lamb. Cook over medium heat until it turns brown. Use a wooden spoon to break the meat into small pieces. After cooking, drain any fat left in the skillet. Next, add 1 cup of diced onions and 2 cloves of minced garlic. Sauté for about 3 to 4 minutes. You want the onions to become soft and clear. This step creates a great smell in your kitchen. Now, mix in 2 cups of frozen mixed vegetables. You can use carrots, peas, and corn. Pour in 1 cup of beef broth and 1 tablespoon of Worcestershire sauce. Add 1 teaspoon of dried thyme, 1 teaspoon of salt, and ½ teaspoon of black pepper. Stir everything well and bring it to a gentle simmer. Let it cook for about 5 minutes. This allows the sauce to thicken, coating the meat and veggies nicely. Transfer the meat and vegetable mixture into a greased 9x13-inch casserole dish. Spread it out evenly across the bottom. Then, carefully spoon 4 cups of creamy mashed potatoes over the meat layer. Spread them evenly with a spatula. You can create some peaks and valleys for a fun look. Next, sprinkle 1 cup of shredded sharp cheddar cheese on top of the mashed potatoes. This cheese will melt and create a delicious crust. Finally, place the casserole in the oven and bake for 25 to 30 minutes. Look for the cheese to bubble and turn golden brown. This signals that your meal is ready to serve! - Using store-bought mashed potatoes: This is a quick way to save time. You can grab a tub of creamy mashed potatoes from the store. It cuts your prep time in half and still tastes great. - Prepping vegetables in advance: Chopping your onions and measuring your frozen veggies ahead of time makes cooking smoother. You can do this the night before or even in the morning. Keep them in the fridge until you're ready to cook. - Ensuring meat is well browned: When you cook the ground meat, make sure it’s browned well. This gives your casserole a rich flavor. Use a wooden spoon to break the meat into small bits while it cooks. - Techniques for evenly spreading mashed potatoes: After you spoon the mashed potatoes on top, use a spatula to spread them evenly. Create peaks and valleys with the spatula. This creates a nice texture and allows the cheese to melt perfectly. - Alternative garnishes for presentation: Fresh herbs like thyme or chives can add a pop of color. You can sprinkle them on top right before serving. It makes your dish look fancy with little effort. - Choosing the right cheese for flavor: Sharp cheddar cheese adds a nice kick. You can also try mozzarella or gouda for a different taste. Each cheese brings its own unique flavor to the dish. Pro Tips Use Fresh Herbs: Fresh herbs can elevate the flavor of your shepherd's pie. Consider adding fresh thyme or rosemary for a fragrant touch. Customize Your Vegetables: Feel free to swap out the frozen vegetables for your favorites, such as bell peppers or green beans, to tailor the dish to your taste. Make Ahead: You can prepare the casserole in advance. Assemble it, cover it tightly, and refrigerate for up to 24 hours before baking for a quick weeknight meal. Perfectly Creamy Mashed Potatoes: For the best mashed potatoes, use a combination of butter and cream. This ensures a rich and smooth texture that complements the casserole perfectly. {{image_4}} You can swap out ground beef or lamb for ground turkey. This change makes the dish lighter. You can also use plant-based meat alternatives. They work well and add a nice flavor. Feel free to mix up the vegetable mix. Instead of frozen carrots, peas, and corn, try green beans or bell peppers. You can also add mushrooms or spinach for extra nutrition. Adding fresh herbs or spices can boost the flavor. Try rosemary or oregano for a new twist. A touch of paprika can add warmth, too. Using different cheese varieties can change the taste. You could use mozzarella for a milder flavor. Or try pepper jack for a bit of heat. Each cheese will give a unique taste to your casserole. You can serve this casserole in different ways. For a fun twist, make individual portions in ramekins. This makes it easy for everyone to have their own dish. You can also serve it family-style in a larger dish. Pair it with a fresh side salad or crusty bread for a complete meal. This adds color and freshness to your table. To store your leftovers, let the casserole cool first. Cover it tightly with plastic wrap or aluminum foil. You can also use an airtight container. This will keep it fresh. In the fridge, it lasts about 3-4 days. You can freeze the casserole before or after baking. If you freeze it before baking, wrap it well. Use plastic wrap, then foil. This helps prevent freezer burn. To freeze after baking, let it cool completely first. Then, follow the same wrapping method. When ready to eat, thaw it overnight in the fridge. The best way to reheat your casserole is in the oven. Preheat it to 350°F (175°C). Cover the dish with foil to keep moisture in. Bake for about 30-40 minutes. If using the microwave, heat it in short bursts. Stir between intervals to keep it even. Portion out servings before reheating. This helps heat the food evenly and makes it easier to serve. Yes, you can prepare this casserole ahead of time. Start by cooking the meat and onions. After that, mix in the frozen veggies, broth, and spices. Cool it down. You can layer everything in the casserole dish. Cover it tightly with plastic wrap or foil. Store it in the fridge for up to two days. When you are ready to bake, just add the mashed potatoes and cheese. It will save you time on a busy weeknight! Shepherd's pie is hearty on its own. However, some side dishes can enhance your meal. A simple green salad adds freshness. You can also serve crusty bread for dipping. Steamed broccoli or green beans work well, too. These sides balance the richness of the casserole. You can use fresh veggies! Just chop them into small pieces. Fresh vegetables may require longer cooking time. Make sure they are tender before combining them with the meat. This way, they will blend well in your casserole. Keep an eye on the texture to ensure a delicious bite! This blog post covers how to make a delicious shepherd's pie. You learned about the main ingredients, cooking steps, and tips to save time. We explored ways to change the recipe and how to store leftovers. You can enjoy this meal no matter your dietary needs or style. Remember, comfort food is all about enjoyment. Now, gather your ingredients and start cooking! Your kitchen awaits a savory experience.

Craving a warm, hearty meal that’s quick and simple? Look no further than my Weeknight Shepherd’s Pie Casserole! This dish combines savory ground beef, crisp veggies, and creamy mashed potatoes …

Read more

Categories Dinner

Low Carb Creamy Chicken Casserole Simple and Tasty

November 19, 2025March 28, 2025 by Chef Tavio
To make the Low Carb Creamy Chicken Casserole, you need the following: - 2 cups cooked chicken, shredded - 1 cup broccoli florets (fresh or frozen) - 1 cup cauliflower florets (fresh or frozen) - 1 cup cream cheese, softened to room temperature - 1/2 cup sour cream - 1 cup shredded cheddar cheese - 1/2 cup grated Parmesan cheese - 1 teaspoon garlic powder - 1 teaspoon onion powder - Salt and pepper, to taste - 1 tablespoon olive oil - 1/2 teaspoon paprika (to sprinkle on top) Each serving of this casserole has about: - Calories: 360 - Protein: 30g - Carbohydrates: 6g - Dietary Fiber: 2g - Fat: 24g This dish is rich in protein and low in carbs, making it great for many diets. When picking fresh broccoli and cauliflower, look for vibrant colors. The florets should be tight and compact. Avoid any that show yellowing or wilting. If you choose frozen veggies, ensure they are bright in color and free from ice crystals. Fresh ingredients make your casserole taste better! {{ingredient_image_2}} First, set your oven to 350°F (175°C). This heat will help the casserole cook evenly. While it warms up, gather all your ingredients. You need cooked chicken, broccoli, cauliflower, cream cheese, sour cream, cheddar cheese, Parmesan cheese, and some spices. Having everything ready makes cooking smooth and quick. Next, take a big skillet and heat one tablespoon of olive oil over medium heat. Add the broccoli and cauliflower. Cook them for about 5-7 minutes. You want them tender but still bright in color. Once they are done, take them off the heat. In a large bowl, mix together the softened cream cheese, sour cream, garlic powder, onion powder, and salt and pepper. Use a hand mixer or whisk to make it creamy. Then, gently fold in the shredded chicken along with the sautéed veggies. Make sure everything is well mixed and coated. Now, transfer the creamy mixture into a greased 9 x 13 inch casserole dish. Spread it out evenly so it cooks well. On top, sprinkle shredded cheddar cheese and grated Parmesan cheese for a cheesy finish. Add a light dusting of paprika for flavor and color. Put the casserole in your preheated oven and bake for 25-30 minutes. You want the top to be golden brown and the edges bubbling. After baking, let it cool for about 5 minutes. This helps it set up nicely. Serve hot and enjoy! For a fresh touch, you can add chopped parsley or chives on top. Pair it with crunchy greens for a great meal. To make this casserole, you need a few simple tools. Gather the following: - Large skillet - Mixing bowl - Hand mixer or whisk - 9 x 13 inch casserole dish - Measuring cups and spoons - Spatula These tools help you mix and bake your casserole easily. To get that perfect creamy texture, start with room temperature cream cheese. This makes it easier to blend. Mix in the sour cream well for added creaminess. If the mixture seems too thick, you can add a splash of chicken broth. This adds flavor and helps achieve a smooth texture. A few common mistakes can ruin your dish. Here are some tips to avoid them: - Don’t skip sautéing the vegetables. This step adds flavor and ensures they cook right. - Make sure to season your creamy mixture well. Taste as you go to get the right balance. - Don’t overcook the casserole. Bake it just until the top is golden. This keeps it moist inside. By following these tips, you'll create a delicious low carb creamy chicken casserole every time! Pro Tips Tip Title: Use Rotisserie Chicken: For a quicker prep time, consider using store-bought rotisserie chicken. It's already cooked and adds great flavor to your casserole. Tip Title: Customize Vegetables: Feel free to swap out or add your favorite low-carb vegetables like spinach, bell peppers, or zucchini to make the dish your own. Tip Title: Add Herbs: Fresh or dried herbs like thyme or oregano can enhance the flavors significantly. Sprinkle some on top before baking for an aromatic touch. Tip Title: Make Ahead: This casserole can be prepared in advance and stored in the fridge. Just bake it when you're ready to serve for a hassle-free meal. {{image_4}} You can easily change the protein in this casserole. Try using turkey instead of chicken. Ground meats like beef or pork also work well. For a vegetarian option, use tofu or tempeh. Each protein brings a unique taste and texture. Be sure to adjust cooking times for different meats. There are many vegetables you can add to this casserole. Zucchini, bell peppers, or spinach are great choices. They add color and nutrients. Just make sure to chop them small. This helps them cook evenly. Remember to sauté them lightly before mixing in. This keeps them tender and tasty. Cheese is key to this dish’s creamy goodness. You can switch up the cheese for different flavors. Try mozzarella for a stringy texture or feta for a tangy taste. Gouda or Swiss can add a nice twist too. Just ensure the cheese melts well for that creamy finish. Each option gives the casserole a new flair. Store your Low Carb Creamy Chicken Casserole in an airtight container. Let it cool down first. Keep it in the fridge for up to three days. If you want to store it longer, freezing is a great option. Just make sure to wrap it well to avoid freezer burn. When you're ready to eat, take it out of the fridge. Reheat it in the oven at 350°F (175°C) for about 20 minutes. You can also use the microwave, but heat it in short bursts. Stir it every few minutes to ensure even warming. To freeze your casserole, portion it out into smaller containers. This makes it easy to thaw only what you need. When you’re ready to enjoy it, take a container from the freezer. Let it thaw in the fridge overnight before reheating. This helps maintain the creamy texture. Yes, you can make this casserole ahead of time. Prepare it up to the baking step, then cover it well. Store it in the fridge for up to 24 hours. When ready to cook, just pop it into the oven. You may need to add a few extra minutes to the baking time. This makes it a great option for busy days! Absolutely! This casserole is perfect for meal prep. It keeps well in the fridge for up to five days. You can portion it into containers for easy grab-and-go meals. Just reheat in the microwave or oven for a quick and tasty lunch or dinner. You can pair this casserole with many sides. A fresh green salad adds a nice crunch. Steamed asparagus or green beans also work well. If you want more low-carb options, try sautéed zucchini or roasted Brussels sprouts. Each of these sides complements the creamy flavors of the casserole beautifully. This blog post explored how to make a tasty Low Carb Creamy Chicken Casserole. We discussed the key ingredients, detailed cooking steps, and shared helpful tips. You learned about variations to enhance flavor and how to store your dish properly. In closing, this recipe is simple and satisfying. It allows for creativity while keeping health in mind. Enjoy cooking and savoring each delightful bite!

Looking for a tasty dinner that’s low in carbs? You’ve found it! This Low Carb Creamy Chicken Casserole is simple to make and packed with flavor. I’ll guide you through …

Read more

Categories Dinner

Sausage French Toast Roll-Ups Easy and Tasty Treat

November 16, 2025March 28, 2025 by Chef Tavio
- 8 slices of soft white bread - 4 breakfast sausages, cooked and crumbled - 4 large eggs - 1/4 cup whole milk - 1 teaspoon pure vanilla extract - 1 teaspoon ground cinnamon - 1/4 cup granulated sugar - Butter for frying - Maple syrup for drizzling - Optional garnish: powdered sugar, seasonal fruits You need a few simple items to make Sausage French Toast Roll-Ups. Start with soft white bread. It rolls well and holds the filling nicely. Next, get some breakfast sausages. Cook them first, then crumble them. This gives the roll-ups a great flavor. You’ll also need eggs, whole milk, vanilla extract, cinnamon, and sugar. These items help create the egg mixture that coats each roll. They add sweetness and warmth. Butter is essential for frying. It gives a nice golden color to the outside of the roll-ups. Finally, don’t forget the maple syrup! It’s perfect for drizzling on top. For a fun touch, you can add powdered sugar or seasonal fruits as a garnish. These extras make your dish look pretty and taste even better! {{ingredient_image_2}} To start, you need to flatten the bread. Use a rolling pin to gently roll each slice. Aim for a thickness that makes the bread soft but not too thin. This way, it will roll easily without tearing. Next, mix your filling. In a bowl, combine the crumbled sausages with sugar and a pinch of cinnamon. This blend packs a punch of flavor. Spread a spoonful of this mix on one edge of each bread slice. Now, it's time to roll up the bread. Start from the edge with the filling and roll tightly. If your roll-ups start to come apart, use toothpicks to hold them in place. Then, prepare your egg mixture by whisking eggs, milk, vanilla, sugar, and cinnamon in a bowl. Heat a large skillet over medium heat. Add a tablespoon of butter and let it melt. Dip each roll-up, seam-side down, into the egg mix. Place them in the hot skillet. Cook for about 2-3 minutes on each side. Look for a nice golden brown color. Once cooked, take the roll-ups out of the skillet. You can sprinkle them with powdered sugar for sweetness. Serve them warm on a plate with a small dish of maple syrup for dipping. Enjoy the tasty treat! To make great roll-ups, you must avoid common mistakes. First, flatten the bread well. Use a rolling pin to make it thin and easy to roll. If the bread is too thick, it may break. Keep the rolls tight when cooking. After rolling, secure the ends with toothpicks if needed. This step helps keep your filling in place as they cook. To make the filling even tastier, season the sausage with herbs. Try adding a pinch of garlic powder or some red pepper flakes for heat. This small change can add depth to your dish. You can also switch up the bread type. Try whole wheat for a nutty flavor, or use brioche for more sweetness. Each bread type can change the taste and texture of your roll-ups. Choose the right skillet for cooking. A non-stick skillet works best to prevent sticking. It also helps achieve a nice golden brown color. Adjust the heat while cooking. Start at medium heat to brown the outside. If they cook too fast, turn the heat down. This way, the inside cooks through without burning the outside. Pro Tips Choose the Right Bread: Use soft white bread for a tender texture that complements the savory filling perfectly. Prep Ahead: Assemble the roll-ups in advance, then store them in the refrigerator until ready to cook for a quick breakfast option. Get Creative with Fillings: Experiment with different types of sausage or add ingredients like cheese, spinach, or peppers for extra flavor. Perfect the Cooking Temperature: Keep the skillet at medium heat to ensure that the roll-ups cook evenly and do not burn while achieving a golden crust. {{image_4}} You can easily change the taste of your Sausage French Toast Roll-Ups. Here are a couple of fun ideas: - Adding cheese or herbs to the sausage mix: Try mixing in shredded cheese like cheddar or mozzarella. Fresh herbs, like parsley or chives, add a nice touch too. They make the filling more rich and tasty. - Incorporating fruits like apples or berries: You can add diced apples or fresh berries to the sausage mix. This gives a sweet twist that pairs well with the savory sausage. The fruits add moisture and flavor to each bite. If you have dietary needs, there are simple ways to adjust this recipe: - Gluten-free bread options: Use gluten-free bread for those who can’t eat gluten. Many brands offer soft gluten-free options that work well in this recipe. - Vegetarian/vegan adaptations: For a vegetarian version, try using plant-based sausage. You can also use flax eggs for the egg mixture. This allows you to enjoy the roll-ups without meat or eggs. You can create delicious sweet options with your Sausage French Toast Roll-Ups: - Ideas for creating sweet variations: You can spread jam or Nutella inside before rolling. This adds sweetness and makes the roll-ups even more fun. A sprinkle of powdered sugar on top gives a lovely finish. - Combining savory and sweet elements: Try pairing the savory sausage with a drizzle of maple syrup. The blend of sweet and savory flavors makes each bite exciting. You can’t go wrong with this combination! For storing your Sausage French Toast Roll-Ups, use airtight containers. Glass or plastic containers work great. First, let the roll-ups cool down before sealing them. This helps prevent sogginess. If you have a lot left, consider freezing some. Wrap each roll-up in plastic wrap, then place them in a freezer bag. This keeps them safe from freezer burn. To bring back the crispy texture, reheat your roll-ups in the oven. Preheat your oven to 350°F (175°C). Place the roll-ups on a baking sheet for about 10-15 minutes. This method warms them up evenly. If you’re in a hurry, you can use the microwave. Heat them for about 30 seconds. However, this may make them a bit soft. In the fridge, your roll-ups last about 3-4 days. If you freeze them, they can stay good for up to 2 months. Always check for signs of spoilage. Look for any off smells, mold, or changes in texture. If you see any of these signs, it’s best to toss them out. For these roll-ups, I recommend using soft white bread. It has a nice texture and rolls easily. You can also try brioche for something richer or whole wheat for a healthier twist. Just make sure the bread is fresh. Stale bread won't roll up properly. Yes, you can prepare these roll-ups ahead of time. Roll them up and place them in the fridge for up to a day. Just make sure to cover them well to keep them fresh. When you're ready to cook, dip them in the egg mixture and fry them as normal. You can change the filling to mix things up. Try adding cheese for a melty surprise. You can also use cooked bacon or ham instead of sausage. For a veggie option, consider spinach or mushrooms. The options are endless, so get creative! These roll-ups pair great with fresh fruit like berries or bananas. You can also add a side of yogurt for extra creaminess. A drizzle of maple syrup on top adds sweetness. Serve them with a hot cup of coffee or tea for a perfect breakfast! This recipe for Sausage French Toast Roll-Ups offers delicious flavors and fun. You learned how to mix crumbled sausage, eggs, and sweet toppings into rolled bread. I shared tips to help avoid mistakes and create tasty variations. Whether you prefer sweet or savory, these roll-ups can fit your taste. Remember to store and reheat them for best results. Enjoy creating this dish to share, or savor each bite alone. Happy cooking!

Looking for a fun twist on breakfast? Try Sausage French Toast Roll-Ups! This easy treat combines soft bread, tasty sausage, and sweet cinnamon. You’ll impress your family and friends with …

Read more

Categories Breakfast

Savory Mini Chocolate Chip Muffins Easy and Tasty Treat

December 5, 2025March 28, 2025 by Chef Tavio
For my mini chocolate chip muffins, I use simple ingredients that make a big impact. Here’s what you need: - 1 cup all-purpose flour - 1/2 cup granulated sugar - 1/2 teaspoon baking powder - 1/4 teaspoon baking soda - 1/4 teaspoon salt - 1/2 cup unsalted butter, melted and cooled - 1 large egg - 1 teaspoon vanilla extract - 1/2 cup buttermilk (or milk with 1/2 tablespoon vinegar added) - 1 cup mini chocolate chips These ingredients work together to create a soft and sweet treat. The all-purpose flour provides the base, while sugar adds sweetness. Baking powder and baking soda help the muffins rise. The buttermilk keeps them moist and fluffy. To make your muffins even tastier, consider adding these optional ingredients: - A pinch of cinnamon for warmth - Chopped nuts like walnuts or pecans - A splash of almond extract for a nutty twist These extras let you personalize your muffins. A little spice or crunch can elevate the flavor. Using high-quality ingredients makes a difference in your muffins. Here are my tips: - Choose fresh baking powder and baking soda. Old ones may not rise well. - Use real vanilla extract instead of imitation for a richer flavor. - Opt for unsalted butter to control the saltiness of your muffins. These small choices lead to big flavor in your baked goods. Quality ingredients help you create the best mini chocolate chip muffins every time. {{ingredient_image_2}} First, preheat your oven to 350°F (175°C). This gets it ready for baking. Next, grab a mini muffin tin and line it with paper liners. You can also spray it with non-stick cooking spray. In a large bowl, mix the dry ingredients. Add 1 cup of all-purpose flour, 1/2 cup of granulated sugar, 1/2 teaspoon of baking powder, 1/4 teaspoon of baking soda, and 1/4 teaspoon of salt. If you want a hint of spice, add a pinch of cinnamon. Whisk these until they blend well. Now, in another bowl, combine your wet ingredients. Use 1/2 cup of melted butter (make sure it’s cooled), 1 large egg, 1 teaspoon of vanilla extract, and 1/2 cup of buttermilk. Whisk these until smooth. Pour the wet mix into the dry mix. Use a spatula to fold them together gently. Be careful! Overmixing can make your muffins tough. It’s okay if some lumps remain. Finally, gently fold in 1 cup of mini chocolate chips. Make sure they spread evenly through the batter. Now, it’s time to fill the muffin cups. Use a small cookie scoop or a spoon to fill each cup about two-thirds full. This gives them room to rise. Place the muffin tin in your preheated oven. Bake for 10 to 12 minutes. Your muffins are done when they are golden brown. To check, insert a toothpick into the center of a muffin. If it comes out clean, they’re ready! To ensure your muffins are perfect, watch for these signs: - They should be golden brown on top. - The tops should spring back when you press them lightly. - A toothpick inserted into the center should come out clean. If you see any wet batter on the toothpick, bake them for another minute or two. Remember to let the muffins cool in the tin for about five minutes before transferring them to a wire rack. Enjoy the warm, chocolatey goodness! To get fluffy mini chocolate chip muffins, use room-temperature ingredients. Cold ingredients can make your muffins dense. Whisk the dry ingredients well before adding the wet ones. This helps mix the baking powder and soda evenly. When you combine wet and dry, fold gently. Overmixing can lead to tough muffins. Avoid using melted butter that is too hot. Hot butter can cook the egg, causing clumps. Don’t skip the buttermilk; it adds moisture and flavor. Make sure to fill the muffin cups only two-thirds full. If you overfill, they will spill over while baking. Lastly, don’t forget to check your oven temperature. An oven that is too hot can burn the muffins. A good muffin tin is key for baking. Look for one with non-stick coating or use liners. A scoop helps fill the cups evenly. A whisk is essential for mixing dry ingredients well. Finally, a toothpick is great for checking if the muffins are done. Use these tools to ensure your muffins turn out perfectly every time! Pro Tips Use Room Temperature Ingredients: Ensure your egg and buttermilk are at room temperature for better emulsification, resulting in a lighter muffin texture. Don’t Overmix the Batter: Mixing just until the ingredients are combined helps to keep the muffins tender and fluffy. Experiment with Mix-Ins: Feel free to add nuts, dried fruits, or a sprinkle of sea salt on top for additional flavor and texture variations. Check for Doneness: Insert a toothpick into the center of a muffin; it should come out clean or with a few crumbs, but not wet batter. {{image_4}} You can easily change your mini chocolate chip muffins. Try adding nuts or fruits. Chopped walnuts or almonds add crunch. You can also use blueberries or raspberries for a fruity twist. Mix in a teaspoon of instant coffee for a mocha flavor. Just remember to keep the chocolate chips for that sweet touch. For gluten-free muffins, swap all-purpose flour for a gluten-free blend. Many brands work well. You can use almond milk or coconut milk instead of regular milk. This makes the muffins dairy-free too. Just be sure to check labels for hidden gluten and dairy. Change the flavor with the seasons. In fall, add pumpkin puree and spices like nutmeg and cinnamon. In spring, mix in lemon zest and poppy seeds for a fresh taste. For summer, try adding fresh berries or peach chunks. These twists keep your muffins exciting year-round! To keep your mini chocolate chip muffins fresh, store them in an airtight container. This keeps moisture in and prevents them from drying out. You can leave them at room temperature for up to three days. Place a paper towel at the bottom of the container to absorb any excess moisture. If you want to keep them longer, consider refrigeration, but this may change their texture. When you're ready to enjoy leftover muffins, reheating is easy. You can use the microwave for a quick fix. Heat them for 10-15 seconds until warm. For a better texture, use an oven. Preheat it to 350°F (175°C), then warm the muffins for about 5-7 minutes. This helps restore that fresh-baked taste. Freezing is a great way to store muffins for later. First, let them cool completely. Then, wrap each muffin tightly in plastic wrap. Place the wrapped muffins in a freezer-safe bag or container. They will stay good for about three months. When you're ready to eat them, just thaw at room temperature or reheat directly from the freezer. You can swap eggs with applesauce. Use 1/4 cup of unsweetened applesauce for each egg. This will keep the muffins moist. Another option is to use a flaxseed meal. Mix 1 tablespoon of flaxseed meal with 2.5 tablespoons of water. Let it sit for five minutes to thicken. Both options work well, giving you tasty muffins without eggs. Yes, you can use whole wheat flour. It adds fiber and nutrients. However, the muffins may be denser. To balance this, use 1 cup of whole wheat flour and add 2 tablespoons of all-purpose flour. This mix helps make the muffins lighter while keeping the health benefits of whole wheat. Homemade mini chocolate chip muffins last about three days at room temperature. Store them in an airtight container to keep them fresh. You can also freeze them for up to three months. Just thaw them in the fridge overnight for a quick snack or breakfast! In this post, we covered everything about mini chocolate chip muffins. You learned about key ingredients and tips for quality. I shared step-by-step instructions for making the batter and baking. You also found tricks for fluffy muffins and common mistakes to avoid. Plus, there are great variations for different diets. Remember how to store, reheat, and freeze your muffins for later. With this guide, you can bake tasty muffins that all will enjoy. Now, it’s time to get baking and have fun in the kitchen!

If you’re craving a sweet treat that’s both easy to make and delicious, you’re in the right place! I’ll guide you through the process of whipping up savory mini chocolate …

Read more

Categories Desserts
Older posts
Newer posts
← Previous Page1 … Page146 Page147 Page148 … Page162 Next →

TASTED NEST

Where Flavor Finds a Home 🍳🏡 — warm, simple, and crave-worthy recipes made for real life, from stovetop mornings to backyard dinners.

PAGES

Home About Contact Privacy Policy Terms & Conditions Cookie Policy GDPR Policy Copyright Policy Disclaimer

CATEGORIES

Appetizers Desserts Salads Breakfast Dinner
Copyright © 2025 Tasted Nest. All rights reserved.