Skip to content
  • GDPR Privacy Policy
  • Copyright Policy
  • Disclaimer
  • Terms & Conditions
Tasted Nest
  • Home
  • Appetizers
  • Desserts
  • Salads
  • Breakfast
  • Dinner
  • Privacy Policy
  • Contact
  • About

Chef Tavio

Creamy Cajun Chicken Pasta Delightful and Easy Meal

November 18, 2025March 2, 2025 by Chef Tavio
- 2 boneless, skinless chicken breasts - 8 oz fettuccine or penne pasta - 1 cup heavy cream - 1 cup chicken broth - 1/2 cup grated Parmesan cheese Chicken breasts are your main protein. I like to slice them into strips for quick cooking. Pasta is next; fettuccine or penne works great here. The creamy base comes from heavy cream and chicken broth. Lastly, don’t forget the Parmesan cheese for that rich, cheesy finish. - 2 tablespoons Cajun seasoning - Salt and black pepper to taste Cajun seasoning adds that bold, spicy kick. You can adjust the amount based on your taste. A pinch of salt and black pepper helps enhance the flavors. - 1 cup cherry tomatoes, halved - 1 cup fresh spinach leaves - 3 cloves garlic, finely minced Cherry tomatoes bring sweetness and color to the dish. Fresh spinach adds a nice touch of greens. Garlic is a must; it gives a wonderful aroma. Mince it finely to blend well into the sauce. {{ingredient_image_2}} How do I season the chicken? First, take the chicken breasts and slice them into strips. Place the strips in a mixing bowl. Add two tablespoons of Cajun seasoning. Toss the chicken well. Make sure every piece is coated with the spice mix. This gives the chicken a bold flavor. What is the cooking process? Next, heat a tablespoon of olive oil in a large skillet over medium heat. Once hot, add the seasoned chicken strips. Cook them for about 5 to 7 minutes. Look for a nice golden brown color. Make sure the chicken is cooked through. After cooking, transfer the chicken to a plate. Keep it warm while you prepare the pasta. How do I boil the pasta? Fill a large pot with water and add a pinch of salt. Bring the water to a rolling boil. Add 8 oz of fettuccine or penne pasta. Cook according to the package instructions until it is al dente. This usually takes around 8 to 10 minutes. What should I do after draining? Once the pasta is cooked, drain it in a colander. Remember to save some pasta water in a cup. You may need it later for the sauce. How do I sauté the garlic? In the same skillet used for the chicken, reduce the heat to low. Add three finely minced cloves of garlic. Sauté for about one minute. Watch closely so the garlic does not burn. What do I add next? Slowly pour in one cup of chicken broth. Let it come to a gentle simmer. After that, add one cup of heavy cream. Stir until the mixture is smooth and well mixed. How do I mix in the vegetables and chicken? Now, toss in one cup of halved cherry tomatoes and one cup of fresh spinach. Cook for 2 to 3 minutes. The spinach should wilt, and the tomatoes should soften. How do I adjust the sauce consistency? Return the cooked pasta and the sautéed chicken to the skillet. Toss everything together until the pasta is coated in the sauce. If the sauce seems too thick, add a little reserved pasta water. Stir until you reach the desired consistency. Finally, sprinkle in half a cup of grated Parmesan cheese. Stir until it melts into the sauce. - Seasoning adjustments: Taste your dish before serving. If it needs more kick, add more Cajun seasoning or a dash of hot sauce. Balance is key for a rich flavor. - Cooking pasta perfectly: Always use a large pot with plenty of water. This helps the pasta cook evenly. Salt the water well. It should taste like the ocean. This adds flavor to the pasta itself. - Recommended cookware: Use a large pot for boiling pasta. A spacious skillet works best for cooking the chicken and making the sauce. A good non-stick skillet can help with easy cleanup. - Gadgets to simplify the process: A quality cutting board and sharp knife make slicing chicken and veggies easy. A pasta strainer helps drain cooked pasta quickly. - Presentation ideas: Serve your creamy pasta in deep bowls. Drizzle some extra sauce on top for flair. A sprinkle of fresh parsley adds color and freshness. - Best sides to serve: Pair this dish with a simple green salad or garlic bread. A light salad helps balance the richness of the pasta. Garlic bread is perfect for soaking up any extra sauce. Pro Tips Use Fresh Ingredients: Fresh spinach and ripe cherry tomatoes will elevate the flavor of your dish significantly. Always opt for fresh produce when possible for the best results. Adjust the Spice Level: Feel free to adjust the amount of Cajun seasoning to your taste. If you prefer a milder dish, start with a smaller amount and gradually increase. Reserve Pasta Water: Keeping a cup of reserved pasta water is key! It helps to loosen the sauce and bind it to the pasta, ensuring every bite is creamy and flavorful. Garnish Wisely: Always finish your dish with a sprinkle of fresh parsley and extra Parmesan cheese. This not only enhances the visual appeal but also adds a burst of fresh flavor. {{image_4}} You can swap proteins in this recipe. Shrimp works great if you like seafood. Tofu is a good choice for a plant-based meal. Both offer a nice texture and flavor. For dairy-free options, use coconut cream instead of heavy cream. This will keep the dish creamy and rich without dairy. You can also try non-dairy cheese for a tasty finish. Want a milder dish? Use less Cajun seasoning. Start with half the amount and add more if needed. You still get some flavor without the heat. To kick up the spice, add cayenne pepper or crushed red pepper flakes. Mix them into the sauce for that extra kick. Taste as you go to find your perfect heat level. You can use different pasta shapes for this dish. Bowtie or rotini are fun options. They hold the sauce well and add variety to your meal. If you need gluten-free pasta, try rice or quinoa pasta. They cook well and pair nicely with the creamy sauce. Just follow the cooking instructions on the package for the best results. To store your creamy Cajun chicken pasta, let it cool first. Place the leftovers in an airtight container. This keeps the pasta fresh and tasty. You can keep it in the fridge for about 3 to 4 days. Always check for any signs of spoilage before eating. If it smells off or looks strange, it’s best to toss it. If you want to save your creamy Cajun chicken pasta for later, you can freeze it. First, let the dish cool completely. Then, portion it into freezer-safe bags or containers. Try to remove as much air as possible to prevent freezer burn. It can last in the freezer for about 2 to 3 months. When you’re ready to enjoy it again, thaw it in the fridge overnight. To reheat, warm it on the stove over low heat. Add a splash of chicken broth or cream to keep it creamy. Stir well to combine everything. You can also microwave it, but stir every minute for even heating. This way, your dish stays delicious and full of flavor! How to make the dish spicier? To add heat, you can use more Cajun seasoning. You could also add red pepper flakes. If you like, diced jalapeños will amp up the spice level. Start small, then taste and adjust as needed. Can I prepare it ahead of time? Yes, you can make this dish ahead. Cook the pasta and chicken, then store them separately. When ready to serve, heat them together with the sauce. This keeps flavors fresh and prevents soggy pasta. Caloric content and serving size Each serving of creamy Cajun chicken pasta has about 500 calories. This is based on four servings. Keep in mind that portion sizes can vary. Healthy modifications For a lighter meal, swap heavy cream for Greek yogurt or a light cream. You can use whole wheat pasta for more fiber. Adding more veggies can boost nutrients and flavor. Brief history of Cajun cuisine Cajun cuisine has roots in Louisiana. It blends French, Spanish, and African flavors. Cajuns were originally farmers and fishermen, using local ingredients for hearty meals. This style focuses on bold spices and rich flavors. Popularity of Cajun pasta dishes Cajun pasta has gained fame for its unique taste. It mixes classic pasta with spicy Cajun flair. Many enjoy this twist on Italian dishes for its vibrancy and comfort. It's a favorite at family dinners and gatherings. To sum up, this blog post guides you through making a tasty Cajun pasta dish. We covered the main ingredients, cooking steps, and helpful tips. You learned how to adjust flavors and make it perfect for your taste. Variations like different proteins and pasta types offer fun choices. Storing leftovers and answering common questions helps you keep this dish fresh. Enjoy making and sharing your Cajun pasta creation! It’s all about flavor and ease in the kitchen.

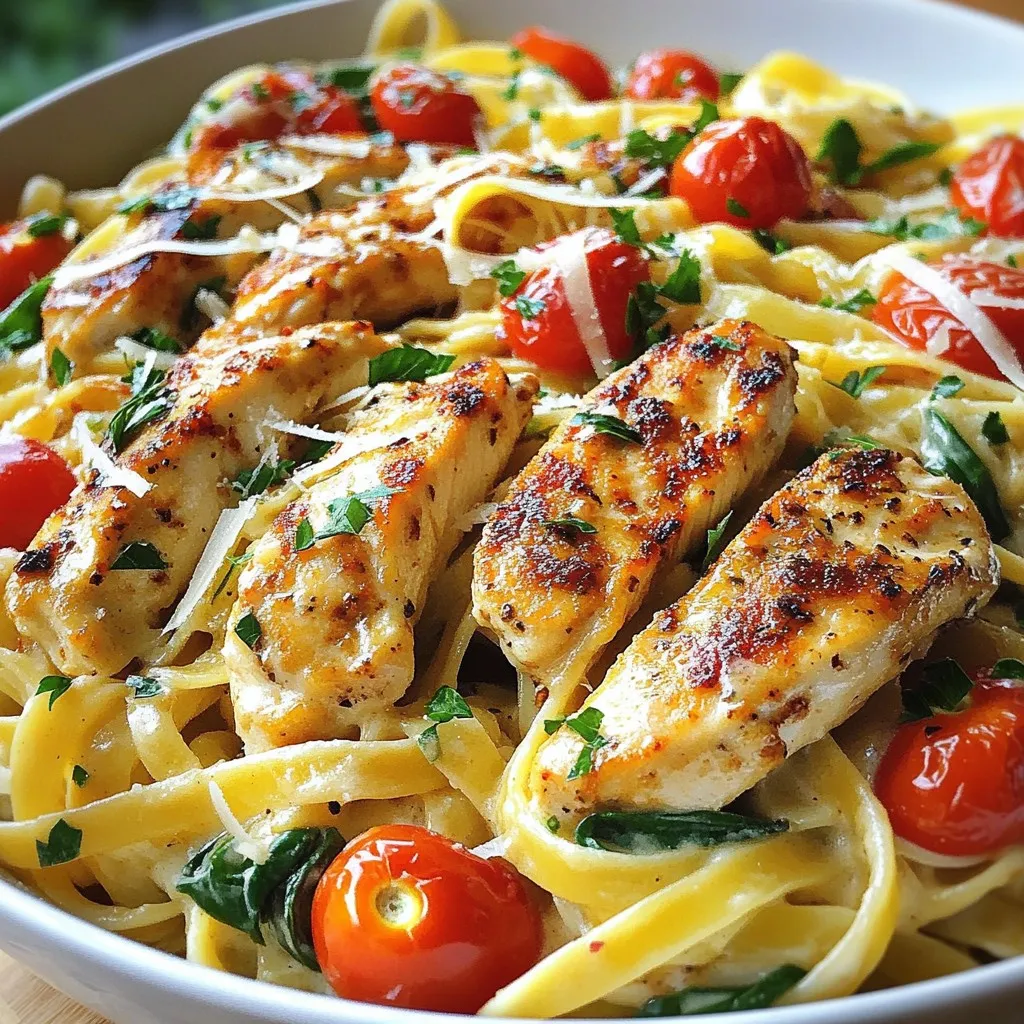
Are you ready to spice up your dinner routine? Creamy Cajun Chicken Pasta is a simple yet flavorful dish that brings the taste of the South to your kitchen. With …

Read more

Categories Dinner

French Onion Chicken Rice Bake Flavorful Comfort Meal

November 26, 2025March 1, 2025 by Chef Tavio
- 2 cups cooked rice (white or brown) - 4 boneless, skinless chicken thighs - 2 medium yellow onions, thinly sliced - 2 cups low-sodium chicken broth - 1 tablespoon olive oil - 1 teaspoon dried thyme - 1 teaspoon garlic powder - 1 teaspoon onion powder - Salt and pepper to taste For this French Onion Chicken Rice Bake, I love using either white or brown rice. Brown rice gives a nutty flavor, while white rice is soft and fluffy. Both work well! The chicken thighs are the star here. They stay juicy and tender, making every bite a delight. Season them well with salt, pepper, garlic powder, and onion powder. This ensures they soak up all the great flavors. Onions add a sweet depth to the dish. Sauté them until they turn golden and caramelized. This takes about 15-20 minutes. Use low-sodium chicken broth for a rich taste without too much salt. - 1 cup shredded Gruyère cheese - 1/2 cup crispy fried onions Gruyère cheese is my top choice for this recipe. It melts beautifully and adds a rich, creamy texture. If you can’t find Gruyère, try Swiss or mozzarella for similar results. Crispy fried onions give a fun crunch. Add them on top just before serving for a delightful texture contrast. They bring a satisfying finish to your comforting meal. - Consider using dried rosemary or parsley for extra flavor. - Adjust salt and pepper based on your taste. For added flair, you can mix in dried rosemary or parsley. These herbs brighten up the dish and enhance the overall flavor. Always taste your mix before baking. Adjust salt and pepper as needed to suit your liking. {{ingredient_image_2}} Start by preheating your oven to 375°F (190°C). This ensures the oven is hot before baking. Next, take a large skillet and pour in 1 tablespoon of olive oil. Heat it over medium heat. This will get the oil warm and ready for the onions. Add 2 medium yellow onions, thinly sliced, to the skillet. Sauté them for about 15 to 20 minutes. Stir occasionally to help them cook evenly. You want them to turn a deep golden brown color. For perfect caramelization, keep the heat steady. If the onions stick, add a little more oil or water. Take 4 boneless, skinless chicken thighs. Season them well with salt, pepper, garlic powder, and onion powder. This adds great flavor. Once your onions are caramelized, push them to the side. Add the chicken thighs to the skillet. Sear them for 3 to 4 minutes on each side. You want a nice golden crust on the chicken. In a large bowl, mix together 2 cups of cooked rice and 2 cups of low-sodium chicken broth. Then, add in the caramelized onions and chicken. Sprinkle in 1 teaspoon of dried thyme and adjust salt and pepper to taste. Stir everything well until it is mixed nicely. Pour the mixture into a greased 9x13 inch baking dish. Spread it evenly. Place the seared chicken thighs on top. Make sure they sit partially in the rice mix to soak up the flavors. Cover the dish tightly with aluminum foil. Bake it in the oven for 25 minutes. After 25 minutes, take off the foil. Sprinkle 1 cup of shredded Gruyère cheese on top of the chicken. Return the dish to the oven without the foil. Bake for another 15 to 20 minutes until the cheese is melted and bubbly. Let the dish sit for about 5 minutes once it's out of the oven. Finally, add 1/2 cup of crispy fried onions on top for a crunchy finish. To get the best rice texture, use cooked rice. I recommend white or brown rice. Both work well. Make sure the rice is fluffy and not too sticky. If you want more flavor, use chicken broth instead of water to cook your rice. Keep your chicken juicy by not overcooking it. Sear the thighs for just 3-4 minutes per side. This gives them a nice crust while keeping them moist. When baking, cover the dish with foil to trap steam. This helps keep the chicken tender. For melting Gruyère cheese, sprinkle it on top right before the final bake. This allows it to melt evenly. If you want a golden top, bake it uncovered for the last 15-20 minutes. If you can’t find Gruyère, use Swiss cheese or mozzarella. Both melt well and add a creamy texture. Cheddar is another fun option for a sharper taste. Serve the dish in shallow bowls for a nice look. This makes it easy for guests to enjoy. Garnish with fresh thyme sprigs. They add color and a hint of flavor. For extra flair, sprinkle crispy fried onions on top. They give a nice crunch and contrast to the soft chicken and rice. This simple touch makes your dish look and taste gourmet. Pro Tips Caramelizing Onions: For the best flavor, be patient while caramelizing the onions. Cook them slowly over medium heat until they are deep golden brown, which can take around 15-20 minutes. Seasoning Chicken: Don't skimp on seasoning the chicken thighs. Properly seasoning them not only enhances the flavor but also infuses the rice with deliciousness as it cooks. Using Broth: Opt for low-sodium chicken broth to control the salt levels in your dish. This allows you to adjust the seasoning to your taste without overpowering it. Cheese Choice: Gruyère cheese adds a wonderful depth of flavor. For a twist, consider mixing it with a bit of mozzarella for extra creaminess. {{image_4}} If you want to switch up the protein, there are great options. Turkey works well instead of chicken. It adds a nice, lean flavor. Tofu is a good choice for a plant-based meal. Just press and cube it before adding to the skillet. Other meats like pork or beef can also fit this dish nicely. Just adjust the cooking time to ensure they are cooked through. Rice is a wonderful base for this dish. You can use wild rice for a nutty flavor. Quinoa is another excellent choice, bringing in protein and texture. To boost the taste, cook your rice in chicken broth instead of water. Adding herbs like parsley or basil can also enhance the flavor of the rice. Experimenting with these options can make each meal unique. Adding vegetables can really elevate your French Onion Chicken Rice Bake. Mushrooms bring an earthy taste, while spinach adds a fresh touch. You can sauté them with the onions for added flavor. Cheese is key too. Gruyère is classic, but you can try mozzarella or cheddar for a different taste. Each cheese will change the dish's flavor profile, so feel free to mix it up! To keep your French Onion Chicken Rice Bake fresh, store it in an airtight container. I recommend using glass or plastic containers with tight-fitting lids. This will help prevent moisture loss and keep flavors intact. You can refrigerate the leftovers for up to four days. If you know you won’t finish it in that time, freezing is a great option. To freeze the dish, allow it to cool completely first. Then, transfer portions into freezer-safe bags or containers. Remove as much air as possible to prevent freezer burn. This meal can be frozen for up to three months. When you are ready to enjoy it again, thaw it overnight in the fridge. Reheating is simple. Just preheat your oven to 350°F (175°C) and place the dish in a baking pan. Cover it with foil to keep moisture in and heat for about 25-30 minutes. When reheating, the oven is best for keeping the dish moist. Covering with foil helps prevent drying out. If you need a quicker method, the microwave works too. Just add a splash of chicken broth to keep it juicy. Heat in short bursts, stirring in between, until it’s warmed through. Enjoy your leftovers as if they were fresh! How long does it take to cook French Onion Chicken Rice Bake? You need about 25 minutes to bake it, plus 15 to 20 minutes for the cheese to melt. What is the total time including prep and cooking? The total time is around 1 hour. This includes 20 minutes for prep and 40 minutes for cooking. Can I use brown rice instead of white? Yes, you can use brown rice. Just make sure it's cooked before mixing it in. What can I use if I don’t have Gruyère cheese? If you lack Gruyère, try mozzarella or cheddar. Both will melt well and taste great. What pairs well with French Onion Chicken Rice Bake? This dish goes well with a fresh green salad or steamed veggies. They add a nice crunch and balance. Can this dish be served as a meal prep option? Absolutely! This bake stores well in the fridge and is perfect for meal prep. Just reheat before serving. This blog post covered all you need to make a delicious French Onion Chicken Rice Bake. We discussed the main ingredients, like cooked rice, chicken, and tasty toppings. You also learned the step-by-step process to create this dish from prepping the oven to finishing touches. Remember, the right technique makes a big difference. Whether you're trying out protein substitutes or unique rice variations, feel free to get creative. With these tips, you can easily impress your family or friends. Enjoy making this flavorful meal!

Craving a dish that warms your soul and fills your belly? Look no further! My French Onion Chicken Rice Bake combines tender chicken, savory onions, and cheesy goodness all in …

Read more

Categories Dinner

Cozy Potsticker Soup Comforting and Simple Recipe

November 19, 2025March 1, 2025 by Chef Tavio
- 20 potstickers (choose chicken, vegetable, or pork) - 6 cups chicken or vegetable broth - 2 cups water - 1 tablespoon soy sauce - 1 teaspoon sesame oil - 1 tablespoon fresh ginger, minced - 2 cloves garlic, minced - 1 cup green onions, sliced (keep the green and white parts separate) - 1 cup carrots, thinly sliced - 1 cup bok choy, chopped - 1 tablespoon chili oil (optional, for heat) Potstickers form the heart of this soup. They add flavor and texture. You can choose chicken, vegetable, or pork. The broth gives a warming base. I prefer chicken broth for its rich taste. Combine it with water for the perfect mix. Next, we add aromatics. Soy sauce adds depth. Sesame oil brings a lovely nutty flavor. Fresh ginger and garlic provide warmth and zest. These ingredients balance well with the potstickers. Then, we add vegetables. Green onions give a fresh crunch. Carrots add sweetness. Bok choy brings a mild flavor and nice texture. If you like heat, chili oil is a great option. It adds a spicy kick to the cozy soup. This blend of ingredients makes a delicious, comforting meal. Each bite warms you up and fills you with joy. {{ingredient_image_2}} First, heat the sesame oil in a large pot over medium heat. When the oil is hot, add minced ginger and garlic. Sauté them for about one minute. You want the smell to be strong but be careful not to burn them. Next, pour in the chicken or vegetable broth and the water. Stir in the soy sauce. Bring this mixture to a gentle boil. This helps all the flavors blend together nicely. Once the broth is boiling, gently add the potstickers. Simmer them for five to seven minutes. You’ll know they are ready when they float to the top and are heated throughout. Now, stir in the thinly sliced carrots and the white parts of the green onions. Cook this for an additional three to four minutes. The carrots should be tender but still have a bit of crunch. Next, mix in the chopped bok choy. Let it wilt for about two minutes. After that, taste the soup. Adjust the seasoning with salt, pepper, and chili oil if you want extra spice. Finally, ladle the hot soup into deep bowls. Top each bowl with the green parts of the green onions and a sprinkle of fresh cilantro. This adds a bright touch to your cozy potsticker soup. To make your broth shine, you can adjust the flavor. You might want to add more soy sauce or a pinch of salt. This will help to enhance the savory notes. If you like some heat, consider adding chili oil. Just a little can give your soup a nice kick. Make sure your potstickers are fully cooked. They should float and be hot throughout. If you prefer them crispy, you can pan-fry them first. This adds texture to the soup. If you like them softer, just simmer them directly in the broth. Serve the soup in deep bowls. This makes it look inviting and keeps it warm. For a burst of color, add fresh cilantro. You can also sprinkle more green onion on top. A drizzle of chili oil right before serving makes it pop! Pro Tips Use Frozen Potstickers: Frozen potstickers are a convenient option and can be cooked directly in the broth without thawing, saving time while still delivering delicious results. Customize the Broth: Feel free to enhance the broth with additional seasonings such as a splash of rice vinegar or a dash of five-spice powder for an extra depth of flavor. Vegetable Variations: Experiment with different vegetables like snap peas, mushrooms, or spinach to add variety and nutrition to your soup. Make it Ahead: This soup can be made ahead of time; just keep the potstickers separate until you're ready to serve to maintain their texture. {{image_4}} You can easily switch up the protein in your potstickers. Shrimp or tofu works great. Shrimp adds a nice texture and flavor. Tofu gives a soft bite and soaks up the broth. You can also explore different fillings for vegetarian potstickers. Try mushrooms, carrots, or even cheese. Each choice brings its own taste and fun. Feel free to add more veggies to your soup. Mushrooms, snow peas, or spinach can make it even better. Each adds a unique flavor and color. You can pick vegetables based on what is fresh and in season. This keeps your soup exciting and healthy. Seasonal veggies also add a pop of color. Want more heat in your soup? Simply increase the chili oil. It gives a nice kick. Also, you can add fresh chili peppers while cooking. They offer a burst of spice and flavor. Adjust the amount to fit your taste. You can make it mild or fiery, depending on your mood. To store your Cozy Potsticker Soup, use airtight containers. Glass containers work well, as do plastic ones. Make sure the soup cools before sealing. In the fridge, this soup lasts up to three days. Always check for freshness before eating. To freeze your soup, first let it cool completely. Then, pour it into freezer-safe containers. Leave some space at the top to allow for expansion. For thawing, move the soup to the fridge overnight. Reheat on the stovetop or in the microwave. For potstickers, keep them in the broth while freezing. This helps maintain their texture. For reheating, the stovetop is best. Pour the soup into a pot and heat on low. Stir often to avoid sticking. If using a microwave, heat in short bursts. Check the soup’s temperature frequently. This helps keep the flavors bright and fresh. Making Cozy Potsticker Soup takes about 40 minutes. Here’s how it breaks down: - Prep time: 15 minutes - Cook time: 25 minutes - Total time: 40 minutes Yes, you can use frozen potstickers. They are quick and easy. Here are some tips: - Add frozen potstickers directly to the boiling broth. - Increase cooking time by 2-3 minutes. - Ensure they are heated all the way through before serving. You can serve potsticker soup with several sides. Here are some good options: - Steamed rice or jasmine rice for a filling meal. - A simple salad for a fresh crunch. - Sliced cucumbers with rice vinegar for a light side. Yes, this soup is great for meal prep! Here are some best practices: - Store the soup in airtight containers. - Keep potstickers separate if you want them crisp. - Reheat the soup on the stove or in the microwave. This potsticker soup is a warm and tasty meal. You learned about the ingredients, like potstickers and fresh veggies. I shared easy steps to make the broth and cook the potstickers. You can even switch up the protein or add more veggies! Remember to store leftovers right to keep them fresh. Try this cozy dish today; it’s fun to make and perfect for sharing. Enjoy creating your own version of this soup!

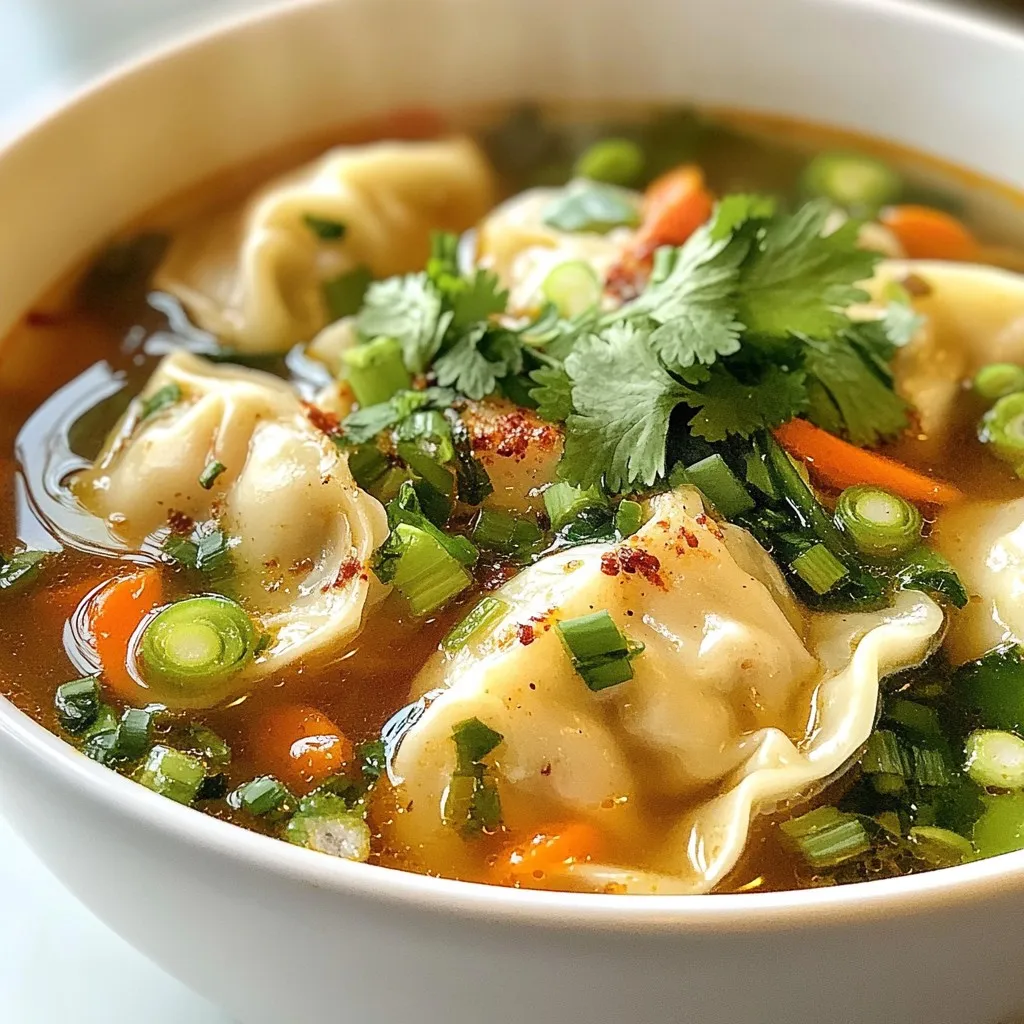
If you’re looking for a warm, easy meal that hits the spot, this Cozy Potsticker Soup is for you! With savory potstickers and a tasty broth, it’s perfect for any …

Read more

Categories Dinner

One-Pan Beef & Broccoli Stir-Fry Quick and Easy Meal

December 3, 2025March 1, 2025 by Chef Tavio
For this One-Pan Beef & Broccoli Stir-Fry, you will need: - 1 lb (450g) beef sirloin, thinly sliced against the grain - 3 cups broccoli florets, fresh or frozen - 1 red bell pepper, thinly sliced - 2 cloves garlic, finely minced - 1 inch piece of fresh ginger, finely minced - 1/4 cup soy sauce (low-sodium recommended) - 2 tablespoons oyster sauce (or additional soy sauce for a vegetarian option) - 1 tablespoon cornstarch - 1 tablespoon sesame oil for rich flavor - 2 tablespoons vegetable oil for cooking - Salt and freshly cracked black pepper to taste - 1 cup cooked rice (jasmine or brown rice work well) for serving You can easily swap some ingredients if needed. Here are a few ideas: - Use chicken or tofu instead of beef for a different flavor. - Broccoli can be replaced with green beans or snow peas. - If you don’t have oyster sauce, use more soy sauce or hoisin sauce. - You can skip sesame oil; olive oil works fine, though it won’t have the same taste. Garnishes add that final touch! Consider these options: - Sprinkle sesame seeds for a nice crunch. - Add sliced green onions for a fresh bite. - A drizzle of spicy chili oil can give it a kick. - Fresh cilantro can also brighten up the dish. Feel free to mix and match based on what you have on hand! {{ingredient_image_2}} Start by marinating the beef. Take 1 pound of beef sirloin and slice it thin against the grain. In a medium bowl, mix the beef with 1/4 cup of soy sauce, 2 tablespoons of oyster sauce, and 1 tablespoon of cornstarch. Add a pinch of black pepper. Stir well to coat the beef. Let it sit for 15 minutes. This step makes the beef tender and flavorful. Now, heat a large pan or wok over medium-high heat. Add 2 tablespoons of vegetable oil. Once the oil is hot, add the marinated beef in a single layer. Stir-fry for 3 to 4 minutes. Look for a nice brown color and ensure the beef is cooked through. After that, remove the beef from the pan and put it on a plate. In the same pan, you may need a bit more oil. Add 2 cloves of minced garlic and 1 inch of minced ginger. Sauté these for about 30 seconds. You want to smell their wonderful aroma. Be careful not to burn them, as burnt garlic can ruin the dish. Next, toss in 3 cups of broccoli florets and 1 sliced red bell pepper. Stir-fry these for about 4 to 5 minutes. You want the vegetables to be tender but still have a crisp bite. Stir occasionally to cook them evenly. Return the cooked beef to the pan with the vegetables. Drizzle 1 tablespoon of sesame oil over the mixture. Gently toss everything together. Stir-fry for another 2 to 3 minutes. This allows the flavors to blend nicely. Taste your stir-fry. Adjust the seasoning with salt and freshly cracked black pepper as needed. If you want it saucier, add a splash of water or more soy sauce. Serve hot over 1 cup of cooked rice. Optionally, garnish with sesame seeds and sliced green onions for a tasty finish. To cook beef just right, slice it thinly against the grain. This keeps it tender. Marinate the beef for at least 15 minutes. The marinade helps it soak up flavor. Use low-sodium soy sauce to control saltiness. Stir-fry in a hot pan for just 3-4 minutes. This keeps the beef juicy and flavorful. To keep broccoli and bell peppers crisp, don’t overcook them. Stir-fry them for only 4-5 minutes. You want them tender but still bright green. If using frozen broccoli, thaw it first. This way, it cooks evenly. Also, add the vegetables after the beef. This prevents them from getting soggy. Serve your beef and broccoli stir-fry over fluffy rice. Jasmine or brown rice works great. For a fresh touch, add green onions and sesame seeds on top. This adds flavor and looks nice. For a fun twist, try serving it in lettuce wraps. It’s a great way to enjoy a light meal. Pro Tips Marinating Matters: Allowing the beef to marinate for at least 15 minutes not only enhances the flavor but also tenderizes the meat, making it more succulent. High Heat is Key: Stir-frying requires high heat to quickly cook the ingredients while preserving their color and crunch. Ensure your pan is hot before adding the beef. Vegetable Variety: Feel free to mix in other vegetables like snap peas or carrots for added color and nutrition. Just adjust cooking times according to their tenderness. Perfect Rice Pairing: Use day-old rice for best texture as it holds up better in stir-frys. Freshly cooked rice can become mushy when mixed with sauces. {{image_4}} You can easily make this dish vegetarian or vegan. Replace the beef with tofu or tempeh. Both options add great texture. Use soy sauce and vegetable broth for the base. Skip the oyster sauce or swap it for more soy sauce or a vegan hoisin sauce. This change keeps the flavors bold while making it plant-based. Feel free to add more veggies to your stir-fry. Snow peas, carrots, and bell peppers work well. You can also try mushrooms for an earthy taste. Each veggie adds color and nutrition. Just ensure they are cut into similar sizes for even cooking. Switching up the sauce can change the whole dish. Try adding hoisin sauce for sweetness or sriracha for heat. You can also mix in a bit of teriyaki sauce for a sweeter flavor. Adjust the sauce to your taste. This flexibility keeps the meal exciting and fresh every time you cook it. After you enjoy your One-Pan Beef & Broccoli Stir-Fry, store any leftovers in an airtight container. Make sure the stir-fry has cooled down first. Place it in the fridge. Your leftovers will stay fresh for up to three days. If you want to keep it longer, consider freezing it. To reheat, use a skillet over medium heat. Add a splash of water or soy sauce to keep it moist. Stir until heated through, usually about 5 minutes. You can also use a microwave. Heat in a microwave-safe bowl for about 1-2 minutes. Stir halfway to ensure even heating. If you plan to freeze your stir-fry, use a freezer-safe container. It’s best to freeze it without rice. This keeps the rice from becoming mushy. Your stir-fry can last up to three months in the freezer. When you’re ready to eat, thaw it overnight in the fridge before reheating. This keeps flavors intact. Yes, you can! Chicken, pork, or tofu work well in this dish. Simply slice them thinly, just like the beef. Each option brings its own flavor. Chicken tends to be milder and cooks quickly. Pork adds a bit more sweetness. Tofu is great for a vegetarian twist. Just make sure to adjust the cooking time based on the meat you choose. This stir-fry pairs nicely with rice. Jasmine or brown rice are great choices. You can also serve it with noodles for a change. If you want a side, try spring rolls or a simple salad. Each option adds a nice touch to your meal. To add heat, use red pepper flakes or chili sauce. You can also add sliced fresh chilies while cooking. Start with a small amount and taste as you go. This way, you can find the perfect level of spice for you! This blog post covered how to make a tasty beef and broccoli stir-fry. You learned about key ingredients, common swaps, and garnishes to enhance your dish. I provided step-by-step instructions to make cooking easy. We explored tips for perfect beef and crisp veggies, plus fun options to change it up. You also got storage tips for leftovers. When you're ready, try these recipes and share them. Cook smart and enjoy tasty meals with friends and family!

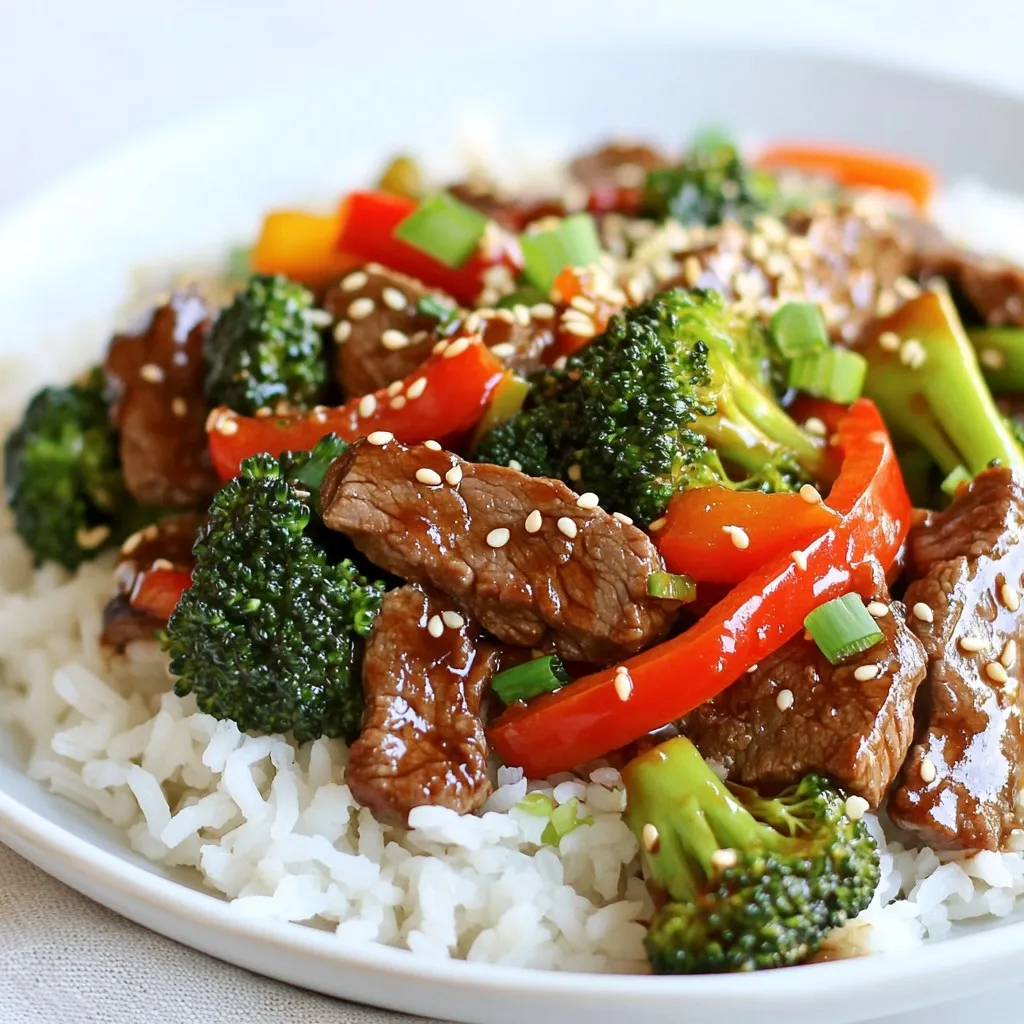
Looking for a quick and easy meal? This One-Pan Beef & Broccoli Stir-Fry is your answer! In just one pan, you’ll transform simple ingredients into a tasty dish that’s perfect …

Read more

Categories Dinner

White Chicken Chili Hearty and Flavorful Recipe

November 28, 2025February 28, 2025 by Chef Tavio
- 2 cups cooked chicken, shredded - 1 can (15 oz) white beans (cannellini or great northern) - 1 cup corn (fresh, frozen, or canned) - 1 medium onion, finely diced - 2 cloves garlic, minced - 1 green bell pepper, finely diced - 2 cups low-sodium chicken broth - 1 teaspoon ground cumin - 1 teaspoon chili powder - ½ teaspoon paprika - ½ teaspoon cayenne pepper (adjust based on your heat preference) - ¼ cup fresh cilantro, chopped (plus more for garnish) - Salt and freshly ground black pepper to taste - 1 tablespoon olive oil - Optional toppings: sour cream, shredded cheese, sliced jalapeños, or diced avocado White chicken chili is hearty and filling. The main ingredients create a creamy and rich blend. I use cooked chicken to save time. Shredded chicken works well and adds flavor. White beans give a creamy texture and add protein. Corn adds a sweet crunch, balancing the spice. Onions and garlic bring a warm base. Diced bell pepper adds color and sweetness. The low-sodium chicken broth provides a rich flavor without too much salt. Seasoning is key. Cumin and chili powder give depth. Paprika adds a smoky note, while cayenne brings heat. Adjust cayenne to your liking. Fresh cilantro brightens the dish. You can add toppings like sour cream, cheese, jalapeños, or avocado. These toppings add extra flavor and texture. Gather these ingredients, and you will have a great start to making white chicken chili. {{ingredient_image_2}} 1. Start by heating the olive oil in a large pot over medium heat. 2. Once hot, add the finely diced onion. Sauté it for about 5 minutes. The onion should turn translucent and fragrant. 3. Next, add the minced garlic and diced green bell pepper to the pot. Sauté this mix for 2-3 minutes. The peppers should become tender. 1. Gently stir in the shredded chicken, rinsed white beans, and corn. 2. Pour in the low-sodium chicken broth. Add ground cumin, chili powder, paprika, and cayenne pepper. Start with half the cayenne for less heat. 3. Toss in the chopped cilantro, but save a bit for later. Mix everything until it is well combined. 1. Bring the chili mixture to a gentle simmer. Then, reduce the heat to low. 2. Let the chili cook uncovered for about 20-25 minutes. Stir it occasionally to prevent sticking. This helps meld the flavors. 3. After cooking, taste the chili. Season with salt and freshly ground black pepper. If you want more heat, add more cayenne pepper. 4. Serve hot, garnished with the reserved cilantro. You can also add optional toppings like sour cream, shredded cheese, jalapeños, or diced avocado. For white chicken chili, I recommend using cannellini or great northern beans. These beans are creamy and hold their shape well. For chicken, shredded cooked chicken works best. You can use rotisserie chicken for ease. Fresh corn adds sweetness, but frozen corn is a great time-saver too. Just make sure to thaw it before use. To spice things up, adjust the cayenne pepper to your liking. If you prefer a milder chili, use less. If you want more heat, add more as it cooks. For a thicker chili, try mashing some beans with a fork. You can also add a cornstarch slurry or reduce the liquid by cooking it longer. I love serving this chili with warm bread or fluffy rice on the side. It makes the meal heartier. For toppings, get creative! Sour cream adds creaminess, while shredded cheese brings flavor. Sliced jalapeños give a nice kick, and diced avocado adds a rich texture. Each topping changes the dish and makes it special. Pro Tips Enhance the Flavor: Consider adding a splash of lime juice before serving for a bright, zesty finish. Meal Prep Friendly: This chili stores well! Make a double batch and freeze leftovers for an easy meal later. Customize Your Heat: Adjust the cayenne pepper to your spice preference, or add fresh jalapeños for extra heat. Garnish Wisely: Use a variety of toppings like avocado and cheese to give each bowl a personal touch and texture. {{image_4}} You can make your white chicken chili lighter by using low-fat chicken. Ground turkey works well too. These swaps cut fat but keep the taste. For beans, consider using lentils or chickpeas. They offer good protein and flavor. If you want a meatless chili, use plant-based proteins. Tofu or tempeh can replace chicken. You can also use more beans for protein. For toppings, try dairy-free sour cream or avocado. You still get creaminess without dairy. Adding more herbs and spices can change your chili’s flavor. Try oregano or thyme for a fresh twist. For a Southwest vibe, add chipotle powder or smoked paprika. If you want a Mexican touch, use fresh lime or jalapeños. These changes can make your chili exciting and new! To keep your white chicken chili fresh, follow these tips: - Refrigeration: Place cooled chili in an airtight container. Store it in the fridge. It should stay good for up to 4 days. - Freezing: For longer storage, freeze the chili. Use freezer-safe bags or containers. Leave space for expansion. It can last for up to 3 months in the freezer. You can reheat your chili in two main ways: - Microwave: Pour the chili into a bowl. Cover it with a microwave-safe lid or wrap. Heat in short bursts, stirring between. This helps it heat evenly. - Stovetop: Pour the chili into a pot. Heat on low. Stir often to prevent sticking. This method keeps the texture nice and smooth. The shelf life of your chili is important: - In the fridge: It lasts about 4 days if stored properly. - In the freezer: It remains safe to eat for up to 3 months. After that, it may lose flavor and texture. White chicken chili is a creamy soup made with chicken and white beans. It differs from traditional chili, which often uses beef and red beans. This dish brings a lighter taste with a mix of spices. You can also add corn for extra sweetness and texture. The base usually includes chicken broth, making it hearty but not too heavy. Yes, you can use rotisserie chicken! It saves time and adds great flavor. The pros include convenience and moist meat. However, the downside is that it may have extra salt. If you choose rotisserie chicken, reduce added salt in your recipe. Shred the chicken and mix it in at the same stage. The spice level can vary. You can adjust the heat to your liking. If you prefer mild chili, use less cayenne pepper. Start with half a teaspoon and taste as you go. You can always add more if you want it spicier. Toppings like sliced jalapeños can also add heat. Yes, white chicken chili can be gluten-free. Use gluten-free chicken broth to ensure it fits your dietary needs. Check the labels on canned beans and corn to confirm they are gluten-free. This dish can be a great option for those with gluten intolerance. Enjoy it without worry! This blog post covered how to make a tasty white chicken chili. We looked at the key ingredients and how to prepare them. You learned tips for choosing the best items and improving flavor. We even explored healthier swaps and vegan options. In the end, this chili is not just a meal; it's a chance to be creative in the kitchen. Enjoy your cooking!

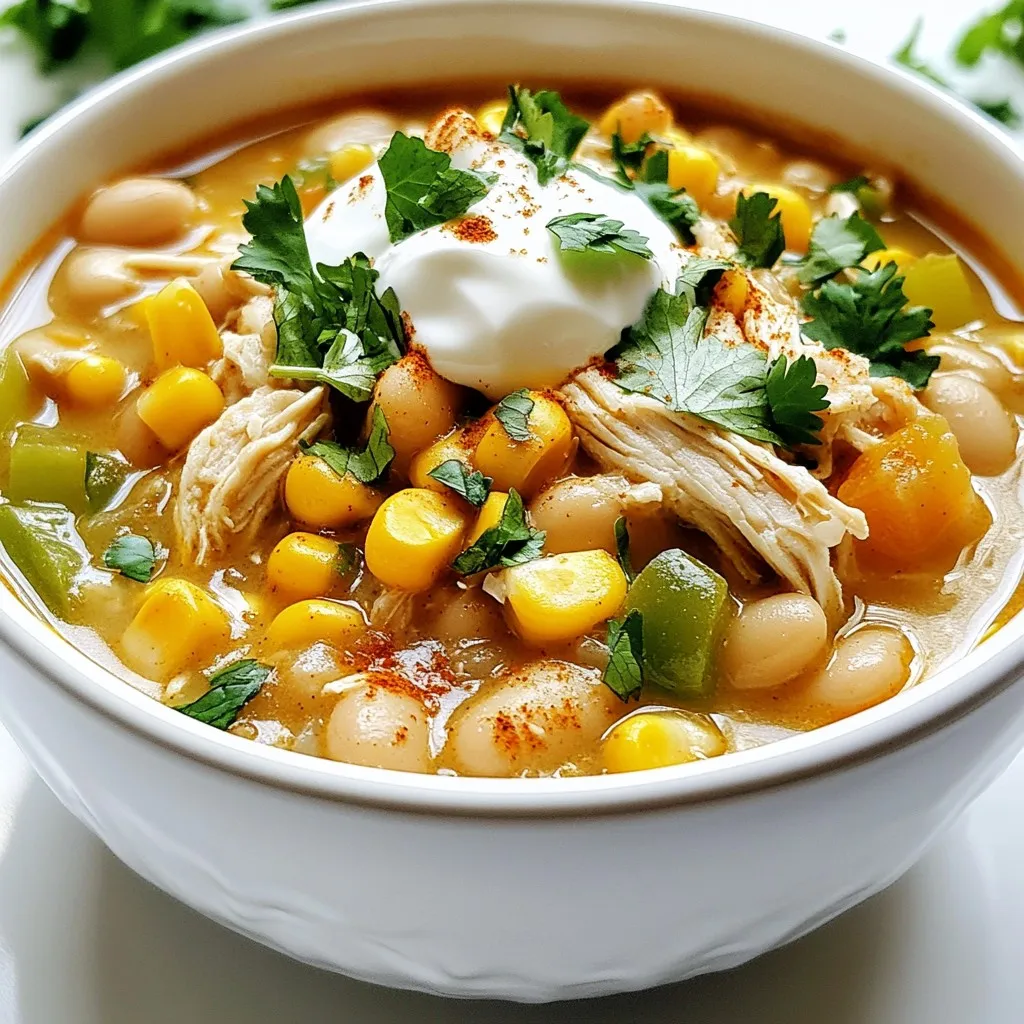
Are you ready for a bowl of comfort? My White Chicken Chili recipe blends tender chicken, creamy beans, and sweet corn into a hearty dish you’ll crave. Simple to make …

Read more

Categories Dinner

Garlic Steak Bites with Potatoes Easy Dinner Recipe

November 23, 2025February 27, 2025 by Chef Tavio
- 1 lb steak (sirloin or ribeye), cut into bite-sized cubes - 4 cloves garlic, minced - 1 lb baby potatoes, halved - 2 tablespoons olive oil, divided - Smoked paprika, salt, and pepper to taste - Fresh parsley, rosemary, dried oregano - Zest of 1 lemon To make these garlic steak bites with potatoes, you need fresh, quality ingredients. The steak is the star of the dish. I prefer sirloin or ribeye for their flavor and tenderness. Cut it into bite-sized cubes. This makes cooking fast and easy. Next, garlic adds a wonderful taste. Use fresh garlic, as it packs a powerful punch. You’ll want to mince four cloves for this dish. Now, let's talk about the baby potatoes. They are small, creamy, and perfect for roasting. Halve them so they cook evenly. This adds a nice texture to the meal. For seasoning, we use olive oil, smoked paprika, and a mix of herbs. Olive oil helps everything cook nicely. Smoked paprika gives a rich flavor and a slight smokiness. Don’t forget salt and pepper to taste. Herbs like fresh parsley and rosemary add brightness. Dried oregano gives depth. Finally, the zest of one lemon brings a burst of freshness. This combination of ingredients creates a simple yet tasty dinner. {{ingredient_image_2}} - Preheat the oven to 425°F (220°C). - In a bowl, add halved baby potatoes. Pour in 1 tablespoon of olive oil. - Add salt, pepper, chopped rosemary, dried oregano, and lemon zest. - Toss the potatoes well until they are fully coated with the oil and seasonings. - Transfer the seasoned potatoes onto a baking sheet in a single layer. - Place the baking sheet in the preheated oven. Roast for 20-25 minutes. - Shake the pan halfway through cooking. This helps the potatoes brown evenly. - While the potatoes roast, heat 1 tablespoon of olive oil in a skillet over medium-high heat. - Add the minced garlic and sauté for about 1 minute. You want it fragrant and slightly golden. - Add the seasoned steak cubes to the skillet. Cook for about 3-4 minutes. Stir occasionally. - Look for a nice brown crust on the outside while keeping the inside tender. - Once the steak bites are cooked, remove the skillet from heat. - When the potatoes are golden and crispy, take them out of the oven. - To serve, arrange the garlic steak bites on a platter. - Place the crispy herb potatoes beside the steak. Garnish with finely chopped parsley for color. - To get the best flavor, make sure your steak bites are in one layer in the pan. This helps them cook evenly. - Use a meat thermometer to check doneness. Aim for 130°F for medium-rare and 140°F for medium. This will keep your steak juicy. - Garnish your dish with finely chopped parsley. This adds color and freshness. - Add lemon wedges on the side. They give a nice burst of flavor when squeezed over the steak. - Serve your garlic steak bites on a wooden board. This adds an elegant touch to your meal. - Layer the potatoes and steak bites for a colorful display. Use bright greens and golden potatoes to make it pop. Pro Tips Choose the Right Cut: For tender steak bites, opt for cuts like sirloin or ribeye, which are both flavorful and tender when cooked quickly. Don’t Overcrowd the Pan: When cooking the steak, make sure not to overcrowd the skillet. This allows for better searing and prevents steaming. Let the Steak Rest: After cooking, let the steak bites rest for a few minutes before serving. This allows the juices to redistribute, resulting in a juicier bite. Variations in Herbs: Feel free to experiment with different herbs like thyme or basil to customize the flavor of your crispy potatoes. {{image_4}} You can use other cuts of steak for this recipe. Flank steak is a great choice. It has a rich flavor and cooks quickly. Tenderloin is another option. This cut is very tender and buttery. Both cuts will give you tasty garlic steak bites. Feel free to play with your seasonings. You can use different spices to change the flavor. Try adding cumin or thyme for a twist. If you like heat, sprinkle in some red pepper flakes. You can also drizzle hot sauce over the finished dish for an extra kick. If you want a different taste, switch the potatoes. Sweet potatoes add a nice sweetness. They also bring a vibrant color to the plate. Other root vegetables like carrots or parsnips can work too. Just cut them into similar sizes for even cooking. To keep your garlic steak bites and potatoes fresh, store them in an airtight container in the fridge. This helps to seal in flavors and prevent spoilage. Enjoy your leftovers within three days for the best taste and quality. When you’re ready to enjoy your leftovers, reheat them in the oven or a skillet. This method helps to keep the potatoes crispy and the steak juicy. Avoid using the microwave, as it can make the potatoes soggy and the steak tough. Aim for medium heat and stir occasionally for even warming. Yes, you can use frozen steak, but it’s not ideal. Thawing the steak first is key. When you cook frozen steak, it may not sear well. This affects the flavor and texture. Thaw overnight in the fridge for best results. Once thawed, you can season and cook as normal. I recommend using sirloin or ribeye for this dish. Sirloin is lean and flavorful. Ribeye has more fat, which adds juiciness. Both cuts cook quickly and taste great with garlic. You can also try flank steak for a budget-friendly option. Each cut gives a different taste and texture. To get crispy potatoes, start with small, even pieces. Halve baby potatoes and coat them well with olive oil. Add salt, pepper, and herbs for flavor. Roast at 425°F (220°C) for 20-25 minutes. Shake the pan halfway through to help them brown evenly. This will give you that perfect crispy bite. Yes, you can prepare steak bites in advance. Cook them and let them cool. Store in an airtight container in the fridge for up to three days. When ready to eat, reheat them in a skillet. This keeps them tender and helps maintain the flavor. This blog post shared a simple way to prepare garlic steak bites with crispy potatoes. We covered the main ingredients, easy steps, and helpful tips. Don’t forget to experiment with different steak cuts and seasonings. Presentation matters too, so try serving it on a wooden board. Lastly, store leftovers correctly to keep them tasty. Enjoy making this dish, and remember, cooking is all about creativity. Your kitchen is a place for delicious fun!

Looking for a quick and tasty dinner idea? You’ll love my Garlic Steak Bites with Potatoes! This easy recipe combines tender steak cubes with crispy, seasoned potatoes. In under 30 …

Read more

Categories Dinner

Cheesy Sausage Potato Soup Comforting and Hearty Meal

November 14, 2025February 27, 2025 by Chef Tavio
Here’s everything you need to make Cheesy Sausage Potato Soup. This list makes it easy to gather all items before you start cooking. - 1 pound Italian sausage, casing removed - 4 medium potatoes, diced into bite-sized pieces - 1 medium onion, finely chopped - 2 cloves garlic, minced - 4 cups chicken broth (preferably low-sodium) - 1 cup heavy cream - 2 cups shredded sharp cheddar cheese - 1 teaspoon dried thyme - 1 teaspoon smoked paprika - Salt and freshly ground black pepper to taste - 2 tablespoons extra virgin olive oil - 2 green onions, thinly sliced (for garnish) Each ingredient plays a key role. The Italian sausage gives rich flavor. Potatoes add heartiness and texture. Onion and garlic bring depth. Chicken broth forms the soup base. Heavy cream and cheddar make it creamy and cheesy. Seasonings like thyme and paprika add warmth and spice. Olive oil helps sauté, while green onions add a fresh touch on top. With this list, you're ready to create a comforting bowl of soup! {{ingredient_image_2}} 1. Start by heating the olive oil in a large pot over medium heat. Wait until it shimmers. 2. Now, add the chopped onion and minced garlic. Sauté them for 3-4 minutes. You want the onion to be soft and fragrant. 3. Increase the heat a bit and add the Italian sausage. Use a wooden spoon to break it into smaller pieces. Cook for 6-8 minutes until it is deep brown and fully cooked. 4. Next, mix in the diced potatoes, dried thyme, and smoked paprika. Add a good pinch of salt and pepper. Stir well so the potatoes get coated. 1. Carefully pour in the chicken broth and bring the soup to a rolling boil. 2. Once it boils, reduce the heat to low. Let it simmer for 15-20 minutes. This is when the potatoes become soft enough to pierce with a fork. 1. When the potatoes are tender, stir in the heavy cream and shredded cheddar cheese. Keep stirring until the cheese melts into a creamy soup. 2. Taste the soup and adjust the seasoning with more salt and pepper if needed. - Alternative sausage options: If you prefer a milder flavor, use chicken sausage. For a spicy kick, try chorizo. Both options work well in this soup. - Dairy-free substitutes for cream and cheese: You can swap heavy cream for coconut milk for a rich taste. Nutritional yeast can replace cheese for a cheesy flavor without dairy. - Ensuring sausage is well-cooked: Cook the sausage until it is deep brown. Use a wooden spoon to break it apart, ensuring it cooks evenly. This adds great flavor to the soup. - Tips for achieving creamy consistency: Stir in the cream and cheese slowly. This way, they melt evenly, making the soup rich and smooth. If it seems too thick, add a splash of broth. - Garnishing with green onions: Slicing green onions adds color and freshness. Sprinkle them on top right before serving for a bright finish. - Best serving suggestions with sides: Serve this soup in sturdy bowls. Pair it with crusty bread or warm rolls. They help soak up the creamy goodness and make the meal more filling. Pro Tips Use Fresh Ingredients: Fresh potatoes and quality sausage will elevate your soup’s flavor significantly. Opt for locally sourced ingredients when possible. Adjust the Thickness: If you prefer a thicker soup, mash some of the potatoes against the side of the pot before adding the cream and cheese. Cheese Choices: Feel free to experiment with different types of cheese. Gruyère or Monterey Jack can add unique flavors to your soup. Make Ahead: This soup can be made ahead of time and stored in the refrigerator. The flavors will deepen as it sits, making it even more delicious the next day! {{image_4}} You can make Cheesy Sausage Potato Soup even better by adding fresh veggies. Good choices are: - Carrots, diced small - Spinach or kale, chopped - Corn, frozen or fresh - Bell peppers, diced Each veggie adds flavor and texture. They also boost the soup’s nutrition. For spices, try these to enhance the taste: - A pinch of cayenne for heat - A dash of oregano for warmth - Fresh herbs like parsley or basil for brightness These spices give your soup a unique twist. Mixing in these options keeps your meal exciting. If you need gluten-free options, make sure to use gluten-free sausage. Check the broth too. Many brands are gluten-free. For a low-fat version, swap heavy cream for: - Reduced-fat milk - Unsweetened almond milk - Half-and-half You can also use less cheese. This still keeps the soup creamy, just lighter. These changes make it fit your needs without losing flavor. After you enjoy your Cheesy Sausage Potato Soup, store any leftovers in an airtight container. This keeps the soup fresh for up to four days in the fridge. When reheating, use a pot on medium heat. Stir often to warm it evenly. You can also microwave it, but cover the bowl to prevent splatters. Heat it until hot, then enjoy it again! If you want to save the soup for later, freezing is a great option. Let the soup cool completely before you freeze it. Use freezer-safe containers or bags, leaving some space at the top for expansion. The soup lasts up to three months in the freezer. To defrost, move it to the fridge overnight. You can also use the microwave for quick thawing. After thawing, reheat as mentioned before for best results. You can add some heat by using spicy sausage. You can also mix in red pepper flakes or diced jalapeños. If you want more heat, add a dash of hot sauce while cooking. Adjust the spice level to suit your taste. Yes, Yukon Gold potatoes work well in this soup. They have a creamy texture and cook nicely. Their flavor blends well with the sausage and cheese. Feel free to use them instead of regular potatoes. This soup pairs well with crusty bread or warm dinner rolls. You can also serve it with a light salad for balance. A sprinkle of fresh herbs on top adds a nice touch too. These sides make your meal more filling. If your soup is too thin, you can mash some of the potatoes. This will make the soup thicker without changing the flavor. You can also add a bit more cheese or cream for extra thickness. Just stir it in until you reach the desired consistency. This blog post covered how to make a hearty Cheesy Sausage Potato Soup. We looked at the ingredients, step-by-step cooking instructions, tips for success, variations to try, and storage methods. Now, you have all the tools to create this delicious dish. Remember, you can change ingredients to suit your taste. Enjoy making this recipe and sharing it with others. It’s a comforting meal for any time of year. Happy cooking!

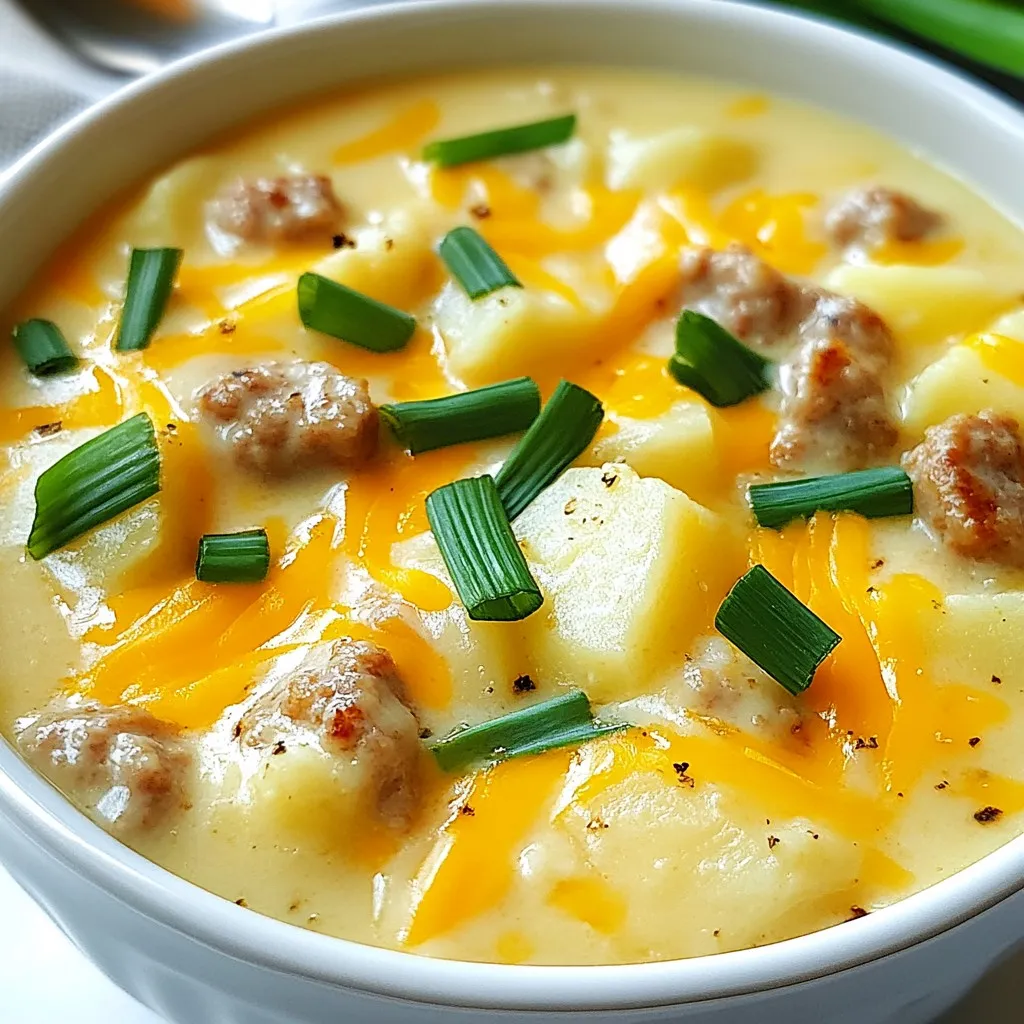
If you’re craving a warm, comforting meal, look no further than Cheesy Sausage Potato Soup! With rich flavors of Italian sausage and creamy cheddar cheese, this hearty dish warms you …

Read more

Categories Dinner

Tater Tot Pizza Casserole Delightful Family Dinner

November 23, 2025February 25, 2025 by Chef Tavio
To make Tater Tot Pizza Casserole, you need a few main ingredients. Each one adds a special touch to the dish. Here’s what you’ll need: - 1 lb ground beef or turkey - 1 small onion, finely chopped - 2 cloves garlic, minced - 1 can (15 oz) pizza sauce - 1 teaspoon Italian seasoning - 1 cup sliced pepperoni - 2 cups shredded mozzarella cheese - 1 bag (about 32 oz) frozen tater tots - 1/2 cup grated Parmesan cheese - Salt and pepper to taste - Fresh basil leaves for garnish (optional) These ingredients come together to create a rich and tasty casserole. The ground meat gives a hearty base, while the pizza sauce adds flavor. The pepperoni and cheese create that classic pizza taste. Tater tots on top provide a crispy finish that everyone loves. You can add fresh basil at the end for a pop of color and flavor. This recipe is simple but packed with deliciousness. {{ingredient_image_2}} 1. Preheat your oven to 425°F (220°C). This helps cook the casserole evenly. 2. Chop one small onion finely. This will add flavor to the meat mixture. 3. Mince two cloves of garlic. Garlic gives a nice aroma and taste to the dish. 1. In a large skillet, cook one pound of ground beef or turkey over medium heat. Brown the meat for about 6-8 minutes. Make sure it is no longer pink. 2. Drain any excess fat from the skillet to keep your dish lean and healthy. 3. Add the chopped onion and minced garlic to the skillet. Sauté this mixture for about 3-4 minutes until the onion turns soft and clear. 4. Pour in one can of pizza sauce and add one teaspoon of Italian seasoning. Season with salt and pepper to taste. Let it simmer for 5 minutes. This helps all the flavors mix well. 1. Lightly grease a 9x13 inch baking dish. This keeps the casserole from sticking. 2. Spread the meat and sauce mixture evenly in the baking dish. This forms a tasty bottom layer. 3. Layer sliced pepperoni over the meat mixture. Make sure it is spread out evenly. 4. Sprinkle one cup of shredded mozzarella cheese on top of the pepperoni. This cheese melts and adds creaminess. 5. Carefully arrange frozen tater tots in a single layer over the cheese. It’s okay if they overlap a little. 6. Add the remaining mozzarella cheese evenly on top of the tater tots. This ensures a cheesy topping. 7. Finish with half a cup of grated Parmesan cheese for extra flavor. 1. Place the casserole in the preheated oven. Bake for 25-30 minutes. 2. Keep an eye on it. Look for the tater tots to turn a golden brown color. 3. The cheese should be bubbly and delicious. This means it’s ready to eat! 4. After baking, let the casserole cool for about 5 minutes. This helps it firm up for slicing. 5. If you like, garnish with fresh basil leaves for a pop of color and flavor. - Always cook the meat until it is fully brown. This makes sure it's safe to eat. - After browning the meat, drain the fat. This helps keep your dish leaner and tastier. - For even cooking, layer the ingredients well. Start with the meat, then cheese, and finish with tater tots. - To get crispy tater tots, spread them in a single layer. If they overlap, don’t worry; they will still turn out tasty. - Serve the casserole with fresh basil on top. This adds a nice color and flavor. - Pair it with a side salad. This gives a refreshing touch and balances the meal. Pro Tips Use Lean Meat: Opt for lean ground beef or turkey to reduce excess fat and calories while keeping the dish flavorful. Fresh Garlic is Key: Always use fresh minced garlic instead of pre-packaged to enhance the aromatic flavors of the casserole. Customize Your Toppings: Feel free to add other favorite pizza toppings like mushrooms, bell peppers, or olives for a personalized touch. Let it Rest: Allow the casserole to cool for a few minutes before slicing to ensure cleaner cuts and better presentation. {{image_4}} If you want to switch up the meat, use ground turkey. It’s lean and tasty. You can also try ground chicken for a lighter option. For those who prefer a meatless meal, use a mix of beans and lentils. They add protein and flavor without meat. To add more flavor, consider adding chopped bell peppers or mushrooms. These veggies bring color and taste. You can also use different cheeses. Try cheddar for a sharper flavor or a blend of cheeses for extra creaminess. For a gluten-free dish, look for gluten-free tater tots. They are just as crispy and delicious. If you are on a low-carb diet, use cauliflower tots instead. They offer a great base and lower the carbs in your meal. To keep your Tater Tot Pizza Casserole fresh, store leftovers in an airtight container. Place it in the fridge within two hours of baking. This helps to prevent bacteria growth. Use a shallow dish for quick cooling. Make sure to cover it tightly to avoid drying out. You can easily freeze Tater Tot Pizza Casserole. First, let it cool completely. Cut it into portions for easier thawing later. Wrap each piece in plastic wrap, then place them in a freezer bag. Squeeze out as much air as you can before sealing. For best taste, eat within three months. When you're ready to eat, thaw the casserole overnight in the fridge. To reheat, place it in the oven at 350°F (175°C) for about 20-25 minutes. Cover with foil to keep it moist. Check that it's hot all the way through before serving. In the fridge, leftovers last about 3-4 days. Make sure to eat them during this time for the best flavor and safety. If you freeze it, aim to enjoy it within three months. While it may last longer, quality may decline after that. Always check for any signs of spoilage, like off smells or changes in texture. To make Tater Tot Pizza Casserole vegetarian, swap the meat for veggies. You can use mushrooms, bell peppers, or spinach. Add a can of drained black beans for extra protein. This mix keeps the dish hearty and tasty. Follow the same steps as the meat version. Just sauté the veggies until soft before adding them to the sauce. Yes, you can use different types of meat. Ground turkey works well if you want a leaner option. You might also try ground chicken or sausage for a different flavor. Just cook the meat until no longer pink. Then, follow the steps in the recipe. Feel free to mix in different spices to match your taste. Tater Tot Pizza Casserole pairs nicely with a side salad. A simple green salad adds freshness to the meal. You can also serve garlic bread or breadsticks for extra fun. For drinks, try soda or lemonade. Both add a nice touch to this casual dinner. Tater Tot Pizza Casserole takes about 25 to 30 minutes to bake. You want the tater tots to be golden brown and crispy. Check the cheese, too. It should be bubbly and melted. After baking, let it cool for about 5 minutes. This makes it easier to slice and serve. This blog post shared a simple and fun recipe for Tater Tot Pizza Casserole. We covered the key ingredients, how to prep and cook, and tips for perfecting your dish. Vary the recipe with substitutions or enhance flavors to suit your taste. Storing leftovers is easy, and you can freeze extra servings for later. Enjoy your delicious casserole and impress your friends and family with this treat. Cooking can be simple and satisfying!

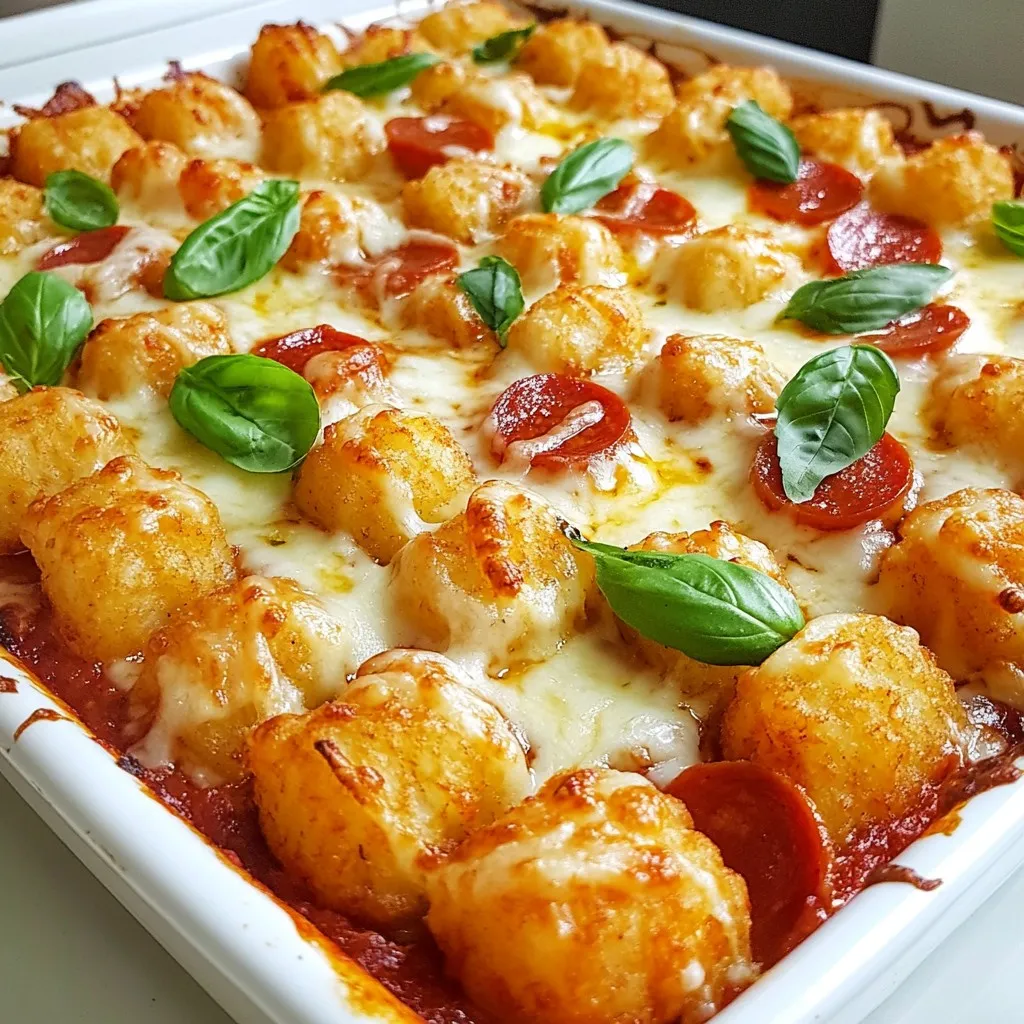
Looking for a fun and tasty family dinner? Tater Tot Pizza Casserole is your answer! Packed with savory ground meat, zesty pizza sauce, and crispy tater tots, this dish is …

Read more

Categories Dinner

One-Minute Microwave Brownie Simple and Tasty Treat

December 10, 2025February 24, 2025 by Chef Tavio
To make a one-minute microwave brownie, you need just a few simple ingredients. Here’s what you will need: - 4 tablespoons all-purpose flour - 4 tablespoons granulated sugar - 2 tablespoons unsweetened cocoa powder - 1/8 teaspoon fine salt - 3 tablespoons milk - 2 tablespoons vegetable oil - 1/4 teaspoon pure vanilla extract - Optional: 2 tablespoons chocolate chips or chopped nuts Each ingredient plays a key role. The flour gives the brownie its structure. Sugar adds sweetness, while cocoa powder brings rich chocolate flavor. Salt enhances the taste, and milk provides moisture. Vegetable oil keeps the brownie soft, and vanilla adds a lovely aroma. If you want extra flavor, mix in chocolate chips or nuts. This simple list makes it fun and easy to whip up a delicious treat! {{ingredient_image_2}} Start by gathering your ingredients. You will need a microwave-safe mug or small bowl. In this container, combine: - 4 tablespoons all-purpose flour - 4 tablespoons granulated sugar - 2 tablespoons unsweetened cocoa powder - 1/8 teaspoon fine salt Whisk or stir the dry ingredients well. Make sure there are no lumps. An even mix will help your brownie bake nicely. Next, we need to add the wet ingredients. Pour in: - 3 tablespoons milk - 2 tablespoons vegetable oil - 1/4 teaspoon pure vanilla extract Use a fork or spoon to mix everything together. Stir until you see a smooth batter. It should feel like pancake batter. If you want to make it richer, fold in: - 2 tablespoons chocolate chips or chopped nuts This step adds a yummy twist to your brownie. Now it’s time for the microwave magic. Cook your brownie on high for 40 to 60 seconds. Start with 40 seconds. Check if the top is set, but the center is still slightly gooey. If it needs more time, microwave in 10-second intervals. It’s better to undercook than overcook. Enjoy the smell while it cooks! - Tips for consistency: Make sure to mix your dry and wet ingredients well. This helps avoid lumps. The batter should feel like pancake batter. If it feels too thick, add a tiny bit more milk. - Understanding microwave wattage: Microwaves can vary in power. If yours is strong, check the brownie after 40 seconds. If it’s weaker, you may need longer. The goal is a set top and a gooey center. - Options for mix-ins: You can make your brownie unique. Try adding chocolate chips, nuts, or even dried fruit. Each mix-in gives a new flavor and texture. Be creative! - Adjusting sweetness: If you like it sweeter, add a bit more sugar. If you prefer it less sweet, cut back on the sugar slightly. Taste the batter to find your sweet spot! Pro Tips Perfect Microwave Timing: Start with 40 seconds and check for doneness. Every microwave is different, so adjust the time as needed, cooking in 10-second intervals to avoid overcooking. Mixing Technique: Use a fork or spoon to stir the batter until smooth, ensuring no dry ingredients remain. This will create a better texture in your brownie. Customize Your Brownie: Feel free to experiment with different add-ins like peanut butter chips, caramel, or spices such as cinnamon to create your unique flavor profile. Serving Suggestions: For a decadent treat, serve your brownie warm with a scoop of ice cream, whipped cream, or a drizzle of chocolate sauce for an indulgent dessert experience. {{image_4}} You can easily make this brownie gluten-free. Just swap the all-purpose flour with almond flour or coconut flour. Almond flour gives a nutty taste. Coconut flour absorbs more moisture, so use less. Try 3 tablespoons of coconut flour instead of 4. This change keeps the brownie soft and tasty. To make a vegan brownie, replace the milk and oil. Use almond milk or coconut milk instead of regular milk. For oil, try using melted coconut oil or applesauce. Applesauce adds moisture and sweetness. This way, you get a rich taste without the dairy. Add some fun to your brownie with different flavors. Try using almond or peppermint extract instead of vanilla. A teaspoon will add a nice twist. You can also mix in spices like cinnamon or espresso powder for depth. These small tweaks can really enhance the taste! To keep your brownie fresh, store it in an airtight container. This helps keep it moist. Place it in the fridge if you plan to eat it later. It can stay good for up to three days. When you want to eat it again, take it out and let it sit for a few minutes. To reheat, pop it in the microwave for about 10 to 15 seconds. This will warm it up nicely. Check to see if it's warm enough for you. You want it cozy, but not too hot. If you want to save your brownie for later, you can freeze it. First, let the brownie cool completely. Wrap it tightly in plastic wrap. Then, place it in a freezer-safe bag or container. This will help prevent freezer burn. Your brownie can stay frozen for up to a month. When you're ready to enjoy it, take it out and let it thaw in the fridge overnight. If you're in a hurry, you can microwave it for about 30 seconds. Just check to see if it's warm all the way through. Enjoy! Making a microwave brownie is quick and easy. The prep time is about 5 minutes. Cooking time is between 40 to 60 seconds. So, in just a few minutes, you can enjoy a warm brownie! Yes, you can double the recipe. Just use twice the amount of each ingredient. If you double it, be careful with the cooking time. Start with 60 seconds and check. You may need a bit more time, but keep it in 10-second intervals to avoid overcooking. Your brownie might be dry for a few reasons. It could be overcooked, or you may have added too much flour. If your brownie is dry, try reducing the cooking time next time. You can also add an extra tablespoon of milk for moisture. Enjoying it warm with ice cream can help too! You now know how to make a tasty microwave brownie. We covered the ingredients, step-by-step instructions, and tips for the perfect texture. You learned about variations, including gluten-free and vegan options. Storing leftovers and handling common issues were also discussed. Enjoy your baking journey. Experiment with flavors and toppings. You’ll impress your friends and family with your new skill. Happy baking!

Craving a quick, sweet treat? You can whip up a delicious microwave brownie in just one minute! This simple recipe uses everyday ingredients to create a rich, chocolaty delight. Whether …

Read more

Categories Desserts

One-Pot Garlic Parmesan Pasta Quick and Easy Meal

December 3, 2025February 23, 2025 by Chef Tavio
- 12 oz fettuccine or spaghetti - 4 cups vegetable broth - 1 cup heavy cream - 1 cup freshly grated Parmesan cheese - 4 cloves garlic, minced - 2 tablespoons extra virgin olive oil - 1 teaspoon Italian seasoning blend - Fresh parsley, finely chopped (for garnish) - Salt - Black pepper In this recipe, I use fettuccine or spaghetti as the base. You can choose either based on your taste. The vegetable broth adds flavor and moisture while the heavy cream creates that rich, creamy texture we love. Freshly grated Parmesan cheese gives this dish its signature taste. I always include minced garlic for that wonderful aroma and flavor. You can add olive oil, but it’s optional. Italian seasoning adds a nice touch, but feel free to skip it if you prefer. Fresh parsley not only garnishes the dish but also adds a pop of color. For seasoning, salt and black pepper are key. They enhance the overall flavor. Adjust these to your liking for the best results. By keeping these ingredients on hand, you can whip up this tasty meal any time. {{ingredient_image_2}} 1. Heating olive oil Start by heating 2 tablespoons of extra virgin olive oil in a large pot. Set the heat to medium. This will help the oil warm up slowly and evenly. 2. Sautéing garlic Add 4 minced garlic cloves to the pot. Cook for about 1 minute. Stir frequently to keep the garlic from browning. You want it fragrant and soft, not burnt. 1. Adding pasta and liquids Next, add 12 ounces of fettuccine or spaghetti into the pot. Pour in 4 cups of vegetable broth and 1 cup of heavy cream. Stir everything well so the pasta is coated in the liquid. 2. Bringing to a boil and simmering Raise the heat to bring the pot to a gentle boil. Once it boils, reduce the heat to a simmer. Cook the pasta for about 10 to 12 minutes. Stir occasionally and watch for that perfect al dente texture. 1. Incorporating Parmesan and seasoning Once the pasta is cooked, stir in 1 cup of freshly grated Parmesan cheese and 1 teaspoon of Italian seasoning. Mix until the cheese melts and the sauce becomes rich and creamy. 2. Adjusting sauce consistency If the sauce is too thick, add more vegetable broth or cream. Do this until it reaches your desired creaminess. Taste and add salt and freshly cracked black pepper to your liking. To make your One-Pot Garlic Parmesan Pasta shine, pay close attention to cooking time. Start with the heat on medium. As the pasta cooks, stir it every few minutes. This keeps it from sticking and helps it cook evenly. The key is to watch for the pasta to reach al dente. Al dente means it is firm but not hard. It should have a slight bite to it. This texture gives you a perfect base for the creamy sauce. Adding extra seasonings can really boost the flavor. Consider a pinch of red pepper flakes for heat. A squeeze of lemon juice can add brightness. Using fresh ingredients makes a big difference too. Fresh garlic gives a stronger taste than dried. Fresh parsley adds color and freshness at the end. Using high-quality Parmesan cheese enhances the dish’s richness. When serving, think about garnishing ideas. A sprinkle of extra Parmesan on top always impresses. Finely chopped parsley not only looks nice but adds a fresh taste. Pair your pasta with a simple side salad or garlic bread. These sides balance the rich pasta. If you want, you can serve it with grilled vegetables for more color and nutrition. Pro Tips Use Fresh Garlic: Freshly minced garlic adds a vibrant flavor that powdered garlic simply can't match. Be sure to sauté it just until fragrant to avoid bitterness. Cheese Quality Matters: Always use freshly grated Parmesan cheese instead of pre-grated. The texture and flavor will significantly enhance your sauce. Adjusting Sauce Thickness: If your sauce becomes too thick, gradually add a splash of vegetable broth or cream to reach your preferred consistency without compromising flavor. Garnishing Tips: For a pop of color and freshness, don't skip the parsley. You can also add a squeeze of lemon juice for an extra zing! {{image_4}} If you need gluten-free options, use gluten-free pasta. Many brands make tasty gluten-free fettuccine or spaghetti. This swap keeps the dish light and enjoyable. For dairy-free alternatives, try coconut cream or cashew cream. Nutritional yeast adds a cheesy flavor without dairy. These swaps make the dish suitable for more diets. You can easily add protein to your pasta. Chicken or shrimp works well. Just cook the protein in the pot before adding the pasta. This boosts the meal's heartiness and flavor. Incorporating vegetables is another great idea. Spinach adds color and nutrients. Cherry tomatoes bring sweetness and freshness. Mix these in when the pasta is almost done. To give your pasta an Italian twist, add spices like red pepper flakes or oregano. These spices enhance the rich flavors of garlic and Parmesan. For an Asian twist, try soy sauce and sesame oil. This creates a unique flavor profile that is both savory and rich. It’s a fun way to switch things up! To keep your One-Pot Garlic Parmesan Pasta fresh, follow these tips: - Refrigeration: Allow the pasta to cool before storing. Place it in the fridge within two hours of cooking. This helps prevent bacteria growth. - Storage containers: Use airtight containers for best results. Glass or plastic containers work well. Make sure to leave space at the top for any expansion. When you're ready to enjoy leftovers, consider these methods: - Microwave vs. stovetop: The microwave is quick and easy. Use a microwave-safe dish and cover it to keep moisture in. The stovetop method is better for even heating. Add a splash of broth or cream to keep it creamy. - Maintaining sauce consistency: If the sauce thickens too much during storage, add a little broth or cream while reheating. Stir well to combine. If you want to store this dish long-term, freezing is a great option: - Freezing process: Let the pasta cool completely. Place it in freezer-safe containers or bags. Remove as much air as possible to prevent freezer burn. Label and date your containers. - Thawing and reheating instructions: To thaw, place the container in the fridge overnight. For quick thawing, use the microwave. Reheat on the stovetop, adding broth or cream to restore the sauce's creaminess. You can use fettuccine or spaghetti for this dish. Both types work well. They soak up the creamy sauce nicely. Other shapes like penne or linguine are also good options. Just pick what you like best! Yes, you can make this dish vegan! Use plant-based cream instead of heavy cream. For the cheese, try nutritional yeast or a vegan Parmesan. This will give you the creamy flavor without dairy. Use vegetable broth to keep it plant-based. This dish lasts about 3 to 5 days in the fridge. Store it in an airtight container to keep it fresh. When you're ready to eat, just reheat it on the stove or in the microwave. If the sauce is too thick, add a splash of broth or water. This blog post covered how to make One-Pot Garlic Parmesan Pasta. We looked at the main ingredients like fettuccine and garlic, along with optional items to enhance flavor. You learned the steps to prepare the dish from sautéing garlic to cooking the pasta. Tips offered insights on texture and flavor improvements. Variations provided ideas for ingredient swaps and international twists. Lastly, I shared storage tips to keep leftovers fresh. Enjoy making this dish, and remember to add your unique touch!

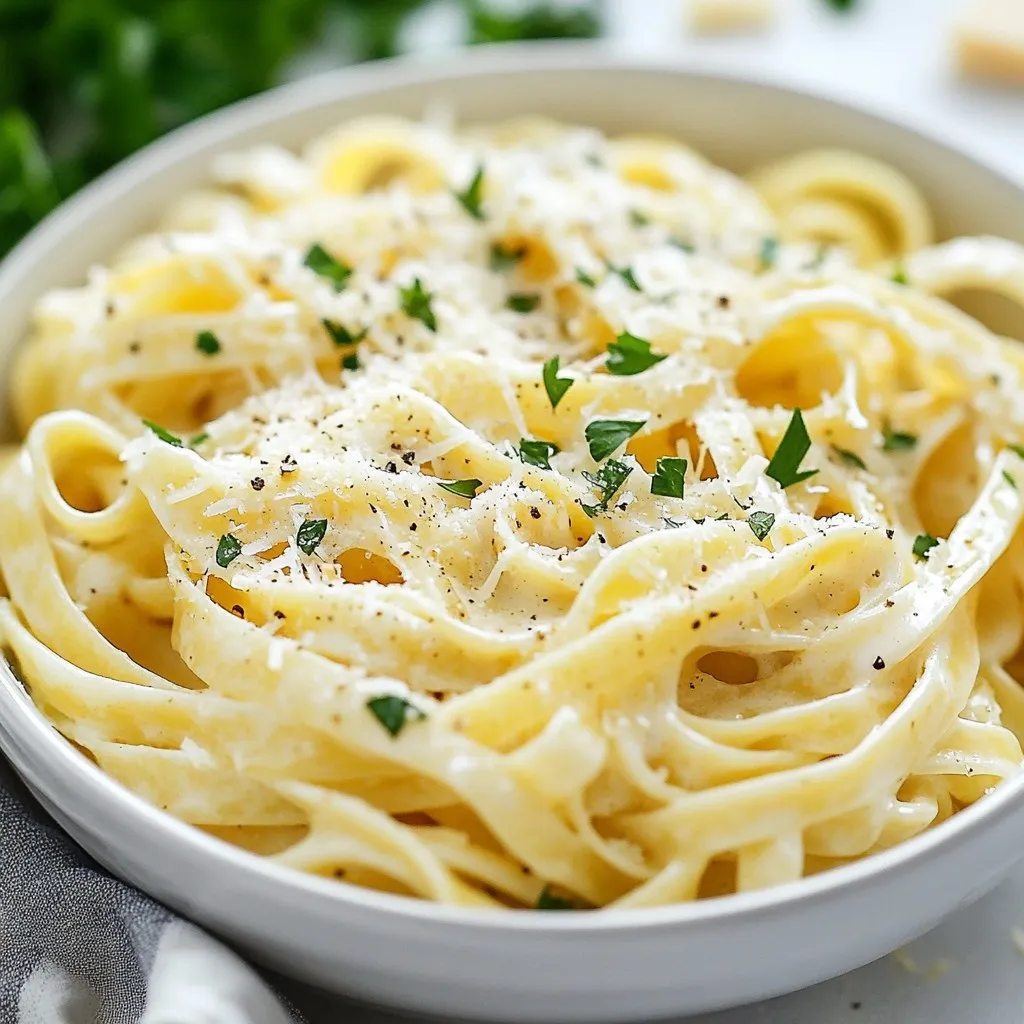
Looking for a quick meal that’s packed with flavor? Look no further! This One-Pot Garlic Parmesan Pasta is your answer. With simple ingredients like garlic, parmesan, and your choice of …

Read more

Categories Dinner
Older posts
Newer posts
← Previous Page1 … Page149 Page150 Page151 … Page161 Next →

TASTED NEST

Where Flavor Finds a Home 🍳🏡 — warm, simple, and crave-worthy recipes made for real life, from stovetop mornings to backyard dinners.

PAGES

Home About Contact Privacy Policy Terms & Conditions Cookie Policy GDPR Policy Copyright Policy Disclaimer

CATEGORIES

Appetizers Desserts Salads Breakfast Dinner
Copyright © 2025 Tasted Nest. All rights reserved.