Skip to content
  • GDPR Privacy Policy
  • Copyright Policy
  • Disclaimer
  • Terms & Conditions
Tasted Nest
  • Home
  • Appetizers
  • Desserts
  • Salads
  • Breakfast
  • Dinner
  • Privacy Policy
  • Contact
  • About

Chef Tavio

Honey BBQ Chicken Rice Bowls Easy and Flavorful Recipe

November 19, 2025February 23, 2025 by Chef Tavio
To make Honey BBQ Chicken Rice Bowls, gather these simple ingredients: - 2 cups cooked jasmine rice - 1 lb boneless, skinless chicken thighs, diced into bite-sized pieces - 1/2 cup honey - 1/2 cup your favorite BBQ sauce - 1 tablespoon soy sauce - 1 tablespoon olive oil - 1 teaspoon garlic powder - 1 teaspoon onion powder - 1/2 teaspoon smoked paprika - 1/4 teaspoon black pepper - 1/4 cup green onions, finely chopped (for garnish) - 1 cup broccoli florets, steamed until tender - 1 ripe avocado, sliced (optional for added creaminess) You can easily swap some ingredients if needed: - Chicken thighs can be replaced with chicken breasts for a leaner option. - Use agave syrup instead of honey for a vegan choice. - Any BBQ sauce can work, so choose one that you love. - If you don't have jasmine rice, any rice type will do. - For a crunch, you can add nuts like cashews or peanuts instead of avocado. A serving of Honey BBQ Chicken Rice Bowls provides: - Calories: About 480 - Protein: 30 grams - Carbohydrates: 70 grams - Fat: 12 grams This meal is filling and packed with nutrients. The chicken offers protein, while the rice provides carbs for energy. Add broccoli for fiber and vitamins. If you include avocado, you’ll gain healthy fats too. Enjoy a well-rounded meal! {{ingredient_image_2}} First, you need to make the marinade. In a medium bowl, mix together: - 1/2 cup honey - 1/2 cup BBQ sauce - 1 tablespoon soy sauce - 1 teaspoon garlic powder - 1 teaspoon onion powder - 1/2 teaspoon smoked paprika - 1/4 teaspoon black pepper Whisk until everything blends well. Next, add 1 pound of diced chicken thighs. Stir to coat each piece in the marinade. Cover the bowl and put it in the fridge for at least 30 minutes. If you have time, let it sit longer for better taste. After the chicken has marinated, heat 1 tablespoon of olive oil in a large skillet over medium heat. Once the oil is hot, add the marinated chicken. Make sure to discard any extra marinade. Cook the chicken for about 6 to 8 minutes. Stir it often. The chicken should be fully cooked and golden brown. Once done, take it off the heat and let it rest for a minute. Now, it's time to put everything together. Start by placing 2 cups of warm jasmine rice in each serving bowl. This rice makes a great base. Next, add the caramelized chicken on top of the rice. Then, add 1 cup of steamed broccoli florets for color and health. If you want extra creaminess, slice a ripe avocado and place it on top. Finally, sprinkle some chopped green onions to add a fresh touch before serving. Enjoy your meal! To get juicy chicken, use boneless, skinless thighs. They stay moist during cooking. Dice the chicken into bite-sized pieces for even cooking. This helps it cook faster and keeps it tender. Heat your skillet over medium heat before adding the chicken. This ensures a nice sear. Cook the chicken for about 6-8 minutes, stirring often. Look for a golden-brown color on the outside. This shows it’s cooked and full of flavor. Marinating is key for flavor. Start by mixing honey, BBQ sauce, soy sauce, garlic powder, onion powder, smoked paprika, and black pepper. Whisk these together until smooth. Next, add the chicken pieces to the bowl. Make sure every piece gets coated. Cover the bowl and let it sit in the fridge. For best results, let it marinate for a few hours or overnight. This allows the chicken to soak in all the tasty flavors. Seasonings can take your dish to the next level. Use garlic powder and onion powder for a savory base. Smoked paprika adds a nice, smoky flavor. Black pepper gives it a little kick. You can also experiment with other spices like cumin or chili powder. For a fresh touch, add chopped green onions on top before serving. They add color and a burst of flavor that brightens the dish. These simple tips will make your Honey BBQ Chicken Rice Bowls truly stand out! Pro Tips Marinate for Maximum Flavor: Allowing the chicken to marinate for longer than 30 minutes, ideally several hours or overnight, infuses it with a deeper flavor and tenderness. Use Fresh Ingredients: Fresh garlic and onion can elevate the dish further. Consider using minced garlic and finely chopped onion instead of powders for a more vibrant taste. Customize Your Bowls: Feel free to add other vegetables like bell peppers, corn, or snap peas to your bowls for added texture and nutrition. Perfectly Cooked Chicken: To ensure your chicken stays juicy, avoid overcooking. It should be cooked until the internal temperature reaches 165°F (75°C). {{image_4}} You can switch the chicken for other proteins. Try using diced pork or shrimp. Both cook fast and soak up the BBQ sauce well. For pork, I suggest using tenderloin or shoulder. For shrimp, choose large, raw shrimp for the best taste. Cook the shrimp for just a few minutes until they turn pink. This gives you a quick and tasty meal. If you prefer a vegetarian option, use tofu or tempeh. Both are great at absorbing flavors. Press and cube firm tofu before marinating it like the chicken. Use the same honey BBQ sauce to coat it. If you like tempeh, steam it first to soften. Then slice it and marinate. Both options provide a nice texture and taste. While jasmine rice is great, you can use other grains. Try brown rice for added fiber and nutrients. Quinoa is another option; it’s light and nutty. Cauliflower rice works for a low-carb meal. Just sauté it lightly before adding your toppings. Each grain brings its own flavor and health benefits, making your meal even better. To store any leftover Honey BBQ Chicken Rice Bowls, place them in an airtight container. Make sure to let the bowls cool down first. This helps keep the flavors fresh. You can separate the chicken and rice if you prefer. Store them in the fridge for best results. When you're ready to eat the leftovers, reheating them is simple. You can use a microwave or a skillet. If using a microwave, place the bowl in for about 2-3 minutes. Stir halfway through to heat evenly. For the skillet, heat over medium heat for about 5-7 minutes. Add a splash of water if things seem dry. You can store the leftovers in the fridge for up to 3 days. If you want to keep them longer, consider freezing them. In the freezer, they can last for up to 3 months. Just make sure to thaw them overnight in the fridge before reheating. Enjoy your tasty bowls later! Yes, you can make this recipe in advance. Marinate the chicken and store it in the fridge for up to 24 hours. This lets the flavors soak in well. You can also cook the chicken and keep it in the fridge for a few days. Just reheat it when you are ready to serve. This saves time on busy days. To add spice, try using spicy BBQ sauce. You can also mix in some red pepper flakes or sriracha. For extra heat, chop up fresh jalapeños and add them to the chicken while cooking. Adjust the spice level based on your taste. Experimenting is key to finding the right balance for you. These rice bowls are delicious on their own. However, you can serve them with a fresh salad or roasted veggies. For a fun twist, pair them with tortilla chips and salsa. If you want more protein, add hard-boiled eggs or beans. These sides will make your meal even more satisfying and colorful. This blog post covered how to make Honey BBQ Chicken Rice Bowls. We looked at ingredients, cooking steps, and tips for perfect chicken. I also shared fun variations and how to store leftovers. These bowls are easy to customize, so don’t be afraid to try new things. Whether you want to spice it up or go vegetarian, you can make it work. Enjoy your cooking adventure and make these rice bowls your own!

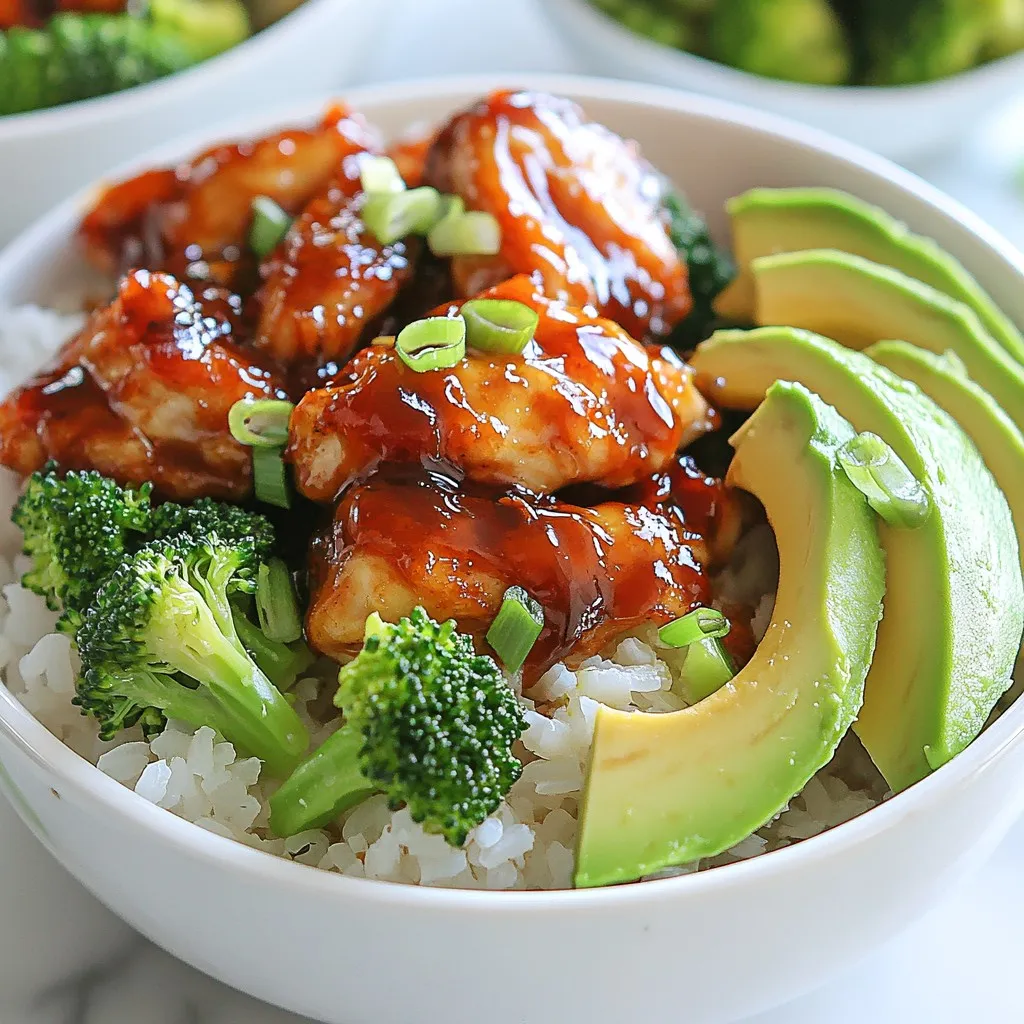
Craving a delicious dinner that’s both easy and packed with flavor? You’re in the right place! My Honey BBQ Chicken Rice Bowls bring a sweet and tangy twist to your …

Read more

Categories Dinner

Lemon Herb Chicken and Rice Flavorful Easy Meal

November 14, 2025February 23, 2025 by Chef Tavio
- 4 boneless, skinless chicken thighs - 1 cup long-grain rice - 2 cups chicken broth - 1 large onion, diced - 3 cloves garlic, minced - 1 lemon (zest and juice) - 2 tablespoons olive oil - 1 teaspoon dried thyme - 1 teaspoon dried rosemary - 1 teaspoon paprika - Salt and pepper to taste - Fresh parsley, chopped (for garnish) To make this dish, you will need: - A mixing bowl for marinating - A large skillet for cooking - A knife and cutting board for prepping ingredients - Measuring cups and spoons to ensure accuracy - A fork for fluffing the rice This meal is not only tasty but also packed with nutrients. Each serving roughly contains: - Calories: 350 - Protein: 25g - Carbohydrates: 30g - Fat: 15g - Fiber: 2g This dish provides a balance of protein and carbs, making it a great choice for a wholesome meal. The chicken offers essential proteins, while the rice gives you energy. Plus, the herbs add flavor without extra calories! {{ingredient_image_2}} To start, grab a mixing bowl. Add 2 tablespoons of olive oil, the juice of 1 lemon, and the zest from that lemon. Then, toss in 3 cloves of minced garlic, 1 teaspoon of dried thyme, 1 teaspoon of dried rosemary, 1 teaspoon of paprika, and a sprinkle of salt and pepper. Mix this well. Next, add 4 boneless, skinless chicken thighs to the bowl. Make sure each piece gets coated with the marinade. Cover the bowl and let it chill in the fridge for at least 30 minutes. This step lets all those yummy flavors soak in. After marinating, heat a skillet on medium heat. Add 1 tablespoon of olive oil and wait until it shimmers. Carefully place the marinated chicken thighs into the skillet. Sear them for about 5 to 7 minutes on each side. Look for a golden brown color. Once cooked through, remove the chicken and set it aside on a plate. This step adds a nice crust and locks in the juices. In the same skillet, add 1 diced large onion. Sauté it for about 3 to 4 minutes until it turns soft and fragrant. Next, stir in 1 cup of long-grain rice. Sauté this for another 2 minutes to coat the rice in the flavors left in the skillet. This step builds the base of taste for your dish. Now, pour in 2 cups of chicken broth. Increase the heat until it gently boils. Once boiling, tuck the seared chicken thighs back into the skillet with the rice. Reduce the heat to low, cover the skillet with a lid, and let it simmer for about 20 minutes. This allows the rice to absorb the broth and become fluffy. After 20 minutes, take it off the heat and let it sit, still covered, for 5 more minutes. Finally, use a fork to fluff the rice and separate the grains. Sprinkle fresh parsley on top for color and flavor. Enjoy every bite of your Lemon Herb Chicken and Rice! To make the most flavorful marinade, combine olive oil, lemon juice, lemon zest, garlic, thyme, rosemary, paprika, salt, and pepper in a bowl. Mix these well to blend the flavors. The lemon juice adds a bright taste, while the herbs bring depth. Add the chicken thighs and ensure they are fully coated. Cover the bowl and chill it for at least 30 minutes. This step allows the chicken to absorb all those tasty flavors. For a great sear, heat a tablespoon of olive oil in your skillet. Wait until the oil shimmers before adding the marinated chicken. This step is key. Place the chicken thighs in the skillet, leaving space between them. Sear them for about 5-7 minutes on each side. You want a deep golden brown color, as this adds flavor. Once done, set the chicken aside on a plate. This helps keep it juicy. To cook the rice perfectly, first sauté diced onion in the same skillet. This adds extra flavor to the rice. Stir in the long-grain rice and cook it for about 2 minutes. This step coats the rice with the onion and oil flavors. Then, add chicken broth and bring it to a boil. Carefully nestle the seared chicken back into the rice. Cover the skillet and simmer for 20 minutes. This helps the rice become fluffy and soak up all the broth. Pro Tips Marinate for Better Flavor: Allow the chicken to marinate for at least an hour, or even overnight if possible. This will help the flavors penetrate the meat more deeply, resulting in a more flavorful dish. Check Rice Consistency: If the rice seems undercooked after the suggested time, add a splash more chicken broth and let it sit covered for an additional 5 minutes. This helps ensure perfectly fluffy rice. Use Fresh Herbs: While dried herbs work well, fresh thyme and rosemary can elevate the dish even further. Add them towards the end of cooking for a brighter flavor. Serve with a Twist: For an extra zesty kick, serve with additional lemon wedges on the side. This allows everyone to customize their dish according to personal preference. {{image_4}} You can switch a few ingredients if you want. Use chicken breasts instead of thighs for a leaner option. Brown rice works well if you prefer it over long-grain rice. If you have fresh herbs, feel free to use them instead of dried ones. Basil and oregano give a nice twist. You can also use vegetable broth for a lighter flavor. Want to kick up the taste? Add red pepper flakes for heat. You can also mix in sun-dried tomatoes for a burst of flavor. A splash of white wine during cooking adds depth. For a tangy twist, stir in some capers or olives. Fresh lemon slices on top brighten up the dish. Serve this dish on a large platter for a beautiful look. Pair it with a fresh side salad to balance flavors. Garlic bread goes great alongside this meal. If you want a bit of crunch, add roasted vegetables. Drizzle some balsamic glaze on your plate for extra flair. To store leftovers, let the chicken and rice cool to room temperature. Then, transfer it to an airtight container. You can keep it in the refrigerator for up to three days. This keeps the flavors fresh and safe to eat later. When you are ready to eat, reheat the chicken and rice on the stove or in the microwave. If using the stove, add a splash of chicken broth to keep it moist. Heat over low until warm. For the microwave, heat in 30-second intervals, stirring in between. Ensure it is hot all the way through. You can freeze the chicken and rice for longer storage. Place the cooled dish in a freezer-safe container. Seal it tightly to avoid freezer burn. It can last up to three months in the freezer. When ready to eat, thaw it in the fridge overnight before reheating. Yes, you can use chicken breasts instead of thighs. Chicken breasts are leaner. They may cook faster than thighs. Adjust the cooking time to avoid dryness. Sear them for about 4-6 minutes per side. Check for an internal temperature of 165°F. This ensures your chicken is safe to eat. Marinate the chicken for at least 30 minutes. For best results, marinate for up to 1 hour. This allows the lemon juice and herbs to soak in well. If you have more time, marinating overnight will deepen the flavors. Just remember to keep the chicken in the fridge while marinating. This dish pairs well with various sides. Roasted vegetables bring a nice balance. A fresh garden salad adds crunch and color. You could also serve it with garlic bread for a hearty touch. For a light option, lemon wedges brighten the plate and add zing. Yes, you can make this dish in a slow cooker. First, sear the chicken to add flavor. Then, layer the rice, broth, and onions in the slow cooker. Add the seared chicken on top. Cook on low for about 4-6 hours. This will make the chicken tender and flavorful. This blog post covered everything you need to create a tasty Lemon Herb Chicken and Rice. We explored the key ingredients, step-by-step cooking methods, and helpful tips to make it perfect. You learned about ingredient substitutes and how to store leftovers effectively. My final thought is this dish is versatile and simple. You can impress anyone with a little practice. Enjoy making it your own! Happy cooking!

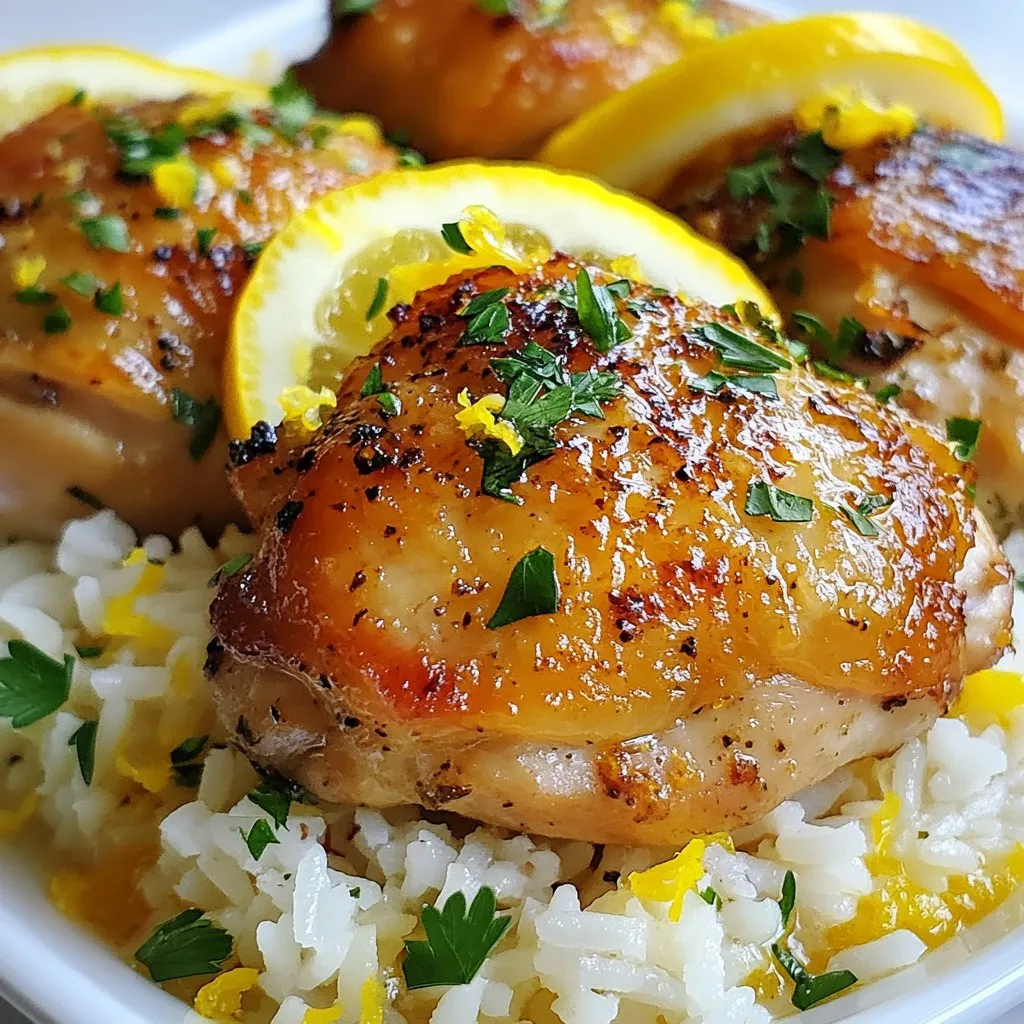
Looking for a tasty dinner that’s easy to make? Lemon Herb Chicken and Rice is your answer! This dish bursts with fresh flavors, making it a favorite for weeknight meals. …

Read more

Categories Dinner

Savory Smashburger Quesadillas Easy and Flavorful Treat

November 11, 2025February 23, 2025 by Chef Tavio
- 1 pound ground beef - 4 large flour tortillas - 1 cup shredded cheddar cheese - 1 cup shredded Monterey Jack cheese - 1 tablespoon onion powder - 1 tablespoon garlic powder - 1 teaspoon smoked paprika - Salt and freshly ground black pepper to taste - 1/2 cup fresh diced tomatoes - 1/4 cup pickles, finely diced - 1/4 cup diced red onion - 1/4 cup mayonnaise - 1 tablespoon ketchup For perfect Smashburger Quesadillas, use fresh ground beef. I like 80/20 beef for flavor and juiciness. Flour tortillas should be large enough to hold your filling without tearing. For cheese, I combine sharp cheddar and creamy Monterey Jack. This mix melts beautifully and adds great taste. Seasonings are key to enhancing the beef's flavor. Onion powder, garlic powder, and smoked paprika create a rich, savory base. Salt and pepper balance the dish. Fresh ingredients like tomatoes, pickles, and red onion add crunch and freshness. Don't forget the dipping sauce! A mix of mayonnaise and ketchup offers a tangy kick. It complements the quesadillas well. {{ingredient_image_2}} To start, grab a mixing bowl. Combine 1 pound of ground beef with the following seasonings: - 1 tablespoon onion powder - 1 tablespoon garlic powder - 1 teaspoon smoked paprika - Salt and freshly ground black pepper to taste Use your hands to mix everything well. This is key for flavor. Next, divide the beef mixture into four equal parts. Shape each part into a small, flat patty. Make sure they are not too thick. Heat a large skillet over medium-high heat. It's important to let the skillet get hot. Once it is ready, place each beef patty in the skillet. Press down on each patty with a spatula. This gives you that smashburger style. Cook for about 3-4 minutes on each side. You want them browned and juicy. Once done, remove the patties from the skillet. Let them rest for a moment while you prepare the quesadillas. Lay one large flour tortilla on a clean surface. Sprinkle half of the shredded cheddar and Monterey Jack cheese over one half of the tortilla. Place one smashburger patty on top of the cheese. Now, add layers of diced tomatoes, pickles, and red onion. Sprinkle more cheese on top. Then, fold the other half of the tortilla over the filling. This creates a half-moon shape. Next, return the skillet to the heat. Drizzle some cooking oil into the skillet. Wait for the oil to heat up. Carefully place the folded quesadilla in the skillet. Fry for about 3-4 minutes on one side. You want it crispy and golden brown. Using tongs or a spatula, flip the quesadilla and cook the other side for another 3-4 minutes. Again, ensure it’s crispy. Once done, remove it from the skillet. Let it cool for a minute before slicing into wedges. To cook a quesadilla perfectly, use medium heat. This keeps the tortilla from burning while allowing the cheese to melt. Flip the quesadilla carefully to avoid spills. To prevent filling leaks, avoid overstuffing. Keep the filling to one side of the tortilla. Fold it gently over the filling. This technique helps seal everything inside. For extra flavor, consider adding fresh jalapeños or some hot sauce. These will give your quesadilla a nice kick. You can also mix in spices like cumin or chili powder for more depth. When it comes to cheese, cheddar and Monterey Jack are great. They melt well and create a creamy texture. You can also try pepper jack for a spicy twist or mozzarella for a milder taste. Pro Tips Use Fresh Ingredients: Fresh tomatoes, pickles, and onions will enhance the flavor of your quesadillas, making them taste even more delicious. Don’t Overcrowd the Skillet: Fry one quesadilla at a time to ensure even cooking and crispiness. Overcrowding can lead to soggy tortillas. Customize Your Cheese: Feel free to mix and match your favorite cheeses. Pepper Jack or Gouda can add a unique twist to your quesadilla. Let It Rest: Allow the cooked quesadillas to rest for a minute before cutting. This helps the cheese set and makes for cleaner slices. {{image_4}} You can switch up the protein in your quesadillas. Ground turkey or chicken works great. These leaner meats keep the dish light. For a vegetarian option, try black beans or lentils. Both add flavor and protein. You can also use crumbled tofu for a plant-based twist. Just season it well to match the quesadilla vibe. To amp up the flavor, consider adding jalapeños for some heat. They bring a nice kick that pairs well with the cheeses. You can also try different cheeses. Pepper Jack adds spice while Gouda offers a smooth, creamy texture. If you want a themed dish, think about Southwest flavors. Use corn, black beans, and a sprinkle of taco seasoning. For a BBQ twist, swap the mayonnaise for BBQ sauce. Add some cooked bacon or pulled pork for extra richness. These easy changes keep your quesadillas fun and exciting! To keep leftover quesadillas fresh, follow these steps: - Allow the quesadillas to cool completely. - Wrap each quesadilla in plastic wrap or foil. - Place them in an airtight container. - Store in the fridge for up to three days. This method keeps them safe and tasty. If you want to keep them longer, you can freeze them. Just wrap them tightly in plastic wrap and then foil. They can last up to three months in the freezer. When reheating, you want to keep that crispiness. Here are the best methods: - Skillet Method: Heat a non-stick skillet on medium heat. Place the quesadilla in the skillet and cover with a lid. Cook for about 3-4 minutes per side until heated through and crispy. - Oven Method: Preheat the oven to 375°F (190°C). Place quesadillas on a baking sheet. Bake for about 10-12 minutes until hot and crispy. - Air Fryer Method: Set the air fryer to 350°F (175°C). Place the quesadilla in the basket and heat for about 5-7 minutes. These methods ensure your quesadillas stay delicious and crunchy, just like when you first made them! Yes, you can prepare the quesadillas in advance. Here are some tips for storage: - Cook the beef and assemble the quesadillas. - Place them in a single layer on a baking sheet. - Cover them with plastic wrap or foil. - Store in the fridge for up to 24 hours. When ready to eat, cook them right from the fridge. This keeps them fresh and tasty. You can pair these quesadillas with various sides and dips: - Fresh guacamole adds a creamy texture. - Salsa provides a zesty kick. - Serve with sour cream for a cool contrast. - A side of crispy tortilla chips is great too. These options enhance the flavor and make your meal more fun. Yes, you can make these quesadillas gluten-free. Here are some ideas: - Use gluten-free tortillas instead of flour ones. - Check that your beef and seasonings are gluten-free. - You can try using corn tortillas as a tasty option. These swaps let everyone enjoy this dish without worries. You learned how to make delicious Smashburger quesadillas using ground beef, tortillas, and cheese. We explored key ingredients, cooking techniques, and tasty variations to suit your taste. Remember to pick your favorite seasonings and toppings for extra flavor. Store leftovers properly to enjoy later and reheat them for that perfect crisp. Now, you can impress friends and family with your quesadilla skills. Enjoy the fun of cooking!

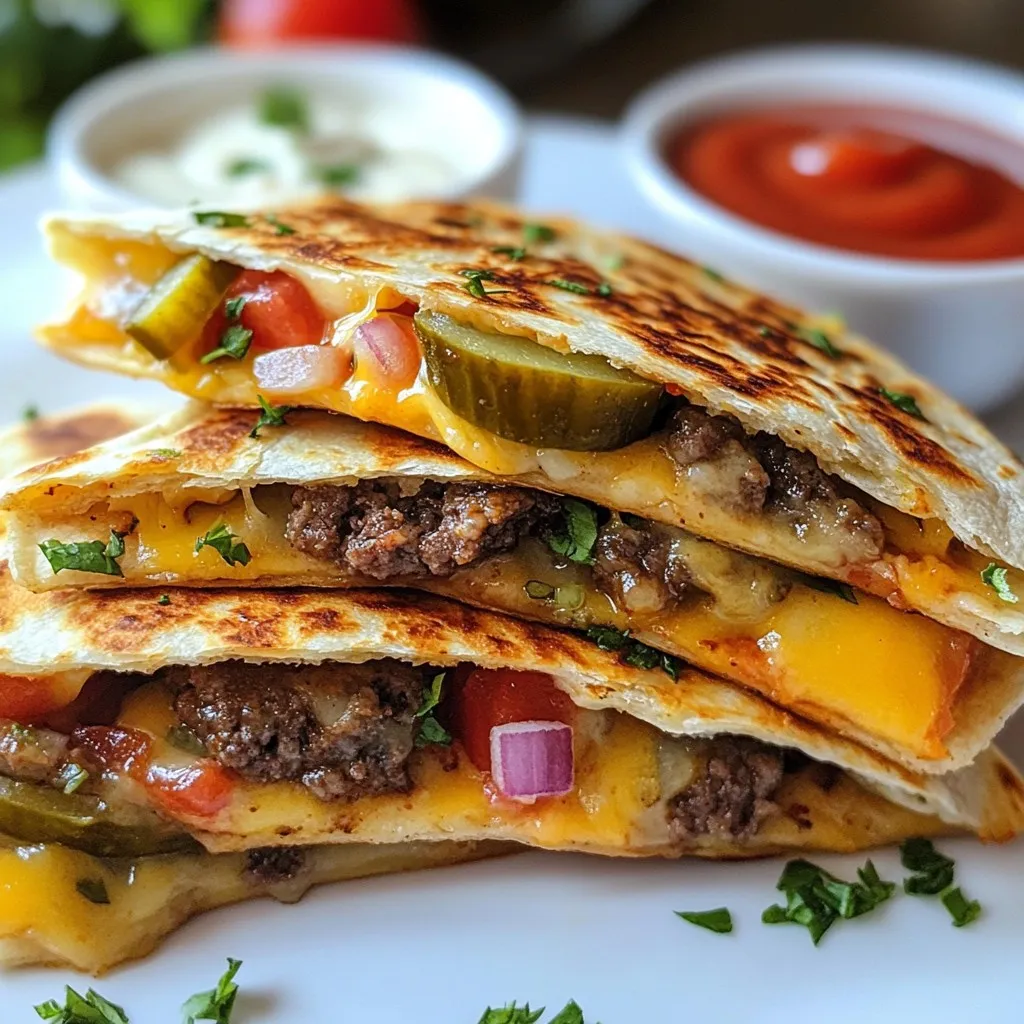
If you crave something quick, tasty, and fun, you’ll love my Smashburger Quesadillas! These easy treats combine juicy beef, melty cheese, and fresh toppings, all wrapped in crispy tortillas. Whether …

Read more

Categories Appetizers

Turkey Zucchini Skillet Delightful and Healthy Meal

December 4, 2025February 22, 2025 by Chef Tavio
- 1 pound ground turkey - 2 medium zucchinis, diced - 1 bell pepper (either red or yellow), diced - 1 small onion, finely chopped - 2 cloves garlic, minced - 1 cup cherry tomatoes, halved - 1 teaspoon Italian seasoning - 1 teaspoon smoked paprika - ½ teaspoon red pepper flakes (optional, for a kick) - Salt and freshly ground black pepper, to taste - 2 tablespoons extra virgin olive oil - ½ cup shredded mozzarella cheese (optional for creaminess) - Fresh basil leaves, for garnish When I make this Turkey Zucchini Skillet, I focus on fresh, vibrant ingredients. The ground turkey is lean and healthy. Zucchini adds a nice crunch and a pop of color. I love using bell peppers for their sweetness. The onion gives a great base flavor, and garlic adds a nice touch. For seasoning, I keep it simple but packed with flavor. Italian seasoning brings warmth, while smoked paprika adds depth. If you like spice, the red pepper flakes are a fun option. Always season with salt and black pepper to make everything shine. The cooking essentials are equally important. Extra virgin olive oil is my go-to for sautéing. It adds richness without overpowering. If you want creaminess, sprinkle mozzarella cheese on top. Fresh basil is a must for garnish. It brightens the dish and makes it look stunning. Gather these ingredients to create a delightful and healthy meal. This skillet comes together quickly, making it perfect for a weeknight dinner. {{ingredient_image_2}} - Chopping vegetables Start by dicing the two zucchinis and one bell pepper. Make sure they are in bite-sized pieces. Finely chop one small onion and mince two cloves of garlic. This helps the flavors blend well. - Sautéing aromatics Heat two tablespoons of extra virgin olive oil in a large skillet over medium heat. Once it shimmers, add the chopped onion and bell pepper. Sauté for about three to four minutes. Stir often until the onion turns soft and clear. Then, add the minced garlic and cook for another minute. The garlic should smell nice but not burn. - Browning the turkey Now, raise the heat slightly and add one pound of ground turkey. Use a spatula to break it apart into small pieces. Cook this for five to seven minutes. Keep stirring until the turkey is no longer pink and is browned. - Adding seasonings Season the turkey with one teaspoon of Italian seasoning, one teaspoon of smoked paprika, and half a teaspoon of red pepper flakes if you like heat. Add salt and black pepper to taste. Stir well to make sure the spices mix evenly. - Incorporating zucchini and tomatoes Gently fold in the diced zucchinis and one cup of halved cherry tomatoes. Cook this mixture for about five to six minutes. The zucchini should get soft but not mushy, so watch it closely. - Melting cheese If you want a creamy finish, sprinkle half a cup of shredded mozzarella cheese on top. Cover the skillet with a lid and lower the heat. Let it cook for two to three minutes. This will melt the cheese nicely. - Garnishing before serving Once done, remove the skillet from the heat. Garnish with fresh basil leaves. This adds color and a fresh taste. Serve hot, and enjoy your Turkey Zucchini Skillet! How to avoid overcooking zucchini To keep zucchini crisp, cook it just until tender. Add it to the skillet after the turkey is browned. Stir gently and watch it closely. Cook for about five to six minutes. This way, it will stay firm and not turn mushy. Ensuring turkey is fully cooked Always check that the ground turkey is fully cooked. It should be browned with no pink left. Use a meat thermometer for accuracy. The internal temperature should reach 165°F. This ensures it is safe to eat and tasty. Best sides to complement the dish Pair the Turkey Zucchini Skillet with a fresh side salad. A light cucumber salad adds a nice crunch. Brown rice or quinoa also works well. They soak up flavors and add fiber. Presentation ideas Serve the skillet right from the pan for a rustic touch. You can also plate individual servings. Drizzle with extra olive oil for shine. Top with fresh basil leaves for color and aroma. Opting for lean turkey Choosing lean ground turkey is key for a healthy dish. It has less fat compared to other meats. This choice helps in making a lighter meal without losing flavor. Customizing with low-fat cheese If you want a creamy texture, use low-fat mozzarella cheese. It adds richness without too many calories. Melt it on top just before serving for a delicious finish. Pro Tips Choose Lean Turkey: Opt for lean ground turkey to keep the dish healthier while still being flavorful. Seasoning Variations: Feel free to experiment with different herbs and spices, such as oregano or cumin, to customize the flavor. Texture Matters: Avoid overcooking the zucchini to maintain its texture and vibrant color in the dish. Serving Suggestions: Pair this dish with a side of quinoa or brown rice for a complete meal that adds extra fiber. {{image_4}} You can change the vegetables in this dish. Try using asparagus, spinach, or mushrooms. Each option brings a new taste. You can also use squash or carrots for a sweeter flavor. If you want a different protein, consider using ground chicken or lean beef. Both options work well and still keep the meal light. You can even try plant-based ground meat for a vegan twist. Herbs can boost flavor a lot. Adding fresh oregano or thyme gives a nice depth. You can mix in some chopped parsley for brightness, too. For spice, try adding cumin or chili powder. Both can add a warm kick. If you like heat, don’t skip the red pepper flakes. You can switch proteins easily. Shrimp or diced chicken are great alternatives. Each offers its own unique taste. For sauces, consider a splash of soy sauce or a bit of sriracha. These can add extra flavor and fun to your meal. You might also top the skillet with avocado or a dollop of sour cream. To store leftovers from your Turkey Zucchini Skillet, let it cool first. Once cooled, put it in an airtight container. This keeps the dish fresh and tasty. I recommend using glass containers or BPA-free plastic ones. These containers seal well and help prevent odors from other foods. You can freeze the cooked skillet for later. Use a freezer-safe container or a heavy-duty freezer bag. Be sure to remove extra air to avoid freezer burn. When ready to eat, thaw it overnight in the fridge. Reheat in a skillet over medium heat. Add a splash of water or broth to keep it moist. Your refrigerated leftovers last about 3 to 4 days. Always check for signs of spoilage. Look for off smells or changes in color. If you notice any of these signs, it's best to toss the dish. This way, you ensure that you eat only fresh and safe food. You can pair this dish with several tasty sides. Here are some ideas: - A fresh garden salad with mixed greens. - Quinoa or brown rice for a filling option. - Crusty bread to soak up the flavors. For beverages, try these suggestions: - A chilled glass of white wine. - Sparkling water with lemon for a refreshing twist. - Herbal tea for a light finish. To make this skillet vegan, swap the turkey and cheese. Use these substitutes: - Replace ground turkey with lentils or chickpeas for protein. - Use nutritional yeast instead of mozzarella cheese for a cheesy flavor. You can also add more veggies to enhance the dish. This recipe is healthy and balanced. Here’s a quick look at its nutrition: - Calories: About 350 per serving. - Protein: 30 grams from turkey. - Carbs: 12 grams mainly from veggies. - Fat: 20 grams from olive oil and cheese. The ingredients provide many health benefits. Turkey is lean and rich in protein. Zucchini adds fiber and hydration. Cherry tomatoes are packed with vitamins and antioxidants. Enjoy this dish for a nutritious meal! In this post, we explored how to make a tasty Turkey Zucchini Skillet. I covered the main ingredients, like ground turkey, zucchini, and spices. You learned step-by-step instructions for preparation and cooking. We also shared tips on serving and storing leftovers. This dish is not only easy to make but also healthy. Try different veggies or spices to make it your own. Enjoy your cooking adventure!

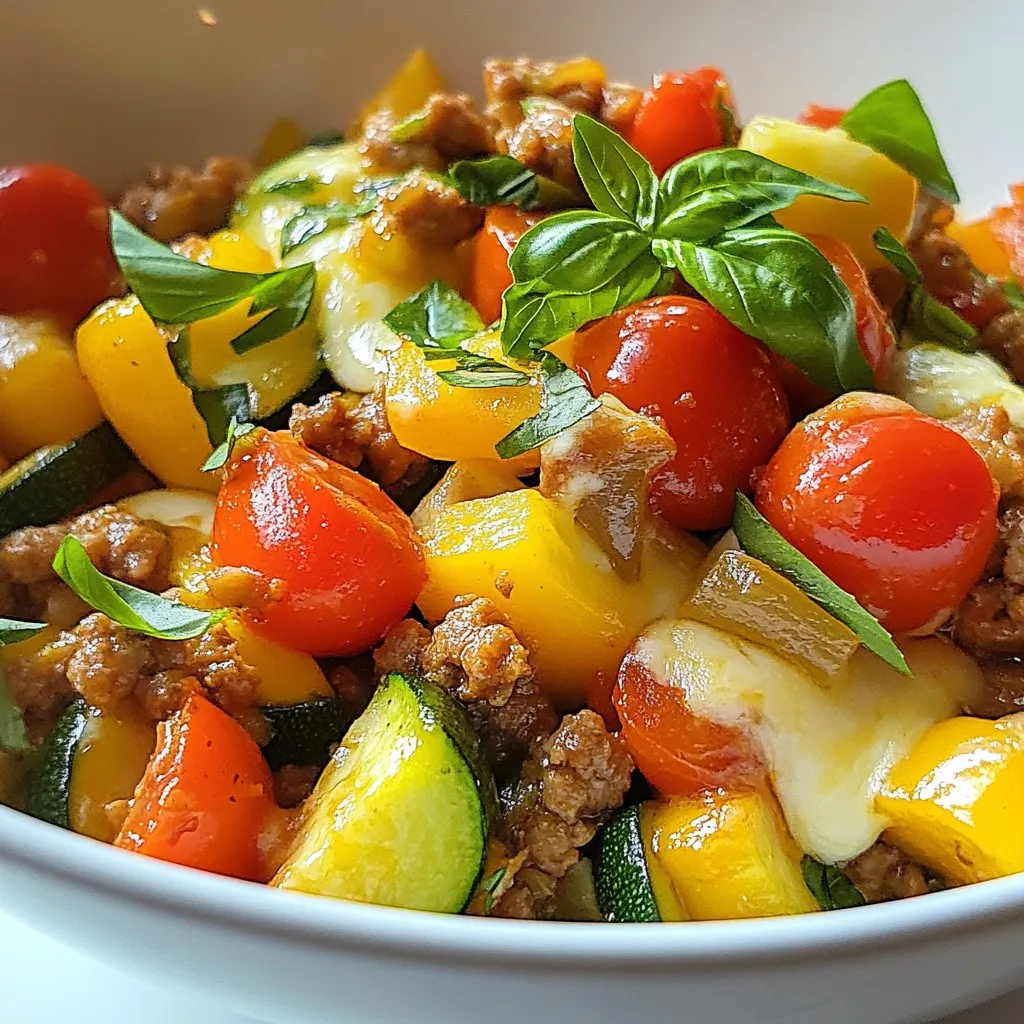
Looking for a tasty way to enjoy healthy meals? Let me introduce you to my Turkey Zucchini Skillet! This dish brings together lean ground turkey and fresh zucchini, making it …

Read more

Categories Dinner

No-Bake Granola Bars Simple and Tasty Snack Idea

December 12, 2025February 20, 2025 by Chef Tavio
- 2 cups rolled oats - 1 cup almond butter (or substitute with smooth peanut butter) - 1/4 cup honey (or maple syrup for a vegan option) - 1/2 cup dark chocolate chips - 1/2 cup mixed nuts (such as walnuts, almonds, or pecans), coarsely chopped - 1/4 cup chia seeds - 1/2 teaspoon pure vanilla extract - Pinch of sea salt These ingredients create a tasty and healthy snack. I love using rolled oats as the base. They add great texture and fiber. Almond butter or peanut butter gives the bars their rich flavor and helps bind the mix. For sweetness, honey works well, but maple syrup is a great vegan option. Dark chocolate chips add a sweet touch, while mixed nuts boost crunch and healthy fats. Chia seeds are tiny but mighty, adding fiber and protein. The vanilla extract gives a warm flavor, and a pinch of sea salt balances everything. You can customize these ingredients to suit your taste. Want a nut-free version? Just skip the nuts. Prefer dried fruit? Toss in some raisins or cranberries. The choice is yours! {{ingredient_image_2}} Line an 8x8 inch square baking dish with parchment paper. Let the paper hang over the edges. This helps you lift the bars out later. It also keeps the bars intact for serving. In a medium saucepan, melt the almond butter and honey over low heat. Stir until smooth. Remove from heat and mix in vanilla extract and a pinch of sea salt. This adds great flavor to your bars. In a large bowl, combine rolled oats, chopped nuts, dark chocolate chips, and chia seeds. Use a spoon to mix well. Make sure everything is evenly spread. This is key for a tasty bite. Pour the warm almond butter mixture over the dry ingredients. Use a sturdy spatula or your hands to mix. Stir until everything is sticky and well-coated. This step is vital for binding the bars. Transfer the mixture into the lined baking dish. Use the back of a spatula or your hands to press down firmly. Make sure to fill the corners. A tight pack helps the bars stay together. Cover the dish with plastic wrap or a lid. Place it in the fridge for 1-2 hours. Chilling helps the bars firm up. They need to hold their shape when cut. Once firm, lift the mixture out using the parchment paper. Place it on a cutting board. Slice into bars or squares as you like. For a nice touch, arrange them on a platter. Enjoy your tasty homemade treats! You can switch up the nut butter in this recipe. Almond butter is great, but smooth peanut butter works too. If you want a nut-free option, use sunflower seed butter instead. You can also change the sweetener based on what you like. Honey is sweet and sticky, while maple syrup adds a nice flavor for vegans. Keeping your bars fresh is easy. Store them in an airtight container at room temperature for a week. If you want them to last longer, put them in the fridge. For best results, separate layers with parchment paper to avoid sticking. If they crumble, try packing them tighter next time. You can add fun mix-ins to your bars. Dried fruits like cranberries or apricots add sweetness and chewiness. Seeds like pumpkin or sunflower give a nice crunch. For a special treat, drizzle some melted chocolate or nut butter on top. It adds a lovely touch and makes them look fancy! Pro Tips Store in the Right Place: Keep your granola bars in an airtight container at room temperature for up to a week or in the refrigerator for longer freshness. Customize Your Nuts: Feel free to experiment with different types of nuts or seeds according to your taste preference or dietary needs. Sweetness Level: Adjust the amount of honey or maple syrup based on your sweetness preference; you can add more or less according to your taste. Extra Crunch: For added texture, consider toasting the oats or nuts before mixing; this enhances the flavor and provides a delightful crunch. {{image_4}} You can easily make these bars vegan. Just swap honey for maple syrup. Use all plant-based ingredients like almond butter. They taste great, and you can enjoy them without any animal products. Maple syrup adds a sweet, rich flavor. This option makes the bars suitable for everyone. If you need gluten-free snacks, these bars are perfect. Just make sure to use certified gluten-free oats. Most nut butters, like almond and peanut, are also gluten-free. This way, you can enjoy your bars without worrying about gluten. Want to boost the protein in your bars? Add a scoop of protein powder. You could also mix in seeds like pumpkin or hemp. These additions make your granola bars a great snack for energy and nutrition. They help keep you full longer, too. To keep your no-bake granola bars fresh, use airtight containers. This method helps keep them from drying out. You can stack them neatly in the container. This way, they stay moist and tasty when you grab one for a snack. No-bake granola bars can last up to two weeks when stored correctly. If you keep them in an airtight container, they stay fresh longer. You might notice that the flavor can change over time, but they should still taste good. Freezing is a great way to save extra bars. To freeze, wrap each bar in plastic wrap. Then, place them in a freezer-safe bag or container. When you’re ready to eat, just take out a bar and let it thaw in the fridge. This way, you can enjoy your favorite snack anytime! Yes, you can switch nuts in this recipe. I suggest using walnuts, almonds, or pecans. Each nut adds a unique flavor and texture. You could also try cashews or hazelnuts for a fun twist. Just make sure they are coarsely chopped to mix well. To keep your bars from falling apart, pack them tightly. Use your hands or a spatula to press the mixture firmly into the dish. The more you press, the better they stick together. Also, ensure the nut butter and honey are warm when mixing. This helps everything bind better. Yes, these bars are packed with good ingredients. Rolled oats provide fiber and energy. Almond butter offers healthy fats and protein. Chia seeds add omega-3s, while dark chocolate gives a sweet touch without too much sugar. Overall, they make a wholesome snack. Absolutely! You can make these bars in advance. Just let them chill in the fridge for at least 1-2 hours. Store them in an airtight container to keep them fresh. They will last up to a week. Enjoy them as a quick snack or breakfast option! In this post, we explored how to make no-bake granola bars. We covered essential ingredients like oats, nut butter, and sweeteners. You learned the step-by-step methods for preparing and chilling your bars. I shared tips for customization, storage, and flavor enhancement. No-bake granola bars are easy, tasty, and perfect for quick snacks. You can enjoy healthy treats made just the way you like them. So, get creative in the kitchen and make your own delicious bars today!

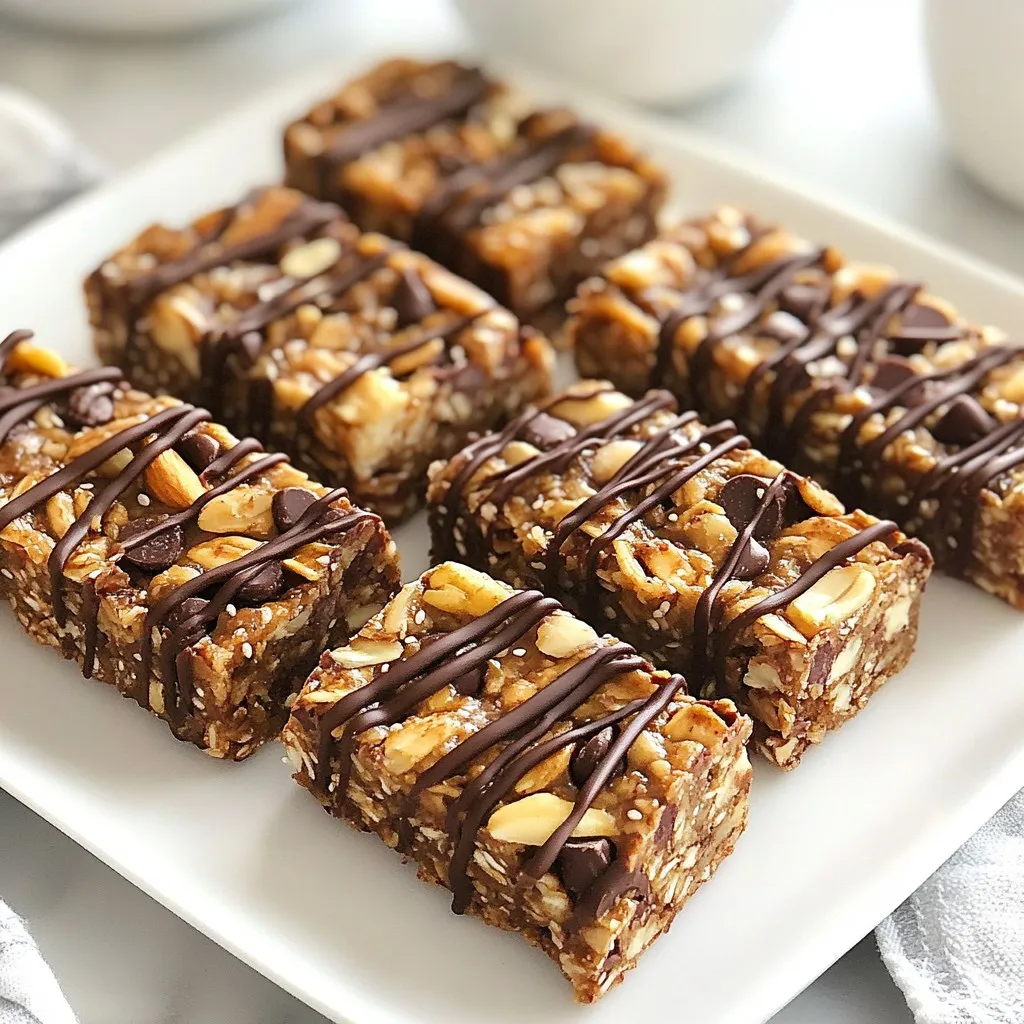
Looking for a simple snack that’s tasty and healthy? No-bake granola bars are the answer! With just a few key ingredients, you can whip up these delicious treats in no …

Read more

Categories Desserts

One Pan Cheesy Chicken Broccoli Pasta Delight

November 28, 2025February 20, 2025 by Chef Tavio
- 2 boneless skinless chicken breasts - 8 oz pasta (fusilli or penne recommended) - 2 cups fresh broccoli florets - Low-sodium chicken broth (3 cups) - Garlic (3 cloves, minced) - Onion powder (1 tsp) - Garlic powder (1 tsp) - Red pepper flakes (1/2 tsp, optional) - Salt and pepper to taste - Sharp cheddar cheese (1 cup, shredded) - Parmesan cheese (1/2 cup, finely grated) When you gather these ingredients, you set the stage for a tasty meal. The chicken gives the dish protein and flavor. The pasta serves as a hearty base. Broccoli adds a fresh crunch and a pop of color. The seasonings transform plain ingredients into a feast. Garlic brings warmth, while onion powder adds depth. Red pepper flakes can add a kick if you like spice. Always adjust salt and pepper to suit your taste. Cheese is the star of this dish. Sharp cheddar melts beautifully, creating a creamy sauce. Parmesan adds a nutty finish. Together, they turn this simple meal into a cheesy delight that everyone loves. Now that you have all the ingredients ready, you can dive into the fun part—cooking! {{ingredient_image_2}} Start by heating 2 tablespoons of extra virgin olive oil in a large skillet over medium heat. Season 2 diced boneless, skinless chicken breasts with salt, black pepper, 1 teaspoon of onion powder, and 1 teaspoon of garlic powder. This mix adds great flavor. Sauté the chicken for about 5-7 minutes. Stir it occasionally until it turns golden brown and is fully cooked. Always check that the chicken reaches an internal temperature of 165°F for safety. Once done, take the chicken out and set it aside on a plate. In the same skillet, add 8 oz of uncooked fusilli or penne pasta. Pour in 3 cups of low-sodium chicken broth and add 3 minced garlic cloves. Turn the heat to high and bring the mix to a rolling boil. Once boiling, reduce the heat to a gentle simmer. Cover the skillet and let it cook for 8-10 minutes. Make sure to stir occasionally to prevent the pasta from sticking together. You want it to be al dente, which means firm but not hard. When the pasta cooks for about 8 minutes, it's time to add 2 cups of fresh broccoli florets. This should happen during the last 3 minutes of cooking. The steam will cook the broccoli perfectly, keeping it bright and tender. After the pasta and broccoli are cooked, return the chicken to the skillet. Gently stir all the ingredients together until they are mixed well. Lower the heat to the lowest setting. Now, sprinkle 1 cup of shredded sharp cheddar cheese and 1/2 cup of finely grated Parmesan cheese over the pasta mixture. Stir continuously to help the cheese melt into a creamy sauce. This is the magic moment! If you like some heat, you can add 1/2 teaspoon of red pepper flakes here. Adjust the amount based on your spice preference. Before serving, taste the dish and adjust the seasoning with more salt or pepper if needed. If the sauce seems too thick, add a splash of chicken broth to loosen it. To serve, dish out the cheesy chicken and broccoli pasta into bowls. For an extra touch, you can sprinkle more Parmesan or a dash of red pepper flakes on top. Enjoy your delicious meal hot! To cook efficiently in one pan, start with great prep. Cut all ingredients before you begin. This makes cooking smooth and fast. Use a large skillet to give food room to cook evenly. Stir often to avoid sticking. Let the heat do the work, but don’t forget to watch your food. To ensure even cooking, try these tips: - Cut chicken into similar sizes. - Cook pasta at a gentle simmer. - Add broccoli when pasta is almost done. You can spice up your dish in many ways. Try adding fresh herbs like basil or parsley for a burst of flavor. A pinch of smoked paprika gives a warm taste. You could also mix in some lemon zest for brightness. For cheese, feel free to experiment. Gouda or mozzarella can replace cheddar for a different twist. You can even use a spicy cheese if you love heat. This recipe is easy to follow. You can prep in about 10 minutes. The cooking part takes about 20 minutes, so the total is only 30 minutes. This dish suits both beginner and intermediate cooks. If you can chop, stir, and watch a pot, you can make this meal. Enjoy the process and have fun! Pro Tips Perfectly Cooked Pasta: Stir the pasta occasionally while it cooks to prevent sticking and ensure even cooking. Cheese Melting Technique: To achieve a creamy sauce, make sure to reduce the heat to the lowest setting before adding cheese. Broccoli Cooking Time: Adding the broccoli during the last few minutes of cooking helps retain its vibrant color and nutrients. Adjusting Consistency: If the sauce is too thick, a splash of chicken broth or water can help achieve your desired creaminess. {{image_4}} You can switch chicken for turkey or shrimp. Turkey works well if you use similar cuts. For shrimp, add it later in the cooking process. Cook shrimp for about 3-4 minutes until pink. Adjust cooking times to keep everything tender. To make this dish vegetarian, skip the chicken. Use extra broccoli, or add bell peppers and mushrooms for more flavor. You can also use tofu as a protein. Tofu needs a little more time to sauté. Make sure it’s crispy on the outside for better texture. If you need gluten-free, use gluten-free pasta. Various brands offer great options that taste good. Check the broth to ensure it’s gluten-free too. Some brands may add gluten, so read the label. You might need to adjust cooking times based on the pasta type. To store your One Pan Cheesy Chicken Broccoli Pasta, let it cool first. Place it in an airtight container. This keeps the dish fresh and tasty. It will last in the fridge for 3 to 4 days. When you're ready to eat, check for any odd smells or colors. If it looks good, you're all set! If you want to keep it longer, freezing is a great option. Scoop the pasta into freezer-safe bags or containers. Make sure to remove any air to prevent freezer burn. This dish can stay fresh for up to 3 months in the freezer. To thaw, place it in the fridge overnight. For quick reheating, use the microwave or stovetop. Add a splash of chicken broth if it seems too thick. Enjoy your cheesy pasta delight anytime! 1. Cook the Chicken: Heat olive oil in a large skillet. Season chicken with salt, pepper, onion powder, and garlic powder. Sauté for 5-7 minutes until golden and cooked. Set aside. 2. Cook the Pasta: In the same skillet, add pasta and chicken broth. Stir in minced garlic. Bring to a boil, then reduce heat and simmer for 8-10 minutes until pasta is al dente. 3. Add the Broccoli: In the last 3 minutes, add broccoli florets to the pasta. This steams the broccoli perfectly. 4. Combine Ingredients: Return the chicken to the skillet. Stir everything together well. 5. Incorporate the Cheese: Lower heat and sprinkle cheddar and Parmesan cheese on top. Stir until melted and creamy. 6. Taste and Adjust Seasoning: Check flavor and add salt or pepper if needed. Add broth if sauce is too thick. 7. Serve Hot: Dish into bowls and garnish if desired. Enjoy! Yes, you can use frozen broccoli. It’s convenient and saves time. Frozen broccoli cooks faster. Just add it during the last 5 minutes of pasta cooking. This ensures it heats through without getting mushy. Fresh broccoli gives a slight crunch and bright color. Choose based on your preference! Here are some great side dishes: - Garlic Bread: Toasted and buttery, perfect for dipping. - Mixed Green Salad: A light salad adds freshness. - Roasted Vegetables: Carrots or bell peppers complement the meal well. - Fruit Salad: A sweet touch balances the savory pasta. To add heat, try these tips: - Red Pepper Flakes: Add more than 1/2 teaspoon for extra kick. - Hot Sauce: Drizzle your favorite hot sauce before serving. - Spicy Cheese: Use pepper jack cheese instead of cheddar for added spice. - Chili Powder: Mix in a teaspoon during cooking for a deeper flavor. This recipe creates a tasty one-pan dish. We covered the key ingredients, from chicken to cheese. You learned step-by-step cooking tips and variations for dietary needs. Remember, cooking can be fun and easy, whether you're a beginner or have more skills. Enjoy the leftovers by storing them wisely. With the right ingredients, you can make this dish your own. So, gather your items, and get cooking!

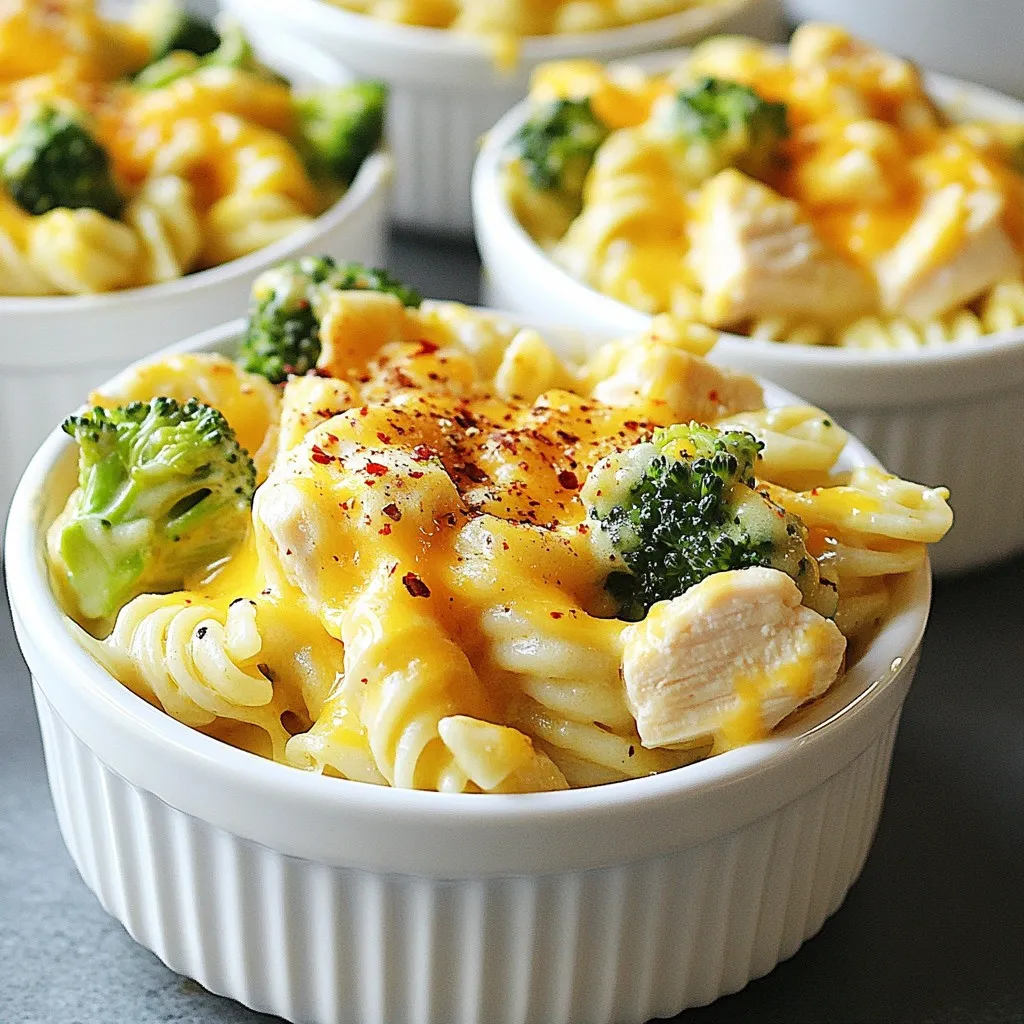
Welcome to your next favorite dish: One Pan Cheesy Chicken Broccoli Pasta Delight! This easy recipe cooks in one pan, saving you time and dishes. With tender chicken, fresh broccoli, …

Read more

Categories Dinner

Creamy Smoked Sausage Pasta Delightful and Easy Meal

November 20, 2025February 19, 2025 by Chef Tavio
To make creamy smoked sausage pasta, gather these tasty ingredients: - 8 oz (225 g) penne pasta - 2 tablespoons extra-virgin olive oil - 12 oz (340 g) smoked sausage, sliced into bite-sized pieces - 1 medium onion, finely diced - 3 cloves garlic, finely minced - 1 red bell pepper, diced into small cubes - 1 cup cherry tomatoes, halved - 1 cup heavy cream - 1 cup freshly grated Parmesan cheese - 1 teaspoon smoked paprika - Salt and freshly ground black pepper to taste - Fresh basil leaves for garnish If you can’t find some ingredients, don’t worry! Here are some swaps you can try: - Pasta: You can use any pasta you like, such as fusilli or rigatoni. - Smoked Sausage: Try kielbasa or chicken sausage for a lighter option. - Heavy Cream: Use half-and-half or coconut cream for a different flavor. - Parmesan Cheese: Grate some Pecorino Romano or nutritional yeast for a vegan option. - Vegetables: Mix in zucchini, spinach, or mushrooms for more veggies. You’ll need some basic tools to whip up this dish: - A large pot for boiling pasta - A spacious skillet for sautéing - A colander to drain the pasta - A cutting board and knife for chopping - A cheese grater for the Parmesan These items make cooking easier, helping you create a delightful meal! {{ingredient_image_2}} To start, fill a large pot with 4 quarts of salted water. Bring it to a rolling boil. Add 8 ounces of penne pasta to the pot. Cook the pasta based on the package instructions, usually 10 to 12 minutes. You want it to be al dente. This means it should be firm when you bite into it. After cooking, drain the pasta in a colander. Set it aside while you prepare the other ingredients. Next, take a large skillet and heat 2 tablespoons of extra-virgin olive oil over medium heat. Wait until the oil shimmers. Add 12 ounces of sliced smoked sausage to the skillet. Sauté the sausage for about 5 minutes. You want it to be browned and a bit crispy. After that, remove the sausage from the skillet and set it aside. Keep the tasty fat from the sausage in the pan; it adds flavor to your dish. In the same skillet, add one finely diced medium onion. Cook it for about 2 to 3 minutes until it turns soft and translucent. Then, add 3 cloves of minced garlic and one diced red bell pepper. Sauté these for another 3 to 4 minutes. This will let the flavors blend. Now, stir in one cup of halved cherry tomatoes. Cook them until they begin to burst, which should take around 2 minutes. The juices from the tomatoes will add great taste. Now, lower the heat and pour in 1 cup of heavy cream. Stir well to mix everything. Gradually add 1 cup of freshly grated Parmesan cheese. Sprinkle in 1 teaspoon of smoked paprika as you stir. Keep stirring until the cheese melts and the sauce thickens a bit, about 2 to 3 minutes. Finally, return the browned sausage to the skillet. Add the drained penne pasta and toss everything together. Ensure the pasta is well coated in the creamy sauce. Taste it and add salt and black pepper as needed. Your creamy smoked sausage pasta is now ready to serve! To make your creamy smoked sausage pasta shine, use simple seasonings. Start with smoked paprika. This spice adds a warm, smoky flavor. Add salt and pepper to taste. Fresh herbs can boost the dish. Basil works well, but parsley is nice too. You can also sprinkle some red pepper flakes for a bit of heat. A creamy sauce needs to be smooth. To achieve this, heat the cream gently. Stir often to avoid burning. When you add Parmesan, do it slowly. This helps it melt evenly. If your sauce is too thick, add a splash of pasta water. This will loosen it up without losing flavor. How you present your dish matters! Serve the pasta in wide, shallow bowls. This lets the vibrant colors pop. For a touch of elegance, drizzle olive oil on top. Sprinkle extra Parmesan cheese for a beautiful finish. Lastly, add fresh basil leaves as a garnish. This not only looks great but adds more flavor too. Pro Tips Use Fresh Ingredients: Whenever possible, opt for fresh vegetables and high-quality sausage to enhance the overall flavor of your dish. Adjust the Creaminess: For a lighter version, substitute half the heavy cream with chicken broth or use a lighter cream alternative. Perfect Pasta Cooking: Make sure to cook the pasta just until al dente; it will continue to cook when mixed with the sauce, preventing it from becoming mushy. Customize Your Veggies: Feel free to add or substitute other vegetables, such as spinach or zucchini, to add more nutrition and flavor to the dish. {{image_4}} You can easily add more veggies to your creamy smoked sausage pasta. Try adding: - Spinach or kale for a green boost. - Zucchini, sliced thin for added crunch. - Mushrooms for a rich, earthy flavor. - Peas for a pop of sweetness. Cook these veggies with the onion and bell pepper. This adds color and nutrition. Switching up the sausage can change the dish’s flavor. You might try: - Chicken sausage for a leaner option. - Italian sausage for a spicy kick. - Turkey sausage for a lighter choice. Each type brings its own taste. Pick one that fits your mood! If you need gluten-free or dairy-free options, it's simple. Use: - Gluten-free penne pasta made from rice or corn. - Coconut cream or cashew cream instead of heavy cream. - Nutritional yeast for a cheesy flavor without dairy. These swaps keep your dish tasty while fitting your dietary needs. Enjoy your creamy smoked sausage pasta any way you like! To keep your creamy smoked sausage pasta fresh, let it cool first. Transfer the leftovers to an airtight container. Make sure to seal it tightly. Store the container in the fridge. It helps to label the container with the date. This way, you know when you made it. When you're ready to enjoy your leftovers, take them out of the fridge. You can reheat the pasta on the stove or in the microwave. If using the stove, add a splash of milk or cream to prevent it from drying out. Stir it gently over low heat until it is warm. In the microwave, use a microwave-safe dish. Heat in short bursts, stirring in between. This will ensure even heating. Your creamy smoked sausage pasta will stay good in the fridge for about 3 to 4 days. If you want to keep it longer, consider freezing it. In the freezer, it can last up to 2 months. Just remember to use a freezer-safe container. When you're ready to eat it, thaw it overnight in the fridge. Then follow the reheating instructions above. Yes, you can use other types of pasta. Options like fusilli, farfalle, or rigatoni work well. Just remember to adjust the cooking time based on the type you choose. The key is to cook it until it's al dente. This keeps the pasta firm and tasty in your dish. If you want to avoid heavy cream, try using half-and-half or whole milk. You can also use coconut milk for a dairy-free option. These substitutes will change the flavor and texture slightly. To get a thicker sauce, mix in some cornstarch or a bit of cream cheese. To add some heat, you can include red pepper flakes or diced jalapeños. Stir these in while cooking the sausage or veggies. Another option is to use spicy sausage instead of smoked sausage. Adjust the amount based on your personal spice level. Enjoy the kick! This blog post covered the main ingredients and steps for making creamy smoked sausage pasta. We explored key ingredients and tasty substitutes, along with helpful cooking tips. You can adjust the recipe to fit your taste, add options for veggies, and choose various sausages. Remember to store leftovers properly for best quality. I hope you enjoy making this dish as much as I do. It's easy, flexible, and so satisfying!

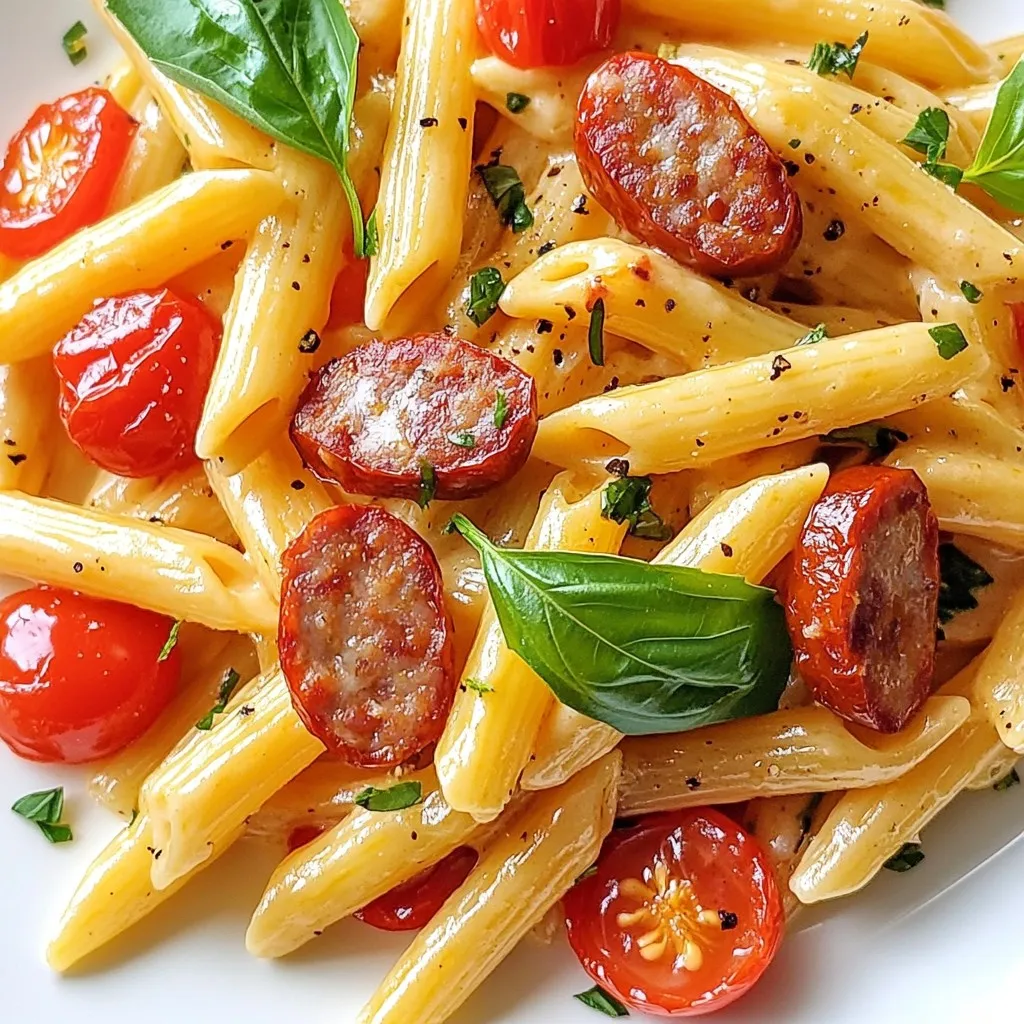
Are you craving a delicious meal that’s quick and easy to make? Look no further! My Creamy Smoked Sausage Pasta hits all the right spots. With just a handful of …

Read more

Categories Dinner

Pesto Grilled Cheese Delightfully Cheesy Goodness

December 10, 2025February 19, 2025 by Chef Tavio
- 4 slices of rustic sourdough bread - 4 tablespoons basil pesto - 4 slices of fresh mozzarella cheese - 2 tablespoons grated Parmesan cheese - 2 tablespoons unsalted butter, softened - 1/2 teaspoon garlic powder - Salt and pepper to taste - Optional: A handful of arugula or spinach for added freshness Pesto grilled cheese is all about fresh, simple ingredients. Each one adds flavor and texture. I love rustic sourdough bread. It gives a nice crunch. The basil pesto is key. It adds a burst of flavor that brightens the sandwich. Fresh mozzarella melts perfectly, making it gooey and cheesy. Grated Parmesan adds a nice salty bite. Unsalted butter is essential for that golden crust. Garlic powder gives a hint of warmth without being strong. Salt and pepper bring all the flavors together. If you want a touch of green, arugula or spinach is a great choice. It adds freshness and a bit of crunch. You can mix and match these ingredients based on your taste. Enjoy the process of making this sandwich! {{ingredient_image_2}} - Start by spreading about 1/2 tablespoon of softened butter on one side of each slice of rustic sourdough bread. This butter will help create a nice, golden crust. - Next, take two slices of bread and spread 2 tablespoons of basil pesto on the unbuttered side. Make sure to cover the whole slice for full flavor. - Now, layer 2 slices of fresh mozzarella cheese on top of the pesto. This cheese melts beautifully and adds creaminess. If you like greens, add a handful of arugula or spinach on top of the cheese for a fresh taste. - Preheat your skillet over medium heat. A hot skillet is key for good crispiness. - Place the sandwiches in the skillet and let them cook for about 3-4 minutes. Look for a rich golden brown color on the bottom. - When it's time to flip, use a spatula to gently turn the sandwiches. After flipping, sprinkle a pinch of garlic powder on the newly exposed side. Cook for another 3-4 minutes until both sides are golden and the cheese is melted. - Once cooked, take the sandwiches out of the skillet and let them rest for one minute. This helps avoid a cheesy mess when you slice them. - Serve the warm sandwiches with a sprinkle of salt and pepper to boost the flavors. For a fun twist, cut them diagonally and serve with marinara sauce for dipping. A sprig of fresh basil on the plate adds a nice touch! To get that perfect crispy crust, butter coverage is key. Spread the butter evenly on each slice of bread. This helps achieve a golden brown outside. Use unsalted butter for a rich flavor. The ideal skillet temperature is medium heat. If it's too hot, the bread burns before the cheese melts. A properly heated skillet will make your grilled cheese sizzle and bubble, creating that delightful crunch. The best cheeses for melting are fresh mozzarella and Gruyère. Fresh mozzarella gives a lovely stretch. Gruyère adds a nutty flavor. For extra gooeyness, combine different cheeses. Mixing mozzarella with cheddar makes for an amazing blend. Another trick is to cover the skillet with a lid while cooking. This traps the heat and melts the cheese faster. Adding herbs or spices can elevate your grilled cheese. Try mixing in some fresh basil or a pinch of red pepper flakes. Both add a burst of flavor. You can also use alternative spreads to mix with pesto. Sun-dried tomato paste or garlic aioli can change the game. These swaps bring new tastes to your sandwich, making each bite exciting. Pro Tips Use Fresh Ingredients: Always opt for fresh mozzarella and basil pesto for the best flavor and texture in your grilled cheese. Temperature Control: Cooking on medium heat ensures that the bread gets golden brown without burning while allowing the cheese to melt thoroughly. Add a Flavor Boost: Experiment with adding a sprinkle of red pepper flakes or a dash of lemon juice to the pesto for an extra zing. Rest Your Sandwich: Allow the sandwiches to rest for a minute after cooking; this helps the cheese set slightly, making it easier to slice without spilling out. {{image_4}} You can easily switch up the bread for your pesto grilled cheese. Try using: - Whole wheat bread for a nutty flavor. - Ciabatta for a crusty bite. - Gluten-free bread for a safe option. For the pesto, feel free to experiment with different flavors. Consider using: - Sun-dried tomato pesto for a sweet twist. - Walnut pesto for a rich, earthy taste. These swaps can change the whole dish while keeping it delicious. If you want a vegan version, you can substitute the cheese and butter. Use: - Vegan mozzarella cheese for a similar melt. - Coconut oil instead of butter for frying. For gluten-free options, make sure to choose certified gluten-free bread. This way, everyone can enjoy this tasty sandwich without worry. Adding more to your sandwich can make it even better. You can try: - Slices of fresh tomato for juiciness. - Roasted red peppers for sweetness. Pair it with complementary sides like: - Tomato soup for dipping. - A fresh salad for a light crunch. These add-ins can boost flavor and make your meal more exciting. Enjoy your culinary adventure! To keep your pesto grilled cheese fresh, store it in an airtight container. Place parchment paper between sandwiches to avoid sogginess. You can refrigerate leftovers for up to three days. After that, the bread may lose its nice texture, and the cheese could dry out. For the best taste, reheat in an oven. Preheat your oven to 350°F (175°C) and place the sandwich on a baking sheet. Heat for about 10 minutes, until the cheese melts again and the bread gets crisp. If you use a microwave, the sandwich may become soft. Heat in short bursts of 15 seconds if you have no other option. To freeze pesto grilled cheese, wrap each sandwich tightly in plastic wrap. Place them in a freezer-safe bag. They can stay frozen for up to two months. When you're ready to eat, thaw the sandwich in the fridge overnight. Reheat in the oven as mentioned above for the best results. Yes, you can prepare your sandwiches in advance. To do this, follow the steps until you make the sandwich. After assembling, wrap it in plastic wrap or foil. This keeps the bread fresh and moist. You can store it in the fridge for up to 24 hours. When ready to eat, just cook it in the skillet. This way, you can enjoy your delightful meal with ease. Different types of pesto bring unique flavors. Classic basil pesto is a favorite for its fresh taste. You can also try sun-dried tomato pesto for a sweet twist. Spinach or arugula pesto adds a vibrant green flavor. Each type pairs well with the creamy cheeses in your sandwich. Try mixing different pestos to discover your favorite blend! Yes, adding protein can make your meal heartier. You can use sliced turkey or chicken for a tasty option. If you prefer plant-based choices, add chickpeas or black beans. These options boost the protein and make the sandwich more filling. Experiment with your favorite meats or legumes to find the best combination! You’ve learned how to make a tasty pesto grilled cheese sandwich. We covered the ingredients, preparation steps, and cooking techniques. I also shared tips for crispiness, cheese melting, and flavor boosts. You saw variations and dietary options to suit your needs. Remember, you can store leftovers properly or freeze them for later. Enjoy experimenting with this sandwich to make it your own. Each bite should be gooey, fresh, and delicious. Happy cooking!

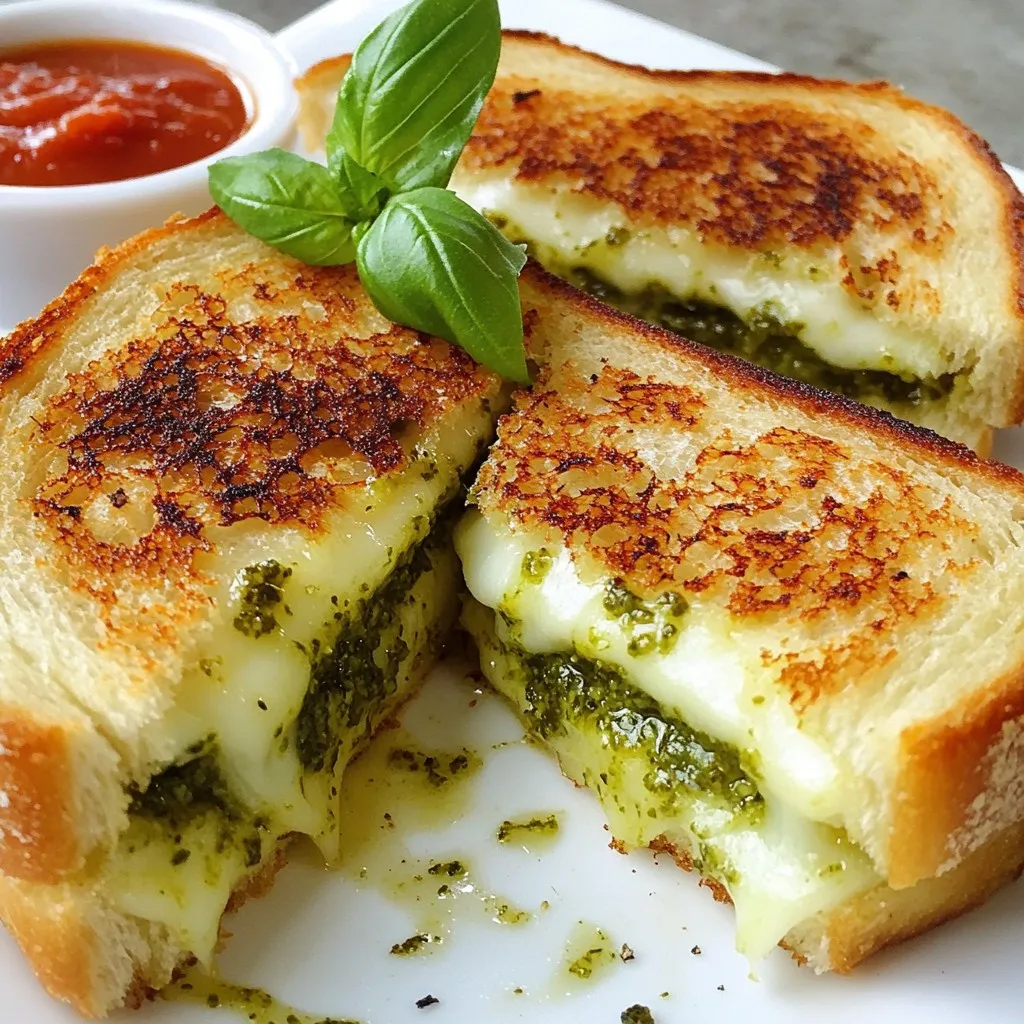
Dive into the world of Pesto Grilled Cheese, where cheesy goodness meets fresh flavors! This sandwich brings together crispy sourdough, creamy mozzarella, and vibrant basil pesto for a taste sensation …

Read more

Categories Dinner

Savory Chicken Pot Pie Pasta Hearty and Simple Recipe

December 9, 2025February 19, 2025 by Chef Tavio
For this hearty Chicken Pot Pie Pasta, you need: - 12 oz penne pasta - 2 tablespoons olive oil - 1 medium onion, diced - 2 carrots, diced - 2 celery stalks, diced - 3 cloves garlic, minced - 1 rotisserie chicken, shredded (approximately 3 cups) - 1 cup frozen peas - 1 cup chicken broth - 1 cup heavy cream - 1 teaspoon dried thyme - 1 teaspoon dried rosemary - Salt and black pepper to taste - 1 cup grated cheddar cheese - Fresh parsley, chopped (for garnish) These ingredients blend together to create a creamy and rich dish. The rotisserie chicken saves time and adds great flavor. The herbs give the pasta a warm and inviting taste. While the pasta is delicious on its own, some garnishes can enhance it: - Extra grated cheddar cheese - Fresh parsley, chopped - Cracked black pepper Using garnishes adds a pop of color and flavor. They make your dish look more appealing and taste even better. To make this recipe, you will need: - Large pot for boiling pasta - Large skillet for sautéing - Wooden spoon for stirring - Measuring cups and spoons - Knife and cutting board for chopping vegetables Having the right tools makes cooking easier. It helps you stay organized and ensures everything cooks evenly. {{ingredient_image_2}} Start by boiling a large pot of salted water. Once it boils, add 12 oz of penne pasta. Cook the pasta according to the package instructions until it is al dente. Remember to stir it occasionally. After it cooks, drain the pasta and set it aside for later. In a large skillet, heat 2 tablespoons of olive oil over medium heat. Add one medium diced onion, two diced carrots, and two diced celery stalks. Sauté the veggies for about 5 minutes. You want them to soften and the onion to turn translucent. This adds great flavor to your dish. Next, stir in 3 cloves of minced garlic. Cook it for about one minute. This will release a nice fragrance. Then, add in the shredded rotisserie chicken, one cup of frozen peas, one cup of chicken broth, and one cup of heavy cream. Sprinkle in one teaspoon of dried thyme and one teaspoon of dried rosemary. Season with salt and black pepper to taste. Turn up the heat slightly and bring the mix to a gentle simmer. Let it cook for about 5 to 7 minutes. Stir occasionally until the sauce thickens a bit. Now, it's time to mix in the cooked penne pasta. Stir well to coat it with the creamy sauce. Make sure chicken and vegetables are evenly mixed throughout. After that, sprinkle one cup of grated cheddar cheese over the pasta. Cover the skillet with a lid and let it sit on low heat for 2 to 3 minutes. This will help the cheese melt nicely. When you're ready to serve, dish out the pasta while it's warm. Use deep bowls or plates to hold the hearty meal. Top each serving with chopped fresh parsley for a nice touch. If you want, add an extra sprinkle of cheese on top. This will make your dish look even more inviting! To make your sauce creamy and rich, use heavy cream. This adds a nice thickness. Make sure to simmer it gently. Stir often to avoid burning. If the sauce is too thick, add a bit more chicken broth. This helps achieve the right consistency. For a smoother sauce, mix in some cheese as it melts. It brings a delightful flavor that enhances the whole dish. One mistake is overcooking the pasta. Cook it just until al dente. This keeps it firm and tasty. Another mistake is not seasoning enough. Always taste your sauce as you cook. Adjust with salt and pepper if needed. Lastly, don’t rush the simmering step. This is key for thickening the sauce and blending the flavors. Add fresh herbs for an extra kick. Chopped parsley or thyme works well. You can also sprinkle some garlic powder or onion powder. This boosts the overall taste. For a twist, try adding a splash of white wine to the sauce. It adds depth and a lovely aroma. Lastly, don’t forget to garnish your dish with extra cheese. It makes everything look delicious and inviting! Pro Tips Use Fresh Herbs: Fresh herbs like thyme and rosemary can elevate the flavor profile significantly compared to dried herbs. Add them at the end for a burst of freshness. Customize Your Veggies: Feel free to substitute or add other vegetables like bell peppers or mushrooms based on your preference. This dish is versatile! Make It Ahead: You can prepare the sauce and pasta in advance. Simply combine and bake when ready to serve for a quick meal solution. Cheese Variations: Experiment with different types of cheese like gouda or mozzarella for varied taste and texture. Each will bring its unique character to the dish. {{image_4}} You can change the protein in this dish. If you like turkey, use shredded turkey instead of chicken. This works well, especially after a holiday meal. You can also make it vegetarian. Just replace the chicken with mushrooms or tofu. Add extra veggies like zucchini or bell peppers for more flavor. While I use penne, you can choose other pasta types. Fusilli, rotini, or even egg noodles can work great. Each pasta shape brings a unique texture. For a heartier option, try whole wheat pasta. Gluten-free pasta is a good choice too. Just make sure to cook it according to package instructions. Adding herbs and spices can boost the flavor. Besides thyme and rosemary, think about adding parsley or dill. A pinch of cayenne pepper adds a warm kick. You can also sprinkle in a little garlic powder for more depth. Experiment with your favorites to make this dish your own. After enjoying your Chicken Pot Pie Pasta, store leftovers in an airtight container. Allow the dish to cool down before sealing it. This helps keep it fresh. You can store it in the fridge for up to three days. If you want to keep it longer, consider freezing it. To reheat, you can use the microwave or the stove. If using a microwave, place a portion in a bowl. Cover it loosely with a microwave-safe lid or wrap. Heat it for 1-2 minutes, stirring halfway through. On the stove, add a bit of broth or cream in a pan. Stir gently over low heat until warmed through. If you plan to freeze your Chicken Pot Pie Pasta, ensure it cools completely first. Divide it into portions for easy thawing. Store in freezer-safe bags or containers. You can freeze it for up to three months. When ready to enjoy, thaw overnight in the fridge. Reheat as mentioned above for the best taste. Yes, you can use fresh chicken. Cook the chicken first. You can boil or bake it. Shred or chop the cooked chicken. This adds a nice flavor. Using fresh chicken makes the dish healthier. To make this dish gluten-free, swap out the pasta. Use gluten-free penne or any gluten-free pasta. Check all labels on your ingredients. Some chicken broths and creams can contain gluten. Great sides include a simple salad or garlic bread. You can also serve steamed veggies. These sides balance the creamy pasta. They add freshness to your meal. Yes, you can make this dish ahead. Prepare it and store it in the fridge. Reheat it gently before serving. The flavors will deepen and taste even better! You've learned how to make Chicken Pot Pie Pasta from start to finish. We covered key ingredients, easy steps, and helpful tips. Remember to choose your favorite proteins and pasta shapes. Don't forget to check storage tips for leftovers. You can mix in your favorite herbs for added flavor. This dish is versatile, fun, and a great way to bring comfort food to your table. Enjoy creating your own delicious version of this recipe!

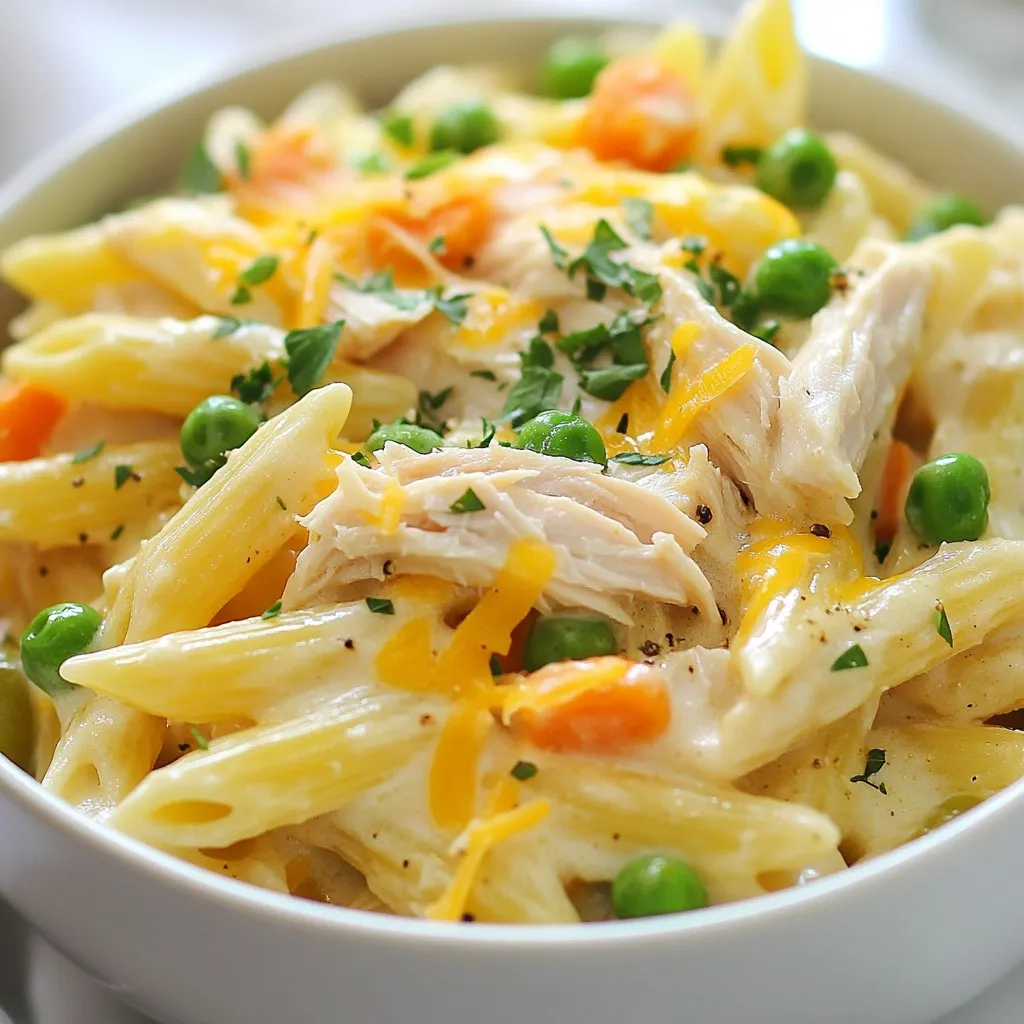
If you love comfort food that’s easy to make, you’ll adore my Chicken Pot Pie Pasta. This hearty dish combines all the cozy flavors of a classic pot pie into …

Read more

Categories Dinner

Award-Winning Chili Recipe for Flavorful Meals

November 11, 2025February 18, 2025 by Chef Tavio
To make a great chili, you need these main ingredients: - 1 lb ground beef or plant-based meat - 1 medium onion, finely chopped - 2 cloves garlic, minced - 1 can (15 oz) black beans, drained and rinsed - 1 can (15 oz) kidney beans, drained and rinsed - 1 can (28 oz) crushed tomatoes - 2 tablespoons chili powder - 1 tablespoon ground cumin - 1 teaspoon smoked paprika - 1 tablespoon olive oil - 1 bell pepper (any color), diced - 1 jalapeño pepper, diced (remove seeds for a milder flavor) - Salt and black pepper to taste These ingredients work together to create a rich and hearty flavor. The combination of beans adds texture and protein. The spices give it warmth and depth. For an extra touch, consider these optional toppings: - Shredded cheese - Sour cream - Fresh herbs, like cilantro or green onions These toppings can enhance the chili's flavor and presentation. They let everyone customize their bowl, making it even more fun. Enjoy experimenting with your favorite toppings! {{ingredient_image_2}} 1. Sauté onions and garlic First, grab a large pot. Heat 1 tablespoon of olive oil over medium heat. Add 1 medium onion, finely chopped, and 2 cloves of minced garlic. Sauté for about 3-4 minutes. The onion should look clear, and the garlic will smell great. 2. Cooking ground meat Next, raise the heat to medium-high. Add 1 pound of ground beef or plant-based meat. Break the meat apart with a spatula. Cook it until brown, which takes about 5-7 minutes. 1. Incorporating bell and jalapeño peppers Time to add flavor! Dice one bell pepper of any color and one jalapeño pepper (remove seeds for less heat). Stir these into the pot. Cook for another 3-4 minutes until the peppers soften. 2. Blooming spices for enhanced flavor Now, sprinkle in 2 tablespoons of chili powder, 1 tablespoon of ground cumin, and 1 teaspoon of smoked paprika. Stir well to coat everything. Cook for 1-2 minutes. This step helps the spices release their full flavor. 1. Adding tomatoes and beans Pour in 28 ounces of crushed tomatoes. Then, add 15 ounces each of drained black beans and kidney beans. Stir until everything combines well. 2. Adjusting seasoning and cooking time Season with salt and black pepper to taste. Bring the pot to a gentle simmer. Once it simmers, lower the heat, cover, and let it cook for at least 30 minutes. For richer flavor, let it simmer for up to 2 hours. Stir occasionally to keep it from sticking. Sautéing vegetables adds depth to your chili. Start with onion and garlic. Cook them until soft and fragrant. This brings out their sweet flavors. Next, add your meat. Brown it well for a rich taste. The key is to let the meat get some color. This adds a savory layer to your dish. Simmering is also important. Once you've combined all ingredients, let the chili simmer. A good simmer allows the flavors to meld. For best results, simmer for at least 30 minutes. If you can, let it cook longer. It only gets better with time. You can easily adjust the spice levels. For milder chili, remove the seeds from the jalapeño. You can also skip the jalapeño altogether. If you like heat, add more chili powder. Taste as you go to find your perfect balance. For a vegetarian option, swap ground beef for plant-based meat. Keep all the other ingredients the same. This way, you still get all the great flavors without meat. Serving chili can be fun and creative. Ladle it into nice bowls. Offer a variety of toppings on the side. This could include cheese, sour cream, or fresh herbs. Let guests customize their chili to their liking. For containers, use deep bowls or rustic mugs. They add charm to your meal. Make sure to have a big spoon for serving. This makes it easy for everyone to dig in! Pro Tips Enhance Flavor: For a deeper flavor, consider adding a splash of beer or a tablespoon of cocoa powder to the chili while it simmers. Make It Ahead: This chili tastes even better the next day! Make it ahead of time and let the flavors meld in the refrigerator overnight. Adjust Spice Level: If you prefer a spicier chili, leave the seeds in the jalapeño or add a pinch of cayenne pepper to the mix. Freezing Tips: This chili freezes well! Portion it into airtight containers and freeze for up to 3 months for a quick meal later. {{image_4}} Chili varies by region. Texas-style chili is thick and meaty. It usually skips beans. On the other hand, Cincinnati chili is sweet and served over spaghetti. It often includes spices like cinnamon and chocolate. If you're looking for a meat-free option, try vegetarian chili. Use plant-based meat or extra beans for texture. Vegan chili can skip dairy too, focusing on veggies and spices. Want to make your chili unique? Add dark chocolate for richness. Just a small amount enhances the flavors. Beer is another great addition. It adds depth and a slight bitterness. Different beans can also change the taste. Try using pinto beans or chickpeas alongside black and kidney beans. Each bean has its own flavor and texture. Chili is fun to serve in many ways. You can make nachos with chili on top! Just layer chips with cheese, then add hot chili. Bake it until the cheese melts. Another tasty idea is chili-stuffed baked potatoes. Scoop out some potato and fill it with chili. Top with cheese, sour cream, or green onions for extra flavor. These options make your meal fun and interactive! To keep your chili fresh, follow these simple steps: - Allow the chili to cool to room temperature. - Transfer the chili to airtight containers. Glass or plastic containers work well. - Store the chili in the fridge for up to four days. - Label the container with the date to track freshness. Using airtight containers helps keep the flavors intact. If you have more chili than you can eat, freezing is a great option. Here’s how to do it: - Portion the chili into freezer-safe bags or containers. - Remove as much air as possible to avoid freezer burn. - Label the bags or containers with the date and contents. Chili can last in the freezer for about three months. When you're ready to enjoy it again, thaw it in the fridge overnight. Reheat it on the stove or in the microwave before serving. Enjoy your flavorful chili any time! Award-winning chili stands out due to its rich flavors and perfect balance. Here are key factors: - Quality Ingredients: Use fresh vegetables and good meat or beans. They add depth. - Spices: A mix of chili powder, cumin, and smoked paprika creates a warm, bold taste. - Cooking Technique: Sautéing onions and garlic first builds a strong flavor base. - Simmer Time: Longer cooking times let flavors meld and deepen. Aim for at least 30 minutes. By focusing on these areas, your chili can impress judges and friends alike. Yes! You can make this chili in a slow cooker. Here’s how to adjust: - Sauté First: Cook onions and garlic in a skillet before adding. This boosts flavor. - Layer Ingredients: Put meat, beans, tomatoes, and spices in the slow cooker. - Cook Time: Set it on low for 6-8 hours or high for 3-4 hours. This method makes it easy and allows flavors to develop slowly. Serving chili at a party is fun and easy. Here are some ideas: - Chili Bar: Set up a chili bar with bowls of toppings. Include shredded cheese, sour cream, and fresh herbs. - Bowls and Spoons: Use individual bowls for a neat serving. Provide spoons for guests. - Pairings: Offer cornbread or tortilla chips as tasty sides. With these tips, your chili will be a hit at any gathering! You learned how to make chili from scratch with key ingredients and simple steps. I shared tips to enhance flavor and customize your dish. Remember, the best chili suits your taste. Feel free to experiment with toppings and spices. You can even adapt recipes based on your dietary needs. Whether shared at a party or enjoyed solo, chili warms the heart. Don’t forget to store leftovers wisely for later. Enjoy your delicious, homemade chili!

Are you ready to impress your friends with a chili recipe that could win awards? This award-winning chili is packed with flavor and just the right amount of kick. Whether …

Read more

Categories Dinner
Older posts
Newer posts
← Previous Page1 … Page150 Page151 Page152 … Page161 Next →

TASTED NEST

Where Flavor Finds a Home 🍳🏡 — warm, simple, and crave-worthy recipes made for real life, from stovetop mornings to backyard dinners.

PAGES

Home About Contact Privacy Policy Terms & Conditions Cookie Policy GDPR Policy Copyright Policy Disclaimer

CATEGORIES

Appetizers Desserts Salads Breakfast Dinner
Copyright © 2025 Tasted Nest. All rights reserved.