Skip to content
  • GDPR Privacy Policy
  • Copyright Policy
  • Disclaimer
  • Terms & Conditions
Tasted Nest
  • Home
  • Appetizers
  • Desserts
  • Salads
  • Breakfast
  • Dinner
  • Privacy Policy
  • Contact
  • About

Chef Tavio

Minute Beef & Veggie Stir Fry Quick and Flavorful Dish

November 22, 2025November 24, 2024 by Chef Tavio
- 1 pound flank steak, thinly sliced against the grain - 1 red bell pepper, thinly sliced - 1 yellow bell pepper, thinly sliced - 1 cup snap peas, trimmed and strings removed - 1 cup broccoli florets, bite-sized - 1 medium carrot, peeled and julienned - 3 green onions, chopped (whites and greens separated) - 2 tablespoons soy sauce - 1 tablespoon oyster sauce - 1 tablespoon sesame oil - 2 garlic cloves, minced - 1 teaspoon fresh ginger, grated - Cooked jasmine rice or noodles, for serving - Garnishes like sesame seeds and fresh cilantro When you make Minute Beef & Veggie Stir Fry, the choice of ingredients matters. First, you want flank steak. This cut is tender and flavorful. Slicing it against the grain keeps it juicy. Next, fresh vegetables add color and crunch. I use red and yellow bell peppers, snap peas, broccoli, and carrots. They cook quickly and stay crisp. The marinade is key too. Soy sauce brings saltiness. Oyster sauce adds depth. Sesame oil gives a nutty aroma. Garlic and ginger add a nice kick. Let the beef soak in these flavors for at least 15 minutes. For serving, jasmine rice or noodles work best. They soak up the sauce. Don't forget garnishes! A sprinkle of sesame seeds and fresh cilantro makes it pop. Enjoy making this dish! {{ingredient_image_2}} - In a medium bowl, mix 1 pound of flank steak with: - 2 tablespoons soy sauce - 1 tablespoon oyster sauce - 1 tablespoon sesame oil - 2 minced garlic cloves - 1 teaspoon grated ginger - Stir well to coat the beef evenly. - Let the beef marinate for at least 15 minutes. This step helps the meat absorb all those tasty flavors. - In a large skillet, heat 2 tablespoons of vegetable oil over high heat. - Once hot, add the marinated beef in a single layer. - Sear the beef for 2-3 minutes without moving it. This helps create a nice brown crust. - After browning, remove the beef and set it aside on a plate. - In the same skillet, add the remaining oil. - Toss in: - 1 sliced red bell pepper - 1 sliced yellow bell pepper - 1 cup snap peas - 1 cup broccoli florets - 1 julienned carrot - Stir-fry for about 4-5 minutes. Keep the vegetables bright and crisp. - Return the beef to the skillet with the cooked vegetables. - Stir everything together to combine. - Cook for an additional 2 minutes. This allows the flavors to meld beautifully. - Remove the skillet from heat and add: - 3 chopped green onions (whites and greens separated) - Toss everything for a final mix. - Serve hot over cooked jasmine rice or noodles. - Garnish with sesame seeds and fresh cilantro for a pop of color and flavor. To boost flavor, try adding spices like black pepper or red pepper flakes. You can also mix in a splash of hoisin or chili sauce for extra zest. When marinating, use a good balance of soy sauce and sesame oil. Let the beef soak in the marinade for at least 15 minutes. This lets the flavors seep in, making the beef richer and more tasty. High heat is key for a great stir-fry. It cooks meat quick and keeps veggies crisp. Use a large skillet or wok for even heat. When you add the beef, do not stir too much. Let it sear for 2-3 minutes. This forms a nice crust and keeps juices in. After, toss in the veggies and stir-fry for about 4-5 minutes. Keep them moving to ensure they stay bright and crunchy. For a stunning plate, start with a base of jasmine rice or noodles. Pile the stir-fry on top for a colorful look. To finish, drizzle with a bit of sesame oil and sprinkle sesame seeds. Fresh cilantro adds a nice touch too. These simple steps make your dish look as good as it tastes, making dinner feel special. Pro Tips Marinate Longer for Flavor: If time allows, marinate the beef for up to 2 hours. This will deepen the flavors and tenderness of the meat. High Heat is Key: Make sure your skillet or wok is hot enough before adding the beef. This ensures a good sear and prevents steaming. Veggie Crunch: Avoid overcooking your vegetables. They should be crisp-tender to retain their vibrant colors and nutrients. Garnish for Freshness: Adding fresh cilantro and a sprinkle of sesame seeds right before serving enhances the dish's flavor and visual appeal. {{image_4}} If you want to switch things up, try using chicken or tofu. Chicken breast works well when sliced thin. It cooks fast and stays juicy. For a plant-based option, tofu is great. Use firm tofu, and press it to remove water. This helps it absorb flavors better. Feel free to swap in seasonal or frozen vegetables. Fresh veggies add crunch and color. Bell peppers come in many colors. Try using green, orange, or even purple for a fun twist. Frozen options are also good. They save time and still taste great. You can change the sauce to suit your taste. Adding hoisin sauce gives a sweet kick. If you like heat, try chili sauce. Adjust the saltiness and sweetness by adding more soy sauce or sugar. Experiment until you find the perfect balance for you. To keep your beef and veggie stir fry fresh, use airtight containers. Glass containers work best. They help keep flavors intact and make reheating easy. Let the stir fry cool before sealing it. This avoids moisture buildup, which can make it soggy. Store leftovers in the fridge. They stay good for up to three days. When reheating stir fry, use a skillet or pan. Heat it on medium until warm. This ensures even heating. Stir often to keep the veggies crisp. You can also use a microwave, but be careful. Heat in short bursts and stir in between. This helps the veggies stay bright and crunchy. If you want to freeze your stir fry, portion it out first. Use freezer-safe containers or bags. Label them with the date. This makes it easy to track freshness. When ready to eat, thaw in the fridge overnight. Reheat it in a pan for the best texture. Freezing can change some veggies, but proper steps help keep flavors strong. Marinate the beef for at least 15 minutes. This time lets the flavors soak in well. If you have more time, you can marinate for up to 2 hours. The longer marination adds even more taste. Yes, you can use frozen vegetables. They are quick and easy. To use them, thaw them first and pat dry. This step helps avoid excess water in your stir fry. Cook them for a shorter time, about 3-4 minutes, to keep them crunchy. You can try different sauces like hoisin or teriyaki. Each sauce gives a new taste. You can also mix in chili sauce for heat. Adjust the amount based on your taste preference. This recipe works great for meal prep. You can cook it ahead and store it. Keep the stir fry in airtight containers in the fridge. It stays fresh for 3-4 days. You can reheat it quickly for a tasty meal later. Stir-frying is easy and fun. You learned about key ingredients like flank steak and fresh veggies. The marinade adds depth with soy sauce, oyster sauce, and spices. High heat gives your dish that perfect texture. Don’t forget to try different proteins and veggies for variety. Store leftovers properly to enjoy later. Overall, this dish is great for meal prep and family dinners. With these tips, you can create delicious meals every time. Enjoy your cooking journey!

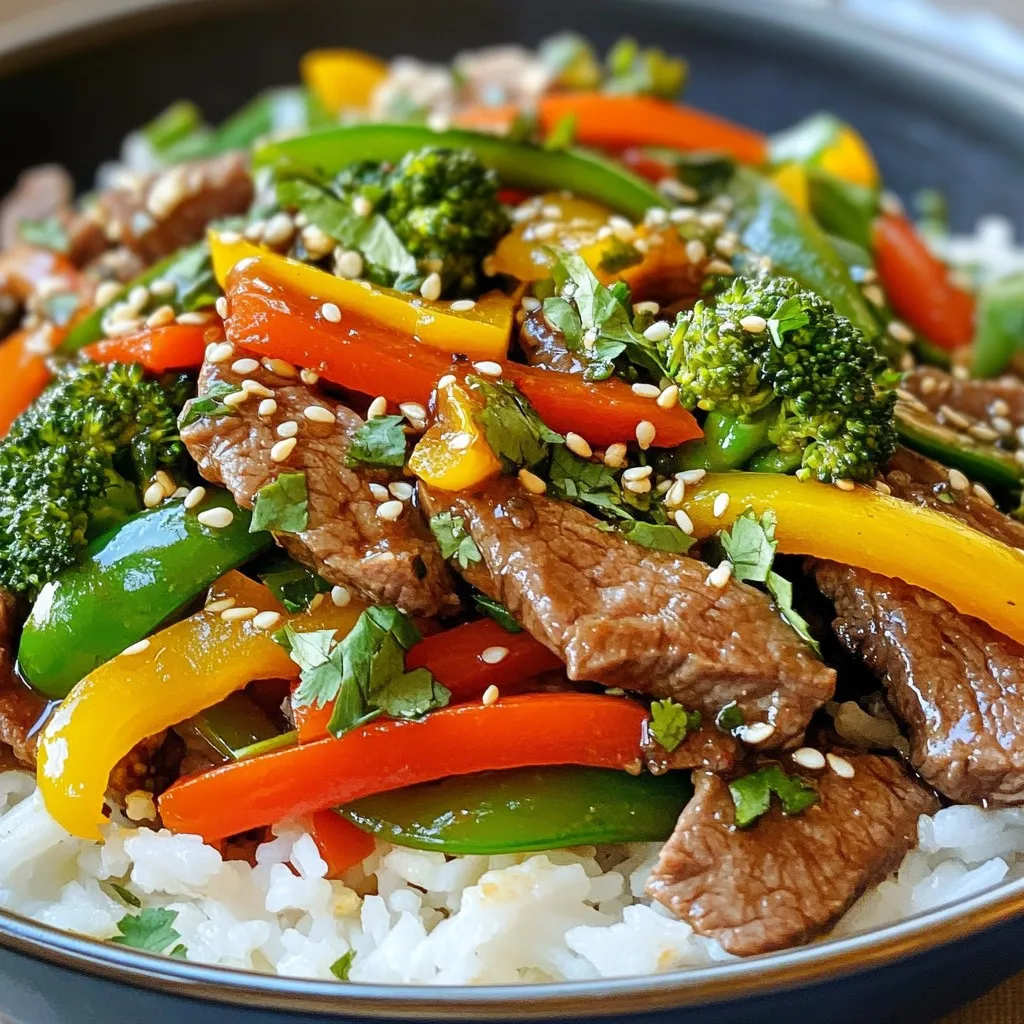
In a rush but craving a delicious meal? My Minute Beef & Veggie Stir Fry is the answer! This quick dish combines tender flank steak and fresh vegetables, all coated …

Read more

Categories Dinner

Ingredient Peanut Butter Cookies Simple and Fun Recipe

November 13, 2025November 20, 2024 by Chef Tavio
- 1 cup creamy peanut butter - 1 cup packed brown sugar - 1/2 cup granulated sugar - 1 large egg - 1 teaspoon pure vanilla extract - 1/2 teaspoon baking soda - 1/4 teaspoon salt To make peanut butter cookies, you need a few key items. The creamy peanut butter adds that rich flavor we all love. Brown sugar brings deep sweetness, while granulated sugar gives a nice crunch. A large egg binds everything together, making the dough smooth. The vanilla extract adds warmth, and baking soda helps the cookies rise. Finally, a little salt balances the sweetness. - 1/2 cup chocolate chips - 1/4 cup crushed peanuts for topping If you want to jazz up your cookies, consider adding chocolate chips. They melt and create gooey pockets of chocolate. Crushed peanuts on top add a lovely crunch. These extras make your cookies even more fun and tasty! {{ingredient_image_2}} - Preheat your oven to 350°F (175°C). - Line a baking sheet with parchment paper. Start by preheating your oven. This step helps your cookies bake evenly. Lining your baking sheet with parchment paper makes for easy cleanup. It also keeps the cookies from sticking. - Combine peanut butter, brown sugar, and granulated sugar. - Beat mixture until fluffy, around 2-3 minutes. In a large bowl, mix creamy peanut butter, brown sugar, and granulated sugar. I use an electric mixer at medium speed. Beat the mixture for about 2 to 3 minutes. It should look light and fluffy. This adds air, making the cookies soft. - Add egg, vanilla extract, baking soda, and salt. - Ensure dough is smooth and creamy. Next, add the large egg, pure vanilla extract, baking soda, and salt. Mix well until everything is combined. You want the dough to be smooth and creamy. This helps the cookies rise nicely. - Portion dough onto baking sheet. - Criss-cross pattern with a fork. - Bake for 10-12 minutes, cool slightly before transferring. Now it’s time to shape the cookies. Use a tablespoon or cookie scoop to make balls of dough. Place them on the baking sheet, leaving space between each one. To create the classic peanut butter look, press down gently with a fork to make a criss-cross pattern. Bake the cookies for 10 to 12 minutes. Look for golden edges and soft centers. This slight underbaking ensures a chewy texture. Once baked, let them cool on the sheet for about 5 minutes. Then, transfer them to a wire rack to cool completely. Enjoy the sweet aroma filling your kitchen! To get the best texture in your cookies, remember to underbake them slightly. This means taking them out of the oven when they still look a bit soft in the middle. The edges should be golden brown, while the center should look a little undercooked. This technique gives your cookies that perfect chewy bite that everyone loves. Using room temperature ingredients is also key. When your peanut butter, egg, and other ingredients are at room temp, they mix better. This helps create a smooth dough without lumps. To make your cookies look as good as they taste, arrange them on a decorative plate. A nice plate can really boost the appeal of your cookies. Consider adding a drizzle of melted chocolate on top for an extra touch of flair. This will not only look great but also add a rich, sweet flavor. Pair your cookies with a glass of cold milk for a delightful treat experience! Pro Tips Use Room Temperature Ingredients: Allow your egg and peanut butter to come to room temperature before mixing. This will help create a smoother dough and better incorporation of ingredients. Don’t Overbake: For the perfect chewy texture, take the cookies out of the oven when the edges are golden but the centers look slightly underbaked. They will continue to firm up as they cool. Experiment with Add-ins: Feel free to customize your cookies by adding ingredients like oats, dried fruit, or different types of chocolate. This allows you to create a unique flavor profile. Store Properly: To keep your cookies fresh, store them in an airtight container at room temperature. For longer shelf life, consider freezing them and reheating as needed. {{image_4}} You can easily change this peanut butter cookie recipe to suit different diets. - Gluten-free options: Use almond flour or a gluten-free blend. These flours work well with peanut butter. - Vegan substitutions: Swap the egg for a flax egg. Mix 1 tablespoon of flaxseed meal with 2.5 tablespoons of water. Let it sit until it thickens. For sugar, use coconut sugar or maple syrup. These changes make the cookies friendly for more diets, while still tasting great. You can add fun twists to your cookies to make them unique. Here are some ideas: - Adding nuts, dried fruit, or spices: Try chopped walnuts or pecans for crunch. Dried cranberries or raisins add sweetness and chew. A pinch of cinnamon or nutmeg can give a warm flavor. - Experimenting with different types of chocolate: Use dark chocolate chips or white chocolate for a different taste. You can even mix in peanut butter chips for extra richness. Feel free to play around with these ideas. Each variation can give you a new cookie experience! To keep your cookies fresh, store them at room temperature. Place them in an airtight container. This prevents air from making them dry. Use a container with a tight seal for the best results. Layer parchment paper between cookies to avoid sticking. To freeze cookies, let them cool completely first. Arrange them in a single layer on a baking sheet. Place the sheet in the freezer for about an hour. Once frozen, transfer the cookies to a freezer-safe bag. Remove as much air as possible to avoid freezer burn. When you want a cookie, take one out. Let it thaw at room temperature. For a warm treat, pop it in the microwave for a few seconds. Enjoy the same great taste as fresh cookies! Homemade peanut butter cookies last about one week at room temperature. Store them in an airtight container. If you keep them in the fridge, they can last up to two weeks. Just remember to let them cool before storing. This helps keep them soft and fresh. Yes, you can use natural peanut butter. However, it may change the texture. Natural peanut butter has oil that can make cookies more crumbly. You might need to adjust the sugar or add a bit more flour to help. The flavor will be richer and more intense, which some people love! If you want to skip the eggs, try using flaxseed meal or applesauce. For flaxseed, mix one tablespoon with three tablespoons of water. Let it sit until it thickens. For applesauce, use a quarter cup to replace one egg. Both options keep your cookies moist and tasty. To make your cookies less sweet, reduce the brown sugar by a quarter cup. You can also swap out some sugar for honey or maple syrup. These alternatives add flavor and sweetness without being too overpowering. Adjusting sweetness helps cater to different taste preferences. You now know how to make delicious peanut butter cookies with ease. The key ingredients create a rich flavor. You can add extras for fun twists. Follow the steps to bake perfectly chewy cookies. Remember, slight underbaking gives the best texture. Store them correctly to keep them fresh. Whether you prefer classic or unique variations, there’s something for everyone. Enjoy these treats, and share them with friends and family.

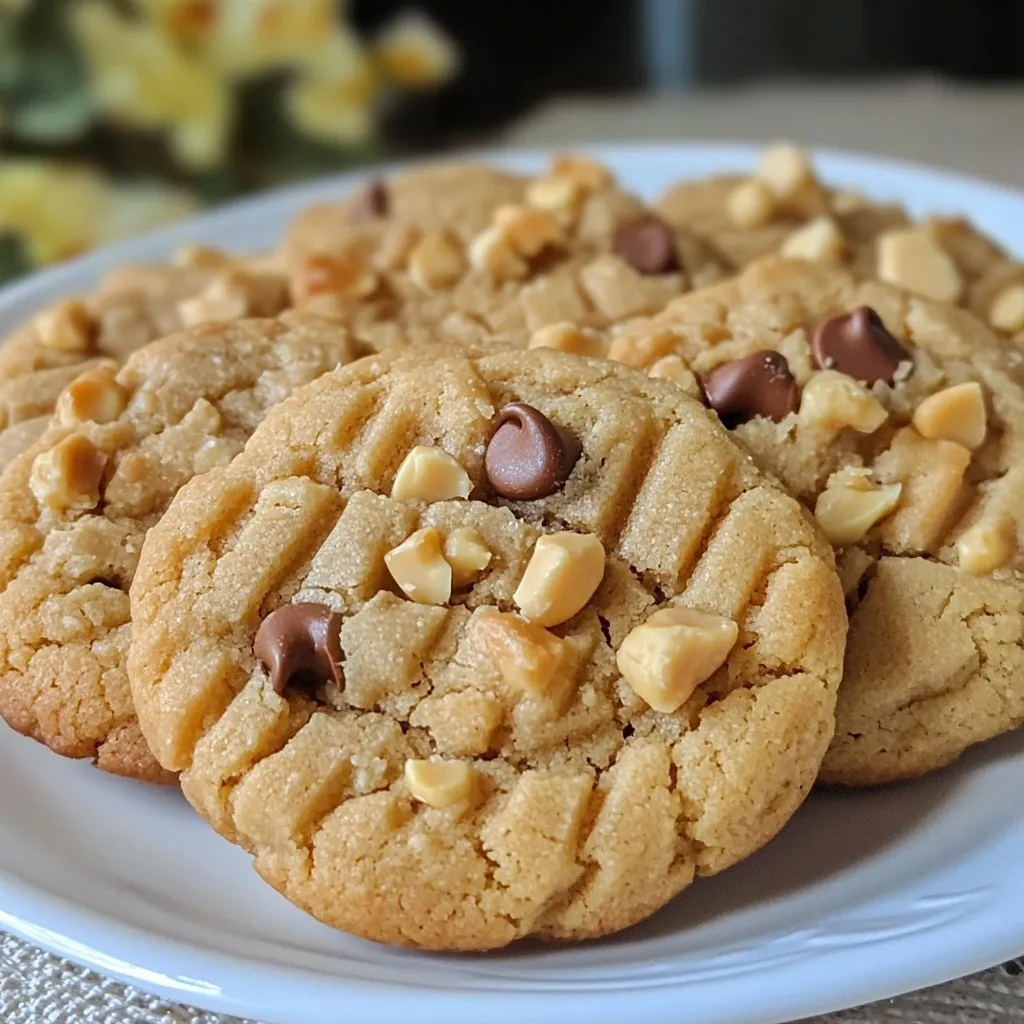
Get ready to whip up a treat that is both simple and fun: Peanut Butter Cookies! This easy recipe requires just a few ingredients, and it’s perfect for bakers of …

Read more

Categories Desserts

S’mores Chocolate Chip Skillet Cookie Delight

November 13, 2025November 17, 2024 by Chef Tavio
- 1 cup all-purpose flour - 1/2 teaspoon baking soda - 1/4 teaspoon salt - 1/2 cup unsalted butter - 1/2 cup packed brown sugar - 1/4 cup granulated sugar - 1 large egg - 1 teaspoon pure vanilla extract - 1 cup semi-sweet chocolate chips - 1 cup mini marshmallows - 1/2 cup crushed graham crackers - Additional chocolate chips for topping I love gathering my ingredients before I start cooking. It helps me stay focused. For this s'mores chocolate chip skillet cookie, you need some simple staples. All you need is flour, sugar, butter, and chocolate. Don't forget the graham crackers and marshmallows. Those give the cookie a fun s’mores twist. First, measure out 1 cup of all-purpose flour. This helps the cookie hold its shape. Next, grab 1/2 teaspoon of baking soda and 1/4 teaspoon of salt. These ingredients help the cookie rise and balance the sweetness. Now, let’s get to the butter. You need 1/2 cup of unsalted butter. Make sure it’s soft. This will mix well with the sugars. Speaking of sugars, you’ll use 1/2 cup of packed brown sugar and 1/4 cup of granulated sugar. The brown sugar adds a nice depth of flavor. You’ll also need 1 large egg. It should be at room temperature for the best mix. Add in 1 teaspoon of pure vanilla extract for that sweet aroma. For the chocolate, grab 1 cup of semi-sweet chocolate chips. These will melt and mix through the cookie. You’ll also need 1 cup of mini marshmallows. They will puff up and get gooey. Lastly, grab 1/2 cup of crushed graham crackers. This adds that classic s’mores crunch. For a final touch, keep some extra chocolate chips on hand for the topping. This cookie is about to become a warm, sweet delight! {{ingredient_image_2}} - Preheat the oven to 350°F (175°C). - Prepare the cast-iron skillet by greasing it lightly. This helps the cookie come out easily. - In a medium bowl, combine 1 cup flour, 1/2 teaspoon baking soda, and 1/4 teaspoon salt. Whisk them together well. - In a large bowl, cream 1/2 cup softened butter, 1/2 cup brown sugar, and 1/4 cup granulated sugar. Mix until smooth, about 2-3 minutes. - Add 1 large egg and 1 teaspoon vanilla extract to the mixture. Stir on low speed until mixed. - Gradually add the dry mix to the wet mix, stirring gently. Do not overmix. - Fold in 1 cup chocolate chips and 1/2 cup crushed graham crackers. Make sure they are evenly spread throughout the dough. - Carefully spread the dough in the greased skillet. Smooth the top with a spatula. - Place the skillet in the oven and bake for 20-25 minutes. Look for golden edges and a soft center. - When baked, take the skillet out and sprinkle 1 cup mini marshmallows and more chocolate chips on top. - Switch to the broiler setting. Broil for 1-2 minutes, watching closely. You want the marshmallows to toast without burning. - Let the cookie cool for about 5 minutes. Then slice and serve. Enjoy this warm treat! - Avoid overmixing the dough: Overmixing can lead to tough cookies. Mix just until combined. - Use room temperature ingredients: This helps the butter blend well and creates a smooth dough. - Serving suggestions with ice cream: Serve the warm cookie straight from the skillet. Top it with a scoop of vanilla ice cream. The warm cookie and cold ice cream create a wonderful contrast. - Garnishing with crushed graham crackers: Sprinkle some crushed graham crackers on top. This adds a nice crunch and brings out the s’mores flavor. - Using different types of baking dishes: You can use any oven-safe dish, but a cast-iron skillet gives a great crust. - Cooking times for varied sizes: If you use a larger skillet, check the cookie earlier. A smaller dish may need a bit more time. Always watch for that golden edge! Pro Tips Use Room Temperature Ingredients: Ensuring your butter and egg are at room temperature helps create a smoother batter and promotes even baking. Don’t Overmix the Dough: Overmixing can lead to a tougher cookie. Mix until just combined to maintain a tender texture. Broil with Caution: When broiling the marshmallows, keep a close eye on them as they can burn quickly. Aim for a golden brown color for the perfect toast. Serve Warm: This skillet cookie is best enjoyed warm and gooey. Serve it straight from the oven for a delightful treat! {{image_4}} You can make this cookie even better by adding some fun flavors. Try mixing in nuts like walnuts or pecans for a nice crunch. You can also use different types of chocolate. Dark chocolate or white chocolate chips work great, too. For an extra kick, add a splash of almond or coconut extract. These small changes can bring new life to your skillet cookie. If you want a lighter option, consider using alternative sweeteners like coconut sugar or agave. These can make your cookie just as sweet without the extra calories. You can also swap regular flour for gluten-free flour. Almond flour or coconut flour are great choices. This way, you can enjoy a tasty treat without worrying about gluten. For those who follow a vegan diet, you can easily modify this recipe. Replace the egg with flaxseed meal or applesauce. Use vegan butter instead of regular butter. This way, you can keep the rich taste without any animal products. If you have allergies, be cautious with the chocolate. Look for nut-free and dairy-free options. This ensures everyone can enjoy your delicious S’mores Chocolate Chip Skillet Cookie. To keep your S’mores Chocolate Chip Skillet Cookie fresh, store it properly. First, let the cookie cool completely. Then, cover it tightly with plastic wrap or aluminum foil. This helps keep moisture in and prevents it from drying out. Place the skillet in the fridge. It will last up to five days. When you want to enjoy it again, preheat your oven to 350°F (175°C). For reheating, slice the cookie into pieces. Place them on a baking sheet. Heat for about 5-10 minutes. This will make them warm and gooey again. Freezing is a great option for longer storage. To freeze your cookie, first, let it cool completely. Then, slice it into serving pieces. Wrap each piece tightly in plastic wrap. After that, place all the wrapped pieces into a freezer-safe bag. Squeeze out as much air as possible before sealing. This helps prevent freezer burn. You can freeze it for up to three months. To thaw, simply move the cookie from the freezer to the fridge. Let it thaw overnight. If you want it warm, preheat your oven to 350°F (175°C). Place the slices on a baking sheet and heat for about 10 minutes. This way, you’ll enjoy a warm cookie just like fresh! Yes, you can make the dough in advance. Store it in the fridge for up to two days. When ready to bake, just spread the cold dough in the skillet and bake as usual. This saves time and keeps the flavor fresh. You can tell when it’s done by checking the edges. They should be golden brown. The center might look soft, but that’s perfect. It will firm up as it cools. Use a toothpick to check; it should come out mostly clean. I love serving this cookie warm with a scoop of vanilla ice cream. The cold ice cream melts a bit into the gooey cookie. You can add extra crushed graham crackers on top for more crunch. Whipped cream is also a fun choice. Absolutely! You can swap semi-sweet chocolate chips for milk chocolate or dark chocolate. You might even try white chocolate or peanut butter chips. Mix and match to create your perfect flavor blend. For crispy edges, use a cast-iron skillet. Grease it well before adding the dough. Bake at the right temperature and time. If you want extra crunch, bake it a few minutes longer, but watch closely to avoid burning. This blog post guides you through making a delicious S'mores Chocolate Chip Skillet Cookie. You learned about the key ingredients, equipment, and step-by-step instructions. We also covered tips for perfecting your cookie and various ways to customize it. In conclusion, baking this cookie is easy and fun. Feel free to play with flavors and presentation. Enjoy the tasty results, and share them with friends. Happy baking!

Are you ready for a sweet treat that combines gooey s’mores and a warm cookie? My S’mores Chocolate Chip Skillet Cookie Delight is just what you need! With rich chocolate, …

Read more

Categories Desserts

Classic Buffalo Chicken Dip Tasty and Easy Recipe

November 11, 2025November 14, 2024 by Chef Tavio
To make Classic Buffalo Chicken Dip, you need these simple items: - 2 cups shredded cooked chicken (rotisserie is best) - 1 (8 oz) package of cream cheese (softened) - 1/2 cup sour cream - 1/2 cup ranch dressing - 1/2 cup buffalo sauce (adjust for spice) - 1 cup shredded sharp cheddar cheese - 1/2 cup blue cheese crumbles (optional) - Fresh celery sticks (for serving) - Tortilla chips (for dipping) You can swap some ingredients if you like: - Use Greek yogurt instead of sour cream for a healthier option. - For a creamier dip, try mascarpone cheese instead of cream cheese. - If you do not like ranch, use blue cheese dressing for a stronger taste. - You can use cooked turkey or even shredded tofu for a lighter choice. I recommend these brands for the best flavor: - For Chicken: Look for a quality rotisserie chicken from your local grocery store. - For Cream Cheese: Philadelphia cream cheese is a classic choice. - For Ranch Dressing: Hidden Valley Ranch dressing adds great flavor. - For Buffalo Sauce: Frank's RedHot is the go-to for authentic buffalo flavor. - For Cheese: Tillamook sharp cheddar cheese melts beautifully. Now you're all set to make this delicious dip! {{ingredient_image_2}} First, gather all your ingredients. You will need: - 2 cups shredded cooked chicken - 1 (8 oz) package of cream cheese - 1/2 cup sour cream - 1/2 cup ranch dressing - 1/2 cup buffalo sauce - 1 cup shredded sharp cheddar cheese - 1/2 cup blue cheese crumbles (optional) - Fresh celery sticks and tortilla chips for serving Start by preheating your oven to 350°F (175°C). This step is key for even cooking. Next, take a large mixing bowl. Add the softened cream cheese, sour cream, ranch dressing, and buffalo sauce. Use a hand mixer or a spatula to mix until smooth. This mixture should be creamy and well-combined. Now, gently fold in the shredded chicken. Add 3/4 cup of the cheddar cheese too. If you like blue cheese, gently fold that in as well. Mixing should be light to keep the texture fluffy. Once your mixture is ready, transfer it to a baking dish. An 8x8 inch dish works well. Spread the dip evenly in the dish. This helps it cook nicely. Now, sprinkle the remaining cheddar cheese on top. This will create that golden crust we love. Place your dish in the preheated oven. Bake for 20 to 25 minutes. You will know it's done when the dip is bubbling, and the cheese on top turns golden brown. Keep an eye on it to avoid overcooking. After baking, carefully remove the dish from the oven. Let it cool for a few minutes. This cooling time helps the flavors settle and makes it easier to scoop. For serving, you can use fresh celery sticks and an assortment of tortilla chips. To make it extra special, drizzle some buffalo sauce on top. This adds a nice touch and a pop of color. Arrange the tortilla chips around the dish for an inviting display. Now, you’re ready to enjoy this classic Buffalo chicken dip! - Not using enough chicken: Always use two cups of chicken. This adds bulk and flavor. - Skipping the cream cheese: Cream cheese gives the dip its rich, creamy texture. Don't skip it. - Not mixing well: Make sure to blend all the ingredients well. This ensures every bite is tasty. - Adjust the buffalo sauce: If you like spice, add more buffalo sauce. For less heat, use less. - Try different cheeses: Swap out cheddar for Monterey Jack or pepper jack. This gives a new twist. - Add fresh herbs: Chopped green onions or cilantro can brighten the flavor. Just sprinkle on top before serving. - Serve with plenty of chips: Tortilla chips are perfect for scooping. You can also use pita chips. - Add crunchy veggies: Celery sticks and carrots add a nice crunch. They also balance the creamy dip. - Garnish for flair: Drizzle extra buffalo sauce on top. It makes the dip look great and adds more flavor. Pro Tips Use Rotisserie Chicken: Opting for rotisserie chicken not only saves time but also adds a depth of flavor that's hard to beat in this dip. Adjust Spice Level: Feel free to adjust the amount of buffalo sauce according to your spice preference; start with less and add more if you like it hotter. Let it Rest: Allow the dip to cool for a few minutes after baking; this will help the flavors meld together and make it easier to scoop. Garnish for Presentation: A drizzle of buffalo sauce and extra celery sticks as garnish not only enhance the visual appeal but also add freshness to the dish. {{image_4}} You can make this dip healthier with simple swaps. Use Greek yogurt instead of sour cream. It adds creaminess and protein. For the cheese, try reduced-fat versions. You still get great taste with fewer calories. You can also use baked tortilla chips or fresh veggies for dipping. Want more kick? Add extra buffalo sauce. For a milder taste, use less sauce. Try adding minced garlic for extra flavor. You can create a vegetarian version by using beans or lentils instead of chicken. This change keeps the dish hearty and satisfying. If you dislike cream cheese, there are great options. Neufchâtel cheese is a good choice; it has a similar taste but less fat. You can also use dairy-free cream cheese if you're vegan. Silken tofu blended until smooth works too. This keeps the dip creamy and delicious. Store any leftover Buffalo Chicken Dip in an airtight container. This keeps it fresh. Place it in the fridge. It will stay good for up to four days. Make sure to cool it down first before sealing. To reheat, scoop the dip into an oven-safe dish. Preheat your oven to 350°F (175°C). Bake for about 15 minutes. Check that it's warm all the way through. You can also use a microwave. Heat in 30-second bursts, stirring in between. This helps avoid hot spots. If you want to freeze the dip, use a freezer-safe container. Make sure to leave some space at the top. The dip will expand as it freezes. It will last for up to three months in the freezer. To thaw, move it to the fridge overnight. Reheat as described above. You can serve Buffalo Chicken Dip with many tasty sides. Here are some great options: - Fresh celery sticks - Crunchy tortilla chips - Carrot sticks - Pita chips - Crackers These choices add a nice crunch and balance the creamy dip. The fresh veggies also help cut through the rich flavors. Yes, you can make Buffalo Chicken Dip ahead. Prepare it up to the baking step. Then, store it in the fridge for up to two days. When you're ready, bake it as directed. This makes it easy for parties or game days. To make Buffalo Chicken Dip less spicy, simply reduce the amount of buffalo sauce. Start with 1/4 cup instead of 1/2 cup. You can also add more sour cream or cream cheese. This will make it creamier and milder. Adjust to your taste! This guide covered everything you need to know about Buffalo Chicken Dip. We explored the ingredients you can use, how to prepare and bake, and tips for perfect flavor. You learned about variations for health and taste, plus how to store leftovers. Buffalo Chicken Dip is fun and easy to make. With these steps, you can impress your friends and family at any gathering. Now, it’s time to grab your ingredients and start crafting this delicious dip! Enjoy every bite!

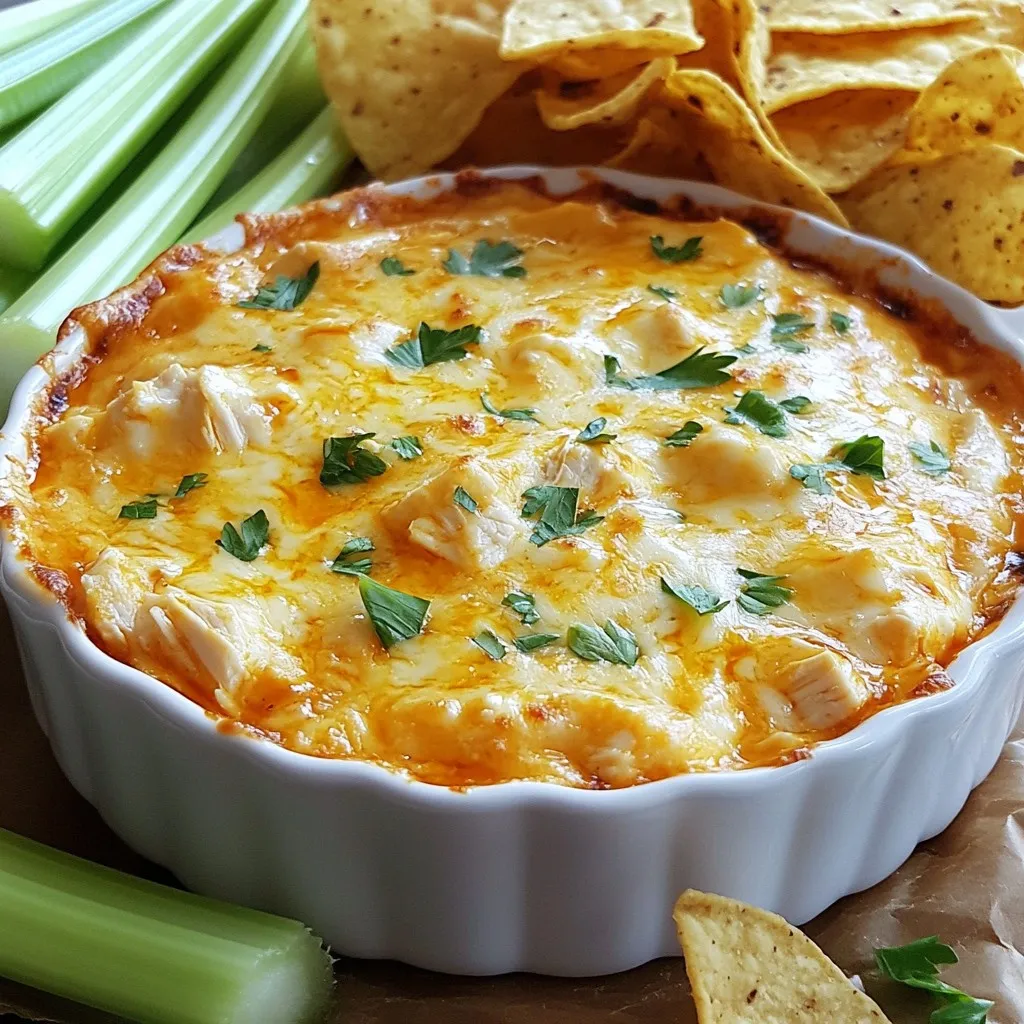
If you love creamy, spicy dips, you have to try this Classic Buffalo Chicken Dip! It’s easy to whip up and perfect for game day or any gathering. I’ll share …

Read more

Categories Appetizers
Newer posts
← Previous Page1 … Page161 Page162

TASTED NEST

Where Flavor Finds a Home 🍳🏡 — warm, simple, and crave-worthy recipes made for real life, from stovetop mornings to backyard dinners.

PAGES

Home About Contact Privacy Policy Terms & Conditions Cookie Policy GDPR Policy Copyright Policy Disclaimer

CATEGORIES

Appetizers Desserts Salads Breakfast Dinner
Copyright © 2025 Tasted Nest. All rights reserved.