Skip to content
  • GDPR Privacy Policy
  • Copyright Policy
  • Disclaimer
  • Terms & Conditions
Tasted Nest
  • Home
  • Appetizers
  • Desserts
  • Salads
  • Breakfast
  • Dinner
  • Privacy Policy
  • Contact
  • About

Chef Tavio

Peanut Butter Chocolate Caramel Cookies Delightful Treat

December 28, 2025March 28, 2025 by Chef Tavio
To make these Peanut Butter Chocolate Caramel Cookies, you need a few simple ingredients. Each one plays a key role in creating that perfect taste and texture. - 1 cup creamy peanut butter - 1/2 cup unsalted butter, softened - 1 cup brown sugar, packed firmly - 1/2 cup granulated sugar - 1 large egg - 1 teaspoon pure vanilla extract - 2 cups all-purpose flour - 1 teaspoon baking soda - 1/2 teaspoon fine sea salt - 1 cup semi-sweet chocolate chips - 1/2 cup caramel sauce - Flaky sea salt for topping Each ingredient adds a layer of flavor. The peanut butter gives a rich, nutty taste. The unsalted butter adds creaminess. Both sugars provide sweetness and help the cookies stay soft. The egg binds everything together, while vanilla adds warmth. Flour, baking soda, and salt build the cookie's structure. Chocolate chips bring a melty, sweet touch. Caramel sauce offers a gooey surprise in the middle. Finally, flaky sea salt enhances all the flavors. Together, these ingredients create a treat that is hard to resist. You’ll find that these cookies are a delightful mix of sweet and salty, chewy and crunchy. {{ingredient_image_2}} First, preheat your oven to 350°F (175°C). This helps the cookies bake evenly. Next, line a baking sheet with parchment paper. This keeps the cookies from sticking and makes cleanup easy. In a large bowl, combine 1/2 cup unsalted butter and 1 cup creamy peanut butter. Add 1 cup packed brown sugar and 1/2 cup granulated sugar. Use a mixer or whisk to blend until smooth and creamy. Now, crack in 1 large egg and pour in 1 teaspoon of pure vanilla extract. Mix until everything is well combined. In another bowl, whisk together 2 cups all-purpose flour, 1 teaspoon baking soda, and 1/2 teaspoon fine sea salt. This step ensures that the baking soda and salt spread evenly in the dough. Gradually add the dry mix to the wet mixture. Stir gently until just combined. Be careful not to overmix. Now, fold in 1 cup of semi-sweet chocolate chips. This adds rich flavor and texture. Use a tablespoon or cookie scoop to portion out the dough. Roll each piece into a ball and place them on the prepared baking sheet. Make sure to space them about 2 inches apart. Press your thumb gently into the center of each dough ball to create a small indentation. Carefully fill each indent with 1/2 cup caramel sauce. If you like, sprinkle a tiny pinch of flaky sea salt on top for extra flavor. Bake your cookies in the preheated oven for 10-12 minutes. Keep an eye on them until the edges turn golden brown. The centers may look soft, but they will firm up as they cool. Allow the cookies to cool on the baking sheet for about 5 minutes. Then, transfer them to a wire rack to cool completely. How to avoid overmixing Overmixing can make cookies tough. Mix just enough to blend the dry and wet ingredients. Stop as soon as you see no dry flour. This keeps your cookies nice and soft. Tips for soft and chewy cookies To get that soft, chewy texture, try using brown sugar. Brown sugar has more moisture than white sugar. Also, don’t bake them too long. You want the edges golden but the centers a bit soft. Using a stand mixer vs. hand mixing A stand mixer saves time and energy. It mixes the dough well without much effort. But hand mixing gives you more control. You can feel the dough’s texture and avoid overmixing. Both methods work well; it just depends on what you prefer. Presentation ideas and serving tips For a lovely presentation, stack your cookies on a decorative plate. Drizzle extra caramel sauce on top. A sprinkle of flaky sea salt adds a nice touch too. This makes your cookies look as good as they taste. Serve them warm for that gooey, melt-in-your-mouth experience! Pro Tips Use Room Temperature Ingredients: Ensuring that your butter and eggs are at room temperature helps create a smoother batter and results in fluffier cookies. Don’t Overmix the Dough: Mixing the dough just until combined helps keep the cookies tender. Overmixing can lead to dense cookies. Chill the Dough for Extra Flavor: For a deeper flavor, chill the cookie dough for at least 30 minutes before baking. This allows the ingredients to meld together better. Experiment with Toppings: Feel free to get creative with toppings! Try adding crushed nuts or a drizzle of melted chocolate for added texture and flavor. {{image_4}} You can make these cookies even better by adding nuts. Chopped walnuts or pecans add a nice crunch. You can also switch up the chocolate. Try using dark chocolate or even white chocolate chips. Each choice gives a unique taste and texture. If you want a gluten-free option, use almond flour instead of all-purpose flour. It works well and keeps the cookies soft. For a dairy-free treat, swap unsalted butter for coconut oil. This change keeps the cookies moist and adds a light coconut flavor. Get creative by adding different flavors. Try mixing in shredded coconut for a tropical vibe. You can also use mint extract instead of vanilla for a fresh taste. Each twist offers a fun new way to enjoy these cookies. Store your peanut butter chocolate caramel cookies at room temperature. Place them in an airtight container. This keeps them soft and chewy. If you want, you can also store them in the fridge. However, this may change their texture slightly. They may become firmer and less chewy. Freezing cookies is easy. First, let them cool completely. Then, wrap each cookie tightly in plastic wrap. Place the wrapped cookies in a freezer bag. Make sure to squeeze out as much air as possible. This helps avoid freezer burn. When you want to eat them, take out the cookies. Let them thaw at room temperature for a few hours. These cookies stay fresh for about a week at room temperature. In the fridge, they can last for up to two weeks. If you freeze them, they are good for up to three months. Just remember to label the bag with the date. This way, you will know when to enjoy them! Yes, you can use crunchy peanut butter. It adds a fun texture. The cookies will still taste great. Just remember, the crunch will change the feel of each bite. If you love that crunch, go for it! Making homemade caramel sauce is easy! You need just three ingredients: sugar, butter, and heavy cream. Heat sugar in a pan until it melts. Stir in butter until smooth. Slowly add cream, stirring constantly. Cook until it thickens. Let it cool before using it in your cookies. To prevent cookies from spreading, chill the dough before baking. You can chill it for about 30 minutes. This helps the butter firm up. Also, using the right amount of flour can help keep the shape intact. Measure carefully! Yes, you can make the dough ahead! Shape the dough into balls and store them in the fridge. They can stay fresh for up to three days. When you’re ready to bake, just add a few extra minutes to the bake time. If you run out of semi-sweet chocolate chips, use dark chocolate or milk chocolate. You can even chop a chocolate bar into small pieces. This works great and adds a unique twist to your cookies! You now have a complete guide on making delicious caramel-filled peanut butter cookies. We covered each step, from mixing wet ingredients to baking and finally storing your cookies. Don’t forget to try the variations for added fun. With the tips shared, you can perfect the texture and impress everyone with your treats. Enjoy every bite, and remember, baking is an adventure. Embrace the process and get creative!

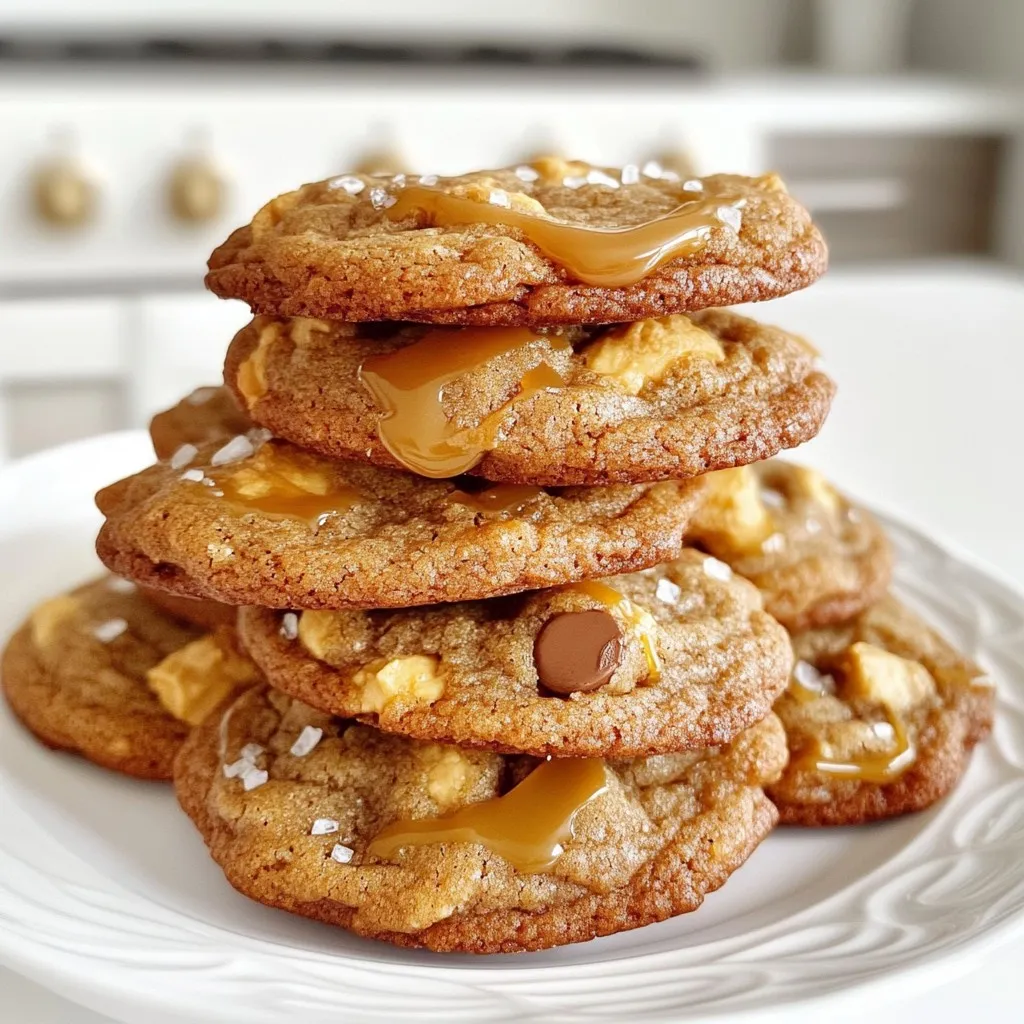
Get ready to indulge in a treat that combines the best of all worlds: Peanut Butter, Chocolate, and Caramel! In this blog post, I’ll guide you through making these delightful …

Read more

Categories Desserts

Savory Mini Chocolate Chip Muffins Easy and Tasty Treat

December 5, 2025March 28, 2025 by Chef Tavio
For my mini chocolate chip muffins, I use simple ingredients that make a big impact. Here’s what you need: - 1 cup all-purpose flour - 1/2 cup granulated sugar - 1/2 teaspoon baking powder - 1/4 teaspoon baking soda - 1/4 teaspoon salt - 1/2 cup unsalted butter, melted and cooled - 1 large egg - 1 teaspoon vanilla extract - 1/2 cup buttermilk (or milk with 1/2 tablespoon vinegar added) - 1 cup mini chocolate chips These ingredients work together to create a soft and sweet treat. The all-purpose flour provides the base, while sugar adds sweetness. Baking powder and baking soda help the muffins rise. The buttermilk keeps them moist and fluffy. To make your muffins even tastier, consider adding these optional ingredients: - A pinch of cinnamon for warmth - Chopped nuts like walnuts or pecans - A splash of almond extract for a nutty twist These extras let you personalize your muffins. A little spice or crunch can elevate the flavor. Using high-quality ingredients makes a difference in your muffins. Here are my tips: - Choose fresh baking powder and baking soda. Old ones may not rise well. - Use real vanilla extract instead of imitation for a richer flavor. - Opt for unsalted butter to control the saltiness of your muffins. These small choices lead to big flavor in your baked goods. Quality ingredients help you create the best mini chocolate chip muffins every time. {{ingredient_image_2}} First, preheat your oven to 350°F (175°C). This gets it ready for baking. Next, grab a mini muffin tin and line it with paper liners. You can also spray it with non-stick cooking spray. In a large bowl, mix the dry ingredients. Add 1 cup of all-purpose flour, 1/2 cup of granulated sugar, 1/2 teaspoon of baking powder, 1/4 teaspoon of baking soda, and 1/4 teaspoon of salt. If you want a hint of spice, add a pinch of cinnamon. Whisk these until they blend well. Now, in another bowl, combine your wet ingredients. Use 1/2 cup of melted butter (make sure it’s cooled), 1 large egg, 1 teaspoon of vanilla extract, and 1/2 cup of buttermilk. Whisk these until smooth. Pour the wet mix into the dry mix. Use a spatula to fold them together gently. Be careful! Overmixing can make your muffins tough. It’s okay if some lumps remain. Finally, gently fold in 1 cup of mini chocolate chips. Make sure they spread evenly through the batter. Now, it’s time to fill the muffin cups. Use a small cookie scoop or a spoon to fill each cup about two-thirds full. This gives them room to rise. Place the muffin tin in your preheated oven. Bake for 10 to 12 minutes. Your muffins are done when they are golden brown. To check, insert a toothpick into the center of a muffin. If it comes out clean, they’re ready! To ensure your muffins are perfect, watch for these signs: - They should be golden brown on top. - The tops should spring back when you press them lightly. - A toothpick inserted into the center should come out clean. If you see any wet batter on the toothpick, bake them for another minute or two. Remember to let the muffins cool in the tin for about five minutes before transferring them to a wire rack. Enjoy the warm, chocolatey goodness! To get fluffy mini chocolate chip muffins, use room-temperature ingredients. Cold ingredients can make your muffins dense. Whisk the dry ingredients well before adding the wet ones. This helps mix the baking powder and soda evenly. When you combine wet and dry, fold gently. Overmixing can lead to tough muffins. Avoid using melted butter that is too hot. Hot butter can cook the egg, causing clumps. Don’t skip the buttermilk; it adds moisture and flavor. Make sure to fill the muffin cups only two-thirds full. If you overfill, they will spill over while baking. Lastly, don’t forget to check your oven temperature. An oven that is too hot can burn the muffins. A good muffin tin is key for baking. Look for one with non-stick coating or use liners. A scoop helps fill the cups evenly. A whisk is essential for mixing dry ingredients well. Finally, a toothpick is great for checking if the muffins are done. Use these tools to ensure your muffins turn out perfectly every time! Pro Tips Use Room Temperature Ingredients: Ensure your egg and buttermilk are at room temperature for better emulsification, resulting in a lighter muffin texture. Don’t Overmix the Batter: Mixing just until the ingredients are combined helps to keep the muffins tender and fluffy. Experiment with Mix-Ins: Feel free to add nuts, dried fruits, or a sprinkle of sea salt on top for additional flavor and texture variations. Check for Doneness: Insert a toothpick into the center of a muffin; it should come out clean or with a few crumbs, but not wet batter. {{image_4}} You can easily change your mini chocolate chip muffins. Try adding nuts or fruits. Chopped walnuts or almonds add crunch. You can also use blueberries or raspberries for a fruity twist. Mix in a teaspoon of instant coffee for a mocha flavor. Just remember to keep the chocolate chips for that sweet touch. For gluten-free muffins, swap all-purpose flour for a gluten-free blend. Many brands work well. You can use almond milk or coconut milk instead of regular milk. This makes the muffins dairy-free too. Just be sure to check labels for hidden gluten and dairy. Change the flavor with the seasons. In fall, add pumpkin puree and spices like nutmeg and cinnamon. In spring, mix in lemon zest and poppy seeds for a fresh taste. For summer, try adding fresh berries or peach chunks. These twists keep your muffins exciting year-round! To keep your mini chocolate chip muffins fresh, store them in an airtight container. This keeps moisture in and prevents them from drying out. You can leave them at room temperature for up to three days. Place a paper towel at the bottom of the container to absorb any excess moisture. If you want to keep them longer, consider refrigeration, but this may change their texture. When you're ready to enjoy leftover muffins, reheating is easy. You can use the microwave for a quick fix. Heat them for 10-15 seconds until warm. For a better texture, use an oven. Preheat it to 350°F (175°C), then warm the muffins for about 5-7 minutes. This helps restore that fresh-baked taste. Freezing is a great way to store muffins for later. First, let them cool completely. Then, wrap each muffin tightly in plastic wrap. Place the wrapped muffins in a freezer-safe bag or container. They will stay good for about three months. When you're ready to eat them, just thaw at room temperature or reheat directly from the freezer. You can swap eggs with applesauce. Use 1/4 cup of unsweetened applesauce for each egg. This will keep the muffins moist. Another option is to use a flaxseed meal. Mix 1 tablespoon of flaxseed meal with 2.5 tablespoons of water. Let it sit for five minutes to thicken. Both options work well, giving you tasty muffins without eggs. Yes, you can use whole wheat flour. It adds fiber and nutrients. However, the muffins may be denser. To balance this, use 1 cup of whole wheat flour and add 2 tablespoons of all-purpose flour. This mix helps make the muffins lighter while keeping the health benefits of whole wheat. Homemade mini chocolate chip muffins last about three days at room temperature. Store them in an airtight container to keep them fresh. You can also freeze them for up to three months. Just thaw them in the fridge overnight for a quick snack or breakfast! In this post, we covered everything about mini chocolate chip muffins. You learned about key ingredients and tips for quality. I shared step-by-step instructions for making the batter and baking. You also found tricks for fluffy muffins and common mistakes to avoid. Plus, there are great variations for different diets. Remember how to store, reheat, and freeze your muffins for later. With this guide, you can bake tasty muffins that all will enjoy. Now, it’s time to get baking and have fun in the kitchen!

If you’re craving a sweet treat that’s both easy to make and delicious, you’re in the right place! I’ll guide you through the process of whipping up savory mini chocolate …

Read more

Categories Desserts

Slow Cooker Healthy Chicken Tacos Flavorful Meal Idea

December 8, 2025March 27, 2025 by Chef Tavio
- 1.5 lbs boneless, skinless chicken breasts - 1 can (15 oz) black beans, rinsed and drained - 1 can (15 oz) diced tomatoes with green chilies - 1 red bell pepper, sliced into thin strips - 1 yellow onion, sliced into rings - 2 cloves garlic, minced finely - 1 tablespoon ground cumin - 1 tablespoon chili powder - 1 teaspoon paprika - Salt and pepper to taste - 8 small whole wheat tortillas - Fresh cilantro, chopped (for garnish) - Lime wedges (for serving) Using fresh ingredients makes a big difference in taste. Fresh chicken, veggies, and herbs have more flavor. They also add color and nutrition. For example, fresh cilantro brightens the dish and adds a nice touch. I use ground cumin, chili powder, and paprika for the perfect spice mix. These spices create a warm and rich flavor. You can adjust the spice levels to suit your taste. If you like it spicy, add more chili powder. For a milder flavor, use less. Serve your tacos with lime wedges and chopped cilantro. These add freshness and zing. You can also try toppings like avocado, salsa, or Greek yogurt. They enhance the meal and let everyone customize their taco. {{ingredient_image_2}} Start by placing the chicken breasts in the slow cooker. Spread them out evenly at the bottom. This helps them cook well and stay tender. Next, layer the black beans over the chicken. Rinsing the beans first keeps the dish fresh and light. After that, pour in the diced tomatoes, juices and all. This adds moisture and flavor. Finally, add the sliced red bell pepper and onion on top. Layering these ingredients correctly is key. It ensures even cooking and great taste. Now, let's cook! You can set your slow cooker to low or high. If you want the chicken tender and juicy, use low for 6 to 8 hours. In a hurry? Go for high, which takes about 3 to 4 hours. You’ll know the chicken is done when it is easy to shred. A good tip is to check the chicken after the first few hours. This way, you can adjust the time if needed. After cooking, it’s time to shred the chicken. Take two forks and pull the chicken apart right in the slow cooker. This keeps the flavors together. Mix the shredded chicken with the beans, tomatoes, and peppers. This step is important. It helps all the ingredients blend well. The flavors will come together beautifully, making your tacos even tastier! To boost the taste of your Slow Cooker Healthy Chicken Tacos, consider adding more spices. A pinch of cayenne pepper gives a nice kick. You can also try adding smoked paprika for a deeper flavor. For a fresh twist, mix in lime juice or zest. You can also use taco seasoning instead of individual spices for convenience. Marinades are a great way to enhance flavors. A simple mix of lime juice, olive oil, and garlic works well. You can marinate the chicken for a few hours or overnight. This adds depth and a burst of flavor to the dish. To keep your tacos low in calories, use lean chicken and whole wheat tortillas. You can also swap sour cream for Greek yogurt. This change adds creaminess without the extra calories. Try using fresh veggies like lettuce, tomatoes, or avocados for added nutrients. If you need gluten-free tortillas, corn tortillas are an excellent option. They are widely available and tasty. Check labels to ensure they are gluten-free. You can also use lettuce wraps for a fresh and crunchy alternative. Batch cooking is a smart way to save time. Make a large batch of the chicken mixture. Store leftovers in airtight containers for up to three days. You can also freeze the chicken mixture for future meals. Just thaw it overnight before cooking. For busy nights, prep ingredients ahead of time. Chop the veggies and mix the spices in advance. Store them in the fridge. This way, you can throw everything into the slow cooker in minutes. It makes dinner stress-free and quick! Pro Tips Use Fresh Ingredients: For the best flavor, opt for fresh spices and high-quality chicken. Fresh ingredients elevate the taste of your tacos significantly. Customize Your Heat: If you enjoy a spicier kick, add diced jalapeños or a dash of hot sauce to the slow cooker for an extra layer of flavor. Let It Rest: Allow the chicken to rest for a few minutes after cooking before shredding. This helps the juices redistribute, keeping the meat moist. Experiment with Toppings: Don’t hesitate to try different toppings like avocado, salsa, or cheese to personalize your tacos and enhance their flavor. {{image_4}} You can swap chicken for other meats. Turkey is a great choice. It cooks well and stays moist. Ground beef or shredded beef are also tasty alternatives. Just adjust the cooking time. For turkey, cook for 5 to 7 hours on low. For beef, allow 8 hours on low or 4 hours on high. Want a meatless meal? Try using tofu or jackfruit. Tofu absorbs flavors well and adds protein. For jackfruit, shred it to mimic chicken texture. Add extra spices to keep the taste bold. Cook these in the slow cooker for 4 to 6 hours on low. Taco shells come in many forms. You can use hard shells or soft tortillas. Each brings a different crunch and flavor. Think outside the box with toppings. Try avocado, salsa, or even pickled onions. You can also add cheese or fresh veggies to make them more exciting. After enjoying your tacos, store the leftovers in an airtight container. Make sure the chicken mixture is cool. Refrigerate within two hours of cooking. This helps keep it fresh and safe. For best quality, use the leftovers within three to four days. If you want to store for longer, freeze the chicken mixture. Use a freezer-safe container or bag. Squeeze out as much air as possible to prevent freezer burn. The tacos can last in the freezer for up to three months. When you're ready to enjoy the leftovers, reheat them gently. You can use the microwave or a stovetop. If you use the microwave, heat in short bursts. Stir in between to heat evenly. On the stovetop, use a small pan over low heat. This helps keep the chicken moist. To keep flavors fresh, add a splash of lime juice while reheating. This brightens the dish. Avoid high heat, as it can dry out the chicken and affect the taste. In the fridge, the leftover chicken mixture lasts about three to four days. In the freezer, it can last up to three months. Always check for signs of spoilage. If the chicken smells off or has a strange color, it’s best to throw it out. Proper storage helps maintain flavor and freshness, so enjoy your tacos safely! Slow cooker healthy chicken tacos take about 6 to 8 hours on low heat. If you are short on time, you can cook them on high for 3 to 4 hours. The chicken needs to be tender and easy to shred when it's done. This slow cooking method lets the flavors blend nicely, giving you a rich taste. Yes, you can prepare the chicken ahead of time. Marinating the chicken overnight adds great flavor. You can use a simple mix of lime juice, garlic, and spices. You can also cook the chicken in advance. Just let it cool, shred it, and store it in the fridge. When you are ready, add it to your slow cooker with the other ingredients. For dairy-free options, skip any cheese topping or use dairy-free cheese. If you need a low-carb option, you can use lettuce wraps instead of tortillas. You can customize flavors by adding different spices like smoked paprika for a deeper taste. For a spicy kick, add jalapeños or hot sauce to your mix. To wrap up, we explored the ingredients and steps for making healthy slow cooker chicken tacos. Fresh ingredients enhance flavor, while the right spice blend can fit your taste. We covered cooking tips, meal prep ideas, and healthy variations, emphasizing choices for different diets. By following these insights, you can create tasty tacos tailored to your needs. Try mixing things up to keep meals exciting. Enjoy your cooking journey, and savor the flavors you create!

Looking for a delicious way to spice up dinner? Slow Cooker Healthy Chicken Tacos are your answer! I’ll guide you through a simple recipe that keeps flavors fresh and healthy. …

Read more

Categories Dinner

High Protein Italian Pasta Salad Perfect for Lunch

December 8, 2025March 27, 2025 by Chef Tavio
- 2 cups whole grain pasta (fusilli or penne is best) - 1 cup cooked quinoa (cool it before adding) - 1 cup cherry tomatoes, halved - 1 cup cooked chickpeas, drained and rinsed - 1/2 cup diced cucumber - 1/2 cup diced red bell pepper - 1/4 cup black olives, sliced - 1/2 cup mozzarella balls, halved or cubed - 1/4 cup fresh basil, chopped - 3 tablespoons olive oil (extra virgin for better flavor) - 2 tablespoons balsamic vinegar - 1 teaspoon dried oregano - 1 teaspoon garlic powder - Salt and pepper to taste This pasta salad packs a protein punch. The cooked quinoa and chickpeas are the stars. Quinoa offers all nine essential amino acids. It is a complete protein. Chickpeas are full of fiber and protein too. Together, they boost the salad’s nutrition. Whole grain pasta adds even more protein and fiber. This combination helps keep you full and satisfied. Feel free to customize this salad! Add-ins can enhance taste and texture. Try diced avocado for creaminess. You can add artichoke hearts for a tangy touch. Sun-dried tomatoes bring richness and depth. Want some heat? Toss in sliced jalapeños or red pepper flakes. These options let you build your perfect salad. {{ingredient_image_2}} Start by boiling water in a large pot. Add a pinch of salt to the water. Once boiling, add 2 cups of whole grain pasta. Cook it according to the package instructions until it is al dente. This means it should be firm when you bite into it. After cooking, drain the pasta carefully. Rinse it under cold water to stop the cooking process. Set it aside to cool. Take a medium saucepan and add 1/2 cup of quinoa and 1 cup of water. Bring this mixture to a boil. Once it boils, turn down the heat. Cover the pot and let it simmer for about 15 minutes. After this time, the quinoa should be fluffy and the water should be absorbed. Remove the pot from heat and let the quinoa cool. In a large mixing bowl, combine several fresh ingredients. Start with 1 cup of halved cherry tomatoes. Then, add 1 cup of cooked chickpeas that you drained and rinsed. Next, add 1/2 cup of diced cucumber and 1/2 cup of diced red bell pepper. Don't forget to include 1/4 cup of sliced black olives and 1/2 cup of halved mozzarella balls. Gently stir these ingredients together. Now, it’s time to mix everything. Once both the quinoa and pasta are cool, add them to the bowl with the vegetables. This creates a hearty base for your salad. In a small bowl, whisk together the dressing. Use 3 tablespoons of olive oil and 2 tablespoons of balsamic vinegar. Add 1 teaspoon of dried oregano, 1 teaspoon of garlic powder, and a sprinkle of salt and pepper. Mix this well until all ingredients combine smoothly. Drizzle the dressing over the salad mixture. Use a large spoon to gently toss everything together. Make sure all the pasta and vegetables are coated in the dressing. Taste to see if it needs more seasoning. For the best flavor, cover the salad and refrigerate it for at least 30 minutes. This allows the flavors to blend. Serve the salad in a colorful bowl, garnished with fresh basil for a lovely touch. To cook perfect pasta, start with a large pot. Use plenty of salted water. Bring it to a rolling boil. Add the whole grain pasta and stir. Cook until it's al dente, which means firm to the bite. Check the package for exact cooking time. Drain the pasta and rinse it under cold water. This stops the cooking and helps keep it firm. Marinades can boost flavor in your pasta salad. Use olive oil and balsamic vinegar for a tasty dressing. Add garlic powder and dried oregano for more flavor. You can even marinate your veggies. Just let them soak in the dressing for at least 15 minutes. This makes every bite packed with delicious taste. Meal prep makes lunch easy and fun. Start by cooking the pasta and quinoa ahead of time. Store them in separate containers. Chop your veggies and keep them fresh in the fridge. When you're ready to eat, mix everything together. This keeps your salad crisp and tasty. You can also make a big batch. It lasts for up to three days in the fridge. Enjoy this healthy meal all week! Pro Tips Cook Pasta Al Dente: Ensure your pasta is cooked al dente to maintain its texture and prevent it from becoming mushy when mixed with the other ingredients. Use Fresh Ingredients: Opt for fresh vegetables and herbs to enhance the flavor and nutritional value of your salad. Fresh basil, in particular, can elevate the overall taste. Chill for Flavor: Allowing the salad to chill for at least 30 minutes before serving helps the flavors meld together beautifully, resulting in a more delicious dish. Customize Your Add-ins: Feel free to add or substitute other vegetables, proteins, or cheeses based on your preferences. This salad is versatile and can be tailored to your taste! {{image_4}} If you want a meatless dish, swap chickpeas for cannellini beans. They add a creamy texture and are high in protein. You can also add more veggies. Try roasted zucchini or artichoke hearts for depth. Fresh spinach or arugula brings a nice green touch. You can easily boost protein by adding grilled chicken or shrimp. Both options work well with the flavors in this salad. For a plant-based option, use tofu. Make sure to marinate it in some olive oil and herbs before adding. This will enhance the taste and keep your meal exciting. While the olive oil and balsamic vinegar is great, you can mix it up. Try lemon juice for a fresh zing. Adding Dijon mustard gives a nice kick. For a creamier option, a Greek yogurt dressing works well. It adds tang and richness while keeping it healthy. To keep your high protein Italian pasta salad fresh, store it in an airtight container. This helps prevent moisture loss and stops odors from mixing. Make sure to chill the salad in the fridge right after you prepare it. This allows the flavors to meld while keeping it safe to eat. When stored correctly, the pasta salad stays fresh for about 3 to 5 days. Check for any signs of spoilage, like off smells or changes in texture. If you notice anything unusual, it's best to discard it. This will ensure you enjoy your salad at its best. You can freeze this pasta salad, but some ingredients may not hold up well. The pasta and quinoa freeze fine, but fresh veggies like tomatoes and cucumbers may become mushy. If you choose to freeze it, do so in a freezer-safe container. Use it within 1 to 2 months for the best taste and texture. When you're ready to eat, thaw it in the fridge overnight. Yes, you can make this pasta salad ahead of time. It tastes better after chilling. I recommend making it a few hours before serving. You can store it in the fridge for up to 3 days. Just keep it in a tight container to stay fresh. This high-protein salad is packed with nutrients. The whole grain pasta gives you energy. Quinoa and chickpeas provide protein and fiber. These ingredients help keep you full longer. The fresh vegetables add vitamins and minerals. Plus, the olive oil is a healthy fat that supports heart health. Absolutely! You can swap ingredients to fit your needs. If you're gluten-free, use gluten-free pasta. You can replace chickpeas with black beans for a different flavor. If you're vegan, skip the mozzarella or use a plant-based cheese. Feel free to mix and match based on what you like. To lower the calories, use less olive oil. You can also cut back on the cheese or use a lighter version. Adding more veggies instead of pasta can help too. Try using zucchini noodles or riced cauliflower for a fun twist. These swaps keep the flavors while making it lighter. This blog post covered how to create a tasty and healthy pasta salad. We detailed the main ingredients, tips for perfect cooking, and ways to change your dish. Storage tips keep your meals fresh for longer. Enjoy the flexibility of this recipe. You can mix and match flavors and ingredients as you like. Don’t hesitate to experiment to find your favorite version. A healthy meal can be delicious, fun, and easy to prepare.

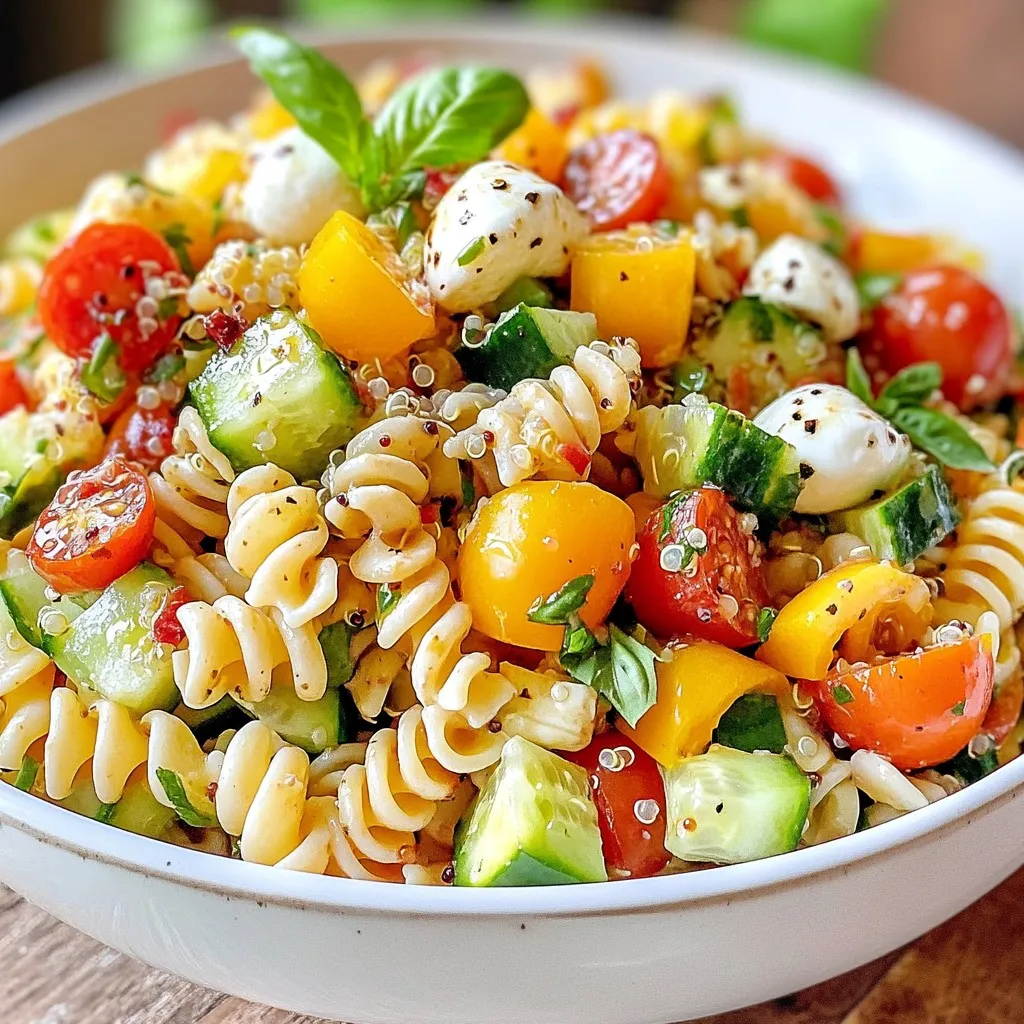
Looking for a tasty lunch that packs a protein punch? Look no further! My High Protein Italian Pasta Salad combines delicious flavors with nutritious ingredients, making it the perfect meal …

Read more

Categories Salads

One-Pan Lemon Parmesan Salmon Flavorful Easy Meal

November 13, 2025March 26, 2025 by Chef Tavio
You need 4 fresh salmon fillets for this recipe. Choose fillets that are bright in color and smell fresh. Salmon is healthy and full of omega-3 fats. These fats help your heart and brain. Fresh salmon makes the dish taste amazing. For flavor, gather these tasty items: - 2 tablespoons extra virgin olive oil - 2 tablespoons unsalted butter, melted - Zest of 1 lemon - Juice of 1 lemon - 3 cloves garlic, minced finely - 1/2 cup freshly grated Parmesan cheese - Salt and black pepper to taste The olive oil and butter create a rich base. Lemon zest and juice add brightness. Garlic gives depth and warmth. Parmesan cheese adds a salty, nutty flavor that pairs well with the salmon. You will need these vegetables: - 1 cup cherry tomatoes, halved - 1 cup broccoli florets These veggies bring color and nutrition. Cherry tomatoes add sweetness, while broccoli adds crunch. For garnish, use fresh parsley, chopped. It gives a fresh touch to the dish. With these ingredients, you create a delightful meal. Each bite bursts with flavor. Enjoy cooking! {{ingredient_image_2}} Start by preheating your oven to 400°F (200°C). This step is key for roasting the salmon and veggies. While the oven warms up, grab your baking dish. Make sure it is large enough to hold everything without crowding. In a large bowl, whisk together the olive oil, melted butter, lemon zest, lemon juice, and minced garlic. Mix until everything is well combined. This mixture adds a bright flavor to your meal. Place the salmon fillets in the baking dish. Drizzle half of the lemon-garlic mixture over the salmon. Make sure each piece is coated. Sprinkle salt and black pepper on top. Next, add the halved cherry tomatoes and broccoli florets around the salmon. Drizzle the rest of the lemon-garlic mixture over the veggies. Toss them gently to coat. Now, sprinkle freshly grated Parmesan cheese over the salmon and vegetables. This will create a lovely golden crust as they bake. Place the baking dish in the oven. Bake for 15-20 minutes. The salmon is done when it flakes easily with a fork. The veggies should be tender but still bright. After baking, let the dish rest for 5 minutes before serving. Garnish with chopped fresh parsley for extra color and taste. To get perfectly cooked salmon, check the time. Bake it for 15-20 minutes. The salmon should flake easily with a fork when done. If you want to be sure, use a meat thermometer. The internal temperature should reach 145°F (63°C). Keep an eye on the fish. Overcooking makes it dry and tough. To boost flavors, use fresh ingredients. Fresh lemon zest and juice add brightness. Garlic gives a nice kick. Don’t skip the salt and pepper; they really enhance taste. For more depth, consider adding herbs like thyme or dill. A sprinkle of red pepper flakes can add heat if you like spice. Feel free to experiment with your favorite flavors. For an eye-catching presentation, serve directly from the baking dish. It looks rustic and inviting. If you prefer, plate individual servings. Add a lemon wedge on the side for a pop of color. Sprinkle fresh parsley over the dish for a fresh look. A colorful plate makes the meal more appealing! Pro Tips Freshness Matters: Always use the freshest salmon you can find, as it significantly enhances the flavor and texture of the dish. Season Generously: Don’t skimp on the salt and pepper; they elevate the overall taste of the salmon and vegetables. Customize Your Veggies: Feel free to mix in other vegetables like asparagus or bell peppers, depending on what you have on hand. Let It Rest: Allowing the dish to rest for a few minutes after baking helps the flavors to meld and makes for a more enjoyable eating experience. {{image_4}} You can change the salmon for other fish. Try tilapia or cod for a lighter taste. If you want a richer flavor, go for trout. You can also swap out the Parmesan cheese. Try feta for a tangy twist, or use a dairy-free cheese for a vegan option. For a spicy kick, add red pepper flakes to the lemon-garlic mix. You can bake the salmon, but grilling is another great choice. Grilling gives it a smoky flavor. If you want to use a stovetop, try pan-searing. Just cook the salmon in a hot skillet until golden. For a quick meal, you can also use an air fryer. This method makes the salmon crispy and delicious. Use whatever is fresh in your area. In spring, add asparagus or snap peas. Summer is great for zucchini and bell peppers. In fall, try butternut squash or Brussels sprouts. Winter veggies like carrots or kale work well too. Mix and match based on what’s in season for a fresh taste. After enjoying One-Pan Lemon Parmesan Salmon, let the leftovers cool. Place them in an airtight container. Store it in the fridge for up to three days. This keeps the salmon moist and fresh. If you separate the salmon from the veggies, it stays even better. To reheat, preheat your oven to 350°F (175°C). Place the salmon and veggies on a baking sheet. Cover them with foil to keep moisture in. Heat for about 10-15 minutes, or until warm. You can also use a microwave for quick reheating. Just use a lower power setting to avoid drying it out. You can freeze this dish for later! Wrap the salmon and veggies tightly in plastic wrap. Then, place them in a freezer-safe bag or container. It can last for up to three months in the freezer. When ready to eat, thaw it in the fridge overnight before reheating. This keeps flavors intact and makes meal prep easy. The best side dish pairs well with the flavors of lemon and Parmesan. I love serving this salmon with rice or quinoa. Both absorb the rich juices and add a nice texture. A fresh salad works well too. You can use mixed greens or a simple cucumber salad. The crispness of the salad balances the rich salmon. Yes, you can use frozen salmon fillets. Just make sure to thaw them first. Place the frozen fillets in the fridge overnight for best results. If you're short on time, you can run them under cold water for about 30 minutes. Ensure they are fully thawed before cooking. This ensures even cooking and great flavor. To check if salmon is cooked well, look for its color and texture. Cooked salmon turns opaque and flakes easily with a fork. The internal temperature should reach 145°F (63°C). If you don’t have a thermometer, use a fork to test. If it flakes apart, it’s ready to enjoy! This blog post covered how to make One-Pan Lemon Parmesan Salmon. You learned about fresh salmon, key flavors, and vegetables. I shared step-by-step baking instructions and tips for perfect results. We also explored variations for different tastes and how to store leftovers. Enjoy this dish with family and friends. It's easy to make and packed with good flavors. Try it today and see how simple cooking can be!

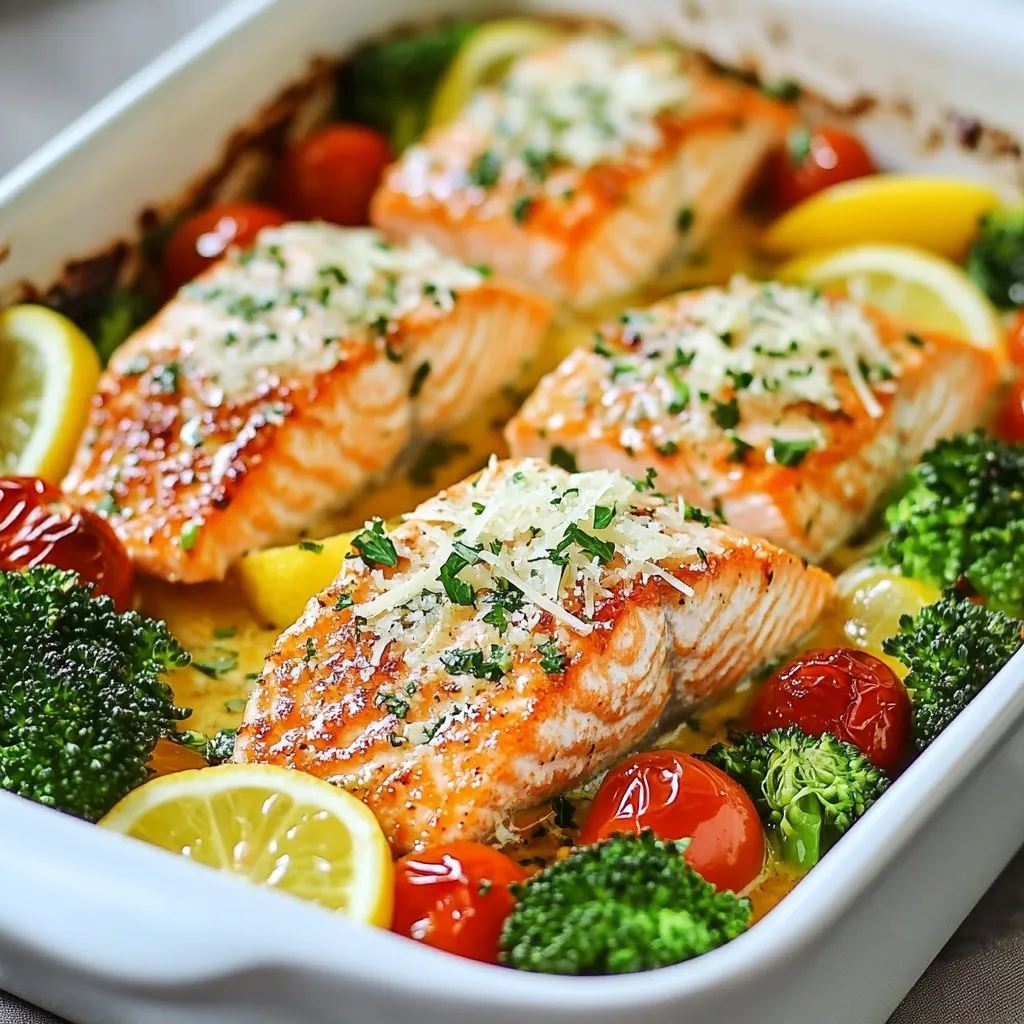
Are you looking for a quick and tasty meal? One-Pan Lemon Parmesan Salmon is the answer! This dish is simple, fresh, and packed with flavor. You can make it in …

Read more

Categories Dinner

Ingredient S’mores Cookie Cups Tasty Dessert Treat

December 18, 2025March 26, 2025 by Chef Tavio
To make s'mores cookie cups, gather these key items: - 1 cup all-purpose flour - 1/2 teaspoon baking soda - 1/4 teaspoon salt - 1/2 cup unsalted butter, softened - 1/2 cup granulated sugar - 1/2 cup brown sugar, packed - 1 large egg - 1 teaspoon pure vanilla extract - 1 cup graham cracker crumbs - 1 cup semi-sweet or milk chocolate chips - 1 cup mini marshmallows - Additional graham cracker crumbs for garnish You can swap some ingredients if needed. Here are some ideas: - Use coconut flour for a gluten-free option. - Substitute vegan butter for a dairy-free version. - Replace granulated sugar with coconut sugar for a healthier choice. - You can use egg replacers like flaxseed meal or applesauce if you need to avoid eggs. - For a different flavor, try white chocolate chips instead of semi-sweet. These swaps can fit many dietary needs while still keeping your cookie cups tasty! To make these treats, you’ll need a few basic tools: - Standard muffin tin - Mixing bowls (1 large and 1 small) - Electric mixer or whisk - Spatula for folding - Measuring cups and spoons - Baking sheet for cooling Having these items ready will help your baking go smoothly. {{ingredient_image_2}} Start by setting your oven to 350°F (175°C). This is the perfect temperature for baking. Next, take a standard muffin tin and lightly grease each cup. This step helps the cookie cups pop out easily once baked. In a large bowl, combine 1/2 cup of softened unsalted butter, 1/2 cup of granulated sugar, and 1/2 cup of brown sugar. Use an electric mixer to mix these on medium speed. Keep mixing until the mix looks light and fluffy. This usually takes about two minutes. Now, add 1 large egg and 1 teaspoon of pure vanilla extract. Beat these in well until the mix is smooth. In a small bowl, whisk together 1 cup of all-purpose flour, 1/2 teaspoon of baking soda, and 1/4 teaspoon of salt. Once mixed, slowly add this dry mix into the wet ingredients. Use low speed to combine them. Mix just until you see no dry flour. Next, gently fold in 1 cup of graham cracker crumbs and 1 cup of chocolate chips. Make sure they are well mixed. Scoop about a tablespoon of dough into each muffin tin cup. Press down lightly to form a base. Place the muffin tin in the oven and bake for about 10 minutes. You want the edges to turn lightly golden brown. After baking, take the muffin tin out of the oven. Immediately press a few mini marshmallows into the center of each cookie cup. They should sink slightly into the warm cookie. Put the tin back in the oven for another 3-4 minutes. Watch for the marshmallows to puff up and turn a nice golden brown. This step makes them gooey and delicious! To keep your cookie cups soft, avoid overmixing the dough. When you add dry ingredients, mix until you see no flour. Stop as soon as it comes together. Overmixing can make the cookie cups tough. Trust me, a gentle touch makes all the difference in texture. Baking time is key for the right texture. Bake for about 10 minutes first. Look for edges that are light brown. Then, add marshmallows and bake for another 3-4 minutes. You want them puffed and golden. Keep an eye on them, as ovens can vary. Timing can change the whole treat! Cooling is just as important as baking. Let the cookie cups cool in the pan for 10 minutes. This helps them set and prevents crumbling. After that, move them to a wire rack. This allows air to flow, which keeps them from getting soggy. Enjoy the perfect texture with these simple cooling tips! Pro Tips Chill the Dough: For a thicker cookie cup, chill the dough in the refrigerator for about 30 minutes before scooping it into the muffin tin. Use Fresh Marshmallows: For the best texture and flavor, use fresh mini marshmallows. Stale marshmallows can result in a chewy, less appealing finish. Experiment with Chocolate: Try using different types of chocolate chips, such as dark chocolate or white chocolate, to customize the flavor of your cookie cups. Presentation Matters: Consider garnishing with chocolate drizzle or extra graham cracker crumbs for an eye-catching presentation that enhances the s'mores theme. {{image_4}} You can easily switch the type of chocolate in your S’mores cookie cups. Try using dark chocolate for a richer taste. If you love milk chocolate, that works too! You can even use white chocolate for a fun twist. Each chocolate type gives a new flavor to the cups. You can mix and match to find your favorite. Adding flavors can make your cookie cups even better. Nutella adds a creamy, hazelnut taste. Just spoon a little into the center before baking. Peanut butter is another great choice. You can use it in the dough or add a dollop in the middle. Don't forget to try caramel for an extra sweet touch. Each addition brings a new layer of fun! You can change your cookie cups for holidays. In winter, add peppermint extract to the dough for a festive touch. Top with crushed candy canes for some crunch. In fall, mix in pumpkin spice for a cozy flavor. You can use different toppings for each season. This keeps your treats exciting all year round! To keep your S’mores cookie cups fresh, store them in an airtight container. Place parchment paper between layers to prevent sticking. These treats will last for about 3 to 5 days on the counter. If you want to keep them longer, consider refrigeration. This will help them stay soft and tasty. If your cookie cups lose their softness, you can easily bring them back to life. Just place them in the microwave for 10-15 seconds. This will warm them up and make them gooey again. Be careful not to overheat. You want them warm, not hot. To enjoy these cookie cups later, freezing is a great option. First, let them cool completely. Then, wrap each cookie cup in plastic wrap. After that, put them in a freezer-safe bag or container. They can last up to three months in the freezer. When you're ready to eat, just thaw them in the fridge or at room temperature. Reheat if you like them warm! Yes, you can make these cookie cups gluten-free. Use a gluten-free flour blend instead of all-purpose flour. The texture will still be nice and chewy. Just check that your other ingredients are also gluten-free. These cookie cups last about 3 to 4 days when stored in an airtight container. They taste best fresh but still hold up well for a few days. If you can’t find mini marshmallows, you can use regular marshmallows. Just cut them into smaller pieces. You can also try using marshmallow fluff for a different texture. Yes, you can prepare the dough in advance. Just wrap it tightly in plastic wrap and store it in the fridge for up to 2 days. When ready, scoop and bake as normal. To get the marshmallows perfectly toasted, watch them closely while baking. They should puff up and turn golden. Bake for 3 to 4 minutes after pressing them into the cups. In this post, we explored making delicious cookie cups. We covered essential ingredients, equipment, and step-by-step instructions. I shared tips to avoid mistakes and suggestions for tasty variations. After baking, I explained the best ways to store cookie cups for later enjoyment. Now, you can enjoy these treats anytime! Get creative with flavors and storage. Happy baking!

Get ready for a sweet treat! Ingredient S’mores Cookie Cups are simple to make and so tasty. These cookie cups mix soft dough with melted chocolate and toasted marshmallows, capturing …

Read more

Categories Desserts

Ingredient Fudgy Brownies Rich and Decadent Delight

December 28, 2025March 26, 2025 by Chef Tavio
- 1 cup unsalted butter - 1 ½ cups granulated sugar - 1 cup packed brown sugar - 4 large eggs - 1 tablespoon pure vanilla extract - 1 cup unsweetened cocoa powder - 1 cup all-purpose flour - ½ teaspoon baking powder - ½ teaspoon salt - 1 cup semi-sweet chocolate chunks - ½ cup dark chocolate chips The right amounts of each ingredient impact the final taste and texture. For instance, the butter adds richness and moisture. The sugars provide sweetness and help form that desired crust. Eggs bind all the ingredients together and add structure. The cocoa powder gives the brownies their deep chocolate flavor. The flour helps create the structure while the chocolate chunks and chips add bursts of melty chocolate. Each ingredient plays a key role in making these brownies fudgy. The unsalted butter is crucial for that rich texture. Too little butter can make them dry. The combination of granulated and brown sugars ensures a perfect balance of flavor and moisture. Eggs must be mixed in well, giving the brownies lift without making them cake-like. Sifting the cocoa powder, flour, baking powder, and salt ensures a smooth batter, which helps in getting that fudgy consistency. Lastly, the chocolate chunks and chips contribute to the gooeyness that makes each bite heavenly. {{ingredient_image_2}} Start by preheating your oven to 350°F (175°C). Grab a 9x13 inch baking pan. Grease the pan with a light coat of unsalted butter. Next, line it with parchment paper. Let the paper hang over the edges. This helps you lift the brownies out easily later. In a medium saucepan, melt 1 cup of unsalted butter over low heat. Once melted, take the saucepan off the heat. Stir in 1 ½ cups of granulated sugar and 1 cup of brown sugar. Mix until the sugars blend well and form a smooth mixture. Let it cool slightly. This stops the eggs from cooking when added. Now, whisk in 4 large eggs one by one. Make sure each egg mixes in fully before adding the next. This helps create a rich texture. After that, add 1 tablespoon of pure vanilla extract. This gives the brownies a lovely flavor. In a different bowl, sift together 1 cup of unsweetened cocoa powder, 1 cup of all-purpose flour, ½ teaspoon of baking powder, and ½ teaspoon of salt. This step ensures that the dry mix is lump-free. It helps the brownies rise correctly. Gently fold the dry ingredients into the wet mix. Stir just until combined. Be careful not to overmix; that can make the brownies dense instead of fudgy. Now, add 1 cup of semi-sweet chocolate chunks and ½ cup of dark chocolate chips. Mix until the chunks are evenly spread throughout the batter. Pour the thick brownie batter into your prepared pan. Use a spatula to spread it evenly. Place the pan in your preheated oven. Bake for 25-30 minutes. Check for doneness by inserting a toothpick in the center. It should come out with a few moist crumbs. Once baked, remove the pan from the oven and let it cool for about 10 minutes. Lift the brownies out using the parchment paper. Transfer them to a wire rack to cool completely. Once cool, cut them into squares. Enjoy your rich, fudgy brownies! To get that rich fudgy texture, follow a few key steps. First, use unsalted butter. It adds creaminess without extra salt. Make sure to melt the butter slowly over low heat. This keeps it smooth and helps blend well with the sugars. Next, avoid overmixing after adding the dry ingredients. Just stir until you see no flour. Overmixing can make your brownies cake-like. Finally, bake them just until a toothpick shows moist crumbs. This keeps them soft and gooey. A few common mistakes can spoil your brownies. One mistake is using the wrong pan size. A 9x13 inch pan is best for even baking. If you use a smaller pan, the brownies may bake too long. Another mistake is baking them too long. Check them at 25 minutes. Even a minute can change the texture. Lastly, don’t skip the cooling step. Let them cool in the pan, or they may fall apart. Measuring ingredients correctly is key to great brownies. Use a kitchen scale for accuracy. For dry ingredients, spoon them into your measuring cup. Don’t scoop directly from the bag; this packs them down. For liquids, use a clear measuring cup. Look at eye level to get the right amount. Lastly, always sift dry ingredients together. This helps mix them well and avoids lumps. Following these practices makes your brownies taste even better! Pro Tips Use high-quality chocolate: The flavor of your brownies relies heavily on the quality of the chocolate used. Opt for premium semi-sweet and dark chocolate for a richer taste. Don't overmix the batter: To maintain that fudgy texture, mix the dry ingredients into the wet ingredients just until combined. Overmixing can lead to cakey brownies. Check for doneness early: Ovens can vary in temperature, so start checking your brownies a few minutes before the suggested baking time to avoid overbaking. Cool completely before cutting: Allowing the brownies to cool completely in the pan ensures that they set properly and makes for cleaner cuts when slicing. {{image_4}} You can make gluten-free fudgy brownies by swapping the all-purpose flour. Use an equal amount of gluten-free flour blend instead. Look for blends that have xanthan gum; this helps bind the ingredients. These will taste just as rich and delicious as the original! To make these brownies dairy-free, replace the unsalted butter. Use coconut oil or a dairy-free butter substitute. For chocolate, choose dairy-free chocolate chunks and chips. This way, you get the same fudgy texture without the dairy. Add nuts or extracts to boost flavor. Chopped walnuts or pecans add crunch and richness. For a taste twist, try adding a teaspoon of almond or mint extract. You can also sprinkle sea salt on top before baking. This adds a tasty contrast to the sweetness. Enjoy experimenting with different flavors! To keep your fudgy brownies fresh, store them in an airtight container. This helps keep them moist and delicious. You can layer parchment paper between the brownies to prevent sticking. If you have a large batch, cut them into squares before storing. This way, you can grab one easily when you crave a sweet treat. Fudgy brownies last about four to five days at room temperature. Make sure they stay in a cool, dry place. If you store them in the fridge, they can last a week. However, refrigeration may change their texture slightly, making them less fudgy. To freeze brownies, first, let them cool completely. Then, wrap each brownie tightly in plastic wrap. After that, place them in a freezer bag or container. They can stay frozen for up to three months. When you want a brownie, just let it thaw at room temperature. For a warm treat, you can microwave them for a few seconds. Fudgy brownies are dense and moist. They have a rich texture that melts in your mouth. Cakey brownies are lighter and more airy. They often taste more like cake than chocolate. The main difference lies in the fat and flour ratio. Fudgy recipes use more fat and less flour. This gives them that gooey feel. Cakey recipes have more flour and less fat. This is why they rise more in the oven. Yes, you can make fudgy brownies without eggs! There are many egg substitutes. Common ones include applesauce, mashed bananas, or flaxseed meal. Use ¼ cup of applesauce for each egg. This keeps the brownies moist and adds sweetness. Mashed bananas work too, but they add a banana flavor. Flaxseed meal is a great option. Mix 1 tablespoon of flaxseed with 2.5 tablespoons of water. Let it sit until it thickens. This mix acts like one egg. To check if brownies are done, use a toothpick. Insert it into the center of the brownies. If it comes out with a few moist crumbs, they are ready. If the toothpick is clean, the brownies are overbaked. Keep an eye on them while they bake. Usually, 25-30 minutes is just right. Remember, they will continue to cook a bit after you take them out! Yes, you can use cocoa powder instead of melted chocolate! You need to make some adjustments. For every ounce of chocolate, use 3 tablespoons of cocoa powder. Add 1 tablespoon of fat, like butter or oil. This helps keep the brownies rich. Cocoa powder gives a strong chocolate flavor and works well in fudgy recipes. Just be sure to sift it to avoid lumps. In this post, we explored how to make fudgy brownies with the right ingredients and steps. You learned the key ingredients, their amounts, and what makes them fudgy. We also shared tips to avoid common mistakes and variations for dietary needs. Remember, the secret to perfect fudgy brownies lies in mixing well and baking at the right temperature. Enjoy your baking and make those brownies memorable!

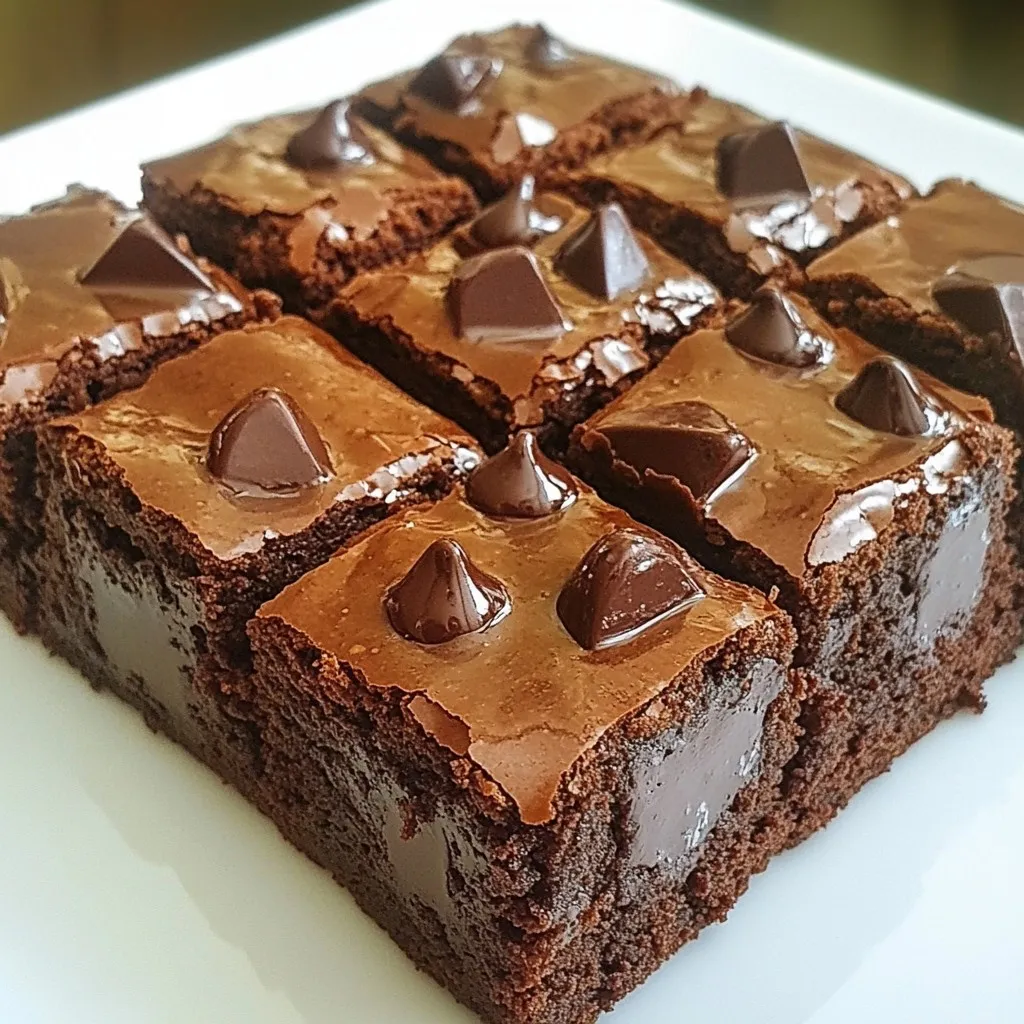
Get ready to indulge in the rich world of fudgy brownies! In this article, I’ll share the secret ingredients that make these treats so decadent. You’ll discover how each component …

Read more

Categories Desserts

Creamy Chicken Mushroom Spinach Skillet Delight

December 21, 2025March 24, 2025 by Chef Tavio
- 2 boneless, skinless chicken breasts, cut into bite-sized cubes - 1 tablespoon extra virgin olive oil - 1 cup mushrooms, sliced (button or cremini for a rich flavor) - 2 cups fresh spinach, washed and coarsely chopped - 2 cloves garlic, minced - 1 cup low-sodium chicken broth - 1 cup heavy cream - 1 teaspoon Italian seasoning blend - Salt and freshly cracked black pepper to taste - 1/2 cup freshly grated Parmesan cheese - Fresh parsley, chopped, for garnish (optional) The main ingredients in this dish combine to create a rich and creamy sauce. The chicken gives a hearty base, while mushrooms add a nice umami flavor. Spinach brings a touch of green, making the dish vibrant and healthy. - Skillet or frying pan - Wooden spoon for stirring - Cooking utensils Using the right equipment is key to making this dish shine. A good skillet allows for even cooking. A wooden spoon helps mix the ingredients without scratching your pan. {{ingredient_image_2}} Heat the olive oil in a large skillet over medium heat until it shimmers. Add the chicken pieces. Season them with salt and pepper. Sauté the chicken for 6-8 minutes. You want it browned and cooked through. Once done, remove the chicken from the skillet. Set it aside on a plate while you cook the vegetables. In the same skillet, add the sliced mushrooms. Cook them for about 4-5 minutes. You want them to turn golden brown and soften. Then, add the minced garlic. Cook for an additional minute, stirring constantly. This will enhance the flavor without burning the garlic. Now, pour in the chicken broth. Bring it to a gentle simmer. Use a wooden spoon to scrape up any tasty bits from the skillet. Lower the heat and add the heavy cream, stirring until the mixture is smooth. Sprinkle in the Italian seasoning. Adjust the taste with more salt and pepper if needed. Return the cooked chicken to the skillet. Fold in the chopped spinach. Stir gently until the spinach wilts, which takes about 2-3 minutes. Gradually mix in the grated Parmesan cheese. Stir until it melts and blends into the creamy sauce. Let the dish rest for a couple of minutes before serving so the flavors meld together. To achieve the ideal creamy consistency, start with full-fat heavy cream. This helps the sauce stay rich. Stir the cream gently into the skillet. You want it smooth, not lumpy. If your sauce is too thick, add a little more chicken broth. This will help loosen it up. For extra creaminess, mix in more Parmesan cheese as it melts into the sauce. When it comes to seasoning, taste is key. Use salt and pepper to balance flavors. Italian seasoning gives a nice herbal note. If you prefer a kick, try adding a pinch of crushed red pepper flakes. Adjust to your liking for the best flavor. For sides, crusty bread is perfect for dipping. It soaks up the creamy sauce nicely. You can also serve it over fluffy rice or pasta. This makes the meal hearty and filling. To present the dish, use shallow bowls. This adds elegance to your meal. Garnish with chopped parsley for a pop of color. The fresh green looks great against the creamy sauce. Enjoy your beautiful, flavorful dish! Pro Tips Use Fresh Spinach: Fresh spinach not only enhances the flavor but also adds vibrant color and nutrients to the dish. Brown the Chicken Well: Make sure to brown the chicken pieces thoroughly; this step adds depth and enhances the overall flavor of the dish. Adjust Creaminess: For a lighter version, substitute half of the heavy cream with Greek yogurt or low-fat sour cream without compromising on taste. Serve with Sides: Pair this dish with crusty bread, rice, or pasta to soak up the creamy sauce and create a more satisfying meal. {{image_4}} You can easily switch up the proteins in this dish. Try using turkey instead of chicken. Turkey gives a nice flavor and keeps it light. If you prefer a plant-based option, use tofu. Tofu absorbs flavors well and adds a good texture. You can also play with the veggies. Instead of spinach, try kale or Swiss chard. Both will add great taste and nutrition. You can also mix in bell peppers or zucchini for a pop of color and crunch. To boost the flavor, add spices like red pepper flakes for a little heat. A pinch of smoked paprika can give a nice smoky flavor. You can also add a squeeze of lemon juice for brightness. Cheese is another great way to change the taste. Instead of Parmesan, use feta for a tangy twist. Goat cheese can also add creaminess and a unique flavor. Fresh herbs like basil or thyme can lift the dish, making it more vibrant and fresh. To keep your creamy chicken mushroom spinach skillet fresh, place it in an airtight container. This helps prevent air from spoiling the dish. You can store it in the fridge for up to three days. After that, the chicken and spinach may lose their texture and flavor. When you are ready to enjoy your leftovers, reheat them gently. The best method is to use a skillet on low heat. Add a splash of chicken broth or cream to help revive the creamy texture. Stir often until heated through. You can also use a microwave, but be careful not to overheat. Heat in short bursts, stirring in between, to keep the dish creamy and delicious. You can pair this dish with many tasty sides. Here are some ideas: - Crusty bread: Perfect for soaking up the creamy sauce. - Fluffy rice: A great base that adds heartiness. - Pasta: Use any shape you like for a comforting meal. - Steamed veggies: Broccoli or green beans can add color and crunch. These sides enhance your meal and bring balance to the creamy chicken mushroom spinach skillet. Yes, you can easily make this dish dairy-free. Here are a few tips: - Use coconut milk: Swap heavy cream for full-fat coconut milk. It adds a nice flavor. - Nutritional yeast: Replace Parmesan cheese with nutritional yeast for a cheesy taste without dairy. - Dairy-free cream cheese: This can give a nice creamy texture without dairy. These swaps keep the meal creamy and delicious while meeting dairy-free needs. If you love heat, here’s how to kick it up a notch: - Red pepper flakes: Add a pinch during cooking for warmth. - Hot sauce: Drizzle some into the sauce for extra flavor. - Jalapeños: Chop fresh jalapeños and cook them with the mushrooms. These options let you control the spice level to fit your taste. In this blog post, we explored cooking a creamy chicken mushroom spinach skillet. We discussed key ingredients and equipment, detailed step-by-step instructions, and shared helpful tips to perfect your dish. You learned about variations like ingredient swaps and flavor enhancements, as well as how to store and reheat leftovers. Cooking can be simple and fun. With these tips and tricks, you can make a delicious meal that everyone will enjoy. Try it out and make it your own!

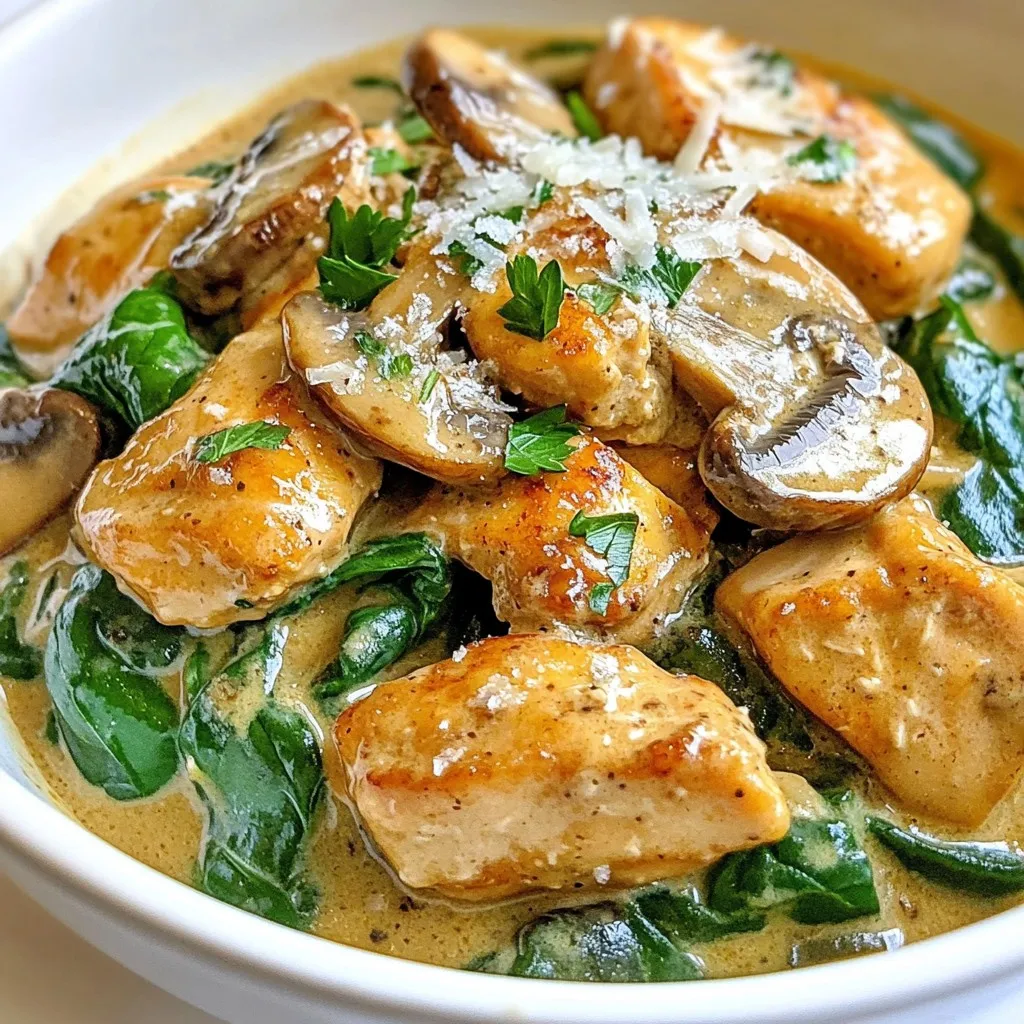
Get ready to savor a dish that’s as tasty as it is easy! In this post, I’ll show you how to make a Creamy Chicken Mushroom Spinach Skillet that will …

Read more

Categories Dinner

Easy Szechuan Noodles Flavorful and Quick Recipe

January 3, 2026March 24, 2025 by Chef Tavio
- 8 oz. noodles (egg or rice noodles) - 1 tablespoon vegetable oil - 2 cloves garlic, minced - 1 tablespoon ginger, grated - 1 red bell pepper, sliced - 1 green bell pepper, sliced - 1 cup snap peas, trimmed - 3 green onions, chopped - 2 tablespoons soy sauce - 1 tablespoon rice vinegar - 1 tablespoon sesame oil - 1 tablespoon Szechuan peppercorns, crushed - 1 teaspoon chili flakes - Salt, to taste - Toasted sesame seeds for garnish - Fresh cilantro for garnish - Additional vegetables like carrots or broccoli - Protein sources like cooked chicken or tofu Using fresh ingredients makes a big difference. Look for bright, crisp vegetables. Choose firm noodles for the best bite. Fresh garlic and ginger have stronger flavors. Always check the expiration dates on sauces to ensure quality. This attention to detail will elevate your Szechuan noodles to a new level. {{ingredient_image_2}} To start, boil a large pot of water. Add 8 oz. of your choice of noodles. For a quick meal, I recommend egg noodles or rice noodles. Cook them as per the package instructions until they are al dente. Once done, drain the noodles and rinse them under cold water. This stops the cooking. Set the noodles aside for later. In a small bowl, mix together the sauce. Combine 2 tablespoons of soy sauce, 1 tablespoon of rice vinegar, and 1 tablespoon of sesame oil. Add 1 tablespoon of crushed Szechuan peppercorns and 1 teaspoon of chili flakes. Whisk it all together until smooth. Set this spicy sauce aside for now. Heat 1 tablespoon of vegetable oil in a large skillet or wok on medium heat. Add 2 cloves of minced garlic and 1 tablespoon of grated ginger. Stir these for about 30 seconds. You want them fragrant but not burnt. Next, add 1 sliced red bell pepper, 1 sliced green bell pepper, and 1 cup of snap peas. Stir-fry for about 3-4 minutes. The veggies should be bright and tender but still crisp. Now, it’s time to mix everything. Gently add the drained noodles to the skillet. Pour in the Szechuan sauce you prepared earlier. Toss all ingredients together for about 2-3 minutes. Ensure the noodles are well coated in the sauce and heated through. Finally, stir in 3 chopped green onions. Taste the noodles and add salt if needed. Then, serve the Szechuan noodles in deep bowls. For a nice touch, sprinkle toasted sesame seeds on top. You can add extra bell pepper slices or a sprig of cilantro for color. Enjoy! To cook noodles perfectly, start with a big pot of water. Bring it to a boil first. Add your noodles and stir them gently. Check the package for timing. Once they are al dente, drain them quickly. Rinse under cold water to stop cooking. This keeps them firm and prevents sticking. Adjusting the spice level is easy. If you like more heat, add more chili flakes or Szechuan peppercorns. If you prefer mild, use less. Remember, taste as you go! You can always add more spice later, but you can't take it out. To make these noodles vegetarian, skip the meat and focus on fresh veggies. For a vegan version, ensure your sauces are plant-based. Soy sauce is usually vegan, but check the label. You can also replace any non-vegan ingredients with vegan options. Try adding tofu or tempeh for protein. Pro Tips Choose Your Noodles Wisely: Depending on your texture preference, egg noodles offer a richer taste while rice noodles provide a lighter, chewier bite. Customize Your Spice Level: Adjust the amount of chili flakes and Szechuan peppercorns according to your heat tolerance for a personalized kick. Fresh Ingredients Matter: Using fresh garlic, ginger, and crisp vegetables enhances the overall flavor and texture of the dish. Get Creative with Garnishes: Consider adding fresh herbs like cilantro or mint, or even sliced radishes, for an extra layer of flavor and color. {{image_4}} You can easily add protein to your Szechuan noodles. Chicken is a popular choice. Use about 1 cup of cooked, shredded chicken. It adds a nice flavor and texture. Tofu is another great option. Use firm or extra-firm tofu. Simply cube it and sauté until golden. You can also try shrimp or beef for a different twist. Just make sure to cook the protein well before adding it to the noodles. Feel free to mix up the veggies in your dish. You can use broccoli or carrots for a crunchy bite. Snow peas work well too and add a nice sweetness. If you want a greener touch, add zucchini or bok choy. Just remember to cut all vegetables into even strips or pieces. This ensures they cook evenly and look great on your plate. If you're looking for a gluten-free version, choose rice noodles. They cook quickly and taste great. You can also use gluten-free soy sauce. This keeps all the flavors without the gluten. For a twist, try zucchini noodles or spaghetti squash as a base. These options add a unique touch while keeping it light and healthy. To store your leftover Szechuan noodles, allow them to cool first. Place the noodles in an airtight container. Make sure to keep the vegetables mixed in. Refrigerate them for up to three days. This keeps the flavors fresh and the noodles tasty. When you are ready to enjoy your leftovers, take them out of the fridge. Add a splash of water or soy sauce to keep them moist. Use a skillet over medium heat or a microwave. Stir occasionally to heat evenly. The noodles should be hot in just a few minutes. Freezing Szechuan noodles is easy for meal prep. Pack the cooled noodles in freezer-safe bags. Remove as much air as possible before sealing. They can last in the freezer for up to three months. To eat, thaw in the fridge overnight and reheat as mentioned above. Enjoy the taste of Szechuan any time! You can tell when the noodles are al dente by tasting them. They should be firm but not hard. Follow the package instructions for cooking time. Usually, it takes about 6 to 8 minutes. Drain them once they are cooked. Rinse them briefly under cold water to stop the cooking. This step helps keep them firm. Yes, you can use different types of noodles! Egg noodles and rice noodles work well for this dish. You can even try udon or soba noodles if you like. Each type will give a different texture and flavor. Just adjust the cooking time based on the noodle type you choose. If you can’t find Szechuan peppercorns, you can use black pepper or crushed red pepper. However, they won’t give the same unique flavor. You may also try a mix of ground coriander and a bit of cayenne for some heat. This won't match the flavor exactly, but it will still taste great. The spice level of Szechuan noodles can vary. It depends on the amount of chili flakes you add. The recipe calls for 1 teaspoon, which gives a nice kick. If you prefer less heat, use less chili. If you want more spice, add more chili flakes or even hot sauce. Always taste as you go! In this blog post, we covered key ingredients for Szechuan noodles and how to make them. You learned to cook noodles, prepare sauce, and sauté aromatics. I shared tips for flavor, spice levels, and even dietary options. We discussed variations with proteins and veggies, plus storage tips for leftovers. In summary, you can enjoy delicious Szechuan noodles at home. Follow these steps, get creative, and make it your own!

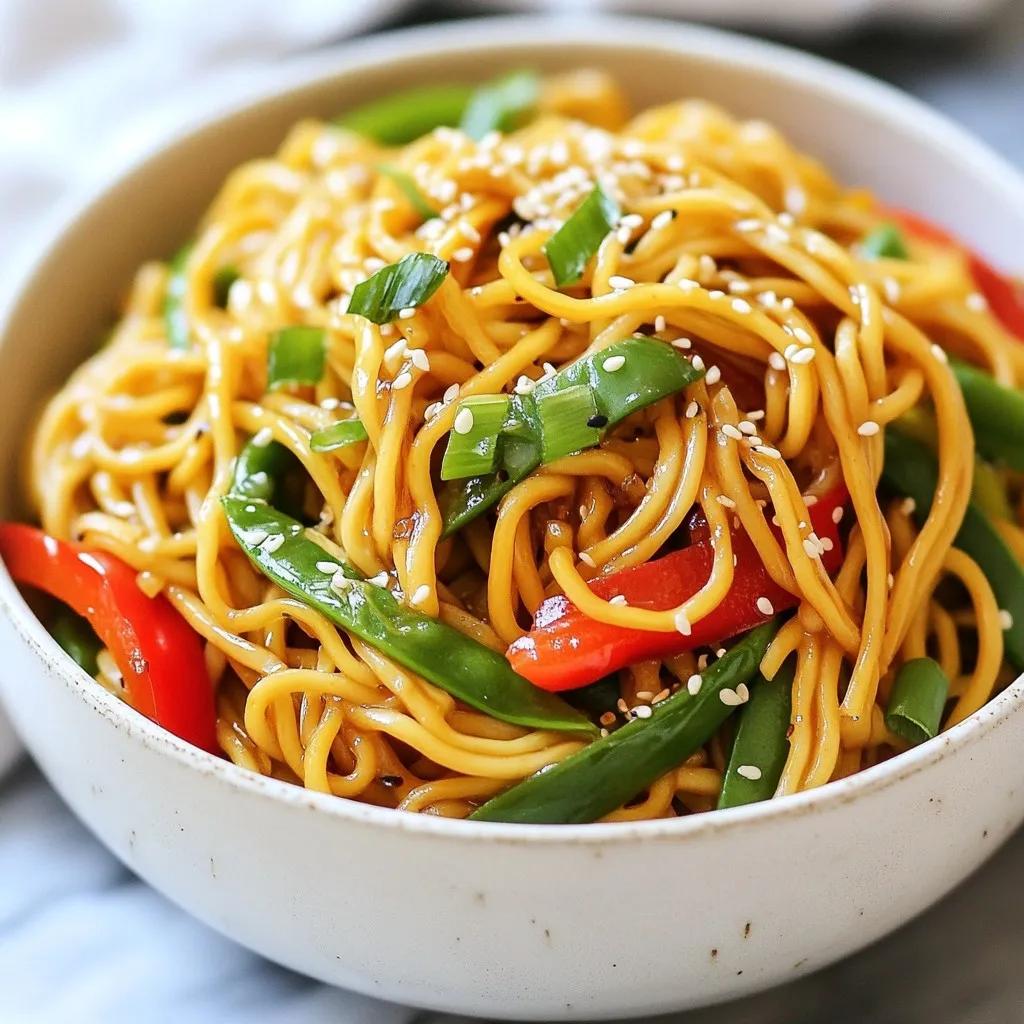
Looking for a quick and tasty meal? These Easy Szechuan Noodles are your answer! With bold flavors and simple steps, I’ll guide you through a delicious recipe that anyone can …

Read more

Categories Dinner

Cheesy Buffalo Chicken Pasta Bake Simple and Tasty

November 24, 2025March 24, 2025 by Chef Tavio
- 2 cups uncooked penne pasta - 2 cups cooked, shredded chicken - 1 cup buffalo sauce - 1 cup cream cheese - 1 ½ cups shredded sharp cheddar cheese - 1 cup shredded mozzarella cheese - ¼ cup crumbled blue cheese (optional) - 1 teaspoon garlic powder - 1 teaspoon onion powder - Salt and freshly ground black pepper - 2 tablespoons chopped green onions This dish starts with simple pasta. I use penne, but any pasta works. Next, I add cooked and shredded chicken, which you can buy pre-cooked for ease. The buffalo sauce gives this dish its kick. You can adjust the heat to match your taste. Cream cheese makes the sauce rich and smooth, while sharp cheddar and mozzarella add gooeyness. If you like blue cheese, sprinkle some on top for a tangy flavor. Don’t forget the garlic and onion powders. They boost the taste without adding extra work. Lastly, season with salt and pepper. Fresh green onions add color and crunch when you serve the dish. Each ingredient plays a part in making this pasta bake creamy and flavorful. {{ingredient_image_2}} First, you need to preheat your oven to 350°F (175°C). This step is key for cooking the pasta bake evenly. Next, bring a large pot of salted water to a boil. Add 2 cups of uncooked penne pasta. Cook the pasta according to the package directions until it is al dente. Drain the pasta well and set it aside. This helps the pasta hold its shape when mixed. In a large mixing bowl, combine 2 cups of cooked, shredded chicken with 1 cup of buffalo sauce. Add 1 cup of softened cream cheese, 1 teaspoon of garlic powder, and 1 teaspoon of onion powder. Don't forget a pinch of salt and pepper. Mix it all well until the cream cheese blends smoothly into the chicken and sauce. Now, gently fold in the cooked penne pasta. Add half of the 1 ½ cups of shredded cheddar cheese and all of the 1 cup of shredded mozzarella cheese. Make sure the pasta is well-coated in the creamy buffalo sauce mixture. This is where the flavors start to come together. Lightly grease a 9x13 inch baking dish with cooking spray or butter. Pour your pasta mixture into the dish, spreading it out evenly. This ensures that every bite has flavor. Sprinkle the remaining shredded cheddar cheese over the top of the pasta. If you like, add ¼ cup of crumbled blue cheese for extra flavor. This will give your dish a great cheesy crust. Place the dish into the preheated oven. Bake for 25-30 minutes, or until the cheeses are melted and bubbly. You want a nice golden color on top. This step makes everything warm and inviting. Once baked, remove the dish from the oven. Let it sit for a few minutes to cool slightly. Before serving, garnish with 2 tablespoons of chopped fresh green onions. This adds a fresh pop of color and a nice crunch. Enjoy your tasty creation! For this dish, you can use cooked chicken. Rotisserie chicken works great. It saves time and adds flavor. If you want, you can cook chicken breasts or thighs. Just boil or bake them until done. Shred the chicken into small pieces for easy mixing. The buffalo sauce gives this dish its kick. You can adjust the heat to fit your taste. If you like it mild, use less sauce. For more heat, add extra sauce or use a hotter brand. You can also mix in some cayenne pepper for a more intense flavor. Always taste as you go! Cheese adds creaminess and flavor. I recommend using sharp cheddar and mozzarella. They melt well and taste amazing. If you want a tangy note, add blue cheese. It pairs well with buffalo sauce. You can also try pepper jack cheese for a spicy twist. Mix and match to find your favorite blend! Pro Tips Use Leftover Chicken: Rotisserie chicken is a great time-saver, but you can also use leftover grilled or baked chicken for added flavor. Adjust the Spice Level: Feel free to customize the amount of buffalo sauce to match your heat preference. Start with less and add more if you like it spicier! Cheese Variations: Experiment with different cheeses like pepper jack for a spicy kick or gouda for a smoky flavor. Make Ahead: This dish can be assembled a day in advance. Just cover it with foil and refrigerate, then bake when you're ready to serve. {{image_4}} You can make a tasty vegetarian version of this dish. Swap the chicken for cooked lentils or chickpeas. Use your favorite veggies, like bell peppers or spinach. Replace the buffalo sauce with a spicy BBQ sauce for a new flavor. This way, you still get a rich, creamy bake without the meat. To make this recipe gluten-free, choose gluten-free penne pasta. Many brands offer great options that taste just as good. Make sure your buffalo sauce is also gluten-free. Check the label to avoid hidden gluten. This will keep your dish safe and delicious for everyone. You can switch the chicken for other proteins. Ground turkey or shredded pork works well. Make sure to cook them fully before mixing with the other ingredients. This gives you a new twist on the classic dish and can suit any taste. Store leftovers in an airtight container. Let the pasta bake cool down first. Then, place it in the fridge. It will stay fresh for about 3 to 4 days. Make sure to cover it well. This keeps the flavors intact. To reheat, use your oven or microwave. If using the oven, set it to 350°F (175°C). Place the pasta bake in an oven-safe dish. Cover it with foil to keep it moist. Heat for about 15-20 minutes. Check if it's hot all the way through. If using a microwave, heat on high for 2-3 minutes. Stir halfway to ensure even warming. You can freeze this dish for up to 3 months. Cut it into serving sizes before freezing. Wrap each piece in plastic wrap, then place it in a freezer bag. Label the bag with the date. To thaw, move it to the fridge overnight. Reheat as mentioned above for a tasty meal later. Yes, you can use other pasta types. Bowtie or rotini work well. They hold sauce nicely. Just cook them according to package directions. This ensures they stay al dente. To make it spicier, add more buffalo sauce. You can also mix in hot sauce. Smoked paprika or cayenne pepper adds heat too. Adjust to your taste for the right kick. Absolutely! You can prepare it a day before. Just mix all the ingredients and store them in the fridge. When you're ready, bake it straight from the fridge. It saves time on busy days. This dish pairs well with a crisp side salad. Try serving it with veggie sticks and ranch dressing. A light fruit salad also adds a nice touch. These sides balance the rich flavors. Yes, you can use a slow cooker! Mix all ingredients as usual. Pour into the slow cooker and cook on low. This method keeps the dish moist and flavorful. Just remember to check for doneness. This dish blends pasta, chicken, and cheese for a tasty meal. You can easily adjust spice, switch proteins, or make it vegetarian. Don't forget the tips on storing leftovers for later. Enjoy creating a dish everyone will love. Cooking is fun, and sharing food brings joy. So grab your ingredients and get started on this Cheesy Buffalo Chicken Pasta Bake!

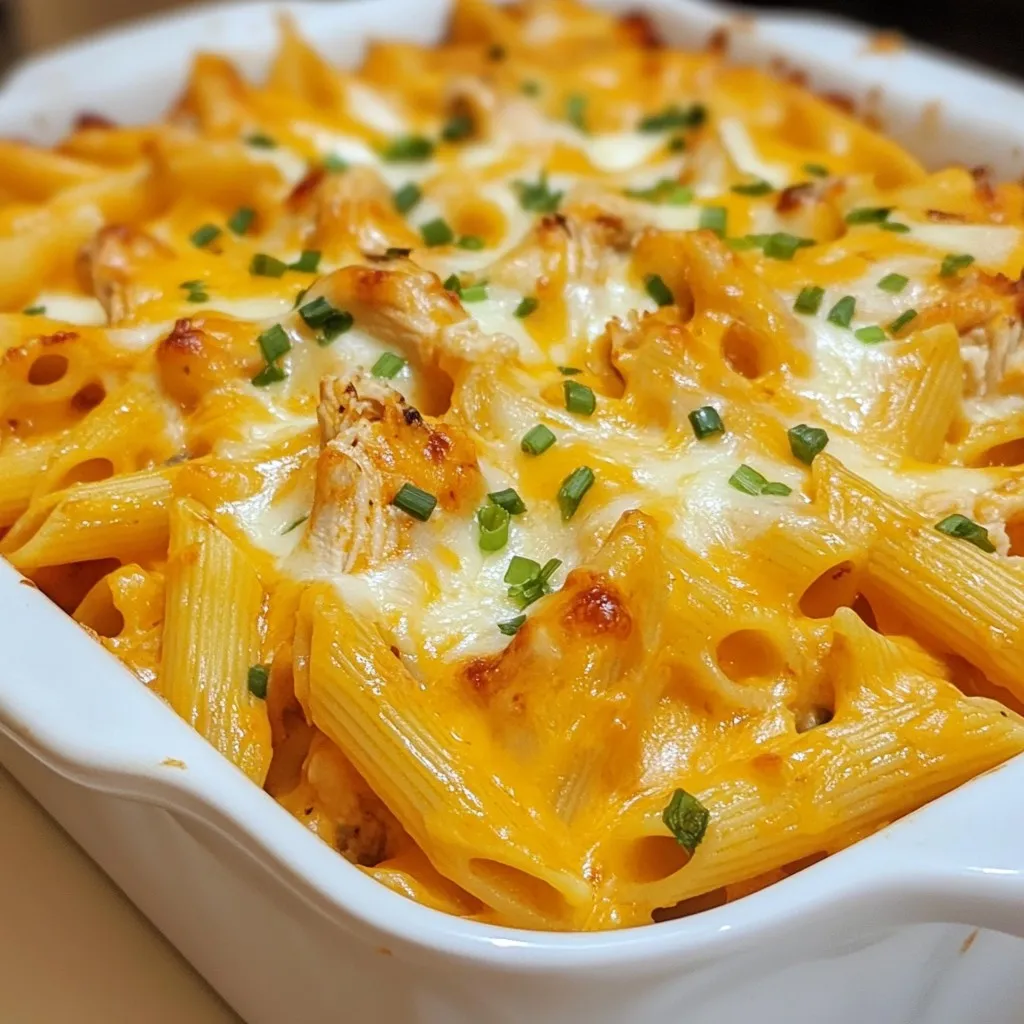
Looking for a cozy dish that’s both simple and tasty? You’ve found it! My Cheesy Buffalo Chicken Pasta Bake brings together the fiery kick of buffalo sauce and the comfort …

Read more

Categories Dinner
Older posts
Newer posts
← Previous Page1 … Page170 Page171 Page172 … Page191 Next →

TASTED NEST

Where Flavor Finds a Home 🍳🏡 — warm, simple, and crave-worthy recipes made for real life, from stovetop mornings to backyard dinners.

PAGES

Home About Contact Privacy Policy Terms & Conditions Cookie Policy GDPR Policy Copyright Policy Disclaimer

CATEGORIES

Appetizers Desserts Salads Breakfast Dinner
Copyright © 2026 Tasted Nest. All rights reserved.