Skip to content
  • GDPR Privacy Policy
  • Copyright Policy
  • Disclaimer
  • Terms & Conditions
Tasted Nest
  • Home
  • Appetizers
  • Desserts
  • Salads
  • Breakfast
  • Dinner
  • Privacy Policy
  • Contact
  • About

Chef Tavio

Spicy Korean Beef Ramen Bold and Flavorful Delight

November 18, 2025March 24, 2025 by Chef Tavio
- 200g ramen noodles - 300g ground beef - 4 cups beef broth - 2 cloves garlic, minced - 1 inch fresh ginger, grated - 1 tablespoon gochujang (Korean chili paste) - 1 teaspoon soy sauce - 1 tablespoon sesame oil - 2 boiled eggs, halved - 2 green onions, finely chopped - 1 medium carrot, julienned Gather these ingredients to make a delicious bowl of spicy Korean beef ramen. The ramen noodles bring a chewy texture. Ground beef adds richness and protein. Beef broth provides a savory base. Garlic and ginger give a warm and aromatic kick. Gochujang brings heat and depth, while soy sauce adds umami. Sesame oil rounds out the flavors with its nutty taste. For toppings, boiled eggs add creaminess. Green onions bring freshness and crunch. Julienned carrots add color and a bit of sweetness. You can mix and match these ingredients to suit your taste. Enjoy the bold and flavorful delight of this dish! {{ingredient_image_2}} Bring a large pot of water to a rolling boil. Add the ramen noodles and cook them for about 4-5 minutes. It’s important to check the package for exact timing. Once cooked, drain the noodles well and set them aside. This will keep them from getting too soft. Heat a large skillet over medium heat and add the vegetable oil. Once the oil is hot, add the ground beef. Use a spatula to break the beef apart. Cook for about 5-7 minutes until it turns brown. If you see too much fat, carefully drain it from the skillet. This will make your dish leaner and tastier. Next, add the minced garlic and grated ginger to the beef. Stir it all together and sauté for an additional 1-2 minutes. This step is key. Sautéing brings out the flavors. You want the garlic to turn golden and fragrant. It makes your dish even more delicious. Now, it’s time to mix in the spices. Stir in the gochujang, soy sauce, and sesame oil. Let it cook for another minute. Then, pour in the beef broth while stirring. Bring the mixture to a gentle simmer. Let it bubble for about 10 minutes. This helps deepen the flavors. Afterward, add the julienned carrot and let it simmer for another 5 minutes until soft. Gently fold the drained ramen noodles into the simmering broth. Make sure the noodles spread out evenly. Let everything heat through for about 2 minutes. This is crucial for a warm and cozy meal. Stir gently to keep the noodles from sticking together. To make a great broth, balance the flavors. Use the right amount of gochujang and soy sauce. Too much can make it too salty. Taste as you go. Simmer the broth gently. This helps the flavors blend well. Let it cook for at least 10 minutes. The longer you simmer, the better it tastes. If you can’t find ramen noodles, try these options: - Udon noodles - Soba noodles - Rice noodles For gluten-free choices, use rice noodles or gluten-free ramen. They still taste great! Make your ramen look stunning. Serve it in deep bowls for a nice touch. Layer your toppings for height. Place the boiled eggs and sprinkle green onions on top. Add sesame seeds for a crunchy finish. A little color goes a long way in making your dish pop! Pro Tips Use Fresh Ingredients: Fresh garlic and ginger will enhance the overall flavor of your ramen, making it more aromatic and delicious. Adjust the Spice Level: If you prefer a milder dish, use less gochujang and add more soy sauce for depth without too much heat. Customize Your Toppings: Feel free to add additional toppings like spinach, mushrooms, or chili flakes for extra flavor and texture. Perfecting the Broth: For a richer broth, consider simmering the beef broth with some dried kelp or shiitake mushrooms for added umami. {{image_4}} You can add more veggies to your ramen for extra flavor. Spinach, mushrooms, and bell peppers work great. They not only add color but also boost nutrition. Greens like spinach can give you vitamins, while mushrooms add umami. This makes your dish more balanced and fun to eat. Want more heat? Try adding more gochujang or fresh chili peppers. You can also use chili oil for a different spice flavor. If you prefer less heat, reduce the gochujang. Adding a spoon of sugar can balance the spice too. This way, you can adjust it to your taste. If you want to switch meats, chicken, pork, or tofu can work well. Just remember, cooking times may change. Chicken takes about the same time as beef. Pork might need a few extra minutes. Tofu cooks quickly, so add it near the end. This gives you options based on what you like! To keep your ramen fresh, follow these tips: - Refrigerate within two hours of cooking. - Use airtight containers to prevent moisture loss. - For long-term storage, freeze the broth and noodles separately. I like using glass containers. They keep the flavors intact and allow you to see what's inside. When you want to enjoy your ramen again, here’s how: - Stovetop is best. Heat the broth and noodles gently together. This keeps the texture nice. - If you use a microwave, heat in short bursts. Stir often to avoid hot spots. A good tip is to add a splash of water if the ramen seems dry. How long can you keep your ramen? - In the fridge, eat leftovers within 3 days. - Frozen ramen can last for 1-2 months. Check for signs of spoilage. If it smells bad or looks off, don’t eat it. Always trust your senses! Gochujang is a thick red paste made from fermented chili peppers. It has a sweet and spicy flavor. You can find it in most Asian grocery stores. Many big supermarkets also carry it in the international aisle. If you prefer online shopping, websites like Amazon offer a variety of gochujang brands. Yes, you can make this ramen in advance. To prepare, cook the beef and broth, but keep the noodles separate. Store the beef and broth in airtight containers. You can refrigerate them for up to three days. When you want to enjoy it, reheat the beef and broth on the stove. Boil the noodles fresh for the best texture. You can serve spicy Korean beef ramen with various side dishes. Try kimchi for a tangy crunch. Pickled vegetables add brightness and flavor. You can also pair it with steamed dumplings or spring rolls. These sides will enhance the meal and add extra flavor. This blog post covered everything about making Spicy Korean Beef Ramen. We looked at the key ingredients like ramen noodles, ground beef, and broth. I shared how to build flavors using garlic, ginger, and gochujang. I provided tips on enhancing your ramen with toppings and how to store leftovers. Experiment with the variations we discussed to make this dish your own. Enjoy creating a bowl of ramen that warms you up!

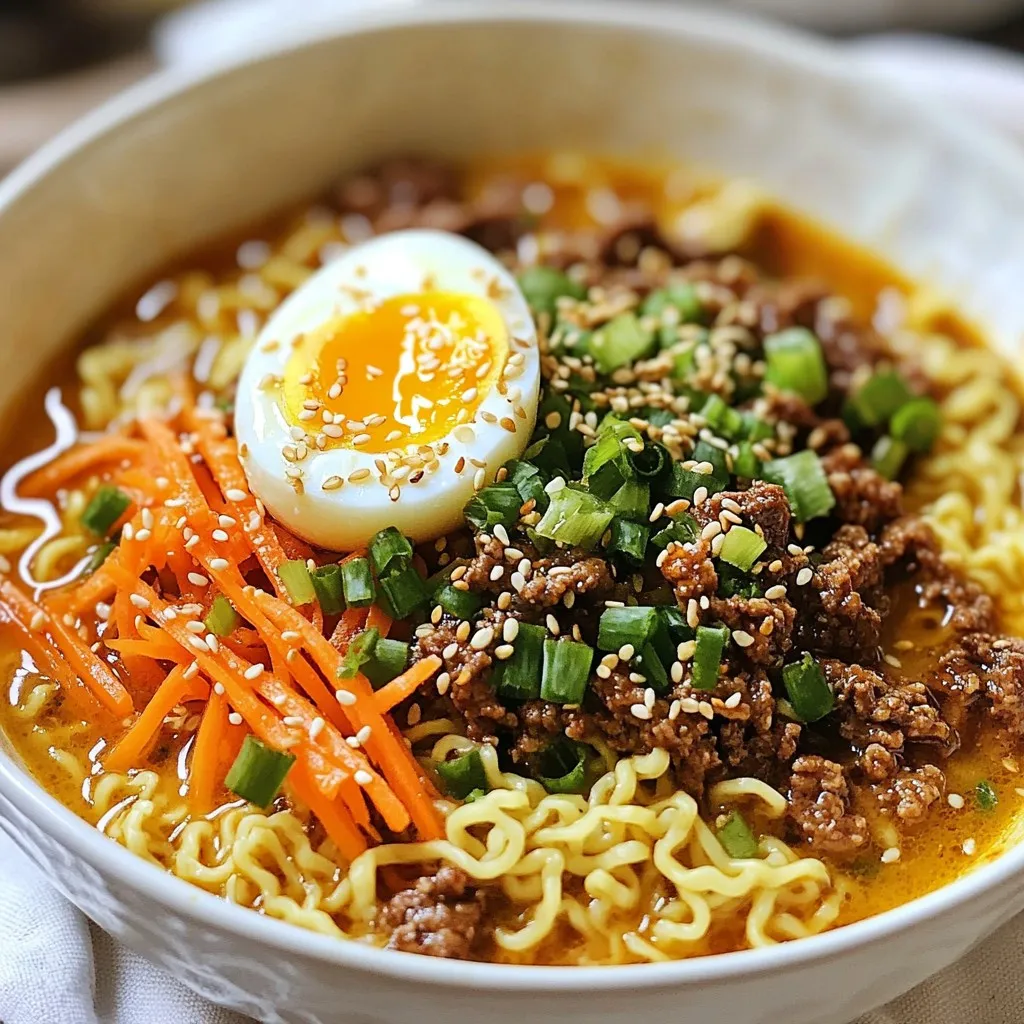
Craving a bowl of spicy goodness? You’re in the right place! In this post, I’ll show you how to make Spicy Korean Beef Ramen that’s bold and packed with flavor. …

Read more

Categories Dinner

Air Fryer Egg-Cheese Toast Cups Quick and Tasty Bite

December 17, 2025March 24, 2025 by Chef Tavio
- 4 slices of whole grain bread - 4 large eggs - 1 cup shredded mozzarella cheese - 1/2 cup diced bell peppers (mix red and green for color) - 1/4 cup finely diced red onion - 1 tablespoon chopped fresh chives (or green onions) - Salt and pepper to taste - Olive oil spray For bread, I love using Dave's Killer Bread. It's hearty and full of flavor. You can swap mozzarella for cheddar if you want a different taste. If fresh chives are not available, green onions work great too. Always choose bright, firm bell peppers. They add color and crunch. For eggs, look for ones that are labeled "farm-fresh" or "free-range" for the best taste. When selecting cheese, aim for blocks you can shred. Freshly shredded cheese melts better and tastes richer than pre-shredded options. {{ingredient_image_2}} First, preheat your air fryer to 350°F (175°C). Take the slices of whole grain bread and gently flatten them with a rolling pin. This step helps the bread shape better into cups. Next, lightly spray the air fryer basket with olive oil. This keeps the bread from sticking. Now, press each slice of bread into the basket or a muffin tin. Make sure to form well-defined edges. This ensures the cups hold the filling. In a mixing bowl, crack the 4 large eggs. Add 1 cup of shredded mozzarella cheese, 1/2 cup of diced bell peppers, and 1/4 cup of finely diced red onion. Toss in 1 tablespoon of chopped chives too. Season with salt and pepper to your taste. Whisk everything together until it is mixed well. Make sure the eggs blend nicely with the other ingredients. Carefully pour the egg mixture into each bread cup. Be careful not to overfill them. Leave a bit of space at the top since the eggs will rise. Place the basket into your air fryer and cook for 8-10 minutes. Keep an eye on them as they cook. The eggs should be set and the tops should look golden brown. When done, let them cool for a minute. Then, gently lift them out and serve on a platter. To make the best egg-cheese toast cups, use fresh bread. Whole grain bread works great. Flatten each slice with a rolling pin. This step helps the bread mold into a cup shape easily. Spray your air fryer basket with olive oil. This keeps the cups from sticking. Press the flattened bread firmly into the basket or muffin tin. Make sure to define the edges well. This helps hold the egg filling. One common mistake is overfilling the cups. Leave some space at the top. The eggs will puff up while cooking. Another mistake is not preheating the air fryer. Preheating helps cook the eggs evenly. Also, avoid using stale bread. Fresh bread shapes better and tastes best. Lastly, don't skip seasoning. Salt and pepper enhance the flavor of the egg mixture. Cooking times may vary with different air fryers. Start with 8 minutes at 350°F. Check for doneness around this time. If the eggs are not set, add more time in small increments. Some air fryers cook faster than others. Keep an eye on your cups to avoid overcooking. A golden brown top means they are ready. Pro Tips Use Fresh Ingredients: Always opt for fresh eggs and veggies to enhance the flavor and nutritional value of your toast cups. Experiment with Cheese: Feel free to mix different types of cheese, like cheddar or feta, to give a unique twist to your egg-cheese toast cups. Customize the Veggies: You can add other vegetables such as spinach, mushrooms, or zucchini to customize your cups based on your taste preferences. Check for Doneness: Every air fryer is different, so check your toast cups a minute or two before the suggested cooking time to avoid overcooking. {{image_4}} You can make these toast cups meat-free and tasty. Swap the bell peppers for other veggies. Try spinach, mushrooms, or zucchini. You can even add some chopped tomatoes for a fresh twist. Just make sure to keep the egg and cheese. This way, you still get that rich flavor. Cheese makes everything better! While mozzarella is great, you can mix it up. Try cheddar for a sharper taste. Feta adds a nice tang, while pepper jack gives a kick. You can even use a blend of cheeses. Each type adds a new layer of flavor. If you love spice, this is your chance! Add diced jalapeños or banana peppers to the egg mix. A pinch of cayenne or red pepper flakes can also work. For a smoky flavor, try smoked paprika. Just remember, start with a little. You can always add more heat! To store your egg-cheese toast cups, let them cool first. Place them in an airtight container. They will stay fresh for up to three days in the fridge. You can also layer them with parchment paper to keep them from sticking. When you’re ready to enjoy your leftovers, preheat your air fryer to 350°F (175°C). Place the toast cups in the basket. Heat them for about 3-5 minutes. This helps them regain their crispiness. You can also use a microwave if you are short on time. Heat them on a microwave-safe plate for about 30 seconds. If you want to freeze them, cool the cups completely first. Wrap each one in plastic wrap, then place them in a freezer bag. They can last up to a month in the freezer. To reheat, thaw them in the fridge overnight. Then use the air fryer or oven to warm them up. Yes, you can use other types of bread. Sourdough or white bread works well. Just make sure it is thick enough to hold the egg mixture. If you like a sweeter taste, try brioche. It adds a nice flavor to the cups. Check the eggs after 8 minutes. The eggs should be firm and not runny. If you see a nice golden brown on top, they are ready. If they look soft, give them another minute or two. The texture should be light and fluffy. These cups go well with fresh fruit or a light salad. You can add a side of yogurt for some creaminess. A few slices of avocado also make a great pairing. For a kick, add hot sauce or salsa on the side. In this article, we explored the key ingredients for egg-cheese toast cups, offering substitutes and tips for freshness. I shared step-by-step instructions for preparing, mixing, and air frying. You learned tricks to create perfect cups and avoid mistakes. We discussed tasty variations, storage options, and answered common questions. Now, you can create tasty and fun egg-cheese toast cups in your kitchen. Enjoy experimenting with different ingredients and flavors!

Looking for a quick, tasty snack? I’ve got just the recipe for you! Air Fryer Egg-Cheese Toast Cups are not only easy to make, but they’re also packed with flavor. …

Read more

Categories Breakfast

Irresistible Chicken Alfredo Pasta Simple and Creamy Dish

December 24, 2025March 24, 2025 by Chef Tavio
To make Chicken Alfredo Pasta, you need these simple ingredients: - 8 oz fettuccine pasta - 2 tablespoons olive oil - 2 boneless, skinless chicken breasts, thinly sliced - Salt and freshly ground black pepper, to taste - 4 cloves garlic, finely minced - 1 cup heavy cream - 1 cup freshly grated Parmesan cheese - 1 teaspoon Italian seasoning - Fresh parsley, finely chopped (for garnish) These ingredients come together to create a rich and creamy dish that you and your loved ones will enjoy. You can change things up with these optional ingredients: - Broccoli florets for a veggie boost - Spinach for added greens - Mushrooms for an earthy flavor - Other cheeses like mozzarella or Romano - Lemon juice for a fresh zing Feel free to mix and match based on what you have at home or what you like best! To prepare this dish, you will need: - A large pot for boiling pasta - A large skillet for cooking chicken and sauce - A cutting board and knife for slicing chicken - A wooden spoon or spatula for stirring - Measuring cups and spoons for accuracy - A colander for draining pasta With these tools, you can whip up your Chicken Alfredo Pasta easily. Enjoy the cooking process! {{ingredient_image_2}} To cook the pasta, start by boiling a large pot of salted water. Use enough water to let the pasta move freely. Once it boils, add 8 oz of fettuccine. Cook according to the package, usually about 8-10 minutes. You want it al dente, firm but not hard. After cooking, drain the pasta and set it aside. This step ensures the pasta is ready for the creamy sauce. While the pasta cooks, heat 2 tablespoons of olive oil in a large skillet over medium heat. Take 2 boneless, skinless chicken breasts and slice them thinly. Season them with salt and ground black pepper. Place the chicken in the skillet and cook for 6-7 minutes. Flip it once to get it golden brown. Make sure it reaches an internal temperature of 165°F. Once cooked, transfer the chicken to a plate and cover to keep warm. In the same skillet, reduce the heat a bit. Add 4 cloves of finely minced garlic to the pan. Sauté it for about 1 minute, stirring often. You want it fragrant but not browned. Next, pour in 1 cup of heavy cream. Stir gently and bring it to a gentle simmer for 2-3 minutes. Then, slowly add 1 cup of freshly grated Parmesan cheese and 1 teaspoon of Italian seasoning. Stir until the cheese melts and the sauce becomes creamy. Taste it and adjust salt and pepper if needed. Now, gently fold the cooked fettuccine and sliced chicken into the Alfredo sauce. Toss everything well, making sure the pasta is coated in the rich sauce. Heat it through for about 2-3 minutes. This step melds the flavors, making it a complete dish. Once everything is heated, remove it from the stove. Serve the creamy pasta in shallow bowls. For a touch of color, garnish with finely chopped fresh parsley. You can also add a sprinkle of grated Parmesan cheese on top. A twist of freshly ground black pepper and a lemon wedge on the side can brighten up the dish. Enjoy your Chicken Alfredo Pasta! To avoid overcooked pasta, watch the timer closely. Cook the fettuccine for about 8-10 minutes. It should be al dente, which means it has a slight bite. Also, don’t forget to salt the water. This step adds flavor to the pasta. Burnt garlic can ruin your dish. Sauté the minced garlic for just 1 minute. Stir it often to keep it from browning. If it burns, toss it out. You can start fresh with new garlic. To make your Alfredo even better, try adding more spices. A pinch of red pepper flakes gives a nice kick. You can also add a bit of nutmeg for warmth. Fresh herbs like basil or thyme can boost the flavor too. Just chop them finely and mix them in the sauce. Serving is just as important as cooking. Use shallow bowls for a nice look. After plating, sprinkle more Parmesan cheese on top. This adds a creamy finish. You can also add a twist of black pepper for a touch of class. A lemon wedge on the side brightens the dish. It makes your Chicken Alfredo Pasta look and taste even better! Pro Tips Cook Pasta Al Dente: Be sure to cook your fettuccine al dente for the best texture. This ensures the pasta holds up well when mixed with the creamy sauce. Don't Overcook Garlic: Sauté the garlic just until fragrant, about a minute. Overcooking can lead to a bitter taste, so keep an eye on it! Use Freshly Grated Cheese: For a smooth and creamy sauce, always opt for freshly grated Parmesan cheese instead of pre-packaged. It melts better and enhances flavor. Garnish for Flavor and Color: Adding freshly chopped parsley not only brightens up the dish visually but also adds a fresh flavor that balances the richness of the Alfredo sauce. {{image_4}} You can easily add vegetables to your Chicken Alfredo Pasta. Broccoli is a great choice. It adds color and crunch. Just steam it for a few minutes before mixing it in. Spinach wilts quickly and gives a nice flavor. Add it just before serving for the best taste. Mushrooms add a rich, earthy flavor. Sauté them in the same skillet before adding the garlic. This way, you enhance the sauce without extra effort. If you want to switch up the protein, shrimp is a fantastic option. Cook it in the same way as the chicken. It cooks fast and adds a nice seafood twist! For a plant-based choice, use tofu. Press and cube the tofu, then sauté it until golden. This keeps the dish creamy while making it suitable for vegetarians. Both options will still pair well with the rich Alfredo sauce. To make this dish lighter, try zucchini noodles. Spiralize the zucchini for a fresh and healthy base. You can sauté them briefly so they stay crisp. For a gluten-free option, use gluten-free pasta. There are many great choices that cook just like regular pasta. If you want to cut calories, swap heavy cream for light cream. It will still taste creamy but with less fat. These variations help everyone enjoy Chicken Alfredo Pasta! After cooking Chicken Alfredo Pasta, let it cool to room temperature. Store it in an airtight container. This helps keep the dish fresh. Place it in the fridge if you plan to eat it within a few days. Use it within 3-4 days for the best taste. Make sure to label the container with the date. When reheating, use medium heat on the stove. Add a splash of water or broth to help it warm evenly. Stir often to prevent sticking. You can also use the microwave. Heat in short bursts, stirring in between. This helps keep the pasta creamy and delicious. Yes, you can freeze Chicken Alfredo Pasta! First, let it cool completely. Use a freezer-safe container or bag. Remove as much air as possible before sealing. It can last up to 2 months in the freezer. When you're ready to eat, thaw it overnight in the fridge. Reheat using the tips above for a tasty meal. Yes, you can make Chicken Alfredo Pasta ahead of time. Cook the pasta and chicken, then mix them with the sauce. Store everything in an airtight container. Keep it in the fridge for up to three days. When you're ready to eat, simply heat it in a pan or microwave until warm. If you need a substitute for heavy cream, use half-and-half or whole milk mixed with butter. For a lighter option, use Greek yogurt or a blend of milk and cornstarch. These will give you a creamy texture, but the flavor may change slightly. To make a vegetarian version, skip the chicken and add veggies instead. You can use broccoli, mushrooms, or spinach. Cook them in the skillet with garlic before adding the cream and cheese. This will keep the dish creamy and flavorful. Fettuccine is the best pasta for Alfredo. Its wide shape holds onto the creamy sauce well. You can also use other pasta types like penne or linguine, but fettuccine gives the best texture. Absolutely! Adding more cheese boosts the flavor. Parmesan is the classic choice, but try adding mozzarella or pecorino for extra creaminess. Just remember to stir well as you add cheese to keep the sauce smooth. In this article, I explored the key ingredients and equipment needed to make Chicken Alfredo Pasta. I provided step-by-step instructions on cooking each component perfectly. You learned tips to enhance flavor and avoid mistakes, as well as ways to customize the dish with vegetables or alternative proteins. Finally, I shared storage info and answered common questions. Now, you can create this classic dish with ease. Enjoy your delicious Chicken Alfredo Pasta, and don't hesitate to experiment with new flavors!

Are you ready to whip up a simple and creamy Chicken Alfredo Pasta that will impress everyone? This dish is not just easy to make; it’s full of flavor and …

Read more

Categories Dinner

Fried Strawberry Cheesecake Sandwiches Irresistible Treat

December 2, 2025March 23, 2025 by Chef Tavio
To make these tasty sandwiches, you need: - 8 slices of bread (white, whole grain, or brioche) - 1 cup cream cheese, softened - 1/4 cup powdered sugar - 1 teaspoon pure vanilla extract - 1 cup fresh strawberries, hulled and diced - 1/2 teaspoon ground cinnamon - 1 large egg - 1/2 cup milk, any type - 1 cup breadcrumbs (panko is best) - Vegetable oil (for frying) These ingredients work together to create a sweet and creamy filling, making every bite a delight. You can make your sandwiches even better with these extras: - Whipped cream (for topping) - Fresh mint leaves (for garnish) The whipped cream adds creaminess, while mint gives a nice touch of freshness. If you want to change things up, try these options: - Use almond or coconut milk instead of regular milk. - Swap out strawberries for other fruits, like blueberries or peaches. - For a lower-sugar option, you can use a sugar substitute in place of powdered sugar. These swaps let you customize the flavor to fit your taste. {{ingredient_image_2}} To start, grab a medium bowl. Add 1 cup of softened cream cheese, 1/4 cup of powdered sugar, and 1 teaspoon of vanilla extract. Blend these until smooth. You can use a hand mixer or a whisk. This mixture should be creamy and well combined. Next, fold in 1 cup of hulled and diced strawberries. Make sure the strawberries are evenly mixed in. Set this tasty filling aside for now. Now, take 2 slices of your favorite bread. Spread a generous amount of the strawberry cream cheese mixture on one slice. Place the second slice on top to form a sandwich. Repeat this until you use all the bread and filling. You can choose white, whole grain, or brioche bread. Each type adds a different flavor. In a shallow dish, whisk together 1 large egg and 1/2 cup of milk. This will coat the sandwiches. In another shallow dish, mix 1 cup of breadcrumbs with 1/2 teaspoon of ground cinnamon. This will give the sandwiches a nice flavor. Heat vegetable oil in a large skillet over medium heat. Aim for about 1/4 inch deep. Dip each sandwich in the egg mixture. Let any extra egg drip off. Then, coat the sandwich in the breadcrumb mixture. Press gently to make sure the crumbs stick. Once the oil is hot, fry the sandwiches in batches. Cook for about 2-3 minutes on each side until they turn golden brown. Transfer the fried sandwiches to a plate lined with paper towels to soak up extra oil. Enjoy them warm with whipped cream and mint leaves, if you like! To make your fried strawberry cheesecake sandwiches crispy, heat your oil well. Use enough oil to cover the bottom of your skillet. Test the oil by dropping a small piece of bread in it. If it sizzles, you are ready to fry. Fry each sandwich for about 2-3 minutes on each side. You want them golden brown. If they brown too quickly, your oil is too hot. Lower the heat to get an even fry. You can add extra flavors to your filling. Try mixing in some chopped chocolate or a bit of lemon zest. This adds a fresh twist to the sweet cream cheese. For a crunch, consider adding crushed nuts like pecans or walnuts. They blend well with strawberries. If you want a spice kick, add a dash of nutmeg along with the cinnamon. This gives a warm flavor that pairs nicely with the berries. Serve your sandwiches warm for the best taste. Top them with whipped cream for extra richness. Fresh mint leaves not only look nice but also add a fresh taste. You can also drizzle some chocolate or caramel sauce over the top. It makes your dish even more tempting. For a fun twist, serve these sandwiches with a scoop of vanilla ice cream on the side. Enjoying them hot with cold ice cream is a great treat! Pro Tips Choose the Right Bread: Using brioche will give your sandwiches a rich, buttery flavor, while whole grain will add a nutty taste. Choose based on your preference! Perfectly Crispy Coating: For an extra crunch, use panko breadcrumbs. They create a lighter, crispier texture compared to regular breadcrumbs. Control the Oil Temperature: Test the oil's readiness by dropping a small piece of bread in. If it sizzles, it's perfect. Too hot can burn the coating, while too cool will make them greasy. Serving Suggestions: Serve these sandwiches warm with a dollop of whipped cream and fresh mint for a refreshing contrast to the sweetness of the strawberries. {{image_4}} You can choose many types of bread for your sandwiches. White bread works well for a classic taste. Whole grain adds a nutty flavor. Brioche gives a rich and buttery bite. Each bread type changes the texture and taste of the sandwich. Try different options to see what you like best! Strawberries are great, but other fruits can shine too. Blueberries offer a sweet touch. Raspberries add a tart twist. Sliced bananas give a creamy base. You can mix and match fruits for fun flavors. Just make sure to keep the fruit fresh and ripe for the best taste. You can make these sandwiches without eggs for a vegan option. Use a mixture of flaxseed and water instead of eggs. Combine 1 tablespoon of ground flaxseed with 2.5 tablespoons of water. Let it sit for a few minutes to thicken. For the cream cheese, use a vegan cream cheese. This way, everyone can enjoy this tasty treat! Store any leftover fried strawberry cheesecake sandwiches in an airtight container. Place parchment paper between layers to keep them from sticking. Keep the sandwiches in the fridge for up to three days. To reheat your sandwiches, use a skillet on low heat. Add a bit of butter to the pan for extra flavor. Heat for about 2-3 minutes on each side. This will help keep the bread crispy. You can also use an air fryer for 3-5 minutes at 350°F for a quick and tasty option. You can freeze these sandwiches before frying. Wrap each sandwich tightly in plastic wrap. Then, place them in a freezer bag. Store them for up to three months. When you are ready to eat, thaw in the fridge overnight. Fry them directly from frozen or let them sit at room temperature for a bit before frying. For this recipe, I recommend using: - White bread - Whole grain bread - Brioche bread Each type brings a unique taste and texture. Brioche offers a rich, buttery flavor. Whole grain adds a nutty note. White bread keeps it classic and soft. Yes, you can make the filling ahead of time. I suggest mixing the cream cheese, sugar, and strawberries. Store it in the fridge for up to two days. This saves time on cooking day. Just remember to stir it well before spreading. To check if the oil is hot, drop a small piece of bread into it. If it sizzles, the oil is ready. The temperature should be around 350°F. This ensures the sandwiches fry evenly and become golden brown. You can use frozen strawberries, but they should be thawed first. Drain any excess liquid to avoid a soggy filling. Fresh strawberries provide the best flavor and texture, but frozen works in a pinch. If you don't have powdered sugar, use granulated sugar. Blend it in a food processor until fine. You can also mix granulated sugar with a little cornstarch. This creates a similar texture to powdered sugar. In this post, I covered how to make fried strawberry cheesecake sandwiches. We looked at the key ingredients and creative ways to serve them. I shared tips for perfect frying and storage for leftovers. You can even try different fruits and bread types. These sandwiches are fun to make and tasty to eat. Don't hesitate to experiment with flavors and enjoy your sweet treat!

Get ready to indulge in a sweet sensation with Fried Strawberry Cheesecake Sandwiches! This treat combines creamy cheesecake filling and juicy strawberries, all wrapped in crispy golden goodness. In this …

Read more

Categories Desserts

Single-Serve Protein Cookie Simple and Tasty Treat

December 20, 2025March 23, 2025 by Chef Tavio
- 2 tablespoons natural peanut butter - 1 tablespoon honey or maple syrup - 1 tablespoon protein powder - 1 tablespoon almond flour - 1/4 teaspoon baking powder - A pinch of salt - Optional add-ins (dark chocolate chips or chopped nuts) The ingredients for the Single-Serve Protein Cookie are simple and easy to find. Natural peanut butter gives the cookie a rich taste and healthy fats. You can choose honey or maple syrup for sweetness. I prefer honey, but both work well. Next, protein powder is a key part of this recipe. It boosts the protein content and gives you energy. I suggest using vanilla-flavored protein powder. It adds a nice taste and blends well with other flavors. Almond flour is gluten-free and adds a nutty flavor. You only need one tablespoon, but it makes a big difference. Baking powder helps the cookie rise and become fluffy. Just a pinch of salt balances the sweet and savory flavors. Feel free to add dark chocolate chips or chopped nuts. They add a fun crunch and extra taste. You can mix and match based on your favorites! These ingredients come together to create a delicious, healthy treat. {{ingredient_image_2}} First, preheat your oven to 350°F (175°C). This step helps your cookie bake evenly. While the oven heats, grab a small baking tray. Line it with parchment paper to stop the cookie from sticking. In a medium bowl, add 2 tablespoons of natural peanut butter. Next, mix in 1 tablespoon of honey or maple syrup. Stir well until the mix is smooth. This is key for a tasty cookie. Now, it’s time for the dry ingredients. Add 1 tablespoon of protein powder, 1 tablespoon of almond flour, 1/4 teaspoon of baking powder, and a pinch of salt to the peanut butter mix. Use a spoon to blend everything until you form a dough. This dough will be thick and sticky. Take the dough and roll it into a ball with your hands. Place the ball on the baking tray. Flatten it slightly to make a cookie shape. Aim for about 1/2 inch thick. This thickness helps the cookie bake evenly. Bake your cookie in the preheated oven for 8-10 minutes. Look for golden edges and a soft center. It’s okay if the middle looks a bit undercooked. It will firm up as it cools. Once baked, let the cookie cool on the tray for a few minutes. This helps it set. After that, move it to a wire rack to cool completely. Enjoy your cookie warm or at room temperature! To get the best cookie texture, aim for about 1/2 inch thickness. This thickness helps the cookie bake evenly. I recommend baking it for 8-10 minutes. Keep an eye on the edges; they should turn golden brown. The center should still feel soft. This is key for a chewy cookie. You can boost the flavor in fun ways. Consider adding spices like cinnamon or nutmeg. A dash of vanilla extract brightens the taste too. For a richer cookie, fold in dark chocolate chips or chopped nuts. These add texture and taste to every bite. To keep your cookie fresh, store it in an airtight container. If you have leftovers, this is a must. You can also refrigerate the cookie for longer freshness. Just let it come to room temperature before enjoying. This way, it remains tasty and delightful. Pro Tips Quality Ingredients: Using high-quality natural peanut butter and fresh honey or maple syrup will enhance the flavor of your cookie significantly. Opt for organic options if available. Customize Your Cookie: Feel free to experiment with different flavors of protein powder or add spices like cinnamon for an extra kick. You can also substitute almond flour with oat flour for a gluten-free version. Baking Time: Keep an eye on your cookie while it bakes. Every oven is different, so start checking around the 8-minute mark to avoid overbaking. Storage Tips: If you have leftovers, store your cookie in an airtight container at room temperature for up to 2 days, or refrigerate for longer freshness. You can also freeze the dough for a quick treat later! {{image_4}} You can switch up the flavor of your single-serve protein cookie to keep things fun. - Chocolate protein cookie: Just use chocolate protein powder instead of vanilla. This adds a rich chocolate taste. You can also mix in chocolate chips for extra yumminess. - Almond joy-inspired cookie: Add chopped almonds and a sprinkle of shredded coconut. This gives the cookie a taste of the classic candy bar. It's a sweet twist that feels special. You can easily adjust this recipe to fit your diet needs. - Vegan options: Use plant-based protein powder and substitute honey with maple syrup. This makes the cookie vegan and just as tasty. - Gluten-free modifications: Swap almond flour with coconut flour or oat flour. This keeps the cookie gluten-free while still being delicious. Make your cookie match the season with some fun flavors. - Holiday-themed versions: Add spices like cinnamon and nutmeg for a warm flavor. This is perfect for fall and winter treats. You can even top with a drizzle of icing for a festive look. You can store the unbaked dough easily. First, wrap it tightly in plastic wrap. Place the wrapped dough in an airtight container. This way, it stays fresh and ready for baking. You can refrigerate it for up to three days. If you want to keep it longer, freeze it. Frozen dough lasts up to three months. When you're ready to bake, simply thaw it in the fridge overnight. Then, shape and bake as usual. Storing your baked cookie right is key to keeping it fresh. Use an airtight container to hold your cookie. This helps keep moisture in and air out. You can also use a resealable plastic bag. Just make sure to remove as much air as possible. Store the container at room temperature away from direct sunlight. This keeps your cookie tasty and soft for longer. At room temperature, your cookie can stay fresh for about three days. If you refrigerate it, it can last up to a week. However, the texture may change. Refrigeration can make it a bit firmer. If you want that soft, gooey feel, enjoy it soon after baking. Yes, you can still enjoy these cookies without protein powder. You can replace protein powder with oat flour or more almond flour. This will keep the cookie's texture nice and chewy. If you want extra protein, try adding chopped nuts or seeds. Adjust the liquid slightly if you use oat flour, as it absorbs more moisture. Oven types can affect baking time. For a convection oven, lower the temperature by 25°F (about 14°C). This helps cookies cook evenly. Keep an eye on your cookie as it bakes. Start checking for doneness a few minutes early. The edges should be golden, but the center should stay soft. If you want to swap peanut butter, many options work well. Almond butter gives a nice flavor. Sunflower seed butter is great for nut-free diets. Cashew butter also offers a creamy texture. Just keep in mind that each butter has its own taste and may change the cookie's flavor slightly. You can create tasty and healthy cookies with simple ingredients. We covered the base ingredients, mixing, and baking steps. Remember to explore variations and tips for storage to keep them fresh. Feel free to customize flavors or adapt for dietary needs to make them your own. Baking should be fun, so experiment and enjoy your creations!

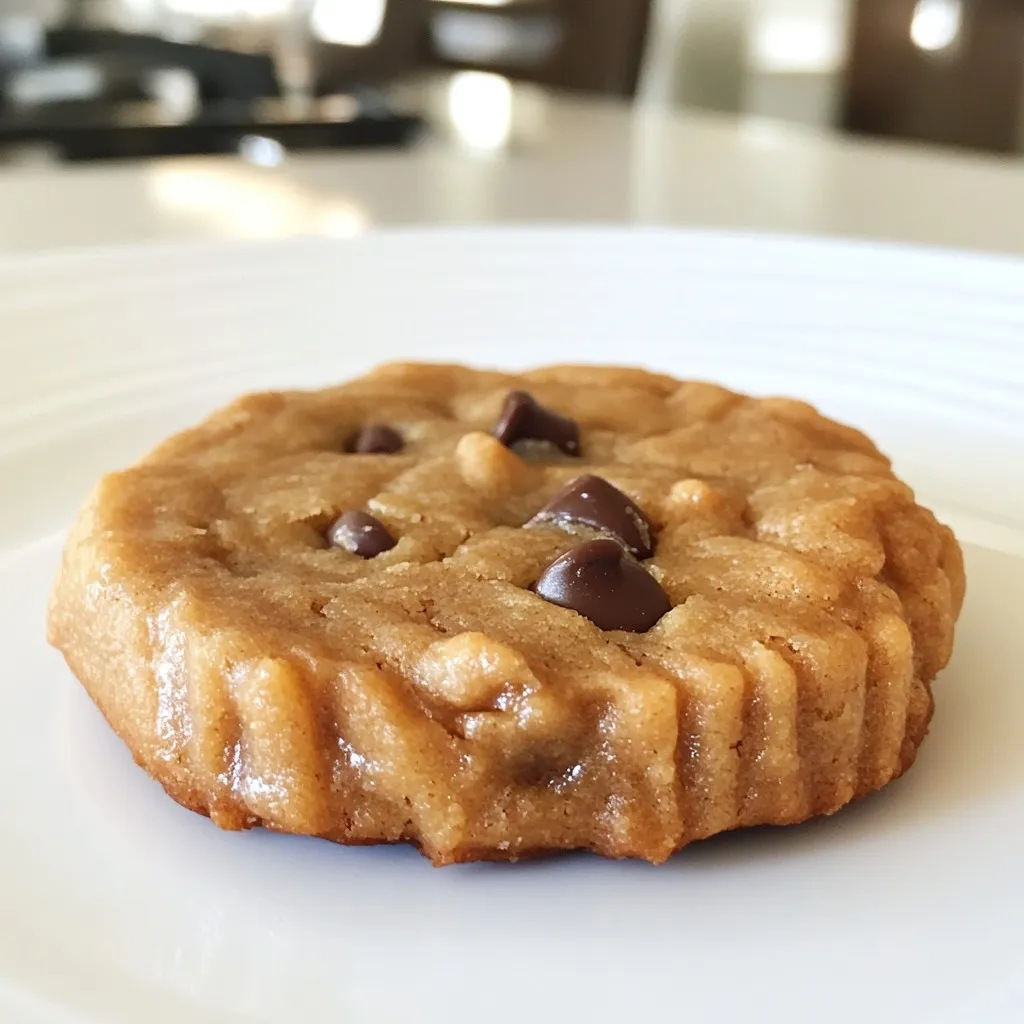
Looking for a quick, tasty treat that packs a protein punch? I’m excited to share my go-to recipe for a single-serve protein cookie! This simple delight uses just a few …

Read more

Categories Desserts

Crockpot BBQ Pulled Chicken Flavorful and Easy Meal

January 5, 2026March 22, 2025 by Chef Tavio
- 2 lbs boneless, skinless chicken breasts - 1 cup barbecue sauce - 1/4 cup honey - 1 tablespoon apple cider vinegar - 1 tablespoon smoked paprika - 1 teaspoon garlic powder - 1 teaspoon onion powder - 1/2 teaspoon black pepper - 1/2 teaspoon salt - 1/4 teaspoon cayenne pepper (optional) - Hamburger buns or whole grain bread for serving - Coleslaw for topping (optional) I love this recipe because it is simple and packed with flavor. The chicken needs just a few basic ingredients. You get tender, juicy meat with each bite. To start, you will need chicken breasts. I always choose boneless and skinless. This helps the chicken cook evenly. The barbecue sauce adds a sweet and tangy taste. You can use your favorite store brand or a homemade version. Next, honey is key for that sweet touch. It blends perfectly with the spices. Apple cider vinegar gives a little tang, making the sauce bright. The spices are what really make this dish pop. Smoked paprika adds a nice smoky flavor. Garlic and onion powder give depth, while black pepper and salt enhance everything. If you like heat, the cayenne pepper is a great option. For serving, I like to use hamburger buns. Whole grain bread works well, too. Top your pulled chicken with coleslaw for some crunch. It adds a fresh touch that balances the rich flavors. Gather all these ingredients, and you are ready to make a delicious meal that everyone will love! {{ingredient_image_2}} - In a bowl, whisk together the barbecue sauce, honey, apple cider vinegar, smoked paprika, garlic powder, onion powder, black pepper, salt, and cayenne pepper if you want some heat. This mixture makes your chicken flavorful. - Layer the chicken breasts in your crockpot. Pour the sauce over the chicken. Make sure every piece is covered well. This ensures every bite has great taste. - Cover the crockpot. Cook on low for 6-7 hours or on high for 3-4 hours. The chicken is done when it is tender and shreds easily. - Once cooked, take the chicken out of the crockpot. Place it on a cutting board. Use two forks to shred the chicken into small pieces. Let the juices soak in for extra flavor. - Put the shredded chicken back into the crockpot. Stir it into the sauce. Let it heat for another 15-20 minutes on low if you like. - To serve, pile the pulled chicken onto hamburger buns. Add a scoop of coleslaw on top for crunch. Enjoy your meal! - Cook chicken on low for 6-7 hours for tender, juicy meat. - If using chicken thighs, adjust cooking time to 7-8 hours on low. - Try adding smoked chipotle for a spicy, smoky twist. - Balance sweetness with a splash of vinegar to cut through the sauce. - Pair pulled chicken with sweet potato fries or baked beans. - Top with pickled jalapeños for extra kick and crunch. Pro Tips Choose Quality Chicken: Opt for organic, free-range chicken for the best flavor and texture in your pulled chicken. Customize Your Sauce: Feel free to experiment with different barbecue sauces to find your perfect flavor profile. Add Extra Smokiness: For an even smokier flavor, consider using a smoked salt or adding liquid smoke to your sauce. Meal Prep Friendly: This pulled chicken can be made ahead of time and freezes well, making it great for quick meals later. {{image_4}} You can use many BBQ sauces for this pulled chicken. You can make your own or buy it ready-made. Homemade sauce gives you control over the taste. You can adjust sweetness or spice levels. Store-bought sauces save time and can be tasty. Try different regional BBQ styles, too. Kansas City sauce is thick and sweet. Texas sauce is often spicier and tangy. Carolina sauce is vinegar-based and has a sharp kick. Experiment to find your favorite! If you want a different meat, use turkey instead. It works well and has less fat. You can also use tofu for a plant-based option. Just make sure it soaks up the sauce flavors. If you are vegetarian, consider jackfruit. It shreds like chicken and takes on the BBQ flavor nicely. This option is great for those who want a meat-like texture. You can serve pulled chicken in many fun ways. The classic way is on a hamburger bun. Add coleslaw on top for crunch. For a lighter dish, serve it over rice or a salad. This adds freshness and keeps it healthy. You can also use pulled chicken in wraps or tacos. Add your favorite toppings like avocado or salsa. These creative ideas make this meal fun and unique! After cooking, let the pulled chicken cool down. Place it in a shallow container. This helps it cool faster. Seal the container with a lid or plastic wrap. In the fridge, it lasts about 3-4 days. Always check for signs of spoilage before eating. To freeze, portion the pulled chicken into airtight bags. Squeeze out as much air as you can. Label each bag with the date. It will stay good for up to 3 months. When ready to use, take it out of the freezer. Thaw it in the fridge overnight for best results. You can also use the microwave on the defrost setting if you're in a hurry. When reheating, use a microwave or stovetop. For the microwave, add a splash of water to keep it moist. Cover it with a damp paper towel. If using the stovetop, heat it on low. Stir often to avoid burning. Avoid reheating too many times; it can dry out. Enjoy your pulled chicken warm and juicy! You can tell the chicken is done by checking its texture. When the chicken pulls apart easily with a fork, it is ready. Look for chicken that is soft and tender. If you use a meat thermometer, aim for an internal temperature of 165°F. This means it is safe to eat. The chicken should also look moist and juicy, not dry. Yes, you can cook this on high. Cooking on high takes about 3-4 hours. However, the chicken may not be as tender as when cooked on low. The low setting, which takes 6-7 hours, allows the flavors to blend better. It also helps keep the chicken juicy. If you are in a rush, use high, but low is best for taste and texture. If you want a substitute for honey, try using maple syrup or agave nectar. Both will add sweetness. You can also use brown sugar mixed with water for a similar effect. If you prefer a less sweet option, just reduce the amount of barbecue sauce. It will still taste great without honey. This blog post covered key ingredients and steps for making delicious pulled chicken. I shared tips on cooking, flavor, and serving ideas to enhance your dish. Experiment with different BBQ sauces, chicken types, and creative ways to serve. Plan for storage and reheating so your chicken stays tasty. With these pointers, you can enjoy great pulled chicken any time. Try it out and impress your family or friends!

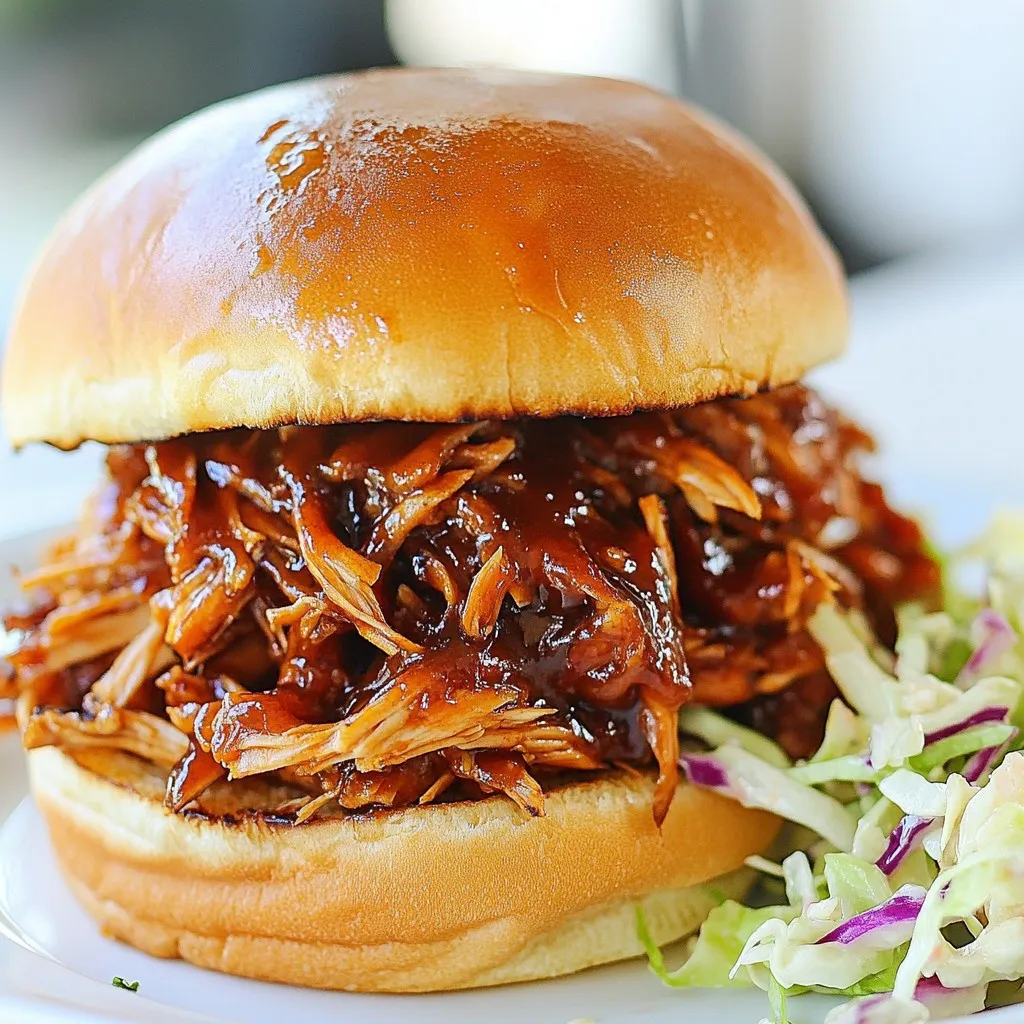
Looking for a simple, tasty meal idea? This Crockpot BBQ Pulled Chicken is your answer! It’s packed with flavor and super easy to make. With just a few ingredients and …

Read more

Categories Dinner

Spicy Buffalo Chicken Taquitos Crunchy and Tasty

November 27, 2025March 21, 2025 by Chef Tavio
- 2 cups cooked, shredded chicken - 1/2 cup buffalo sauce - 1 cup shredded sharp cheddar cheese - 1/2 cup cream cheese The main ingredients of these taquitos are simple but bold. I use cooked, shredded chicken for that tender bite. The buffalo sauce brings the heat, but you can adjust it to your liking. I blend in sharp cheddar for that gooey, cheesy goodness and cream cheese for a rich texture. - 1/4 cup finely diced green onions - 1 teaspoon garlic powder - 1 teaspoon onion powder - 8 small tortillas - Cooking spray or olive oil For added flavor, I mix in finely diced green onions. They add freshness and a slight crunch. Garlic and onion powders boost the savory profile. I wrap everything in tortillas, which hold the filling perfectly. Finally, a bit of cooking spray or olive oil ensures the taquitos turn golden and crispy in the oven. {{ingredient_image_2}} - Preheat the Oven Start by preheating your oven to 425°F (220°C). This heat helps make the taquitos crispy. - Prepare the Filling In a big bowl, mix 2 cups of cooked, shredded chicken with 1/2 cup of buffalo sauce. Add in 1 cup of shredded sharp cheddar cheese, 1/2 cup of softened cream cheese, and 1/4 cup of finely diced green onions. Sprinkle in 1 teaspoon of garlic powder and 1 teaspoon of onion powder. Mix it well until everything blends into a creamy filling. - How to Roll Tortillas Take a clean, flat surface for rolling. Lay out a tortilla flat. Scoop 2-3 tablespoons of your chicken filling into the center of the tortilla. - Securing the Filling Roll the tortilla tightly around the filling. Make sure to fold in the sides as you roll. This keeps the filling safe inside. Repeat this with all your tortillas and filling until you have a nice stack of rolled taquitos. - Placement on Baking Sheet Place the rolled taquitos seam-side down on a baking sheet lined with parchment paper. This helps keep them from sticking. Lightly spray or brush the tops with cooking spray or olive oil. This step gives them a nice golden-brown color. - Baking Time and Temperature Bake the taquitos in your preheated oven for 15-20 minutes. Keep an eye on them towards the end to avoid burning. They should turn golden brown and crispy all over. After baking, let them cool for a few minutes before serving. Achieving Crispy Texture To get that perfect crunch, brush the taquitos with olive oil or cooking spray. This step helps them brown nicely while baking. Place them seam-side down on your baking sheet. Keep space between each taquito for even cooking. Bake at 425°F for 15-20 minutes. Watch them closely to avoid burning. Once they are golden brown, you know they are ready! Adjusting Spiciness You can control the heat in your taquitos. Start with a mild buffalo sauce if you want less spice. Mix in more buffalo sauce gradually if you like it hot. Taste your filling before rolling the taquitos. This way, you can find the right balance that suits your taste buds. Presentation Ideas Serve your taquitos on a colorful platter. You can add some chopped green onions on top for a fresh look. A sprinkle of smoked paprika can add nice color, too. Place a small bowl of ranch or blue cheese dressing next to the taquitos for dipping. This will make the dish look great and inviting. Dipping Sauce Recommendations Ranch dressing pairs well with spicy flavors. Blue cheese dressing adds a rich taste that complements the buffalo sauce. You can also try a creamy avocado dip or a zesty salsa for a twist. These options will enhance the flavors of your taquitos and keep everyone wanting more! Pro Tips Adjust the Spice Level: If you prefer a milder flavor, reduce the amount of buffalo sauce or mix in a little ranch dressing to balance the heat. Use Fresh Ingredients: For the best taste, opt for fresh green onions and high-quality cheese. Fresh ingredients can elevate the overall flavor of your taquitos. Prevent Sogginess: Make sure to bake the taquitos until they are crispy. This will help prevent them from becoming soggy and will enhance the texture. Experiment with Fillings: Feel free to customize the filling by adding other ingredients like black beans, corn, or different types of cheese for variety. {{image_4}} You can change up the protein in your taquitos. Try tofu for a plant-based twist. Beef works well too if you prefer red meat. Use shredded beef for a hearty option. If you want it to be vegan, use a mix of beans and veggies. This gives you great flavor and texture. You can also swap out the cheese. Vegan cheese melts nicely! Want to mix things up? Use different sauces. Barbecue sauce gives a sweet and smoky taste. Teriyaki sauce adds a sweet, tangy flair. Both pair well with chicken and make the dish fun! You can also change the cheese. Cheddar is sharp, but Monterey Jack is milder. Pepper Jack adds a nice kick too. Mix and match to find your favorite flavor! - Refrigeration Tips: Let your taquitos cool down first. Place them in an airtight container. They can last in the fridge for up to three days. Keep them away from moisture to maintain crispiness. - Freezing Instructions: For longer storage, freeze your taquitos. Wrap them tightly in plastic wrap, then place them in a freezer bag. They can stay fresh for up to two months. No need to thaw before cooking; you can bake them straight from the freezer. - Oven vs. Microwave: The oven is best for reheating taquitos. It keeps them crunchy. Preheat your oven to 375°F (190°C). Bake for about 10-15 minutes, until heated through. The microwave works too but may make them soggy. If you use the microwave, heat in 30-second intervals until warm. Enjoy your leftover taquitos with your favorite dip! Can I use raw chicken? No, using raw chicken is not safe for taquitos. You need to cook the chicken first. Cooked, shredded chicken gives the best flavor and texture. It ensures the filling is ready and safe to eat. How to make taquitos ahead of time? You can make taquitos ahead of time. Roll them and place on a baking sheet. Cover with plastic wrap and keep in the fridge. Bake them just before serving. This way, they stay crispy and tasty. What is the best way to roll taquitos? Lay a tortilla flat and scoop in the filling. Place it in the center, then fold the sides in. Roll tightly from the bottom to the top. Make sure the filling stays inside. This helps avoid spills during baking. How can I make them less spicy? To make taquitos less spicy, use less buffalo sauce. You can also mix in sour cream or yogurt. These will cool down the heat and add creaminess. Adjust the spice to fit your taste. Making chicken taquitos is simple and fun. You start with tasty ingredients like chicken, buffalo sauce, and cheese. Then, you prepare and roll the tortillas before baking them to a crispy finish. Remember to adjust the spice level to your liking and get creative with different fillings. Store leftovers properly for the best taste later. With these tips and variations, you can enjoy this dish at home anytime. Happy cooking!

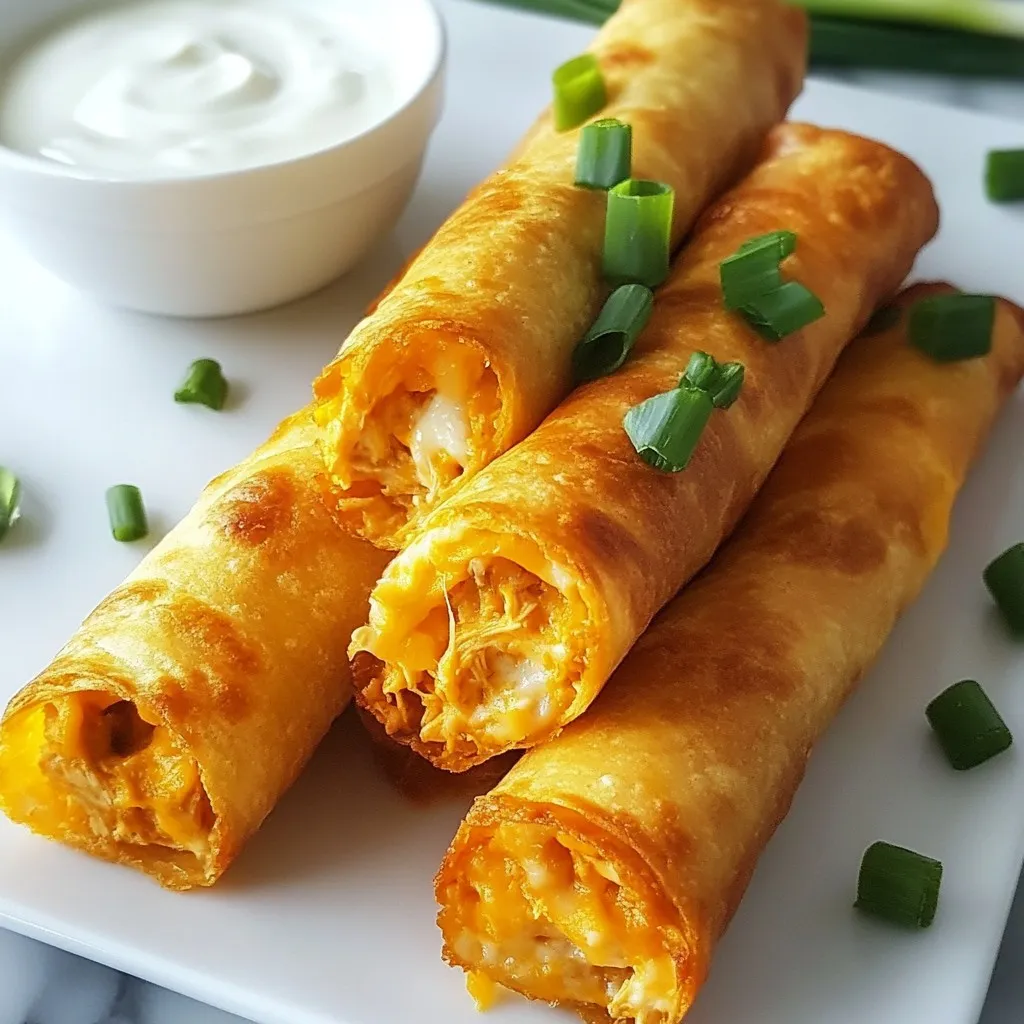
Are you craving something crunchy that packs a spicy punch? These Spicy Buffalo Chicken Taquitos are the perfect solution! Imagine tender, shredded chicken mixed with zesty Buffalo sauce and creamy …

Read more

Categories Appetizers

Blueberry Cream Cheese Bread Delightful and Simple Recipe

November 18, 2025March 20, 2025 by Chef Tavio
To make Blueberry Cream Cheese Bread, gather these simple ingredients: - 2 cups all-purpose flour - 1 cup fresh or frozen blueberries - 1/2 cup granulated sugar - 1/2 teaspoon baking powder - 1/2 teaspoon baking soda - 1/4 teaspoon salt - 1/2 cup unsalted butter - 1 package (8 oz) cream cheese - 2 large eggs - 1 teaspoon pure vanilla extract - 1/2 cup Greek yogurt - Zest of 1 lemon These ingredients work together to create a moist, flavorful bread. The blueberries add a burst of sweetness, while the cream cheese makes it rich and creamy. The lemon zest brings a nice, fresh touch. You can use fresh blueberries or frozen ones. If you choose frozen, make sure to thaw and drain them first. This way, your bread won’t turn too wet. Each ingredient plays a role in giving the bread its delightful taste and texture. {{ingredient_image_2}} - Preheat oven to 350°F (175°C) - Prepare the loaf pan Start by turning your oven on to 350°F. This heat gives the bread a nice rise. Next, take a 9x5-inch loaf pan. Grease it with butter or cooking spray. Then, dust it lightly with flour. This step helps the bread come out easily after baking. - Combine all-purpose flour, baking powder, baking soda, and salt In a medium bowl, mix together your dry ingredients. This includes 2 cups of all-purpose flour, 1/2 teaspoon of baking powder, 1/2 teaspoon of baking soda, and 1/4 teaspoon of salt. Whisk them well to combine. This mix forms the base of your bread. - Use an electric mixer to blend until smooth In a large bowl, cream together 1/2 cup of softened butter and 8 oz of softened cream cheese. Use an electric mixer on medium speed. Mix for about 2-3 minutes until it's smooth and fluffy. This mix adds a rich flavor to your bread. - Gradually add sugar and eggs one at a time Now, slowly add in 1/2 cup of granulated sugar. Keep mixing until the sugar is well blended. Next, crack in 2 large eggs, one at a time. Mix well after each egg. This ensures the eggs are fully mixed in, giving the bread a nice texture. - Mix in vanilla extract and lemon zest Add 1 teaspoon of pure vanilla extract and the zest of 1 lemon. Stir them in until combined. These flavors brighten up the bread and make it smell amazing. Then, add 1/2 cup of plain Greek yogurt. This adds moisture and keeps the bread soft. - Alternate adding dry ingredients and Greek yogurt Now, it's time to combine everything. Alternate adding the dry mix and Greek yogurt to the wet ingredients. Start with a third of the dry mix. Stir gently, then add half the yogurt. Repeat this until all ingredients are combined. Be careful not to overmix to keep the bread fluffy. - Carefully mix in blueberries to prevent overmixing Gently fold in 1 cup of fresh or thawed blueberries with a spatula. Make sure to do this carefully. You want to keep the blueberries whole for bursts of flavor in every bite. - Pour batter into pan and bake for 55-65 minutes Pour the batter into the loaf pan. Smooth the top with a spatula. Place the pan in your preheated oven. Bake for 55-65 minutes. Check with a toothpick to see if it comes out clean or with a few crumbs. - Allow to cool before slicing Once baked, take the loaf out of the oven. Let it cool in the pan for about 10 minutes. Then, transfer it to a wire rack to cool completely before slicing. This cooling step is key for great texture. - Always ensure your ingredients are at room temperature. This helps them blend better. - To check doneness, insert a toothpick into the center of the bread. If it comes out clean, it's done. If it has wet batter, bake it longer. - For a beautiful presentation, slice the bread and serve it warm. - Add a dollop of whipped cream on top for extra flair. A light dusting of powdered sugar adds sweetness. - Pair the bread with a handful of fresh blueberries for a burst of flavor. - Avoid overmixing the batter. This can make the bread tough. Mix gently to keep it light. - Ensure you prepare the pan well. Grease it with butter or spray, then dust with flour. This helps the bread release easily after baking. Pro Tips Choose Fresh Berries: Using fresh blueberries will enhance the flavor and texture of your loaf. If using frozen berries, make sure they are completely thawed and drained to prevent excess moisture. Room Temperature Ingredients: Ensure your butter, cream cheese, and eggs are at room temperature. This helps achieve a smooth batter and better rise. Don’t Overmix: When incorporating the flour mixture and yogurt, mix until just combined. Overmixing can lead to a dense loaf instead of a light and fluffy texture. Cool Before Slicing: Allow the loaf to cool completely on a wire rack before slicing. This helps set the crumb and prevents it from becoming gummy. {{image_4}} You can easily make this bread gluten-free. Here are a few good flour substitutes: - Almond flour - Coconut flour - Gluten-free all-purpose flour Each of these options gives a nice texture. Just make sure to adjust the liquid if needed. You can also switch up the fruits or flavors. Here are some ideas to try: - Raspberries or strawberries for a different taste - Chopped nuts like walnuts or pecans for crunch - A splash of lemon juice for extra zest Using flavored yogurt can add a fun twist too. Try vanilla or lemon yogurt for added flavor. Get creative with how you serve this bread. Here are some fun ideas: - Slice the bread warm and top it with whipped cream. - Dust with powdered sugar for a sweet touch. - Serve with fresh blueberries on the side for added flavor. These simple touches can make your Blueberry Cream Cheese Bread even more delightful! Store your Blueberry Cream Cheese Bread at room temperature. Place it in an airtight container. This keeps the bread fresh and moist. If you don't have a container, wrap it tightly in plastic wrap. It will stay good for about 2-3 days on the counter. For longer storage, freeze the bread. First, let it cool completely. Then, wrap it tightly in plastic wrap. You can also use aluminum foil for extra protection. Place the wrapped bread in a freezer bag or airtight container. It can stay fresh in the freezer for up to three months. The bread's best practice shelf life is about 2-3 days at room temperature. If frozen, it lasts about three months. When you are ready to eat, thaw it overnight in the fridge. For best flavor, reheat slices in the toaster or oven. Enjoy the fresh taste as if it were just baked! Yes, you can use frozen blueberries! Just remember to thaw and drain them first. This helps avoid excess moisture in your bread. Frozen berries may burst more than fresh ones. So, fold them in gently to keep your bread looking great. Look for a few signs to check if the bread is done. The top should be golden brown and springy to the touch. Insert a toothpick into the center; if it comes out clean or with a few moist crumbs, it’s ready. If it has wet batter on it, give it more time. Yes, you can prepare this bread ahead of time! You can mix the batter and store it in the fridge for up to 24 hours. However, for the best taste, I recommend baking it fresh. If you have leftovers, you can store them for later. This bread pairs well with many things! You can serve it with whipped cream or a dollop of yogurt. For a fruity twist, add a side of fresh berries. A cup of tea or coffee also goes great with it. Enjoy it any time of day! You learned how to make Blueberry Cream Cheese Bread, from ingredients to storage tips. Remember to mix your ingredients carefully to avoid overmixing and ensure a great texture. Try different fruits or yogurt flavors to make it your own. Proper storage will keep your bread fresh longer. Bake this special treat and enjoy it with family or friends. Happy baking!

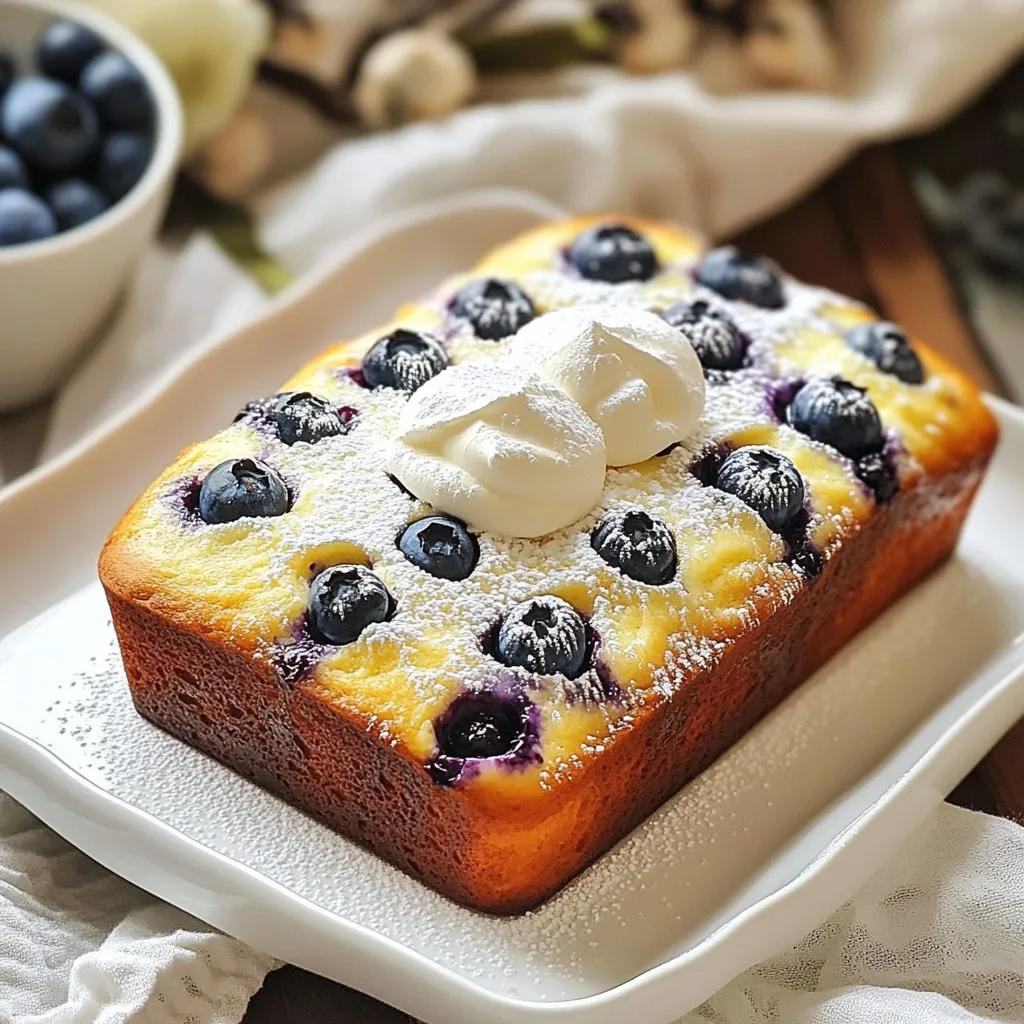
If you crave a sweet, tangy treat, then my Blueberry Cream Cheese Bread recipe is for you! This simple bread combines fresh or frozen blueberries with a creamy, rich texture …

Read more

Categories Desserts

Healthy Oatmeal Peanut Butter Chocolate Chip Bars Delight

December 10, 2025March 20, 2025 by Chef Tavio
- 2 cups rolled oats - 1/2 cup natural peanut butter - 1/3 cup honey or maple syrup - 1/2 cup almond milk - 1/2 teaspoon vanilla extract - 1/2 teaspoon baking powder - 1/4 teaspoon salt - 1/4 cup dark chocolate chips - 1/4 cup chopped nuts (optional) - 1/4 cup unsweetened shredded coconut (optional) These simple ingredients make up a tasty and healthy snack. Rolled oats serve as a great base and add fiber. They help keep you full and satisfied. Natural peanut butter gives the bars a creamy texture and rich flavor. You can choose honey or maple syrup for sweetness. Both options work well, yet they add different tastes. If you want to switch out the peanut butter, almond butter is a great choice. It has a nice flavor too. For sweeteners, honey is thicker, while maple syrup is more fluid. Choose what you like best. You can also use any dairy-free milk. Almond milk is a popular choice, but oat or soy milk works just as well. These swaps can help match your dietary needs while keeping the bars delicious. {{ingredient_image_2}} 1. Preheat the Oven: First, set your oven to 350°F (175°C). This step is key for even baking. 2. Prepare the Baking Dish: Line an 8x8 inch baking dish with parchment paper. Leave some paper hanging over the edges. This helps lift the bars out later. 3. Mix Dry Ingredients: In a large bowl, combine 2 cups of rolled oats, 1/2 teaspoon of baking powder, and 1/4 teaspoon of salt. Stir well until mixed. 1. Combine Wet Ingredients: In a different bowl, whisk together 1/2 cup of natural peanut butter, 1/3 cup of honey or maple syrup, 1/2 cup of almond milk, and 1/2 teaspoon of vanilla extract. Make sure it is smooth and lump-free. 2. Mix Wet and Dry Mixtures: Gradually pour the wet mixture into the dry ingredients. Stir until everything is fully combined. 3. Add Chocolate Chips: Gently fold in 1/4 cup of dark chocolate chips. If you like, add in 1/4 cup of chopped nuts or 1/4 cup of shredded coconut for extra texture and flavor. 1. Spread the Mixture: Transfer the mixture into the lined baking dish. Spread it out evenly and press it down firmly with a spatula. 2. Bake: Place the dish in the oven and bake for about 20-25 minutes. Look for golden brown edges and a firm center. 3. Cool Down: After baking, let the dish cool for 10 minutes. Use the parchment paper to lift the bars out. Let them cool completely on a wire rack. 4. Slice and Store: Once cooled, slice into individual bars. Store in an airtight container to keep them fresh for up to a week. To make these bars even better for you, try reducing the sweetness. You can cut down the honey or maple syrup by a tablespoon. This small change lowers the sugar and calories. Also, opt for whole grain oats instead of regular oats. They add more fiber, which helps keep you full longer. Want more flavor? Add spices like cinnamon or nutmeg to the mix. Just a half teaspoon can make a big difference. You can also experiment with different mix-ins. Try adding dried fruits, like raisins or cranberries, for a chewy texture. Nuts can add crunch too. Go for almonds or walnuts if you like! When serving, you can get creative! Arrange the bars on a nice platter. Drizzle some melted dark chocolate on top for a fancy touch. Pair the bars with fresh fruits like berries or sliced bananas. This adds color and boosts nutrition. It makes your dish look even more inviting! Pro Tips Choose Your Peanut Butter: Opt for smooth peanut butter for a creamier texture or crunchy for added texture and flavor. Sweetness Adjustment: Feel free to adjust the amount of honey or maple syrup to suit your taste preferences; you can always add more if you like it sweeter. Storage Tips: Store the bars in an airtight container in a cool, dry place to maintain their freshness and avoid becoming stale. Experiment with Add-Ins: Customize your bars by adding different mix-ins like dried fruits, seeds, or spices to enhance flavor and nutrition. {{image_4}} You can make these bars even tastier. Try adding dried fruits like raisins or cranberries. They give a nice chewiness and sweetness. You can also use different nut butters. Almond, cashew, or even sunflower seed butter work well. Each nut butter brings its unique taste. If you want a crunch, mix in crispy rice cereal. It adds a fun crunch that kids love. You can also skip the shredded coconut if you prefer. Instead, try using chopped nuts like almonds or walnuts for added texture. If you need a gluten-free option, use certified oats. This way, you can enjoy the bars without worry. For a vegan version, swap honey for maple syrup. This keeps the bars sweet while meeting vegan needs. To keep your Healthy Oatmeal Peanut Butter Chocolate Chip Bars fresh, store them in airtight containers. This helps prevent them from drying out. Make sure to place parchment paper between layers if stacking. This will avoid sticking and keep them intact. You can freeze these bars for longer storage. First, cut the bars into individual pieces. Wrap each piece tightly in plastic wrap. Then, place them in a freezer-safe bag. They will stay good for about three months. To thaw, simply leave them in the fridge overnight. At room temperature, these bars last for about one week. If you see any mold or an off smell, it’s best to throw them out. Always check for signs of spoilage before enjoying a bar. Keeping them stored properly ensures they stay tasty and safe to eat. You can use other nut butters like almond or cashew. You can also try seed butters, like sunflower seed butter. These options offer similar creaminess and flavor. Always choose a natural brand with no added sugars. Yes! You can omit chocolate chips if you want. Try adding dried fruits like raisins or cranberries for sweetness. You could also mix in some seeds or extra nuts for a different crunch. When stored in the fridge, these bars last about a week. Keep them in an airtight container to ensure freshness. If you notice any changes in smell or texture, it's best to toss them. Absolutely! You can make these bars ahead of time. Just bake and cool them, then cut into bars. Store them in an airtight container for easy grab-and-go snacks during the week. You now have a complete guide on making delicious bars with simple ingredients. From choosing rolled oats to experimenting with flavors, each choice adds to your bars. You can easily swap ingredients for your taste or needs, like using almond butter instead of peanut butter. Remember, these bars are not only tasty but also flexible. Enjoy making and sharing them with friends and family. Whether you need a snack or meal prep, these bars fit right in. Try different variations and make them your own!

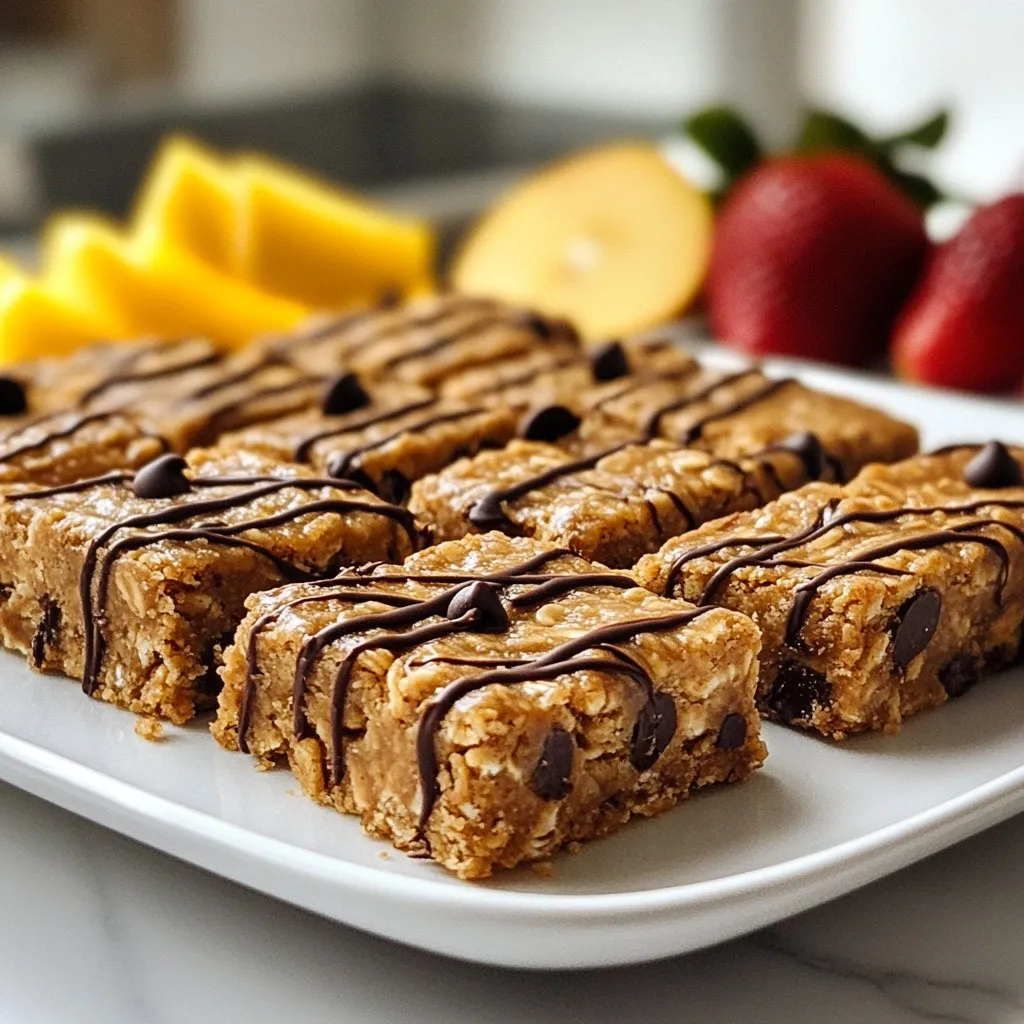
Looking for a snack that’s tasty and good for you? Healthy Oatmeal Peanut Butter Chocolate Chip Bars are the perfect choice! Packed with protein and fiber, these bars are easy …

Read more

Categories Desserts

Blender Banana Oat Pancakes Gluten-Free Delight

November 16, 2025March 19, 2025 by Chef Tavio
- 2 ripe bananas - 1 cup gluten-free rolled oats - 1 cup almond milk (or alternative) - 2 large eggs - 1 tablespoon baking powder - 1 teaspoon vanilla extract - 1/2 teaspoon ground cinnamon - Pinch of salt - Olive oil or coconut oil for cooking The key to making these pancakes is using ripe bananas. They add natural sweetness and moisture. Gluten-free rolled oats give the pancakes a hearty texture while being safe for gluten-free diets. Almond milk is a great choice, but any milk works well. Two large eggs help bind the mix, adding protein too. Baking powder makes the pancakes fluffy. Vanilla extract and cinnamon add warmth and flavor. A pinch of salt balances the sweetness. For cooking, I recommend using olive or coconut oil. Both oils work well and add a nice flavor. You don’t need much oil to keep the pancakes from sticking. Just a light coating will do. - Caloric content per serving: About 150 calories - Breakdown of macronutrients: - Carbohydrates: 25g - Protein: 6g - Fats: 5g These pancakes pack a solid nutritional punch. The bananas give you potassium, which is great for muscles. Oats provide fiber, helping digestion. Eggs add protein, making these pancakes filling. The almond milk keeps the recipe light and dairy-free. Overall, these pancakes are a smart choice for breakfast. They offer energy and nutrients to kickstart your day. {{ingredient_image_2}} To start, gather your ingredients. Place the sliced bananas, gluten-free oats, almond milk, eggs, baking powder, vanilla extract, ground cinnamon, and salt in a high-speed blender. Blend on high until smooth. Check the sides and scrape them down if needed. This ensures all the ingredients mix well. After blending, let the batter rest for 5-10 minutes. This resting time is vital. The oats absorb the liquid, making the batter thicker. A thicker batter helps create fluffier pancakes. While the batter rests, preheat a non-stick skillet or griddle over medium heat. It's important to have the skillet hot. Once hot, lightly coat the surface with olive oil or coconut oil. This helps the pancakes cook evenly and prevents sticking. Now, pour about 1/4 cup of the batter onto the skillet for each pancake. Watch for bubbles to form on the surface. This takes about 2-3 minutes. When you see bubbles, it's time to flip the pancake. Use a spatula to gently turn it over. Cook for another 2-3 minutes until golden brown. Repeat this process until you use all the batter. Add more oil to the skillet as needed to keep the pancakes from sticking. When serving, stack the pancakes high for an appealing look. Drizzle maple syrup over the top for sweetness. Adding a slice of fresh banana on top is a great touch. A sprinkle of ground cinnamon adds flavor and makes the stack eye-catching. You can also try adding nuts or other fruits for variety. Enjoy your delicious gluten-free pancakes! To make a smooth batter, use a high-speed blender. Start with the bananas, then add oats, milk, eggs, baking powder, vanilla, cinnamon, and salt. Blend on high until the mixture looks creamy. If you see lumps, stop and scrape down the sides. This step helps mix everything well. Avoid common blending mistakes. Don't add too much liquid at once. This can make the batter too thin. If you blend too long, the batter may heat up, which can affect texture. Blend just until smooth. To achieve even cooking, preheat your skillet on medium heat. A hot skillet helps pancakes cook evenly. Use a measuring cup for pouring the batter. This keeps the pancake size uniform. Prevent sticking by using enough oil on the pan. Lightly coat the skillet with olive or coconut oil. If pancakes stick, they may tear when you flip them. Always check if the edges look set before flipping. You can add spices for extra flavor. Try a pinch of nutmeg for warmth. A splash of almond extract adds a nice twist too. Mix in chocolate chips or nuts for a fun texture. Walnuts or pecans work great here. These additions make your pancakes even tastier! Pro Tips Choose Ripe Bananas: The riper the bananas, the sweeter and more flavorful your pancakes will be. Look for bananas with brown spots for the best taste! Rest the Batter: Allowing the batter to rest for 5-10 minutes helps the oats absorb the liquid, resulting in fluffier pancakes with a better texture. Monitor the Heat: Cooking pancakes over medium heat ensures they cook evenly. Too high of a heat can burn the outside before the inside is fully cooked. Experiment with Toppings: Don’t hesitate to get creative with toppings! Fresh berries, yogurt, or nut butter can elevate your pancakes to a new level. {{image_4}} You can swap the rolled oats for other gluten-free grains. Quinoa flakes or brown rice flour work well. Each grain gives a unique taste and texture. You can also try almond flour or coconut flour. These flours add richness and flavor to your pancakes. Just adjust the liquid based on the flour you choose. You can mix in other fruits for fun flavors. Berries like blueberries or strawberries bring a burst of sweetness. Grated apples or chopped peaches are tasty, too! For toppings, think outside the box. Try yogurt, nut butter, or even a sprinkle of nuts. Maple syrup is classic, but honey or agave syrup is great, too. If you want a vegan option, replace the eggs with flaxseed meal. Mix one tablespoon of flaxseed with three tablespoons of water. Let it sit for a bit until it thickens. For dairy-free options, almond milk is a great choice. Coconut milk also works well and adds a nice flavor. These swaps help everyone enjoy this delicious pancake treat! To keep your pancakes fresh, let them cool first. Place the cooled pancakes in an airtight container. You can also use parchment paper between layers to prevent sticking. Store them in the fridge for up to three days. After that, they may lose flavor and texture. To freeze your pancakes, stack them with parchment paper in between. Wrap the stack tightly in plastic wrap. Then, place it in a freezer-safe bag. You can freeze these pancakes for up to two months. When you want to enjoy them, take out as many as you need. Reheat them in a toaster or microwave until warm. Batch cooking pancakes is a smart way to save time. Make a big batch over the weekend, and you’ll have breakfast ready for the week. You can also cut them into smaller pieces and add them to yogurt or smoothies. They make tasty snacks when you are on the go. Yes, you can make these pancakes without bananas. If you skip the bananas, you need a binding agent. Try using unsweetened applesauce or pumpkin puree. Both options add moisture and sweetness. You can also mix in a bit of nut butter for extra flavor and binding. To make pancakes fluffier, add extra leavening agents. Increase the baking powder to 1.5 tablespoons. You can also separate the egg whites from the yolks. Whip the egg whites until they form soft peaks. Fold them into the batter gently. This technique adds air, making the pancakes rise more. Serve your gluten-free pancakes with tasty sides. Fresh fruits like berries or sliced bananas pair well. You can also add yogurt or whipped cream for creaminess. For drinks, try fresh juice or a smoothie. Maple syrup brings sweetness and ties everything together nicely. You now have a solid recipe for gluten-free pancakes. We covered the ingredients, nutrition, and step-by-step instructions. I shared helpful tips and variations to suit your taste. Remember, cooking is about trying new things. Enjoy personalizing your pancake stack with fruits or toppings you love. Store extras for quick meals later. With a bit of practice, you’ll become a pancake pro in no time!

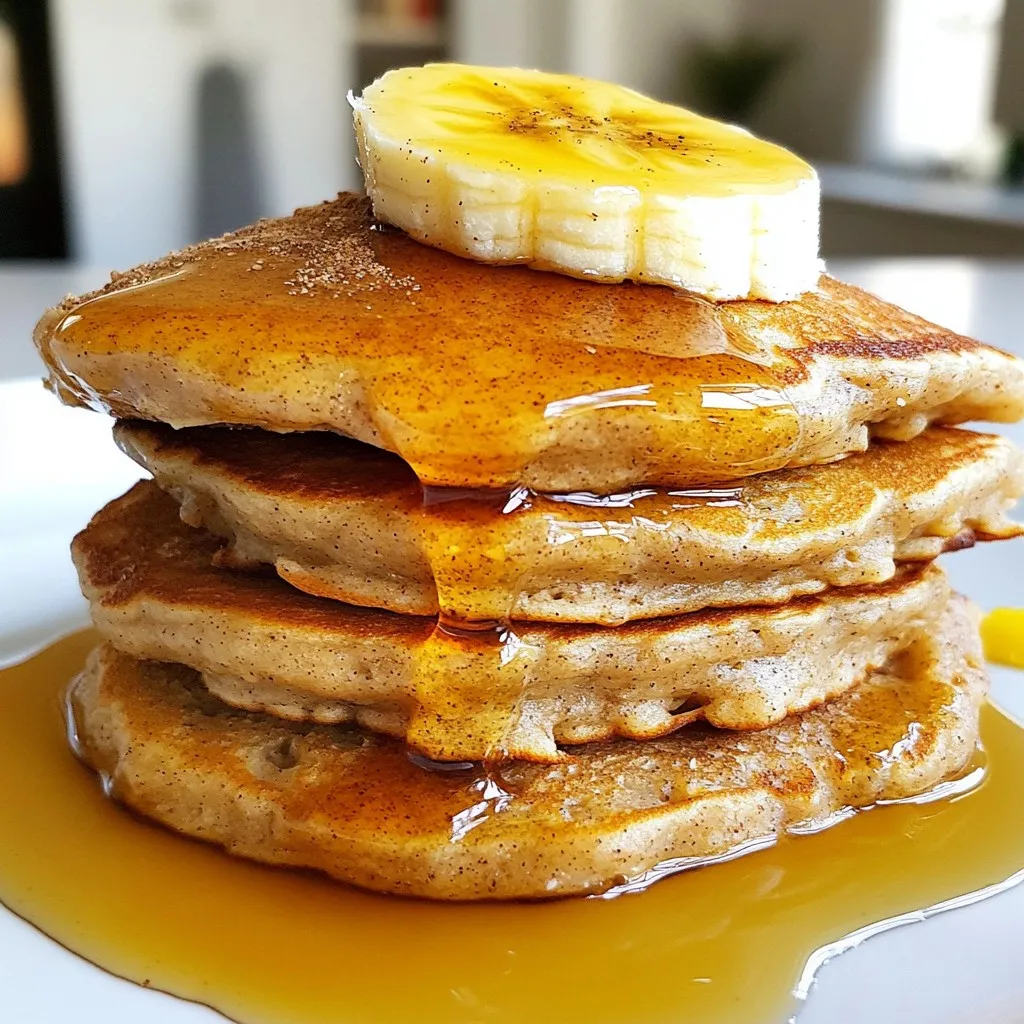
Do you crave pancakes but need to stick to a gluten-free diet? Let me introduce you to my Blender Banana Oat Pancakes! These fluffy, flavorful treats are easy to make …

Read more

Categories Breakfast
Older posts
Newer posts
← Previous Page1 … Page171 Page172 Page173 … Page191 Next →

TASTED NEST

Where Flavor Finds a Home 🍳🏡 — warm, simple, and crave-worthy recipes made for real life, from stovetop mornings to backyard dinners.

PAGES

Home About Contact Privacy Policy Terms & Conditions Cookie Policy GDPR Policy Copyright Policy Disclaimer

CATEGORIES

Appetizers Desserts Salads Breakfast Dinner
Copyright © 2026 Tasted Nest. All rights reserved.