Skip to content
  • GDPR Privacy Policy
  • Copyright Policy
  • Disclaimer
  • Terms & Conditions
Tasted Nest
  • Home
  • Appetizers
  • Desserts
  • Salads
  • Breakfast
  • Dinner
  • Privacy Policy
  • Contact
  • About

Chef Tavio

g Protein Power Breakfast Bowl for Busy Mornings

November 25, 2025February 6, 2025 by Chef Tavio
- 1 cup cooked quinoa - 1/2 cup plain Greek yogurt - 1/2 cup mixed berries - 1 ripe banana - 2 tablespoons almond butter - 1 tablespoon chia seeds - 1 tablespoon honey or maple syrup - A pinch of ground cinnamon - Fresh mint leaves for garnish This breakfast bowl starts with cooked quinoa. Quinoa is a great source of protein. It fills you up and keeps you going. I like to cook the quinoa ahead of time. This makes mornings easier. Next, we add Greek yogurt. It adds creaminess and more protein. Greek yogurt is thick and tangy. It balances the sweetness of the fruit. Mixed berries bring a burst of flavor. I use blueberries, strawberries, and raspberries. They are colorful and sweet. You can use fresh or frozen berries. Both work well in this bowl. A ripe banana adds natural sweetness. Sliced banana creates a nice texture. It pairs well with the yogurt and berries. Almond butter gives richness. It adds healthy fats and protein. You can swap it for peanut butter if you prefer. Chia seeds are small but mighty. They add crunch and fiber. They also help to thicken the bowl. For sweetness, use honey or maple syrup. Both options work great. Just drizzle it on top to finish. A pinch of ground cinnamon adds warmth. It enhances the flavors in this bowl. Finally, fresh mint leaves make the dish pop. They add a nice color and aroma. These ingredients mix together for a tasty breakfast. They give you energy for your busy day. {{ingredient_image_2}} To cook quinoa perfectly, start by rinsing 1 cup of quinoa under cold water. This removes any bitter taste. Then, combine the quinoa with 2 cups of water in a pot. Bring it to a boil, then cover and reduce to a simmer. Cook for about 15 minutes, or until the quinoa absorbs all the water. Fluff the quinoa with a fork and let it cool to room temperature. Cooling quinoa is key for your breakfast bowl. If you skip this step, the warm quinoa can melt the yogurt. Once cooled, it’s ready to layer in your bowl. Begin by layering the cooled quinoa as the base in a serving bowl. Spread it evenly across the bottom. This creates a hearty foundation for your meal. Next, gently spoon 1/2 cup of plain Greek yogurt over the quinoa. Spread it evenly to ensure a balanced flavor in every bite. Now, it’s time to add color and taste. Arrange 1/2 cup of mixed berries and 1 ripe banana, sliced, on top of the yogurt. This not only makes it look beautiful but also adds fresh flavors. Next, drizzle 2 tablespoons of almond butter over the fruit. This adds creaminess and a rich taste. For sweetness, drizzle 1 tablespoon of honey or maple syrup over the bowl. This step makes every bite delightful. Sprinkle 1 tablespoon of chia seeds on top for added crunch and nutrition. Finally, dust a pinch of ground cinnamon over the bowl. This elevates the flavor with warmth and spice. For a finishing touch, garnish with fresh mint leaves. This adds a pop of color and freshness. Enjoy your beautiful and tasty Protein Power Breakfast Bowl! To get the best from your breakfast bowl, focus on layering. Start with a solid base of quinoa. Spread it evenly across the bowl. Next, add Greek yogurt. This gives a creamy texture. Make sure to cover the quinoa well. Then comes the fun part—adding fruits. Use seasonal fruits for the best taste. Fresh berries add color and flavor. You can also use ripe banana slices. They bring sweetness and a nice bite. Serving in a deep, wide bowl makes a big difference. It shows off the layers nicely. You can make it even prettier by adding a swirl of honey over the yogurt. This adds a touch of shine. For garnishing, fresh mint leaves work wonders. They give a pop of color and a fresh smell. You can also sprinkle a few extra chia seeds on top. Not only do they add crunch, but they also look great! Pro Tips Use Cold Quinoa: Allow your quinoa to cool completely in the fridge before assembling the bowl. This keeps the yogurt from melting and ensures a refreshing breakfast. Berry Selection: Choose seasonal berries for the best flavor. If you can, opt for organic berries to enhance the freshness and reduce pesticide exposure. Nut Butter Variations: Experiment with different nut butters like peanut or cashew for a unique flavor twist, or try sunflower seed butter for a nut-free option. Make It Ahead: Prepare the quinoa and yogurt the night before. Just layer the other ingredients in the morning for a quick and nutritious breakfast. {{image_4}} You can easily adapt this recipe to fit different diets. For a vegan version, swap the Greek yogurt with coconut yogurt or almond yogurt. These options provide a creamy texture and delicious flavor without any dairy. Instead of honey, you can use maple syrup for sweetness. If you need a gluten-free option, this recipe is already perfect! Quinoa is naturally gluten-free. Just make sure any toppings, like granola, are also gluten-free. This way, everyone can enjoy this tasty breakfast bowl. Don't be afraid to get creative with flavors! Try different nut butters, like peanut or cashew butter, to change the taste. Each nut butter adds its unique twist to your breakfast. You can also add fun toppings! Granola adds crunch and texture, while coconut flakes bring a tropical vibe. Mix and match these toppings to find your favorite combination. The more you experiment, the more fun your breakfast will be! To keep your Protein Power Breakfast Bowl fresh, store it in the fridge. Use airtight containers. This will prevent air from getting in and drying it out. If you have leftover quinoa, store it separately. Quinoa can last up to five days in the fridge. However, the fruit and yogurt should be eaten within two days for best taste. - Best Practices: - Store in airtight containers. - Keep fruit separate from yogurt and quinoa. - Recommended Storage Containers: - Glass containers with lids work well. - Plastic containers with tight seals are also good. Meal prepping makes busy mornings easier. Start by cooking a larger batch of quinoa. This can last throughout the week. You can then portion it into containers. - Preparing Ingredients in Advance: - Cook and cool quinoa ahead of time. - Wash and slice fruits and store them in the fridge. - Assembling Bowls for Quick Breakfasts: - Grab a container of quinoa. - Add yogurt, fruit, and toppings right before serving. With these tips, your Protein Power Breakfast Bowl can be ready in minutes. Enjoy a healthy start to your day! Can I use frozen berries instead of fresh? Yes, you can use frozen berries. They work well in this recipe. They will soften when you mix them in. Just let them sit a bit to thaw. This makes them easier to blend with the yogurt and other ingredients. How to adjust the recipe for multiple servings? To make more bowls, just multiply each ingredient by the number of servings. For example, if you want to make three bowls, use three cups of quinoa, one and a half cups of yogurt, and so on. This keeps the flavors balanced and the layers nice. Caloric content and macronutrient breakdown One serving of this bowl has about 450 calories. It has around 20 grams of protein, 15 grams of fat, and 60 grams of carbs. This mix gives you energy and helps you feel full. Health benefits of the ingredients used - Quinoa: This grain is rich in protein and fiber. It helps with digestion and keeps you full. - Greek yogurt: It adds protein and probiotics, which are good for gut health. - Berries: They are full of vitamins and antioxidants, which help fight free radicals. - Banana: It gives you potassium and quick energy. - Almond butter: This nut butter has healthy fats and protein. - Chia seeds: They add omega-3s and fiber for heart health. - Honey or maple syrup: Natural sweeteners that provide energy without refined sugars. In this article, we explored a tasty breakfast bowl that combines health and flavor. We covered each ingredient, from cooked quinoa to fresh berries. I shared step-by-step instructions for making the bowl and tips for perfect presentation. You can also try different variations to suit your diet. Remember to store leftovers properly for future meals. This breakfast bowl is a simple, healthy option to start your day strong. Get creative, enjoy your meal, and nourish your body!

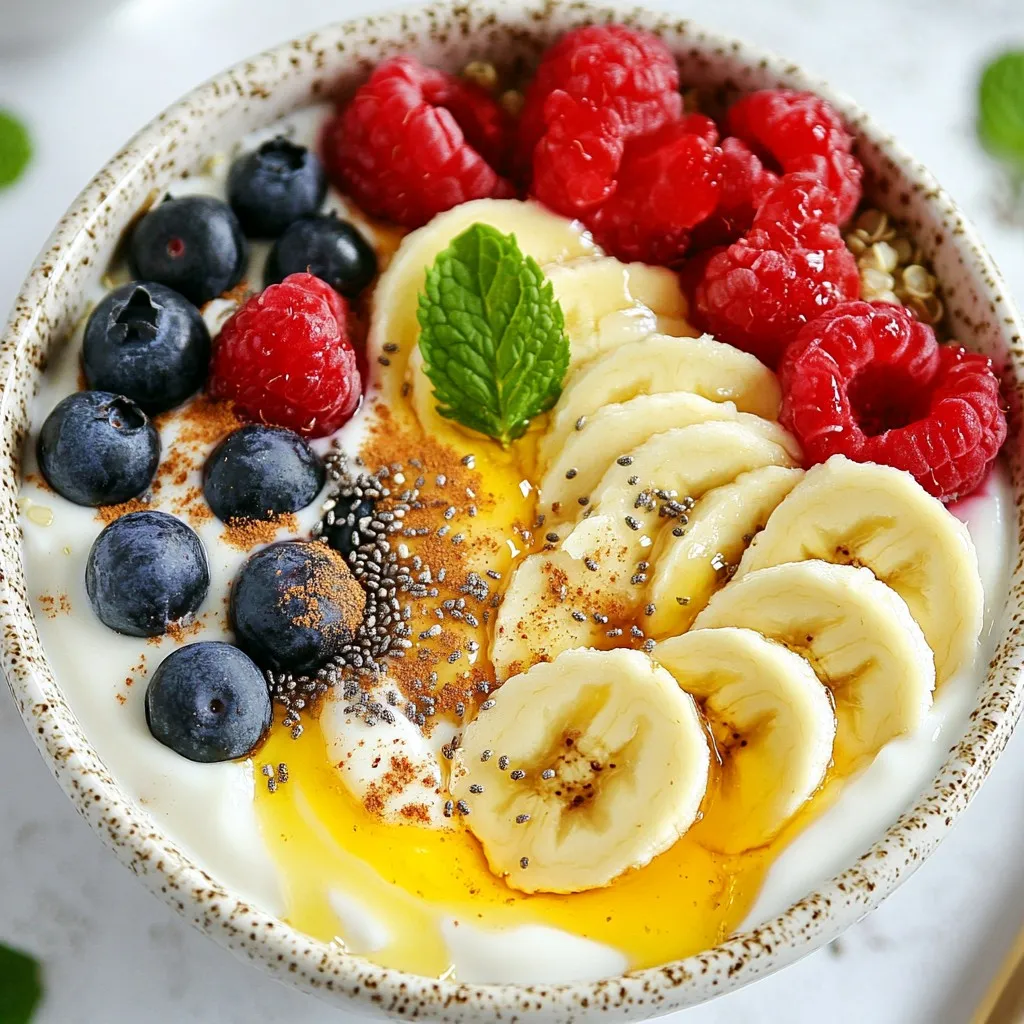
Are you always rushing in the morning and skipping breakfast? I get it! That’s why I’ve created the ultimate g Protein Power Breakfast Bowl. With easy steps and wholesome ingredients, …

Read more

Categories Breakfast

Creamy Chicken Mushroom Spinach Skillet Delight

December 21, 2025February 6, 2025 by Chef Tavio
- 2 boneless, skinless chicken breasts, cut into bite-sized cubes - 1 tablespoon extra virgin olive oil - 1 cup mushrooms, sliced (button or cremini for a rich flavor) - 2 cups fresh spinach, washed and coarsely chopped - 2 cloves garlic, minced - 1 cup low-sodium chicken broth - 1 cup heavy cream - 1 teaspoon Italian seasoning blend - Salt and freshly cracked black pepper to taste - 1/2 cup freshly grated Parmesan cheese - Fresh parsley, chopped, for garnish (optional) The main ingredients in this dish combine to create a rich and creamy sauce. The chicken gives a hearty base, while mushrooms add a nice umami flavor. Spinach brings a touch of green, making the dish vibrant and healthy. - Skillet or frying pan - Wooden spoon for stirring - Cooking utensils Using the right equipment is key to making this dish shine. A good skillet allows for even cooking. A wooden spoon helps mix the ingredients without scratching your pan. {{ingredient_image_2}} Heat the olive oil in a large skillet over medium heat until it shimmers. Add the chicken pieces. Season them with salt and pepper. Sauté the chicken for 6-8 minutes. You want it browned and cooked through. Once done, remove the chicken from the skillet. Set it aside on a plate while you cook the vegetables. In the same skillet, add the sliced mushrooms. Cook them for about 4-5 minutes. You want them to turn golden brown and soften. Then, add the minced garlic. Cook for an additional minute, stirring constantly. This will enhance the flavor without burning the garlic. Now, pour in the chicken broth. Bring it to a gentle simmer. Use a wooden spoon to scrape up any tasty bits from the skillet. Lower the heat and add the heavy cream, stirring until the mixture is smooth. Sprinkle in the Italian seasoning. Adjust the taste with more salt and pepper if needed. Return the cooked chicken to the skillet. Fold in the chopped spinach. Stir gently until the spinach wilts, which takes about 2-3 minutes. Gradually mix in the grated Parmesan cheese. Stir until it melts and blends into the creamy sauce. Let the dish rest for a couple of minutes before serving so the flavors meld together. To achieve the ideal creamy consistency, start with full-fat heavy cream. This helps the sauce stay rich. Stir the cream gently into the skillet. You want it smooth, not lumpy. If your sauce is too thick, add a little more chicken broth. This will help loosen it up. For extra creaminess, mix in more Parmesan cheese as it melts into the sauce. When it comes to seasoning, taste is key. Use salt and pepper to balance flavors. Italian seasoning gives a nice herbal note. If you prefer a kick, try adding a pinch of crushed red pepper flakes. Adjust to your liking for the best flavor. For sides, crusty bread is perfect for dipping. It soaks up the creamy sauce nicely. You can also serve it over fluffy rice or pasta. This makes the meal hearty and filling. To present the dish, use shallow bowls. This adds elegance to your meal. Garnish with chopped parsley for a pop of color. The fresh green looks great against the creamy sauce. Enjoy your beautiful, flavorful dish! Pro Tips Use Fresh Spinach: Fresh spinach not only enhances the flavor but also adds vibrant color and nutrients to the dish. Brown the Chicken Well: Make sure to brown the chicken pieces thoroughly; this step adds depth and enhances the overall flavor of the dish. Adjust Creaminess: For a lighter version, substitute half of the heavy cream with Greek yogurt or low-fat sour cream without compromising on taste. Serve with Sides: Pair this dish with crusty bread, rice, or pasta to soak up the creamy sauce and create a more satisfying meal. {{image_4}} You can easily switch up the proteins in this dish. Try using turkey instead of chicken. Turkey gives a nice flavor and keeps it light. If you prefer a plant-based option, use tofu. Tofu absorbs flavors well and adds a good texture. You can also play with the veggies. Instead of spinach, try kale or Swiss chard. Both will add great taste and nutrition. You can also mix in bell peppers or zucchini for a pop of color and crunch. To boost the flavor, add spices like red pepper flakes for a little heat. A pinch of smoked paprika can give a nice smoky flavor. You can also add a squeeze of lemon juice for brightness. Cheese is another great way to change the taste. Instead of Parmesan, use feta for a tangy twist. Goat cheese can also add creaminess and a unique flavor. Fresh herbs like basil or thyme can lift the dish, making it more vibrant and fresh. To keep your creamy chicken mushroom spinach skillet fresh, place it in an airtight container. This helps prevent air from spoiling the dish. You can store it in the fridge for up to three days. After that, the chicken and spinach may lose their texture and flavor. When you are ready to enjoy your leftovers, reheat them gently. The best method is to use a skillet on low heat. Add a splash of chicken broth or cream to help revive the creamy texture. Stir often until heated through. You can also use a microwave, but be careful not to overheat. Heat in short bursts, stirring in between, to keep the dish creamy and delicious. You can pair this dish with many tasty sides. Here are some ideas: - Crusty bread: Perfect for soaking up the creamy sauce. - Fluffy rice: A great base that adds heartiness. - Pasta: Use any shape you like for a comforting meal. - Steamed veggies: Broccoli or green beans can add color and crunch. These sides enhance your meal and bring balance to the creamy chicken mushroom spinach skillet. Yes, you can easily make this dish dairy-free. Here are a few tips: - Use coconut milk: Swap heavy cream for full-fat coconut milk. It adds a nice flavor. - Nutritional yeast: Replace Parmesan cheese with nutritional yeast for a cheesy taste without dairy. - Dairy-free cream cheese: This can give a nice creamy texture without dairy. These swaps keep the meal creamy and delicious while meeting dairy-free needs. If you love heat, here’s how to kick it up a notch: - Red pepper flakes: Add a pinch during cooking for warmth. - Hot sauce: Drizzle some into the sauce for extra flavor. - Jalapeños: Chop fresh jalapeños and cook them with the mushrooms. These options let you control the spice level to fit your taste. In this blog post, we explored cooking a creamy chicken mushroom spinach skillet. We discussed key ingredients and equipment, detailed step-by-step instructions, and shared helpful tips to perfect your dish. You learned about variations like ingredient swaps and flavor enhancements, as well as how to store and reheat leftovers. Cooking can be simple and fun. With these tips and tricks, you can make a delicious meal that everyone will enjoy. Try it out and make it your own!

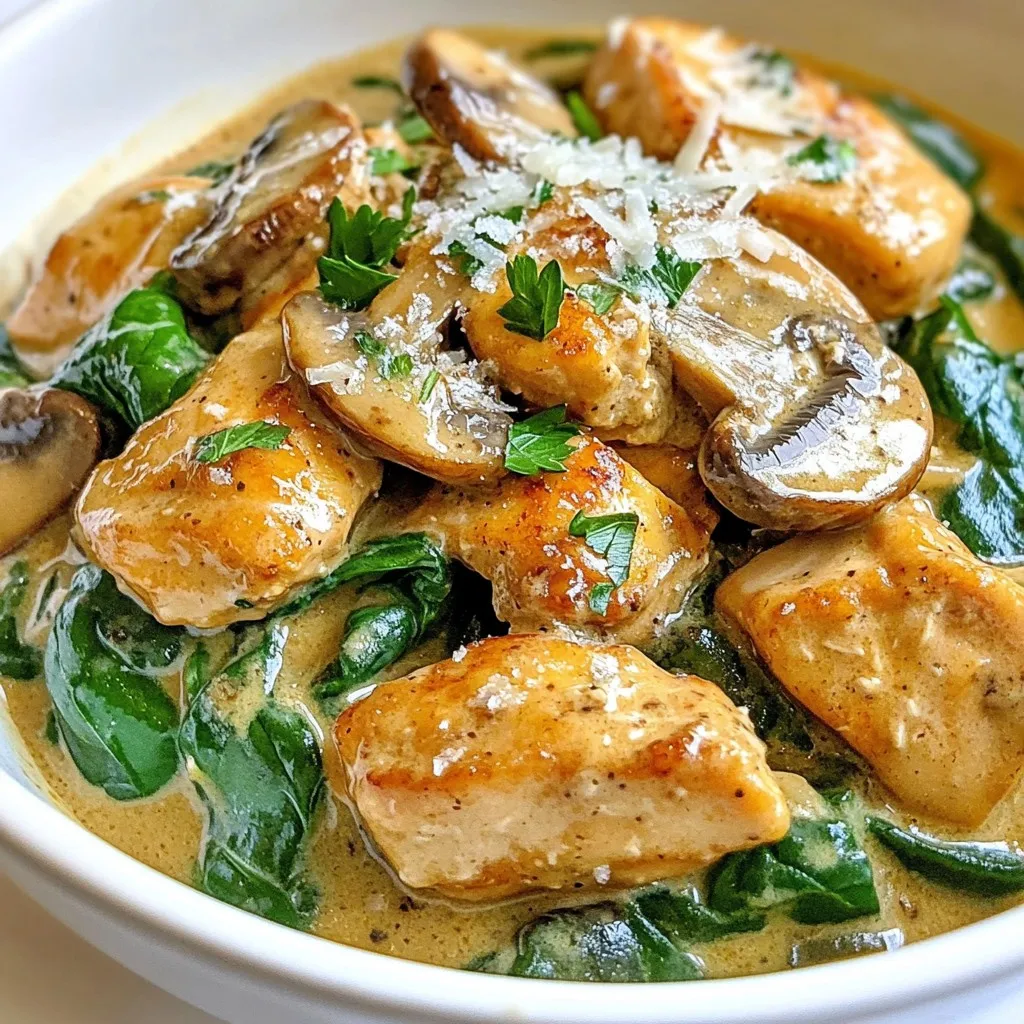
Get ready to savor a dish that’s as tasty as it is easy! In this post, I’ll show you how to make a Creamy Chicken Mushroom Spinach Skillet that will …

Read more

Categories Dinner

Southwest Shredded Chicken Salad Flavorful Dish Today

January 5, 2026February 5, 2025 by Chef Tavio
- 2 cups cooked shredded chicken - 1 can (15 oz) black beans, rinsed and drained - 1 cup corn (canned or frozen and thawed) - 1 red bell pepper, diced - 1 ripe avocado, diced - 1 small red onion, finely chopped - 1 cup cherry tomatoes, halved - 1 cup shredded lettuce (romaine or iceberg for crunch) - ½ cup fresh cilantro, chopped - Juice of 2 limes (fresh is ideal) - 3 tablespoons olive oil - 1 teaspoon ground cumin - 1 teaspoon chili powder - Salt and freshly ground black pepper, to taste - Tortilla chips for added crunch To make the Southwest Shredded Chicken Salad, you need fresh and colorful ingredients. The cooked shredded chicken forms the base. I love using rotisserie chicken for its flavor and ease. Black beans add protein and fiber, while corn brings sweetness. The diced red bell pepper and cherry tomatoes add color and texture. Don't forget the creamy avocado, which makes every bite rich and smooth. The red onion gives a nice crunch and bite. Shredded lettuce keeps the salad light and fresh, and cilantro adds a bright, herby taste. For the dressing, fresh lime juice is key. It adds zing and balances the flavors. Olive oil gives it richness. Ground cumin and chili powder add warmth and spice, while salt and pepper enhance all the tastes. If you want a little crunch, sprinkle some tortilla chips on top before serving. This salad is not just tasty; it's also a feast for the eyes. The mix of colors makes it look exciting. You can serve it as a main dish or a side. Each bite is a burst of flavor, making it a go-to recipe for any meal. {{ingredient_image_2}} - In a large mixing bowl, add the cooked shredded chicken. - Next, add the rinsed and drained black beans. - Toss in the corn, diced red bell pepper, and diced avocado. - Add the finely chopped red onion and halved cherry tomatoes. - Finally, add the shredded lettuce. - Gently mix for even distribution of all ingredients. - In a small bowl, whisk together the juice of two limes. - Pour in the olive oil and whisk until smooth. - Add ground cumin, chili powder, salt, and pepper. - Mix until all spices are well combined with the oil and lime juice. - Pour the dressing over the salad mixture. - Toss gently until everything is evenly coated in the dressing. - Fold in the freshly chopped cilantro for a burst of flavor. - If you want extra crunch, add crushed tortilla chips. - Serve the salad right away for the best taste. - You can chill it for up to 30 minutes for stronger flavors. - For a nice look, use colorful bowls and add lime wedges. - Place crushed tortilla chips in a small bowl for fun serving. Use cooked shredded chicken for this salad. Rotisserie chicken works great and saves time. It is tender and full of flavor. To shred chicken, use two forks or your hands. Pull the meat apart until you have nice, fine pieces. This method keeps the chicken juicy. You can swap some ingredients to change the taste. Try using grilled chicken or turkey for a twist. If you want more crunch, add diced cucumber or radishes. For a creamier texture, toss in some black olives or cheese. Feel free to leave out any ingredient you don't like. The salad can adapt to your taste. You can change the dressing to your liking. To make it spicier, add more chili powder or a dash of hot sauce. If you prefer a milder flavor, reduce the chili powder. For a vegan option, use avocado oil instead of olive oil. You can also skip the honey if you want it completely plant-based. Pro Tips Use Fresh Ingredients: Fresh lime juice and ripe avocados will enhance the overall flavor of your salad, making it taste vibrant and delicious. Customize Your Heat: Adjust the amount of chili powder to your taste preference. For an extra kick, consider adding diced jalapeños or a dash of hot sauce. Make Ahead: You can prepare the salad ingredients in advance, but add the dressing and cilantro just before serving to maintain freshness. Try Different Proteins: While shredded chicken is great, you can substitute with shredded beef, turkey, or even a plant-based protein for a different flavor profile. {{image_4}} Store your Southwest shredded chicken salad in an airtight container. This keeps it fresh. Place it in the fridge right after serving. The salad stays good for about 3 days. After that, the flavors may fade. If you want warm chicken, heat it gently in a pan. Avoid overheating, as it can dry out. You can serve the salad chilled or at room temp. Both ways taste great! You can freeze the chicken but not the salad. The veggies and dressing do not freeze well. To freeze chicken, place it in a freezer bag. Squeeze out air before sealing. Use it within 3 months for best taste. When ready, thaw it in the fridge overnight before using. This salad is both tasty and healthy. Each serving has about 400 calories. Here’s how the macronutrients break down: - Protein: 30 grams - Carbohydrates: 35 grams - Fat: 18 grams The ingredients in this salad are packed with health benefits. Shredded chicken offers lean protein, which helps build muscle. Black beans add fiber, good for digestion. Corn gives you vitamins and minerals, while bell peppers are rich in antioxidants. Avocado provides healthy fats that are good for your heart. Eating this salad can help with weight control and overall health. For dietary considerations, this dish is great for those looking for gluten-free options. If you want to meal prep, you can easily adjust the servings. This recipe serves four. To serve eight, just double the ingredients. For larger gatherings, it’s simple to scale up. Just keep the same ratios. You can store leftovers in the fridge for up to three days. You can use several options for shredded chicken. Here are some alternatives: - Canned chickpeas: Rinse and drain them for a protein boost. - Tofu: Firm tofu works great when marinated and cooked. - Pulled pork: A savory option for those who enjoy pork. - Tempeh: Crumbled tempeh gives a nice texture and flavor. These choices suit various diets and tastes. Yes, you can prep this salad in advance! Here are some tips: - Prep veggies: Chop your peppers, onions, and tomatoes earlier. - Store separately: Keep the dressing in another container to avoid sogginess. - Mix before serving: Combine all the ingredients right before you eat. This way, your salad stays fresh and crunchy. To keep your avocado looking bright, try these tips: - Lemon juice: Squeeze fresh lemon juice on the cut avocado. - Keep the pit: If you leave the pit in, it slows browning. - Cover tightly: Use plastic wrap to cover any leftover avocado. These methods help keep your salad appealing and tasty. Yes, this salad can easily be gluten-free! Here’s how: - Check ingredients: Make sure your canned goods are labeled gluten-free. - Use corn: Both canned and frozen corn are gluten-free. - Watch for dressings: Ensure any store-bought dressings are gluten-free. This salad is perfect for those avoiding gluten while still being flavorful! This blog post shared a simple Southwest Shredded Chicken Salad recipe. We covered the main ingredients, how to prepare and dress the salad, and tips for storage. You can create a tasty meal with fresh flavors and healthy foods. Remember to customize the salad based on your taste. Enjoy making it as a quick dinner or meal prep. With easy steps and fun variations, you'll love how this dish fits your style.

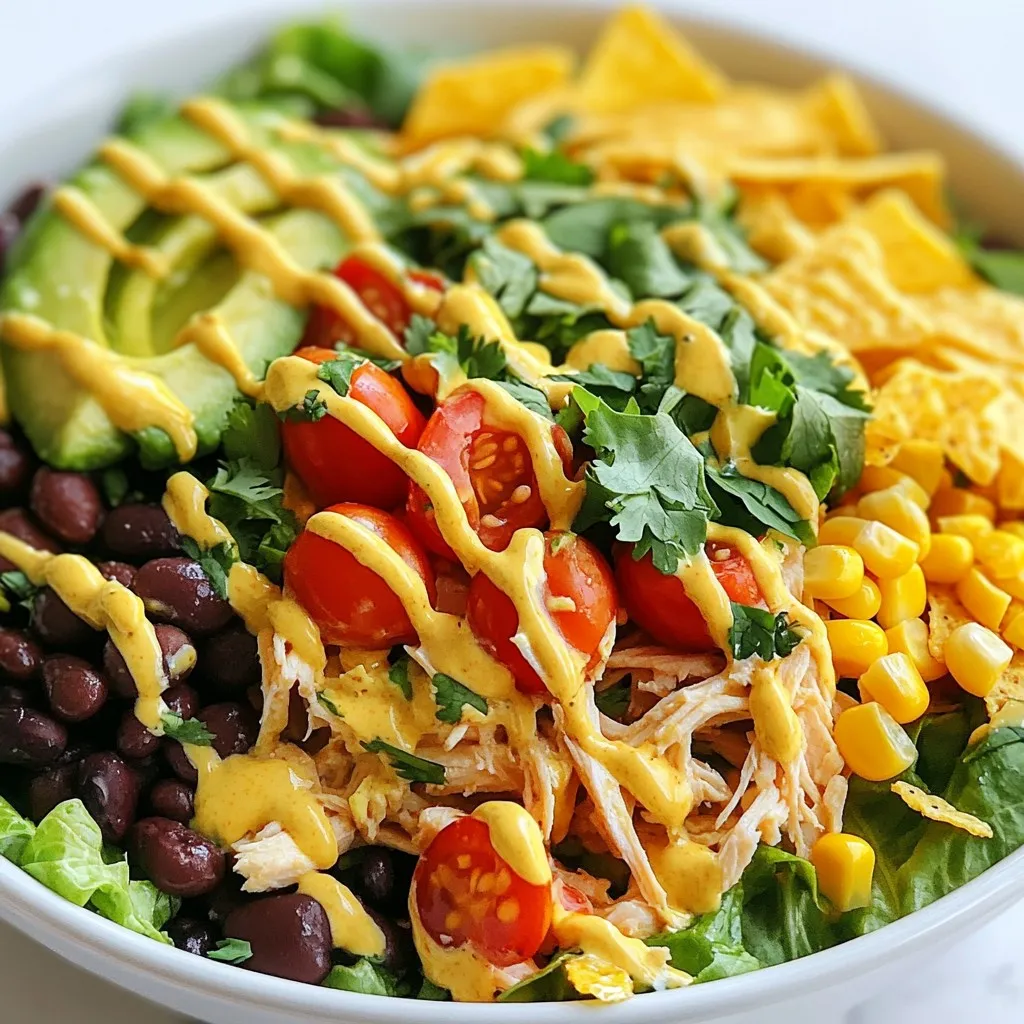
Looking for a fresh and tasty meal? The Southwest Shredded Chicken Salad is your answer! Packed with vibrant flavors and wholesome ingredients, this salad is perfect for any day of …

Read more

Categories Salads

Creamy Chicken Tortilla Wraps Tasty and Simple Meal

November 29, 2025February 4, 2025 by Chef Tavio
- 2 cups cooked chicken, shredded - 1 cup cream cheese, softened to room temperature - 1/2 cup plain Greek yogurt The main ingredients create a rich and creamy base. Shredded chicken gives protein and texture. Cream cheese adds creaminess, while Greek yogurt offers tang and helps with texture. - 1 teaspoon garlic powder - 1 teaspoon smoked paprika - 1/2 teaspoon ground cumin - 1/4 teaspoon freshly ground black pepper These spices bring flavor and warmth. Garlic powder adds a nice kick. Smoked paprika gives a subtle smokiness. Ground cumin rounds it out with earthy notes. Black pepper adds just the right amount of heat. - 1 cup fresh spinach, finely chopped - 1/2 cup cherry tomatoes, halved - 1/2 cup shredded cheddar cheese Fresh add-ins brighten the wraps. Spinach adds color and nutrients. Cherry tomatoes offer sweetness and juiciness. Shredded cheddar cheese enhances the creamy texture and flavor. - 4 large flour tortillas - Olive oil, for drizzling - Fresh cilantro, for garnish Flour tortillas wrap everything together. They provide a soft and chewy texture. Olive oil helps to crisp up the wraps when cooked. Fresh cilantro adds a burst of freshness and color on top. {{ingredient_image_2}} To start, you need a large mixing bowl. Add 2 cups of shredded chicken, 1 cup of softened cream cheese, and 1/2 cup of plain Greek yogurt. Mix these together until smooth. This creamy base is key to your wraps. Next, add 1 teaspoon of garlic powder, 1 teaspoon of smoked paprika, 1/2 teaspoon of ground cumin, and 1/4 teaspoon of black pepper. Stir well to blend the spices into the mixture. This step gives your filling a rich flavor that you will love. Finally, gently fold in 1 cup of finely chopped fresh spinach, 1/2 cup of halved cherry tomatoes, and 1/2 cup of shredded cheddar cheese. Make sure everything mixes evenly for the best taste. Now, it's time to build your wraps. Lay out one large flour tortilla on a clean, flat surface. Use a spoon to place a generous scoop of the creamy filling in the center. Leave about an inch of space on the edges. This space helps with folding later. Next, fold the sides of the tortilla inward. Start at the bottom and roll it up tightly. This keeps all the tasty filling inside. Repeat with the other tortillas and filling until you have all your wraps ready. For the cooking step, heat a non-stick skillet over medium heat. Drizzle it lightly with olive oil to prevent sticking. When the skillet is hot, place the wraps seam side down. Cook each wrap for about 2-3 minutes on each side. You want them to be golden-brown and slightly crispy. This adds a nice texture to your meal. Once cooked, remove the wraps from the skillet. Let them cool a bit before slicing them in half diagonally. This makes for a pretty plate. Finish by garnishing with fresh cilantro for extra color and flavor. Enjoy your delicious creamy chicken tortilla wraps! To get that perfect creamy texture, start with softened cream cheese. It blends easier and gives your filling a nice, smooth feel. You can let the cream cheese sit out for about 30 minutes before you start. If you forget, you can also microwave it for just a few seconds. Next, use a sturdy mixing method. I like to use a fork or a spatula. You want to mash and mix until everything is well combined. This helps the flavors mix and gives your filling a nice, creamy base. When cooking, ensure even cooking by heating your skillet on medium. This way, the wraps brown nicely without burning. Always check that the filling is hot throughout. When handling tortilla wraps, be gentle. If they tear, your filling may leak out. Always warm your tortillas slightly before filling them. This makes them more flexible and easier to fold. Slicing your wraps in half diagonally makes them look nice on the plate. It shows off the colorful filling and makes them fun to eat. For garnishing, sprinkle fresh cilantro on top. It adds a pop of color and a fresh taste. You can also serve with a small bowl of salsa or guacamole on the side. This adds more flavor and makes your meal look even better. Pro Tips Use Leftover Chicken: This recipe is perfect for utilizing leftover rotisserie chicken, making it a quick and convenient meal option. Customize Your Fillings: Feel free to add other vegetables like bell peppers or corn to enhance the flavor and nutrition of your wraps. Perfectly Soft Tortillas: To avoid tearing, warm the tortillas slightly in the microwave before filling them, making them more pliable. Achieve Crispiness: For an extra crispy wrap, brush the outside of the tortilla with olive oil before cooking. {{image_4}} You can make these wraps work for different diets. - Gluten-free tortillas: Use gluten-free tortillas made from rice or corn. They taste great and hold the filling well. - Dairy-free alternatives: Swap cream cheese with a dairy-free spread. Use coconut yogurt instead of Greek yogurt. Add extra flavor to your wraps to make them pop! - Additional spices or herbs: Try chili powder for heat or fresh cilantro for brightness. Cumin adds a nice depth, too. - Alternative vegetables: Mix in bell peppers, avocado, or corn for a fresh twist. They add crunch and color. You can switch up the protein in these wraps. - Using rotisserie chicken: Grab a rotisserie chicken for an easy option. Just shred it and mix it in. - Vegetarian alternatives: Replace chicken with black beans or lentils for a hearty vegetarian wrap. They are filling and healthy. - Storing before cooking: You can store your unwrapped tortillas in the fridge. Place them in an airtight container. They stay fresh for up to two days. - Storing leftovers: If you have extra wraps, cut them in half and place them in a container. Cover them tightly. They will last for three days in the fridge. - Best practices for freezing: Wrap each cooled tortilla in plastic wrap. Place them in a freezer bag. They freeze well for up to three months. Make sure to label the bag with the date. - Reheating instructions: To reheat, take the wraps from the freezer. Let them thaw in the fridge overnight. Heat them in a skillet over medium heat for about five minutes on each side, or until warm. You can also microwave them for 1-2 minutes if you’re in a hurry. To save time, prep your ingredients first. - Use pre-cooked chicken. - Soften cream cheese in the microwave. - Chop spinach and tomatoes while chicken warms. - Make the filling in one bowl to mix fast. This way, you cut down your cooking time. Yes! You can switch proteins easily. - Try rotisserie chicken for speed. - Use turkey if you want a change. - For a vegetarian twist, try black beans. - Tofu works well for a plant-based option. These choices keep your wraps exciting! Many sides go great with these wraps. - Serve with salsa for a zesty kick. - Guacamole adds creaminess and flavor. - A fresh salad can lighten the meal. - Tortilla chips give a nice crunch. Mix and match to find your favorite combo! In this blog post, we explored making creamy chicken tortilla wraps. We looked at the main ingredients like cooked chicken, cream cheese, and Greek yogurt. You also learned about spices, fresh add-ins, and how to assemble, cook, and store your wraps. Remember, you can customize them by changing proteins or using gluten-free tortillas. Enjoy your wraps fresh or reheated from the freezer. With these tips, you can create a delicious meal that pleases everyone. Dive in, and make your wraps today!

Looking for an easy dinner idea? Creamy Chicken Tortilla Wraps are a tasty solution! With simple ingredients like chicken, cream cheese, and fresh veggies, you can whip these up in …

Read more

Categories Appetizers

Greek Yogurt Cookie Dough Delightful Homemade Treat

December 15, 2025February 4, 2025 by Chef Tavio
To make Greek yogurt cookie dough, you need some simple ingredients. Each one plays a key role in creating a tasty treat. Here’s what you will need: - 1 cup all-purpose flour - 1/2 cup plain Greek yogurt (preferably full-fat for creaminess) - 1/4 cup packed brown sugar - 1/4 cup granulated sugar - 1/4 cup unsalted butter - 1 teaspoon pure vanilla extract - 1/2 teaspoon baking soda - 1/4 teaspoon fine sea salt - 1/2 cup chocolate chips or nuts (optional for added texture) These ingredients work together to bring flavor and texture to your cookie dough. Greek yogurt adds moisture, while the sugars give sweetness. The butter makes it rich, and the flour holds it all together. If you like a bit of crunch, toss in some chocolate chips or nuts. Each ingredient matters, so make sure to measure them accurately for the best results. {{ingredient_image_2}} - In a large bowl, combine 1/4 cup of softened butter, 1/4 cup of brown sugar, and 1/4 cup of granulated sugar. - Beat this mix on medium speed for about 2-3 minutes. This will make it light and fluffy. - Now, add 1/2 cup of plain Greek yogurt and 1 teaspoon of pure vanilla extract to the bowl. - Mix until everything is smooth and well combined. This part makes the dough creamy! - In another bowl, whisk together 1 cup of all-purpose flour, 1/2 teaspoon of baking soda, and 1/4 teaspoon of fine sea salt. - Gradually add this dry mix to the wet ingredients. Blend on low speed until just combined. Don’t overmix; this keeps your dough soft. - If you like, fold in 1/2 cup of chocolate chips or chopped nuts. - Use a spatula to ensure they mix evenly throughout the dough. - Cover the bowl tightly with plastic wrap. - Refrigerate it for at least 30 minutes. Chilling helps the flavors blend and makes it easier to handle. - If you want to bake them, preheat your oven to 350°F (175°C). - Use a cookie scoop to portion balls of dough onto a lined baking sheet. Space them about 2 inches apart. - Bake for around 10-12 minutes. The edges should be golden, but the centers stay soft for that perfect cookie bite! When choosing Greek yogurt, you can pick between full-fat or low-fat options. Full-fat Greek yogurt gives your cookies a rich and creamy texture. Low-fat yogurt works too, but it may not be as soft. Using Greek yogurt in baking adds moisture and protein. It also helps your cookies rise and stay soft. This leads to a more enjoyable bite. One common mistake is overmixing the dough. Overmixing can make cookies tough instead of tender. Mix just until all ingredients blend. Another mistake is not chilling the dough. Proper chilling helps the flavors meld and makes the dough easier to handle. I recommend chilling it for at least 30 minutes. This time is key for great cookies. For a fun way to serve raw cookie dough, use small bowls. You can even sprinkle extra chocolate chips on top. This makes it look tempting and delicious. If you decide to bake the cookies, let them cool slightly. Display them on a rustic board or a colorful platter. This adds a nice touch to your treat table. Pro Tips Chill for Better Texture: Refrigerating the dough for at least 30 minutes enhances the flavors and results in a firmer texture, making it easier to scoop or roll into balls. Mix-Ins for Customization: Feel free to experiment with different mix-ins like dried fruits, white chocolate chips, or even spices like cinnamon for a unique twist on the classic flavor. Don’t Overmix: When combining the dry ingredients with the wet, mix just until incorporated to maintain a tender cookie texture; overmixing can lead to tough cookies. Bake for the Perfect Finish: Keep an eye on the baking time; cookies should be lightly golden around the edges but still soft in the center for the best taste and texture. {{image_4}} You can make Greek yogurt cookie dough more nutritious. Swap some sugars with natural sweeteners like honey or maple syrup. These options add sweetness without refined sugar. You can also reduce the butter. Use half the amount and add more Greek yogurt for moisture. Adding oats gives your dough a nice chew. Use rolled oats or quick oats. They add fiber and texture. Just mix in about half a cup when you combine the dry ingredients. This change makes your treat heartier. Let your creativity shine with different mix-ins! You can add dried fruits like cranberries or raisins. They bring a sweet and chewy bite. You could also try spices like cinnamon or nutmeg for warmth. Want a nutty twist? Try adding peanut butter or almond butter. Just replace some of the butter with your nut butter of choice. For a vanilla twist, add an extra teaspoon of vanilla extract. Each option gives your dough a new and exciting taste. If you need a gluten-free version, there are easy swaps. Use almond flour or coconut flour instead of all-purpose flour. These flours work well and keep the dough tasty. Just remember, you might need a bit more liquid. You can also try gluten-free baking blends. They often have a mix of flours that help mimic regular flour. Just follow the package instructions for replacing the flour. Enjoy baking without gluten worries! To store unbaked cookie dough, follow these steps: - Refrigeration: Place the dough in a bowl. Cover it tightly with plastic wrap. Refrigerate for up to 3 days. This keeps the dough fresh and ready to bake. - Freezing: If you want to store it longer, freeze the dough. Shape it into balls and place them on a baking sheet. Freeze until solid, then transfer to a freezer bag. This way, you can keep it for up to 3 months. Just thaw it in the fridge before baking. For baked cookies, use these tips to keep them fresh: - Storage conditions: Store cookies in an airtight container. Place parchment paper between layers to prevent sticking. This keeps them soft and tasty. - Shelf life: Baked cookies stay good for about a week at room temperature. If you want them to last longer, you can freeze them for up to 3 months. To refresh your baked cookies, follow these easy steps: - Reheating: Preheat your oven to 300°F (150°C). Place cookies on a baking sheet and heat them for about 5-10 minutes. This warms them up and revives their soft texture. - Enjoying refrigerated dough: If you have leftover cookie dough, you can eat it raw! Just make sure to use pasteurized eggs or skip them altogether for safety. Scoop some out and enjoy it straight from the bowl for a tasty treat! Yes, you can eat Greek yogurt cookie dough raw. It is safer than regular dough. The use of Greek yogurt instead of eggs reduces the risk of foodborne illness. Still, be aware that flour can also carry bacteria. To be extra safe, you can heat-treat the flour or choose to eat only a small amount. Greek yogurt cookie dough lasts about one week in the fridge. Store it in an airtight container to keep it fresh. If you want to keep it longer, consider freezing it. Frozen dough can last for up to three months. If you don’t have Greek yogurt, you can use plain yogurt. You can also try sour cream or even applesauce. Each alternative will change the flavor and texture slightly, but they will work in a pinch. Use full-fat versions for the best results. Yes, you can bake the cookie dough! Preheat your oven to 350°F (175°C). Use a cookie scoop to form balls of dough. Place them on a lined baking sheet, leaving space between each ball. Bake for 10 to 12 minutes until the edges are golden. The centers should still be soft for a chewy cookie. Greek yogurt adds protein and calcium to the cookie dough. It makes the cookies a bit healthier than regular cookie recipes. The use of less butter and sugar also helps. Overall, this cookie dough can be a tasty and nutritious treat when enjoyed in moderation. This blog post covered how to make cookie dough using Greek yogurt. I shared tips for mixing, chilling, and baking. We also explored variations for healthier options and flavors. Remember to chill the dough for the best results. Storing dough and baked cookies correctly keeps them fresh longer. Enjoy trying new mix-ins while keeping it simple. Greek yogurt makes this recipe a tasty and nutritious choice. Happy baking!

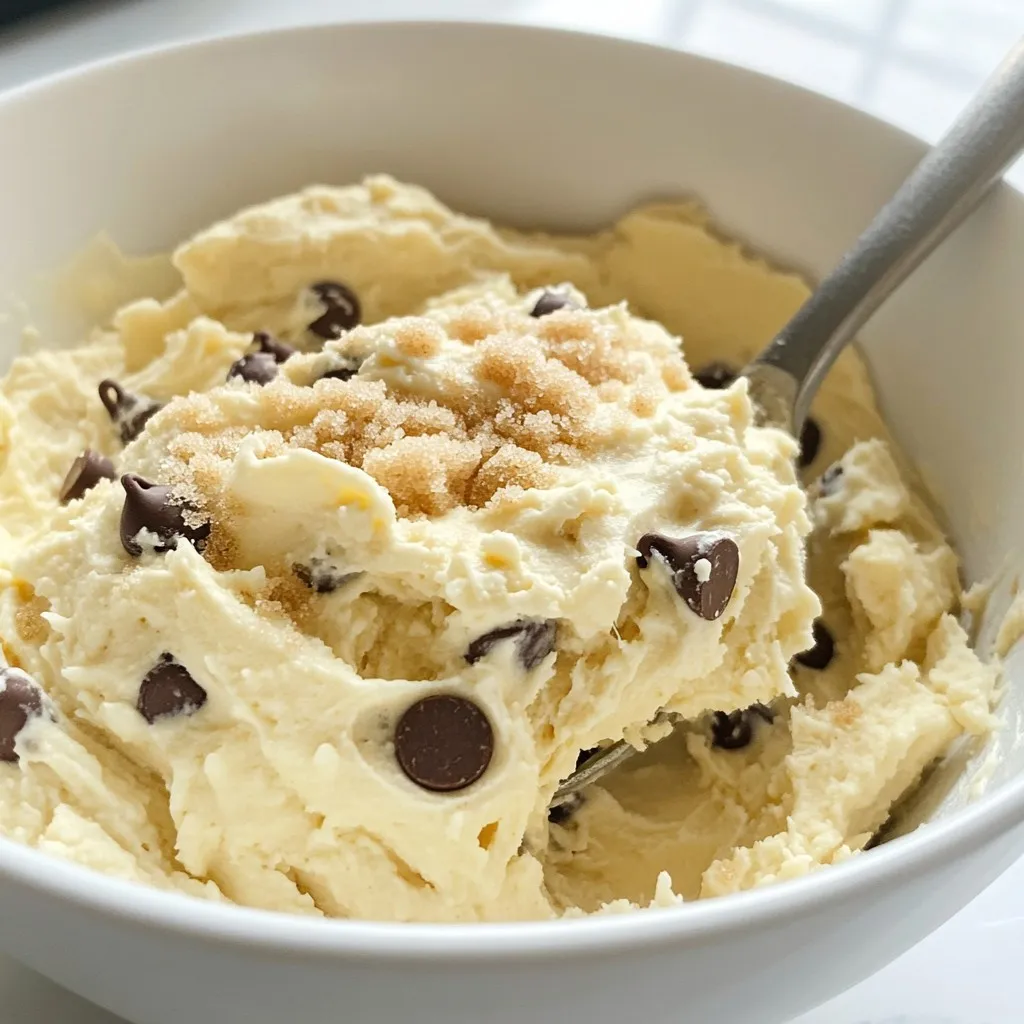
Craving a sweet treat that’s both delicious and a bit healthier? Look no further than Greek yogurt cookie dough! This delightful homemade recipe combines creamy Greek yogurt with classic cookie …

Read more

Categories Desserts

Savory Chicken Alfredo Pasta Recipe You’ll Love

January 5, 2026February 3, 2025 by Chef Tavio
To make delicious Chicken Alfredo Pasta, you need some key items. Here’s what you’ll need: - 12 oz fettuccine pasta - 2 tablespoons olive oil - 2 boneless, skinless chicken breasts - Salt and freshly cracked black pepper, to taste - 4 cloves garlic, finely minced - 1 cup heavy cream - 1 cup freshly grated Parmesan cheese - 1 teaspoon Italian seasoning blend These ingredients work together to create a creamy and rich dish. If you want to boost the taste of your Chicken Alfredo, add these optional items: - 1 cup fresh spinach leaves - Fresh parsley, finely chopped (for garnish) Adding spinach gives a nice color and extra nutrients. The parsley adds a fresh touch. You can adapt this recipe for different diets. Here are some substitutions: - For a lighter option, use whole wheat or gluten-free pasta. - Replace heavy cream with a dairy-free cream for a vegan option. - Use chicken thighs instead of breasts for more flavor. These substitutions let you enjoy Chicken Alfredo no matter your diet. {{ingredient_image_2}} To start, grab a big pot. Fill it with water and add salt. Bring that water to a rolling boil. Once it's boiling, toss in the fettuccine pasta. Cook it for about 8 to 10 minutes, until it's al dente. After cooking, drain the pasta and set it aside. Make sure to save about 1 cup of that starchy pasta water for later. While the pasta cooks, it's time to prepare the chicken. Heat the olive oil in a large skillet over medium heat. Take your two chicken breasts and season them with salt and pepper on both sides. Place the chicken in the hot skillet. Cook for about 6 to 7 minutes on each side. You want a nice golden brown crust. Check that the internal temperature reaches 165°F. Once done, move the chicken to a cutting board and let it rest. After a few minutes, slice it into strips. Now, let's make that creamy Alfredo sauce. Using the same skillet, add the minced garlic. Sauté it for about 30 seconds, until it's fragrant but not burnt. Slowly pour in the heavy cream while stirring. Bring this mixture to a gentle simmer. Next, whisk in the grated Parmesan cheese. Keep stirring until it melts and the sauce is creamy. Add the Italian seasoning and mix well. If the sauce is too thick, add some of the reserved pasta water, one tablespoon at a time, until you reach your desired thickness. Now it's time to combine everything. Add the drained fettuccine to the Alfredo sauce. Toss it well to coat every noodle. If you're using spinach, fold it in now. Stir until the spinach just wilts and blends into the pasta. For serving, slice the rested chicken and place it on top of the creamy pasta. Garnish with freshly chopped parsley for a lovely touch. For an elegant look, serve it in shallow bowls. You can add more Parmesan cheese and a drizzle of olive oil for flavor. Enjoy your delicious Chicken Alfredo Pasta! To make the best Chicken Alfredo, focus on cooking techniques. Start by boiling water for your fettuccine. Use a large pot and add a good amount of salt. This helps flavor the pasta. Cook the fettuccine until it is al dente. This means it should be firm but not hard. Drain it but save some pasta water. It helps to thin the sauce later. For the chicken, heat olive oil in a skillet. Make sure it's hot before adding the seasoned chicken. Cook it until golden brown and fully cooked. This usually takes about 6-7 minutes per side. Let it rest before slicing to keep the juices in. This keeps it moist and tasty. The key to a creamy Alfredo sauce is the heavy cream and cheese. After cooking the chicken, add minced garlic to the same skillet. Sauté it until fragrant, about 30 seconds. Be careful not to burn it. Then slowly pour in the heavy cream while stirring. Bring it to a gentle simmer. Add freshly grated Parmesan cheese next. Whisk it in until it melts completely. If your sauce is too thick, use the reserved pasta water. Add it a little at a time until you reach the right consistency. This makes the sauce silky and smooth. You can make this dish healthier without losing flavor. Try using whole wheat fettuccine instead of regular pasta. It adds fiber and nutrients. For the cream, consider using a light cream or unsweetened almond milk. This lowers the fat content. If you want to skip cheese, nutritional yeast can add a cheesy flavor. Add more veggies like broccoli or zucchini for extra nutrients. You can also use grilled or baked chicken instead of pan-frying. These swaps make the dish lighter but still delicious. Pro Tips Perfectly Cooked Fettuccine: Always cook your pasta al dente for the best texture. It should have a slight bite to it, as it will continue to cook when mixed with the hot sauce. Rest the Chicken: Allowing the chicken to rest after cooking helps retain its juices, resulting in a moist and flavorful dish. Slice it just before serving. Adjusting Sauce Consistency: If your Alfredo sauce becomes too thick, gradually add reserved pasta water to achieve your desired creaminess without compromising flavor. Fresh Spinach Addition: If using spinach, add it to the sauce towards the end of cooking to keep its vibrant color and nutrients intact. {{image_4}} You can easily add veggies to your Chicken Alfredo. Try adding fresh spinach, broccoli, or bell peppers. These vegetables bring color and extra nutrients. To do this, add them to the skillet when you sauté the garlic. Cook them until they are tender but still bright. This adds flavor and makes your dish more balanced. If you want to switch things up, shrimp Alfredo is a great choice. Use shrimp instead of chicken for a seafood twist. Start by cooking the shrimp in the same skillet after the garlic. Cook them until they turn pink, which takes about 2-3 minutes each side. Then, follow the same steps for the sauce and pasta. This variation is quick and delicious. You can enjoy a vegan version of Chicken Alfredo too. Instead of cream and cheese, use cashew cream or coconut milk. Blend soaked cashews with water for a creamy base. Use nutritional yeast for a cheesy flavor. Replace chicken with grilled tofu or mushrooms for protein. This option keeps it tasty and plant-based, perfect for anyone avoiding animal products. After enjoying your Chicken Alfredo, you may have some leftovers. To store them, let the pasta cool for about 30 minutes. Use an airtight container to keep it fresh. Place the pasta and sauce together in the container. If you have extra chicken, add that too. This way, you preserve the flavors. Store the container in the fridge for up to three days. When you're ready to enjoy your leftovers, reheating is key. The best method is on the stove. Pour the pasta into a skillet over low heat. Add a splash of milk or cream to keep it creamy. Stir gently until warm. If you prefer the microwave, use a microwave-safe bowl. Heat it in short bursts, stirring in between. This helps avoid hot spots and keeps the pasta from drying out. If you want to save your Chicken Alfredo for later, freezing works well. First, let the dish cool completely. Then, place it in a freezer-safe container. Make sure to leave some space at the top. This allows the sauce to expand. Label the container with the date. You can freeze it for up to three months. To thaw, move it to the fridge overnight before reheating. Chicken Alfredo Pasta comes from Italy. It began with a simple dish called Fettuccine Alfredo. In the early 1900s, Alfredo di Lelio created it at his restaurant in Rome. He made it with just butter and Parmesan cheese. The creamy sauce became popular when American tourists tried it. They added chicken for extra flavor and protein, making it a hit worldwide. Yes, you can make Chicken Alfredo ahead of time. Cook the pasta and chicken, then store them separately in the fridge. I recommend keeping the sauce in another container. When you are ready to eat, heat the sauce on low. Add a splash of pasta water to loosen it up. Toss in the chicken and pasta until warmed through. This way, your meal stays fresh and tasty. You can serve many sides with Chicken Alfredo Pasta. Here are some tasty options: - Garlic bread for a crunchy bite. - A fresh salad with greens and vinaigrette for a light touch. - Roasted vegetables like broccoli or asparagus for added nutrition. - Steamed peas for a pop of color and sweetness. These sides complement the creamy pasta well and make your meal complete. You learned the key ingredients for Chicken Alfredo Pasta and how to make it. I shared tips for cooking the perfect dish and offered variations for diverse diets. Storing and reheating leftovers helps reduce waste and save time. Remember, a creamy Alfredo sauce makes this meal shine. Adjust it to your taste, and don’t hesitate to try new ideas. Enjoy your Chicken Alfredo journey, and make it your own!

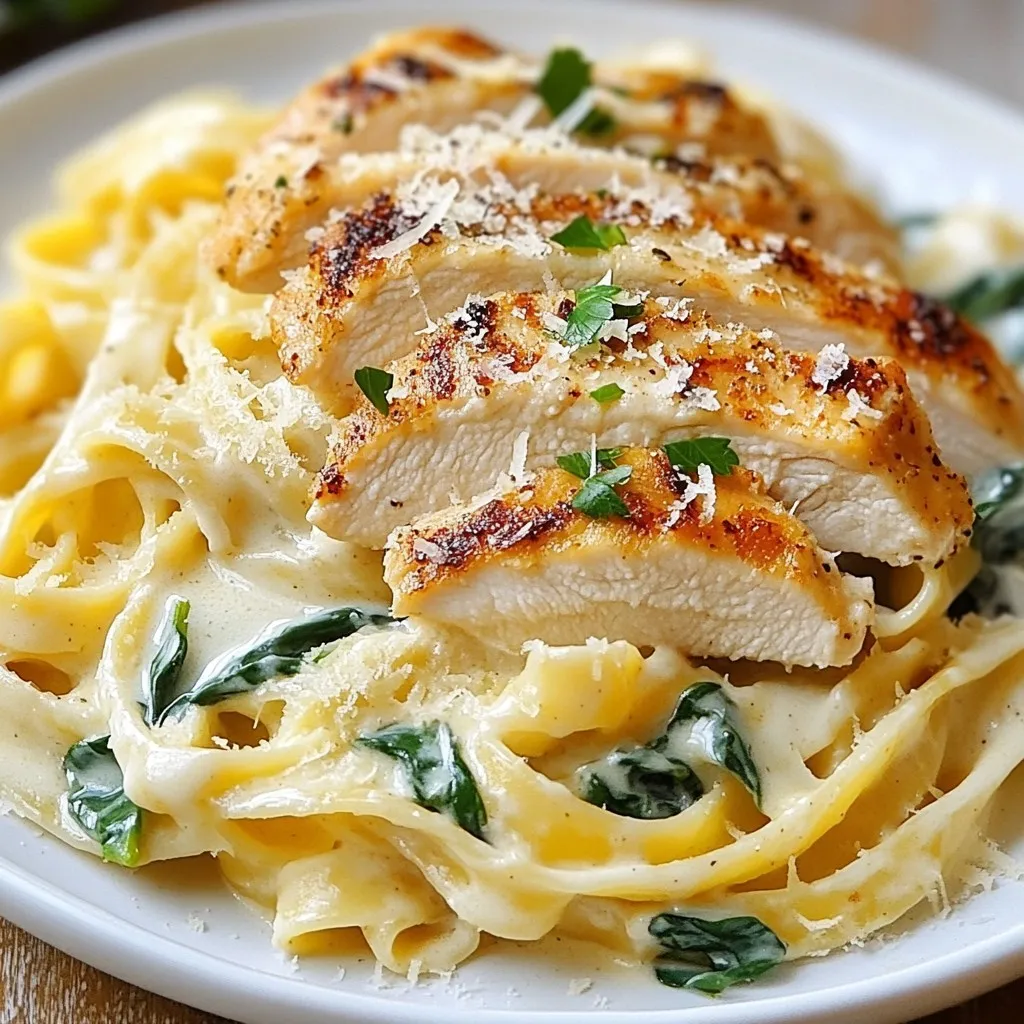
Get ready to enjoy a creamy, dreamy dish that will make your taste buds dance! This Chicken Alfredo Pasta recipe is quick, easy, and perfect for any night of the …

Read more

Categories Dinner

High-Protein Anabolic French Toast Delightful Recipe

November 24, 2025February 3, 2025 by Chef Tavio
- 4 slices of whole-grain bread - 1 cup egg whites (or 4 whole eggs) - 1/2 cup low-fat cottage cheese - 1 scoop vanilla protein powder - 1 teaspoon ground cinnamon - 1 teaspoon vanilla extract - 1 tablespoon almond milk (optional) The main ingredients create a tasty and healthy dish. Whole-grain bread gives fiber and texture. Egg whites or whole eggs add protein. Low-fat cottage cheese makes the mixture creamy. Vanilla protein powder boosts the protein even more. Ground cinnamon adds warmth and flavor. Vanilla extract enhances the overall taste. Almond milk can make the mix creamier if you want. - Fresh fruit (berries, banana slices) - Maple syrup or honey Toppings make this French toast special. Fresh fruit adds color and natural sweetness. Berries are full of vitamins, while bananas add creaminess. A drizzle of maple syrup or honey gives extra flavor. You can choose what you like best. Enjoy mixing and matching! {{ingredient_image_2}} - Mix the egg mixture ingredients: In a large bowl, whisk together 1 cup of egg whites, 1/2 cup of low-fat cottage cheese, 1 scoop of vanilla protein powder, 1 teaspoon of ground cinnamon, 1 teaspoon of vanilla extract, and 1 tablespoon of almond milk. Make sure it’s smooth and creamy. This mix gives your French toast a great protein boost. - Preheat the skillet: Set your non-stick skillet on medium heat. Spray it lightly with cooking spray or add a little coconut oil. This helps prevent sticking. - Coat the bread slices: Take your 4 slices of whole-grain bread. Dip each slice in the egg mixture, letting it soak for a few seconds on each side. Make sure they are well-coated but not too soggy. - Cooking in the skillet: Place the coated bread slices in the skillet. Cook each side for about 2-3 minutes. Look for a golden brown color to know they are done. Adjust the heat as needed to avoid burning. - Arranging on a plate: Once cooked, take the French toast out and place it hot on a plate. This keeps it warm and tasty. - Adding toppings: Top each slice with fresh fruit like mixed berries or banana slices. You can also drizzle a bit of maple syrup or honey for some extra sweetness. Enjoy your delicious, high-protein meal! To get the best texture, use low-fat cottage cheese. It gives the French toast a rich creaminess. Blend it well with the other ingredients. This makes a smooth mixture that coats the bread nicely. Soaking the bread is key. Dip each slice quickly in the egg mixture. Let it soak for just a few seconds on each side. You want it to be coated but not soggy. Adding spices can take your French toast to the next level. Ground cinnamon is a must-have for warmth and sweetness. You can also try nutmeg or a pinch of ginger for a twist. Choosing the right bread matters too. Whole-grain bread adds fiber and flavor. You can also use brioche for a richer taste. Getting the skillet temperature right is crucial. Preheat it over medium heat. This helps the toast cook evenly and get golden brown. Manage your cooking time carefully. Cook each side for about 2-3 minutes. If it browns too fast, lower the heat. This ensures a nice, even cook without burning. Pro Tips Use Stale Bread: Day-old or stale whole-grain bread works best for French toast as it absorbs the egg mixture better without becoming too soggy. Customize Your Protein: Experiment with different flavors of protein powder, such as chocolate or cinnamon, to add variety to your French toast. Monitor the Heat: Cooking on medium-low heat allows the French toast to cook evenly and prevents burning while ensuring it cooks all the way through. Make It Ahead: You can prepare the egg mixture the night before and store it in the fridge to save time in the morning. {{image_4}} You can easily change some ingredients for your High-Protein Anabolic French Toast. - Alternative protein sources: Use Greek yogurt instead of cottage cheese. It’s creamy and rich in protein. You can also try silken tofu for a vegan option. It blends well into the mix. - Gluten-free options: Swap whole-grain bread for gluten-free bread. Look for a high-protein variety to keep the health benefits. Get creative with flavors to make your French toast fun! - Different fruit toppings: Instead of just berries, try sliced apples or peaches. Grilled pineapple also adds a tropical touch. - Sweetener alternatives: Use agave syrup or stevia instead of maple syrup. They offer sweetness without the added sugar. You may want to adjust the recipe based on your diet. - Vegan or vegetarian adjustments: Replace egg whites with a mix of flaxseed and water. It acts as a great binding agent. Use plant-based protein powder as well. - Low-carb versions: Choose low-carb bread made from almond or coconut flour. This makes the dish suitable for low-carb diets while still being delicious. Store any leftover French toast in an airtight container. This keeps it fresh. Place wax paper between layers to avoid sticking. It stays good for up to three days. To reheat, use a toaster or skillet. Heat on low to avoid burning. Flip it over to warm it evenly. You can also microwave it for a quick fix. Just cover it with a damp paper towel to keep it moist. You can freeze cooked French toast for later. Let it cool first, then wrap each slice in plastic wrap. Place the wrapped slices in a freezer bag. They can last up to three months in the freezer. When you want to eat them, take them out and thaw overnight in the fridge. To reheat, you can use a toaster, skillet, or microwave. If using a microwave, place a slice on a plate and cover it. Heat for 30 seconds, check, and continue if needed. You can boost protein in this French toast easily. Here are some methods: - Add more protein powder. Use an extra half scoop. - Mix in Greek yogurt. It adds creaminess and more protein. - Use higher protein bread. Look for brands with added protein. - Top with nut butter. Almond or peanut butter works great. These options help you reach your protein goals. Yes, you can make a vegan version! Replace the egg whites with these: - Silken tofu blended until smooth. - A mix of ground flaxseed and water. Use 1 tablespoon of flaxseed with 2.5 tablespoons of water. For the cottage cheese, try vegan cream cheese or blended tofu. This keeps the texture nice. Whole-grain bread is the best choice. It adds fiber and nutrients. Look for these options: - High protein bread brands. They often pack more protein. - Sprouted grain bread. It is nutritious and tasty. - Low-carb bread can work if you watch carbs. Choosing the right bread helps you enjoy a healthy meal. This blog covers the simple steps to make high-protein French toast. You start with the right ingredients, like whole-grain bread and egg whites. I provided detailed steps for preparation and cooking, along with tips for a perfect texture. You can also explore variations for dietary needs or flavor twists. Remember to store leftovers correctly for later enjoyment. Overall, this recipe is easy to customize, fun to make, and healthy. Enjoy creating a dish full of flavor and nutrition!

Are you ready to transform your breakfast? This High-Protein Anabolic French Toast is more than just a tasty meal; it’s a powerhouse of nutrition! Packed with protein and easy to …

Read more

Categories Breakfast

Creamy Crack Chicken Penne Flavorful Dinner Delight

December 24, 2025February 2, 2025 by Chef Tavio
- 8 oz penne pasta - 1 lb chicken breasts, diced into bite-sized pieces - 1 tablespoon olive oil - 1 packet ranch seasoning mix - 1 cup cream cheese, softened to room temperature - 1 cup chicken broth (preferably low-sodium) - 1 cup shredded sharp cheddar cheese - 1/2 cup cooked bacon bits (can substitute with turkey bacon for a lighter option) - 1/2 cup green onions, sliced finely - 1/2 teaspoon garlic powder - Salt and pepper to taste - Fresh parsley, chopped, for garnish Creating a great meal starts with the right ingredients. For this creamy crack chicken penne, you will need penne pasta, chicken breasts, and some key seasonings. The ranch seasoning mix brings a unique flavor that makes this dish special. Cream cheese and cheddar cheese create that rich, creamy texture we love. You can use bacon bits for a savory crunch, but feel free to swap in turkey bacon if you prefer a lighter option. Green onions add a fresh taste and vibrant color. Don't forget garlic powder, salt, and pepper. These ingredients help to enhance all the flavors. Finally, fresh parsley is perfect for garnish. It adds a nice pop of color and a hint of freshness. Each ingredient plays a role in making this dish a flavorful dinner delight. Gather these items, and you’ll be ready to create a meal your family will love! {{ingredient_image_2}} 1. Start by bringing a large pot of salted water to a boil. This water will help cook the pasta. 2. Add 8 oz of penne pasta to the boiling water. Cook it until it is al dente, about 8-10 minutes. 3. Once the pasta is done, drain it well. Be sure to save a small cup of pasta water to use later if needed. 1. In a large skillet, heat 1 tablespoon of olive oil over medium heat. Wait until it shimmers before adding chicken. 2. Add 1 lb of diced chicken breasts to the skillet. Season it with 1/2 teaspoon garlic powder, salt, and pepper to taste. 3. Sauté the chicken for about 7-10 minutes. Stir occasionally until the chicken is browned and fully cooked, reaching 165°F (75°C). 1. Sprinkle 1 packet of ranch seasoning mix over the cooked chicken. Stir it well to coat the chicken evenly. 2. Lower the heat to medium-low. Add 1 cup of softened cream cheese and 1 cup of chicken broth to the skillet. 3. Stir continuously until the cream cheese melts and mixes with the broth, forming a smooth sauce. 4. Gradually mix in 1 cup of shredded sharp cheddar cheese. Keep stirring until it melts. If the sauce is too thick, add a splash of the reserved pasta water. 1. Carefully fold in the cooked penne pasta and 1/2 cup of cooked bacon bits. Make sure every piece of pasta is coated well with the sauce. 2. Cook the mixture for an additional 2-3 minutes. This helps heat everything through. 3. Stir in 1/2 cup of sliced green onions, mixing them evenly into the pasta. 4. Taste the dish and adjust the seasoning with more salt and pepper, if needed. - How to check chicken doneness: Use a meat thermometer. Chicken should reach 165°F (75°C). This ensures it's safe to eat. - Avoiding a thick sauce: If your sauce is too thick, add a splash of reserved pasta water. This keeps the sauce creamy and smooth. Stir well to blend. - Keeping pasta from sticking: Stir the pasta immediately after draining. A little olive oil helps keep it from clumping together. - Presentation ideas for serving: Serve in shallow bowls for a nice look. Add extra bacon bits and green onions on top for texture. A sprinkle of parsley adds color. - Pairing with sides or salads: Serve with a fresh green salad or garlic bread. These sides balance the creamy dish and add crunch. Pro Tips Perfect Pasta: Always cook the penne pasta until al dente for the best texture. It will continue to cook slightly when mixed with the sauce. Seasoning Balance: Taste your sauce before serving. Adjust the salt and pepper to ensure a well-balanced flavor. Cheese Tip: Use freshly shredded cheddar cheese instead of pre-shredded for better melting and a creamier sauce. Ingredient Swaps: Feel free to customize this dish by adding vegetables like spinach or bell peppers for extra nutrition and color. {{image_4}} You can easily change this dish to fit your needs. If you want a lighter option, try using turkey bacon instead of regular bacon. This swap keeps the flavor but cuts down on fat. You can also make the dish gluten-free by using gluten-free penne pasta. This way, everyone can enjoy it! Get creative with the flavors in this dish! You can add vegetables like spinach, bell peppers, or broccoli. These will boost nutrition and add color. You could also experiment with different cheese types. Try using pepper jack for a kick or mozzarella for a milder taste. Each change makes the dish unique and fun! To keep your creamy crack chicken penne fresh, use proper storage containers. Glass or plastic containers with tight lids work well. Let the dish cool before putting it in the fridge. This step helps it stay creamy and tasty. Aim to store it within two hours of cooking for best results. For reheating, the best methods are using the stove or microwave. If using the stove, place it in a skillet over low heat. Stir often to avoid burning. Add a splash of chicken broth or cream to keep it creamy. If using a microwave, heat in short bursts. Stir between intervals until it’s hot. Always check the temperature to ensure it heats evenly. Crack Chicken is a creamy, flavorful dish that combines chicken, ranch seasoning, and cheese. It has a rich and savory taste with hints of garlic and herbs. Many people love its creamy texture and comforting flavor. This dish often features bacon bits for added crunch and a burst of flavor. Yes, you can make this recipe ahead of time. Prepare the creamy sauce and chicken mixture without the pasta. Store it in an airtight container in the fridge for up to three days. When you are ready to serve, cook the penne pasta and mix it with the sauce. This saves time and allows the flavors to meld nicely. To add some heat, try adding crushed red pepper flakes or diced jalapeños to the sauce. You can also use spicy ranch seasoning if you want more kick. For an extra layer of flavor, consider adding a dash of hot sauce when mixing in the cream cheese. Adjust to your taste for the perfect spice level! This blog post covered a tasty dish called Crack Chicken. You learned the key ingredients, step-by-step instructions, and helpful tips. We discussed cooking and serving ideas to make your meal stand out. Don't forget the variations for dietary needs and flavor tweaks. Proper storage ensures your leftovers stay fresh. With these details, you can confidently make your own delicious Crack Chicken. Enjoy the flavors and feel free to get creative with your version!

Looking for a dinner that’s rich in flavor and super easy to make? You’ve hit the jackpot with my Creamy Crack Chicken Penne! This dish is loaded with mouthwatering ingredients …

Read more

Categories Dinner

Greek Yogurt Blueberry Protein Muffins Delightful Snack

December 8, 2025February 2, 2025 by Chef Tavio
- 1 cup plain or vanilla Greek yogurt - 2 large eggs - 1/4 cup honey or maple syrup - 1 teaspoon pure vanilla extract - 1 cup whole wheat flour - 1/2 cup vanilla or unflavored protein powder - 1 teaspoon baking powder - 1/2 teaspoon baking soda - 1/4 teaspoon salt - 1 cup blueberries (fresh or frozen) - Optional: 1/4 cup chopped walnuts or almonds The key ingredients in these muffins provide great flavor and nutrition. Greek yogurt adds creaminess and protein, making these muffins a tasty snack. Whole wheat flour gives a rich taste and adds fiber. The protein powder boosts the protein content, which is perfect for a filling treat. Blueberries add sweetness and antioxidants, making this snack even healthier. For nutritional highlights, Greek yogurt is low in fat and high in protein. Whole wheat flour is a good source of fiber, while blueberries are low in calories but high in vitamins. Honey or maple syrup provides natural sweetness without refined sugars. You can also add optional ingredients like chopped walnuts or almonds. Nuts add a nice crunch and healthy fats. They can make the muffins even more satisfying. {{ingredient_image_2}} 1. Preheat your oven to 350°F (175°C). This helps your muffins rise well. 2. Prepare a muffin tin. You can use paper liners or grease it lightly. This stops the muffins from sticking. 3. In a large bowl, combine the Greek yogurt, eggs, honey, and vanilla. Whisk them until smooth. This mix gives the muffins moisture and flavor. 4. In another bowl, sift together the whole wheat flour, protein powder, baking powder, baking soda, and salt. Sifting helps mix the dry ingredients evenly. This step is key for texture. 5. Gradually add the dry mix to the wet mix. Stir gently with a spatula. Do not overmix; this keeps your muffins light and fluffy. 6. Carefully fold in the blueberries and optional nuts. Be gentle; you want whole blueberries, not mush! 1. Spoon the batter into the muffin cups. Fill them about two-thirds full. This allows the muffins to rise without spilling over. 2. Place the muffin tin in the oven. Bake for 18-20 minutes. The tops should be golden brown. 3. To check for doneness, insert a toothpick into the center of a muffin. If it comes out clean, they are ready! 4. Once baked, take the muffins out of the oven. Let them cool in the tin for 5 minutes. Then, move them to a wire rack to cool completely. This keeps them from getting soggy. To make the best Greek Yogurt Blueberry Protein Muffins, follow these simple tips: - Texture: Use room temperature eggs and yogurt. This helps mix better and makes the muffins light. - Avoid Overmixing: Stir until just combined. Overmixing can lead to tough muffins, which we want to avoid. - Equipment: Use a non-stick muffin tin to prevent sticking. If you use paper liners, choose the right size for your tin. How you serve these muffins can make a big difference: - Presentation: Serve warm or at room temperature. Dust with powdered sugar for a sweet touch. A drizzle of honey adds flavor and looks pretty. - Pairing: Enjoy these muffins with a cup of coffee or tea. They also go well with yogurt or a fruit salad. - When to Eat: These muffins are great for breakfast, snacks, or even dessert. They fit any time you need a tasty treat! Pro Tips Fresh vs. Frozen Blueberries: Fresh blueberries tend to burst beautifully in your muffins, while frozen blueberries can add a lovely swirl of color. If using frozen, do not thaw them before adding to the batter to prevent purple streaks. Protein Powder Choice: Opt for a high-quality protein powder that complements the flavor of your muffins. Vanilla protein powder works best for a sweet touch, while unflavored can keep the focus on the blueberries. Mixing Technique: Avoid overmixing your batter to ensure light and fluffy muffins. Mix just until the dry ingredients are incorporated to prevent dense muffins. Storage Tips: Keep your muffins fresh longer by allowing them to cool completely, then store them in an airtight container. They can also be frozen for up to three months for a quick snack later. {{image_4}} You can switch up the fruits in these muffins. Try adding raspberries, chopped bananas, or diced apples. Each fruit brings its unique flavor. If you want a sweeter taste, use natural sweeteners like agave syrup or coconut sugar. These options often add a nice flavor twist. For those with dietary needs, you can make these muffins gluten-free. Use almond flour or a gluten-free blend instead of whole wheat flour. For dairy-free options, replace Greek yogurt with coconut yogurt. This still keeps the muffins moist and tasty. Choosing the right protein powder can change the muffins. You can use whey, pea, or hemp protein. Each type offers a different taste and texture. If you want more protein, add some Greek yogurt, or even nut butter. These ingredients boost the protein without changing the flavor. You can also customize protein sources based on your diet. For vegan diets, stick to plant-based protein powders. If you need more protein, consider adding seeds like chia or flaxseeds. They blend well and add extra nutrients. To keep your Greek yogurt blueberry protein muffins fresh, store them in an airtight container. This method helps prevent moisture loss and keeps them soft. You can keep them at room temperature for up to five days. If you live in a humid area, consider refrigeration. While refrigeration may slightly change the texture, it helps them last longer. For longer storage, freezing is an excellent option. Wrap each muffin individually in plastic wrap. Then, place them in a freezer-safe bag or container. They can stay good for up to three months. When you're ready to eat one, just take it out and let it thaw at room temperature. When it’s time to enjoy your muffins again, reheating is easy. You can use an oven or a microwave. If using the oven, preheat it to 350°F (175°C). Place the muffins on a baking sheet for about 5-10 minutes. This method keeps them warm and helps restore a bit of their original texture. For the microwave, heat the muffin for about 15-20 seconds. Be careful not to overheat as it can dry them out. Always check the temperature before enjoying. This way, you can have a warm, tasty snack anytime! How to make Greek Yogurt Blueberry Protein Muffins without eggs? You can replace eggs with unsweetened applesauce. Use 1/4 cup for each egg. This swap keeps your muffins moist. You can also use mashed banana or flaxseed meal mixed with water. These options work well in the recipe. Can I substitute Greek yogurt with something else? Yes, you can use regular yogurt or a dairy-free yogurt. However, Greek yogurt adds creaminess and protein. If you use regular yogurt, your muffins may be less thick but still tasty. What can I do if I don’t have protein powder on hand? You can leave it out, but the muffins may have less protein. You can add more flour to keep the texture. Another option is to use ground oats. This adds fiber and keeps muffins fluffy. Caloric and macronutrient breakdown per muffin Each muffin has about 120 calories. It contains 5 grams of protein, 4 grams of fat, and 18 grams of carbs. Benefits of the key ingredients Greek yogurt adds protein and calcium. Whole wheat flour provides fiber, which is great for digestion. Blueberries are rich in antioxidants. They help boost your health. How these muffins fit into a healthy diet These muffins are a smart snack or breakfast choice. They balance protein and carbs. Plus, they use natural sweeteners like honey. This makes them healthier than store-bought options. Enjoy these muffins as part of your balanced diet! Greek Yogurt Blueberry Protein Muffins are easy to make and tasty. We covered the key ingredients, preparation steps, and baking tips. You can alter flavors and customize based on your needs. Storing muffins properly keeps them fresh for longer. Enjoy them anytime, whether for breakfast or a snack. With these clear steps and variations, you can create delicious muffins to share or enjoy alone. Dive into baking and make these healthy treats today!

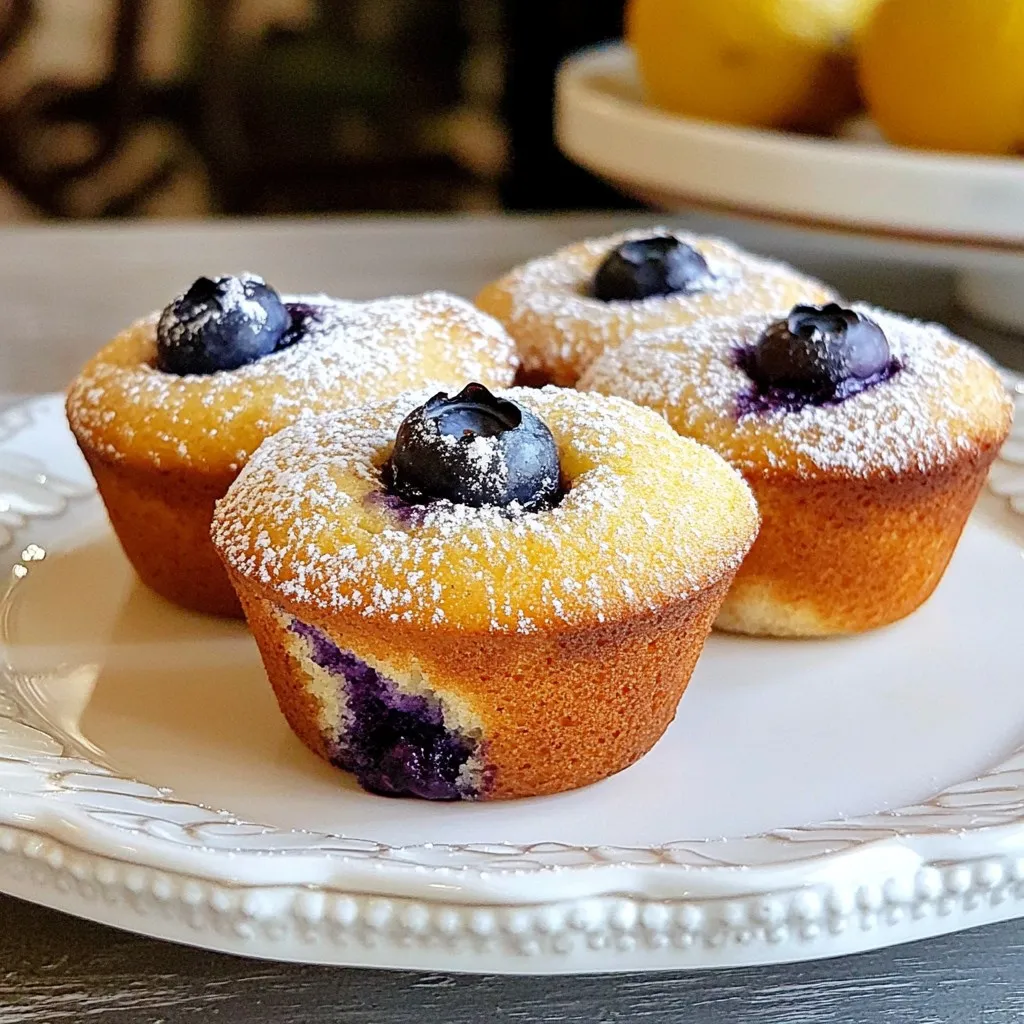
Looking for a delicious and healthy snack? You’ll love my Greek Yogurt Blueberry Protein Muffins! These muffins pack a punch of protein and flavor in every bite. They’ll not only …

Read more

Categories Breakfast

Cheesy Sausage Breakfast Bombs Simple and Tasty Treat

November 18, 2025February 1, 2025 by Chef Tavio
- 1 lb breakfast sausage - 1 cup shredded sharp cheddar cheese - 1 cup refrigerated biscuit dough - 1/4 cup cream cheese - Seasonings: garlic powder, onion powder - Optional garnish: fresh parsley - 1 egg, beaten for coating For these Cheesy Sausage Breakfast Bombs, you need just a few key ingredients. First, grab 1 pound of breakfast sausage. This will give your bombs that savory and hearty flavor. Next, you’ll want 1 cup of shredded sharp cheddar cheese. This cheese melts beautifully and adds creaminess. You also need 1 cup of refrigerated biscuit dough. This makes the base of our bombs easy and quick to prepare. You can make your filling even better with some extra ingredients. Add 1/4 cup of cream cheese for a rich texture. Season with garlic powder and onion powder to enhance the taste. If you like, sprinkle some fresh parsley on top for a pop of color. Finally, don't forget the egg wash! You’ll need 1 beaten egg. This will make your bombs golden and shiny when they bake. These ingredients come together to create a tasty treat for breakfast or brunch. {{ingredient_image_2}} - Preheat your oven to 375°F (190°C). - Line a baking sheet with parchment paper. - In a bowl, mix 1 lb of cooked sausage, 1 cup of sharp cheddar cheese, and 1/4 cup of cream cheese. - Add 1/2 teaspoon of garlic powder and 1/2 teaspoon of onion powder. - Stir until creamy and well combined. - Open the biscuit dough and separate each biscuit. - Flatten each biscuit into a circle, about 4 inches wide. - Spoon a heaping tablespoon of the filling into the center of each biscuit. - Bring the edges together and pinch tightly to seal. - Place the breakfast bombs seam-side down on the baking sheet. - Brush the tops with the beaten egg for a golden finish. - Bake for 12-15 minutes until puffed and golden brown. - Let them cool for a few minutes before serving. Ensure your sausage is fully cooked and crumbled. This step is key for flavor. Use a fork to break up any large pieces. The more even the mix, the better the taste. Add sharp cheddar cheese and cream cheese for creaminess. The cheeses will melt together, creating a gooey center. Don't forget the garlic and onion powder for extra depth. To flatten the biscuit dough without tearing, handle it gently. Start by lightly dusting your surface with flour. Place the biscuit on the surface and press down with your hands. If you use a rolling pin, roll from the center outwards. This method helps keep the dough intact. Aim for circles about four inches wide. This size holds the filling just right. Monitor your baking for even coloring. After about 10 minutes, check the breakfast bombs. They should start to puff and turn golden brown. If they look pale, give them a few more minutes. Every oven is unique, so watch closely. When done, remove them carefully and let them cool for a few minutes. This way, the filling sets just right, making them easier to eat. Pro Tips Use Fresh Ingredients: Fresh herbs and high-quality sausage can elevate the flavor of your breakfast bombs significantly. Consider using homemade sausage for a personal touch. Experiment with Cheese: While sharp cheddar is delicious, try mixing different cheeses like pepper jack or mozzarella for a unique flavor profile. Ensure Proper Sealing: Make sure to pinch the seams of the biscuit dough tightly to prevent the filling from leaking out while baking, ensuring each bite is packed with flavor. Serving Suggestions: These breakfast bombs pair wonderfully with a variety of dipping sauces. Try serving with a spicy ranch or a sweet chili sauce for a delightful twist. {{image_4}} You can switch up the cheese in your breakfast bombs. Try mozzarella or pepper jack for a twist. Each cheese adds a unique flavor and melt. If you prefer, you can swap the sausage too. Turkey sausage or veggie sausage both work well. They keep the dish tasty and cater to different diets. To add some heat, consider mixing in jalapeños. Chop them finely and blend them into the filling. This adds a nice kick to each bite. You can also try fresh herbs like thyme or oregano. These herbs bring a fresh taste that brightens the dish. Don't shy away from adding spices like smoked paprika. A dash can elevate the flavor profile. These breakfast bombs shine when served warm. For extra fun, pair them with dips. Consider ranch or a spicy sriracha mayo. You can also serve them with fresh fruit or a side salad for balance. These options make your meal more colorful and satisfying. To store leftovers, first let the breakfast bombs cool. Place them in an airtight container. You can keep them in the fridge for up to three days. Make sure they are not stacked, so they stay nice and fresh. You can freeze these breakfast bombs before or after baking. If freezing before baking, prepare them as normal, then place them on a baking sheet. Freeze them for about 30 minutes, then transfer to a freezer bag. They will last up to two months. To freeze after baking, let them cool completely, then follow the same steps. To reheat, the oven is best for keeping that texture. Preheat it to 350°F (175°C). Place the bombs on a baking sheet and heat for about 10-15 minutes. You can also use a microwave, but they may lose some crispiness. If you use the microwave, heat them for about 30 seconds at a time until warm. Cheesy sausage breakfast bombs are tasty bites filled with sausage and cheese. They use biscuit dough as a shell. Inside, you get cooked sausage, sharp cheddar cheese, and cream cheese. These ingredients create a creamy, cheesy filling. You add garlic and onion powder for flavor. They are fun to make and eat, perfect for breakfast or brunch. Yes, you can prepare these breakfast bombs ahead of time. Mix the filling and fill the dough. Then, cover them and place them in the fridge for up to 24 hours. When you're ready, bake them directly from the fridge. This saves time in the morning and makes breakfast easy. You can serve these breakfast bombs with many sides. Fresh fruit adds a nice touch. A simple salad can balance the meal. For dipping, try spicy ketchup or ranch dressing. These sauces enhance the flavors and make eating more fun. These breakfast bombs can last in the fridge for about 3-4 days. Make sure to store them in an airtight container. If they smell off or look funny, it's best to toss them. Always check for freshness before eating any leftovers. You learned how to make Cheesy Sausage Breakfast Bombs with easy steps. We covered the main ingredients like sausage and cheese, plus tips for the perfect bake. I shared ideas for variations and how to store leftovers. These breakfast bombs are fun and tasty. You can try many flavors and pair them with sides. Get creative and enjoy your cooking!

Start your morning with a burst of flavor! Cheesy Sausage Breakfast Bombs are simple, tasty bites that you can whip up in no time. With just a few key ingredients …

Read more

Categories Breakfast
Older posts
Newer posts
← Previous Page1 … Page180 Page181 Page182 … Page191 Next →

TASTED NEST

Where Flavor Finds a Home 🍳🏡 — warm, simple, and crave-worthy recipes made for real life, from stovetop mornings to backyard dinners.

PAGES

Home About Contact Privacy Policy Terms & Conditions Cookie Policy GDPR Policy Copyright Policy Disclaimer

CATEGORIES

Appetizers Desserts Salads Breakfast Dinner
Copyright © 2026 Tasted Nest. All rights reserved.