Skip to content
  • GDPR Privacy Policy
  • Copyright Policy
  • Disclaimer
  • Terms & Conditions
Tasted Nest
  • Home
  • Appetizers
  • Desserts
  • Salads
  • Breakfast
  • Dinner
  • Privacy Policy
  • Contact
  • About

Chef Tavio

Ingredient Protein Pancakes Flavorful and Healthy Meal

November 18, 2025January 31, 2025 by Chef Tavio
- 1 cup rolled oats - 1 ripe banana - 1 cup cottage cheese (or Greek yogurt) - 1 scoop vanilla protein powder - 1 teaspoon baking powder - 1/2 teaspoon cinnamon - 1/4 teaspoon salt - 1/2 cup mixed berries (blueberries, strawberries, raspberries) - 1 tablespoon honey or maple syrup (optional) - Cooking spray or butter for the pan These ingredients come together to create a healthy and tasty meal. The oats provide fiber and energy. The banana gives natural sweetness and moisture. Cottage cheese or Greek yogurt adds protein and creaminess. The protein powder boosts the protein content. Baking powder helps the pancakes rise and become fluffy. Cinnamon adds warmth and flavor. Salt balances the sweetness. Mixed berries bring freshness and color. Honey or maple syrup can sweeten them further if you like. Finally, cooking spray or butter keeps the pancakes from sticking. With these simple yet nutritious ingredients, you can whip up a delicious breakfast. {{ingredient_image_2}} To start, gather your ingredients. You need rolled oats, a ripe banana, and cottage cheese. You can also use Greek yogurt if you prefer. Place these items into a blender. Blend them on high speed until the mix is smooth and creamy. You want a thick batter that is still pourable. Next, add your protein powder, baking powder, cinnamon, and salt. Blend again until everything is mixed well. This step adds flavor and boosts the protein content of your pancakes. Now, it’s time to add the berries. I like to use a mix of blueberries, strawberries, and raspberries. Gently fold the berries into the batter with a spatula. Be careful not to mash the berries. You want them whole for bursts of flavor in every bite. Heat a non-stick skillet or griddle over medium heat. Lightly grease the surface with cooking spray or a small pat of butter. This prevents sticking and gives the pancakes a nice golden color. Pour about 1/4 cup of batter for each pancake onto the skillet. Cook them for about 2-3 minutes. You will see bubbles forming on the surface when they are ready to flip. Carefully turn them over and cook for another 2 minutes until they are golden brown. Keep cooking the rest of the batter. Adjust the heat if needed, so your pancakes don’t burn. Serve them warm, and feel free to drizzle honey or maple syrup on top if you like! To get fluffy pancakes, you need the right batter. Start with a thick but pourable mix. If you find it too thick, add a splash of milk or water to loosen it. For fluffiness, don’t overmix the batter. This keeps air in the mix, making your pancakes light. Cooking temperature is also key. Use a medium heat to cook the pancakes. If it’s too hot, they can burn on the outside while staying raw inside. You’ll know it’s ready when you see bubbles on top. Flip the pancakes when the edges look set. For toppings, think outside the box! Drizzle honey or maple syrup for sweetness. A dollop of yogurt adds a creamy touch. You can also sprinkle nuts for crunch or add more berries on top. Pair your pancakes with sides like fresh fruit or a smoothie. A side of yogurt can boost protein too. This makes your meal balanced and tasty. Enjoy your colorful, protein-packed pancakes! Pro Tips Use Overripe Bananas: Overripe bananas add more sweetness and enhance the flavor of your pancakes, making them extra delicious. Experiment with Protein Powder: Feel free to try different flavors of protein powder, such as chocolate or strawberry, to create unique pancake variations. Keep the Heat Moderate: Cooking at medium heat allows the pancakes to cook through without burning, ensuring a fluffy texture. Make Ahead and Freeze: These pancakes freeze well! Make a large batch, cool completely, and store in an airtight container for a quick breakfast option. {{image_4}} You can use many flavors of protein powder in these pancakes. Vanilla is a classic choice. Chocolate adds a rich taste. You might also try berry or peanut butter flavors for something unique. If you prefer plant-based protein, options like pea or hemp protein work well. They blend nicely and keep the pancakes fluffy. Just use the same amount as the whey protein in the recipe. For a healthier pancake, try using whole wheat flour instead of regular flour. Whole wheat flour adds fiber and nutrients. Almond flour is a great gluten-free choice. It gives a nutty flavor and a different texture. If you need allergy-friendly options, look for gluten-free oats. These pancakes can be dairy-free too. Substitute cottage cheese with dairy-free yogurt. This keeps your pancakes creamy and delicious without dairy. To store leftover protein pancakes, let them cool first. Place them in an airtight container. This keeps them fresh for about three to five days. If you want to reheat them, use the microwave. Heat for 20-30 seconds, or until warm. You can also use a skillet. Just warm each side for a minute on low heat. To freeze pancakes, stack them with parchment paper between each one. This prevents sticking. Place the stack in a freezer bag. Remove as much air as you can before sealing. This helps avoid freezer burn. When you’re ready to enjoy them, take out the pancakes and leave them in the fridge overnight. For a quick meal, use the microwave. Heat for 1-2 minutes, or until warm. You can also reheat them in a skillet. Just warm them on low heat for a few minutes on each side. Yes, you can make protein pancakes ahead of time. To prep, cook the pancakes as usual. Let them cool completely. Then, stack them with parchment paper in between. Store them in an airtight container in the fridge for up to four days. For longer storage, freeze the pancakes. Place them in a freezer-safe bag, with parchment paper between each pancake. They will keep well for up to three months. When ready to eat, just reheat them in the microwave or toaster. You can substitute Greek yogurt for cottage cheese. It adds creaminess while keeping the protein high. If you're lactose intolerant, try using dairy-free yogurt. Look for options made from almond or coconut. Another choice is silken tofu. Blend it until smooth to mimic the texture of cottage cheese. This works well for vegan diets and adds protein too. To make these pancakes vegan, replace the cottage cheese with silken tofu or a dairy-free yogurt. Use a plant-based protein powder instead of the regular one. For the egg, you can use a flax egg. Mix one tablespoon of ground flaxseed with three tablespoons of water. Let it sit for five minutes to thicken. You can also skip the honey and use maple syrup as a sweetener. These changes keep the pancakes tasty and healthy. You now have a simple and tasty recipe for protein pancakes. We covered ingredients, mixing, cooking, and serving tips. Variations help you tailor them to your needs. You can store these pancakes easily, making meal prep a breeze. Whether you want a quick breakfast or a nutritious snack, these pancakes fit the bill. Enjoy making them your own by trying different flavors and toppings. Dive into your kitchen and create a stack that’s both delicious and good for you. Happy cooking!

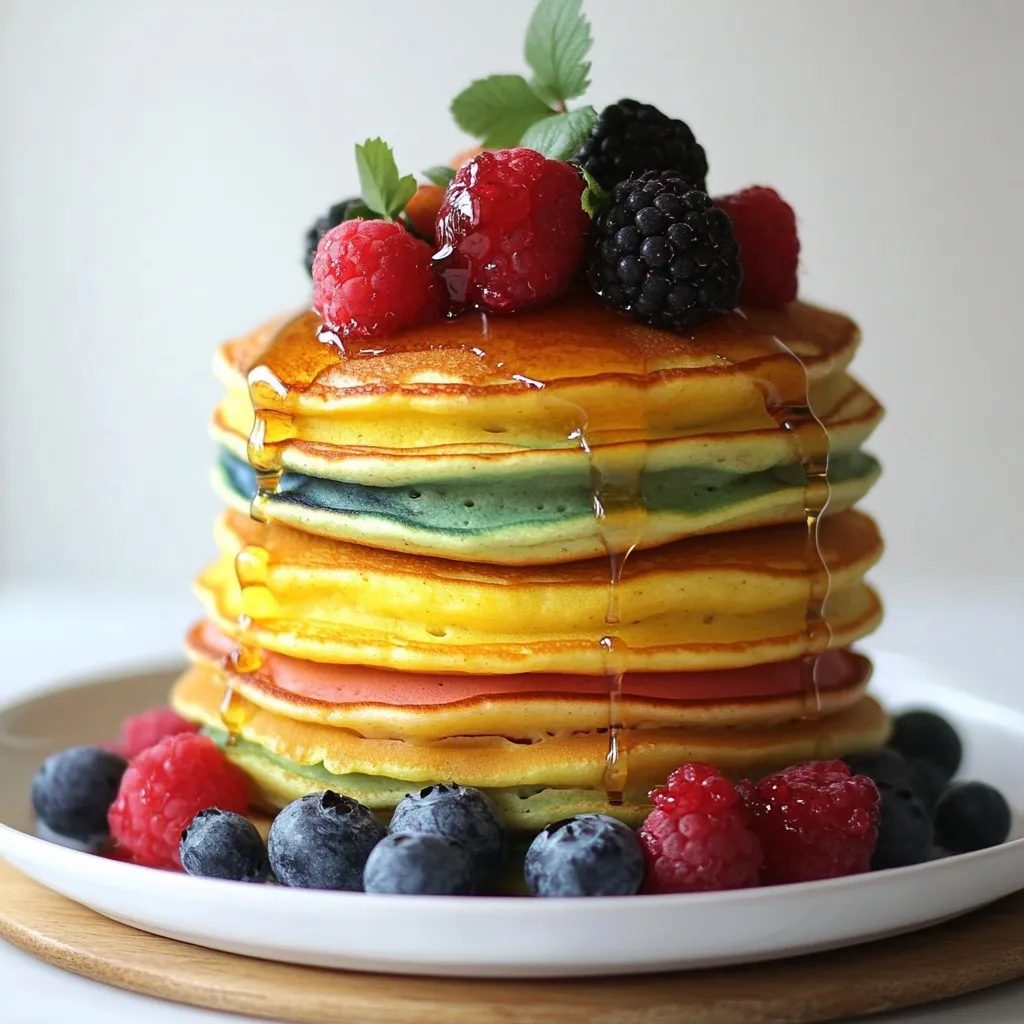
Are you searching for a tasty and healthy breakfast that fuels your day? Look no further! My Ingredient Protein Pancakes combine simple ingredients like oats, banana, and protein powder for …

Read more

Categories Breakfast

Croissant Breakfast Bake Flavorful and Easy Recipe

January 4, 2026January 30, 2025 by Chef Tavio
- 4 large buttery croissants, cut into bite-sized pieces - 6 large eggs, lightly beaten - 1 cup whole milk - 1 cup sharp cheddar cheese, shredded - 1 cup mixed diced vegetables (such as vibrant bell peppers, fresh spinach, and sweet cherry tomatoes) - 1/2 cup cooked sausage, crumbled (feel free to use a plant-based alternative) The main ingredients make this dish truly delightful. Buttery croissants provide a soft and flaky base. Eggs and milk create a rich custard that binds everything together. You can choose from many vegetables. Bell peppers, spinach, and tomatoes add color and flavor. For protein, crumbled sausage gives a savory touch. You can swap it for plant-based sausage too. - 1 tablespoon Dijon mustard, for a tangy kick - Salt and freshly cracked pepper, to taste - Fresh herbs for garnish (chopped chives or parsley work beautifully) Seasonings enhance the flavors in your croissant breakfast bake. Dijon mustard adds a nice tang. Salt and pepper balance the dish perfectly. Fresh herbs like chives or parsley make a lovely garnish. They add flavor and a pop of color. Use them to make your meal visually appealing and delicious! {{ingredient_image_2}} 1. Preheat your oven to 350°F (175°C). This makes sure your bake cooks evenly. 2. Grease a 9x13 inch baking dish with butter or cooking spray. This helps prevent sticking. 3. Cut your 4 large buttery croissants into bite-sized pieces. Distribute these even in your dish. This will create a nice base. 1. In a large bowl, whisk together 6 beaten eggs and 1 cup of whole milk. Add 1 tablespoon of Dijon mustard, salt, and pepper. Mix until smooth. 2. Fold in 1/2 cup of crumbled sausage, 1 cup of mixed diced vegetables, and half of the 1 cup of shredded cheddar cheese. Make sure everything is spread out evenly. 3. Pour this egg mixture over the croissant pieces. Coat each piece well to boost flavor. 1. Let the dish sit for 10-15 minutes. This gives the croissants time to soak up the egg mix. 2. Bake in your preheated oven for 30-35 minutes. Watch for a golden brown top and set egg. 3. Once baked, take it out and let it cool for a few minutes. This helps when slicing. 4. Before serving, sprinkle fresh herbs on top to make it look and taste great. - Importance of soaking time: Let your croissant pieces soak for 10-15 minutes. This step helps them absorb the egg mixture. It gives you a richer, more flavorful bake. You want each bite to be moist and delicious. - Choosing the right vegetables and proteins: Pick fresh vegetables like bell peppers, spinach, and cherry tomatoes. They add color and taste. For protein, use crumbled sausage or a plant-based option. Both choices provide great flavor. You can also try adding cooked bacon or ham. - Overbaking or underbaking: Keep an eye on your bake while it cooks. If you bake it too long, it can dry out. If underbaked, the center may be runny. Aim for a golden top and a firm center. - Skipping the greasing step: Always grease your baking dish. It prevents the bake from sticking. Use butter or cooking spray for best results. This small step makes serving and cleaning much easier. Pro Tips Use Day-Old Croissants: For the best texture, use slightly stale croissants. They will absorb the egg mixture better, resulting in a more flavorful bake. Customize Your Veggies: Feel free to swap in your favorite vegetables or whatever you have on hand. Just ensure they are chopped into small, even pieces for even cooking. Let It Rest: Allowing the assembled dish to sit for 10-15 minutes before baking gives the croissants time to soak up the egg mixture, ensuring every bite is moist and bursting with flavor. Perfect Cheese Melting: Grate your cheese instead of using slices. Shredded cheese melts more evenly and will create a beautiful, gooey topping for your breakfast bake. {{image_4}} You can easily swap ingredients to fit your needs. Here are some ideas: - Using gluten-free croissants: If you need a gluten-free option, use gluten-free croissants. They work well and still taste great in this dish. - Plant-based sausage alternatives: For a meat-free version, try plant-based sausage. It gives a nice flavor and works perfectly in this bake. Get creative with flavors in your Croissant Breakfast Bake. Here are two great ways to add your own touch: - Adding spices or herbs: Spice it up! Add herbs like oregano or thyme for fresh flavor. You can also try spices like paprika or chili powder for a kick. - Incorporating different cheeses: Cheddar is great, but you can mix it up. Use mozzarella, goat cheese, or feta for a unique twist. Each cheese brings a different taste to the dish. To keep your Croissant Breakfast Bake fresh, use an airtight container. Glass or plastic containers work well. Store it in the fridge for up to three days. This keeps the flavors intact and stops it from drying out. If you want to freeze portions, cut the bake into squares. Wrap each piece in plastic wrap, then put them in a freezer-safe bag. It can last up to three months in the freezer. For the best results when reheating, place a piece in a microwave-safe dish. Heat it on low power for a few minutes until warm. You can also bake it in the oven at 350°F (175°C) for about 15 minutes. This way, the texture stays nice, and it gets warm all the way through. You can pair your Croissant Breakfast Bake with some fresh sides. Here are some suggestions: - Seasonal fresh fruit: Berries, melons, or citrus add a sweet touch. - Light salad: A simple green salad with a vinaigrette balances the richness of the bake. - Yogurt: A dollop of yogurt adds creaminess and tang. - Coffee or tea: These drinks complete your morning feast and add warmth. These side dishes enhance the flavors and make your breakfast feel special. Yes, you can prepare this dish in advance. Here’s how: - Prep the night before: Follow the recipe steps until you pour the egg mixture over the croissants. Cover the dish and refrigerate overnight. - Bake in the morning: In the morning, just take it out, let it sit for about 10 minutes, then bake as directed. - Storage: If you have leftovers, store them in an airtight container in the fridge. It will stay fresh for up to three days. This method saves time and makes breakfast a breeze. You can easily modify this recipe to fit dietary needs. Here are some tips: - Gluten-free: Use gluten-free croissants or bread. Check the labels to ensure they are truly gluten-free. - Dairy-free: Substitute the milk and cheese with plant-based alternatives. Almond milk or oat milk works well. - Low-carb: Skip the croissants and use low-carb bread or cauliflower rice for a lighter option. These adjustments let everyone enjoy this tasty dish. You learned how to make a delicious croissant breakfast bake with simple steps. Start with buttery croissants, eggs, milk, and your favorite veggies and proteins. Season with Dijon mustard, herbs, and cheese for extra flavor. Follow the preparation and baking instructions closely for perfect results. Remember to avoid common mistakes like overbaking. You can even customize this dish with variations to fit any diet. Enjoy this tasty meal, and share it with friends and family. Happy baking!

Are you ready to elevate your breakfast game? This Croissant Breakfast Bake recipe combines buttery croissants, eggs, and your choice of veggies and protein, creating a dish that’s both flavorful …

Read more

Categories Breakfast

Cookie Dough Overnight Oats Simple and Tasty Recipe

November 26, 2025January 30, 2025 by Chef Tavio
- 1 cup rolled oats - 1 cup almond milk (or your preferred type of milk) - 2 tablespoons almond butter (alternatively, use peanut butter) - 1 tablespoon maple syrup (or honey for sweetness) - 1 teaspoon pure vanilla extract - 1/4 teaspoon ground cinnamon - 2 tablespoons mini chocolate chips - A pinch of salt - Optional toppings: crushed nuts, extra chocolate chips, or a sprinkle of sea salt You can use different types of oats if you wish. Quick oats work too, but they may change the texture. For milk, any kind will do. Use oat milk, soy milk, or regular cow's milk based on your taste. If you don’t have almond butter, peanut butter gives a nice flavor. Maple syrup can be swapped for honey or agave syrup if you prefer. If you want a nut-free option, try sun butter instead. This recipe makes two servings. Each serving has about: - Calories: 320 - Protein: 10g - Fat: 14g - Carbohydrates: 40g - Fiber: 6g - Sugar: 8g These oats are rich in protein and fiber. They help keep you full. The chocolate chips add a fun treat while the almond butter provides healthy fats. Enjoy this tasty breakfast with a smile! {{ingredient_image_2}} 1. Gather your ingredients. You need rolled oats, almond milk, almond butter, and more. 2. In a bowl or jar, mix the rolled oats with almond milk. 3. Add the almond butter, maple syrup, vanilla extract, cinnamon, and a pinch of salt. 4. Stir everything well with a whisk or spoon. Make sure the oats are coated. 5. Gently fold in the mini chocolate chips. This adds a nice treat to your oats. 6. Transfer the mixture to an airtight container. You can also use individual jars. 7. Seal the container and put it in the fridge overnight or for at least 4 hours. 8. In the morning, stir the oats to mix any settled ingredients. 9. If the oats are too thick, add a splash of almond milk and stir. - Keep your overnight oats in an airtight container. This helps keep them fresh. - You can store them in the fridge for up to 5 days. - If you make extra, divide them into portions for quick breakfasts. - Enjoy your oats cold straight from the fridge. - If you prefer them warm, heat them in the microwave for about one minute. - Top your oats with extra chocolate chips, crushed nuts, or a sprinkle of sea salt. - Get creative with toppings! Consider adding fruits like banana or berries for more flavor. To get the best texture, use rolled oats. They soak up the almond milk well. Avoid instant oats; they become mushy. The key is to mix your oats evenly with the liquid and let them sit overnight. This makes the oats creamy and soft. If they feel too thick in the morning, add a splash of milk and stir. Prep your oats the night before. It only takes about 10 minutes. You can make several jars at once. Store each jar in the fridge. Grab one on busy mornings. You can also mix the oats in a large bowl. Then, portion them into jars. This way, you save time and have quick breakfasts ready. To boost flavor, add extras like cinnamon or vanilla. These make your oats taste richer. Use good quality maple syrup or honey for sweetness. If you love chocolate, add more mini chocolate chips. For a crunchy twist, sprinkle crushed nuts on top. A pinch of sea salt can also highlight the sweetness. Pro Tips Perfect Oats Ratio: Ensure a 1:1 ratio of oats to liquid for the ideal consistency. Adjust the liquid if you prefer creamier oats. Mixing Technique: Whisking the ingredients together helps to prevent clumping, ensuring that every bite is deliciously uniform. Flavor Variations: Experiment with different nut butters or add-ins like dried fruits or seeds to customize your overnight oats to your taste. Meal Prep Efficiency: Make a larger batch and store them in individual jars for a week’s worth of quick breakfasts! {{image_4}} You can easily adjust this recipe to fit your needs. To make it vegan, swap almond milk for oat milk. Use maple syrup instead of honey for sweetening. For a gluten-free option, ensure your oats are certified gluten-free. Each change keeps the taste delightful and fun. Adding flavors can boost your oats. Try mixing in fresh fruits like sliced bananas or berries. You can also add nut butters for extra creaminess and taste. Peanut butter or cashew butter works well too. Each option adds a new twist to the recipe. Toppings take your oats to the next level. You can sprinkle crushed nuts for crunch. Try adding extra chocolate chips for a sweeter bite. A light sprinkle of sea salt enhances the flavor even more. These toppings make each serving unique and enjoyable. You can store cookie dough overnight oats in the fridge for up to five days. This makes them great for meal prep. Just keep them in a sealed container. The oats will stay fresh and tasty. Use airtight containers for the best results. Mason jars or glass containers work well. They keep the oats moist and flavorful. You can also use plastic containers if they seal tightly. Choose the size based on your needs. Single servings are perfect for quick breakfasts. To reheat your oats, remove the lid and microwave for about one minute. Stir well after heating. If the oats seem too thick, add a splash of almond milk. This will bring back the creamy texture. Enjoy them warm or cold; both ways are delicious! Yes, you can use instant oats. Instant oats cook faster. They may make your overnight oats mushy. Rolled oats have a nice chewy texture. I prefer rolled oats for a heartier bite. Yes, it is necessary to refrigerate them. Refrigeration helps the oats absorb the milk. This makes them soft and creamy. Without chilling, they will not have the right texture. To thicken overnight oats, add less milk. You can also mix in more oats. Another option is to add some chia seeds. Chia seeds soak up liquid and expand. This gives your oats a nice thickness. Overnight oats are quick and easy. They save time for busy mornings. They are also healthy and filling. Oats provide fiber and keep you full longer. You can customize them with your favorite flavors and toppings. In this guide, we covered all aspects of making overnight oats. You learned about ingredients, how to prepare and store them, and tips for the best taste and texture. We explored variations to meet dietary needs and answered common questions about overnight oats. Start your new breakfast today. Enjoy the ease and nutrition of overnight oats!

Do you love cookie dough? How about a healthy twist for breakfast? My Cookie Dough Overnight Oats are quick to make and taste amazing. With simple ingredients, you’ll have a …

Read more

Categories Breakfast

TikTok Feta Tomato Pasta Simple and Flavorful Delight

November 11, 2025January 30, 2025 by Chef Tavio
- 8 oz (225g) penne pasta - 1 pint cherry tomatoes, halved - 7 oz (200g) block of feta cheese - 1/4 cup olive oil, divided - 4 cloves garlic, minced - 1 teaspoon red pepper flakes - Salt and freshly cracked black pepper - Fresh basil leaves, for garnish - Zest and juice of 1 lemon When making TikTok Feta Tomato Pasta, you want fresh and quality ingredients. Start with penne pasta. This shape holds the sauce well. Next, use cherry tomatoes; their sweetness shines when roasted. The feta cheese is the star here; it melts beautifully and adds creaminess. Don’t skimp on olive oil. It brings richness and helps the flavors meld. Garlic is key for depth; minced garlic infuses the dish with its aroma. Adjust the red pepper flakes to your taste for heat. Always use salt and black pepper to season well. For garnish, I love fresh basil leaves. They add a pop of color and flavor. Finally, the lemon gives a refreshing zest and brightness. This combination makes the dish vibrant and full of life, perfect for any meal. {{ingredient_image_2}} - Preheat oven to 400°F (200°C). - In a large baking dish, combine: - 1 pint cherry tomatoes, halved - 4 cloves garlic, minced - 1/4 cup olive oil, divided (3 tablespoons to start) - 1 teaspoon red pepper flakes - Salt and freshly cracked black pepper to taste Mix these well. Make sure all the tomatoes get coated. - Create a well in the center of the tomato mixture. - Place 7 oz (200g) block of feta cheese into the well. - Drizzle the last tablespoon of olive oil over the feta. - Season it with a pinch of salt and pepper. Bake this in the oven for 25-30 minutes. The tomatoes should blister and the feta should turn golden. - While the feta and tomatoes bake, cook 8 oz (225g) penne pasta until al dente. - Reserve 1/2 cup of the starchy pasta water before draining. - Once baked, take the dish out of the oven. - Use a fork to mash the feta and tomatoes into a creamy sauce. Add the drained pasta to the dish. Toss everything together. Gradually mix in the reserved pasta water until the sauce is just right. - Squeeze juice from 1 lemon over the pasta. - Add the zest of that lemon. - Fold in torn fresh basil leaves for a fragrant finish. To get the best sauce, you need to reserve pasta water. This starchy water helps the sauce stick to the pasta. It also makes the sauce creamy and smooth. Start with half a cup and add more if needed. Mix it in slowly. The heat from the pasta helps blend everything together. You can add more flavor with simple ingredients. Try adding minced garlic, fresh herbs, or spices. I love using fresh basil, but you can also use parsley or oregano. Drizzle a little olive oil on top after serving. This adds richness and a nice finish. Don't forget to season with salt and pepper. A squeeze of lemon juice brightens the whole dish. For a beautiful dish, serve the pasta in bowls. Top it with extra basil leaves and a sprinkle of cracked pepper. A drizzle of high-quality olive oil makes it even better. Consider pairing this dish with a side salad or garlic bread. These sides complement the pasta and round out your meal. Pro Tips Quality Ingredients: Use the freshest cherry tomatoes and high-quality feta cheese for the best flavor and texture in your pasta dish. Adjusting Spice Level: Feel free to modify the amount of red pepper flakes based on your spice preference; start with less if you're unsure! Pasta Cooking Tips: Make sure to reserve the pasta water before draining; it helps in achieving a creamy sauce consistency when combined with the baked feta and tomatoes. Serving Suggestion: For an extra touch, drizzle a bit of high-quality olive oil over the finished dish before serving to enhance the overall flavors. {{image_4}} You can easily make this dish vegetarian. Just swap feta cheese for vegan cheese. This change keeps it creamy and tasty. You can also add more veggies. Spinach works great, adding color and nutrients. Bell peppers are another good choice for crunch and sweetness. For gluten-free pasta, use options like brown rice or chickpea pasta. These keep the dish hearty and filling. Cook gluten-free pasta according to the package. It may need different timing, so check often. Want more heat? Adjust the red pepper flakes. Start with a little, then taste. You can always add more. Other spices like smoked paprika or Italian seasoning also boost flavor. Just sprinkle them in while mixing. After you enjoy TikTok Feta Tomato Pasta, store any leftovers right away. Place them in an airtight container. This keeps the pasta fresh and tasty. Store it in the fridge for up to three days. If you wait longer, the pasta may not taste as good. When reheating, keep the pasta creamy. You can do this by adding a splash of water or olive oil. Stir it well to mix in the moisture. For microwaving, heat in short bursts. Check often to avoid overcooking. On the stovetop, warm it over low heat. Stir gently until it is hot throughout. You can freeze TikTok Feta Tomato Pasta, but it’s best to do so before adding fresh basil or lemon. Cool it completely first. Then, place it in a freezer-safe container. Be sure to label it with the date. It will stay fresh for about two months. To thaw, move it to the fridge overnight. Reheat on the stovetop or microwave, adding a bit of water to keep it creamy. You can use a stovetop to make this dish. Start by cooking your penne pasta in a large pot. In a separate pan, heat olive oil over medium heat. Add minced garlic and cherry tomatoes, cooking until the tomatoes are soft. Then, add the feta cheese and let it melt slightly. Mash the tomatoes and feta together to form a sauce. Finally, toss in the cooked pasta and mix well. This method gives you a creamy pasta dish without the oven. Yes, you can use dried herbs if fresh ones are not available. Dried herbs are more concentrated in flavor. A general rule is to use one-third of the amount of dried herbs compared to fresh. For example, if the recipe calls for one tablespoon of fresh basil, use one teaspoon of dried basil. Keep in mind that dried herbs may not have the same bright taste as fresh. Adjust according to your preference. This dish gained fame on TikTok in 2021. It became popular after a user shared a simple recipe showing how to bake feta cheese and tomatoes together. The video went viral, capturing many home cooks’ interest. The creamy and flavorful dish appeals to people of all ages. Its ease of preparation made it a go-to recipe for quick meals. Yes, you can prepare this dish ahead of time. Cook the pasta and the tomato-feta mixture separately, then combine them just before serving. Store the components in airtight containers in the fridge. This way, the flavors stay fresh and vibrant. When ready to serve, reheat the pasta and mix in the tomato-feta sauce. Enjoy a quick and tasty meal any day of the week! This blog post covered a fun and tasty dish: TikTok Feta Tomato Pasta. We looked at essential ingredients like penne, cherry tomatoes, and feta cheese. I shared easy steps so you can make it at home. Plus, I offered tips for a creamy sauce and ways to customize the dish. Remember, you can make this recipe vegetarian or gluten-free to fit your needs. Now, you have the tools to impress anyone at your table with this delightful meal. Enjoy every bite!

If you’re looking for a quick and delicious meal, you’ve found it! TikTok Feta Tomato Pasta is a simple dish that packs a flavor punch. With just a few fresh …

Read more

Categories Dinner

Cinnamon Roll Sugar Cookies Irresistible Treats to Bake

December 24, 2025January 30, 2025 by Chef Tavio
To bake these cinnamon roll sugar cookies, you need the following: - 2 ½ cups all-purpose flour - 1 teaspoon baking powder - ½ teaspoon baking soda - ½ teaspoon salt - 1 tablespoon ground cinnamon - 1 cup unsalted butter, softened - 1 cup granulated sugar - 1 large egg, at room temperature - 2 teaspoons pure vanilla extract - ½ cup packed light brown sugar - 1 tablespoon milk (for cookie dough) - 1 cup powdered sugar (for icing) - 2-3 tablespoons milk (for icing consistency) - Extra ground cinnamon for sprinkling You will also need basic baking staples to make this recipe a success. Make sure you have: - Mixing bowls - Electric mixer - Whisk - Baking sheet - Parchment paper - Wire rack These tools help ensure the cookies turn out perfectly every time. If you want to get creative with your cookies, consider these options: - Add a pinch of nutmeg for a warm flavor. - Use brown sugar instead of granulated sugar for a richer taste. - Drizzle chocolate over the icing for a sweet twist. - Swap out the vanilla extract for almond extract for a unique flavor. These swaps and garnishes can make your cinnamon roll sugar cookies even more fun! {{ingredient_image_2}} Start by making your kitchen ready. First, gather all your ingredients. You will need: - 2 ½ cups all-purpose flour - 1 teaspoon baking powder - ½ teaspoon baking soda - ½ teaspoon salt - 1 tablespoon ground cinnamon - 1 cup unsalted butter, softened - 1 cup granulated sugar - 1 large egg - 2 teaspoons pure vanilla extract - ½ cup packed light brown sugar - 1 tablespoon milk (for cookie dough) - 1 cup powdered sugar (for icing) - 2-3 tablespoons milk (for icing consistency) - Extra ground cinnamon for sprinkling Next, preheat your oven to 350°F (175°C). Line a baking sheet with parchment paper. This step prevents sticking and makes cleanup easy. In a medium bowl, whisk together the flour, baking powder, baking soda, salt, and ground cinnamon. Mix until well combined. Set this aside. In a large bowl, use an electric mixer to cream the softened butter and granulated sugar. Mix on medium speed for about 3-4 minutes. You want it light and fluffy. This shows you have added air to the mix. Beat in the egg and vanilla extract until smooth. Scrape down the bowl's sides to mix well. Gradually add your dry ingredients. Stir gently until just combined. Be careful not to overmix; this helps keep cookies soft. In a small bowl, combine the brown sugar and an extra teaspoon of cinnamon. This mixture will create a sweet swirl in your cookies. Take tablespoons of dough and form them into balls. Slightly flatten each ball in your palm. Roll the edges in the cinnamon-sugar mix to coat. Place the cookies on your lined baking sheet. Keep some space between each cookie. They will spread while baking. Bake them for 10-12 minutes. Look for edges that turn light golden brown. Remove the cookies from the oven. Let them rest on the baking sheet for 5 minutes. This helps them firm up a bit. Afterward, transfer the cookies to a wire rack to cool completely. In a small bowl, mix the powdered sugar with 2-3 tablespoons of milk. Stir until you have a smooth icing. Adjust the consistency by adding more milk for a thinner glaze, or more powdered sugar for a thicker icing. Drizzle or pipe the icing over cooled cookies. Finish with a light sprinkle of cinnamon for a lovely touch. For the best texture, use room temperature ingredients. Your butter and egg should be soft. This helps mix them well, creating a light, fluffy dough. Avoid overmixing when you add the flour. Stir just until you blend everything together. This keeps your cookies soft and chewy. A few common mistakes can ruin your cookies. First, don't skip the chilling step if needed. Chilling dough helps cookies keep their shape. Second, measure your flour correctly. Too much flour makes cookies dry. Use a spoon to scoop flour into the cup, then level it off. Lastly, avoid opening the oven too often. This lets heat escape and can lead to uneven baking. Getting the icing right is key. Start with 2-3 tablespoons of milk mixed with powdered sugar. Stir until smooth. If it's too thick, add more milk a little at a time. If it’s too thin, add more powdered sugar. Aim for a pourable consistency that holds shape. Drizzle it over cookies for a lovely finish. Don't forget to sprinkle a bit of cinnamon on top! Pro Tips Chill the Dough: For thicker cookies, chill the dough for at least 30 minutes before baking. This will help them maintain their shape and prevent excessive spreading. Perfectly Fluffy Cookies: Ensure your butter is softened but not melted. This is key for achieving a light and fluffy texture in your cookies. Spice It Up: Experiment with additional spices like nutmeg or ginger for a unique twist on the classic cinnamon flavor. Store for Freshness: Keep your cookies in an airtight container at room temperature to maintain their softness and flavor for up to a week. {{image_4}} You can make these cookies even better by adding chocolate chips or nuts. I love using semi-sweet chocolate chips. They melt perfectly and add a rich flavor. If you prefer nuts, chopped walnuts or pecans work great too. Just mix in about 1 cup of your choice into the dough before shaping the cookies. This small change brings new texture and taste. If you need a gluten-free option, swap all-purpose flour with a gluten-free blend. Look for one that measures cup-for-cup. This ensures your cookies taste just as good. Be sure to check the labels for hidden gluten in other ingredients, especially the baking powder. With this swap, everyone can enjoy these tasty treats! Seasonal flavors can make these cookies fun and festive. For fall, try adding pumpkin spice to the dough. Mix in about 1 tablespoon along with the cinnamon. You can also add a little pumpkin puree for moisture. During the holidays, consider using peppermint extract instead of vanilla. This gives a fresh twist that pairs well with the cinnamon! To keep cookies fresh, store them in an airtight container. This helps to retain moisture and prevent them from drying out. Place parchment paper between layers of cookies to avoid sticking. If you have a lot of cookies, consider using a cookie tin. It gives a vintage touch and keeps them safe. You can freeze these cookies to enjoy later. First, let the cookies cool completely. Then, place them in a single layer on a baking sheet. Freeze them for about an hour. Once frozen, transfer them to a freezer-safe bag. Label the bag with the date. You can freeze them for up to three months. When ready to eat, simply thaw them at room temperature. Reheating cookies can bring back their fresh-baked taste. Preheat your oven to 350°F (175°C). Place the cookies on a baking sheet. Heat them for about 5 minutes. This warms them up without making them hard. For a soft treat, you can heat them in the microwave for 10-15 seconds. Enjoy the warmth and aroma of your cinnamon roll sugar cookies! Yes, you can make the dough ahead of time. After mixing, wrap it tightly in plastic wrap. You can keep it in the fridge for up to 3 days. This way, you can enjoy fresh cookies whenever you want. Just remember to let the dough sit at room temperature for about 15 minutes before baking. You will know the cookies are done when the edges turn light golden brown. The centers may look a bit soft, but they will firm up as they cool. Bake them for about 10-12 minutes. Keep an eye on them, as ovens can vary. If you need a substitute for unsalted butter, use the same amount of margarine or coconut oil. Both will work well. If you want a richer flavor, try using unsweetened applesauce in a 1:1 ratio. Just remember that this may change the texture slightly. You've learned about the key ingredients and how to bake amazing cookies. We covered necessary items, prep steps, and the baking process. I shared tips for the best texture and common mistakes to avoid. We explored fun variations and how to store your cookies right. Remember, with a little practice, you can make cookies everyone will love. Enjoy the process and get ready for some tasty results. Happy baking!

If you love sweet, gooey treats, get ready for a real delight! Cinnamon Roll Sugar Cookies combine soft, fluffy dough with the warm flavors of cinnamon and sugar. In this …

Read more

Categories Desserts

Apple Snickerdoodle Bars Irresistible Dessert Treat

November 11, 2025January 30, 2025 by Chef Tavio
- 1 cup unsalted butter, softened to room temperature - 1 cup granulated sugar - 1 cup packed light brown sugar - 2 large eggs - 2 teaspoons pure vanilla extract - 3 cups all-purpose flour - 1 tablespoon cream of tartar - 1 teaspoon baking soda - ½ teaspoon fine sea salt - 1 teaspoon ground cinnamon - ½ teaspoon ground nutmeg - ¾ cup white chocolate chips (optional) - ¼ cup cinnamon sugar (to top) The butter gives these bars a rich and creamy taste. It helps create a soft texture. Both sugars add sweetness. Brown sugar brings a hint of caramel flavor. The eggs help bind everything together and add moisture. Flour is the base of the bars. Cream of tartar adds a slight tang and keeps the bars soft. Baking soda helps them rise. Sea salt balances the sweetness. Cinnamon and nutmeg give a warm, cozy flavor. Finally, white chocolate chips add extra sweetness. They melt beautifully and make every bite delightful. If you want to change things up, here are some ideas: - Use coconut oil instead of butter for a dairy-free option. - Swap granulated sugar with coconut sugar for a lower-glycemic option. - Try almond flour instead of all-purpose flour for a gluten-free twist. - Use applesauce instead of eggs for a vegan option. - Dark chocolate chips can replace white chocolate for a richer taste. These swaps can give your Apple Snickerdoodle Bars a new twist while keeping them delicious! {{ingredient_image_2}} 1. Preheat your oven to 350°F (175°C). Grease a 9x13 inch baking dish with butter or use parchment paper. 2. In a large bowl, cream together 1 cup of softened butter, 1 cup of granulated sugar, and 1 cup of brown sugar. Mix until light and fluffy, about 3-4 minutes. 3. Add 2 large eggs one at a time, mixing well after each. Then, mix in 2 teaspoons of pure vanilla extract. 4. In another bowl, whisk together 3 cups of all-purpose flour, 1 tablespoon of cream of tartar, 1 teaspoon of baking soda, ½ teaspoon of fine sea salt, 1 teaspoon of ground cinnamon, and ½ teaspoon of ground nutmeg. 5. Gradually add the dry mix to the wet mix. Stir gently until no flour streaks remain. If using, fold in ¾ cup of white chocolate chips. 6. Pour the thick batter into the prepared dish. Use a spatula to spread it evenly. 7. Sprinkle ¼ cup of cinnamon sugar over the batter. This gives a sweet crust. 8. Bake in the oven for 25-30 minutes. The edges should be golden brown, and a toothpick in the center should come out clean. 9. Let the bars cool in the pan for about 15 minutes. If you used parchment paper, lift them out and place on a wire rack. 10. Once fully cooled, slice the bars into squares. Serve on a rustic platter with a sprinkle of cinnamon sugar and sliced apples for a lovely touch. To get the best apple snickerdoodle bars, start with room-temperature butter. This helps the butter mix well with sugars. Cream them together until fluffy, about 3-4 minutes. This step adds air, making your bars light and soft. Use a 9x13 inch pan for the perfect shape. Grease it well or line it with parchment paper. This makes it easy to lift the bars out later. To achieve the best texture, avoid over-mixing your batter. Mix it just until you don’t see any flour. This keeps the bars soft and chewy. For extra sweetness, fold in white chocolate chips. They melt nicely and add a creamy touch. Finally, sprinkle the cinnamon sugar evenly on top. This gives a sweet crust that adds to the texture. One common mistake is not checking the oven temperature. Always preheat your oven to 350°F (175°C). If your oven runs hot, your bars may bake too fast. Another mistake is cutting the bars too soon. Let them cool in the pan for 15 minutes. This helps them set properly. Avoid using cold eggs straight from the fridge. Room-temperature eggs blend better and help the batter mix evenly. Pro Tips Use Fresh Apples: For the best flavor and texture, use fresh, crisp apples like Granny Smith or Honeycrisp. They add a delightful tartness that pairs perfectly with the sweetness of the bars. Don't Overmix: When combining the wet and dry ingredients, mix just until no flour streaks remain. Overmixing can lead to dense bars instead of the light and fluffy texture you want. Check for Doneness: Ovens can vary in temperature, so start checking your bars at the 25-minute mark. They should be golden brown around the edges and a toothpick inserted in the center should come out clean. Let Them Cool: Allow the bars to cool completely before cutting. This helps them set and makes slicing easier, ensuring you get perfect squares without crumbling. {{image_4}} You can change up the flavors of your apple snickerdoodle bars easily. Here are some fun mix-ins: - Chopped Nuts: Walnuts or pecans add a nice crunch. - Dried Fruit: Raisins or cranberries give a sweet, chewy texture. - Caramel Swirls: Drizzle caramel sauce into the batter for a gooey treat. - Coconut Flakes: Add unsweetened coconut for a tropical twist. If you want to make these bars gluten-free, swap the all-purpose flour with gluten-free flour. Brands like Bob's Red Mill work well. For a vegan option, replace the butter with coconut oil and the eggs with flax eggs. To make a flax egg, mix one tablespoon of flaxseed meal with three tablespoons of water. Let it sit for a few minutes to thicken. Serving these bars can be just as fun as making them! Here are some ideas: - Warm with Ice Cream: Serve warm with a scoop of vanilla ice cream. - Drizzle with Chocolate: Melt dark chocolate and drizzle over the top. - Garnish with Fresh Apples: Add thin apple slices on the side for a fresh touch. - Use Whipped Cream: Top with whipped cream and a sprinkle of cinnamon for extra flair. To store leftover apple snickerdoodle bars, first, let them cool completely. Once cooled, cut the bars into squares. Place them in an airtight container. You can keep them at room temperature for up to three days. If you want to keep them fresh longer, store them in the fridge. They will last about a week in the fridge. If you want to freeze the bars, wrap them tightly in plastic wrap. Then place them in a freezer-safe bag or container. They can stay frozen for up to three months. To enjoy, just take out a bar and let it thaw at room temperature. To reheat your apple snickerdoodle bars, preheat your oven to 350°F (175°C). Place the bars on a baking sheet. Heat them for about 10 minutes. This warms them up and makes them soft again. You can also use the microwave for a quick heat-up. Just warm for about 15-20 seconds. Enjoy your warm, gooey treat! You can tell the bars are done when the edges turn golden brown. Insert a toothpick in the center. If it comes out clean, your bars are ready! The baking time is about 25-30 minutes. Keep an eye on them to avoid overbaking. Let them cool for about 15 minutes in the pan before lifting them out. Yes, you can switch out the white chocolate chips for other types. Dark chocolate or milk chocolate will work well too. Each type of chocolate adds a unique flavor. Feel free to mix and match to find your favorite combination. You can even add nuts or dried fruit for extra crunch. These bars are great on their own, but pairing them with ice cream is a treat! Vanilla or caramel flavors complement the apple and cinnamon well. You can also serve them with a drizzle of caramel sauce. For a fresh touch, add some thinly sliced apples on the side. Enjoy the mix of warm flavors! This blog post covered key ingredients, step-by-step baking, and helpful tips. I highlighted ingredient swaps and variations to try. Proper storage ensures your bars stay fresh. Remember, avoiding common mistakes is crucial for great results. With the right care, you can enjoy these treats longer. So, gather your ingredients and start baking. Your next delicious adventure awaits!

If you’re craving a sweet treat that combines apples and snickerdoodles, you’re in for a delight! Apple Snickerdoodle Bars bring together warm spices and fruity goodness in every bite. Easy …

Read more

Categories Desserts

No-Bake Carrot Cake Energy Bites Simple Snack Treat

January 1, 2026January 26, 2025 by Chef Tavio
- 1 cup rolled oats - 1/2 cup almond flour - 1 cup finely grated carrots (about 2 medium carrots) - 1/2 cup unsweetened shredded coconut - 1/2 cup almond butter (or any nut butter) - 1/4 cup pure maple syrup (or honey) - 1 teaspoon vanilla extract - 1 teaspoon ground cinnamon - 1/4 teaspoon nutmeg - Pinch of salt - 1/4 cup chopped walnuts (optional) - 1/4 cup raisins (optional) You can customize these energy bites. Chopped walnuts add crunch. Raisins give natural sweetness. You can also use dried cranberries or chocolate chips for fun flavors. Try a bit of ground ginger for a spicy kick. If you like more protein, add a scoop of your favorite protein powder. Each energy bite packs a punch of nutrients. They are rich in fiber from oats and carrots. Almond butter offers healthy fats and protein. Carrots provide vitamins and minerals. The maple syrup adds a touch of sweetness without refined sugar. With a mix of wholesome ingredients, these bites are a great snack option. Enjoy them after a workout or as a midday treat! {{ingredient_image_2}} Start by gathering your dry ingredients. You will need: - 1 cup rolled oats - 1/2 cup almond flour - 1 cup finely grated carrots (about 2 medium carrots) - 1/2 cup unsweetened shredded coconut In a large mixing bowl, add the rolled oats, almond flour, grated carrots, and shredded coconut. Use a spoon to mix these ingredients well. Make sure they are evenly blended. This step lays the base for our tasty energy bites. Now, let’s mix our wet ingredients. You will need: - 1/2 cup almond butter (or any nut butter of your choice) - 1/4 cup pure maple syrup (or honey for sweetness) - 1 teaspoon vanilla extract - 1 teaspoon ground cinnamon - 1/4 teaspoon nutmeg - Pinch of salt In a separate bowl, add the almond butter, maple syrup, vanilla extract, ground cinnamon, nutmeg, and a pinch of salt. Stir these together until the mixture is smooth. You want it creamy with no lumps. This mix brings flavor and sweetness to the bites. Next, we combine the dry and wet mixtures. 1. Pour the wet mix into the dry mix. Stir gently until everything is well combined. 2. Add chopped walnuts and raisins if you want extra crunch and sweetness. Fold them in carefully. Now comes the fun part! Take small portions of the mixture and roll them into balls. Aim for about 1 inch in size. Use your hands to shape them. This is a great task for kids, too! After rolling, place the energy bites on a baking sheet lined with parchment paper. Make sure they have space between them. Pop the baking sheet into the refrigerator and chill for at least 30 minutes. This step firms them up and makes them easy to eat. Once chilled, transfer the bites to an airtight container. Store them in the fridge for up to a week. Enjoy this easy, healthy snack anytime! Mix the dry ingredients well first. This helps spread flavors evenly. Use a large bowl to avoid spills. For the wet mix, make sure the almond butter is soft. If it’s too hard, warm it slightly. This helps with blending. To get a chewy texture, use rolled oats and almond flour. These ingredients add a nice bite. The grated carrots give moisture. If the mix feels too dry, add a bit more almond butter or maple syrup. You want a sticky but moldable texture. For a lovely display, use a nice plate. Arrange the energy bites in a circle or a fun pattern. Sprinkle some shredded coconut or chopped walnuts around them. This adds flair and makes them look tasty. Pair with herbal tea for a great snack! Pro Tips Use Fresh Carrots: For the best flavor and sweetness, opt for fresh, organic carrots. They should be crisp and vibrant in color. Chill Time Matters: Allowing the energy bites to chill for at least 30 minutes helps them firm up and makes them easier to handle. Customize Your Mix-ins: Feel free to experiment with different nuts, seeds, or dried fruits for unique flavor combinations! Portion Control: Use a small cookie scoop to ensure uniform size for your energy bites, making them perfect for grab-and-go snacks. {{image_4}} You can change the nut butter for flavor. Almond butter works great, but peanut butter offers a classic taste. Cashew butter adds creaminess, and sunflower seed butter is perfect for nut-free diets. Each nut butter gives a unique twist! Want to spice things up? You can add mix-ins like chocolate chips or dried fruit. Chopped dates or apricots boost sweetness. For crunch, try pumpkin seeds or sunflower seeds. These add-ins will make your bites even more fun! These energy bites can fit many diets. To make them gluten-free, ensure your oats are certified gluten-free. For a vegan option, use maple syrup instead of honey. You can also swap almond butter for any nut or seed butter to match your needs. Enjoy these bites guilt-free! Store your energy bites in an airtight container. This keeps them fresh. I like to use glass jars or plastic containers. Make sure the lid is tight. You can keep them in the fridge or freezer. In the fridge, these energy bites last about a week. They taste best within the first few days. If you want to keep them longer, consider freezing them. Always check for freshness before eating. You can freeze energy bites for up to three months. To freeze, place them in a single layer on a baking sheet. After they freeze solid, transfer them to a freezer bag. Label the bag with the date. When you want one, just take it out and let it thaw. Enjoy a tasty snack anytime! Yes, you can easily make these energy bites vegan. Just swap almond butter with a plant-based nut butter, like peanut or sunflower seed butter. Use pure maple syrup instead of honey for sweetness. This will keep your energy bites vegan and delicious. Substituting ingredients is simple. If you want a different nut butter, use cashew or sunflower seed butter. You can replace almond flour with oat flour or ground almonds. For sweetness, try agave syrup instead of maple syrup. Feel free to mix and match based on your taste. If you don’t have almond flour, don’t worry! You can use oat flour or grind rolled oats into a fine powder. This helps maintain the texture and keeps the recipe intact. Just ensure it is finely ground for the best results. Yes, adding protein powder is a great idea! You can mix in a scoop of your favorite protein powder when combining the dry ingredients. This boosts the protein content and makes these energy bites an even better snack for energy and recovery. These energy bites are simple and fun to make. We explored the key ingredients and shared step-by-step instructions that anyone can follow. I provided tips to achieve the best texture and neat presentation. You learned about variations to suit different diets and storage options to keep them fresh. I hope you feel inspired to try this recipe. By making your energy bites at home, you control the flavors and ingredients. Enjoy your tasty snack, knowing it is healthy and easy!

Looking for a quick snack that’s both tasty and healthy? These No-Bake Carrot Cake Energy Bites are just what you need! Packed with wholesome ingredients, they’re easy to make and …

Read more

Categories Desserts

One Pan Balsamic Chicken Breasts Juicy and Simple Meal

November 30, 2025January 26, 2025 by Chef Tavio
To make One Pan Balsamic Chicken, you need these items: - 4 boneless, skinless chicken breasts - 1/2 cup balsamic vinegar - 1/4 cup honey - 2 tablespoons olive oil - 3 garlic cloves, minced - 1 teaspoon dried Italian herbs - Salt and freshly ground black pepper to taste - 1 cup cherry tomatoes, halved - 2 cups fresh spinach - Fresh basil leaves for garnishing You can swap some ingredients if needed. Use apple cider vinegar instead of balsamic for a different taste. Maple syrup can replace honey for a vegan option. If you don’t have fresh garlic, use 1/2 teaspoon of garlic powder. You can also use any fresh greens instead of spinach, like kale or arugula. When picking chicken, look for bright pink meat with no dark spots. The skin should look smooth and shiny. For tomatoes, choose ones that feel firm and have a sweet aroma. Fresh spinach should be vibrant green and crisp, not wilted. Always check the expiration dates on any packaged items too. {{ingredient_image_2}} First, set your oven to 400°F (200°C). This helps the chicken cook evenly. In a bowl, mix together: - 1/2 cup balsamic vinegar - 1/4 cup honey - 2 tablespoons olive oil - 3 minced garlic cloves - 1 teaspoon dried Italian herbs - Salt and pepper to taste Whisk these ingredients well. This marinade gives the chicken great flavor. Next, take a large baking dish or oven-safe skillet. Place the chicken breasts inside. Pour the marinade over them. Make sure each piece is well coated. Then, add: - 1 cup halved cherry tomatoes Spread these around the chicken. Their juices will mix with the marinade as they cook. Now, put the dish in the oven. Bake for 20 minutes. This lets the chicken soak up the flavors. After 20 minutes, take it out. Add: - 2 cups fresh spinach Place the spinach around the chicken. This will wilt nicely. Drizzle some pan juices over the chicken. Now put the dish back in the oven for another 10-15 minutes. Check that the chicken reaches 165°F (75°C). When done, let it rest for a few minutes. This helps keep the chicken juicy. Before serving, add some fresh basil leaves on top for a lovely finish. To get the best flavor from your balsamic chicken, follow these steps: - Marinate the chicken: Let the chicken sit in the marinade for at least 30 minutes. This adds deep flavor. - Use fresh herbs: Fresh basil enhances the taste. Add it just before serving. - Balance the sweet and sour: The honey and balsamic vinegar need to balance. Adjust to your taste. These tips help you create a dish that bursts with flavor. Juicy chicken makes your meal enjoyable. Here’s how to keep it moist: - Don’t overcook: Bake the chicken until it reaches 165°F. Use a meat thermometer for accuracy. - Rest the chicken: Let it sit for a few minutes after baking. This allows the juices to settle. - Baste during baking: Spoon the pan juices over the chicken halfway through cooking. This keeps it moist. These tricks ensure every bite is tender and juicy. Sometimes things don’t go as planned. Here are solutions: - Chicken is dry: You may have cooked it too long. Use a thermometer next time. - Flavor is weak: Ensure you marinate well. Adding more salt can also help. - Vegetables are soggy: Don’t overbake them. Add them later in the cooking process. These tips help you avoid common mistakes and enjoy a great meal. Pro Tips Marinade Time: For even more flavor, let the chicken marinate in the balsamic mixture for 30 minutes to 2 hours before baking. This will enhance the taste and tenderness. Fresh Ingredients: Using fresh garlic and herbs instead of dried can elevate the dish's flavor profile significantly. Fresh basil especially adds a fragrant note. Cooking Thermometer: Use a meat thermometer to check the chicken's internal temperature. It should reach 165°F (75°C) to ensure it's cooked through and safe to eat. Leftover Possibilities: This dish makes for great leftovers! Use the leftover chicken and veggies in salads or sandwiches for a quick meal. {{image_4}} You can change this dish by adding different veggies. Try bell peppers for crunch. Zucchini slices add a lovely texture. Carrots bring a touch of sweetness. Fresh herbs like rosemary or parsley can boost flavor too. Just chop them and toss them in with the chicken. Each choice adds a new twist to the dish. If you want a smoky taste, try grilling the chicken. Marinate the chicken as usual. Preheat the grill to medium heat. Grill each breast for about 6-7 minutes on each side. You can also sauté the chicken in a skillet. Use olive oil over medium heat. Cook for about 5-6 minutes on each side until golden brown. Both methods give you juicy chicken with a crispy outside. To spice things up, add red pepper flakes or hot sauce to the marinade. This gives the dish a nice kick. For a fresh twist, try adding orange or lemon juice. Replace part of the balsamic vinegar with citrus juice. You can also add zest from these fruits for extra flavor. These small changes can make a big difference in taste. To keep your One Pan Balsamic Chicken fresh, store it in an airtight container. Make sure it’s cool before sealing. This helps lock in flavor and moisture. Place the container in the fridge. Your leftovers will last for about 3 to 4 days. If you have extra sauce, store it separately for better taste. When ready to enjoy your leftovers, reheating is key. Heat the chicken in the oven at 350°F (175°C) for about 15 minutes. This keeps the chicken juicy. You can also microwave it for 1-2 minutes. Add a splash of water or broth to keep it moist. Cover it with a damp paper towel in the microwave to prevent drying out. Freezing is a smart way to save this dish for later. Place cooled chicken and sauce in a freezer-safe container. It will freeze well for up to 3 months. When you are ready to eat, thaw it overnight in the fridge. Reheat it gently in the oven or microwave. This way, you can enjoy this tasty meal anytime! Bake chicken breasts at 400°F for about 20 minutes. After this, add spinach and bake for 10-15 more minutes. This helps the chicken become juicy and tender. Always check the inside temperature. It should reach 165°F to ensure it's safe to eat. Yes, you can use bone-in chicken breasts. They will take longer to cook. I suggest baking them for about 30-35 minutes before adding spinach. This extra time helps the meat stay moist and flavorful. Balsamic chicken pairs well with many sides. Here are a few ideas: - Rice or quinoa for a filling base - Roasted vegetables for extra color and flavor - A fresh green salad for a light touch - Garlic bread for a cozy addition These sides will enhance your meal and make it more balanced. Enjoy! This post covers everything you need for balsamic chicken. We looked at key ingredients, cooking steps, and how to store leftovers. Sharing tips for flavor and texture is vital. I hope you feel confident trying variations like grilling or adding herbs. Remember, using fresh ingredients makes a big difference. Enjoy your meal, and don’t forget to pair it with great sides. With these tips, you can cook perfect balsamic chicken every time. Happy cooking!

Looking for a quick and tasty meal? My One Pan Balsamic Chicken Breasts are just what you need! This simple recipe lets you create juicy chicken and vibrant veggies in …

Read more

Categories Dinner

Greek Yogurt Cookie Dough Bites Fun and Tasty Snack

December 28, 2025January 25, 2025 by Chef Tavio
- 1 cup Greek yogurt (plain, ideally whole or low-fat) - 1/2 cup creamy almond butter - 1/4 cup honey or maple syrup - 1/4 cup chopped walnuts - 1/2 cup mini dark chocolate chips - 1/4 teaspoon sea salt - Mixing bowl - Spatula or whisk - Baking sheet Greek yogurt is the star of these bites. It gives them a creamy base and adds protein. I use plain Greek yogurt for the best taste. Almond butter adds a nutty flavor that pairs well with the yogurt. It keeps the bites moist and rich. Honey or maple syrup adds sweetness. You can choose based on your taste. You can also add chopped walnuts for a nice crunch. Mini dark chocolate chips bring a sweet touch. They melt in your mouth and make the bites even more enjoyable. A pinch of sea salt enhances all the flavors. For tools, you need a mixing bowl to blend everything. A spatula or whisk helps mix the ingredients smoothly. A baking sheet is perfect for chilling the finished bites. This setup makes the process easy and fun! {{ingredient_image_2}} Start by taking a large mixing bowl. In it, combine 1 cup of Greek yogurt, 1/2 cup of creamy almond butter, 1/4 cup of honey (or maple syrup), and 1 teaspoon of pure vanilla extract. Use a spatula or whisk to mix all these ingredients together. You want a smooth and creamy consistency. This mix is the heart of your cookie dough bites! Next, gradually add 1 cup of almond flour into the bowl. As you mix, keep stirring until the almond flour is fully blended. The mixture will become thick and dough-like. If it feels too sticky, you can add a bit more flour. Ensure you get the right texture for easy shaping later. Now, fold in 1/2 cup of mini dark chocolate chips. If you like, you can also add 1/4 cup of chopped walnuts. Make sure these goodies are evenly spread throughout the dough. Use your hands to form small balls, about 1 inch in diameter. Place each bite on a parchment-lined baking sheet, leaving some space between them. Once all bites are shaped, it's time to chill them. Refrigerate the baking sheet for at least 30 minutes. This helps the bites firm up and boosts the flavors. You can enjoy your Greek Yogurt Cookie Dough Bites right from the fridge or let them sit at room temperature for a few minutes. Either way, they are a delightful treat! To make Greek Yogurt Cookie Dough Bites just right, you can adjust the sweetness. Use honey for a rich flavor or maple syrup for a lighter taste. Start with 1/4 cup and add more if needed. For texture, make sure the almond flour blends well. The mixture should feel thick and doughy. If it’s too sticky, add a bit more almond flour. If it’s too dry, add a splash of Greek yogurt. Presentation can make your bites even more tempting. Use a nice plate and arrange the bites in a circle. Drizzle some extra honey on top for shine. Sprinkle a few mini chocolate chips for a fun touch. You can also add fresh fruit around the bites for color. Strawberries or blueberries pair well and add fresh flavor. To keep your cookie dough bites fresh, store them in an airtight container. They can last in the fridge for about five days. If you want to enjoy them longer, consider freezing them. To freeze, place the bites on a baking sheet first. Once they are frozen, transfer them to a freezer bag. This way, they won’t stick together. Thaw them in the fridge before enjoying! Pro Tips Use Full-Fat Yogurt: For a creamier texture and richer flavor, opt for full-fat Greek yogurt. It enhances the overall taste and makes the bites more satisfying. Chill Time is Key: Don’t skip the refrigeration step! Chilling the bites not only helps them firm up but also allows the flavors to meld beautifully. Customize Your Mix-Ins: Feel free to experiment with different add-ins such as dried fruits, seeds, or different types of chocolate chips to suit your taste preferences. Store Properly: To keep your cookie dough bites fresh, store them in an airtight container in the refrigerator. They can last up to a week, perfect for a quick snack! {{image_4}} You can change up the nut butter for fun. Try peanut butter, cashew butter, or sunflower seed butter. Each swap will give your bites a new taste. You can also play with sweeteners. Instead of honey, use agave syrup or coconut sugar. Each sweetener adds its own flavor twist. Want to make these bites even better? Add chia seeds or ground flaxseed. Both boost nutrition and add healthy fats. Just a tablespoon or two will do. You can also mix in dried fruits. Try raisins, cranberries, or chopped apricots. They add a fruity twist and extra fiber to your bites. If you're gluten-free, use almond flour or oat flour. Both work well and keep the bites tasty. You can make these bites vegan too. Replace Greek yogurt with a plant-based yogurt. Use maple syrup instead of honey. This way, everyone can enjoy these treats! Protein Content Analysis Greek yogurt is rich in protein. One cup gives you about 20 grams of protein. This is great for your muscles and helps keep you full. Nutritional Advantages of Using Greek Yogurt Using Greek yogurt adds creaminess and flavor. It also provides probiotics. These good bacteria help your gut health. Greek yogurt often has less sugar than regular yogurt too. This makes it a smart choice for snacks. Individual Bite Calorie Count Each Greek Yogurt Cookie Dough Bite has about 70 calories. This is a tasty treat without too many calories. Comparison to Traditional Cookie Dough Bites Traditional cookie dough bites often have around 100 calories each. This means our Greek yogurt bites are lighter and healthier. Macronutrients: Fats, Carbs, Proteins Each bite has about 4 grams of fat, 8 grams of carbs, and 2 grams of fiber. This balance helps provide energy and keeps you satisfied. Vitamins and Minerals Present in Ingredients These bites offer calcium from Greek yogurt and healthy fats from almond butter. They also have vitamin E from almond flour. This mix of nutrients supports your overall health. Yes, you can make these bites vegan! To do this, use a plant-based yogurt. Almond or coconut yogurt works well. For sweeteners, swap honey for maple syrup. This keeps the bites sweet and delicious while sticking to a vegan diet. These cookie dough bites last about five days in the fridge. Store them in an airtight container. This keeps them fresh and tasty. You can enjoy them as a snack or dessert throughout the week. Freezing these bites is easy! Place them in a single layer on a baking sheet. Freeze until firm, then transfer them to a freezer-safe bag. When you want to eat them, thaw in the fridge overnight. They will taste just as good! You can find pre-made bites at health food stores or online. Look for brands like Oikos or Chobani. They often have ready-to-eat options that are both tasty and convenient. These Greek Yogurt Cookie Dough Bites are simple and fun to make. You combine a few main ingredients to create tasty, healthy snacks. Optional add-ins let you get creative. With tips for storage and presentation, you'll impress everyone. Feel free to swap flavors and adjust sweetness, too. Whether for a quick treat or a meal prep snack, these bites shine. Enjoy them fresh or save some for later. Experiment and find what you love most!

Looking for a fun and tasty snack? Greek Yogurt Cookie Dough Bites are the answer! These little treats combine creamy Greek yogurt with almond butter and honey for a sweet …

Read more

Categories Desserts

Garlic Chicken and Broccoli Bowls Tasty Delightful Meal

December 21, 2025January 25, 2025 by Chef Tavio
- 2 boneless, skinless chicken breasts, cut into bite-sized pieces - 2 cups broccoli florets - 4 cloves garlic, minced - 1 tablespoon fresh ginger, grated - 3 tablespoons low-sodium soy sauce - 1 tablespoon sesame oil - 1 tablespoon honey - 1 teaspoon cornstarch - Salt and pepper to taste - Cooked jasmine rice or quinoa, for serving - Sesame seeds and finely sliced green onions, for garnish Garlic chicken and broccoli bowls shine with simple yet fresh ingredients. The chicken breast offers lean protein. Broccoli adds crunch and nutrition. Garlic and ginger bring a warming flavor punch. In the marinade, soy sauce and sesame oil add depth. Honey gives a sweet touch, while cornstarch helps thicken the sauce. Salt and pepper round out the taste. For serving, I love jasmine rice or quinoa. They make a perfect base for the chicken and broccoli mix. Topping with sesame seeds and green onions offers color and texture. It transforms your meal into a delightful feast! {{ingredient_image_2}} In a bowl, mix the soy sauce, sesame oil, honey, cornstarch, minced garlic, and grated ginger. Whisk until smooth. This marinade is key. It helps the chicken soak up flavor. The garlic and ginger add a nice zing. Place the chicken pieces into the marinade. Make sure each piece is coated well. Cover the bowl and chill it in the fridge for at least 15 minutes. This step is vital. Marinating makes the chicken juicy and packed with flavor. Boil water in a medium pot. Once it's boiling, add the broccoli florets. Blanch them for about 2 minutes. You want them bright green and tender. Drain the broccoli, then cool it quickly under cold water. This keeps the color fresh and vibrant. In a large skillet, heat olive oil over medium-high heat. When it shimmers, add the marinated chicken and the marinade. Cook for 5 to 7 minutes, stirring often. You want the chicken to be golden-brown and fully cooked. This caramelization adds great flavor. Gently fold the blanched broccoli into the skillet with the chicken. Stir everything well to mix. Heat it for about 2 to 3 more minutes. This helps the flavors meld together nicely. Before serving, taste the dish. Adjust the seasoning with salt and pepper as needed. For a beautiful presentation, serve the chicken and broccoli over jasmine rice or quinoa. Sprinkle sesame seeds and green onions on top for a nice touch. To cook chicken just right, aim for an internal temperature of 165°F. This ensures it's safe to eat and juicy. Use a meat thermometer for accuracy. Avoid overcooking by keeping an eye on the clock. Cook the chicken for about 5 to 7 minutes. The chicken should turn golden brown. If it looks dry or tough, it's overcooked. You can cook broccoli in different ways. Steaming helps it stay bright and crisp. To steam, place it in a pot with a little water and cover it. Cook for about 4 minutes. Roasting adds a nice flavor. Toss broccoli with a bit of oil, salt, and pepper, then roast at 425°F for 15 minutes. To boost the flavor, sprinkle garlic powder or red pepper flakes on top. These spices add a tasty kick. Garlic chicken and broccoli bowls pair well with jasmine rice or quinoa. Both grains soak up the sauce nicely. For a side dish, try a simple salad or steamed carrots. If you have leftovers, store them in airtight containers. This dish keeps well in the fridge for 3 days. You can also meal prep for the week. Just divide the bowls into single servings for easy lunches. Pro Tips Marination Time: For the best flavor, marinate the chicken for at least 30 minutes, or even overnight if time permits, to allow the flavors to fully penetrate the meat. Perfectly Cooked Broccoli: To keep broccoli bright and crunchy, make sure to plunge it into ice water immediately after blanching. This stops the cooking process and maintains its vibrant color. Adjusting Sweetness: If you prefer a sweeter dish, feel free to increase the amount of honey slightly. Just remember to balance it with a bit more soy sauce if necessary. Serving Suggestions: For added texture, consider topping your bowl with crushed peanuts or cashews, and for an extra layer of flavor, a drizzle of sriracha can spice things up! {{image_4}} You can switch out the chicken for tofu or shrimp. Tofu gives a nice plant-based option. It soaks up the marinade well. Shrimp cooks quickly and adds a fresh taste. Both options work great. They fit many dietary needs. When using tofu, press it first to remove water. Cut it into cubes before marinating. For shrimp, peel and devein them well. Add them to the marinade for about 15 minutes. Cook until they are pink and firm. Want to spice things up? Try adding more garlic or fresh herbs. You can also toss in some red pepper flakes for heat. Want a sweeter touch? Increase the honey in the marinade. Add some lime juice for a zesty kick. You can use different sauces too. Teriyaki sauce adds a sweet and savory flavor. Sriracha gives a nice heat. Just adjust the amount based on your taste. Jasmine rice is great, but you can use quinoa too. Quinoa is high in protein and gluten-free. It cooks in about 15 minutes. For a low-carb option, try cauliflower rice. It is easy to make. Just pulse cauliflower in a food processor until fine. Sauté it for a few minutes until tender. These grain options give you variety. You can mix and match based on what you like. Each choice helps to balance the dish while keeping it healthy. You can store garlic chicken and broccoli bowls in the fridge for about 3 to 4 days. Use an airtight container to keep the dish fresh. Make sure to let the meal cool down before sealing it. This helps prevent moisture buildup and keeps your dish tasty. To freeze chicken and broccoli bowls, place them in a freezer-safe container. You can freeze it for up to 3 months. For best results, cool the dish completely before freezing. When you want to eat it again, microwave it for 2-3 minutes or bake it at 350°F (175°C) for about 20 minutes. This helps keep the chicken juicy and the broccoli bright. Portion out the chicken and broccoli bowls for easy lunches. You can store them in individual containers. This way, you grab a healthy meal quickly. If you have leftovers, get creative! Use the chicken and broccoli in a stir-fry or mix them into a salad. You can also add them to a wrap for a different twist. You can swap some ingredients to boost health. Use less honey or try maple syrup for sweetness. Choose low-sodium soy sauce to cut down on salt. Instead of olive oil, use avocado oil for a different flavor. Add more veggies like bell peppers or carrots for extra nutrients. You can also serve the dish over brown rice for added fiber. Yes, you can prepare this dish ahead of time. Cook the chicken and broccoli, then cool them down. Store them in airtight containers in the fridge for up to three days. When you’re ready to eat, just reheat in a skillet or microwave. You can also prepare the marinade a day early to save time. Blanching is a great method. It keeps broccoli bright and tender. Boil it for about two minutes, then cool it quickly in cold water. This helps it stay green and crisp. You can also sauté broccoli in the skillet for a different texture. Steaming is another option, giving it a soft and flavorful finish. Yes, but you need to make some swaps. Use tamari instead of soy sauce for a gluten-free option. Check your honey brand to ensure it’s gluten-free. You can also use coconut aminos as another soy sauce alternative. This way, you can still enjoy the dish without gluten. Serve these bowls over cooked jasmine rice or quinoa. For a balanced meal, add a side salad or steamed veggies. You might also enjoy it with a light soup, like miso or vegetable broth. A sprinkle of sesame seeds and green onions adds a nice touch on top. This blog post shared how to make tasty garlic chicken and broccoli bowls. We explored key ingredients, from chicken and broccoli to a flavorful marinade. I provided step-by-step instructions to marinate, cook, and combine your dish. Plus, you got valuable tips for perfecting flavors and storage. These bowls are not just filling—they're also fun to customize. Enjoy your cooking journey and share your unique twists!

Looking for a tasty meal that’s easy to make? Garlic Chicken and Broccoli Bowls are your answer! This dish combines tender chicken, vibrant broccoli, and zesty garlic for a flavor-packed …

Read more

Categories Dinner
Older posts
Newer posts
← Previous Page1 … Page181 Page182 Page183 … Page191 Next →

TASTED NEST

Where Flavor Finds a Home 🍳🏡 — warm, simple, and crave-worthy recipes made for real life, from stovetop mornings to backyard dinners.

PAGES

Home About Contact Privacy Policy Terms & Conditions Cookie Policy GDPR Policy Copyright Policy Disclaimer

CATEGORIES

Appetizers Desserts Salads Breakfast Dinner
Copyright © 2026 Tasted Nest. All rights reserved.