Skip to content
  • GDPR Privacy Policy
  • Copyright Policy
  • Disclaimer
  • Terms & Conditions
Tasted Nest
  • Home
  • Appetizers
  • Desserts
  • Salads
  • Breakfast
  • Dinner
  • Privacy Policy
  • Contact
  • About

Chef Tavio

Cowboy Butter Chicken Pasta Flavorful Dinner Delight

November 16, 2025January 14, 2025 by Chef Tavio
- Chicken and Pasta - 2 boneless, skinless chicken breasts, diced - 8 oz fettuccine pasta - Sauces and Spices - 1 cup unsalted butter (2 sticks) - 4 cloves garlic, minced - 1 tablespoon smoked paprika - 1 tablespoon onion powder - 1 teaspoon cayenne pepper - 1 cup heavy cream - Cheese and Vegetables - 1 cup freshly grated Parmesan cheese - 1 cup sweet corn (fresh or frozen) - 1/2 cup fresh parsley, chopped - Seasoning - Salt and freshly ground black pepper, to taste - Cooking Utensils and Equipment - Large pot for boiling pasta - Large skillet for cooking chicken and sauce - Knife and cutting board for chopping ingredients - Recommended Cookware - Colander for draining pasta - Measuring cups and spoons for precise ingredient use Gather these ingredients and tools to make your Cowboy Butter Chicken Pasta. Each item plays a key role in creating a rich, flavorful dish. The chicken adds protein, while the fettuccine serves as a perfect base. The butter and spices create a creamy sauce that ties everything together. Don't forget the cheese and corn for extra taste and texture! {{ingredient_image_2}} Boiling Water and Cooking Time First, fill a large pot with water and add salt. Bring the water to a boil. Once the water is boiling, add the 8 oz of fettuccine pasta. Cook the pasta according to the package instructions until it is al dente. This usually takes about 8 to 10 minutes. Reserve Pasta Water Tips After cooking, drain the pasta. Be sure to save about 1/2 cup of the pasta water. This starchy water helps thicken the sauce later. Cooking the Chicken In a large skillet, melt 1 cup of unsalted butter over medium-high heat. Once the butter is bubbling, add 4 cloves of minced garlic. Sauté the garlic for about 1 minute until it smells great. Now, add the diced chicken breasts. Season with 1 tablespoon of smoked paprika, 1 tablespoon of onion powder, and 1 teaspoon of cayenne pepper. Cook the chicken for 7 to 10 minutes, stirring often. It should be golden brown and fully cooked. Creating the Butter Sauce Lower the heat to medium-low. Pour in 1 cup of heavy cream and mix well. Gradually add 1 cup of grated Parmesan cheese. Stir until the cheese melts and the sauce is smooth. Mixing Pasta and Sauce Add the cooked fettuccine and sweet corn to the skillet. Use the reserved pasta water to adjust the sauce's thickness. Mix everything well to coat the pasta in the creamy sauce. Final Touches Remove the skillet from the heat. Gently stir in 1/2 cup of chopped fresh parsley. Taste your dish and add more salt and pepper if needed. Serve the pasta hot, garnished with extra parsley and Parmesan for a tasty finish. Ensuring Perfectly Cooked Chicken To cook chicken well, use small, even pieces. This helps them cook evenly. Cook the chicken until it is golden brown and no longer pink inside. Use a meat thermometer if needed. The safe internal temp is 165°F. Achieving a Creamy Sauce For a creamy sauce, lower the heat after adding the heavy cream. Stir gently to mix well. Add the Parmesan cheese slowly. This helps it melt smoothly. If the sauce is too thick, add a bit of reserved pasta water. Spice Adjustments If you like mild flavors, cut back on the cayenne pepper. You can also use sweet paprika for a different taste. Taste as you cook to find the right balance. Ingredient Substitutions You can swap chicken for shrimp or tofu for a new twist. Use any pasta you have on hand. Whole wheat or gluten-free pasta works great too. For veggies, add bell peppers or spinach for extra color and nutrients. Serving Suggestions Serve pasta in shallow bowls for a nice touch. This makes it look fancy. Pair with crusty bread to soak up the sauce. Garnishing Tips Garnish with extra parsley on top. A sprinkle of grated Parmesan adds flavor and visual appeal. You can also add a touch of red pepper flakes for a pop of color. Pro Tips Butter Quality Matters: Use high-quality unsalted butter for the best flavor and creaminess in your sauce. Adjust Spice Levels: Feel free to modify the amount of cayenne pepper to suit your taste preferences. Perfect Pasta: Make sure to cook the fettuccine al dente, as it will continue to cook slightly when mixed with the sauce. Fresh Herbs Finish: Add the parsley at the end to retain its vibrant color and fresh flavor. {{image_4}} Substituting Chicken You can swap chicken with shrimp or turkey. Shrimp cooks fast and adds a nice flavor. Turkey offers a leaner option but stays juicy when cooked right. You can use the same spices for these proteins. Vegetarian Options For a vegetarian twist, try using firm tofu or tempeh. Both add great texture. Cook them until golden, just like chicken. You can also use mushrooms for a meaty feel. Using Different Types of Pasta Fettuccine is great, but you can use other pasta shapes. Penne or farfalle work well too. Choose your favorite or what you have on hand. The sauce clings nicely to all shapes. Gluten-free Variants If you need gluten-free pasta, try rice or quinoa pasta. They cook well and taste good. Just follow the package instructions for the best results. Dairy-Free Versions To make this dish dairy-free, use coconut cream instead of heavy cream. Nutritional yeast can replace cheese for a cheesy taste. This keeps the dish creamy and rich. Adding Extra Veggies You can boost nutrition by adding more veggies. Spinach, bell peppers, or zucchini work well. Toss them in while cooking the chicken to keep them tender. This adds color and flavor to your dish. To keep Cowboy Butter Chicken Pasta fresh, store it properly. Place the pasta in an airtight container. This helps prevent it from drying out. You can store it in the fridge for up to three days. Make sure to cool it first before sealing the container. This will keep flavors intact. Want to save leftovers? Freezing is a great option! Let the pasta cool completely. Then, place it in a freezer-safe container. You can freeze it for up to three months. Make sure to label it with the date. This helps you track how long it has been stored. When freezing, consider portion sizes. This makes it easier to thaw only what you need. Also, use plastic wrap to cover the pasta before sealing. This extra layer helps prevent freezer burn. To reheat, thaw the pasta in the fridge overnight. For quick reheating, use the microwave. Add a splash of cream or water to keep it moist. Heat in short bursts, stirring often. This ensures even heating. Want to enjoy Cowboy Butter Chicken Pasta later? You can make it ahead! Cook the chicken and sauce and store separately from the pasta. This keeps everything fresh and tasty. You can prepare the sauce and chicken a day before. Store it in the fridge. The next day, just cook the pasta and mix everything. It saves time and effort on busy nights. When batch cooking, consider doubling the recipe. You can divide it into meal-sized portions. Use clear labels to identify each meal. This way, you have quick dinners ready to go. Cowboy Butter Chicken Pasta is a creamy, flavorful dish. It features chicken, fettuccine, and a rich butter sauce. I blend garlic, smoked paprika, and Parmesan cheese with heavy cream. This dish combines classic comfort and a cowboy twist. It’s simple to prepare and a crowd-pleaser. Yes, you can make this recipe ahead of time. To meal prep, cook the pasta and chicken separately. Store them in airtight containers. Keep the sauce in another container. When ready to eat, reheat everything on the stove. Add a splash of pasta water to help the sauce blend smoothly. To make Cowboy Butter Chicken Pasta less spicy, reduce the cayenne pepper. You can start with a pinch and taste as you go. Adding more cream can also tone down the heat. If you want, you can use sweet smoked paprika instead of regular. This change keeps the flavor without the spice. This dish pairs well with many sides. A simple green salad adds freshness. Garlic bread is perfect for soaking up the sauce. You can serve steamed vegetables, like broccoli or green beans, for extra nutrition. For a hearty meal, add roasted potatoes on the side. You learned how to make Cowboy Butter Chicken Pasta, a tasty mix of chicken and pasta. We covered the right ingredients, tools, and step-by-step tips to cook it well. You can also try variations and store leftovers safely. Cooking is fun, and this dish is a great start. Remember, don't fear making adjustments to suit your taste. Enjoy your meal, and share it with friends and family!

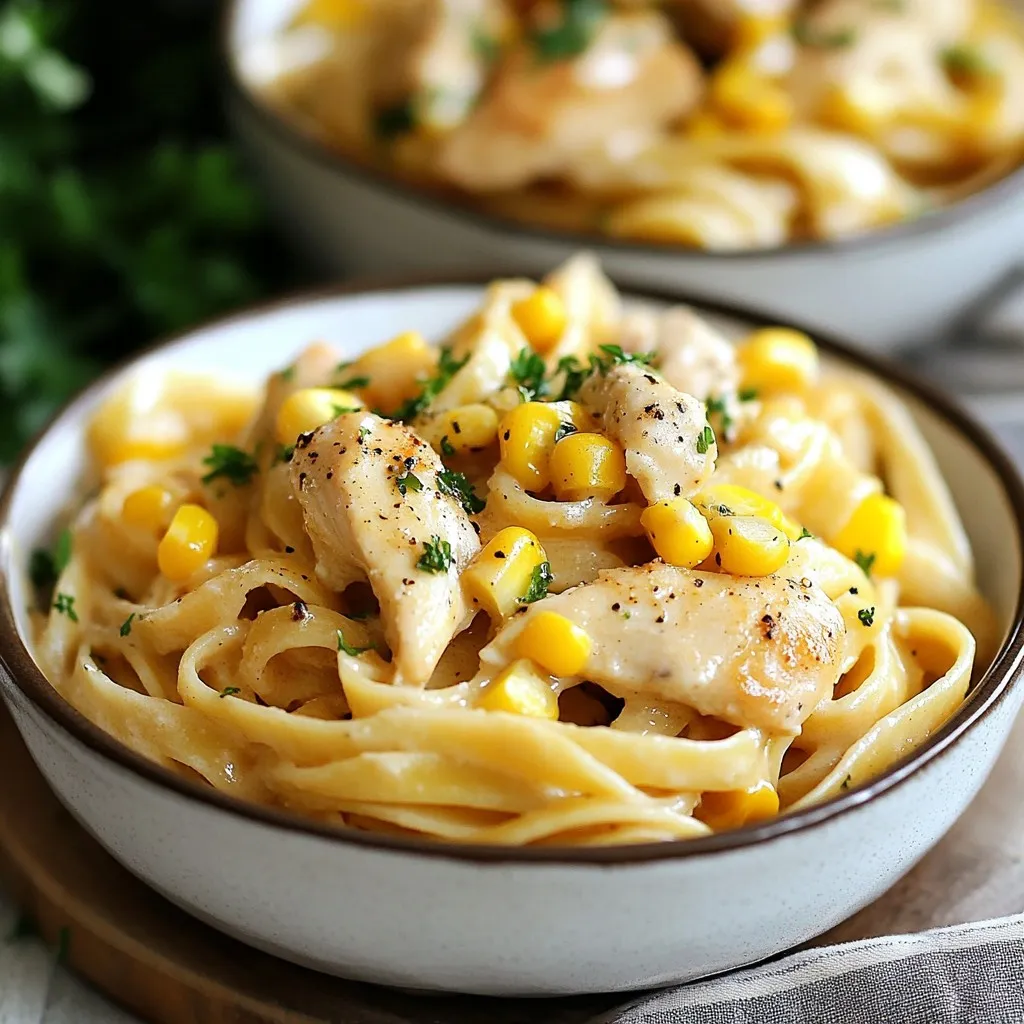
Are you ready for a meal that brings bold flavors to your dinner table? Cowboy Butter Chicken Pasta is the perfect dish for you. Bursting with juicy chicken, rich sauces, …

Read more

Categories Dinner

Bang Bang Chicken Bowl Flavorful and Easy Recipe

December 24, 2025January 13, 2025 by Chef Tavio
- 2 boneless, skinless chicken breasts - 1 cup cooked jasmine rice - 1 cup broccoli florets - 1/2 cup shredded carrots - 1/4 cup sliced green onions - 1/4 cup mayonnaise - 2 tablespoons sweet chili sauce - 1 tablespoon sriracha (adjust according to your spice preference) - 1 tablespoon fresh lime juice - 1 teaspoon garlic powder - Salt and pepper to taste The chicken is the star here. I use boneless, skinless breasts for quick cooking. Cooking them well is key. The jasmine rice provides a nice base. You can’t beat its fluffy texture. Broccoli and carrots add color and crunch. They also give a healthy boost. The bang bang sauce ties everything together. It starts with mayonnaise for creaminess. Sweet chili sauce gives it a sweet kick. Sriracha adds heat, but you can adjust it. A splash of lime juice brightens the flavors. Garlic powder adds depth, making the sauce truly special. - Green onions - Sesame seeds - Fresh herbs Garnishes make your bowl pop! Green onions add a fresh taste. Sesame seeds give a nice crunch. Fresh herbs, like cilantro, bring more flavor and color. Feel free to mix and match these toppings. - Calories per serving: Approximately 550 calories - Key macronutrient breakdown: - Protein: 30g - Carbohydrates: 60g - Fat: 20g This bowl is not just tasty; it's satisfying too. With around 550 calories, it fits a balanced meal. You get plenty of protein from the chicken. The rice offers good carbs for energy. The healthy fats come from the sauce. Each bite gives you a boost while being enjoyable. {{ingredient_image_2}} To start, season the chicken breasts. Use salt, pepper, and garlic powder. This step adds great flavor. For cooking, I suggest using a non-stick skillet. Pour in a splash of olive oil and heat it over medium. Once the oil shimmers, add the seasoned chicken. Cook each side for about 6-7 minutes. The chicken needs to reach 165°F (75°C) inside. You want a golden brown color with no pink. While the chicken cooks, grab a small pot. Fill it with water and bring it to a boil. Add the broccoli florets and blanch for 2-3 minutes. This helps keep them bright and crisp. After blanching, drain the broccoli. Rinse it with cold water to stop the cooking. If you want to change up the veggies, try snap peas, bell peppers, or zucchini. Each option brings its unique flavor and texture. Now, let’s make the Bang Bang sauce. In a small bowl, mix mayonnaise, sweet chili sauce, sriracha, and lime juice. Whisk until smooth. This sauce adds a creamy, tangy kick to the bowl. For spice lovers, add more sriracha. If you prefer it milder, reduce the amount. Adjust it to fit your taste! To make the chicken tender, start with good seasoning. Use salt, pepper, and garlic powder. Season both sides well before cooking. This adds flavor from the start. Cook the chicken in a non-stick skillet. Heat olive oil over medium heat. Cook each side for about 6-7 minutes. The chicken should be golden brown, with no pink inside. Use a thermometer to check that it reaches 165°F (75°C). When serving, think about colorful side dishes. Steamed rice works great here, but you can also try quinoa. A bright green salad adds freshness. For presentation, use a colorful bowl. Layer the rice, chicken, and veggies neatly. Drizzle the bang bang sauce on top. You can sprinkle green onions or sesame seeds for a little flair. This makes your bowl pop with color and flavor. Prep your chicken and veggies early in the day. You can cook the chicken and store it in the fridge. Keep it in an airtight container. It stays good for about 3 days. Cooked rice and veggies can also be stored. Just reheat them when you’re ready to eat. For meal prep, pack everything in separate containers. This way, you can grab a bowl on busy days. Pro Tips Marinate for Extra Flavor: Consider marinating the chicken for at least 30 minutes or up to overnight in a mixture of lime juice, garlic powder, and a touch of soy sauce to enhance flavor and tenderness. Perfectly Cooked Chicken: Use a meat thermometer to check the chicken's internal temperature, ensuring it reaches 165°F (75°C) for safe consumption while keeping it juicy. Customize Your Sauce: Feel free to adjust the levels of sriracha or sweet chili sauce in the Bang Bang sauce according to your taste preferences, adding more for extra heat or sweetness. Add Texture: For an added crunch, consider topping your bowl with toasted nuts or crispy fried onions for a delightful contrast to the tender chicken and fresh veggies. {{image_4}} You can switch out the chicken for tofu or shrimp. Tofu works well if you want a vegan option. Just press it to remove extra water and cube it. Cook it until golden for a nice texture. Shrimp cooks quickly and adds a sweet taste. Use about 8-10 shrimp for this bowl. If you prefer other chicken cuts, try thighs or tenders. They stay juicy and flavorful. If you want a vegan sauce, swap mayonnaise for a plant-based version. You can also use cashew cream or Greek yogurt for a creamy base. For a homemade sauce, mix tahini with lime juice and chili sauce. This will give you a nice twist on flavor. Adjust the heat by adding more sriracha or chili flakes. If jasmine rice isn't your thing, use brown rice or quinoa. Both add a nutty flavor and more fiber. You can also go for cauliflower rice for a low-carb option. When it comes to veggies, feel free to mix it up. Add bell peppers, snap peas, or even corn. These swaps keep your bowl fresh and exciting. To store leftovers, let the bowl cool first. Place it in an airtight container. This keeps the bowl fresh. You can keep it in the fridge for up to three days. If you notice the rice getting dry, add a splash of water when reheating. You can freeze the Bang Bang Chicken Bowl too. Just make sure to store it in a freezer-safe container. It will stay good for about one month. When you're ready to eat it, move it to the fridge overnight to thaw. Reheat in the microwave until hot. Stir well to combine the sauce again. Look for signs of spoilage before eating. If you see any mold or a bad smell, toss it out. Always wash your hands before handling food. Use clean utensils to serve. This keeps your meal safe and tasty. You can use many rice types in place of jasmine rice. Here are some options: - Basmati rice - This has a nice aroma and fluffy texture. - Brown rice - A whole grain option that is healthy and filling. - Quinoa - A protein-rich grain with a nutty flavor. - Cauliflower rice - A low-carb alternative that is light and tasty. You can also try other grains: - Farro - Chewy and hearty, great for a different texture. - Barley - Adds a nice chew and is very nutritious. Bang Bang Chicken Bowl can be spicy, but you can adjust the heat. The sriracha in the sauce adds heat, but you can use less. For a milder version, try these tips: - Use only a small amount of sriracha, or leave it out. - Add more mayonnaise to tone down the heat. - Serve with extra lime on the side. Lime juice adds flavor without spice. Yes, you can make Bang Bang Chicken Bowl ahead of time. Here are some meal prep strategies: - Cook the chicken and veggies in advance. Store them in airtight containers. - Make the sauce and keep it in the fridge for up to a week. To store and reheat: - Keep rice separate to avoid sogginess. - Reheat chicken and veggies in a skillet or microwave. - Add the sauce just before serving for the best flavor. We covered how to make a tasty Bang Bang Chicken Bowl with simple steps. You learned about the main ingredients, how to prepare the chicken, vegetables, and sauce, plus tips for perfecting your dish. We also explored variations, storage methods, and common questions. Now, you can enjoy a delicious meal that suits your tastes and fits your schedule. Whether you try new proteins or make it ahead, this bowl is a win. Enjoy cooking and tasting your creations!

Are you ready to spice up your dinner routine? The Bang Bang Chicken Bowl is a quick and tasty dish packed with flavor. In this easy recipe, I’ll show you …

Read more

Categories Dinner

Protein Cookie Dough Greek Yogurt Tasty Healthy Snack

December 26, 2025January 12, 2025 by Chef Tavio
- 1 cup plain Greek yogurt - 2 tablespoons almond butter - 2 tablespoons honey or maple syrup - 1 scoop vanilla protein powder - 1/4 cup almond flour - 1/4 teaspoon vanilla extract - 1/4 teaspoon salt - 1/4 cup mini dark chocolate chips This protein cookie dough Greek yogurt is both fun and healthy. Each ingredient packs a punch of flavor and nutrition. 1. Greek Yogurt: This forms the base. It gives protein and creaminess. It is low in fat and high in protein. 2. Almond Butter: I love using almond butter for its rich taste. It adds healthy fats and a nutty flavor. You can also use peanut butter or any nut butter you like. 3. Honey or Maple Syrup: This is your sweetener. You can choose honey or maple syrup based on your taste. Both options add natural sweetness. 4. Vanilla Protein Powder: This boosts the protein content. It helps create that cookie dough flavor. Use any brand you prefer. 5. Almond Flour: This gives a light texture. It also adds a nutty flavor. This flour is gluten-free, making it a great choice. 6. Vanilla Extract: This adds a hint of sweetness and depth. Just a little goes a long way for flavor. 7. Salt: It enhances all the flavors in this mix. A tiny pinch is all you need. 8. Mini Dark Chocolate Chips: These are the best part! They add sweetness and make it feel like a treat. - Sliced banana - Extra chocolate chips - Crushed nuts You can make your yogurt even more fun with toppings. Sliced banana adds creaminess. Extra chocolate chips give a sweet crunch. Crushed nuts add texture and healthy fats. Feel free to mix and match! {{ingredient_image_2}} 1. Mixing the primary ingredients Start by taking a mixing bowl. Add one cup of plain Greek yogurt. Then, include two tablespoons of almond butter or your favorite nut butter. Next, pour in two tablespoons of honey or maple syrup. Add one scoop of vanilla protein powder, a quarter cup of almond flour, a quarter teaspoon of vanilla extract, and a quarter teaspoon of salt. 2. Blending for a creamy consistency Use a whisk or spatula to blend these ingredients. Mix until the mixture is smooth and creamy. Make sure there are no lumps left. This step is key to enjoying a nice texture in your yogurt. 3. Folding in chocolate chips Gently fold in a quarter cup of mini dark chocolate chips. Leave a few aside for later use. This will add a delightful surprise in every bite. - Personalizing sweetness levels After mixing, taste your yogurt. If you want it sweeter, feel free to add more honey or maple syrup. Adjusting sweetness lets you create a flavor that suits your taste. - Modifying protein powder amounts If you prefer a protein boost, add more protein powder. Just remember to blend well after each addition. Finding the right protein level is easy and fun. - Chilling instructions for optimal taste For a cool treat, transfer the yogurt to a serving bowl. Let it chill in the fridge for about 30 minutes. This makes the flavors blend nicely. - Presentation tips for a delightful look Serve your yogurt chilled or at room temperature. Top it with extra chocolate chips, sliced banana, or crushed nuts. This not only looks good but adds extra flavor and crunch to your snack. Mixing well is key to a smooth yogurt. Use a whisk or spatula for the best results. Start with the Greek yogurt and nut butter. Add honey and protein powder next. Mix until no lumps remain. A creamy texture makes each bite delightful. You can swap nut butters to change the taste. Try peanut butter or cashew butter for a twist. Different sweeteners also work well. Use agave syrup or stevia if you prefer. This lets you control the sweetness and find your perfect flavor. Enjoy this yogurt in many ways. Serve it chilled or at room temperature. Top it with sliced banana, extra chocolate chips, or crushed nuts. Pair it with fruit for a complete snack. This makes it not just tasty but also fun to eat! Pro Tips Texture Matters: Ensure your Greek yogurt is thick and creamy for the best cookie dough consistency. Sweetness Check: Adjust the amount of honey or maple syrup based on your taste preference; you can always add more if needed. Protein Power: Choose a protein powder that you enjoy, as its flavor can significantly impact the overall taste of the cookie dough. Chill for Flavor: Allowing the mixture to chill for at least 30 minutes enhances the flavors and gives you a more refreshing treat. {{image_4}} For a vegan option, use plant-based yogurt. Brands like coconut or soy yogurt work great. Swap almond butter for a nut-free seed butter like sunflower seed butter. This keeps your snack safe for those with nut allergies. You can add fruits or spices to change the flavor. Chopped apples or berries give a fresh twist. A dash of cinnamon or nutmeg can add warmth. If you want a fun twist, try different extracts. Almond or coconut extract makes this yogurt unique. Adjust servings for meal prep by dividing the yogurt into smaller containers. This makes it easy to grab a quick snack. Create small snack-sized servings with a scoop of yogurt in mini bowls. It’s perfect for kids or a quick treat on the go. To keep your protein cookie dough Greek yogurt fresh, store it in the fridge. Use an airtight container. Glass or plastic containers work well. This prevents moisture and air from spoiling it. This yogurt stays good for about 3 to 5 days in the fridge. If you notice any off smell or change in texture, it's time to toss it. Mold is also a sign it has gone bad. Yes, you can freeze protein cookie dough yogurt! It keeps for about 1 month in the freezer. To thaw, move it to the fridge overnight. Stir well before enjoying. If it seems too thick after thawing, add a little yogurt or milk to bring it back to life. How to make protein cookie dough Greek yogurt? To make this tasty snack, you need some simple steps. First, combine 1 cup of plain Greek yogurt, 2 tablespoons of almond butter, 2 tablespoons of honey or maple syrup, and 1 scoop of vanilla protein powder in a bowl. Then, add 1/4 cup of almond flour, 1/4 teaspoon of vanilla extract, and 1/4 teaspoon of salt. Mix them well until smooth. Finally, fold in 1/4 cup of mini dark chocolate chips. Chill for about 30 minutes, or dig in right away! What can I substitute for almond butter? If you don’t have almond butter, you can use any nut butter. Peanut butter works great and adds a nice flavor. Sunflower seed butter is a good choice too, especially for nut-free diets. How many calories are in protein cookie dough Greek yogurt? This snack is around 250 calories per serving. The exact count can vary based on your choice of ingredients and toppings. Is this recipe suitable for meal prep? Yes, this recipe is perfect for meal prep. You can make it ahead of time and store it in the fridge. It stays fresh for about five days. Just keep it in a sealed container. Healthy snack option for children Absolutely! This yogurt is a healthy snack for kids. It offers protein and essential nutrients. Plus, it tastes like a treat, which makes it fun. Adjustments for kid-friendly flavors You can make it more kid-friendly by adding more sweetener or fun toppings. Try using colorful fruits or a sprinkle of cinnamon for a twist. This blog post covered how to make delicious protein cookie dough Greek yogurt. We discussed key ingredients, preparation steps, and tips for the best texture. I shared ideas for personalizing flavors, storage tips, and recipe variations. Overall, this snack is healthy, tasty, and easy to customize. Whether you enjoy it plain or with fun toppings, it’s a great choice for everyone, including kids. Try it out and make it your own!

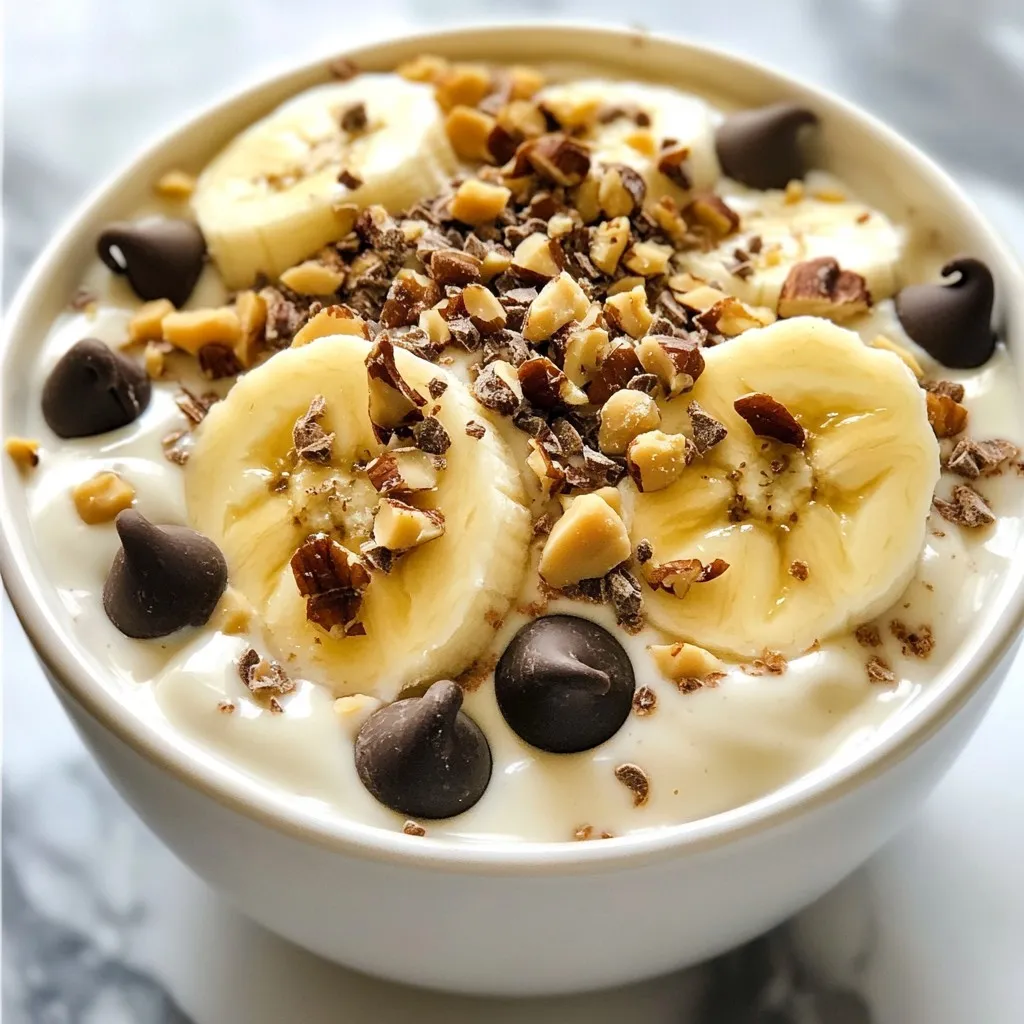
Looking for a tasty and healthy snack? You’ll love this Protein Cookie Dough Greek Yogurt! It’s simple to make and packed with good-for-you ingredients. With just a few easy steps, …

Read more

Categories Desserts

Ingredient Beef Enchiladas Quick and Flavorful Dish

November 20, 2025January 11, 2025 by Chef Tavio
- 1 lb ground beef - 1 small onion, finely chopped - 2 cloves garlic, minced - 1 teaspoon ground cumin - 1 teaspoon chili powder - 1 can (15 oz) black beans, rinsed and drained - 1 cup corn (fresh, frozen, or canned) - 2 cups enchilada sauce (red or green) - 8 small flour or corn tortillas - 2 cups shredded cheese (cheddar or a Mexican blend) - Fresh cilantro, for garnish - Sour cream, for serving You can add more flavor with some optional items. Here are some ideas: - Jalapeños for heat - Bell peppers for crunch - Avocado for creaminess - Lime juice for zest - Green onions for a fresh touch Choosing good ingredients can make your enchiladas great. Here’s how: - Ground Beef: Look for lean beef with a good color. Avoid any with a lot of fat. - Onion and Garlic: Pick fresh ones without blemishes. Strong scents mean they are fresh. - Beans: Use low-sodium canned beans for a healthier option. Rinse them well. - Corn: Frozen corn often tastes sweeter. Fresh corn is great if in season. - Tortillas: Choose soft tortillas that don’t crack when rolled. Look for whole grain options if you prefer. - Cheese: Buy blocks of cheese and shred it yourself for better flavor and melt. - Sauce: Choose a brand you love or make your own for a personal touch. Using quality ingredients makes your beef enchiladas taste better and more authentic. Enjoy the process of selecting fresh, vibrant flavors! {{ingredient_image_2}} First, I heat a skillet over medium heat. I add 1 pound of ground beef. I use a wooden spoon to break it apart. I cook it until it turns brown, about 5-7 minutes. After that, I drain any extra fat. This makes the filling leaner. Next, I add 1 small chopped onion and 2 minced garlic cloves to the skillet. I sauté them for about 3-4 minutes. I wait until the onion is soft and clear. This adds great flavor to the beef. Then, I stir in 1 teaspoon each of ground cumin and chili powder. I also add 1 can of black beans, rinsed and drained, and 1 cup of corn. I mix everything and cook for another 2-3 minutes. I want the flavors to blend well. Once done, I take the skillet off the heat. Now, I preheat my oven to 350°F (175°C). This helps the enchiladas bake evenly. I pour 1 cup of enchilada sauce into a baking dish. I spread it evenly on the bottom. This keeps the enchiladas from sticking. I take a tortilla and place about ¼ cup of the beef filling in the center. I top it with a tablespoon of cheese. Then, I roll the tortilla tightly, starting from one end. I place it seam-side down in the dish. I repeat this with the rest of the tortillas and filling. I want them snug in the dish. After that, I pour the remaining enchilada sauce over the tortillas. I cover each one well. Finally, I sprinkle the leftover cheese on top. I cover the baking dish tightly with aluminum foil. This traps the moisture. I bake them in the oven for 20 minutes. After 20 minutes, I remove the foil. I bake them for another 10-15 minutes. I check that the cheese is melted and bubbly. It should be lightly golden on top. Once they are done, I take them out and let them cool for about 5 minutes. I like to garnish them with fresh cilantro. I serve them with sour cream on the side for a tasty treat. To make your beef enchiladas truly shine, focus on the beef. Start by browning it well. Use medium heat and break it apart in the skillet. This method adds a rich flavor. Next, add the onion and garlic. Sauté them until soft. This step builds depth in taste. Don’t rush these parts. The goal is to layer flavors. Soggy enchiladas are a common problem. To avoid this, always use a good sauce. Pour some sauce in the baking dish first. This keeps the bottom from getting wet. Also, roll the tortillas tightly. A loose roll can lead to filling escaping during baking. Finally, cover with foil while baking, then remove it for the last minutes. This helps the cheese crisp up. When serving, keep it simple and fresh. A sprinkle of cilantro adds color and taste. Sour cream is a must-have on the side. It gives a cool contrast to the warm enchiladas. You can also add avocado or a slice of lime for extra zing. Serve directly from the baking dish for a casual vibe. This dish is perfect for family meals or gatherings. Pro Tips Use Fresh Ingredients: Fresh vegetables and high-quality cheese can elevate the flavors of your enchiladas significantly. Customize the Spice Level: Adjust the amount of chili powder and cumin based on your heat preference. Adding diced jalapeños can also give it a nice kick! Make Ahead: Assemble the enchiladas a day in advance and store them in the refrigerator overnight. Just bake them when you're ready to serve. Experiment with Fillings: Feel free to swap out the beef for shredded chicken or add more veggies like bell peppers or spinach for a healthier twist. {{image_4}} You can make a tasty vegetarian version of enchiladas. Instead of beef, use a mix of black beans, corn, and bell peppers. Add some sautéed mushrooms for a savory taste. You can even include tofu for added protein. Use the same enchilada sauce and cheese to keep the dish classic and comforting. If you love heat, spice things up! Add chopped jalapeños or serrano peppers to the beef filling. You can also use a spicy enchilada sauce or mix in some cayenne pepper. This gives your enchiladas a nice kick. Adjust the spice level to fit your taste. Cheese makes enchiladas extra delicious. While cheddar and Mexican blend are great choices, you can try others too. Queso blanco adds a creamy texture, while pepper jack gives a spicy twist. Feel free to mix different cheeses for more flavor. Just make sure to use a cheese that melts well for that perfect gooey finish. To store leftover enchiladas, let them cool first. Place them in an airtight container. Make sure to cover them well. You can keep them in the fridge for up to three days. This helps keep the flavors fresh. If you want to freeze enchiladas, it’s best to do this before baking. Wrap each enchilada in plastic wrap. Then, place them in a freezer-safe bag. They can last up to three months. When you are ready to eat them, just thaw them in the fridge overnight. To reheat enchiladas, preheat your oven to 350°F (175°C). Place the enchiladas in a baking dish. Cover with foil to keep them moist. Bake for about 20 minutes. If you like, you can add extra cheese on top. Enjoy your delicious dish! You can use many options. Ground turkey or chicken works well. For a plant-based option, try lentils or black beans. Each choice brings a unique flavor. Just cook it the same way as beef. Yes, you can! Feel free to swap red enchilada sauce for green. You can also use salsa or mole. Each sauce offers new tastes and colors to your dish. Beef enchiladas last about three to four days in the fridge. Make sure to store them in an airtight container. This keeps them fresh and tasty for your next meal. Yes, you can make enchiladas ahead! Prepare them, then cover and refrigerate before baking. When you're ready, just bake as normal. This saves time on busy days. In this post, we explored the ingredients and steps for making beef enchiladas. You learned how to prepare a tasty beef filling, assemble the enchiladas, and bake them to perfection. I shared tips to enhance flavor and to avoid sogginess. You also saw variations to try, including vegetarian and spicy options. Finally, we discussed storage and reheating methods. This dish is versatile and fun to make. Enjoy experimenting with your own enchilada recipes!

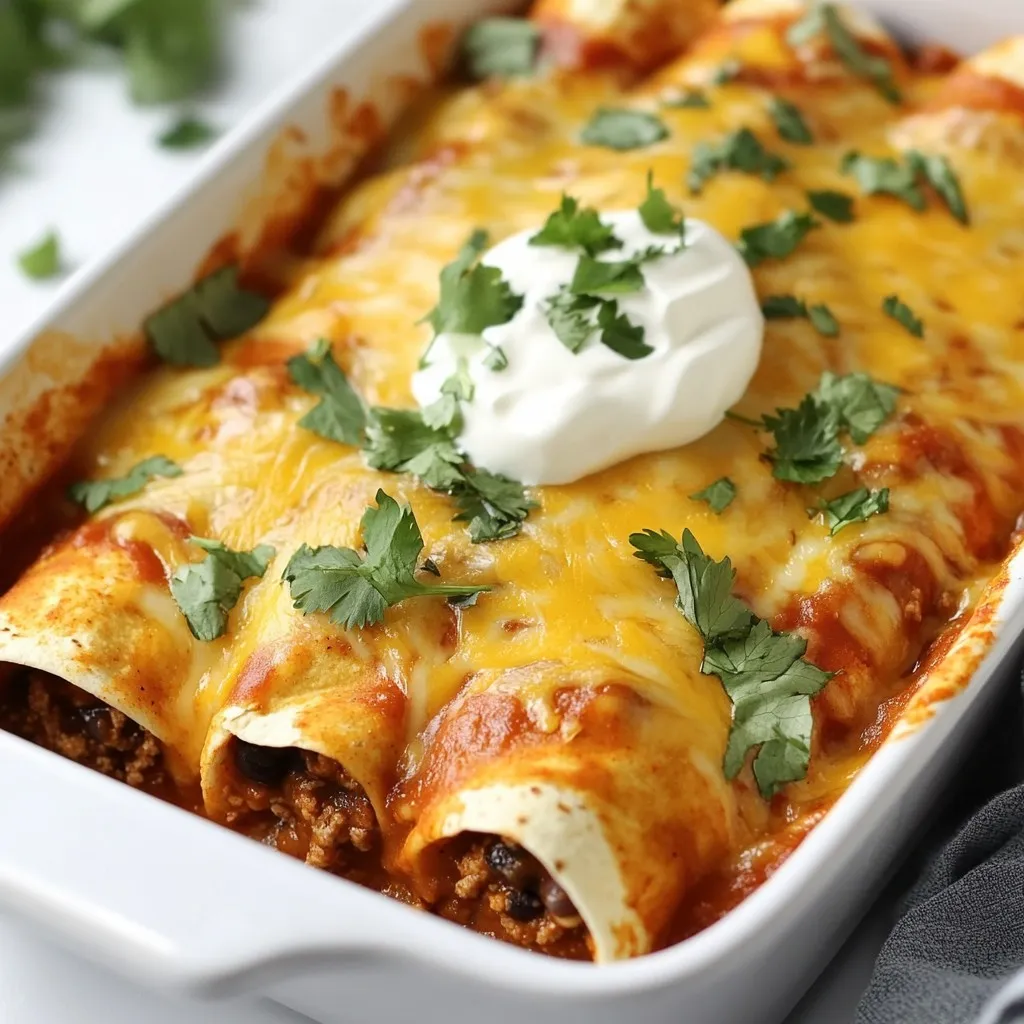
Are you ready to dive into the world of beef enchiladas? This quick and flavorful dish will impress your family and friends. With the right ingredients and easy steps, you …

Read more

Categories Dinner

No-Sugar Banana Brownies Simple and Delicious Treat

December 24, 2025January 10, 2025 by Chef Tavio
To make these brownies, you need just a few core ingredients: - 3 ripe bananas, thoroughly mashed - 1/3 cup smooth unsweetened almond butter - 1/4 cup unsweetened cocoa powder - 1/2 teaspoon baking soda - 1/4 teaspoon sea salt - 1 teaspoon pure vanilla extract - 1/2 cup rolled oats These ingredients work together to create a rich and moist brownie. The ripe bananas act as a natural sweetener. They also add moisture and help bind the brownies. You can make your brownies even better with these options: - 1/4 cup chopped walnuts or pecans - 1/4 cup unsweetened dark chocolate chips Adding nuts gives a nice crunch. Dark chocolate chips add a rich, sweet flavor. Both options enhance the brownie experience. Using ripe bananas in baking has many benefits. They are full of vitamins and minerals. Bananas provide potassium, which supports heart health. Their natural sweetness means you can skip added sugars. This makes these brownies a healthier treat. Plus, they help keep the brownies soft and chewy. {{ingredient_image_2}} Start by preheating your oven to 350°F (175°C). Take an 8x8-inch baking pan and line it with parchment paper. Make sure the paper hangs over two sides. This overhang helps you lift the brownies out later. In a large mixing bowl, add 3 ripe bananas that you have mashed well. Then, mix in 1/3 cup of smooth unsweetened almond butter. Stir these together until you have a smooth and creamy mix. This will give your brownies a delicious base. Next, add 1/4 cup of unsweetened cocoa powder, 1/2 teaspoon of baking soda, 1/4 teaspoon of sea salt, and 1 teaspoon of pure vanilla extract to your banana mix. Stir vigorously so all the dry ingredients blend well. The mixture should look uniform and dark, with a rich chocolate aroma. Now, gently fold in 1/2 cup of rolled oats. If you want some crunch, add 1/4 cup of chopped walnuts or pecans. For a sweet touch, you can mix in 1/4 cup of unsweetened dark chocolate chips. Pour the batter into your prepared pan, spreading it evenly. Bake for 20-25 minutes. Check if they are done by inserting a toothpick into the center. It should come out mostly clean. Let the brownies cool in the pan for about 15 minutes. Use the parchment paper to lift them out and slice into 9 squares. Enjoy your no-sugar treat! For soft and moist brownies, use very ripe bananas. They should be brown and spotty. Mash them well until smooth. The almond butter gives a rich, creamy feel. Mix it in well. Add the dry ingredients gently to keep air in the batter. This helps the brownies rise a bit. Bake them until the edges are firm but the center still looks soft. This keeps them chewy. Do not skip the baking soda. It helps the brownies rise. Mixing too much can make them tough. Stir just until everything blends. Overbaking is another common error. Always check with a toothpick. If it comes out with a few moist crumbs, they’re done. Lastly, don’t forget to cool them before slicing. This helps them set and makes cutting easier. To make your brownies look special, dust them with cocoa powder. A little sprinkle adds charm. You can also top them with a dollop of Greek yogurt. This adds a creamy touch. Serve on a bright plate for a nice contrast. For a fresh touch, add a slice of banana or a mint leaf on top. This makes your brownies look as good as they taste! Pro Tips Ripe Bananas for Sweetness: The riper the bananas, the sweeter your brownies will be. Look for bananas with plenty of brown spots for optimal flavor. Nut Butter Alternatives: While almond butter is great, you can also use peanut butter or cashew butter for a different flavor profile. Just ensure the nut butter is smooth for best results. Customize Your Add-ins: Feel free to experiment with different nuts, seeds, or dried fruits to personalize your brownies. Each addition brings a unique texture and taste. Storage Tips: Store brownies in an airtight container at room temperature for up to 3 days. For longer storage, refrigerate for up to a week or freeze for up to 3 months. {{image_4}} If you don't have almond butter, you can use other nut butters. Peanut butter works well and adds a fun flavor. Cashew butter is a great choice too; it’s creamy and mild. Sunflower seed butter is perfect for those with nut allergies. Just swap it in at the same amount. Each option changes the taste slightly but keeps the brownies delicious. You can add different nuts or fruits to change the flavor and texture. Chopped pecans or hazelnuts add a nice crunch. You can also use walnuts for a richer taste. For fruits, try adding chopped strawberries or blueberries. They blend well with the bananas and add sweetness. Just keep the amounts similar to the recipe to maintain texture. If you want to cut back on the sweetness, you can use different sweeteners. Maple syrup adds a lovely flavor; just reduce the banana amount slightly to balance it. Honey is also an option, but it may make the brownies a bit softer. For a zero-calorie option, try stevia or monk fruit. Use these in small amounts to avoid overpowering the taste. Each sweetener gives a unique twist to your brownies! To store leftover brownies, let them cool completely. Use an airtight container. Place parchment paper between layers if stacking. This keeps them fresh. You can store them at room temperature for up to three days. If you want to keep them longer, consider freezing. To freeze brownies, wrap them well in plastic wrap. Then place them in a freezer-safe bag. Label the bag with the date. These brownies can last up to three months in the freezer. When you're ready to eat, just remove them from the freezer. To reheat brownies, preheat your oven to 350°F (175°C). Place the brownies on a baking sheet. Heat them for about 10 minutes. This warms them and brings back their soft texture. If you prefer, you can use the microwave. Heat them in short bursts of 10 seconds until warm. Enjoy your delicious treat! Yes, you can use different nut butters. Peanut butter works well for a classic taste. Cashew butter offers a creamy texture and mild flavor. Sunflower seed butter is a great option for nut-free diets. Just make sure the nut butter is smooth and unsweetened. It will blend better with the bananas and cocoa. To make these brownies vegan, focus on the ingredients. The bananas and almond butter are already vegan. Just ensure you use plant-based chocolate chips. If you want more fluffiness, add a mix of flaxseed meal and water. This mix replaces eggs. Combine one tablespoon of flaxseed meal with three tablespoons of water. Let it sit until it thickens. You can use different options instead of chocolate chips. Dried fruits like raisins or chopped dates add sweetness. Nuts like pecans or walnuts can enhance the texture. For a fruity twist, consider adding coconut flakes. All these options keep your brownies tasty and unique. Just remember to adjust the amount based on your preference. You just learned how to make no-sugar banana brownies. We covered the key ingredients, step-by-step baking, and helpful tips. Adding variations creates unique flavors. Proper storage ensures freshness, and I answered common questions. This recipe gives a tasty treat that stays healthy. Enjoy your baking adventure. You’ll create brownies everyone will love!

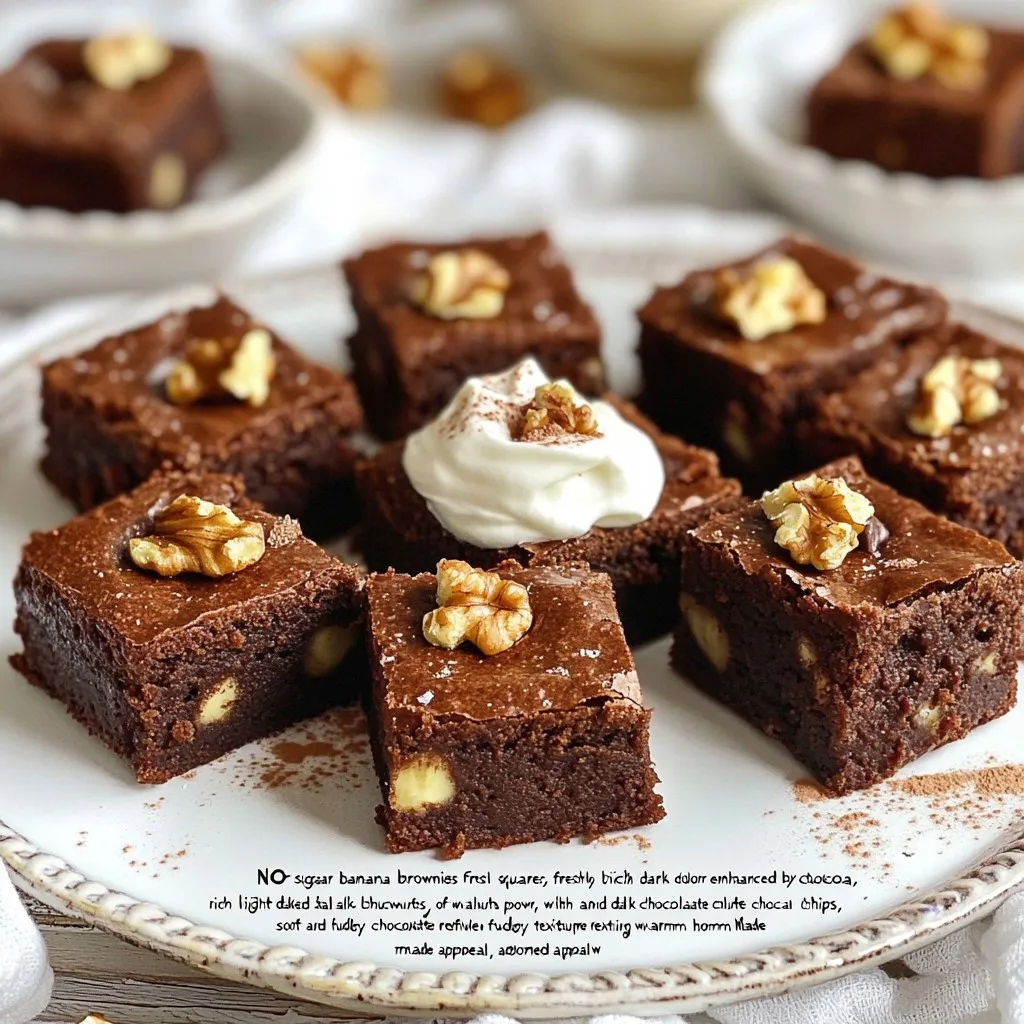
Craving a sweet treat but want to skip the sugar? You’re in luck! I’m excited to share my simple and delicious No-Sugar Banana Brownies recipe. These brownies are made with …

Read more

Categories Desserts

One-Pot Butter Parmesan Pasta Quick and Tasty Meal

December 17, 2025January 10, 2025 by Chef Tavio
To make One-Pot Butter Parmesan Pasta, you need a few simple ingredients. Here’s a list to get you started: - Pasta options: Choose from spaghetti, fettuccine, or penne. Each type gives a different twist to the dish. - Other required ingredients: You will need 4 cups of low-sodium vegetable broth, 1/2 cup of unsalted butter, 1 cup of freshly grated Parmesan cheese, 4 cloves of finely minced garlic, and 1/2 teaspoon of red pepper flakes if you want some heat. - Seasoning and garnish ingredients: Don’t forget salt, black pepper, and fresh parsley for a pop of color and flavor. These ingredients come together to create a creamy, savory meal that is as easy to make as it is delicious. {{ingredient_image_2}} To start, grab a large pot or Dutch oven. Pour in 4 cups of low-sodium vegetable broth. Place the pot on high heat. Bring the broth to a boil. This step adds flavor to the pasta. Once you see bubbles, add 4 cloves of finely minced garlic. If you like heat, toss in 1/2 teaspoon of red pepper flakes. Now, sprinkle in a pinch of salt and black pepper. This will enhance the taste. Next, reduce the heat to medium. Let the pasta simmer. Stir occasionally and cook until the pasta is al dente. This takes about 8 to 10 minutes. Most of the liquid should be absorbed by now. Remove the pot from the heat. Immediately add 1/2 cup of unsalted butter, cut into small pieces. Also, add 1 cup of freshly grated Parmesan cheese. Stir vigorously. This helps the butter melt and the cheese blend in. You want a creamy sauce that coats the pasta well. Taste the dish and adjust the seasoning. Add more salt and black pepper if needed. Now it’s time to serve! Dish out the pasta while it’s hot. Garnish with fresh, finely chopped parsley. This adds color and flavor. If you're a cheese lover, sprinkle extra Parmesan on top. For some spice, add more red pepper flakes if you like. Enjoy every bite! To get the perfect al dente pasta, start with good timing. Cook the pasta in the vegetable broth for about 8 to 10 minutes. Stir it often to keep it from sticking. Check the pasta a minute before the time is up. You want it to be firm but not hard. Adjusting heat helps with even cooking. Start with high heat to boil the broth. After adding the pasta, lower the heat to medium. This lets the pasta cook slowly and evenly. If you see bubbles boiling over, lower the heat a bit more. You can make this dish even better by adding more flavors. Try adding herbs like basil or thyme. A splash of lemon juice can brighten the taste. If you like heat, add more red pepper flakes. Adding proteins or vegetables is a great way to mix things up. Cooked chicken, shrimp, or bacon can boost the dish. For veggies, try spinach, peas, or cherry tomatoes. They add color and nutrition. Just toss them in during the last few minutes of cooking. Pro Tips Perfect Pasta Consistency: Ensure you cook the pasta until al dente, as it will continue to absorb liquid and soften after removing from heat. Garlic Flavor Boost: For a deeper garlic flavor, sauté the minced garlic in a bit of olive oil before adding it to the pot. Cheese Choice: Use freshly grated Parmesan cheese instead of pre-grated for the best melting quality and flavor. Customize Your Heat: Adjust the amount of red pepper flakes to control the spiciness, or omit them entirely for a milder dish. {{image_4}} You can switch out the pasta type for this dish. Here are some great options: - Gluten-free pasta: Try rice or quinoa pasta for a gluten-free meal. - Whole wheat or alternative grains: Whole wheat pasta adds fiber and a nutty flavor. If you want a dairy-free option, you can make some simple swaps: - Using vegan butter and nutritional yeast: Vegan butter gives a similar richness. Nutritional yeast adds a cheesy flavor without dairy. - Suggested dairy-free cheese options: Look for brands that offer dairy-free Parmesan or similar styles. They melt well and taste great! To store leftover One-Pot Butter Parmesan Pasta, let it cool first. Place it in an airtight container. You can keep it in the refrigerator for up to three days. For longer storage, you can freeze it. Use a freezer-safe container or bag. Make sure to remove as much air as possible. This will help prevent freezer burn. The pasta can last in the freezer for up to two months. When you want to reheat your pasta, the best method is to use the stovetop. Add a splash of vegetable broth or water to a pot. Heat it on low and stir the pasta gently. This method keeps the texture nice. You can also reheat it in the microwave. Just add a little water in a microwave-safe bowl. Cover it with a damp paper towel to keep moisture in. Heat it in short bursts, stirring in between, until warm. Can I use chicken broth instead of vegetable broth? Yes, you can swap vegetable broth for chicken broth. This change will add a richer taste. Just keep in mind that it will no longer be vegetarian. How can I make this dish vegetarian-friendly? This recipe is already vegetarian when you use vegetable broth. Ensure that all cheese is rennet-free if you want it to be fully vegetarian. What other cheeses can I use instead of parmesan? You can use Pecorino Romano for a sharper flavor. Grana Padano is also a great choice for a milder taste. Can I double the recipe? Yes, you can easily double this recipe. Just use a larger pot to hold all the pasta and broth. How can I adjust the recipe for a gluten allergy? You can use gluten-free pasta instead. There are many good options, like rice or quinoa pasta. Is it possible to make this dish spicier? Absolutely! Add more red pepper flakes to boost the heat. You can also add hot sauce for extra spice. We explored the essential ingredients, step-by-step cooking instructions, and helpful tips for a delicious pasta dish. You learned about variations for dietary needs and storage tips for leftovers. Cooking can be both fun and rewarding. Remember to try new flavors and adjust recipes to fit your taste. Enjoy your meal and share it with others. Cooking is about joy and creativity, so make it your own!

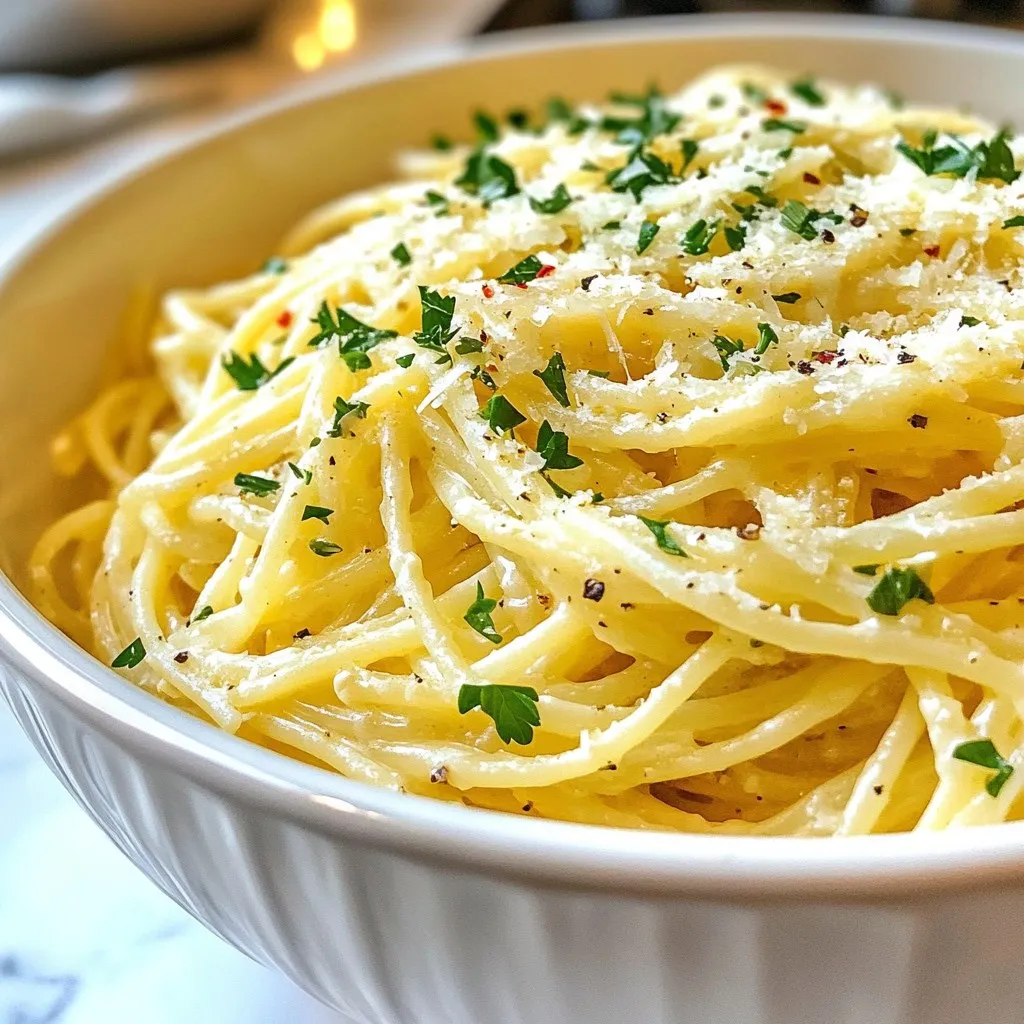
Looking for a quick meal that’s both simple and delicious? One-Pot Butter Parmesan Pasta is the answer! With just a few easy steps, you can whip up a creamy, cheesy …

Read more

Categories Dinner

Greek Chicken Power Bowls Nutritious and Simple Meal

November 16, 2025January 9, 2025 by Chef Tavio
- 2 boneless, skinless chicken breasts - 1 cup quinoa, thoroughly rinsed - 2 cups vegetable broth (or water) - 1 cup cherry tomatoes, halved - 1 cucumber, diced into bite-sized pieces - 1/2 red onion, thinly sliced - 1/2 cup Kalamata olives, pitted and halved These main parts make the base of your Greek chicken power bowls. The chicken gives protein and flavor. Quinoa adds a nice texture and is full of nutrients. Fresh veggies bring color and crunch. - 1 tablespoon extra virgin olive oil - 2 teaspoons dried oregano - 1 teaspoon garlic powder - Salt and freshly ground black pepper to taste - 1 teaspoon red wine vinegar (optional) - 1/4 cup tzatziki sauce The olive oil and spices make the chicken tasty. Tzatziki sauce adds creaminess. The red wine vinegar is optional but can add a nice zing. - 1 cup crumbled feta cheese - 1/4 cup fresh parsley, finely chopped - Zest and juice of 1 lemon Garnishes finish the dish. Feta adds saltiness. Fresh parsley makes it bright and fresh. The lemon zest adds a pop of flavor that ties everything together. {{ingredient_image_2}} To start, I whisk together the marinade in a bowl. I use olive oil, dried oregano, garlic powder, salt, and black pepper. This mix gives the chicken a great flavor. Next, I add the chicken breasts to the bowl. I make sure to coat them well in the marinade. Cover the bowl and let it sit for at least 30 minutes. For more flavor, you can marinate it for up to 2 hours in the fridge. I cook the quinoa next. I take a medium saucepan and combine the rinsed quinoa with vegetable broth. I place the pan over medium-high heat to bring it to a boil. Once boiling, I reduce the heat to low and cover it. I let it simmer for about 15 minutes until it’s tender. After that, I remove it from the heat and let it sit, covered, for another 5 minutes. Finally, I fluff the quinoa with a fork and set it aside. Next, I preheat the grill or a nonstick skillet over medium-high heat. I place the marinated chicken on the grill. I cook it for about 6 to 7 minutes on each side. I check the internal temperature; it should reach 165°F. Once cooked, I take the chicken off the grill and let it rest for 5 minutes before slicing it into thin strips. While the chicken rests, I prepare the salad. In a large mixing bowl, I add halved cherry tomatoes, diced cucumber, thinly sliced red onion, and halved Kalamata olives. I sprinkle in chopped parsley as well. Then, I drizzle fresh lemon juice and red wine vinegar over the top. I gently toss everything together to mix the flavors. Now comes the fun part: assembling the bowls. I start with a generous scoop of quinoa at the bottom. Next, I layer the sliced grilled chicken on top. Then, I add a portion of the salad mixture. To finish, I sprinkle crumbled feta cheese over each bowl and drizzle tzatziki sauce for a refreshing touch. For the last touch, I add fresh lemon zest on top of each bowl. This gives it a burst of flavor. I serve them right away and enjoy the vibrant, tasty Greek chicken power bowls! - Best marination time: I recommend marinating the chicken for at least 30 minutes. This helps the flavors soak in well. For a deeper taste, let it sit for 2 hours in the fridge. - Flavor enhancement tips: Use fresh herbs if you can. Fresh oregano or thyme adds a bright touch. You can also add a splash of lemon juice for a zing. - Alternatives to grilling the chicken: If you don't have a grill, use a nonstick skillet. Sear the chicken on medium heat for a nice crust. Bake it in the oven at 375°F for 20 to 25 minutes if you prefer. - Ensuring perfect quinoa texture: Rinse the quinoa well before cooking. This removes bitterness. Once cooked, let it sit covered for 5 more minutes. Fluff it with a fork for light and fluffy grains. - Pairing ideas: Serve these bowls with crusty whole grain bread. A side of roasted veggies also works well. You can add a dollop of hummus for extra flavor. - Meal prep considerations: These bowls are great for meal prep. Store the quinoa, chicken, and salad in separate containers. This keeps everything fresh and tasty throughout the week. Pro Tips Marinate Longer for Flavor: Allow the chicken to marinate for at least 2 hours in the refrigerator to enhance the flavors and tenderness. Rinse Quinoa Thoroughly: Always rinse quinoa under cold water before cooking to remove its natural coating, which can make it taste bitter. Rest the Chicken: Let the grilled chicken rest for about 5 minutes after cooking. This helps retain its juices, resulting in a more succulent bite. Customize Your Salad: Feel free to add other ingredients to the salad, such as bell peppers or avocado, to suit your taste and boost nutrition. {{image_4}} You can switch the chicken for other proteins. Try grilled shrimp or sliced beef. Both add great flavor and fit well. For a vegetarian option, use chickpeas or grilled tofu. These options keep the bowl filling and delicious. If you want a different base, try brown rice or farro instead of quinoa. Both give a hearty feel and taste great. You can also use seasonal vegetables. Swap in zucchini, bell peppers, or even roasted sweet potatoes when they are fresh. This makes your bowl vibrant and full of nutrients. To amp up the taste, add fresh herbs like basil or dill. These herbs brighten the dish and add new layers of flavor. You can also customize the dressing. Mix in a bit of honey or mustard for a sweet twist. A hint of spice, like red pepper flakes, can also kick it up a notch. To keep your Greek chicken power bowls fresh, store leftovers in airtight containers. This helps prevent any odors from mixing in your fridge. You can keep the bowls in the fridge for up to three days. After serving, let the bowls cool down before placing them in the fridge. This keeps the food safe and helps maintain texture. If you have extra tzatziki sauce, store it separately to avoid soggy ingredients. You can freeze Greek chicken power bowls for longer storage. First, let the bowls cool completely. Then, place them in freezer-safe containers or bags. Remove as much air as possible to avoid freezer burn. These bowls can be stored for up to three months in the freezer. For reheating, thaw the bowls overnight in the fridge. You can warm them in the microwave or an oven. If using a microwave, heat in short bursts, stirring in between to ensure even warming. Assembling bowls ahead of time makes meals quick and easy. Prepare the quinoa and chicken in advance. You can chop the veggies and store them separately to maintain freshness. Keep the dressing and tzatziki sauce aside until you’re ready to eat. This way, the flavors stay bright, and the texture remains crunchy. By prepping ahead, you save time and enjoy tasty meals all week. You should marinate the chicken for at least 30 minutes. For more flavor, it can sit for up to 2 hours. Marinating makes the chicken juicy and tasty. Yes, you can make this recipe gluten-free. Just use gluten-free quinoa. Check all your other ingredients to ensure they are gluten-free too. If you need a substitute for feta cheese, try goat cheese or a dairy-free option. Both options give you a similar creamy texture. You can also skip cheese for a lighter bowl. Store leftovers in airtight containers. Keep them in the fridge for up to three days. To reheat, warm in the microwave or on the stove. Yes, this recipe is great for meal prep. You can prepare bowls ahead of time. Just store the chicken, quinoa, and salad separately until you’re ready to eat. In this post, we explored a tasty power bowl recipe that highlights chicken, quinoa, and fresh veggies. You learned about the marination process, cooking techniques, and how to assemble your bowl. I shared tips for meal prep and storage, along with tasty variations to mix things up. To sum up, these nutritious bowls are versatile, easy to make, and delicious. You can adapt them to fit your taste. Enjoy your cooking and the vibrant flavors you create!

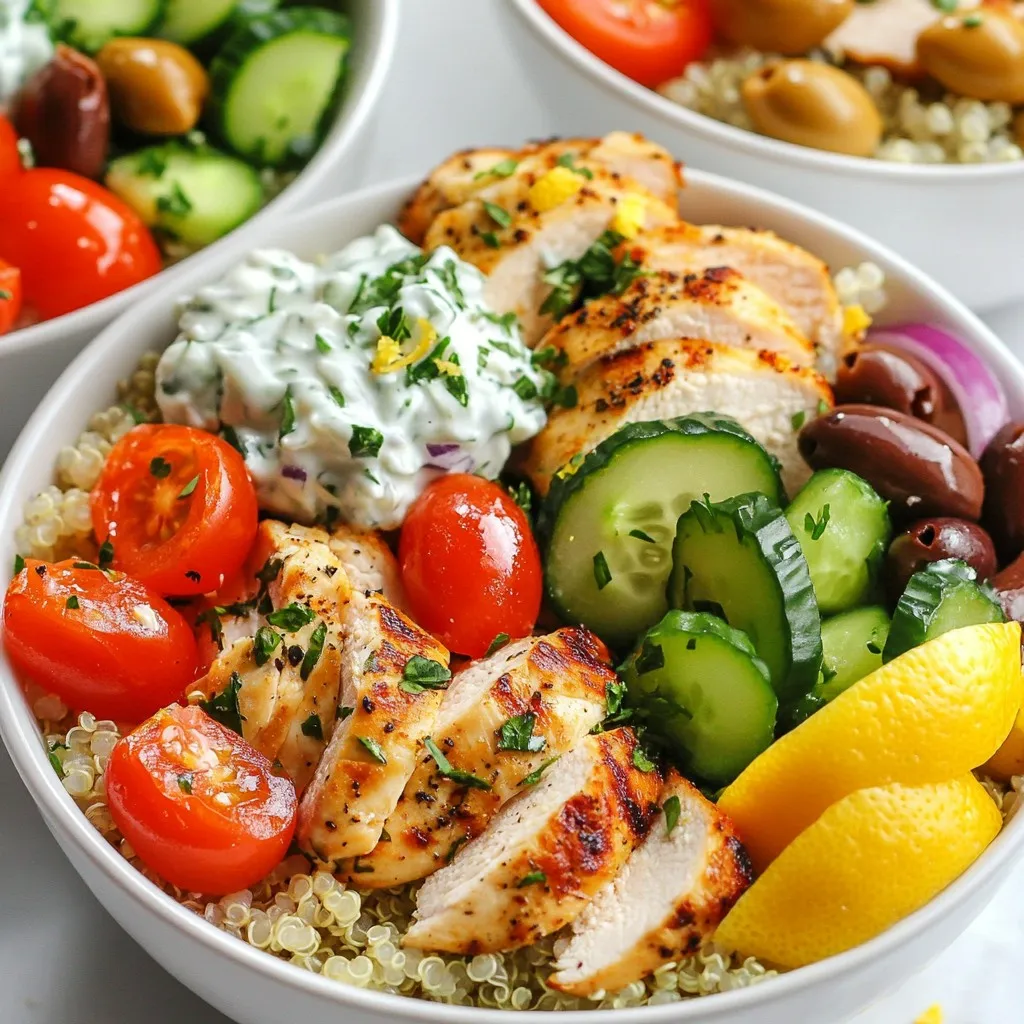
Looking for a quick, healthy meal? Greek Chicken Power Bowls are your answer! With juicy, marinated chicken, fluffy quinoa, and fresh veggies, these bowls are both nutritious and simple to …

Read more

Categories Salads

Birthday Cake Protein Balls Easy and Fun Snack Recipe

December 30, 2025January 9, 2025 by Chef Tavio
- 1 cup rolled oats - 1/2 cup vanilla protein powder - 1/4 cup almond flour - 1/2 cup nut butter (such as almond or cashew) - 1/4 cup maple syrup - 1 teaspoon vanilla extract - 1/4 cup colorful sprinkles (plus extra for rolling) - Pinch of salt These ingredients create a fun and tasty treat. The rolled oats give a hearty base. Vanilla protein powder adds flavor and boosts nutrition. Almond flour makes the balls light and nutty. Nut butter provides healthy fats and a creamy texture. Maple syrup brings a touch of sweetness. The vanilla extract adds warmth. Colorful sprinkles make these protein balls festive and fun. The pinch of salt enhances all the flavors. You can change the nut butter or add different sprinkles for a new twist. This list is simple yet effective, making these protein balls a great snack for any occasion. {{ingredient_image_2}} - Mixing Dry Ingredients: Start by taking a large mixing bowl. Add 1 cup of rolled oats, 1/2 cup of vanilla protein powder, 1/4 cup of almond flour, and a pinch of salt. Stir these dry ingredients well. You want them mixed evenly. - Combining Wet Ingredients: Now, grab a separate bowl. In this bowl, blend 1/2 cup of nut butter, 1/4 cup of maple syrup, and 1 teaspoon of vanilla extract. Mix until it becomes smooth and creamy. This step builds the sweet base for the protein balls. - Merging Wet and Dry Mixtures: Slowly pour the nut butter mix into the dry ingredients. Use a spatula or your hands to combine them. Mix until the dough is sticky yet holds together nicely. - Incorporating Sprinkles: Gently fold in 1/4 cup of colorful sprinkles. Save a few sprinkles for later decoration. This adds a fun touch, perfect for any celebration. - Chilling Process: Once mixed, put the bowl in the fridge for 15-20 minutes. Chilling helps the dough firm up, making it easier to shape. - Shaping Protein Balls: After chilling, scoop out portions with a tablespoon. Roll each scoop into a smooth ball between your hands. Repeat this until all the mixture is formed into balls. - Coating with Extra Sprinkles: Roll each protein ball in the extra sprinkles you saved. Make sure they get coated well. This adds a nice pop of color. - Final Chilling Stage: Place the protein balls on a plate or a baking sheet lined with parchment paper. Return them to the fridge for another 30 minutes. This final chill helps them set before you enjoy them. - Adjusting Texture with Ingredients: You can change the texture by adding more oats or nut butter. If you want them firmer, add more almond flour. If you prefer a softer ball, increase the nut butter. - Ensuring Cohesiveness: Make sure to mix the wet and dry ingredients well. If the mixture feels too dry, add a bit more maple syrup or nut butter. A good mix will help them hold together. - Chilling Times for Best Results: Chill the dough for 15-20 minutes before shaping. This makes it easier to handle. After shaping, chill them again for 30 minutes. This helps them firm up nicely. - Creative Serving Ideas: Serve the protein balls on a bright platter. You can also stack them in a jar for a fun display. Scatter extra sprinkles around to make it festive and appealing. - Attractive Plating Techniques: Use parchment paper under the protein balls. This keeps them neat and clean. A sprinkle of colorful toppings can make your plate pop with color. - Nutritional Advantages: These protein balls are packed with protein and healthy fats. They provide energy and are great for snacking. They help keep you full and satisfied. - Ideal Pre/Post-Workout Snack: Enjoy them before or after a workout. They give you the fuel you need to power through. Plus, they help with recovery and muscle repair. Pro Tips Keep Ingredients Room Temperature: Let your nut butter and maple syrup come to room temperature before mixing. This will help create a smoother mixture and make it easier to combine with dry ingredients. Experiment with Flavors: Feel free to swap out the nut butter for your favorite type or add a pinch of cinnamon or cocoa powder for extra flavor. This recipe is versatile and can be tailored to your taste preferences. Storage Tips: Store the protein balls in an airtight container in the refrigerator for up to a week or freeze them for longer shelf life. Just make sure to separate layers with parchment paper to prevent sticking. Perfect Rolling Technique: If the mixture is too sticky to roll, dampen your hands slightly with water. This will help you form neat, round balls without the mixture sticking to your palms. {{image_4}} You can change the flavor of your Birthday Cake Protein Balls in fun ways. Here are some ideas: - Chocolate Birthday Cake Protein Balls: Swap half of the vanilla protein powder for chocolate protein powder. This gives a rich, cocoa flavor. Add chocolate chips for extra sweetness. - Vanilla Almond Birthday Cake Protein Balls: Use vanilla protein powder and add a touch of almond extract. This gives a lovely almond taste that pairs well with the birthday cake theme. - Gluten-Free Options: Use gluten-free oats and almond flour. This way, everyone can enjoy these tasty treats without worry. You can also swap some ingredients for different needs: - Alternative Nut Butters: If you're not a fan of almond or cashew butter, try peanut butter or sunflower seed butter. Each adds a unique flavor and texture. - Vegan Options: For a vegan version, use a plant-based protein powder and maple syrup. These keep the recipe tasty and friendly for anyone avoiding animal products. Feel free to mix and match these ideas. Experimenting makes cooking exciting and fun! Refrigeration Guidelines Keep your birthday cake protein balls in an airtight container. They stay fresh in the fridge for about a week. This cool storage helps keep their texture and flavor. Remember to place parchment paper between layers to avoid sticking. Freezing Instructions You can freeze protein balls for longer storage. Wrap each ball in plastic wrap. Then, place them in a freezer-safe bag or container. They can last for up to three months in the freezer. When you want to eat them, let them thaw in the fridge or at room temperature. Duration in the Refrigerator These protein balls are best enjoyed within a week when stored in the fridge. After that, they may lose some flavor and texture. Signs of Spoilage Check for any off smells or changes in color. If they feel dry or hard, it's best to toss them. Freshness is key for tasty snacks! How to make protein balls without protein powder? You can use nut butter and oats as a base. Add seeds, like chia or flax, for extra protein. You can also mix in some Greek yogurt for creaminess and protein. Can I use different sweeteners instead of maple syrup? Yes, you can use honey or agave syrup. If you want a lower-calorie option, try stevia or monk fruit. Just remember to adjust the amount based on sweetness. What are the best ways to eat protein balls? You can enjoy them as a snack or dessert. They are great post-workout too. Pair them with fruit or yogurt for a balanced meal. Where can I buy pre-made birthday cake protein balls? You can find pre-made versions at health food stores or online. Look for brands that focus on natural ingredients. Always check the label for added sugars and fillers. In this blog post, we covered how to make delicious birthday cake protein balls. We looked at the key ingredients and walked through clear steps for preparation. You learned tips for the best texture and creative serving ideas. We also explored flavor variations and storage advice. These protein balls are fun, healthy snacks that fit any occasion. I hope you enjoy making them as much as I do!

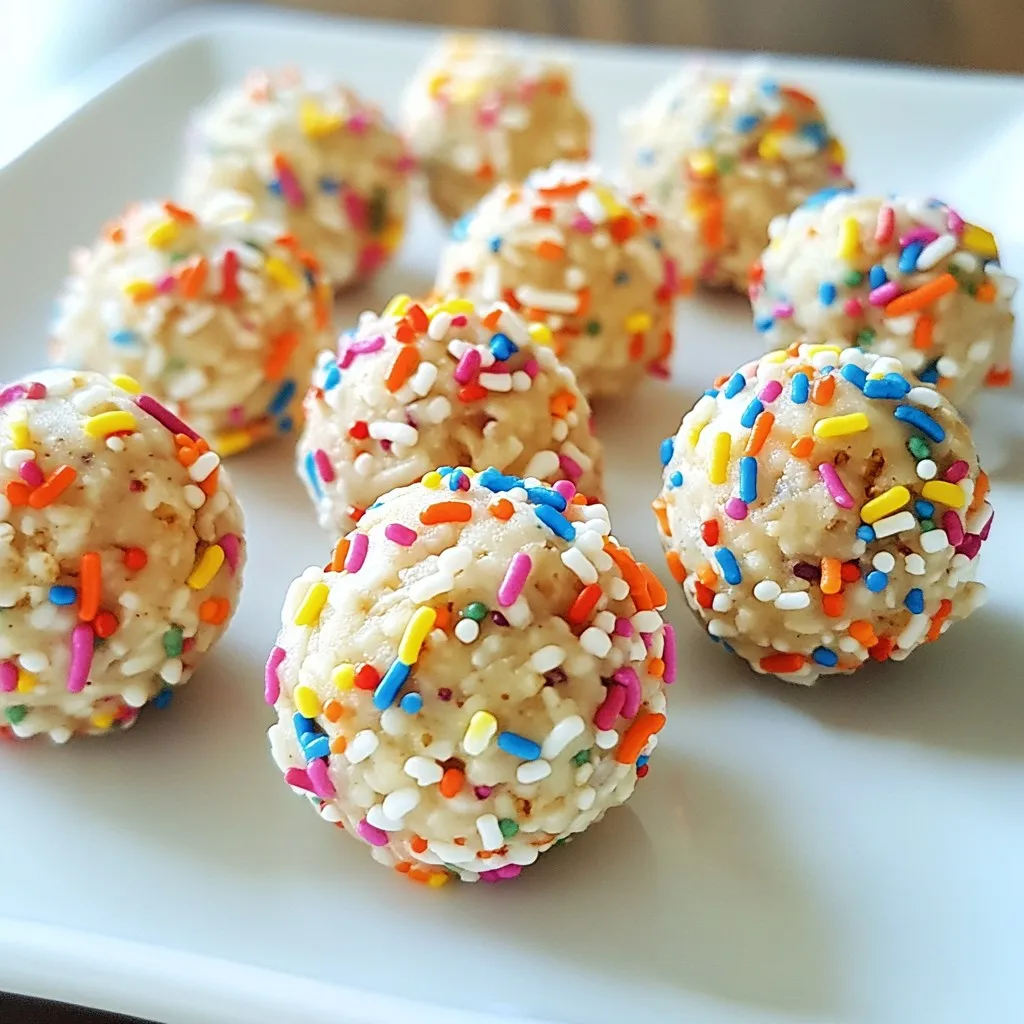
Looking for a fun and healthy snack? These Birthday Cake Protein Balls are just the treat you need! Packed with oats, nut butter, and colorful sprinkles, they are simple to …

Read more

Categories Desserts

Creamy Garlic Chicken Pasta Rich and Flavorful Dish

December 26, 2025January 9, 2025 by Chef Tavio
To make Creamy Garlic Chicken Pasta, gather these ingredients: - 8 ounces fettuccine or spaghetti - 2 boneless, skinless chicken breasts - Salt and freshly ground black pepper, to taste - 2 tablespoons extra-virgin olive oil - 4 cloves garlic, minced - 1 cup heavy cream - 1 cup low-sodium chicken broth - 1 cup freshly grated Parmesan cheese - 1 teaspoon Italian seasoning blend - 1/2 teaspoon red pepper flakes (optional, for a spicy kick) - 1 cup fresh spinach, roughly chopped - Fresh parsley, finely chopped (for garnish) You will need a few tools to prepare this dish: - Large pot for boiling pasta - Colander for draining pasta - Large skillet for cooking chicken and sauce - Cutting board and knife for slicing chicken - Measuring cups and spoons for accuracy Feel free to customize this recipe to suit your taste: - Swap fettuccine for penne or rotini for a fun shape. - Use chicken thighs for a juicier option. - Swap heavy cream with half-and-half or coconut cream for a lighter version. - Add veggies like bell peppers or mushrooms for extra nutrition. - For a vegan version, use tofu and plant-based cream options. {{ingredient_image_2}} First, fill a large pot with water. Add salt to the water and bring it to a boil. Once boiling, add 8 ounces of fettuccine or spaghetti. Cook according to the package instructions until the pasta is al dente. This usually takes about 8 to 10 minutes. When done, reserve 1/2 cup of the pasta water. Drain the pasta using a colander and set it aside. While the pasta cooks, take 2 boneless, skinless chicken breasts. Season both sides with salt and black pepper. In a large skillet, heat 2 tablespoons of extra-virgin olive oil over medium heat. When the oil is hot, add the chicken. Cook for 5 to 7 minutes on each side. The chicken should turn golden brown and reach an internal temperature of 165°F. Once cooked, move the chicken to a cutting board. Let it rest for a few minutes, then slice it into thin strips. In the same skillet, lower the heat slightly. Add 4 cloves of minced garlic and sauté for about 1 minute. Keep an eye on it to prevent burning. Once the garlic is fragrant, pour in 1 cup of heavy cream and 1 cup of low-sodium chicken broth. Stir to mix everything well. Increase the heat to bring the mix to a gentle simmer. Once simmering, add 1 cup of freshly grated Parmesan cheese, 1 teaspoon of Italian seasoning, and 1/2 teaspoon of red pepper flakes if you want some spice. Stir continuously for about 3 to 5 minutes, until the cheese melts and the sauce thickens. Add the cooked pasta and 1 cup of roughly chopped fresh spinach to the sauce. Toss everything together until the pasta is well coated. If the sauce is too thick, use some of the reserved pasta water to adjust the texture. Next, slice the rested chicken breasts and place them over the pasta. For a fresh touch, garnish with finely chopped parsley. Serve this dish warm and enjoy every creamy bite! To make a great sauce, start with fresh ingredients. Use heavy cream for a rich taste. Stir often as the sauce simmers. If it gets too thick, add some reserved pasta water. This helps you control the sauce's texture. Keep it creamy and smooth. Herbs bring life to your dish. Use fresh parsley for a bright finish. Italian seasoning adds depth to the sauce. For a kick, red pepper flakes work well. You can also try fresh basil or oregano. They give a nice twist to the classic flavor. Cooking chicken properly is key for safety and taste. Use a meat thermometer to check the chicken's temperature. It should reach 165°F. Cook it until golden brown on both sides. Let it rest before slicing. This keeps the juices inside, making the chicken tender and juicy. Pro Tips Perfectly Cooked Pasta: Always cook your pasta al dente for the best texture. It should have a slight bite to it and will also hold up better when mixed with the sauce. Rest the Chicken: Let the chicken rest for a few minutes after cooking. This helps retain its juices, making it more tender and flavorful when sliced. Adjusting Sauce Thickness: If your sauce gets too thick, gradually add reserved pasta water until you reach your desired consistency. This will help keep it creamy without diluting the flavor. Enhancing Flavor: For an extra boost of flavor, consider adding a splash of white wine to the sauce after sautéing the garlic. Let it reduce slightly before adding the cream and broth. {{image_4}} You can make this dish vegetarian by replacing the chicken. Use mushrooms instead for a hearty bite. Sauté sliced mushrooms in olive oil until soft. They will add a rich flavor to the sauce. You can also add some protein by using chickpeas or tofu. Both options will keep the meal filling and delicious. Adding vegetables enhances the dish's nutrition and color. You could mix in bell peppers, zucchini, or broccoli. Simply chop them and add them to the skillet with the garlic. Cook them until they are tender. Spinach is already in the recipe, but feel free to add kale or peas for extra greens. These additions make the dish even more vibrant and tasty. If you need a gluten-free option, choose gluten-free pasta. Many brands offer great alternatives that taste good. You can also use zucchini noodles or spaghetti squash for a lighter meal. Make sure to adjust the cooking time based on what you use. These swaps keep the dish enjoyable while meeting dietary needs. To keep your creamy garlic chicken pasta fresh, let it cool first. Place it in an airtight container. Store it in the fridge for up to three days. Make sure to seal it well to avoid any air getting in. This keeps the flavors intact. When you're ready to enjoy leftovers, reheat them gently. You can use the microwave or a skillet. If using a microwave, heat in short bursts. Stir often to warm evenly. If using a skillet, add a splash of chicken broth or water. This helps keep the pasta moist and creamy. Want to save some for later? You can freeze creamy garlic chicken pasta. First, let it cool completely. Then, pack it in a freezer-safe container. It can last for up to three months in the freezer. When you’re ready to eat it, thaw overnight in the fridge. Reheat as mentioned above for the best taste. Yes, you can use different pasta shapes. Penne, rigatoni, or even gluten-free pasta work great. The key is to cook it al dente, just like you do with fettuccine or spaghetti. Feel free to experiment with shapes you enjoy. Each type adds its own charm to the dish. To add heat, increase the red pepper flakes. Start with one teaspoon and adjust to your taste. You can also add sliced jalapeños or a dash of hot sauce. Just remember, spicy flavors can build up. Start small and taste as you go. If you want a lighter option, try using half-and-half or whole milk. For a dairy-free choice, coconut milk works well too. You can also blend silken tofu with a bit of water for a creamy texture. Each substitute will change the flavor a bit, but they can still make a tasty dish. This guide covered the key ingredients and steps to make a creamy pasta dish. You learned how to cook the pasta, prepare the chicken, and create a creamy sauce. I included tips to perfect the texture and enhance flavors. You also discovered variations, storage tips, and answers to common questions. Cooking can be fun and easy with the right knowledge. Now you can get creative with this recipe and enjoy delicious meals at home.

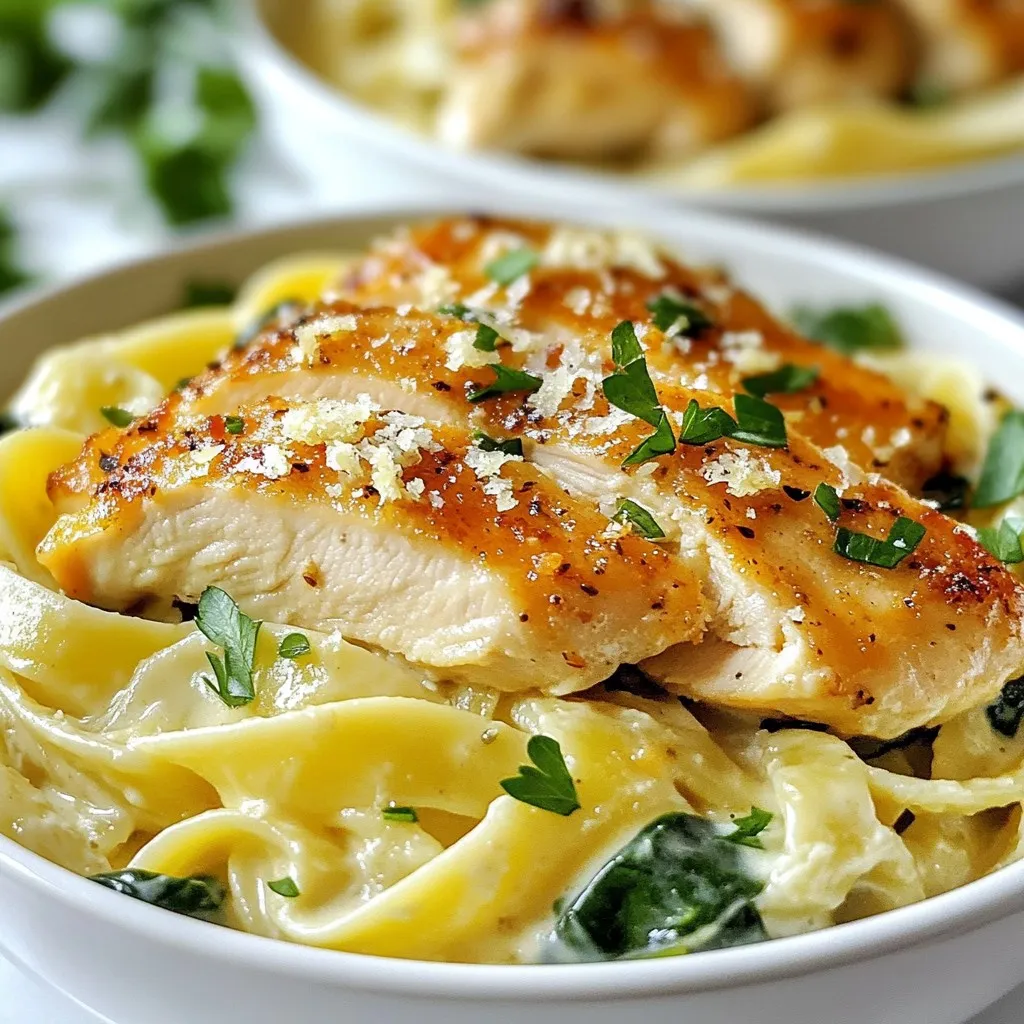
Are you ready to dive into a rich and flavorful dish? This Creamy Garlic Chicken Pasta is simple to make and packed with taste. In this blog post, I’ll take …

Read more

Categories Dinner

Fluffy Greek Yogurt Berry Pancakes Easy and Delicious

November 23, 2025January 7, 2025 by Chef Tavio
To make Fluffy Greek Yogurt Berry Pancakes, gather these simple ingredients: - 1 cup all-purpose flour - 1 tablespoon baking powder - 1 tablespoon granulated sugar - 1/2 teaspoon salt - 1 cup plain Greek yogurt - 2 large eggs - 1/4 cup milk (dairy or non-dairy) - 1 teaspoon pure vanilla extract - 1 cup mixed berries (blueberries, raspberries, strawberries, or your favorites) - 2 tablespoons melted coconut oil or unsalted butter, plus extra for the skillet You can customize your pancakes with fun add-ins. Consider: - Chopped nuts for crunch - Chocolate chips for sweetness - Lemon zest for a fresh twist These additions can make your pancakes even more delightful. These pancakes offer great nutrition. Greek yogurt adds protein and calcium. Berries provide vitamins and antioxidants. Each serving is balanced, making it ideal for breakfast. If you want a lighter option, use low-fat yogurt. For gluten-free needs, swap the flour with a gluten-free blend. {{ingredient_image_2}} Start by gathering your dry items. You need: - 1 cup all-purpose flour - 1 tablespoon baking powder - 1 tablespoon granulated sugar - 1/2 teaspoon salt In a large bowl, whisk these together. This helps mix the dry ingredients well. Make sure there are no lumps. A good mix leads to light and fluffy pancakes. Now, let’s focus on the wet ingredients. Take another bowl and add: - 1 cup plain Greek yogurt - 2 large eggs - 1/4 cup milk (dairy or non-dairy) - 1 teaspoon pure vanilla extract Whisk these ingredients until smooth. You want a creamy mixture with no lumps. This blend gives your pancakes a rich flavor and nice texture. Next, pour the wet mixture into the bowl with the dry ingredients. Use a spatula to gently fold them together. Mix just until you see no dry flour. It's okay to have small lumps. If you mix too much, the pancakes may become heavy. Preheat your skillet or griddle on medium heat. Add 2 tablespoons of melted coconut oil or unsalted butter to the pan. Once it’s hot, use a ladle to scoop about 1/4 cup of batter into the skillet. Cook until bubbles form on the surface. This usually takes about 2-3 minutes. Flip the pancakes gently and cook for another 2-3 minutes until they turn golden brown. Repeat this step until you use all the batter, adding more oil or butter as needed. Serve your fluffy pancakes warm. Drizzle honey or maple syrup on top. You can also add more berries for a pop of color. For a nice touch, stack the pancakes high and sprinkle some powdered sugar on top. A dollop of Greek yogurt makes it creamier and tastier. Enjoy your breakfast! To make your pancakes light and fluffy, use fresh baking powder. This ingredient helps create bubbles in the batter. Check the date on your baking powder. If it’s old, buy a new one. The Greek yogurt also adds moisture. This moisture helps keep the pancakes soft. Mixing too much can ruin your pancakes. When you combine the wet and dry ingredients, stir gently. A few lumps are okay. They will disappear while cooking. Over-mixing makes the pancakes tough, not fluffy. The right heat is key for great pancakes. Preheat your skillet on medium heat. If it's too hot, the pancakes burn on the outside. If it’s too cool, they won’t cook well. You can test the heat by dropping a little batter on the skillet. If it bubbles, it’s ready. Stack your pancakes high for a beautiful look. Add a sprinkle of powdered sugar on top. You can also add a dollop of Greek yogurt for creaminess. Fresh berries on the side add color and charm. Drizzle with honey or maple syrup for sweet flavor. Pro Tips Use Fresh Berries: Fresh berries not only enhance the flavor but also add a vibrant color to your pancakes. If using frozen berries, make sure to thaw and drain them to prevent excess moisture in the batter. Adjust Cooking Temperature: Keep the heat at medium to ensure that pancakes cook evenly. If they brown too quickly, lower the heat to allow the inside to cook through without burning the outside. Rest the Batter: Letting the batter rest for about 5 minutes before cooking allows the baking powder to activate fully, resulting in fluffier pancakes. Experiment with Flavors: Feel free to add spices like cinnamon or nutmeg to the batter for an extra flavor twist, or try using flavored Greek yogurt for a unique taste. {{image_4}} You can use many kinds of berries in these pancakes. Blueberries, strawberries, and raspberries work great. Feel free to mix them up! You can even add blackberries or chopped cherries. Each berry adds its flavor and color. They make the pancakes look fun and bright. Try using a single type of berry for a special taste. Adding flavors can make your pancakes even better. A bit of lemon zest brings freshness. You can also try a sprinkle of cinnamon for warmth. Vanilla extract adds richness, but you can switch it up too. Almond or maple extract can give new tastes. Experiment with flavors to find your favorite mix. You can easily make these pancakes gluten-free. Use a gluten-free flour blend instead of regular flour. Check the label to ensure it works for pancakes. For dairy-free pancakes, swap Greek yogurt with a non-dairy yogurt. Almond, coconut, or soy yogurt are good choices. Use non-dairy milk too. These changes still keep your pancakes light and fluffy. You can keep your leftover pancakes in the fridge for up to three days. Place them in an airtight container. This keeps them fresh and tasty. When you want to eat them, just take them out and enjoy! To freeze your pancakes, let them cool first. Then, stack them with a piece of parchment paper between each one. Place the stack in a freezer bag or container. Your pancakes will stay good for about two months in the freezer. This is great for quick breakfasts! To reheat, use a microwave, skillet, or oven. For the microwave, heat for about 30 seconds or until warm. If using a skillet, use medium heat and cook for 1-2 minutes on each side. For the oven, place them on a baking sheet at 350°F for about 10 minutes. Enjoy them warm, just like when they were fresh! Yes, you can use low-fat Greek yogurt. It may change the texture slightly. Your pancakes may be less rich but still fluffy and tasty. You can use applesauce or mashed bananas as an egg substitute. Use 1/4 cup for each egg. This will keep your pancakes moist and add a slight sweetness. To make pancakes crispy, use a hot skillet with melted coconut oil or butter. Cook them longer on each side until golden brown. This helps create a nice, crispy edge. You can prepare the batter ahead of time. Store it in the fridge for up to 24 hours. Stir it gently before cooking, as it may thicken while sitting. These pancakes taste great with fresh berries, honey, or maple syrup. You can also add a dollop of Greek yogurt or a sprinkle of nuts for extra flavor and texture. This blog post guides you through making delicious pancakes. We covered key ingredients and optional add-ins to enhance flavor. I shared step-by-step instructions for mixing and cooking. You learned tips for fluffy results and discovered fun variations to try. Lastly, we discussed storage tips to keep pancakes fresh. Pancakes are simple yet satisfying. With these ideas, you can create your perfect stack anytime. Enjoy experimenting with flavors and serve them your way!

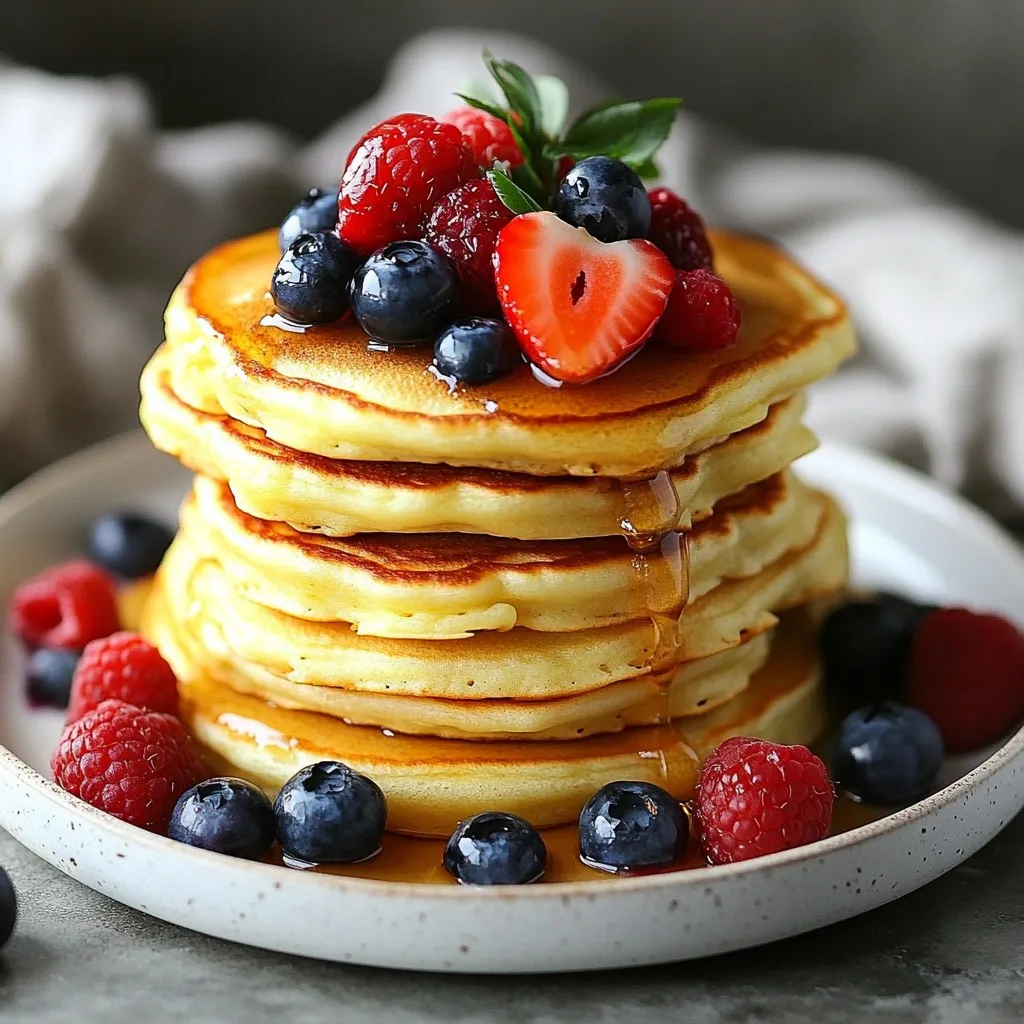
Get ready to flip your breakfast game with Fluffy Greek Yogurt Berry Pancakes! These pancakes are not only easy to make, but they burst with berry goodness and a creamy …

Read more

Categories Breakfast
Older posts
Newer posts
← Previous Page1 … Page184 Page185 Page186 … Page191 Next →

TASTED NEST

Where Flavor Finds a Home 🍳🏡 — warm, simple, and crave-worthy recipes made for real life, from stovetop mornings to backyard dinners.

PAGES

Home About Contact Privacy Policy Terms & Conditions Cookie Policy GDPR Policy Copyright Policy Disclaimer

CATEGORIES

Appetizers Desserts Salads Breakfast Dinner
Copyright © 2026 Tasted Nest. All rights reserved.