Skip to content
  • GDPR Privacy Policy
  • Copyright Policy
  • Disclaimer
  • Terms & Conditions
Tasted Nest
  • Home
  • Appetizers
  • Desserts
  • Salads
  • Breakfast
  • Dinner
  • Privacy Policy
  • Contact
  • About

Chef Tavio

Mongolian Ground Beef Noodles Flavorful and Simple Dish

January 4, 2026December 16, 2025 by Chef Tavio
- Ground beef - Egg noodles - Broccoli and bell pepper Mongolian ground beef noodles start with a few key items. Ground beef is the star of the dish. You need about 1 pound. Next, you'll use 8 ounces of egg noodles. They add a nice texture and flavor. Broccoli and bell pepper add color and crunch. Choose any bell pepper you like. - Soy sauce - Hoisin sauce - Oyster or mushroom sauce For flavor, you need sauces. Soy sauce brings saltiness. Hoisin sauce adds sweetness. You can use oyster sauce or mushroom sauce for a vegetarian option. These sauces blend well with the beef and noodles. - Aromatics (onion, garlic, ginger) - Vegetable oil - Sesame oil and garnishes Aromatics are important. You will use a medium onion, three cloves of garlic, and a piece of ginger. These ingredients add great flavor. Heat up 1 tablespoon of vegetable oil for cooking. After mixing everything, drizzle 1 tablespoon of sesame oil on top. For garnishing, use chopped green onions and sesame seeds. They add a nice touch and make your dish pop! {{ingredient_image_2}} Start by boiling a large pot of water. Once the water bubbles, add the egg noodles. Cook them according to the package instructions. You want them to be al dente, which means they should still have a bit of bite. After cooking, drain the noodles well. Make sure to separate them gently so they don’t stick together. Next, heat a large skillet or wok over medium-high heat. Add one tablespoon of vegetable oil. When the oil is hot, add the ground beef. Use a spatula or wooden spoon to break it apart as it cooks. Sauté the beef until it turns brown and is fully cooked, which should take about 5 to 7 minutes. Once done, season with salt and pepper to taste. Transfer the beef to a plate and set it aside. In the same skillet, keep any leftover fat in the pan. This adds flavor! Next, add the sliced onion, minced garlic, and grated ginger. Stir-fry these aromatics for about 2 to 3 minutes. They should become fragrant and the onions will turn translucent. After that, toss in the broccoli florets, julienned carrot, and sliced bell pepper. Stir-fry for another 4 to 5 minutes. You want the veggies to be bright and crisp, not mushy. Now, return the cooked ground beef to the skillet with the sautéed vegetables. Pour in the soy sauce, hoisin sauce, and oyster sauce. Stir everything well to coat the beef and veggies evenly. Let it cook together for about 2 to 3 minutes. This allows the flavors to blend beautifully. Finally, add the cooked egg noodles into the skillet. Toss them gently with the beef and veggies, ensuring they get coated in the sauce. Drizzle one tablespoon of sesame oil over the top and mix well. This adds a rich depth of flavor. Serve the dish hot, garnished with chopped green onions and a sprinkle of sesame seeds for that perfect finish. Enjoy your delicious meal! To cook noodles perfectly, aim for al dente. This means they should be firm yet cooked through. If you overcook them, they may turn mushy and lose texture. After boiling, drain the noodles well. This keeps them from clumping together. To balance flavors, mix the right sauces. Use soy sauce for saltiness, hoisin for sweetness, and oyster sauce for depth. Taste as you go. Adjust the sauces based on your liking. This step is key to a delicious dish. For an appealing plate, structure the dish well. Start with a mound of noodles at the center. Layer the colorful beef and veggies on top. This creates a vibrant look that is sure to impress. Garnishing adds flair. Sprinkle chopped green onions and sesame seeds on top. These not only enhance the look but also add crunch. A little extra color makes a big difference! If you overcook the noodles, rinse them under cold water. This stops the cooking process. You can then stir-fry them briefly with a splash of oil to reheat. This helps revive their texture. Adjusting seasoning is simple. If it's too salty, add a bit of water or more veggies. If it needs more flavor, a dash of soy sauce or hoisin can help. Taste as you go to find your perfect balance. Pro Tips Use Fresh Ingredients: Fresh vegetables and high-quality beef will enhance the flavor and texture of your dish, making it even more delicious. Don't Overcook the Noodles: Cook the egg noodles just until al dente, as they will continue to cook when combined with the hot beef and vegetables. Customize Your Veggies: Feel free to swap or add vegetables based on your preference or what you have on hand, such as snow peas or snap peas for extra crunch. Adjust the Sauce to Taste: Taste the sauce before serving and adjust the soy sauce or hoisin sauce according to your desired level of sweetness and saltiness. {{image_4}} You can easily switch the ground beef for plant-based protein. Use options like lentils or mushrooms for a hearty texture. This change keeps the dish flavorful and filling. Incorporate more vegetables to boost nutrition. Try adding zucchini, snap peas, or bell peppers. This mix adds color and crunch to your meal. Not a fan of egg noodles? You can use rice noodles or whole wheat noodles. These options fit different dietary needs and still taste great. For gluten-free choices, look for rice or quinoa noodles. They work well and absorb the tasty sauces nicely. Want to spice things up? Add chili sauce for heat. This simple change brings excitement to each bite. You can also explore other sauces. Try adding teriyaki or sweet chili sauce for a unique twist. These additions make your dish even more special. To keep your Mongolian ground beef noodles fresh, follow these steps: - Refrigeration: Allow the dish to cool to room temperature. Place it in an airtight container. This helps to prevent moisture loss. - Duration: The dish lasts up to three days in the fridge. After that, the flavor and texture may suffer. When it’s time to enjoy your leftovers, reheating correctly is key: - Methods: Use a skillet over medium heat to warm the noodles. Stir frequently to keep them from sticking. You can also use a microwave. Heat in short bursts, stirring in between to ensure even warming. - Enhancing Flavors: Add a splash of soy sauce or sesame oil while reheating. This can brighten the flavors and make the dish taste fresh again. Mongolian Ground Beef Noodles is a tasty dish that blends flavors from Mongolia and China. It features ground beef, fresh veggies, and egg noodles. The dish is quick to make and packed with flavor. You can enjoy it at home or serve it to guests. The use of soy sauce and hoisin sauce adds a savory touch. This dish is colorful, making it a feast for the eyes too! Yes, you can use different meats in this recipe. Chicken and pork are great options. For chicken, use ground chicken for a leaner choice. If you prefer pork, ground pork works well too. Just cook the meat until it's browned. This way, you can enjoy the same great flavor with a different protein. To add some heat to your Mongolian noodles, try using chili sauce. You can also add red pepper flakes while cooking. If you like fresh flavors, chopped jalapeños are a great choice. Start with a small amount and taste as you go. This way, you can find the perfect level of spice for your palate. Yes, you can prepare this dish in advance. Cook the noodles and meat separately. Store them in airtight containers in the fridge. You can also chop the vegetables ahead of time. When you're ready to eat, just heat everything together in a skillet. This makes it easy to enjoy a quick meal on busy days! This blog post gave you a clear guide on making Mongolian Ground Beef Noodles. We covered the main ingredients, cooking steps, and handy tips for a great dish. Remember, you can adjust flavors and ingredients to your taste. Try the variations for fun twists. With these methods, you'll create a tasty meal every time. Enjoy cooking and have fun sharing your dishes!

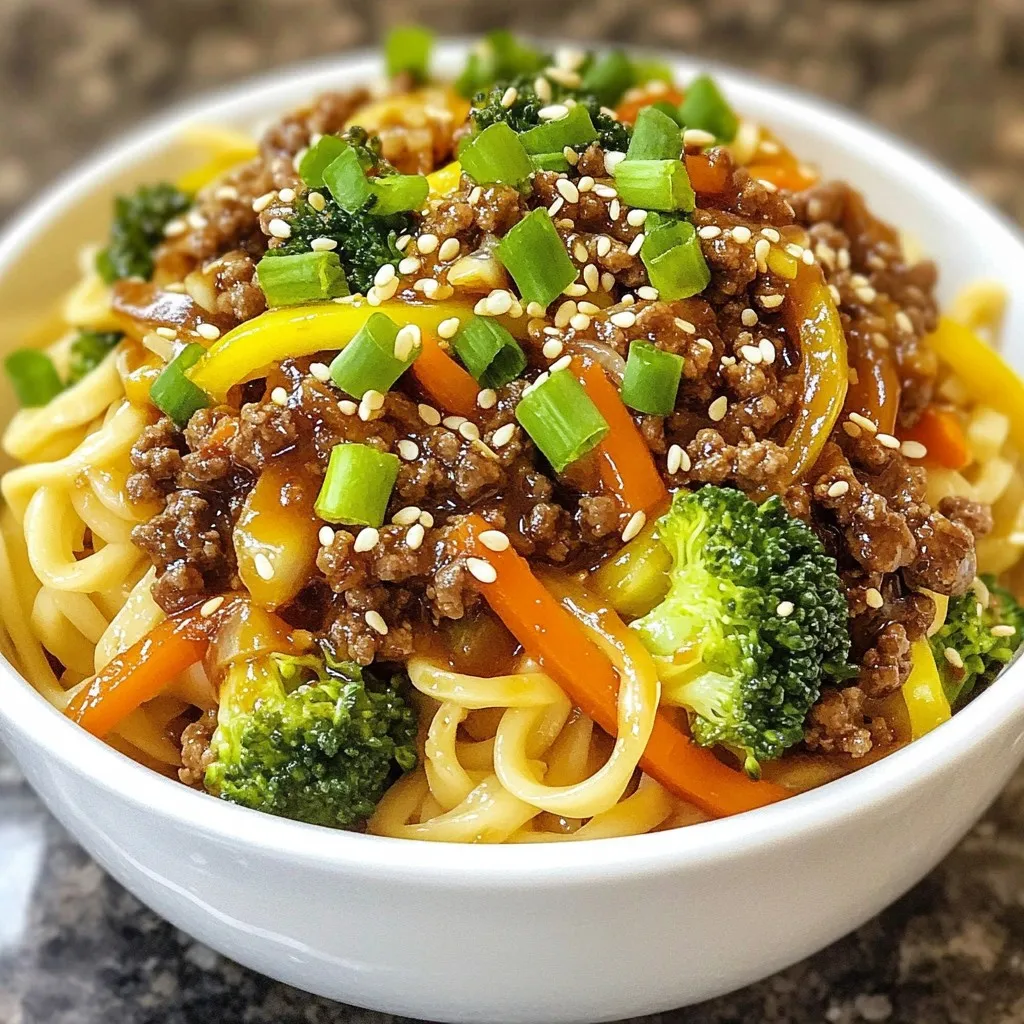
If you’re on the hunt for a quick and tasty meal, look no further! Mongolian Ground Beef Noodles are flavorful and easy to make. With simple ingredients like ground beef, …

Read more

Categories Dinner

Crack Chicken Penne Pasta Simple and Flavorful Meal

January 9, 2026December 15, 2025 by Chef Tavio
- 12 oz penne pasta - 1 lb cooked and shredded chicken breast - 1 cup cream cheese, softened to room temperature - 1/2 cup ranch seasoning mix - 1/2 cup chicken broth (preferably low sodium) - 1 cup sharp cheddar cheese, freshly shredded - 1 cup mozzarella cheese, freshly shredded - 2 tablespoons extra virgin olive oil - 1/2 cup green onions, finely chopped - Salt and freshly ground black pepper to taste To make Crack Chicken Penne Pasta, you need simple yet key ingredients. The penne pasta serves as a hearty base. I prefer cooked and shredded chicken breast for a tender bite. Cream cheese adds creaminess and richness. Ranch seasoning mix brings a bold flavor. Low-sodium chicken broth enhances the sauce without too much salt. Freshly shredded cheddar and mozzarella create that gooey texture we love. Extra virgin olive oil helps sauté the chicken perfectly. Green onions add a fresh crunch. Lastly, salt and pepper allow you to adjust the taste to your liking. Using these ingredients allows you to create a dish that is both filling and delicious. The blend of flavors creates a meal that is hard to resist. {{ingredient_image_2}} To cook the penne pasta, start by boiling water in a large pot. Add salt to the water. This adds flavor to the pasta. Once the water boils, add the penne pasta. Cook it for about 10-12 minutes. You want it to be al dente—firm but not hard. This texture helps the pasta hold up when mixed with the sauce. After it's done, drain the pasta in a colander and set it aside. Next, heat a large skillet over medium heat. Add two tablespoons of extra virgin olive oil. Once the oil shimmers, add the cooked and shredded chicken. Sauté the chicken for 2-3 minutes. Keep stirring to heat it evenly. This step makes sure the chicken warms up nicely and is ready to mix with the sauce. In a mixing bowl, combine 1 cup of softened cream cheese and 1/2 cup of ranch seasoning mix. Add 1/2 cup of chicken broth to this mix. Stir it well until it is smooth and free of lumps. A smooth sauce coats the chicken better and makes every bite tasty. Pour the creamy ranch mixture over the chicken in the skillet. Stir continuously to coat the chicken well with the sauce. This ensures every piece of chicken is full of flavor. The sauce should cling to the chicken, so each bite is rich and delicious. Turn the heat to low and add 1 cup of shredded sharp cheddar cheese and 1 cup of shredded mozzarella cheese. Stir gently until the cheeses melt and blend into the sauce. This creates a rich and creamy texture that brings everything together in a comforting way. Finally, add the cooked penne pasta to the skillet. Toss everything together gently. This helps the pasta soak up the sauce. Season with salt and freshly ground black pepper to taste. For a fresh touch, fold in 1/2 cup of finely chopped green onions. Serve it hot in individual bowls, topped with extra cheese and green onions for a bright finish. Enjoy this simple and hearty meal! - Salt in boiling water: Always add salt to your boiling water. This step helps flavor the pasta. I use about one tablespoon of salt for 4 quarts of water. - Timing for perfect texture: Cook the penne until it is al dente. This means it should be firm but tender. Check the package for timing. Usually, it’s around 10-12 minutes. - Avoiding lumps in sauce: To keep the sauce smooth, stir the cream cheese well before adding it to the pan. Mix it with ranch seasoning first. This helps break up any lumps. - Adjusting thickness with chicken broth: If your sauce is too thick, add chicken broth. This will help thin it out. Start with a little and add more if needed. - Adjusting spice levels: If you like it spicy, add some cayenne pepper or red pepper flakes. Start with a small amount and taste as you go. - Substituting cheese options: You can use different cheeses. Try pepper jack for a kick or gouda for a smoky flavor. Mix and match to find what you love! Pro Tips Use Rotisserie Chicken: For a quicker prep time, you can use store-bought rotisserie chicken instead of cooking and shredding chicken breast yourself. This saves time and adds extra flavor. Customize the Cheese: Feel free to mix different types of cheese based on your preference. Pepper jack or gouda can add a unique twist to the flavor profile of the dish. Make It Ahead: This dish can be prepared in advance and stored in the refrigerator for up to 3 days. Just reheat on the stove with a splash of chicken broth to maintain creaminess. Spice It Up: If you enjoy a little heat, consider adding diced jalapeños or a pinch of red pepper flakes to the sauce for an extra kick. {{image_4}} To make Crack Chicken Penne Pasta healthier, you can try some simple swaps. Use low-fat cream cheese instead of regular cream cheese. This switch cuts calories without losing flavor. Also, try low-fat cheese options for an even lighter dish. Adding vegetables boosts nutrition and flavor. Chop up some spinach, bell peppers, or broccoli. Toss them in with the pasta for a colorful touch. You can also use frozen peas or carrots; they are easy to add and taste great. Want to switch things up? Change the type of ranch dressing you use. There are many flavors available, like spicy or herb-infused ranch. This adds a new twist to your dish. You can also create your own seasoning blend. Mix garlic powder, onion powder, and dried herbs for unique flavors. A homemade blend can give your pasta a personal touch that store-bought mixes often lack. Crack Chicken Penne Pasta pairs well with many sides. Garlic bread is a classic choice. It’s perfect for soaking up that creamy sauce. A fresh green salad complements the richness of the pasta. For a fun twist, turn this dish into a casserole. Pour the pasta mixture into a baking dish, top with extra cheese, and bake until bubbly. This option is great for feeding a crowd or meal prepping for the week. To keep your Crack Chicken Penne Pasta fresh, use airtight containers. Glass containers work best. They help prevent spills and keep the food safe. Make sure the pasta cools down before sealing. This helps avoid steam buildup, which can make the pasta mushy. Refrigerate leftovers within two hours of cooking. Place the pasta in the fridge right away. Leftover pasta stays fresh for up to three to four days. You can reheat your pasta in the microwave or on the stovetop. For the microwave, place the pasta in a safe bowl. Add a splash of chicken broth to keep it moist. Heat it in short bursts, stirring in between. If you use the stovetop, warm the pasta in a skillet over low heat. Add a bit of olive oil or broth to help with moisture. Stir often to keep it from sticking. Leftover Crack Chicken Penne Pasta lasts three to four days in the fridge. If you want to keep it longer, consider freezing it. In the freezer, it can last up to three months. Watch for signs of spoilage like an off smell, changes in color, or mold. If you see any of these, it’s best to throw it away. Yes, you can use frozen chicken. Just cook it fully before shredding. Thaw it first for best results. Use a slow cooker or Instant Pot to save time. If you need a substitute, try Greek yogurt or cottage cheese. Both will add creaminess. They also bring a tangy flavor, which is nice in this dish. To make this dish vegetarian, replace chicken with cooked mushrooms or chickpeas. Use vegetable broth instead of chicken broth. You can add extra veggies for more flavor. Yes, you can prepare it ahead. Cook the pasta and sauce, then mix them. Store in the fridge. Reheat on the stove or in the microwave before serving. This dish pairs well with garlic bread or a fresh salad. You can also serve it with steamed veggies for a balanced meal. Enjoy your delicious creation! In this blog post, we explored how to make Crack Chicken Penne Pasta, starting with essential ingredients like penne, chicken, and creamy cheeses. We outlined cooking tips, steps for a smooth sauce, and ways to enhance flavors. I shared variations for healthier options and addressed storage techniques. Cooking can be fun and rewarding. Remember to customize the dish to fit your taste. Enjoy making this flavorful meal your own!

Ready to whip up a meal that’s simple, tasty, and sure to impress? My Crack Chicken Penne Pasta is here to save your dinner night! With just a few key …

Read more

Categories Dinner

Vanilla Sandwich Sugar Cookies Delightful Treat Recipe

December 21, 2025December 14, 2025 by Chef Tavio
To make Vanilla Sandwich Sugar Cookies, you will need these simple ingredients: - 2 ¾ cups all-purpose flour - 1 teaspoon baking powder - ½ teaspoon baking soda - ½ teaspoon fine sea salt - 1 cup unsalted butter, softened - 1 cup granulated sugar - 1 large egg, at room temperature - 2 teaspoons pure vanilla extract - ½ cup powdered sugar - 1 cup vanilla frosting - Rainbow sprinkles Each ingredient plays a key role. The all-purpose flour gives structure. Baking powder and baking soda help the cookies rise. The fine sea salt enhances flavor. Butter adds richness and makes the cookies soft. Granulated sugar sweetens and helps with texture. The egg binds everything together. Pure vanilla extract provides that lovely vanilla taste. Powdered sugar adds sweetness to the filling. Vanilla frosting brings creaminess, while rainbow sprinkles add fun and color. With these ingredients, you can create delightful treats that will impress anyone! Enjoy the process and have fun mixing these flavors together! {{ingredient_image_2}} - Preheat your oven to 350°F (175°C). This step is key for baking. - While the oven warms, line two baking sheets with parchment paper. This helps the cookies not to stick. - In a medium bowl, whisk together 2 ¾ cups of flour, 1 teaspoon of baking powder, ½ teaspoon of baking soda, and ½ teaspoon of salt. Mix well and set aside. - In a large bowl, cream together 1 cup of softened butter and 1 cup of granulated sugar. Use an electric mixer on medium speed for about 3 minutes. The mix should be light and fluffy. - Now, add 1 large egg and 2 teaspoons of pure vanilla extract to the creamed mixture. Mix on low speed until combined. - Gradually add the dry flour mixture to the wet mix. Mix on low speed until just combined. Avoid overmixing to keep the cookies tender. - Use a cookie scoop or a tablespoon to portion out the dough. Roll each portion into a ball and place them on the lined sheets, leaving 2 inches for spreading. - Slightly flatten each ball with your palm to create a disc. Bake for 10-12 minutes. Look for golden edges and soft centers. - After baking, let the cookies cool on the baking sheet for 5 minutes. Then, move them to a wire rack to cool completely. To make soft cookies, avoid overmixing your dough. Mix just until the flour disappears. Overmixing can lead to tough cookies, which we don’t want. After baking, let them cool. Use a wire rack for even cooling. This keeps the bottoms from getting soggy. You can use store-bought vanilla frosting for ease. However, homemade frosting tastes fresh and rich. If you make your own, try to let it cool before spreading. This helps it stay firm. When spreading frosting, use an offset spatula for a smooth finish. Rainbow sprinkles add a fun look. To use them well, apply them right after frosting. This helps them stick better. If you want variety, try crushed nuts or coconut flakes. These can add flavor and texture. You can also use colored sugar for a different touch. Pro Tips Chill the Dough: For even better flavor and texture, chill the cookie dough in the refrigerator for at least 30 minutes before baking. This helps prevent spreading and creates a thicker cookie. Make It Uniform: Use a cookie scoop to ensure all cookies are the same size, promoting even baking and a consistent look. Customize the Filling: Feel free to mix and match the frosting flavors or add a layer of jam or Nutella for a unique twist on the classic sandwich cookie. Store Properly: Keep the sandwich cookies in an airtight container at room temperature for up to a week. For longer storage, refrigerate or freeze them, separating layers with parchment paper. {{image_4}} You can make these cookies even more fun by adding new flavors. Try using different extracts. Almond extract adds a nice nutty taste. Lemon extract gives a fresh, zesty kick. Both options can change the whole cookie experience. You can also spice things up. Adding a pinch of cinnamon or nutmeg gives warmth and depth. These spices blend well with vanilla. They add a cozy feel to each bite. Experimenting with flavors makes baking exciting. If you follow a gluten-free diet, you can still enjoy these cookies. Use a gluten-free flour blend instead of all-purpose flour. There are many good options available at stores. Just make sure it works for baking. For dairy-free cookies, substitute the butter. Use coconut oil or a dairy-free margarine. This keeps the cookies soft and tasty. You can also use a dairy-free frosting for the filling. These swaps make the cookies fit different diets. The filling is where you can get creative. Instead of vanilla frosting, try different types of frosting. Chocolate or cream cheese frosting works great. These options add new flavors to your sandwich cookies. You can also use jams or fruit spreads. Strawberry or raspberry jam gives a fruity twist. It adds a bright flavor that pairs well with the cookies. These filling variations can make your cookies unique and exciting. To keep your vanilla sandwich sugar cookies fresh, use an airtight container. This will help keep moisture out. You can separate layers with parchment paper. This keeps them from sticking together. The cookies stay fresh for up to one week at room temperature. You can freeze these cookies to enjoy later. First, let the cookies cool completely. Then, place each sandwich cookie in a freezer bag. Squeeze out as much air as possible before sealing. These cookies freeze well for about three months. To thaw, take them out of the freezer and leave them at room temperature. This usually takes about one hour. You can also microwave them for 10-15 seconds for a quick treat. To maintain taste and texture, store cookies away from heat and light. Keeping them in a cool, dark place works best. You can also add a slice of bread to the container. This helps keep cookies soft and moist. Avoid storing cookies in the fridge, as it can dry them out. To make your cookies softer, use room temperature butter. Cream it well with sugar. Do not overbake the cookies; take them out when they are still soft in the center. You can also add an extra egg yolk for added moisture. Yes, you can use cake flour for a lighter texture. Almond flour is another option, but it will change the taste and texture. If you go gluten-free, try a 1:1 gluten-free flour blend. You can store these cookies in an airtight container for up to one week. They stay fresh longer at room temperature. For best results, keep them in a cool, dry place. You can use almond extract for a nutty flavor. Lemon extract also works if you want something bright. A bit of maple syrup can add sweetness and flavor, too. Yes, you can make the dough ahead of time. Chill it in the fridge for up to three days. You can also bake the cookies and freeze them for later. Just thaw and frost when you’re ready to serve. You now have all the details to bake perfect cookies. From gathering ingredients to beautiful decorations, I covered everything you need. Remember, the right mix and baking time are key for great texture. Don’t forget to have fun with flavor and decoration options! With these tips, your cookies will stand out. Enjoy your baking journey and share your creations with friends and family. Happy baking!

Looking for a fun, easy treat that will impress your friends? You’re in the right place! My Vanilla Sandwich Sugar Cookies are crispy on the outside and soft on the …

Read more

Categories Desserts

Low Sugar Applesauce Oatmeal Cookies Delightful Treat

December 24, 2025December 14, 2025 by Chef Tavio
Let’s gather our ingredients for these tasty low sugar applesauce oatmeal cookies. You will need: - 1 cup rolled oats - 1/2 cup whole wheat flour - 1/2 teaspoon baking soda - 1/2 teaspoon ground cinnamon - 1/4 teaspoon sea salt - 1/2 cup unsweetened applesauce - 1/4 cup honey or maple syrup - 1/4 cup coconut oil, melted - 1 teaspoon pure vanilla extract - 1/3 cup raisins or dark chocolate chips - 1/4 cup chopped nuts (optional) These ingredients work together for a healthy and delicious treat. The rolled oats give a nice chewiness, while the whole wheat flour adds depth. Unsweetened applesauce brings moisture and natural sweetness. Using honey or maple syrup lets you control the sugar level. Coconut oil adds a rich flavor, and vanilla extract enhances all the tastes. You can mix in your choice of raisins or dark chocolate chips for a little fun. Chopped nuts offer crunch, but they are optional. With these simple ingredients, you will make cookies that are both delightful and satisfying. {{ingredient_image_2}} - Preheat your oven to 350°F (175°C). - Line a baking sheet with parchment paper. This helps prevent sticking. - In a large bowl, combine: - 1 cup rolled oats - 1/2 cup whole wheat flour - 1/2 teaspoon baking soda - 1/2 teaspoon ground cinnamon - 1/4 teaspoon sea salt - Stir these dry ingredients well until mixed. - In another bowl, blend together: - 1/2 cup unsweetened applesauce - 1/4 cup honey or maple syrup - 1/4 cup melted coconut oil - 1 teaspoon pure vanilla extract - Whisk until smooth and uniform. - Gradually pour the wet mixture into the dry bowl. - Mix gently until just combined. - You can fold in: - 1/3 cup raisins or dark chocolate chips - 1/4 cup chopped nuts (optional) - Be careful not to overmix. - Use a tablespoon to drop spoonfuls of dough onto the baking sheet. - Space them about 2 inches apart. - Lightly flatten each mound with the back of a spoon. - Bake for 10-12 minutes. - They are done when the edges turn golden brown. - Let them rest on the baking sheet for 5 minutes, then cool on a rack. To get the right texture, avoid overmixing the dough. When you mix just until combined, you keep the cookies chewy. Overmixing makes them tough and dry. Remember, lumps are okay! Watch your cookies closely while they bake. They should turn golden at the edges but stay soft in the middle. This will give you that perfect balance of crispy and chewy. If you see the edges start to brown, it’s time to take them out. Make your cookies look lovely when serving. Stack them on a wooden platter or a bright plate. A sprinkle of cinnamon on top adds a nice touch and a sweet aroma. It makes them more inviting for guests or family! Pro Tips Use Fresh Ingredients: For the best flavor and texture, use fresh and high-quality ingredients, especially the applesauce and spices. Adjust Sweetness: Feel free to adjust the amount of honey or maple syrup based on your personal sweetness preference or add some nuts for a delightful crunch. Storage Tips: Store the cookies in an airtight container at room temperature for up to a week, or freeze them for longer storage. Experiment with Mix-ins: Don't hesitate to mix in dried fruit, seeds, or different types of chocolate to make these cookies your own! {{image_4}} You can switch up the sweeteners in this recipe. Instead of honey or maple syrup, try using agave nectar or stevia. Both options add sweetness without much sugar. If you want more flavor, consider brown sugar or coconut sugar. Each sweetener will change the taste slightly, so feel free to experiment. Adding spices can take your cookies to a new level. Besides cinnamon, think about using nutmeg or ginger. Each spice brings its own warmth and depth. You can also add a splash of almond or coconut extract for a unique twist. These small changes can create a fun new taste for your cookies. Mix-ins can make your cookies even more delightful. You can add dried fruits like cranberries, apricots, or figs. They provide a chewy texture and fruity flavor. Nuts like walnuts or pecans add crunch and richness. If you're feeling adventurous, try adding some shredded coconut or sunflower seeds. The options are endless! To keep your low sugar applesauce oatmeal cookies fresh, store them in an airtight container. Line the container with parchment paper to avoid sticking. Place the cookies in a single layer, if possible. This helps maintain their shape and texture. Keep the container in a cool, dry place. Avoid sunlight and heat, which can make them stale. These cookies taste best within a week but can stay fresh longer if stored right. You can freeze both the dough and baked cookies. For the dough, scoop out the cookie mounds and place them on a baking sheet. Freeze until solid, then transfer them to a freezer bag. Label the bag with the date and type. You can bake them straight from the freezer. For baked cookies, let them cool completely. Wrap each cookie in plastic wrap, then place them in a freezer bag. They can last up to three months in the freezer. At room temperature, your cookies can last about one week. If you want to keep them fresh longer, consider freezing them. Always check for any signs of spoilage, like an off smell or changes in texture. Proper storage is key to enjoying these delightful treats for as long as possible! Yes, you can easily make these cookies gluten-free. Use gluten-free rolled oats and a gluten-free flour blend. This swap keeps the flavor while ensuring everyone can enjoy them. To make these cookies vegan, replace honey with maple syrup. Ensure your chocolate chips are dairy-free if you choose to add them. These small changes keep the cookies plant-based and tasty. If you do not have applesauce, try mashed bananas or pureed pumpkin. Both options add moisture and natural sweetness. They also bring a unique flavor twist to the cookies. You can change the amount of honey or maple syrup in the recipe. For a less sweet cookie, cut the sweetener by half. You can also add a little more unsweetened applesauce for extra flavor without added sugar. Watch the edges for a light golden color. The cookies will still be soft in the center. Let them cool on the baking sheet to firm up before moving them to a rack. These easy cookies blend rolled oats, flour, and sweeteners to create a tasty treat. You learned to mix dry and wet ingredients, shape the dough, and bake them perfectly. Remember, keep an eye on the cookies for golden edges and try different variations to customize your batch. Store them well to enjoy for days. Get creative with mix-ins and flavors to make these cookies your own. With simple steps, you can always whip up a delicious snack. Happy baking!

Are you craving a sweet treat without all the sugar? Look no further! I’m excited to share my recipe for Low Sugar Applesauce Oatmeal Cookies. These cookies are not just …

Read more

Categories Desserts

Healthy Greek Yogurt Mug Cake Easy and Delicious Treat

January 1, 2026December 12, 2025 by Chef Tavio
To make your Healthy Greek Yogurt Mug Cake, gather these simple items: - 1/4 cup whole wheat flour - 1/4 teaspoon baking powder - 1/4 teaspoon baking soda - 1 tablespoon honey or maple syrup (adjust to taste) - 1/4 cup plain Greek yogurt - 1 tablespoon unsweetened cocoa powder (optional for a chocolate twist) - 1/2 teaspoon vanilla extract - A pinch of salt These ingredients give you a cake that is moist and tasty. Whole wheat flour adds fiber, while Greek yogurt provides protein. Honey or maple syrup sweetens your cake naturally. You can customize your mug cake. Here are some optional ingredients: - Fresh berries like strawberries or blueberries - A dollop of Greek yogurt for creaminess - Chopped nuts, such as almonds or walnuts, for crunch These extras add flavor and texture. You can mix and match based on what you like or have at home. This mug cake is not just delicious, it is also healthy. Here is a quick look at the nutrition: - Calories: About 180-200 calories (depending on sweetener used) - Protein: Around 10 grams from Greek yogurt - Fiber: About 3 grams from whole wheat flour This treat fits well into a balanced diet. Enjoy it as a snack or a quick dessert without guilt! {{ingredient_image_2}} Start by choosing a microwave-safe mug. Add the following dry ingredients: - 1/4 cup whole wheat flour - 1/4 teaspoon baking powder - 1/4 teaspoon baking soda - 1 tablespoon unsweetened cocoa powder (if you want a chocolate flavor) - A pinch of salt Use a fork or whisk to mix these dry ingredients well. This helps them blend evenly. Make sure there are no lumps left. Next, it’s time to add the wet ingredients. Drizzle in your choice of sweetener: - 1 tablespoon honey or maple syrup (adjust to your taste) Then, add: - 1/4 cup plain Greek yogurt - 1/2 teaspoon vanilla extract Mix these wet ingredients into the dry mix. Stir until you have a thick batter. Keep mixing until everything is smooth. Now, place your mug in the microwave. Set it to high power and cook for about 1 minute. After 1 minute, check the cake. If the center is wet, microwave it for 10-15 more seconds. Don’t cook it for longer than 1 minute and 30 seconds. This prevents the cake from becoming dry. Once it rises and feels firm, carefully take it out. Let it cool for about 1 minute. Now, it’s time to enjoy your healthy mug cake! To get the right texture for your mug cake, use whole wheat flour. It adds a nice density. Mix your dry ingredients well before adding wet ones. This helps avoid lumps. When you combine the wet and dry mixes, stir until smooth. A thick batter is what you want. This ensures a fluffy cake after cooking. You can change how sweet your mug cake is. Use honey or maple syrup based on your taste. Start with one tablespoon, then adjust. If you prefer less sweetness, use less syrup. You can also add fresh berries for a natural sweet touch. They pair well with Greek yogurt. Watch the cooking time closely. Microwave your mug cake for one minute first. After that, check if the center is wet. If it is, cook in short bursts of 10-15 seconds. Stop cooking when the cake feels firm but not dry. The total time should not exceed 1 minute and 30 seconds. This keeps your cake moist and delicious. Pro Tips Choose the Right Mug: Use a mug that is large enough to accommodate the rising cake to prevent overflow in the microwave. Experiment with Flavors: Feel free to add spices like cinnamon or nutmeg for an extra flavor boost in your mug cake. Check Microwave Power: Microwave power levels can vary, so start with 1 minute and adjust the cooking time as needed for your specific microwave. Let It Cool: Allow the mug cake to cool for a minute before digging in; this helps improve the texture and makes it safer to eat! {{image_4}} You can make your mug cake extra rich by adding cocoa powder. Just mix in one tablespoon when you combine the dry ingredients. This will give your cake a nice chocolate flavor without extra fat. You can also adjust the sweetness. Darker chocolate may need more honey or syrup to balance the taste. Fresh fruit can brighten up your mug cake. Berries like strawberries and blueberries add color and flavor. You can fold them into the batter before cooking. You can also use them as a topping. Try adding banana slices or diced apples for extra sweetness. If you like nuts, sprinkle some on top for crunch. To make this recipe vegan, swap Greek yogurt for a plant-based yogurt. Use maple syrup instead of honey for sweetness. For the egg, you can use a flaxseed meal mixture. Just mix one tablespoon of flaxseed meal with two and a half tablespoons of water. Let it sit for a few minutes to thicken. This will help bind your ingredients together and keep the mug cake moist. Store your mug cake in an airtight container. This keeps it fresh and moist. If you have leftovers, let it cool first. Then place it in the container. Keep it in the fridge for up to two days. If you notice any mold, throw it away right away. To reheat your mug cake, place it in the microwave. Heat it for about 10-15 seconds. Check if it is warm enough. If not, heat it in 5-second bursts. Avoid overheating, as it can dry out the cake. You want it soft and moist when you eat it again. You can freeze your mug cake if you want to save it for later. Wrap it tightly in plastic wrap. Then, place it in a freezer-safe bag. It can stay in the freezer for up to a month. When you are ready to eat it, thaw it in the fridge overnight. Reheat it in the microwave as needed. Enjoy the taste of your healthy treat anytime! Yes, you can use non-dairy yogurt. Look for options made from almond, coconut, or soy. These yogurts can replace Greek yogurt in equal amounts. The texture may change slightly, but the cake will still be tasty. Just ensure your non-dairy yogurt is plain and unsweetened for the best results. To make this mug cake gluten-free, simply swap the whole wheat flour for a gluten-free flour blend. Many brands offer these blends that work well in baking. You can also use almond flour or coconut flour as alternatives. Adjust the amount slightly, as these flours can absorb more moisture. For toppings, fresh berries work great. Try strawberries or blueberries to add color and flavor. You can also add a dollop of Greek yogurt on top for creaminess. Chopped nuts like almonds or walnuts give a nice crunch. Feel free to mix and match these toppings for a fun treat! This blog post covered all you need to make a great mug cake. We discussed the main ingredients, step-by-step instructions, and useful tips. We also explored tasty variations and storage tips for your leftovers. Remember, it's easy to adapt the recipe. You can mix in your favorite flavors or adjust the sweetness. I hope you feel excited to try this simple dessert. Enjoy your mug cake adventure!

Looking for a quick and tasty treat? This Healthy Greek Yogurt Mug Cake is your answer! It’s simple to make, packed with goodness, and perfect for satisfying your sweet tooth. …

Read more

Categories Desserts

Creamy Protein Pasta Bowl Flavorful and Filling Meal

January 5, 2026December 12, 2025 by Chef Tavio
- 8 oz whole wheat pasta (fusilli or penne work best) - 1 cup cooked chicken breast, diced - 1 cup plain Greek yogurt (non-fat or low-fat) - 1/2 cup low-sodium chicken broth - 1 cup fresh spinach, chopped - 1/2 cup cherry tomatoes, halved In this dish, whole wheat pasta gives you a hearty base. It offers fiber to keep you full. Chicken provides lean protein, which helps build muscle. If you're vegan, you can swap in tofu for the chicken. Greek yogurt creates a creamy sauce that is both rich and healthy. The chicken broth adds flavor without too much salt. - 1/4 teaspoon garlic powder - 1/4 teaspoon onion powder - Salt and pepper to taste - 1 tablespoon olive oil - Fresh basil leaves for garnish Seasonings like garlic and onion powders bring out the best in this dish. They add depth without being overpowering. A pinch of salt and pepper can really enhance the flavors. Fresh basil leaves on top give a pop of color and freshness. They make each bite feel special. Use good-quality olive oil for sautéing; it adds richness to the mix. This blend of ingredients makes your creamy protein pasta bowl flavorful and filling. {{ingredient_image_2}} To start, fill a large pot with water and add some salt. Bring it to a rolling boil. Once boiling, add your whole wheat pasta. Cook it for about 8-10 minutes, or until it is al dente. This means it should be firm but not hard. Drain the pasta well, then set it aside. Remember, overcooked pasta can become mushy, so keep an eye on it! In a mixing bowl, combine one cup of plain Greek yogurt with half a cup of low-sodium chicken broth. Mix them well until smooth. Add in garlic powder, onion powder, and a pinch of salt and pepper. Whisk until the sauce is creamy and well-blended. This sauce is not just tasty; it adds protein and richness to your dish. Grab a large skillet and heat one tablespoon of olive oil over medium heat. Once it is hot, toss in one cup of chopped spinach and half a cup of halved cherry tomatoes. Sauté them for about 2-3 minutes. Stir occasionally until the spinach wilts and the tomatoes become soft. This step adds great flavor and nutrients to your meal. Next, add one cup of diced cooked chicken and the drained pasta to the skillet with the veggies. Pour the creamy sauce over this mixture. Gently fold everything together to ensure each piece gets coated. Cook for an additional 2-3 minutes to heat it through. Taste your dish and adjust the seasoning if needed. Divide the creamy pasta bowl into four equal servings. For a bright touch, garnish each bowl with fresh basil leaves. This not only looks nice but also adds a burst of flavor. If you want to impress, layer more spinach and tomatoes on top for a beautiful finish! To make your creamy protein pasta bowl pop, try adding more spices or herbs. You can toss in a pinch of red pepper flakes for heat or some dried oregano for depth. Fresh herbs like parsley or dill can brighten the dish. If you're in the mood for a different sauce, swap the Greek yogurt for ricotta cheese. You can also try a homemade pesto for a fresh twist. These small changes can bring new life to your meal while keeping it healthy. The key to a creamy texture lies in the right yogurt and broth ratios. Start with one cup of Greek yogurt and half a cup of broth. You can adjust these amounts based on how creamy you want it. If it’s too thick, add a little more broth. To cook for creaminess, make sure to whisk your sauce well. This helps blend the yogurt and broth smoothly. When you heat the mixture, do it gently. High heat can cause the yogurt to separate and lose its creamy texture. Want to save time? Cook your pasta and sauté your veggies at the same time. While the pasta boils, heat the olive oil and veggies in a skillet. This way, you can combine everything faster. To make this dish a quick weeknight dinner, prep your chicken ahead of time. You can use leftover chicken or even rotisserie chicken for a shortcut. With these tips, you can enjoy a hearty meal in just 20 minutes. Pro Tips Perfect Pasta Texture: Make sure to cook the pasta al dente, as it will continue to cook slightly when mixed with the warm ingredients, ensuring it doesn't become mushy. Yogurt Sauce Consistency: If the sauce is too thick for your liking, gradually add a bit more chicken broth until you reach your desired creaminess. Vegetable Variations: Feel free to swap in other vegetables such as bell peppers or zucchini for added flavor and nutrition, making this dish versatile and exciting. Garnish for Flavor: Fresh herbs like basil not only enhance the dish’s appearance but also elevate the flavor profile; consider adding a squeeze of lemon juice for a fresh kick. {{image_4}} You can easily make this creamy protein pasta bowl vegetarian. Simply swap the chicken for tofu or chickpeas. Both options add great protein. Tofu absorbs flavors well, while chickpeas add a nice texture. You can also boost nutrition by adding more veggies. Consider bell peppers, zucchini, or mushrooms. These will make your dish colorful and tasty. If you need a gluten-free option, there are many pasta types to try. Rice, lentil, or chickpea pasta work well. They all have different textures and flavors. Be sure to adjust the sauce if you use a different pasta. You may need less broth to keep the sauce creamy. Always check the cooking times for your pasta type too. To make this dish kid-friendly, you can use milder flavors. Omit the garlic powder or use less onion powder. Kids often prefer simple tastes. Another fun idea is to present the dish in a creative way. You might layer the pasta and veggies in a bowl. Let kids help with the toppings like tomatoes or basil. They will feel proud to eat their own creation! To keep your creamy protein pasta bowl fresh, store leftovers in the fridge. You can safely refrigerate the pasta for about three to four days. Use an airtight container to prevent moisture loss. Glass containers work well for this. They help you see what's inside and are easy to clean. Make sure to let the pasta cool before sealing it. When it's time to enjoy your leftovers, use safe reheating methods. The microwave is quick, but you can also use a skillet for better texture. If microwaving, heat it in short bursts. Stir in between to help it warm evenly. If using a skillet, add a splash of chicken broth. This keeps the pasta creamy and helps it heat through. Stir gently to maintain that smooth texture. Yes, you can use low-fat Greek yogurt. It still gives a creamy texture. The flavor stays fresh and tangy. This option cuts calories but keeps richness. It’s a great choice for a lighter meal. If you want more creaminess, add a bit more broth. To make this dish dairy-free, swap Greek yogurt for a plant-based yogurt. Look for almond or coconut yogurt. For the broth, use vegetable broth instead of chicken broth. These swaps keep the meal tasty and creamy without dairy. You can use many proteins in this dish. Try cooked shrimp, turkey, or even chickpeas for a plant-based option. These choices keep the meal filling and flavorful. You can mix and match to suit your taste and needs. This dish takes about 20 minutes to make. You spend 10 minutes prepping ingredients. Cooking the pasta and the sauce takes another 10 minutes. It’s a quick meal, perfect for busy nights or a fast lunch. In this blog post, we explored how to make a creamy pasta dish with whole wheat pasta, protein, and a rich sauce. You learned step-by-step cooking methods and tips for flavor and texture. Variations for vegetarian and gluten-free diets were also included. This dish is not only healthy but also easy to adjust for your taste. Whether you're cooking for family or just yourself, you can make it quick and enjoyable. Try it out, and create your own version!

Are you looking for a meal that’s both creamy and packed with protein? Look no further than my Creamy Protein Pasta Bowl! This dish is not just tasty but also …

Read more

Categories Dinner

Teriyaki Chicken Rice Bowl Flavorful Delight Recipe

January 5, 2026December 12, 2025 by Chef Tavio
- 2 boneless, skinless chicken breasts, thinly sliced - 1 cup jasmine rice - 1 cup fresh broccoli florets - 1 red bell pepper, thinly sliced - 1 medium carrot, julienned For this dish, chicken is the star. I love using boneless, skinless chicken breasts because they cook quickly and stay tender. You can slice them thin to help them cook evenly. Next, I add a colorful mix of vegetables. Fresh broccoli adds crunch, while the red bell pepper brings sweetness. The carrot gives a nice pop of color and texture. Jasmine rice is my go-to for its fragrant aroma and fluffy texture. It pairs perfectly with the teriyaki sauce. - 1/4 cup low-sodium soy sauce - 2 tablespoons honey - 1 tablespoon rice vinegar - 1 tablespoon grated fresh ginger - 2 cloves garlic, minced The teriyaki sauce ties everything together. I use low-sodium soy sauce to control the saltiness. Honey adds a nice sweetness that balances the savory flavors. Rice vinegar gives the sauce a slight tang. Grated ginger and minced garlic bring depth and warmth. This sauce is easy to mix and very flavorful. - Sesame seeds - Sliced green onions Garnishes add flair. I like to sprinkle sesame seeds on top for a nutty crunch. Sliced green onions add freshness and a hint of onion flavor, making the dish even more appealing. {{ingredient_image_2}} To cook the jasmine rice, start by rinsing it under cold water. This wash helps remove extra starch. You want the water to run clear. Next, add the rinsed rice to a medium saucepan. Use 1 ¼ cups of water for every cup of rice. Bring this to a boil over high heat. Once boiling, turn the heat down to low. Cover it with a lid and let it simmer for 15 minutes. After this time, check to see if the water is absorbed. If it is, take it off the heat and let it sit for 5 more minutes. Fluff the rice with a fork before serving. For the teriyaki sauce, gather a small bowl. In this bowl, mix together ¼ cup of low-sodium soy sauce, 2 tablespoons of honey, 1 tablespoon of rice vinegar, 1 tablespoon of grated ginger, and 2 cloves of minced garlic. Whisk these ingredients until they are well combined. This step is key to a great flavor. For extra taste, you can add a pinch of black pepper or chili flakes if you like a kick. Heat 2 tablespoons of sesame oil in a large skillet over medium-high heat. Once the oil is hot, add the thinly sliced chicken breasts. Cook them in a single layer for about 5 to 7 minutes. Stir them occasionally until they turn golden brown and reach the right temperature of 165°F (75°C). When the chicken is nearly cooked, add the broccoli florets, sliced red bell pepper, and julienned carrot. Stir-fry these for 3 to 4 minutes until they are bright and still a bit crisp. Pour the teriyaki sauce over the chicken and vegetables in the skillet. Stir everything together well. You want to ensure each piece is coated with the sauce. Cook this mixture for another 2 to 3 minutes. This allows the sauce to heat through and thicken just a little. Now for the fun part! Take a bowl and spoon a generous amount of the fluffy jasmine rice into it. Top the rice with the delicious teriyaki chicken and vegetable mix. Make sure to add enough so every bite is tasty. To finish off your dish, sprinkle sesame seeds and sliced green onions on top. This adds a nice crunch and makes the dish look pretty. For a final touch, you can place a lime wedge on the side. This adds a zesty twist that brightens the flavors. Enjoy your colorful and hot teriyaki chicken rice bowl! - Ensuring perfect rice texture: Rinse your jasmine rice well. This removes extra starch. Use 1 cup of rice to 1 1/4 cups of water for fluffy rice. Let the rice rest after cooking. This helps with texture. - Avoiding overcooked vegetables: Stir-fry your veggies quickly. Cook them for just 3-4 minutes until bright and crisp. This keeps them crunchy and full of flavor. - Adding spices or ingredients for variation: Try adding crushed red pepper for heat. You can also mix in chopped green onions or cilantro for freshness. These small changes can uplift the dish. - Suggestions for sauce adjustments: If you want a sweeter sauce, add more honey. For a tangy twist, try adding a splash of lime juice. Adjust the flavors to fit your taste. - Complementary sides or drinks: Serve your rice bowl with a light salad. A refreshing cucumber salad pairs well. Green tea or a light soda is a good drink choice. - Plating ideas for visual appeal: Use colorful bowls to showcase the dish. Layer the rice at the bottom and pile the chicken and veggies on top. Garnish with sesame seeds and green onions for a lovely finish. Pro Tips Marinate for More Flavor: For even more depth of flavor, consider marinating the chicken in the teriyaki sauce for at least 30 minutes before cooking. Use Fresh Ingredients: Fresh ginger and garlic will provide a more vibrant taste than dried versions, so opt for fresh whenever possible. Customize Your Veggies: Feel free to mix and match your vegetables based on what you have on hand or what’s in season for a personal touch. Perfect Rice Every Time: For fluffier rice, let it rest covered after cooking for 5 minutes before fluffing it with a fork. {{image_4}} You can easily switch chicken for tofu or tempeh. Both options soak up flavor well. For tofu, use firm varieties, and press them to remove excess water. Cut it into cubes and sauté until golden. For tempeh, slice it thin and cook until it’s crispy. You can add vegetables like mushrooms, bell peppers, and snap peas to boost the dish. If you want to explore beyond chicken, try beef or shrimp. For beef, use flank steak or sirloin; thinly slice it across the grain. Cook it quickly over high heat for tenderness. Shrimp is another great choice. Use peeled, deveined shrimp and sauté them until they turn pink. Each protein adds a new twist to the dish. Looking for a healthier option? Use brown rice or cauliflower rice. Brown rice has more fiber and a nutty taste. It takes a bit longer to cook, so plan for that. Cauliflower rice is a great low-carb choice. Simply pulse cauliflower florets in a food processor until they resemble rice. Sauté it in a pan for a few minutes until tender. There are also gluten-free rice options like quinoa or wild rice for extra texture. To keep your teriyaki chicken rice bowl fresh, follow these tips: - Refrigeration: Place leftovers in an airtight container. This helps keep moisture in and air out. Store in the fridge for up to three days. - Freezing: For longer storage, you can freeze the chicken and vegetables. Use freezer-safe bags or containers. Remove as much air as possible. This allows for up to three months of storage. Reheating your bowl while keeping it tasty is easy. Here are some methods: - Microwave: Place the bowl in the microwave. Heat for 1-2 minutes, stirring halfway. This helps the heat spread evenly. - Stovetop: Heat a skillet over medium heat. Add a splash of water or broth to prevent sticking. Stir until warmed through. This method keeps the texture nice and avoids sogginess. Knowing when to discard food is key. Here’s what to look for: - Expiration of Ingredients: Fresh chicken should be used by the date on the package. Cooked chicken is safe for three to four days in the fridge. - When to Discard: If leftovers have an off smell or change color, it’s best to throw them away. Always trust your senses! A teriyaki chicken rice bowl is a tasty dish. It features tender chicken cooked in sweet and savory teriyaki sauce. You serve it over fluffy jasmine rice. Bright vegetables like broccoli, bell peppers, and carrots add color and crunch. This bowl is not just filling but also fun to eat! You can make the teriyaki sauce sweeter by adding more honey or sugar. Start with one extra tablespoon of honey. Taste it, then adjust if you want it sweeter. You can also try adding brown sugar for a deeper flavor. Yes, you can prepare this dish ahead of time. Cook the rice and chicken in advance. Store them in separate containers in the fridge. When you are ready to eat, just reheat and add your fresh veggies. This makes for an easy meal on busy days! You can serve a range of sides with your teriyaki chicken rice bowl. Some great options are: - Steamed edamame - Miso soup - Seaweed salad - Crispy spring rolls These sides add variety and make your meal even more enjoyable. Teriyaki sauce is not always gluten-free. Many brands use soy sauce, which contains gluten. To make it gluten-free, use tamari instead of soy sauce. Always check labels when buying pre-made sauces. This way, you ensure your meal is safe for those with gluten sensitivities. In this blog post, we explored the key ingredients for a delicious teriyaki chicken rice bowl. We broke down the main components, including chicken, vegetables, and rice, plus the essential teriyaki sauce elements. I shared step-by-step instructions on cooking and assembling the dish. You learned helpful tips for flavor enhancement and serving suggestions. With variations available, there’s something for everyone. From vegetarian options to different proteins, you can customize your bowl. Enjoy your cooking journey and savor every bite of your homemade teriyaki chicken rice bowl!

Are you ready to elevate your dinner game with a Teriyaki Chicken Rice Bowl? This flavorful delight combines tender chicken, fresh vegetables, and a sweet sauce that will leave your …

Read more

Categories Dinner

Hot Honey Salmon Bites Flavorful and Easy Recipe

January 3, 2026December 11, 2025 by Chef Tavio
You need 1 pound of fresh salmon fillet. Make sure the skin is removed. Cut it into bite-sized cubes. Fresh salmon gives the best flavor and texture. Gather the following spices: - 2 tablespoons extra virgin olive oil - 1/4 teaspoon fine sea salt - 1/4 teaspoon freshly ground black pepper - 1/2 teaspoon smoked paprika These spices add depth to the salmon. The olive oil helps with cooking and keeps the fish moist. For the glaze, you will need: - 1/4 cup pure honey - 1 tablespoon sriracha sauce (adjust for spice level) - 1 tablespoon freshly squeezed lemon juice This glaze brings a sweet and spicy kick. The honey gives a nice shine to the salmon when baked. {{ingredient_image_2}} Start by preheating your oven to 400°F (200°C). This step helps your salmon cook evenly. Next, line a baking sheet with parchment paper. This keeps the salmon from sticking and makes cleanup easy. Now, take 1 pound of fresh salmon fillet. Make sure to remove the skin and cut the fish into bite-sized cubes. This size helps the salmon cook fast and evenly. In a mixing bowl, add the salmon cubes, 2 tablespoons of olive oil, 1/4 teaspoon of sea salt, 1/4 teaspoon of black pepper, and 1/2 teaspoon of smoked paprika. Gently toss these ingredients so that each piece is nicely coated. In a small bowl, mix together 1/4 cup of pure honey, 1 tablespoon of sriracha sauce, and 1 tablespoon of freshly squeezed lemon juice. Whisk these together until smooth. This sauce is where the sweet and spicy flavors come alive. You can adjust the sriracha to make it as spicy as you like. Arrange the seasoned salmon bites on the prepared baking sheet. Make sure they are in a single layer. This spacing allows heat to circulate around the fish. Drizzle half of your hot honey sauce over the salmon, making sure each piece gets a nice coating. Save the rest of the sauce for later. Place the baking sheet in the oven and bake the salmon bites for about 12 to 15 minutes. Keep an eye on them. You want the salmon to be cooked through, and the edges should be slightly caramelized for extra flavor. Once done, take the salmon out of the oven. Drizzle the reserved hot honey sauce on top for a glossy finish. Finally, sprinkle some fresh parsley over the salmon for a touch of color. Serve these hot honey salmon bites warm and enjoy! To cook salmon just right, follow a few steps. First, choose fresh salmon. Look for bright color and no smell. Cut it into bite-sized cubes for even cooking. Preheat your oven to 400°F (200°C). Arrange the salmon bites on a lined baking sheet. Give them space to breathe. Bake for about 12-15 minutes. Check them often. They should be flaky and slightly caramelized. If you prefer a crispier texture, broil them for the last 2 minutes. This adds a nice touch. Hot honey salmon bites shine on their own. Pair them with a simple salad or rice. A fresh green salad balances the sweet and spicy flavors. You can also serve them with roasted veggies. For a fun twist, put them on skewers with bell peppers and onions. This makes for a colorful dish. If you want to kick things up, offer extra hot honey on the side. It lets each person customize their meal. Using the right tools helps a lot. A good baking sheet with a rim is key. It keeps the honey sauce from spilling. Parchment paper makes cleanup a breeze. A sharp knife is important for cutting the salmon. A mixing bowl helps you combine the ingredients well. If you want to glaze your salmon evenly, use a brush. This helps apply the sauce without making a mess. Lastly, an oven thermometer ensures you cook at the right temperature. Pro Tips Choose Fresh Salmon: Always select high-quality, fresh salmon for the best flavor and texture. Look for bright color and firm flesh. Adjust Spice Level: Feel free to adjust the amount of sriracha in the glaze according to your spice preference. Start with a small amount and add more if you like it spicier. Use Parchment Paper: Lining your baking sheet with parchment paper not only prevents sticking but also helps with easy cleanup, making cooking less of a hassle. Garnish for Flavor: Don’t skip the fresh parsley garnish! It adds a pop of color and a fresh taste that balances the sweet and spicy flavors of the salmon. {{image_4}} You can easily change the spice level of your hot honey salmon bites. If you like it spicy, add more sriracha. For a milder taste, reduce the sriracha. You can also use chili flakes for heat. If you want a different flavor, try adding smoked paprika. It gives a warm taste without added heat. While the hot honey glaze is fantastic, try other flavors too. You can use maple syrup instead of honey for a rich sweetness. A mix of soy sauce and honey creates a savory-sweet glaze. For a citrus twist, use orange juice instead of lemon juice. These alternatives give a new spin to your salmon bites. These salmon bites work great as both an appetizer and a main dish. As an appetizer, serve them on toothpicks for easy eating. They are perfect for parties or gatherings. If you want to make them a main dish, pair them with rice or a fresh salad. This makes the meal filling and balanced. Enjoy the versatility in serving these tasty bites! To store leftover hot honey salmon bites, place them in an airtight container. Make sure the container seals tightly to keep out air. Store them in the fridge for up to three days. This helps keep the salmon fresh and tasty. When you're ready to eat the leftovers, preheat your oven to 350°F (175°C). Place the salmon bites on a baking sheet. Heat them for about 10 minutes. This method keeps them moist and warm. You can also use a microwave, but it may make the salmon less crispy. If you want to save some salmon bites for later, freezing is a great option. Place the cooled salmon bites in a freezer-safe bag or container. Be sure to remove as much air as possible. You can freeze them for up to three months. When you're ready to eat, thaw them in the fridge overnight before reheating. Yes, you can use frozen salmon. Just make sure to thaw it first. I suggest placing it in the fridge overnight or running it under cold water. Once thawed, pat the salmon dry with paper towels. This step helps the seasonings stick better. If you want a milder taste, try using sweet chili sauce. It gives a nice sweetness without too much heat. You can also mix hot sauce and honey for a similar flavor. Adjust the amount to fit your spice level. Salmon is done when it flakes easily with a fork. The flesh should be opaque and not translucent. If you have a meat thermometer, check for an internal temp of 145°F (63°C). Keep an eye on the edges; they should be slightly caramelized for the best taste. This post covered all you need for delicious salmon bites. We explored fresh salmon and spices. I shared how to make a hot honey glaze and how to bake the salmon bites. Remember the tips for perfect cooking and great pairings. You can switch the spice level or glaze too. Store leftovers the right way for later. With these tricks, you'll enjoy this dish in many ways. Dive into cooking with salmon, and have fun experimenting!

If you’re craving a dish that balances sweet and spicy, then you need to try my Hot Honey Salmon Bites! In this easy recipe, fresh salmon gets a flavorful twist …

Read more

Categories Appetizers

Garlic Butter Chicken Pasta Quick and Tasty Meal

January 5, 2026December 9, 2025 by Chef Tavio
- 2 boneless, skinless chicken breasts - 8 oz pasta (fettuccine or spaghetti) - 4 tablespoons unsalted butter - 4 cloves garlic - 1 cup low-sodium chicken broth - 1 cup heavy cream - 1/2 teaspoon red pepper flakes - Salt and freshly ground black pepper - 1/4 cup freshly grated Parmesan cheese - Fresh parsley for garnish When I make Garlic Butter Chicken Pasta, I love using fresh ingredients. The chicken breasts are my main focus. I cut them into bite-sized pieces for quick cooking. This keeps them tender and juicy. Next, I pick my pasta. Fettuccine or spaghetti works great. I like to use 8 ounces. This amount serves four people nicely. Butter is key in this dish. I use 4 tablespoons of unsalted butter. It gives the sauce a rich taste and smooth texture. Garlic brings a lovely aroma. I use 4 cloves, minced finely. The more garlic, the better, right? For the sauce, I add 1 cup of low-sodium chicken broth. It adds flavor and richness. I also use 1 cup of heavy cream for creaminess. Seasoning is important to me. I add 1/2 teaspoon of red pepper flakes for a little kick. Salt and black pepper balance the flavors. Finally, I sprinkle 1/4 cup of freshly grated Parmesan cheese on top. It melts into the pasta beautifully. Fresh parsley is my garnish. It adds a pop of color and freshness. This mix of ingredients makes for a quick and tasty meal that pleases everyone. Enjoy creating this delightful dish! {{ingredient_image_2}} - Boil a large pot of salted water. - Add 8 oz of your chosen pasta. - Cook until al dente, about 8-10 minutes. - Reserve 1/2 cup of pasta water, then drain the pasta. - In a large skillet, heat 2 tablespoons of butter over medium heat. - Add 2 boneless, skinless chicken breasts cut into pieces. - Season with salt and pepper. - Cook for 5-7 minutes until browned and cooked through. - Transfer the chicken to a plate and keep it warm. - In the same skillet, melt the remaining 2 tablespoons of butter. - Add 4 cloves of minced garlic. - Sauté for 1-2 minutes until fragrant, but don’t burn it. - Pour in 1 cup of low-sodium chicken broth. - Bring it to a gentle simmer and reduce for 3-4 minutes. - Stir in 1 cup of heavy cream and 1/4 cup of grated Parmesan. - Add 1/2 teaspoon of red pepper flakes if you like heat. - Simmer for 3 minutes while stirring. - Return the cooked chicken to the skillet. - Toss in the drained pasta. - Mix everything gently. - If the sauce is thick, add some reserved pasta water. - Taste the dish and adjust seasoning with salt and pepper. - Serve hot in bowls, garnished with fresh parsley. - For extra flair, add more Parmesan on top. - To know when chicken is cooked, cut a piece open. It should be white inside, not pink. - For perfect pasta texture, cook it until it's al dente. This means it should be firm but not hard. Don't forget to reserve some pasta water; it helps the sauce stick. - You can add extra spices like Italian seasoning or garlic powder for more flavor. - To balance creaminess with acidity, squeeze some lemon juice into the sauce. This will add a nice zing. - For garnishing, sprinkle fresh parsley and extra Parmesan on top. It looks pretty and adds flavor. - Serve with crusty bread to soak up the delicious sauce. A simple salad on the side makes it a complete meal. Pro Tips Use Fresh Garlic: Freshly minced garlic provides a more vibrant flavor than pre-minced options. Always opt for fresh to elevate your dish! Choose the Right Pasta: Fettuccine holds sauce well, while spaghetti offers a classic touch. Pick based on your preference for a delightful experience. Reserve Pasta Water: The starchy pasta water is a secret ingredient that helps adjust sauce consistency and adds extra flavor. Don't forget to save some! Garnish Wisely: Fresh parsley enhances the dish's color and flavor. A sprinkle of extra Parmesan also adds richness and a touch of elegance to your presentation. {{image_4}} You can easily swap out the chicken. Here are some great options: - Shrimp: Cook just like the chicken for a seafood twist. - Turkey: Use turkey breast for a lean choice. - Tofu: For a vegetarian option, use firm tofu. If you want to keep it vegetarian, try these: - Chickpeas: These add protein and texture. - Tempeh: A hearty choice that soaks up flavors well. You can adjust the sauce to fit your needs. To make it low-fat: - Use low-fat milk instead of heavy cream. - Swap butter for olive oil for a lighter touch. For a dairy-free version, try: - Coconut milk: It gives a nice creamy flavor. - Cashew cream: Blend soaked cashews for a rich sauce. Adding vegetables boosts nutrition and flavor. Consider these: - Spinach: Stir in fresh spinach at the end. - Peas: They add sweetness and color. Choosing the right pasta can change your dish. Here are some options: - Whole grain: Adds fiber and a nutty taste. - Gluten-free: Use rice or corn pasta for a gluten-free meal. You can also use different shapes for fun: - Penne: Great for holding onto the sauce. - Rotini: Twists capture every bite of flavor. To store your garlic butter chicken pasta, place it in an airtight container. Allow it to cool down before sealing. Store it in the fridge for up to three days. When you are ready to eat, reheat it in a skillet over medium heat. Add a splash of chicken broth to keep it moist. Stir often until it is warmed through. Yes, you can freeze garlic butter chicken pasta. Transfer the cooled pasta to a freezer-safe container. It can last up to three months in the freezer. To defrost, take it out and place it in the fridge overnight. Reheat it in a skillet, adding some chicken broth or cream if needed. You can keep leftovers in the fridge for three days. Always check for signs of spoilage. If you see changes in color or smell something off, it's best to toss it. Enjoy your meal safely! It takes about 10 minutes to prep and 20 minutes to cook. In total, you need around 30 minutes to make Garlic Butter Chicken Pasta. This dish is quick and easy, perfect for busy nights. Yes, you can use frozen chicken. Just make sure to thaw it first. The best way is to place it in the fridge overnight. If you're short on time, you can thaw it in cold water for about an hour. If you want a lighter sauce, you can use half-and-half instead of heavy cream. You can also use whole milk mixed with a bit of flour. This mix will help thicken the sauce while keeping it creamy. Absolutely! Kids usually love pasta and chicken. To make it even more appealing, you can cut the chicken into fun shapes. Serve it with a side of veggies or fruit for a balanced meal. To make Garlic Butter Chicken Pasta gluten-free, simply use gluten-free pasta. There are many good options available, like brown rice or chickpea pasta. These will work well and still taste great! In summary, this blog post covered the essential ingredients for Garlic Butter Chicken Pasta, including chicken, pasta, butter, and seasonings. We discussed step-by-step instructions, cooking tips, and variations to suit different preferences. Remember, you can customize this dish in many ways, from proteins to pasta types. It's easy to store and reheat for later meals. Enjoy making this simple, satisfying dish that everyone will love. Use these tips for a delicious meal anytime.

Looking for a quick and tasty meal? Garlic Butter Chicken Pasta is your answer! This dish combines tender chicken with rich garlic butter, creamy sauce, and pasta. It’s easy to …

Read more

Categories Dinner

Dominos Style Parmesan Bread Bites Tasty Snack Idea

December 21, 2025December 6, 2025 by Chef Tavio
To make Domino's Style Parmesan Bread Bites, gather these ingredients: - 1 package of refrigerated pizza dough - 1/4 cup unsalted butter, melted - 2 cloves garlic, finely minced - 1/2 cup finely grated Parmesan cheese - 1 tablespoon dried Italian herbs (like oregano, basil, and thyme) - 1 teaspoon garlic powder - Salt, to taste - Fresh parsley, chopped, for garnishing You can swap a few items based on what you have at home. Use olive oil instead of butter for a healthier option. If you prefer a vegan version, try dairy-free cheese. You can also mix fresh herbs if dried ones are not available. Want a hint of spice? Add red pepper flakes to the cheese mix. Serve these bites warm for the best taste. Pair them with marinara sauce for a classic dip. Pesto also works great if you like a herb flavor. For a twist, try a zesty ranch sauce. Garnish with fresh parsley for a nice touch. Enjoy these bites as a snack or appetizer at your next gathering! {{ingredient_image_2}} Start by preheating your oven to 400°F (200°C). While it heats, take a baking sheet and line it with parchment paper. This paper helps with easy cleanup later. Next, take your package of refrigerated pizza dough. On a clean surface, sprinkle some flour to prevent sticking. Roll out the dough until it forms a rectangle about 1/2 inch thick. This thickness ensures even baking. Now, grab a pizza cutter or a sharp knife. Slice the dough into squares, each about 1 inch by 1 inch. These will be your tasty bites. In a small bowl, melt 1/4 cup of unsalted butter. Add two finely minced garlic cloves to the melted butter. Mix them well to create a flavorful garlic butter. In another bowl, combine 1/2 cup of finely grated Parmesan cheese with 1 tablespoon of dried Italian herbs and 1 teaspoon of garlic powder. Add a pinch of salt to this mix. Stir until all ingredients are blended. Now it’s time to bake! Brush half of the garlic butter mixture over the cut dough squares. Make sure to cover each piece evenly. Then, sprinkle the cheese and herb mix over the brushed dough. Drizzle the remaining garlic butter on top. Place the baking sheet in the oven and bake for 12-15 minutes. Watch for a nice golden brown color and bubbling cheese. This means they are ready! Once baked, let them cool for a minute. Garnish with chopped parsley before serving. Enjoy your warm Parmesan bread bites with your favorite dipping sauce! To get the best texture for your Parmesan bread bites, focus on the dough. Roll it out to about 1/2 inch thick. This thickness helps them bake evenly. If you cut them too thick, they may not cook through. Also, keep an eye on them while they bake. You want a golden brown color and bubbly cheese. This shows they are done and ready to eat. To boost the flavor, use fresh garlic instead of garlic powder. Finely minced garlic gives a strong taste. You can also mix in different cheese types. Try mozzarella or cheddar for a twist. Adding a pinch of red pepper flakes can spice things up too. Lastly, don't skip the fresh parsley. It adds color and freshness that brightens each bite. One mistake is skipping the butter step. Brushing the dough with garlic butter adds flavor and helps the cheese stick. Another issue is not using enough salt. A little salt enhances all the flavors. Avoid overcrowding the baking sheet; this can lead to uneven cooking. Give each piece space, so they get crispy all around. Pro Tips Fresh Ingredients: Always use fresh garlic and high-quality Parmesan cheese for the best flavor. Fresh ingredients can elevate the taste of your dish significantly. Customize Your Herbs: Feel free to experiment with different herbs. Adding fresh herbs like rosemary or thyme can give the bites a unique twist. Don’t Overbake: Keep an eye on the bites while baking. Overbaking can make them tough instead of soft and chewy, so remove them when they are golden brown. Perfect Dipping Sauce: Pair your Parmesan Garlic Bread Bites with a zesty marinara or homemade pesto for an extra burst of flavor that complements the garlic and cheese. {{image_4}} You can switch up the cheese to create new flavors. Try using mozzarella for a milder taste. Cheddar adds a sharp flavor, while gouda gives a smoky touch. Mixing cheeses can also work well. Combine Parmesan with a bit of feta for a tangy twist. Each cheese brings its own unique taste to the bites. Mixing spices and herbs can change the whole feel of your bites. You can add red pepper flakes for heat. If you like a fresh taste, try adding rosemary or dill. A pinch of smoked paprika can give a nice depth. Experiment with flavors to find your favorite blend. It’s fun to try new combinations! For a gluten-free version, use gluten-free pizza dough. Many brands offer tasty options. For vegan bites, swap butter with olive oil or vegan butter. Use nutritional yeast instead of cheese for a cheesy flavor. These adaptations keep the essence of the bites while catering to dietary needs. Enjoy the same great taste while being mindful of your guests' choices! To keep your Parmesan bread bites fresh, place them in an airtight container. Make sure they are cool before sealing. Store them at room temperature for up to two days. If you want them to last longer, refrigerate them for up to a week. When you're ready to enjoy your leftovers, preheat your oven to 350°F (175°C). Place the bites on a baking sheet. Reheat them for about 5 to 10 minutes. This keeps them warm and crispy. You can also use a microwave. Just heat for 15 to 30 seconds. The bites will be soft but not as crispy. To freeze, let the bites cool completely. Then, lay them on a baking sheet and freeze for about an hour. Once they are firm, transfer them to a freezer bag. Make sure to remove as much air as possible. They can stay frozen for up to three months. To bake from frozen, add 2 to 3 extra minutes to your baking time. Enjoy your tasty snack anytime! Yes, you can use homemade pizza dough. Just roll it out to about 1/2 inch thick. Make it as you like, but keep it simple. Homemade dough adds a personal touch. It can change the taste, too. I love serving them with marinara, pesto, or ranch. Each sauce adds a unique flavor. Marinara gives a classic touch. Pesto brings a fresh taste. Ranch is creamy and zesty. You can even mix sauces for fun! You can prepare the bites a few hours before. Cut the dough and add the garlic butter and cheese mix. Store them covered in the fridge. When you’re ready, just bake them for a quick snack. Absolutely! For gluten-free, use gluten-free pizza dough. You can swap out dairy cheese for plant-based options. If you're vegan, use vegan butter and cheese. Adjust herbs and spices to keep it tasty. This post covered everything you need to know for delicious pizza bites. We explored the best ingredients, handy substitutions, and fun serving ideas. The step-by-step instructions made baking easy, while tips and tricks helped perfect flavor and texture. We even discussed tasty variations and smart storage methods. I hope you feel ready to bake these yummy bites. Enjoy sharing them with friends and family!

Craving a tasty and easy snack? You’re in for a treat! These Dominos Style Parmesan Bread Bites are perfect for movie nights or quick munchies. I’ll guide you through simple …

Read more

Categories Appetizers
Older posts
Newer posts
← Previous Page1 Page2 Page3 … Page191 Next →

TASTED NEST

Where Flavor Finds a Home 🍳🏡 — warm, simple, and crave-worthy recipes made for real life, from stovetop mornings to backyard dinners.

PAGES

Home About Contact Privacy Policy Terms & Conditions Cookie Policy GDPR Policy Copyright Policy Disclaimer

CATEGORIES

Appetizers Desserts Salads Breakfast Dinner
Copyright © 2026 Tasted Nest. All rights reserved.