Skip to content
Tasted Nest
  • Home
  • Appetizers
  • Desserts
  • Salads
  • Breakfast
  • Dinner
  • Privacy Policy
  • Contact
  • About

Chef Tavio

Sausage Potato Kale Soup Hearty and Comforting Delight

August 11, 2025 by Chef Tavio
- 1 pound Italian sausage (spicy or mild) - 4 medium Yukon Gold potatoes, diced - 1 large onion, finely chopped - 3 cloves garlic, minced - 4 cups vegetable broth - 1 cup milk (or dairy-free alternative) - 1 bunch fresh kale, chopped - 2 carrots, sliced - Salt, pepper, thyme, and smoked paprika - Olive oil and grated Parmesan cheese (optional) For this sausage potato kale soup, you need a mix of fresh and hearty ingredients. Start with one pound of Italian sausage. You can pick spicy or mild based on your taste. The sausage gives the soup a rich flavor. Next, use four medium Yukon Gold potatoes. Dice them into bite-sized pieces. This makes them cook evenly. A large onion adds sweetness. Finely chop it to help it blend well. Three cloves of minced garlic bring a lovely aroma. Garlic enhances the overall taste of the soup. For the base, four cups of vegetable broth are essential. This adds depth and warmth. You’ll also need one cup of milk or a dairy-free option. This makes the soup creamy and smooth. Now, let’s not forget the greens! Chop one bunch of fresh kale. It adds color and nutrients. Two sliced carrots provide sweetness and crunch. Finally, use salt, pepper, dried thyme, and smoked paprika for flavor. These spices tie everything together. A drizzle of olive oil adds richness. If you like, top with grated Parmesan cheese for a salty finish. This blend of ingredients makes the soup a comforting bowl of goodness. - Warm 2 tablespoons of olive oil in a large pot over medium heat. - Remove the casing from 1 pound of Italian sausage. - Add the sausage to the pot and break it apart with a spatula. - Cook it until it turns brown, about 5 to 7 minutes. - Next, add 1 large finely chopped onion to the pot. - Then, add 3 cloves of minced garlic. - Sauté these until the onion is soft and clear, about 3 to 4 minutes. - Stir in 4 diced Yukon Gold potatoes, 2 sliced carrots, 1 teaspoon of dried thyme, and 1 teaspoon of smoked paprika. - Cook together for 3 minutes, stirring often to mix the flavors. - Pour in 4 cups of vegetable broth and bring it to a boil. - Once boiling, lower the heat to a gentle simmer. Cover the pot and let it cook for 15 to 20 minutes until the potatoes and carrots are tender. - When the veggies are soft, add 1 bunch of chopped kale and 1 cup of milk to the pot. - Stir gently and let it cook for another 5 minutes until the kale wilts. - Taste the soup and add salt and freshly cracked black pepper as you like. - If the soup is too thick, add more broth or water to reach the right consistency. When cooking sausage, start with a hot pot. This helps the sausage brown well. Remove the casing and crumble the sausage into pieces. Cook it until it’s nice and brown. This will add great flavor to your soup. To test for vegetable tenderness, use a fork. Gently poke a potato or carrot piece. If it slides off easily, they are done. This is key to making the soup tasty and enjoyable. Adding herbs and spices can boost the taste of your soup. I love using dried thyme and smoked paprika. They give the soup a warm, earthy flavor. You can also try adding a pinch of red pepper flakes for heat. For extra toppings, consider grated Parmesan cheese. It adds a creamy texture. You can also sprinkle fresh herbs like parsley or chives on top for color. The ideal serving temperature for this soup is hot. Ladle it into bowls straight from the pot. This makes it comforting and inviting. Pair the soup with crusty bread or a fresh salad. A simple green salad works well. The crunch of the salad balances the soup's creaminess. Enjoy every bite! {{image_4}} You can switch the Italian sausage for chicken or turkey sausage. This change makes the soup lighter but still tasty. The flavors blend well with the potatoes and kale. If you want a plant-based option, try vegetarian sausage. It adds a nice texture and flavor without meat. Feel free to add seasonal vegetables to your soup. Sweet potatoes or zucchini work great. You can even throw in some bell peppers for extra color. If you have frozen kale, use it! Just toss it in during the last few minutes of cooking. Frozen kale is already chopped, saving you time and effort. If you need a dairy-free option, use almond, oat, or coconut milk instead of regular milk. Each will change the flavor slightly but still keep the soup creamy. For a rich texture, try using cashew cream. It blends well and adds a nice depth to the soup. To store leftovers, let the soup cool first. Then, transfer it to an airtight container. This keeps the soup fresh and safe. I like to use glass containers. They do not stain and are easy to clean. You can freeze the soup for future meals. Just make sure it cools completely. Pour the soup into freezer-safe containers or bags. Leave some space at the top for expansion. To thaw, place the soup in the fridge overnight. Reheat on the stove over low heat, stirring often. You can also use the microwave for quick reheating. In the fridge, this soup lasts about 3 to 4 days. If you see any mold or a strange smell, it’s best to toss it. If the soup looks off or has a sour smell, do not eat it. Always trust your senses! Yes, you can make this soup ahead of time. Store it in the fridge for up to three days. To reheat, pour the soup into a pot over low heat. Stir often to warm it evenly. If the soup thickens, add a splash of broth or water. Absolutely! If you can't find kale, try using spinach or Swiss chard. Spinach wilts quickly, so add it just five minutes before serving. Swiss chard takes a bit longer, about eight minutes, to soften. Yes, this soup can be gluten-free. Check your sausage and broth labels. Some brands add gluten. Use gluten-free broth and sausage to keep it safe for those with gluten allergies. You can easily add beans for extra protein. Canned beans like cannellini or kidney work best. Rinse and drain them first. Add them when you add the kale, and let them heat through for about five minutes. This soup combines tasty sausage, fresh veggies, and hearty broth. You can customize it with different proteins, vegetables, or toppings. Remember to store any leftovers properly for later enjoyment. This recipe is easy to prepare and fun to make with family or friends. Enjoy every warm, delicious bite of this comfort food classic. Your options are endless, so get creative!

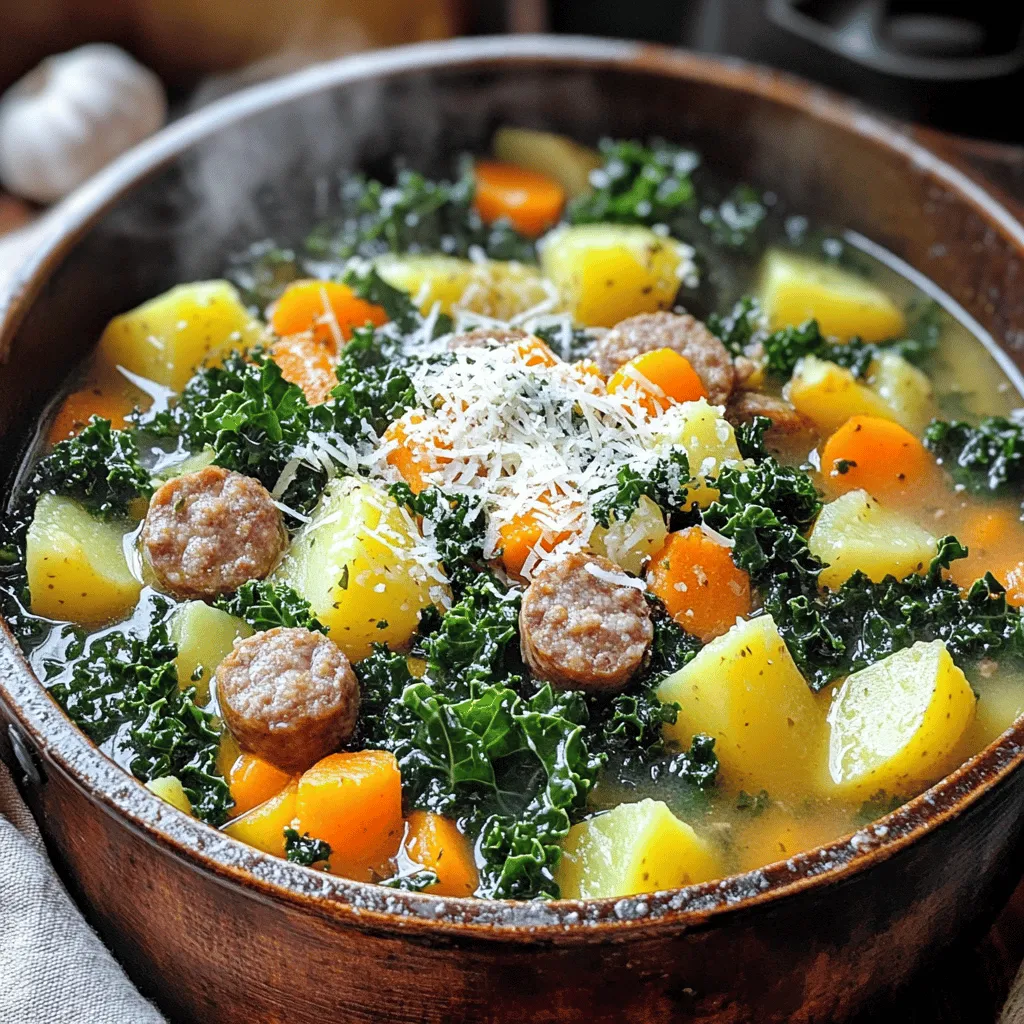
Dive into the warmth of my Sausage Potato Kale Soup, a dish that warms both heart and belly. This hearty and comforting delight blends savory sausage, tender potatoes, and vibrant …

Read more

Categories Dinner

Gingerbread Oatmilk Chai Latte Warm and Cozy Drink

August 11, 2025 by Chef Tavio
- 1 cup oat milk - 1 chai tea bag (or 1 tablespoon loose leaf chai) - 1 tablespoon molasses - 1 teaspoon ground ginger - 1 teaspoon ground cinnamon - 1/4 teaspoon ground nutmeg - 1 tablespoon maple syrup (adjust to your preferred sweetness) - 1/2 teaspoon vanilla extract - Freshly whipped cream (optional, for topping) - A sprinkle of ground cinnamon or nutmeg (for garnish) You can switch oat milk for almond milk or soy milk if you prefer. For a caffeine-free option, use herbal chai tea. If you don't have molasses, honey or agave syrup works well too. You can adjust spices according to your taste. If you want a richer flavor, add a dash of allspice or cloves. - Oat Milk: Creamy and dairy-free, oat milk is rich in fiber. It helps keep your heart healthy. - Chai Tea: Chai tea has spices that boost your immune system. It can also improve digestion and reduce stress. - Molasses: Molasses is high in iron and calcium. It adds sweetness and helps maintain strong bones. - Ginger: Ginger is great for your tummy. It can ease nausea and has anti-inflammatory properties. - Cinnamon: Cinnamon can help lower blood sugar levels. It also adds flavor and warmth to your drink. - Nutmeg: Nutmeg may help with sleep and digestion. Just a little can bring a nice depth to your latte. - Maple Syrup: This natural sweetener has antioxidants. It adds sweetness without refined sugar. - Vanilla Extract: Vanilla can improve mood and has calming effects. It enhances the overall flavor of your drink. - Whipped Cream: While optional, whipped cream adds a touch of indulgence. It can make your drink feel special. - Cinnamon or Nutmeg Garnish: A sprinkle adds a lovely aroma and visual appeal. It makes your drink feel festive and cozy. 1. Start by heating 1 cup of oat milk in a small saucepan. Use medium heat and stir often. This will keep it from sticking or boiling. 2. Once the oat milk is warm, add a chai tea bag or 1 tablespoon of loose leaf chai. Let it steep for about 5 minutes. This step allows the flavors to blend nicely. 3. After steeping, remove the tea bag or strain the loose leaves. This will give you a smooth latte base. 4. Now, it’s time to add flavor! Mix in 1 tablespoon of molasses, 1 teaspoon of ground ginger, 1 teaspoon of ground cinnamon, and 1/4 teaspoon of ground nutmeg. Add 1 tablespoon of maple syrup and 1/2 teaspoon of vanilla extract. Stir everything until well combined. 5. If you want a frothy drink, use a frother to whip it up. This makes the latte light and airy. 6. Pour your delicious chai latte into your favorite mug. For a treat, top it with freshly whipped cream. 7. Finally, sprinkle a little ground cinnamon or nutmeg on top. This adds a festive touch to your cozy drink. - Use fresh chai tea for the best flavor. If you can, choose high-quality loose leaf chai. - Steeping the tea for too long can lead to bitterness. Stick to the 5-minute mark for a balanced taste. - Adjust the amount of chai based on your taste. More chai means a stronger flavor. - Keep the oat milk at a warm temperature, but don’t let it boil. This helps keep the flavors bright and smooth. - Serve your Gingerbread Oatmilk Chai Latte warm for the best experience. Aim for a temperature around 150°F (65°C). - If you prefer a cooler drink, let it sit for a few minutes after making. It should still be warm but not too hot to sip. - Always check the temperature before serving, especially for kids. You want it to be cozy, not scalding! You can make this drink your own! Start with the base. If you like it sweeter, add more maple syrup. You can also try honey or agave syrup. Feeling adventurous? Add a dash of cardamom for a spicy twist. You could also swap the oat milk for almond or soy milk. Each option gives a different flavor. Want to elevate the latte? Top it with crushed ginger snaps or a drizzle of caramel. These add a crunchy texture and extra sweetness. You can also play with spices. Try adding allspice or a pinch of cloves. Each change can give your drink a whole new vibe. Frothing oat milk is simple but requires some care. Start with cold oat milk for the best froth. Pour it into a frothing pitcher. Use a steam wand or a handheld frother. Move the frother in a circular motion. This mixes air into the milk, creating foam. Keep an eye on the temperature. Oat milk should reach about 150°F for the best flavor without burning. If you don't have a frother, you can shake the milk in a jar. Just make sure to leave some space in the jar. After shaking, pour it into your latte and watch it rise! One common mistake is boiling the oat milk. This can change the flavor and texture. Always heat it slowly over medium heat. Another pitfall is not steeping the chai long enough. Five minutes is key for full flavor. Also, watch out for clumps. Ensure you mix the molasses and spices well. If you see lumps, use a whisk to break them up. Finally, don't skip the garnish! A sprinkle of cinnamon or nutmeg gives a nice finish. It makes the drink feel special and cozy. {{image_4}} If you want to change the base, try different dairy alternatives. You can use almond milk, soy milk, or coconut milk. Each type brings its own flavor. Almond milk adds a nutty taste, while coconut milk gives a tropical twist. Choose what fits your diet best. You can mix up the spices for a unique touch. Try adding cardamom or cloves to boost the warm flavor. Each spice adds a different note. If you like it spicy, add more ground ginger or cinnamon. Adjust based on your taste. You can also use pumpkin spice for a seasonal kick. For a refreshing iced drink, follow these steps. First, brew the chai tea and let it cool. Then, mix it with oat milk and spices. Pour it over ice for a cool treat. Garnish it with whipped cream if you like. This version is perfect for hot days when you crave something cozy but cold. You can store your leftover Gingerbread Oatmilk Chai Latte in the fridge. Use an airtight container to keep it fresh. It should stay good for up to three days. Make sure to cool it down before putting it in the fridge. This helps keep the flavors intact. When you're ready to enjoy your leftover chai latte, pour it into a small saucepan. Heat it gently over low to medium heat. Stir it often to ensure it warms evenly. Avoid boiling, as this can change the taste and texture. You can also microwave it, but heat it in short bursts and stir in between. If you want to make a big batch, freezing is a great option. Pour the cooled chai latte into freezer-safe containers. Leave some space at the top, as the liquid will expand when frozen. It can last in the freezer for up to two months. When ready to drink, thaw it in the fridge overnight. Then, reheat it gently for the best taste. The best way to sweeten your Gingerbread Oatmilk Chai Latte is with maple syrup. It adds a nice flavor and blends well with the spices. You can start with one tablespoon and adjust to your taste. If you want to try something different, use honey or agave syrup. Both work great, too. Just remember to stir well after adding your sweetener. This ensures an even sweetness throughout the drink. Yes, this recipe is already vegan-friendly! The main ingredient, oat milk, is a plant-based option. The sweeteners, like molasses and maple syrup, are also vegan. Just skip the whipped cream topping if you want it fully vegan. You can use coconut whipped cream instead if you still want that creamy finish. It’s a delicious way to keep your drink plant-based while enjoying the same great taste. You can find Gingerbread Oatmilk Chai Latte ingredients at most grocery stores. Look for oat milk in the dairy section. Chai tea bags are often near the coffee or tea aisle. Molasses, ground spices, and maple syrup are typically found in the baking section. If you’d rather buy a pre-made version, check specialty coffee shops or cafes. Many places offer seasonal drinks like this during the fall and winter months. In this blog post, we explored how to make a Gingerbread Oatmilk Chai Latte. We covered the important ingredients, tips for cooking, and the health benefits of each item. You learned how to customize your drink and avoid common mistakes. We also discussed different variations and storage tips for leftovers. Enjoy this tasty treat made just for you. Try new flavors and find what you love!

Cozy up with a cup of my Gingerbread Oatmilk Chai Latte, the perfect drink for chilly days! This warm delight mixes bold chai spices with sweet gingerbread flavor, creating a …

Read more

Categories Breakfast

Blueberry Lemon Cheesecake Overnight Oats Delight

August 10, 2025 by Chef Tavio
- 1 cup rolled oats - 1 cup unsweetened almond milk (or preferred milk type) - 1/2 cup Greek yogurt (plain or vanilla) - 1/4 cup cream cheese, softened - 2 tablespoons honey or maple syrup - Zest of 1 lemon - Juice of 1/2 lemon - 1 cup fresh blueberries (plus extras for garnish) - 1 teaspoon chia seeds (optional) - Pinch of salt - Crushed graham crackers for topping (optional) To make Blueberry Lemon Cheesecake Overnight Oats, you need simple ingredients. Start with rolled oats. They give a hearty base. Almond milk makes it creamy. You can use other milk types too. Greek yogurt adds tang and protein. Softened cream cheese brings a rich cheesecake flavor. For sweetness, you can add honey or maple syrup. Lemon zest and juice give a fresh, bright taste. Fresh blueberries are the stars here. They pop with flavor and color. Chia seeds are optional, but they thicken the mix. A pinch of salt balances the sweetness. Finally, add crushed graham crackers for that classic cheesecake crunch. Gather these ingredients, and you’re ready to create a delicious breakfast! To start your Blueberry Lemon Cheesecake Overnight Oats, gather all your ingredients. - Mixing the base ingredients: In a large bowl, combine 1 cup of rolled oats, 1 cup of unsweetened almond milk, 1/2 cup of Greek yogurt, and 1/4 cup of softened cream cheese. Add 2 tablespoons of honey or maple syrup, the zest of 1 lemon, the juice of 1/2 lemon, and a pinch of salt. Whisk this mixture until it is smooth and creamy. - Adding the chia seeds and blueberries: If you like, stir in 1 teaspoon of chia seeds for thickness. Then, gently fold in 1 cup of fresh blueberries. Be careful not to crush them! Next, it's time to portion the oats. - Portioning the mixture into containers: Divide the oat mixture into two or three jars. Make sure each jar has space for the oats to expand as they soak. - Sealing and refrigerating: Seal the jars tightly and put them in the fridge. Let them soak overnight or for at least 4 hours. This soaking allows the oats to absorb all the liquid. Now that your oats are ready, it's time to enjoy them! - Topping ideas: In the morning, stir your oats. You can add more fresh blueberries on top and some crushed graham crackers for that cheesecake crunch. - Enjoying straight from the jar or in a bowl: You can eat your oats straight from the jar for a quick breakfast. Or, pour them into a bowl for a nice sit-down meal. To get the right texture, mix your base ingredients well. Start with rolled oats, almond milk, Greek yogurt, and cream cheese. Use a whisk to blend until smooth. This step is key for creaminess. Overnight soaking brings the oats to life. It allows them to soak up the milk. This makes them soft and fluffy by morning. If you can, let them soak for at least four hours. I always do it overnight for the best results. Adjusting sweetness is easy. You can use honey or maple syrup. Start with two tablespoons, then taste. If you want it sweeter, add more. Adding spices can really boost the flavor. A pinch of cinnamon or nutmeg works well. These spices give a warm taste that pairs nicely with the lemon and blueberries. Serving ideas can make your oats fun. Use mason jars for a cute look. This makes it easy to grab and go. You can layer the oats with extra blueberries on top. For a cheesecake vibe, sprinkle crushed graham crackers on top. This adds a nice crunch and looks appealing. Remember, presentation matters; it makes the meal more enjoyable! {{image_4}} You can switch the blueberries in this recipe. Try strawberries, raspberries, or peaches for a new taste. Seasonal fruits add fun flavors, too. If it’s summer, use fresh peaches. In fall, try apples or pears. Each fruit brings its own sweet charm. If you want a dairy-free dish, plant-based yogurts work great. Look for coconut, almond, or soy yogurts. You can also use non-dairy cream cheese. For milk, almond milk is good, but soy or oat milk is also tasty. These swaps keep the flavor while meeting your needs. For a lighter version, use lower-calorie sweeteners like stevia or monk fruit. They add sweetness without extra calories. You can also boost protein by adding more Greek yogurt. This makes your oats filling and nutritious. Enjoy delicious meals that fit your health goals! To keep your Blueberry Lemon Cheesecake Overnight Oats fresh, use glass jars or airtight containers. These are great for keeping the oats from drying out. Make sure to seal the jars tightly. This keeps air out and preserves flavor. Store the jars in the fridge. The cool temperature helps the oats stay fresh and tasty. If you plan to eat them later, label the jars with the date. This helps you track when you made them. Your overnight oats will last in the fridge for up to five days. This makes them perfect for meal prep. Look for signs of spoilage like off smells or changes in texture. If the oats look dry or clumpy, it’s best to throw them out. To prepare for the week ahead, make several jars at once. You can customize each jar with different toppings. This keeps breakfast exciting. Consider matching flavors with the season. For example, add peaches in summer or apples in fall. Make your breakfast fun and varied! Yes, you can use quick oats. However, rolled oats give a better texture. Quick oats cook faster and can become mushy. If you prefer creamier oats, stick with rolled oats. These overnight oats last about 3 to 5 days in the fridge. Keep them sealed in jars or containers. Always check for any off smell or changes in texture before eating. Yes, you can heat them up! Just transfer the oats to a bowl and microwave for 30-60 seconds. Stir well to ensure even heating. Enjoy warm oats for a cozy breakfast. You can use regular yogurt or plant-based yogurt. If you're dairy-free, coconut yogurt works well. Choose one that fits your taste and dietary needs. No, it's not necessary, but it adds a creamy texture and cheesecake flavor. If you want to skip it, add more yogurt instead. The oats will still taste great! You now have a simple and tasty guide to making overnight oats. We covered key ingredients, step-by-step prep, and helpful tips for success. Don’t forget, you can mix in different fruits or swap in dairy-free options for variety. These oats make for an easy meal prep solution that stays fresh and delicious in your fridge. Enjoy your creation right from the jar or in a bowl. Experiment and have fun with the flavors. You’re ready to start your overnight oats journey!

Are you ready to transform your breakfast routine? My Blueberry Lemon Cheesecake Overnight Oats Delight packs a punch of creamy sweetness and bright citrus flavor. With just a few simple …

Read more

Categories Breakfast

Pesto Mozzarella Stuffed Chicken Flavorful and Juicy Dish

August 10, 2025 by Chef Tavio
- 4 boneless, skinless chicken breasts - 1 cup fresh basil pesto - 1 cup mozzarella cheese, shredded - 1/2 cup sun-dried tomatoes, finely chopped - 1/4 cup grated Parmesan cheese - 2 tablespoons extra virgin olive oil - Salt and freshly ground black pepper to taste - Fresh basil leaves for garnish When I create Pesto Mozzarella Stuffed Chicken, I focus on using fresh and high-quality ingredients. The chicken breasts form the base of this dish. They need to be boneless and skinless for easy stuffing. This choice makes the chicken tender and juicy. For the stuffing, fresh basil pesto adds a bright flavor. I always use a cup of it. It blends perfectly with the shredded mozzarella cheese. This cheese melts beautifully, adding a rich and creamy texture to the dish. To enhance the flavor, I add sun-dried tomatoes. They give a sweet and tangy bite that complements the pesto. A sprinkle of grated Parmesan cheese also adds depth. I love the salty notes it brings to the mix. Using extra virgin olive oil is key for searing the chicken. It helps create a lovely golden crust. Finally, seasoning with salt and freshly ground black pepper is essential. It brings out the best in all the flavors. Top the dish with fresh basil leaves before serving for a pop of color and freshness. This simple touch makes a big difference! - Preheat the oven to 375°F (190°C). - In a bowl, mix the mozzarella, sun-dried tomatoes, and half the pesto. Stir well. - Take each chicken breast. Slice it horizontally to make a pocket. - Fill each pocket with the pesto mozzarella mix. Spread it evenly inside. - Heat olive oil in a skillet over medium heat. - Place the stuffed chicken in the skillet. Sear for 3-4 minutes on each side until golden. - Spread the remaining pesto on top of each chicken breast. Add grated Parmesan cheese. - Move the skillet to the oven. Bake for 20-25 minutes until the chicken is 165°F (75°C). - Let the chicken rest for a few minutes after baking. This keeps it juicy. - Garnish with fresh basil leaves before serving. Enjoy the vibrant look! To ensure even seasoning, sprinkle salt and pepper on both sides of the chicken. This simple step helps bring out the flavors. Cook the chicken on medium heat to avoid burning, and flip it only once for the best crust. Resting the chicken before serving is key. It allows juices to settle, making each bite juicy and tender. You can elevate the taste with extra herbs like thyme or oregano. A pinch of red pepper flakes adds a nice kick. For sides, try roasted veggies or a fresh salad. Both pair well with the rich flavors of the stuffed chicken. For searing, I recommend using a cast iron skillet or a non-stick skillet. These allow for even cooking and easy cleanup. A meat thermometer is a must-have! It ensures your chicken reaches 165°F (75°C) for safe eating. {{image_4}} You can switch up the cheese in this dish. Try using provolone or gouda for a new flavor. You can also make your own pesto at home. Just blend fresh basil, garlic, nuts, cheese, and olive oil. Adding seasonal vegetables can enhance the stuffing. For example, try chopped spinach or roasted bell peppers. These veggies add color and flavor, making the dish even better. If you want a smoky flavor, try grilling the chicken instead. Just marinate it first to keep it juicy. An air fryer is another quick method. It gives you crispy edges while keeping the inside moist. For a meatless option, consider stuffing bell peppers or zucchini. Use the same cheese and pesto mix to keep the flavor. This makes a great vegetarian dish. Pair this dish with a fresh side salad. A simple green salad with a lemon vinaigrette works well. You can also serve it with pasta topped with marinara sauce. For meal prep, slice the stuffed chicken and store it in containers. It makes a great lunch for work or school. Just add some veggies or grains for a balanced meal. To keep your pesto mozzarella stuffed chicken fresh, store it in the fridge. First, let the chicken cool to room temperature. Then, place it in a container with a tight lid. This will help keep the flavors intact. You should eat the leftovers within three to four days. When you want to enjoy the leftovers, you need to reheat them carefully. The best way is to use an oven or a skillet. Preheat your oven to 350°F (175°C). Place the chicken on a baking sheet. Heat it for 15-20 minutes or until warm. If using a skillet, warm it over low heat, turning the chicken until heated through. This keeps the chicken juicy and tasty. If you want to save the stuffed chicken for later, freezing is a great choice. First, let it cool completely. Wrap each piece tightly in plastic wrap, then place them in a freezer bag. Remove as much air as possible. This helps prevent freezer burn. To thaw, move the chicken to the fridge for several hours or overnight. Once thawed, you can reheat as mentioned above. Enjoy the flavors again! Using a meat thermometer is key. Insert it into the thickest part of the chicken. Aim for an internal temperature of 165°F (75°C). This ensures safety and juicy chicken. Cooking times may vary based on thickness, so the thermometer helps you avoid undercooking. Let the chicken rest after cooking. It allows juices to settle, making it tastier. Yes, you can use frozen chicken breasts! Just remember to defrost them first. The best way is to leave them in the fridge overnight. If you’re in a hurry, use the cold water method. Place the sealed chicken in cold water, changing it every 30 minutes. Once thawed, follow the recipe as usual. Cooking from frozen takes longer, so adjust your cooking time. You can keep leftovers in the fridge for up to three days. Store them in an airtight container to maintain freshness. If you want to keep them longer, consider freezing them. Just make sure to label the container with the date. This will help you track how long they’ve been stored. Always check for signs of spoilage before eating. This blog post shared how to make delicious pesto mozzarella stuffed chicken. You learned about the key ingredients like chicken, pesto, and cheese. I covered step-by-step instructions to ensure tasty results. Tips helped you cook evenly and enhance flavors. Variations let you customize the dish to your taste. Cooking is fun, and this recipe is easy to follow. With the right tools and tips, you can create a meal everyone will love. Enjoy your cooking and share this dish with friends!

Are you ready to revamp your dinner routine? This Pesto Mozzarella Stuffed Chicken is bursting with flavor, juicy goodness, and simplicity. With just a few main ingredients like tender chicken …

Read more

Categories Dinner

S’mores Brownie Skillet Irresistible Dessert Delight

August 10, 2025 by Chef Tavio
S'mores Brownie Skillet is simple to make. You need some key ingredients to create this delicious treat. Here’s the list: - 1 cup unsalted butter, melted - 1 1/4 cups granulated sugar - 3/4 cup packed brown sugar - 4 large eggs - 1 teaspoon pure vanilla extract - 1 cup all-purpose flour - 1 cup unsweetened cocoa powder - 1/2 teaspoon baking powder - 1/2 teaspoon fine sea salt - 1 cup mini marshmallows - 1 cup graham cracker crumbs - 1/2 cup semi-sweet or milk chocolate chips - Additional mini marshmallows and graham cracker crumbs for topping Each ingredient plays a big role. The butter gives a rich flavor. The sugar makes it sweet and gooey. The eggs help hold it all together. Flour and cocoa powder form the base of the brownie. Baking powder makes it rise just right. Sea salt enhances the taste, while marshmallows and chocolate chips add fun texture and flavor. Lastly, graham crackers give that classic s'mores crunch. Feel free to gather these ingredients before you start. The more prepared you are, the easier it will be to whip up this tasty dessert! Set your oven to 350°F (175°C). This step warms the oven and helps the brownies bake evenly. Grease a 10-inch cast iron skillet with butter or spray. This keeps the brownies from sticking. In a big bowl, mix the melted butter with granulated sugar and brown sugar. Use a whisk to stir until it looks smooth. This blend gives the brownies a rich flavor. In a different bowl, sift together flour, cocoa powder, baking powder, and salt. Slowly add this mix to the wet ingredients. Stir gently until just combined. Don’t mix too much or the brownies will be tough. Now, fold in the mini marshmallows, graham cracker crumbs, and chocolate chips. This step adds fun textures and flavors. Make sure everything is evenly mixed throughout the batter. Pour the batter into your greased skillet. Spread it evenly across the bottom. This ensures all parts of the brownies bake at the same time. Place the skillet in the oven. Bake for 25-30 minutes. Check by putting a toothpick in the center. It should come out with some moist crumbs. Avoid overbaking, as this makes brownies dry. After baking, sprinkle extra mini marshmallows and graham cracker crumbs on top. Switch to broil and toast for 1-2 minutes. Keep a close watch to avoid burning. Let the skillet cool for a few minutes before serving. This helps the brownies set up. Cut into pieces and enjoy warm, topped with ice cream if you like. To get the best texture in your S’mores Brownie Skillet, don’t overmix the batter. Mix just until the dry ingredients blend in. Overmixing can lead to tough brownies. You want them soft and chewy. Adding mini marshmallows also helps with the soft texture. They melt and create gooey pockets in every bite. When baking, always preheat your oven to 350°F (175°C). This ensures even cooking. Use a 10-inch cast iron skillet or an oven-safe pan to help with heat distribution. Grease the pan well to prevent sticking. Check your brownies at 25 minutes. If a toothpick comes out with a few moist crumbs, they are done. Serve the brownies warm from the oven for the best taste. Top them with more mini marshmallows and graham cracker crumbs. For a delicious treat, add a scoop of vanilla ice cream on top. Drizzle with chocolate sauce for extra sweetness. Enjoy the mix of warm, gooey chocolate with crunchy bits. {{image_4}} You can switch out the chocolate in these brownies. Use dark chocolate for a richer taste. If you want something sweeter, use milk chocolate. You can also try white chocolate chips for a fun twist. Each option gives a unique flavor to your S’mores Brownie Skillet. To make this treat gluten-free, swap all-purpose flour for a gluten-free blend. Look for blends that include xanthan gum. This keeps the texture light and fluffy. You can also check if the graham cracker crumbs are gluten-free. These swaps let everyone enjoy this dessert. Want to jazz up your brownies? Add a teaspoon of espresso powder to boost the chocolate flavor. You could mix in peanut butter chips for a creamy touch. Try crushed nuts for some crunch. Each addition adds its twist, so feel free to get creative! To store your S'mores Brownie Skillet, let it cool first. Once cooled, cover it tightly with plastic wrap or foil. You can also transfer it to an airtight container. This keeps the brownies fresh for up to three days at room temperature. When you're ready to enjoy leftovers, preheat your oven to 350°F (175°C). Place the skillet in the oven for about 10-15 minutes. This warms the brownies without drying them out. Alternatively, you can microwave a slice for 20-30 seconds. Pair it with ice cream for a warm treat! If you want to save some for later, freezing works well. Cut the brownies into squares and wrap each piece in plastic wrap. Place them in a freezer bag or container. The brownies can stay frozen for up to three months. When you're ready, let them thaw in the fridge overnight or warm them up directly from the freezer. You can tell the brownies are ready when a toothpick comes out with a few moist crumbs. This means they are still soft inside. If the toothpick comes out clean, they may be overbaked. Aim for 25-30 minutes of baking time, but start checking at 25 minutes. Yes, you can use any oven-safe pan. A square or round baking dish works well too. Just adjust the baking time if the pan is larger or smaller. A larger pan may bake faster, while a smaller one may take longer. If you don’t have marshmallows, try using whipped cream or meringue instead. You can also use chocolate spread for extra richness. Consider adding nuts for texture if you like a little crunch. You can prepare the brownie batter and store it in the fridge for up to a day. Just make sure to cover it tightly. When you're ready to bake, let it sit at room temperature for about 30 minutes before baking. You can add extra chocolate chips or nuts for a delightful crunch. Drizzling chocolate or caramel sauce on top adds sweetness. Fresh fruits like raspberries or strawberries make it look fancy and taste fresh. Consider adding whipped cream for a creamy finish! You've learned how to make delicious brownies with simple steps. We covered ingredients, mixing methods, and baking tips. Remember, following the right steps leads to great results. Don't forget to try different flavors or adapt for dietary needs. Store leftovers properly to enjoy later. Baking is easy and fun! Enjoy your sweet treats!

Craving a sweet treat that combines classic flavors? Look no further! My S’mores Brownie Skillet brings together gooey marshmallows, rich chocolate, and crunchy graham crackers all in one dish. It’s …

Read more

Categories Desserts

Coconut Lime Energy Bites Simple and Healthy Snack

August 10, 2025 by Chef Tavio
To create Coconut Lime Energy Bites, gather these items: - 1 cup rolled oats - 1/2 cup unsweetened shredded coconut - 1/4 cup almond butter - 1/4 cup honey or maple syrup - Zest of 1 lime - 2 tablespoons fresh lime juice - 1/4 teaspoon sea salt - 1/4 teaspoon pure vanilla extract - 2 tablespoons chia seeds (optional) - 1/4 cup mini dark chocolate chips (optional) You can make these bites your own by adding or swapping ingredients. Here are some ideas: - Use peanut butter instead of almond butter for a different taste. - Swap honey for agave syrup for a vegan option. - Mix in dried fruit like cranberries or raisins for added sweetness. - Add nuts like almonds or walnuts for extra crunch. These energy bites offer a tasty way to boost your energy. Here’s what you get per serving (about 1 energy bite): - Calories: 100 - Protein: 3g - Fat: 5g - Carbohydrates: 12g - Fiber: 2g - Sugar: 4g This snack is not only delicious but also provides healthy fats and fiber. Enjoy these bites as a quick snack or pre-workout fuel! Start by gathering your dry ingredients. In a large bowl, mix together: - 1 cup rolled oats - 1/2 cup unsweetened shredded coconut Stir these well to ensure they blend evenly. This step sets a great base for your energy bites. Next, focus on the wet ingredients. In another bowl, whisk together: - 1/4 cup almond butter - 1/4 cup honey or maple syrup Make sure this mixture is smooth. Then, add: - Zest of 1 lime - 2 tablespoons fresh lime juice - 1/4 teaspoon sea salt - 1/4 teaspoon pure vanilla extract Mix these until fully combined. This step adds flavor and moisture to your bites. Now, pour the wet mixture over the dry ingredients. Use a spatula or wooden spoon to mix everything together. Make sure the oats and coconut are fully coated. If you want to add extras, like chia seeds or dark chocolate chips, fold them in gently. To shape the bites, scoop out small portions of the mixture. Roll them into balls about 1 inch in size. If the mixture is too sticky, dampen your hands with water. This helps in forming neat balls. Arrange the energy bites on a parchment-lined baking sheet. Leave space between them. Now, refrigerate for at least 30 minutes. This helps them firm up. After chilling, store them in an airtight container. They stay fresh in the fridge for a week or can be frozen for longer storage. If your mixture feels too sticky, there are simple fixes. Use damp hands when shaping the bites. You can also sprinkle a bit of extra shredded coconut on your hands for added grip. Another option is to refrigerate the mixture for a short time before rolling it into balls. This will help it firm up and become easier to handle. Feel free to swap ingredients based on your taste. Instead of almond butter, try peanut butter or sunflower seed butter. If you need a sweetener, maple syrup works well. You can also use different nuts or seeds in place of chia seeds. This gives you room to be creative and customize your energy bites to your liking. To serve your energy bites, use a fun plate or a decorative jar. Arrange them neatly for a beautiful display. Sprinkling extra shredded coconut on top adds a nice touch. You could also serve them on a tiered platter to impress your guests. These bites are perfect for snacks, parties, or a healthy treat on the go. {{image_4}} I love adding dark chocolate chips to these bites. The rich chocolate pairs so well with coconut and lime. You can use about 1/4 cup of mini dark chocolate chips. Just fold them in at the end. They add a delightful sweetness and a nice crunch. Want to boost the nutrition? Add chia seeds or hemp seeds. These tiny seeds pack a big nutrient punch. Chia seeds provide fiber and omega-3 fatty acids. Just add 2 tablespoons of chia seeds to your mix. You can also try adding flaxseeds or protein powder for extra benefits. If you want a twist, try different flavors. You can use orange zest and juice instead of lime. Just think of the bright citrus taste! You can also mix in dried berries like cranberries or blueberries. They add a pop of color and flavor. Just chop them small and mix them in. To keep your Coconut Lime Energy Bites fresh, store them in an airtight container. Place them in the refrigerator for best results. This helps preserve their taste and texture. I find that they stay good for up to a week this way. If you want to keep them longer, freezing is a great option. To freeze your energy bites, first, arrange them on a baking sheet. Make sure they don't touch. Place the sheet in the freezer for about an hour. Once they are firm, transfer them to a freezer-safe container. You can layer them with parchment paper to avoid sticking. They will keep well in the freezer for about three months. Pay attention to the ingredients you use. If you use honey, the shelf life may vary. Honey helps keep them fresh longer. If you add optional ingredients like chocolate chips, note that they can change the texture. Always check for any signs of spoilage before eating. If they look or smell off, it’s best to toss them. Coconut Lime Energy Bites are small, tasty snacks packed with oats, coconut, and lime. They give you a quick boost of energy. These bites are easy to make and perfect for on-the-go snacking. You mix dry and wet ingredients, shape them, and chill. Each bite has a refreshing flavor that brightens your day. Yes, you can make these energy bites vegan. Just swap honey for maple syrup. Almond butter is already vegan, so you’re good there. This way, you can enjoy the same great taste without animal products. Homemade energy bites last about a week in the fridge. Store them in an airtight container to keep them fresh. If you want them to last longer, you can freeze them. They will stay good for up to three months in the freezer. Absolutely! You can use any nut butter you like. Peanut butter, cashew butter, or sunflower seed butter all work well. Just keep in mind that each nut butter has its own flavor, which will change the taste of your energy bites. The ingredients in Coconut Lime Energy Bites provide great health benefits. - Rolled oats: These give you fiber and energy. - Shredded coconut: It adds healthy fats and flavor. - Almond butter: This is rich in protein and good fats. - Honey or maple syrup: They sweeten the bites and offer quick energy. - Lime juice and zest: They add vitamin C and a zesty taste. - Chia seeds: They offer omega-3s and extra fiber (if used). - Dark chocolate chips: They provide antioxidants (if used). These bites are not just tasty; they also help keep you energized and satisfied! In this blog post, we covered how to make energy bites from scratch. We explored the key ingredients and shared step-by-step instructions for mixing them. You learned tips to customize flavors and keep your bites less sticky. We also discussed storage methods to keep them fresh. Energy bites are a tasty and healthy snack. I hope you try them and make them your own! Enjoy the journey of creating and sharing these simple yet delicious treats.

Looking for a quick and healthy snack? Coconut Lime Energy Bites are perfect for you! They are simple to make, packed with flavor, and full of natural energy. In this …

Read more

Categories Desserts

Spicy Korean Beef Bowls Flavorful and Quick Meal

August 10, 2025 by Chef Tavio
- 1 lb ground beef (or diced beef for a hearty bite) - 1 tablespoon vegetable oil - 3 cloves garlic, finely minced - 1 tablespoon fresh ginger, minced - 2 tablespoons soy sauce - 1 tablespoon gochujang (Korean chili paste for heat) - 1 tablespoon toasted sesame oil - 2 tablespoons brown sugar - 1 carrot, peeled and julienned - 1 bell pepper, sliced (red or yellow for a touch of sweetness) - 2 green onions, finely chopped - Sesame seeds, lightly toasted, for garnish Gather these ingredients before you start cooking. Each element adds flavor and texture. The ground beef gives protein. Garlic and ginger add a nice aroma. Gochujang brings the heat, while brown sugar balances it. Carrots and bell peppers add crunch and color. The green onions and sesame seeds finish the dish beautifully. - Heat the vegetable oil in a skillet. - Mince garlic and ginger. Start by heating the vegetable oil in a large skillet over medium-high heat. This will help the flavors pop. While the oil heats, mince your garlic and ginger. These two ingredients create a strong base for your dish. - Brown the ground beef evenly. - Drain excess fat if needed. Add the ground beef to the hot skillet. Use a spatula to break it up as it cooks. You want to brown it evenly for about 5 to 7 minutes. If there’s too much fat in the pan, drain it. This keeps your dish from becoming greasy. - Whisk soy sauce, gochujang, sesame oil, and brown sugar. - Pour sauce over browned beef. In a small bowl, whisk together the soy sauce, gochujang, sesame oil, and brown sugar. This sauce brings heat and sweetness. Once the beef is browned, pour the sauce over it. Stir well to coat every piece of meat. Let it simmer for 2 to 3 minutes to blend the flavors. - Stir in julienned carrots and bell peppers. - Cook until tender but crisp. Now, add the julienned carrots and sliced bell peppers to the skillet. Stir them into the beef mixture. Cook for another 2 to 3 minutes. You want the veggies tender yet still crisp. This adds a nice texture. - Season with salt and pepper. - Fold in chopped green onions. - Serve over cooked jasmine rice and garnish with sesame seeds. Finally, season the mixture with salt and pepper to taste. Remove it from heat and fold in the chopped green onions. To serve, scoop cooked jasmine rice into bowls. Top it with the spicy beef mix and sprinkle sesame seeds on top for crunch. Enjoy this vibrant and flavorful dish! - Use high heat for quick browning. This gives beef a nice crust. - Don’t overcrowd the skillet while cooking. This helps the beef brown better. - Add more gochujang for extra heat. You can adjust it to your taste. - Adjust sugar for desired sweetness. This helps balance the spice. - Serve with additional green onions. They add color and freshness. - Pair with pickled cucumbers or kimchi. This adds tang and crunch. {{image_4}} You can switch the ground beef for other proteins. Ground turkey or chicken works great. They provide a lighter option while still being tasty. If you want a vegetarian meal, use tofu. It soaks up flavors well and adds a nice texture. For a twist on rice, try quinoa or cauliflower rice. Quinoa adds protein and is gluten-free. Cauliflower rice is low in carbs and very healthy. If you prefer brown rice, it’s a great choice too. It adds a nutty flavor and extra fiber to your meal. Want to make your bowls even more fun? Add mushrooms or snap peas for extra crunch. Both vegetables add great flavor and color. A sprinkle of sesame seeds on top gives a nice crunch too. This small addition makes your dish look fancy and taste amazing. Store leftovers in an airtight container. This keeps them fresh and tasty. Best consumed within 3-4 days. After that, the flavors may fade, and the texture could change. You can freeze the beef mixture in portions. This makes for easy meals later. Just thaw overnight in the refrigerator before reheating. This way, you maintain the best flavor and texture. To reheat, I recommend using the stove. This gives you the best texture. If you’re in a hurry, use the microwave. Just cover the bowl to keep the moisture in. Enjoy your meal warm and delicious! Yes, you can prepare the beef mixture ahead and store it in the fridge. I often make it a day early. It keeps the flavors strong. When you’re ready, just reheat it on the stove. These bowls pair well with pickled vegetables or a side salad. I love adding pickled cucumbers for a tangy crunch. A simple green salad makes a nice balance too. Reduce the amount of gochujang or omit it for a milder taste. If you want some heat, try half a tablespoon. You still get flavor without too much spice. Yes, it holds up well in the fridge and can be reheated throughout the week. Pack it in containers with rice. It’s a quick lunch or dinner option. Gochujang is a Korean chili paste, usually found in Asian grocery stores or online. It adds heat and depth to dishes. Look for a red tub in the sauce aisle. This blog post covered an easy and tasty recipe for Spicy Korean Beef Bowls. You learned about key ingredients, step-by-step cooking, and useful tips. Remember, you can swap proteins and grains to fit your taste. Store leftovers for later meals and enjoy the flexibility of this dish. Cooking should be fun and rewarding. Try different vegetables or spices, and make it your own! Enjoy your delicious creation and impress your family and friends with this simple yet flavorful meal.

Are you craving a quick, flavorful meal? Look no further than Spicy Korean Beef Bowls! This dish packs a punch with savory beef, fresh veggies, and a spicy sauce all …

Read more

Categories Dinner

Strawberry Pretzel Salad Cups Delightful and Easy Treat

August 10, 2025 by Chef Tavio
To make the delightful Strawberry Pretzel Salad Cups, gather these key ingredients: - 1 cup crushed pretzels - 1/4 cup granulated sugar - 1/2 cup unsalted butter, melted - 8 oz cream cheese, softened to room temperature - 1 cup powdered sugar - 1 cup whipped topping (or homemade whipped cream) - 2 cups fresh strawberries, sliced - 1/2 cup strawberry gelatin powder - 1 1/2 cups boiling water - 1 cup cold water These ingredients create a perfect blend of salty, sweet, and creamy flavors. The crushed pretzels form a crunchy base that contrasts with the smooth cream cheese layer. Fresh strawberries add a burst of color and taste. The gelatin gives the dessert a lovely, firm texture. Each bite is a mix of sweetness and a hint of salt. Using fresh strawberries is key. They bring a natural sweetness and brightness to the cups. If you want to use other fruits, feel free! Blueberries or raspberries could work well, too. You can find all these items at your local grocery store. Make sure to check if your cream cheese is soft enough. It helps create a smoother filling. Enjoy preparing this fun treat! 1. Start by mixing the crushed pretzels, granulated sugar, and melted butter in a bowl. This step is key for flavor. 2. Stir the mixture well until all pretzels are coated. You want every piece to shine with butter and sugar. 3. Line a muffin tin with muffin liners. Press the pretzel mix into the bottom of each liner. Aim for an even layer for a nice crust. 4. Bake the pretzel crusts in a preheated oven at 350°F (175°C) for about 10 minutes. You want them golden but not burnt. 5. Once baked, take them out and let them cool completely. This cooling step helps them firm up. 1. Grab a separate bowl and beat the softened cream cheese with the powdered sugar. Use an electric mixer for a smooth blend. 2. Mix until the cream cheese is creamy and free of lumps. This makes for a rich flavor. 3. Next, gently fold in the whipped topping. Make sure to mix until it is fluffy. This lightens the cream cheese layer. 1. Use a spoon to fill each cooled pretzel crust with the cream cheese mixture. Smooth the tops for an even finish. 2. Now, prepare the strawberry topping. In another bowl, mix the strawberry gelatin powder with 1 1/2 cups boiling water. Stir until dissolved. 3. Once dissolved, add the cold water to the gelatin mixture. Stir well to combine. 4. Let the mixture cool a bit, then fold in the sliced strawberries. This keeps them from getting mushy. 5. Carefully pour the strawberry mixture over the cream cheese layer in each cup. Fill them to the top. 1. Place the cups in the refrigerator and chill for at least 2-3 hours. This helps the gelatin set firmly. 2. When ready to serve, carefully remove the cups from the muffin tin. They should come out easily if cooled properly. 3. Serve them chilled for the best taste. Enjoy the mix of flavors and textures! To keep your crust from getting soggy, bake it until golden. This helps it stay crisp. After baking, let it cool completely. If you rush this step, the crust may not hold well. - How to avoid sogginess: Bake at 350°F (175°C) for 10 minutes. Let cool fully. - Suggested baking tips: Use a firm press when forming the crust. This helps it stay together. For a smooth and fluffy cream cheese layer, ensure your cream cheese is at room temperature. This makes mixing easier. Use an electric mixer for best results. - How to achieve a smooth and fluffy texture: Beat cream cheese and powdered sugar well until no lumps remain. - Tips for accurate measurements: Use measuring cups for both sugars. Level off the powdered sugar for accuracy. To make your cups look even better, add a fresh strawberry slice on top. A dollop of whipped topping adds a nice touch, too. - Garnishing ideas: Top with a fresh strawberry slice and whipped topping. - Serving suggestions with additional toppings: Consider sprinkling crushed pretzels on top for added crunch. {{image_4}} You can make Strawberry Pretzel Salad Cups even more fun. Try using different fruits like blueberries or raspberries. These fruits add color and new flavors. You can also mix in citrus notes. Adding lemon or lime zest gives a fresh zing. The bright flavors will surprise your taste buds. If you need gluten-free options, use gluten-free pretzels. They work great and keep the crunchy texture. For a healthier choice, you can swap granulated sugar for a low-sugar alternative. Sweeteners like stevia or monk fruit can help cut calories. These swaps let everyone enjoy the treat without worry. Let’s talk about how to make your cups look special. You can use different cup sizes or shapes. Mini cups are cute for parties. You can also layer the ingredients for a pretty look. Start with the pretzel crust, then add the cream cheese layer, and top with strawberries. These layers make a beautiful dessert that looks as good as it tastes. You can store Strawberry Pretzel Salad Cups in the fridge for about 3-5 days. To keep them fresh, cover each cup with plastic wrap or place them in an airtight container. This helps prevent the pretzel crust from getting soggy. Yes, you can freeze these cups! To do this, first, let them chill completely in the fridge. After they are set, wrap each cup tightly in plastic wrap and then place them in a freezer-safe bag. When you're ready to eat them, thaw the cups in the fridge overnight. Avoid thawing them at room temperature, as this may cause the gelatin to separate. If you have leftover cups, you can refresh them easily. Simply place them back in the fridge for an hour before serving. If they seem a bit soft, you can add a new layer of whipped topping or fresh strawberries on top. This adds color and flavor back into the cups, making them feel fresh and exciting! Strawberry Pretzel Salad Cups are a fun dessert. They mix sweet and salty flavors. The dish has a crunchy pretzel crust, a creamy cheese layer, and a fruity topping. This dessert comes from the Midwest, where people love layered salads. It is perfect for picnics or gatherings. The bright strawberries make it look beautiful and taste fresh. Yes, you can make these cups ahead of time. I suggest preparing them up to 24 hours in advance. Just keep them in the fridge. This lets the flavors blend nicely. Plus, it saves you time on the day you plan to serve them. You can tell the gelatin is set when it feels firm to the touch. It should not jiggle much. When you press it lightly, it should hold its shape. A perfectly set gelatin layer is smooth and shiny. It will hold the strawberries well without spilling. If you want a substitute for whipped topping, try homemade whipped cream. Just whip heavy cream until fluffy. For a dairy-free option, use coconut whipped cream. Both will taste great and keep the cups creamy. This article walked you through making tasty Strawberry Pretzel Salad Cups. We covered the needed ingredients, step-by-step instructions, and tips for success. You learned about variations and storage tips to keep your dessert fresh. My final thought? Get creative! Use different fruits and flavors to make it your own. Enjoy making and sharing this fun treat. It’s sure to impress.

Are you ready to make a sweet and salty treat that everyone will love? Strawberry Pretzel Salad Cups are a fun twist on the classic dessert. With crunchy pretzels, creamy …

Read more

Categories Desserts

Greek Yogurt Chicken Salad Lettuce Wraps Delight

August 10, 2025 by Chef Tavio
- 2 cups cooked chicken breast, shredded - 1 cup plain Greek yogurt - 1/4 cup diced celery - 1/4 cup diced red onion - 1/4 cup sliced almonds - 1/4 cup dried cranberries - 1 tablespoon Dijon mustard - 1 tablespoon honey (optional) - 1 tablespoon fresh lemon juice - Salt and pepper to taste - 8 large lettuce leaves Greek yogurt chicken salad lettuce wraps are easy to make. You start with cooked chicken breast. I love using shredded chicken for this dish. It makes the salad light and fluffy. The Greek yogurt acts as a creamy base. It gives flavor and a healthy twist. You can add diced celery for crunch. Diced red onion brings a nice bite. Next, I mix in sliced almonds. They add a delightful crunch. Dried cranberries add a touch of sweetness. This balance of flavors is what makes this dish stand out. For the dressing, I use Dijon mustard, fresh lemon juice, and honey. If you want it less sweet, skip the honey. Finally, the salt and pepper bring everything together. The lettuce leaves hold the mixture well. I prefer using romaine or butter lettuce. They are sturdy and easy to wrap. You can serve these wraps with lemon wedges. They add a fresh zing to each bite. - Calories per serving: 250 - Protein: 30g - Carbohydrates: 18g - Fat: 8g This dish is not just tasty; it's also healthy. Each serving gives you a good amount of protein from the chicken. The Greek yogurt adds more protein while keeping it low in fat. The fresh veggies give you vitamins and minerals. Using Greek yogurt offers many advantages. It is rich in protein and low in fat. It helps keep you full without excess calories. Chicken is a great protein source too. It supports muscle growth and repair. Fresh vegetables like celery and onions add fiber. Fiber helps with digestion and keeps you healthy. - Combine chicken, celery, and red onion in a bowl. - Prepare the creamy yogurt dressing. Start by placing the shredded chicken in a large bowl. Add the diced celery and red onion. Use a fork or spoon to mix them well. Make sure everything is spread out evenly. Next, in a separate bowl, combine the yogurt, Dijon mustard, honey, lemon juice, salt, and pepper. Whisk until the mixture is smooth. This creamy dressing adds flavor and moisture to the chicken salad. - Pour yogurt mixture over the chicken. - Fold in almonds and cranberries. Now, pour the yogurt dressing over the chicken mix. Stir gently until everything is coated. You want each piece of chicken to have that creamy dressing. Then, fold in the sliced almonds and dried cranberries. These add a nice crunch and a hint of sweetness. Mix just enough to keep the almonds whole. - Instructions for wrapping in lettuce leaves. - Tips for securing the wraps. To make the wraps, take a large lettuce leaf. Place a good spoonful of the chicken salad in the center. Fold the sides of the leaf over the filling. This creates a neat wrap. If you want, use a toothpick to hold the wrap together. This makes it easier to eat. Continue wrapping until all the chicken salad is used up. Enjoy these fresh and tasty wraps! To make your Greek yogurt chicken salad tasty, use fresh herbs like dill or parsley. They add a bright flavor. You can also sprinkle in garlic powder or onion powder for a nice kick. If you want sweetness but don’t have honey, try maple syrup or agave nectar. Both work well and add their unique touch. When serving the wraps, arrange them on a large platter. Drizzle a bit of honey over the wraps for a nice shine. You can add lemon wedges on the side. They give a fresh burst of flavor. Pair these wraps with a light salad or some veggie sticks for a complete meal. To store your chicken salad, keep it in an airtight container in the fridge. It stays fresh for up to three days. For the best taste, serve the salad in the wraps just before eating. This keeps the lettuce crisp and the filling flavorful. If you mix it too early, the lettuce can get soggy. {{image_4}} You can switch out the chicken for other proteins. Tofu works great for a plant-based option. Chickpeas are also a tasty choice and add fiber. For veggies, try diced bell peppers or shredded carrots. These add color and crunch to the mix. Spices can change the game. Try adding paprika or garlic powder for extra depth. Fresh herbs like dill or parsley can brighten the flavor. For dressings, use ranch or a spicy sriracha mix. These options give your wraps a unique twist. For gluten-free wraps, use lettuce as your base. This dish naturally fits low-carb diets too. If you want a vegan version, swap Greek yogurt for a dairy-free alternative. Cashew cream or coconut yogurt can work well here. These changes keep your meal healthy and satisfying. To keep your Greek yogurt chicken salad fresh, store it in an airtight container. Make sure to seal it tightly. This helps prevent odors from your fridge from seeping in. For the lettuce wraps, I suggest wrapping them in damp paper towels before placing them in a container. This keeps them crisp and fresh. Avoid stacking the wraps on top of each other to prevent crushing. You can freeze the chicken salad, but it may change texture. If you want to freeze it, store the salad in a freezer-safe container. Leave some space at the top for expansion. To thaw, place the container in the fridge overnight. When ready to serve, mix it well. If it seems too thick, add a bit of Greek yogurt to restore creaminess. Leftovers can last in the fridge for about three to four days. Always check for signs of spoilage, like a sour smell or discoloration. If anything seems off, it’s best to toss it. Enjoy your Greek yogurt chicken salad while it’s fresh for the best taste! To make these wraps, start with shredded chicken. Place it in a large bowl. Add diced celery and red onion. Mix these gently with a fork. In another bowl, whisk Greek yogurt, Dijon mustard, honey, lemon juice, salt, and pepper. Pour this creamy mix over the chicken. Stir gently until everything is coated. Fold in sliced almonds and dried cranberries for crunch. Take a lettuce leaf and add a spoonful of the chicken salad. Wrap the sides over the filling. If needed, use a toothpick to hold it together. Repeat until all wraps are made. Yes, rotisserie chicken is a great choice for this recipe. It saves time and effort. The chicken is already cooked and flavorful. Just shred it and mix it into the salad. This makes your prep time shorter. You can have a tasty meal ready in minutes. If you don’t want to use lettuce, there are many options. You can use whole grain tortillas or pita bread. They add a different texture and flavor. You can also try using collard greens or cabbage leaves. They are sturdy and work well as wraps. Another option is to serve the chicken salad in bowls. Just add some fresh veggies on the side. This post shared a simple recipe for Greek Yogurt Chicken Salad Lettuce Wraps. You learned about the main ingredients, their health benefits, and step-by-step instructions. I also covered tips for flavor enhancements and variations for dietary needs. Wraps are versatile and easy to customize. Use this recipe as a guide to create a dish you'll love. Healthy eating can be simple and fun. Enjoy your cooking journey with these wraps!

Are you ready to enjoy a healthy twist on a classic dish? My Greek Yogurt Chicken Salad Lettuce Wraps are packed with flavor and nutrition. You’ll love how easy they …

Read more

Categories Salads

Maple Glazed Carrot Cake Donuts Irresistible Treat

August 10, 2025 by Chef Tavio
- 1 cup all-purpose flour - 1/2 teaspoon baking powder - 1/2 teaspoon baking soda - 1 teaspoon ground cinnamon - 1/2 teaspoon ground nutmeg - 1/4 teaspoon salt - 1/2 cup granulated sugar - 1/4 cup brown sugar - 1/2 cup unsweetened applesauce - 2 large eggs - 1 teaspoon vanilla extract - 1 cup grated carrots - 1/2 cup chopped walnuts (optional) - 1/2 cup pure maple syrup - 1 cup powdered sugar - Optional: extra chopped walnuts for topping To make Maple Glazed Carrot Cake Donuts, gather fresh and quality ingredients. Start with the dry ingredients. Combine flour, baking powder, baking soda, cinnamon, nutmeg, and salt. This mix builds the donut’s structure and flavor. Next, grab the wet ingredients. You need granulated sugar, brown sugar, applesauce, eggs, and vanilla extract. These create a moist and sweet base. Don't forget the grated carrots! They add flavor and texture. For an extra crunch, add chopped walnuts. They’re optional, but I recommend them. Finally, prepare the maple glaze with maple syrup and powdered sugar. It gives the donuts a sweet finish. Each ingredient plays a role. The flour forms the body, while sugars sweeten and the spices warm the flavor. Carrots and walnuts add fun textures. This donut recipe is simple yet rewarding. - Preheat the oven to 350°F (175°C). - Sift and combine the dry ingredients in a large mixing bowl. To start, I always preheat my oven. This step helps the donuts rise well. I sift the flour, baking powder, baking soda, cinnamon, nutmeg, and salt together. This makes the dry mix light and fluffy. It also ensures that each bite tastes great. - Whisk together wet ingredients in a separate bowl. - Fold dry ingredients into the wet mixture, avoiding overmixing. Next, I take another bowl for the wet mix. I whisk granulated sugar, brown sugar, applesauce, eggs, and vanilla extract. This mix should be smooth and creamy. After that, I gently fold the dry mix into the wet mix. I make sure to stir just enough to combine. Leaving a few lumps helps keep the donuts light. - Gently fold in grated carrots and walnuts. - Fill each donut cavity three-quarters full and bake. Now, I add freshly grated carrots and walnuts to the batter. The carrots add sweetness and moisture, while the walnuts give a nice crunch. I fill each cavity of the donut pan about three-quarters full. This gives them room to rise without overflowing. - Whisk together maple syrup and powdered sugar until smooth. While the donuts bake, I prepare the maple glaze. I whisk pure maple syrup and powdered sugar until the mix is smooth. The glaze should be thick yet pourable. If it’s too thick, I add a bit of water to reach the right consistency. - Dip the cooled donuts into the glaze. - Sprinkle additional walnuts on top while the glaze sets. Once the donuts cool, I dip the tops into the glaze. I let the excess drip off. If you want, you can sprinkle more chopped walnuts on top while the glaze is still wet. This adds extra flavor and makes them look pretty. - Use freshly grated carrots for better texture. - Opt for high-quality pure maple syrup for the glaze. Using freshly grated carrots gives your donuts a great crunch. The flavor shines through in every bite. Plus, the texture is just right. You can find fresh carrots at local markets, which makes a big difference. For the glaze, choose pure maple syrup. This syrup adds a rich, sweet taste. It enhances the flavor of the donuts. Avoid imitation syrups—they lack the depth of real maple syrup. - Ensure the donut pan is well-greased to prevent sticking. - Adjust baking time based on your oven’s performance. Before pouring in the batter, grease the donut pan well. This step helps the donuts slide out easily. You can use cooking spray or butter for this task. Baking times can vary depending on your oven. Keep an eye on the donuts. They should turn golden brown and be firm to the touch. A toothpick inserted in the center should come out clean. - Use decorative plates or cake stands for serving. - Garnish with fresh carrot shavings for an elegant look. Presentation matters! Serve your donuts on a decorative plate or cake stand. This touch makes them look even more tempting. For an extra touch, add fresh carrot shavings on top. They add color and a nice rustic look. A dusting of powdered sugar can also create a lovely finish. {{image_4}} To make your donuts even more special, consider adding spices. Ginger or cloves can provide a unique twist that boosts flavor. You can also mix in raisins or shredded coconut. These add texture and a sweet surprise in each bite. If you need a gluten-free treat, swap in gluten-free flour. This change keeps the donuts soft and tasty. You can also replace applesauce with yogurt. This gives the donuts a different, creamy feel. For a richer taste, try a cream cheese glaze. It adds a delicious creaminess that pairs well with carrot cake. You can also experiment with citrus glazes. Adding orange or lemon zest will brighten the flavors and make your donuts stand out. You can keep your donuts fresh for a short while. Place the donuts in an airtight container. They will stay good at room temperature for up to 2 days. This way, you can enjoy a tasty treat without worry. If you want to save some for later, freezing is a great option. You can freeze the glazed donuts for up to 2 months. Just wrap them tightly in plastic wrap or foil before placing them in a freezer bag. This helps keep them fresh and tasty. When you're ready to eat the frozen donuts, thaw them at room temperature. This takes a bit of time, so plan ahead. Once thawed, pop them in the microwave for a few seconds. This warms them up nicely and makes the glaze soft again. Enjoy your sweet treat! Stored properly, they can last 2 days at room temperature or up to 2 months in the freezer. Keeping them in an airtight container helps maintain freshness. It's best to eat them soon for the best taste. Yes, you can prepare the batter a day ahead and refrigerate it before baking. This saves time and makes it easy to enjoy fresh donuts. Just remember to mix it well before filling the pan. You can use flaxseed meal or applesauce as an egg substitute. For each egg, use 1/4 cup applesauce. This keeps the donuts moist and tasty, perfect for different diets. Yes, substitute eggs with a vegan egg replacer and ensure all other ingredients are plant-based. You can still enjoy the great flavor of these donuts without using animal products. For the full recipe, refer to the Maple Glazed Carrot Cake Donuts section above. You'll find all the details you need to create this delicious treat. Now you know how to make tasty Maple Glazed Carrot Cake Donuts from scratch. We covered dry and wet ingredients, how to mix them, and tips for baking. I also shared fun variations and storage tips. These donuts are not only easy to make but also delicious. Enjoy them fresh or experiment with toppings. Happy baking!

Craving a sweet treat that’s both delicious and unique? Look no further! Our Maple Glazed Carrot Cake Donuts are the perfect blend of moist cake and rich maple flavor. These …

Read more

Categories Desserts
Older posts
Newer posts
← Previous Page1 … Page19 Page20 Page21 … Page92 Next →

TASTED NEST

Where Flavor Finds a Home 🍳🏡 — warm, simple, and crave-worthy recipes made for real life, from stovetop mornings to backyard dinners.

PAGES

Home About Contact Privacy Policy Terms & Conditions Cookie Policy GDPR Policy Copyright Policy Disclaimer

CATEGORIES

Appetizers Desserts Salads Breakfast Dinner

Contact

  • Pinterest
  • Mail
Copyright © 2025 Tasted Nest. All rights reserved.