Mango Avocado Black Bean Salsa Flavorful Fresh Dip
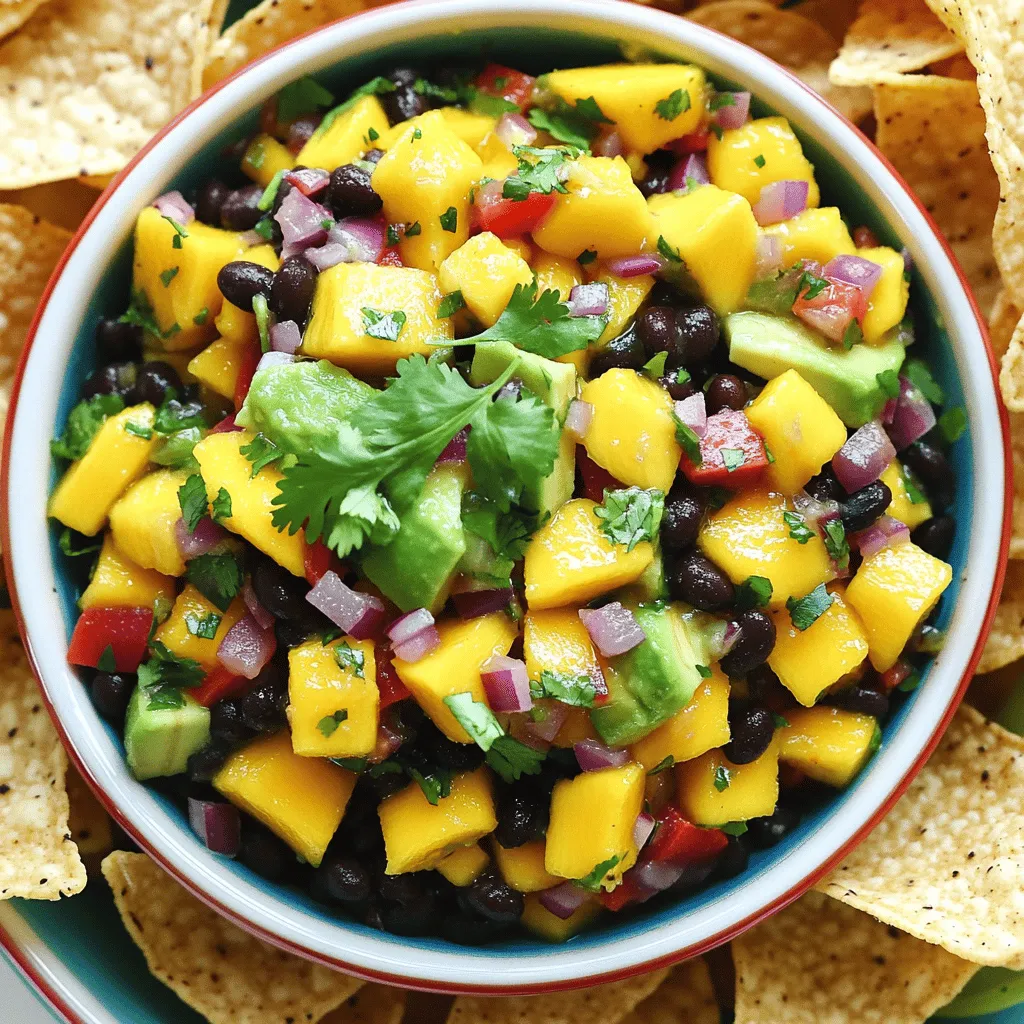
If you’re craving a fresh, zesty dip, you need to try Mango Avocado Black Bean Salsa! This colorful blend combines sweet mango, creamy avocado, and hearty black beans. Perfect for …
If you’re craving a fresh, zesty dip, you need to try Mango Avocado Black Bean Salsa! This colorful blend combines sweet mango, creamy avocado, and hearty black beans. Perfect for …
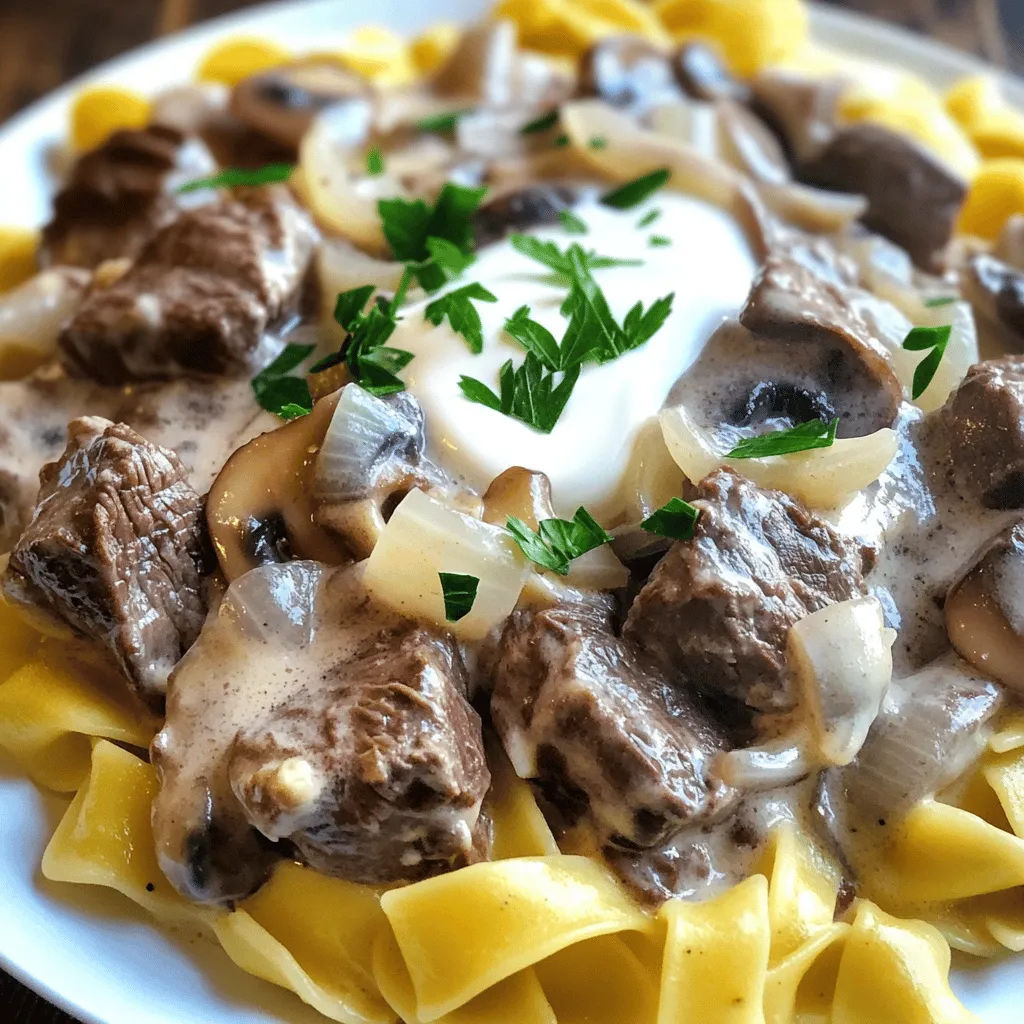
Craving a warm, hearty dish that practically cooks itself? This Satisfying Slow Cooker Beef Stroganoff recipe is just what you need! With tender beef, flavorful sauces, and simple ingredients, it’s …
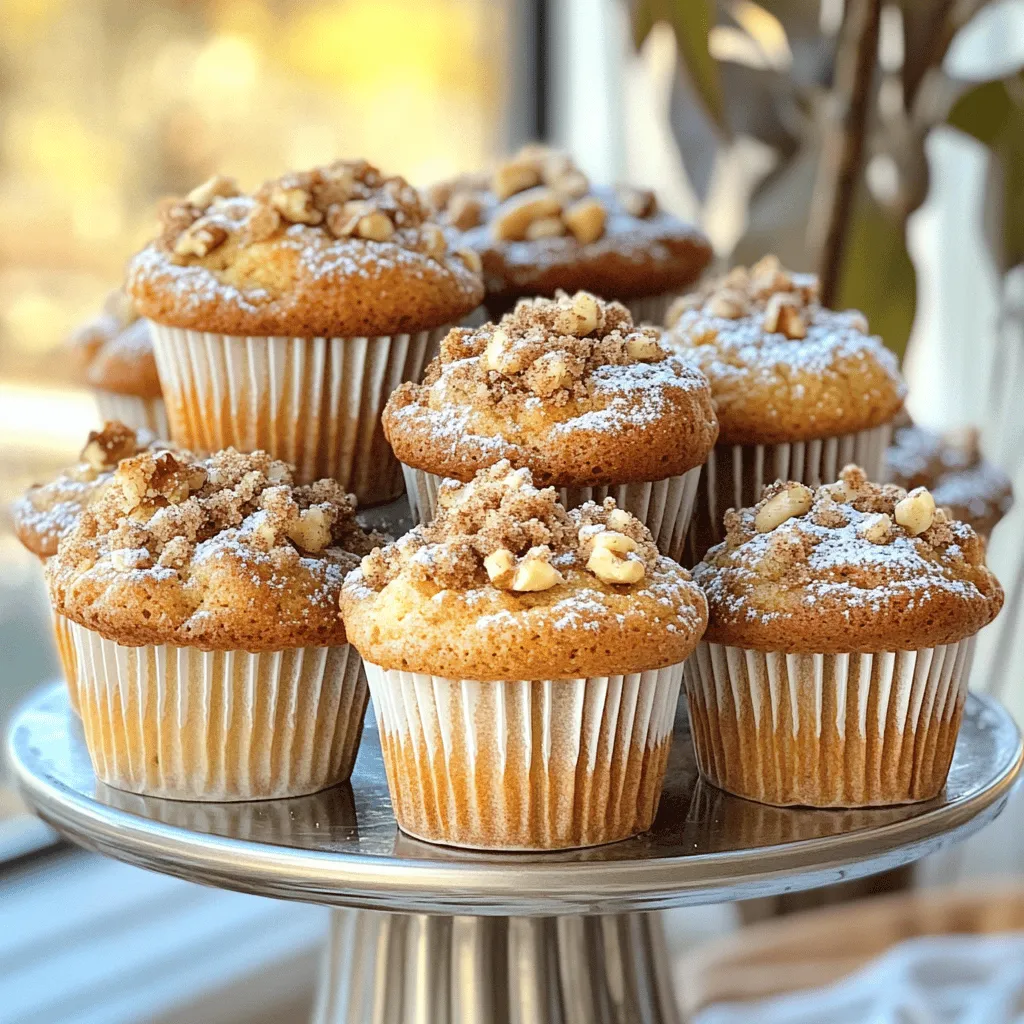
Are you craving something delicious yet easy to make? Dive into this delightful recipe for coffee cake muffins! With warm spices and a crumbly topping, they’re the perfect treat for …
![To make this salsa, you need fresh ingredients. Here’s what you will need: - 10 tomatillos, husked and cut into quarters - 1 medium red onion, cut into quarters - 2 cloves garlic, left unpeeled - 1-2 jalapeños, halved and seeds removed - 1 tablespoon olive oil - Sea salt, to taste - ¼ cup fresh cilantro, finely chopped - Juice of 1 fresh lime These ingredients bring bright flavors and a fresh taste to your salsa. The tomatillos give a tangy punch, while the onions add sweetness. Garlic adds depth, and jalapeños bring the heat. If you can’t find some ingredients, don't worry. Here are some easy swaps: - Tomatillos: Green tomatoes or yellow tomatoes can work in a pinch. - Red onion: Use yellow onion for a milder taste. - Jalapeños: Substitute with serrano peppers for more heat or bell peppers for less spice. - Cilantro: If you dislike cilantro, parsley is a good alternative. These substitutions keep the dish flavorful and fun. Feel free to experiment based on what you have. Choosing the right tomatillos is key. Here are some tips: - Look for firm, bright green tomatillos. They should feel heavy for their size. - Avoid ones with brown spots or wrinkles. These may be overripe. - The husk should be dry and not torn or dark. Fresh tomatillos will give your salsa the amazing taste it deserves. Trust your eyes and hands when selecting them. Start by preheating your oven to 425°F (220°C). This heat will help the tomatillos roast perfectly. Next, prepare your veggies. On a baking sheet, place the quartered tomatillos, red onion, unpeeled garlic cloves, and halved jalapeños. Spread them out in a single layer. This helps them roast evenly. Drizzle olive oil on top and sprinkle with sea salt. Toss everything together with your hands. Make sure all the pieces are coated well. Now, it’s time to roast! Put the baking sheet in the oven. Roast the vegetables for about 20-25 minutes. You want the tomatillos to soften, and their skin should get a bit charred. This charring gives the salsa a great flavor. Once they’re done, carefully take the baking sheet out of the oven. Let the veggies cool for a few minutes. When they are cool enough, peel the skin off the roasted garlic. For blending, grab a blender or food processor. Add the roasted tomatillos, onion, peeled garlic, jalapeños, chopped cilantro, and lime juice. Blend until you reach your desired texture, whether smooth or slightly chunky. Taste your salsa and add more salt or lime juice if needed. Let it rest in a bowl for at least 30 minutes. This helps the flavors meld together. For the full recipe, check out the details above. Enjoy your fresh salsa with chips or on tacos! To create the best taste, think about the mix of ingredients. You want sweet, sour, and spicy. The tomatillos add a tangy flavor. The lime juice brightens it up. The jalapeños bring the heat. Taste as you blend, and adjust the salt and lime. A little more lime can add freshness. A pinch more salt can enhance all the flavors. One common mistake is skipping the roasting step. Roasting gives the salsa depth and richness. Also, don’t over-blend the salsa. You want some texture. If you blend too much, it may turn into a puree. Remember to cool the veggies slightly before blending. This step helps to keep the flavors intact. Serve your salsa with tortilla chips for a fun snack. It also pairs well with grilled chicken or fish. Try using it as a topping for tacos or burritos. You can even mix it into scrambled eggs for a zesty breakfast. For a beautiful presentation, garnish with cilantro and lime wedges. This adds color and invites everyone to dig in. For the full recipe, check out the instructions above! {{image_4}} You can change your salsa by adding fruits. Mango or pineapple works well. These sweet fruits balance the salsa's tartness. You can also use roasted bell peppers for a smoky flavor. Experimenting with different veggies adds depth to your salsa. Try zucchini or corn for a fresh twist. This keeps your dish exciting and unique. Spice is a big part of salsa. You can control it easily. If you want mild salsa, use less jalapeño. Remove the seeds for less heat. For more spice, add more jalapeños or a serrano pepper. You can even sprinkle in some cayenne pepper. Taste as you go, so you get it just right. Herbs can change the taste of your salsa. Cilantro is classic, but you can try others too. Fresh mint adds a cool touch, while basil gives a sweet flavor. Parsley is a great option if you want something milder. Mix and match herbs to find your favorite blend. Each herb brings its own flair, making your salsa even better. For the full recipe, check out the details above. After making your easy roasted tomatillo salsa, let it cool. Store it in an airtight container in the fridge. This keeps the salsa fresh and tasty. It’s best to use it within a week for the best flavor. You can freeze your salsa if you want to keep it longer. Place the salsa in a freezer-safe container or a zip-top bag. Be sure to leave some space for the salsa to expand. It can last up to three months in the freezer. When you’re ready to use it, just thaw it in the fridge overnight. Freshly made tomatillo salsa lasts about 5 to 7 days in the fridge. If you freeze it, enjoy it within three months. You may notice slight changes in texture after freezing, but the taste stays great. For the full recipe, check out the details above. Yes, you can use unroasted tomatillos. However, roasting them brings out their best flavor. Roasting adds a nice char and sweetness. If you skip roasting, the salsa will taste more raw and tart. It won’t have that deep, rich taste that makes roasted tomatillo salsa special. Tomatillo salsa is great with many dishes. Here are some ideas: - Tacos: It adds a fresh kick. - Grilled chicken: The salsa brightens the dish. - Quesadillas: It creates a tasty dip. - Nachos: Pour it over your chips for extra flavor. - Burritos: A drizzle makes them more exciting. You can use it to spice up any meal! To make your salsa spicier, here are a few options: - Add more jalapeños: Use 3 or 4 instead of 1 or 2. - Try serrano peppers: They are hotter than jalapeños. - Include a pinch of cayenne pepper: This adds heat without changing the flavor. - Let it sit longer: Sometimes, flavors intensify over time, so wait before tasting. Feel free to adjust the spice level to fit your taste! For the full recipe, check out the [Full Recipe]. In this article, we explored how to make easy roasted tomatillo salsa. We covered essential ingredients, substitutions, and tips for selecting fresh tomatillos. The step-by-step instructions guided you through preparation, roasting, and blending. I shared tips for flavor balance and common mistakes to avoid. You also learned storage practices and answered common questions. Making salsa from tomatillos is not just fun. It opens doors to many flavors. Enjoy experimenting, and don’t forget to share your creations!](https://tastednest.com/wp-content/uploads/2025/08/15a45f88-3c32-4374-b2ec-aca31658ac13.webp)
If you want a dip that bursts with flavor, you’ve found it! This Easy Roasted Tomatillo Salsa is fresh, zesty, and simple to make. Perfect for parties or a cozy …

If you’re looking for a simple yet delicious dessert, this Pumpkin Roll Recipe is for you! With just a few ingredients and easy steps, you can create a fun-filled treat …

Get ready to whip up some fun with Halloween Whoopie Pies! These delightful treats combine soft chocolate cookies with a creamy filling, perfect for your spooky festivities. Whether you’re hosting …
![- 4 cups green cabbage - 1 cup red cabbage - 1 large carrot - 1/2 red bell pepper - 1/4 cup fresh cilantro - 2 tablespoons lime juice - 1 tablespoon olive oil - 1 teaspoon honey - Seasoning options For this slaw, I love using fresh vegetables. The green cabbage brings a crisp texture. Red cabbage adds a pop of color. Carrots give it a slight sweetness. The red bell pepper adds crunch and flavor. Fresh cilantro is a must for that bright taste. Lime juice gives it zing, while honey adds a touch of sweetness. Olive oil keeps everything moist and flavorful. - Vegan options: Use agave syrup instead of honey. You can also skip the honey altogether. - Low-sodium alternatives: Choose low-sodium soy sauce if you like. These swaps make the slaw fit different diets. You can easily adjust it to your taste. - Calories: Approximately 100 calories - Macros breakdown: - Fat: 5g - Carbs: 12g - Protein: 2g Cilantro lime slaw is not just tasty; it's good for you too! Cabbage is high in fiber. It helps with digestion and keeps you full. Cilantro is rich in vitamins A and C. Lime juice boosts your immune system. Overall, this slaw is a crunchy, refreshing dish that adds nutrition to any meal. For the full recipe, check the link above. To start, we need to prepare the vegetables. First, take your green and red cabbage. Cut them into thin strips to make the slaw crunchy. Aim for four cups of green cabbage and one cup of red cabbage. Use a sharp knife or a mandoline for even cuts. Next, grab a large carrot. Use a box grater or a food processor to grate it. You want one large carrot for the best color and taste. The carrot adds a nice crunch and sweetness to the slaw. Finally, slice half a red bell pepper into thin strips. This adds a pop of color and flavor. Make sure the slices are even so they mix well with the other veggies. Now, let’s make the dressing. In a small bowl, squeeze the juice from fresh limes. You need two tablespoons of this lime juice. Add one tablespoon of extra virgin olive oil for richness. Next, stir in one teaspoon of honey or agave syrup if you want a vegan option. Then, add half a teaspoon of ground cumin. This spice gives a warm flavor to the dressing. Finish by adding a pinch of sea salt and freshly cracked black pepper. To mix, use a whisk. Whisk the ingredients well until the dressing is smooth. If you want a creamier texture, whisk a bit longer. Now it’s time to combine everything. In a large mixing bowl, add the shredded cabbage, grated carrot, and sliced bell pepper. Pour the dressing over the veggies. Don’t forget to sprinkle in the chopped cilantro for fresh flavor. Using tongs or two large forks, toss the mixture gently. Make sure all the veggies are coated with the dressing. This step is key to getting all the flavors together. Let the slaw rest for 10-15 minutes. This allows the flavors to blend and the veggies to soften slightly. After resting, serve it chilled or at room temperature. Enjoy your fresh and flavorful cilantro lime slaw with tacos or as a side dish. For the full recipe, check out the section above. To get the best taste from your cilantro lime slaw, marinate it for about 10 to 15 minutes. This time allows the flavors to blend well. If you serve it too soon, the taste will not be as vibrant. I also suggest serving the slaw chilled or at room temperature. It pairs wonderfully with tacos or grilled chicken. You can boost the flavor by adding more herbs or spices. Fresh mint or parsley works well. If you want to get creative, consider incorporating fruits like diced mango or pineapple. They add a nice sweetness that balances the tangy lime. One big mistake is overmixing the ingredients. If you mix too hard, the vegetables can become mushy. Also, avoid using stale or wilted vegetables. Freshness is key to a great slaw. Always pick crisp cabbage and bright peppers for the best results. For the full recipe, click here: [Full Recipe]. {{image_4}} Customizing your cilantro lime slaw can make it fit your taste and diet. You can add protein like chicken or tofu. Both options make the dish heartier. If you need gluten-free choices, this slaw is perfect as is. All the main ingredients are naturally gluten-free. For flavor variations, you can spice things up. Turn your slaw into a spicy cilantro lime slaw by adding diced jalapeños or a splash of hot sauce. Want to sweeten it? Try adding fruits like mango or pineapple for a twist. They bring a new level of freshness and sweetness. You can also adapt this slaw to different regions. A Southwest-style slaw could use black beans and corn. This adds a nice crunch and a hearty feel. For an Asian-inspired twist, include sesame oil and thinly sliced radishes. This gives a unique flavor that pairs well with Asian dishes. For more details, check out the Full Recipe for the base cilantro lime slaw. To keep your Cilantro Lime Slaw fresh, store it in the fridge. Use airtight containers to prevent moisture loss. Glass containers work well, but plastic ones are just fine too. Make sure the lid seals tightly to keep out air. This slaw lasts about three days in the fridge. After that, it may lose its crunch. Look for signs of spoilage. If you see wilting or an off smell, it’s best to toss it. Cilantro Lime Slaw is best served cold. If you need to refresh it, add a splash of lime juice or a drizzle of olive oil. Toss it lightly to mix. This revitalizes the flavors and keeps it tasty and bright. To make great slaw, you should shred the cabbage. Use a sharp knife or a box grater for this. Cut the cabbage in half first, then slice each half into thin strips. For a quick method, try a food processor with a shredding disk. This makes the process fast and easy, giving you nice, even pieces. Remember, the thinner the strips, the better the texture in your slaw. Yes, you can prepare the slaw ahead. It tastes even better after some time in the fridge. If you want to make it a day in advance, just keep the dressing separate until serving. This helps keep the cabbage crisp. If you mix it early, the veggies may get soggy. Aim to combine it about 30 minutes before serving for the best flavor. You can change the flavor easily. If you want it sweeter, add more honey or a splash of orange juice. For more zing, try extra lime juice or even vinegar. If you like spice, add a pinch of chili powder or diced jalapeños. Each change can bring a new twist to the slaw, making it truly your own. Cilantro lime slaw is easy to make and delicious. You learned about the key ingredients and steps for great taste. I shared tips to enhance flavor and avoid common mistakes. You can also customize this slaw for different diets and flavor preferences. Remember, freshness matters, so store leftovers well. With these ideas, you can enjoy this slaw any time. Dive in and make your own version!](https://tastednest.com/wp-content/uploads/2025/08/02a208c2-1702-43d5-aecb-1c5d4d143380.webp)
Looking for a fresh and zesty side dish? My Cilantro Lime Slaw is the perfect addition to any meal. This vibrant salad blends crisp greens, colorful veggies, and a bright …
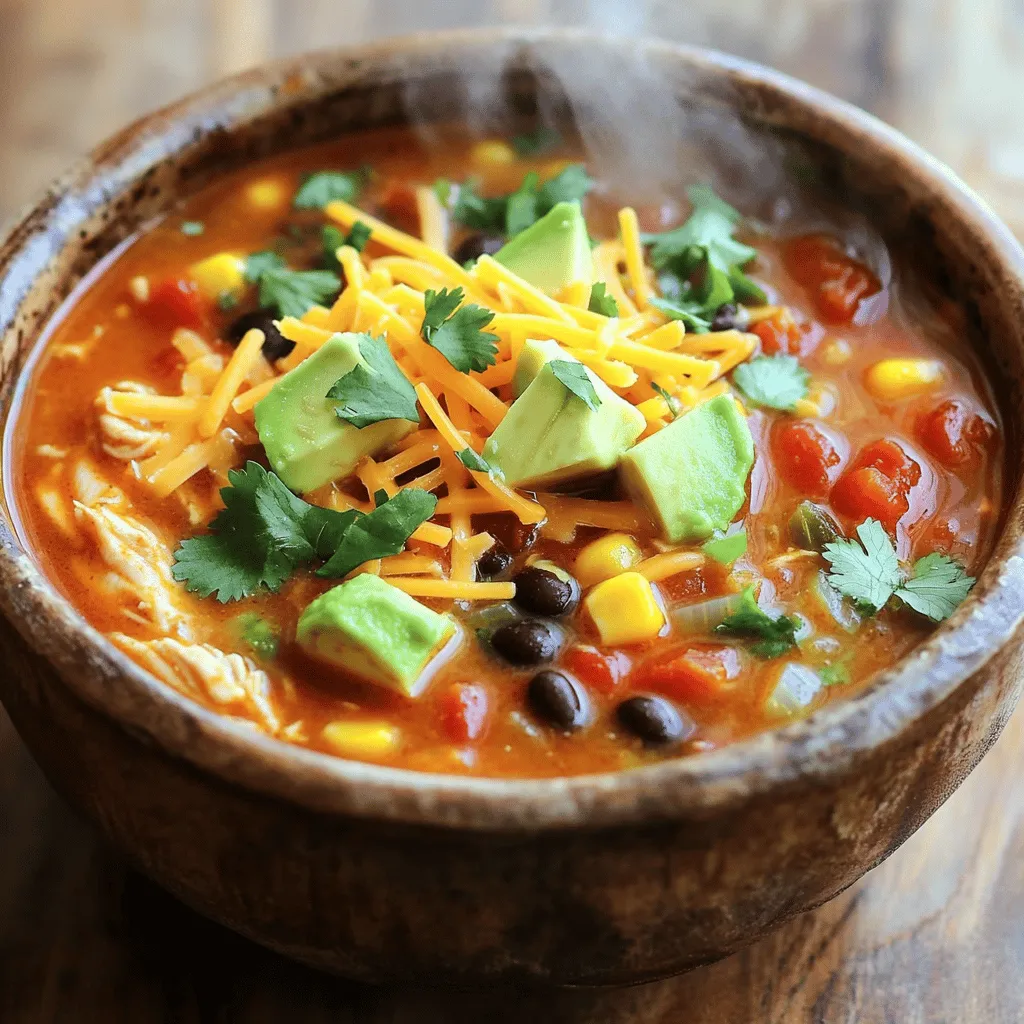
Are you craving a warm, hearty meal? My Chicken Enchilada Soup is both flavorful and simple to make. You don’t need chef skills to whip up this dish! With just …
![To make gluten-free pumpkin donuts, start with key ingredients. Here’s what you need: - 1 cup gluten-free all-purpose flour - 1/2 cup pumpkin puree - 1/2 cup almond flour - 1/2 cup sugar (coconut sugar works well) - 1/4 cup pure maple syrup - 1 teaspoon baking powder - 1/2 teaspoon baking soda - 1 teaspoon ground cinnamon - 1/4 teaspoon ground nutmeg - 1/4 teaspoon ground cloves - 1/2 teaspoon salt - 2 large eggs - 1/4 cup melted coconut oil or unsalted butter - 1 teaspoon pure vanilla extract These ingredients create a moist and flavorful treat. The pumpkin puree brings warmth, while spices give that cozy fall vibe. If you want to mix things up, try different gluten-free flours. Here are some good options: - Oat flour - Brown rice flour - Cassava flour Each flour has its own taste and texture. Oat flour adds a nutty flavor, while cassava flour keeps it light and fluffy. You can take your donuts to the next level with these optional ingredients: - Chocolate glaze for a sweet touch - Maple glaze for a classic flavor - Chopped nuts for crunch These extras allow you to customize your donuts. I love adding a chocolate glaze for a rich taste. You can find the full recipe for these delicious gluten-free pumpkin donuts in the main article. Enjoy experimenting! Start with gathering all your ingredients. This makes cooking easier and more fun. Here’s what you need: - 1 cup gluten-free all-purpose flour - 1/2 cup pumpkin puree - 1/2 cup almond flour - 1/2 cup sugar - 1/4 cup pure maple syrup - 1 teaspoon baking powder - 1/2 teaspoon baking soda - 1 teaspoon ground cinnamon - 1/4 teaspoon ground nutmeg - 1/4 teaspoon ground cloves - 1/2 teaspoon salt - 2 large eggs - 1/4 cup melted coconut oil or unsalted butter - 1 teaspoon pure vanilla extract - Optional: Chocolate glaze or maple glaze for topping Make sure everything is fresh. Preheat your oven to 350°F (175°C). Grease your donut pan with coconut oil or baking spray. This step helps the donuts come out easily. In a large bowl, mix the dry ingredients first. Combine the gluten-free flour, almond flour, sugar, baking powder, baking soda, cinnamon, nutmeg, cloves, and salt. Whisk them until well blended. In a separate bowl, whisk the wet ingredients. Mix the pumpkin puree, maple syrup, eggs, melted coconut oil, and vanilla. Keep whisking until it is smooth and creamy. Now, pour the wet mixture into the dry ingredients. Stir gently. Be careful not to overmix; this keeps your donuts soft. Transfer your donut batter into a piping bag or a ziplock bag. Snip off one corner for easy filling. Pipe the batter into the donut pan, filling each cavity about 2/3 full. This allows space for the donuts to rise while baking. Place the pan in your preheated oven. Bake for 12-15 minutes. Check if they’re done by inserting a toothpick in the center. If it comes out clean, they are ready! Once baked, take the pan out and let the donuts cool for about 5 minutes. Then, move them to a wire rack to cool completely. If you want, dip the tops in chocolate or maple glaze for a tasty touch. Enjoy your flavorful fall treat! For the full recipe, check the earlier section. To get fluffy gluten-free pumpkin donuts, use a mix of flours. I suggest both gluten-free all-purpose flour and almond flour. This blend gives a nice balance of lightness and moisture. Make sure you measure your flour correctly. Too much flour can make your donuts dense. Always spoon flour into your measuring cup and level it off. One common mistake is overmixing the batter. Mix just until combined to keep the donuts light. Another pitfall is using too much pumpkin puree. Stick to a half cup for the best texture. Also, remember to check your oven's temperature. An oven that is too hot can cause donuts to bake too fast and become dry. Glazing adds an extra touch to your donuts. Let your donuts cool completely before glazing. This way, the glaze won't slide off. For a good glaze, dip the tops of the donuts into your chosen glaze. Move them quickly for a nice, even coat. You can even sprinkle some toppings right after glazing to make them more fun. For the full recipe, check out the complete instructions. {{image_4}} You can make these donuts even more fun with flavor add-ins. Here are a few ideas: - Chopped nuts: Walnuts or pecans add a nice crunch. - Chocolate chips: Dark or dairy-free chips bring a rich sweetness. - Dried fruit: Cranberries or raisins give a chewy texture. - Zest: Grated orange or lemon zest brightens the flavors. Try mixing in one or more of these for a unique twist! For a vegan version, you can easily swap a few ingredients. Use flax eggs instead of regular eggs. Mix 1 tablespoon of ground flaxseed with 3 tablespoons of water for each egg. You can also use plant-based milk in place of any dairy. This keeps the donuts soft and moist. Plus, use coconut oil or a vegan butter substitute for the fat. These swaps ensure everyone can enjoy these tasty treats. If you want bite-sized donuts, a mini donut pan is your friend. Simply follow the same recipe but fill the mini pan cavities only halfway. Bake for about 8-10 minutes instead of the longer time needed for regular donuts. Mini donuts are perfect for parties or snacks. They are easy to grab and eat, plus they look adorable on a platter! For the full recipe, check out the Spooky Gluten-Free Pumpkin Donuts section. To keep your gluten-free pumpkin donuts fresh, store them in an airtight container. This helps lock in moisture and flavor. Place a piece of parchment paper between layers to avoid sticking. You can keep them at room temperature for up to three days. If you want them to last longer, refrigerate them. Just make sure to let them cool before sealing. If you want to freeze your donuts, it’s best to do so without glaze. Allow them to cool completely, then wrap each donut tightly in plastic wrap. Place them in a freezer bag and label it with the date. They can last up to three months in the freezer. To reheat, take one out and let it thaw. You can warm it in the microwave for about 10-15 seconds. This brings back the soft texture. Homemade gluten-free donuts taste best when fresh. However, they can stay good for a few days. Check for any signs of spoilage before eating. If they start to smell off or have a strange texture, it’s best to toss them. Enjoy your donuts at their peak freshness for the best taste experience! For the full recipe, follow the link here: [Full Recipe]. Yes, you can use applesauce or mashed banana instead of pumpkin puree. Both options add moisture and sweetness. However, they will change the taste of the donuts. If you prefer a milder flavor, applesauce works well. You can also try butternut squash puree for a similar taste and texture. Your gluten-free donuts are ready when they are golden brown and spring back when touched. You can also use a toothpick to check. Insert it into the center of a donut. If it comes out clean, the donuts are done. Keep an eye on them during baking. Overbaking can make them dry. To frost your gluten-free donuts, wait until they cool completely. You can dip the tops in chocolate glaze or maple glaze. For a simple glaze, mix powdered sugar with a splash of milk or water until smooth. Drizzle the glaze on top for a fun look. Add sprinkles for extra flair! For more tips, check out the Full Recipe. These gluten-free pumpkin donuts are both fun and easy to make. We explored key ingredients, including fun flavor add-ins and different flours. We also discussed baking steps, ensuring the perfect texture, and avoiding common mistakes. Plus, you learned how to store your donuts for freshness. In the end, you can create tasty variations to fit your diet. Enjoy these sweet treats without worry! Try making them your own with simple tweaks.](https://tastednest.com/wp-content/uploads/2025/08/16b5a2d4-f297-4cca-be6b-b79a11ec67e3.webp)
Looking for a tasty fall treat? You’ll love these gluten-free pumpkin donuts! They combine the warm spices of autumn with a soft, fluffy texture that satisfies every craving. I’ll guide …

Do you love warm, sweet muffins? Let’s make 3-Ingredient Chocolate Chip Pumpkin Muffins! They’re easy, quick, and perfect for any time of year. With canned pumpkin, cookie mix, and mini …