Huckleberry Lemon Sweet Rolls Delightfully Fluffy Treat
![To make delicious huckleberry lemon sweet rolls, gather these ingredients: - 3 cups all-purpose flour, plus extra for dusting - 1/4 cup granulated sugar - 1 packet (2 1/4 teaspoons) instant yeast - 1/2 teaspoon salt - 1 cup whole milk, warmed to about 110°F (43°C) - 1/4 cup unsalted butter, melted and slightly cooled - 1 large egg, at room temperature - 1 cup huckleberries (fresh or frozen) - Zest of 1 lemon (approximately 1 tablespoon) - 2 tablespoons fresh lemon juice - 1/4 teaspoon ground cinnamon For the Lemon Glaze: - 1 cup powdered sugar - 2 tablespoons fresh lemon juice - 1 tablespoon milk You can swap some ingredients if needed. Here are a few ideas: - Use almond milk instead of whole milk for a dairy-free option. - Replace unsalted butter with coconut oil for a vegan twist. - If you can't find huckleberries, blueberries or raspberries work well too. - You can use lemon extract if you don't have fresh lemons. Fresh huckleberries are a treat. Here are tips to pick the best ones: - Look for firm berries that are plump and shiny. - Avoid any that are mushy or have dark spots. - Check for a sweet smell; this means they are ripe. - If you buy frozen huckleberries, ensure they are flash-frozen for the best taste. These tips will help you enjoy the best flavors in your huckleberry lemon sweet rolls. For a full recipe, follow this link to the [Full Recipe]. To make the dough, start with a large bowl. Add 2 cups of flour, sugar, yeast, and salt. Whisk them until they mix well. In another bowl, combine the warm milk, melted butter, and egg. Whisk until it looks smooth and a bit frothy. Gradually pour this mixture into the flour bowl. Stir with a wooden spoon until it starts to form a dough. Add the last cup of flour slowly until your dough feels slightly sticky. Now, turn the dough onto a floured surface. Knead it for about 5-7 minutes until it's smooth and elastic. If it sticks, add a little more flour. Shape the dough into a ball and place it in a greased bowl. Cover it with a kitchen towel. Let it rise in a warm spot for about an hour. It should double in size. Once the dough has risen, gently punch it down. Roll it out on a floured surface to make a rectangle about 12x18 inches. Spread the huckleberries evenly over the dough. Next, sprinkle lemon zest, lemon juice, and ground cinnamon on top. Make sure the toppings cover the surface. Now, roll the dough tightly from the long edge to form a log. Pinch the seam to seal it. Use a sharp knife or dental floss to cut the log into 12 equal pieces. Place the rolls in a greased baking dish, leaving some space between them. Cover loosely with a towel and let them rise for another 30 minutes. Preheat your oven to 375°F (190°C). Bake the rolls for 20-25 minutes. They should turn golden brown on top and feel cooked inside. While they bake, prepare the glaze. In a small bowl, whisk together powdered sugar, lemon juice, and milk until smooth. Once the rolls are done, let them cool in the dish for about 10 minutes. Drizzle the warm rolls with the lemon glaze. Enjoy your delicious huckleberry lemon sweet rolls! For the full recipe, check the ingredients list above. To get the perfect rise, you need warm dough and a warm place. Yeast loves warmth. I suggest warming your milk to about 110°F (43°C) before adding it to your mix. This helps activate the yeast. After mixing your dough, let it rise in a cozy spot. Cover it with a clean kitchen towel. Check it after an hour. It should double in size! Fluffy rolls come from kneading the dough well. Knead for about 5-7 minutes until smooth. This builds gluten, which traps air. It helps the rolls stay light and airy. If the dough feels sticky, add a bit more flour. But don’t add too much; you want the dough soft and slightly tacky. One common mistake is using cold ingredients. Always use room temperature eggs and warm milk. Another mistake is under-kneading the dough. This can lead to dense rolls. Make sure to roll it tightly when shaping. If it’s loose, the rolls won’t rise as well. Lastly, don’t skip the second rise. It’s key for fluffy sweet rolls. For the detailed recipe, check out the Full Recipe. {{image_4}} You can mix things up with different fillings. Try using blueberries or blackberries instead of huckleberries. Both fruits provide a sweet burst that pairs well with lemon. If you want a creamy twist, consider adding cream cheese to your filling. Simply spread a thin layer over the dough before adding the fruit. For a nutty flavor, mix in some chopped walnuts or pecans for added crunch. While the lemon glaze adds a bright touch, you can switch it up. Consider a vanilla glaze for a sweeter option. Simply add vanilla extract to your powdered sugar and milk mix. For a berry twist, mash some fresh berries into the glaze. This will create a lovely hue and enhance the fruity flavor of your rolls. A touch of almond extract can also give the glaze an interesting depth. You can easily change the flavor profile of these sweet rolls. For a hint of spice, add a pinch of nutmeg to the dough. If you want a richer taste, substitute whole milk with buttermilk or cream. You can also infuse the dough with herbs like rosemary or thyme for a savory kick. These small changes can make your rolls unique and special. Feel free to experiment and find your favorite combination. For the complete recipe, check out the Full Recipe. To keep your sweet rolls fresh, store them in an airtight container. Place a piece of parchment paper between layers to prevent sticking. They stay good for about 2-3 days at room temperature. You can also keep them in the fridge for up to a week. Just make sure to wrap them well. If you want to save some for later, freezing works great. Allow the sweet rolls to cool completely. Then, wrap each roll in plastic wrap tightly. Place them in a freezer bag or airtight container. They can last up to 3 months in the freezer. When you’re ready to enjoy them, just thaw in the fridge overnight. To reheat your sweet rolls, preheat your oven to 350°F (175°C). Place the rolls on a baking sheet and cover them with foil. Heat for about 10-15 minutes, or until warm. You can also microwave them for about 15-20 seconds each, but they won’t be as fluffy. Drizzle some fresh glaze on top for added flavor. Enjoy every bite! To store your sweet rolls, place them in an airtight container. They stay fresh for up to three days at room temperature. If you want them to last longer, refrigerate them. However, this may dry them out a bit. To maintain their fluffiness, wrap them tightly in plastic wrap before placing them in the fridge. Yes, you can use frozen huckleberries! They work great in this recipe. Just make sure to thaw and drain them first. This prevents too much moisture from making the dough soggy. Using frozen huckleberries also adds a nice burst of flavor. You can prepare the dough a day in advance. After kneading, let it rise as usual. Then, cover it and place it in the fridge overnight. When you're ready to bake, let the dough warm for about 30 minutes. Roll and fill them as instructed. Let them rise again before baking. This makes your morning much easier! Absolutely! Once baked and cooled, you can freeze them. Place them in a freezer-safe container with parchment paper between layers. They can last up to three months in the freezer. When you want to enjoy them, let them thaw in the fridge overnight. Then, reheat in the oven for a few minutes to regain their fluffiness. These sweet rolls pair perfectly with coffee or tea. You can also enjoy them with a dollop of whipped cream or a scoop of vanilla ice cream. Adding a side of fresh fruit makes for a lovely breakfast or dessert option. Yes! If you love lemon, add more zest or juice to the dough. You can also increase the lemon glaze for a tangy kick. Just remember to balance the flavors so it remains sweet and enjoyable. Huckleberries are low in calories and high in antioxidants. They provide vitamins C and K, making them a healthy choice. Adding them to your sweet rolls makes a delicious treat that includes nutrients. Enjoy a guilt-free indulgence! For the full recipe and more tips, check out the [Full Recipe]. In this blog post, we covered how to make delicious huckleberry lemon sweet rolls. We discussed the key ingredients, their substitutes, and how to pick fresh huckleberries. I shared step-by-step instructions for making the dough and filling the rolls. You learned tips for a perfect rise and avoiding common mistakes. We also explored variations, storage tips, and answered frequently asked questions. Now, you can confidently bake these sweet rolls and enjoy them. Happy baking!](https://tastednest.com/wp-content/uploads/2025/08/378df874-9ae1-4777-af82-52c4b4ec1cd7.webp)
Are you ready to indulge in a treat that bursts with flavor? These Huckleberry Lemon Sweet Rolls are delightfully fluffy and oh-so-satisfying! In this blog post, I’ll guide you through …
![- 2 medium acorn squashes - 1 cup quinoa or couscous, cooked - 1 cup black beans, drained and rinsed - 1 red bell pepper, diced - 1 small onion, finely chopped - 2 cloves garlic, minced To make stuffed baked acorn squash, start with fresh acorn squashes. These squashes have a sweet, nutty flavor. They provide a perfect base for stuffing. I like using quinoa or couscous as the grain. They add texture and nutrients. Black beans give a nice protein boost too. Diced red bell pepper adds a pop of color and sweetness. Don't forget the onion and garlic! They bring depth to the dish. - 1 teaspoon ground cumin - 1 teaspoon smoked paprika - ½ cup shredded cheese (your choice of cheddar or pepper jack) - Fresh cilantro, chopped, for garnish Seasoning is key for flavor. Ground cumin adds warmth, while smoked paprika gives a hint of smoke. I love using cheddar or pepper jack cheese for a creamy finish. It melts wonderfully and adds richness. Fresh cilantro as a garnish not only looks good but also adds freshness and brightness to every bite. - ½ cup corn kernels (fresh or frozen) - Additional spices for enhancement - Olive oil for drizzling For extra sweetness and crunch, add corn kernels. They pair nicely with the other flavors. You can also play with more spices if you want to elevate the taste. A drizzle of olive oil adds a nice finish and makes everything richer. This recipe is all about balance and flavor. You can find the full recipe linked above. - Preheat your oven to 400°F (200°C). This helps cook the squash evenly. - Cut each acorn squash in half from top to bottom. Use a spoon to scoop out the seeds and stringy insides. Make sure to create enough space for the filling. Place the halves on a baking sheet with the cut side facing up. Drizzle a bit of olive oil on each half and sprinkle some salt and pepper. - Roast the squash for 30-35 minutes. The flesh should be tender and caramelized around the edges. You can check doneness by easily piercing the flesh with a fork. If it feels soft, it’s ready! - While the squash roasts, heat a tablespoon of olive oil in a skillet over medium heat. Add the finely chopped onion and diced red bell pepper. Sauté them for about 5 minutes. Stir often until they are soft and smell great. - Next, add minced garlic, ground cumin, and smoked paprika. Cook for 1-2 minutes more. This brings out the spices' flavors. - Now, mix in cooked quinoa (or couscous), rinsed black beans, and corn. Stir everything well. Taste and add salt and pepper if needed. Finally, stir in half of the shredded cheese until it melts slightly. - After roasting, take the squash out of the oven. Carefully fill each half with the tasty filling. Press down gently to pack it in. - Sprinkle the remaining cheese over each stuffed squash. This will create a nice, melty top when baked. - Return the stuffed squashes to the oven and bake for another 10-15 minutes. Look for the cheese to melt, bubble, and turn golden brown. - Remove them from the oven, and sprinkle fresh chopped cilantro on top for a colorful touch before serving. For the full recipe, check below. Common mistakes can happen when making stuffed baked acorn squash. One frequent error is overcooking the squash. Watch it closely while roasting. Aim for a tender texture with a bit of caramelization. If you undercook it, the squash will be tough and hard to eat. Adjusting seasoning is simple. Start with a pinch of salt and a dash of pepper. Taste the filling before you stuff the squash. If it needs more flavor, add a bit more cumin or paprika. This small step makes a big difference. To boost flavor, consider adding spices like cayenne pepper for heat. You can also mix in fresh herbs like thyme or oregano. They add an extra layer of taste that complements the dish. Garnishing with fresh cilantro adds color and freshness. You can also try sliced avocado or a drizzle of balsamic glaze. These toppings elevate the dish and add a gourmet touch. Prep is key for busy days. You can make the filling a day in advance. Store it in the fridge in an airtight container. This saves time when you want to bake your stuffed squash. For storage, keep the stuffed squash in the fridge for up to three days. Make sure to cover it well to avoid drying out. To reheat, place the squash in the oven at 350°F (175°C) for about 15-20 minutes. This keeps the squash and filling moist. Enjoy your delicious meal with ease! For the full recipe, check out the details above. {{image_4}} For stuffed baked acorn squash, you can get creative with fillings. Here are some tasty options: - Vegetarian variations: - Use cooked rice or barley instead of quinoa. - Add more veggies like spinach or mushrooms for extra flavor. - Try nuts or seeds for added crunch. - Meat-based options: - Ground turkey or beef can add a hearty touch. - Mix in cooked sausage for a rich, savory flavor. - Chicken adds protein without overpowering the dish. If you want to try different squash, here are some great options: - Other types of squash for stuffing: - Butternut squash offers a sweet, nutty flavor. - Spaghetti squash provides a fun, noodle-like texture. - Zucchini is soft and can be filled easily. - Comparison of flavor profiles: - Acorn squash has a mild, sweet taste. - Butternut is sweeter and creamier. - Zucchini is light and works well with herbs. Making this dish fit various diets is easy. Here’s how: - Gluten-free options: - Use quinoa or rice as your base. - Check that any spices or sauces are gluten-free. - Vegan adaptations: - Replace cheese with a vegan cheese or omit it entirely. - Use vegetable broth for cooking the filling. - Ensure that all ingredients are plant-based. These variations and adjustments make stuffed baked acorn squash a versatile dish. Try experimenting with different flavors and ingredients to find your favorite combination! For the full recipe, check the earlier sections. To keep your stuffed baked acorn squash fresh, store it in the fridge. Use an airtight container. Make sure to cool the squash before sealing it up. If you want to freeze it, wrap each half in plastic wrap. Place the wrapped squash in a freezer bag. This keeps them safe from freezer burn. You can keep leftovers in the fridge for about 3-5 days. For frozen stuffed squash, it lasts up to 3 months. Look for signs of spoilage, like an off smell or discoloration. If you see mold, throw it away. The best way to reheat stuffed squash is in the oven. Set it to 350°F (175°C). Bake for about 15-20 minutes until heated through. You can also microwave it, but be careful. Microwaving can make the squash soggy. To avoid this, cover it loosely and check often. You can check if the squash is done by piercing it with a fork. When the fork goes in easily, the squash is ready. It should feel soft but not mushy. Look for a nice caramelized color on the edges too. This means the natural sugars have developed, adding great flavor. Yes, you can prepare stuffed acorn squash ahead of time. Cook the squash and fill it, then store it in the fridge. Just make sure to cover it well. When you're ready to eat, you can bake it again to heat it through. This makes for an easy weeknight dinner or a tasty side dish for guests. If you want to swap quinoa, couscous works great. You can also try rice or farro. These grains give a nice texture and absorb flavors well. Just cook them according to package directions before mixing with the other filling ingredients. Absolutely! You can use any cheese you like. Feta adds a nice tang, while mozzarella gives a mild flavor. Goat cheese can add creaminess too. Just keep in mind that different cheeses melt differently, so choose one that you enjoy. This recipe yields four servings. Each acorn squash half makes a perfect portion. If you need more, just double the recipe. You can easily adjust the amounts to suit your needs. Check the [Full Recipe] for all the details! Stuffed baked acorn squash is both delicious and easy to make. We covered the key ingredients, step-by-step instructions, and tips for perfect results. You can customize your filling to match your taste and dietary needs. Proper storage helps you enjoy leftovers without losing quality. Experiment with different squashes and fillings for more variety. I hope you enjoy making this healthy dish as much as I do. Happy cooking!](https://tastednest.com/wp-content/uploads/2025/08/95de896b-c1de-4218-86fd-576b135574b0.webp)
![To make a creamy balsamic vinaigrette, you need a few key items. Here’s the list: - 1/2 cup mayonnaise - 1/4 cup balsamic vinegar - 1 tablespoon Dijon mustard - 1 tablespoon honey or maple syrup - 1 garlic clove, minced - 1/2 teaspoon salt - 1/4 teaspoon black pepper - 1/4 cup extra-virgin olive oil - 1 tablespoon fresh herbs (like basil or parsley), finely chopped These ingredients work together to create a rich, tangy dressing that enhances any salad. You can make this vinaigrette special with a few optional ingredients. Consider adding: - A squeeze of lemon juice for extra brightness - A pinch of red pepper flakes for heat - Grated Parmesan cheese for depth - A dash of Worcestershire sauce for umami Feel free to mix and match based on your taste. Don’t worry if you lack some ingredients. Here are some easy swaps: - Use Greek yogurt instead of mayonnaise for a lighter option. - Apple cider vinegar can replace balsamic vinegar for a different flavor. - Maple syrup can be swapped with agave nectar if you prefer. - Any fresh herb can work if you don’t have basil or parsley. These substitutions keep the essence of the dressing while adding your unique touch. For the complete recipe, check out the Full Recipe. To make your creamy balsamic vinaigrette, gather the ingredients first. You will need mayonnaise, balsamic vinegar, Dijon mustard, honey or maple syrup, garlic, salt, black pepper, olive oil, and fresh herbs. 1. Start by placing the mayonnaise, balsamic vinegar, Dijon mustard, honey, minced garlic, salt, and black pepper in a medium bowl. 2. Use a whisk to mix these ingredients until smooth. Make sure there are no lumps from the mayonnaise. Whisking is key for a creamy vinaigrette. Hold the bowl steady with one hand. With the other hand, whisk in a circular motion. This helps combine the ingredients well. Whisk until the mixture is thick and creamy. To make it even smoother, you can whisk faster. If you find it hard to whisk, try using a fork. It will also work to mix the dressing without lumps. Emulsifying is what makes your vinaigrette creamy. After mixing the first ingredients, it’s time for the olive oil. 1. Slowly drizzle the olive oil into the mixture while whisking quickly. This is very important. It helps the oil blend with the other ingredients. 2. Keep whisking until all the oil is fully mixed in. You will see the dressing turn thick and shiny. If you want extra flavor, fold in your chopped fresh herbs last. This gives the vinaigrette a fresh taste. You can pour the finished vinaigrette into a jar for storage. For more details, check the Full Recipe. Enjoy your delicious dressing! To get the right thickness for your dressing, start with mayonnaise. This gives a rich base. If you want it thinner, add more balsamic vinegar. Just a little at a time helps. Whisk well after each addition. This way, you control the creaminess. Taste your vinaigrette as you mix. If you like it sweeter, add more honey or maple syrup. For a stronger kick, add more garlic or mustard. You can also play with the salt and pepper. Just a pinch can change the flavor a lot. Always taste before serving to ensure it’s just right for you. For a lovely presentation, use a nice jar or bottle. A clear glass jar shows off the creamy color. You can also garnish with fresh herbs on top. This adds a pop of color. Serve it alongside a salad or a veggie platter. It makes a simple meal look fancy. You can find the Full Recipe for more details. {{image_4}} You can change the flavor of your creamy balsamic vinaigrette easily. Try adding fresh herbs like dill, cilantro, or chives. Each herb will give a unique taste. Spices like paprika or cayenne can add warmth. Start with a small amount, then taste and adjust. Mixing in herbs and spices makes your dressing special and fun. If you want a different sweetness, try other options. Maple syrup is great, but agave nectar or coconut sugar works too. You can even use a bit of fruit puree for a natural sweet taste. This change can make your vinaigrette more unique and add a fruity twist. Just remember to keep the sweetener balanced for the best flavor. For a lighter dressing, swap mayonnaise with yogurt. Greek yogurt adds creaminess while cutting calories. This version still tastes rich and delicious. Use plain yogurt to avoid extra sweetness. The tanginess of yogurt pairs nicely with balsamic vinegar. You can still add herbs and spices to enhance the flavor. This lighter option is perfect for those watching their diet. For the full recipe, check out the complete guide. Store your creamy balsamic vinaigrette in a clean jar with a tight lid. This keeps it fresh and flavorful. Make sure it is cool before sealing. In the fridge, this vinaigrette lasts about one week. The flavors actually improve as it sits. Always give it a good shake before using. You can freeze this dressing for up to three months. Use an ice cube tray for easy portions. To thaw, place the cubes in the fridge overnight, then stir before serving. This keeps the taste and texture intact. For the full recipe, check the details above. Creamy balsamic vinaigrette lasts about one week in the fridge. Store it in an airtight jar. Always keep it cold. If it separates, simply shake it before use. Yes, you can make this dressing ahead of time. It tastes even better after sitting for a bit. Just let the flavors mix in the fridge for at least 30 minutes before serving. This vinaigrette works well with many dishes. Here are some great pairings: - Fresh green salads - Grilled vegetables - Roasted chicken - Quinoa bowls - Wraps and sandwiches You can even use it as a dip for fresh veggies. Its creamy texture adds a nice touch! Yes, you can use creamy balsamic vinaigrette as a marinade. It adds great flavor to meats and veggies. Just let them marinate for at least an hour before cooking. If you prefer a thinner dressing, add a bit of water. Start with one tablespoon at a time. Mix well until you reach your desired consistency. Absolutely! You can adjust the sweetness by adding more honey or maple syrup. For a spicy kick, add a pinch of red pepper flakes. You can also mix in your favorite herbs. Creamy balsamic vinaigrette can be a healthy choice. It contains healthy fats from olive oil. You can use low-fat mayo or yogurt for a lighter option. Always check the ingredients for added sugars. For the full recipe and to get started, check out the [Full Recipe]. Enjoy making this delicious dressing! In this blog post, we explored the essential ingredients for creamy balsamic vinaigrette and how to customize it to fit your taste. I shared tips on making it smooth and flavorful. We also looked at variations and how to store your dressing for later use. Remember, making your dressing allows for creativity. Don't hesitate to adjust flavors and try new herbs. Enjoy crafting your own balsamic vinaigrette!](https://tastednest.com/wp-content/uploads/2025/08/8f8693f2-7cae-4ef3-ae2a-470220389a37.webp)
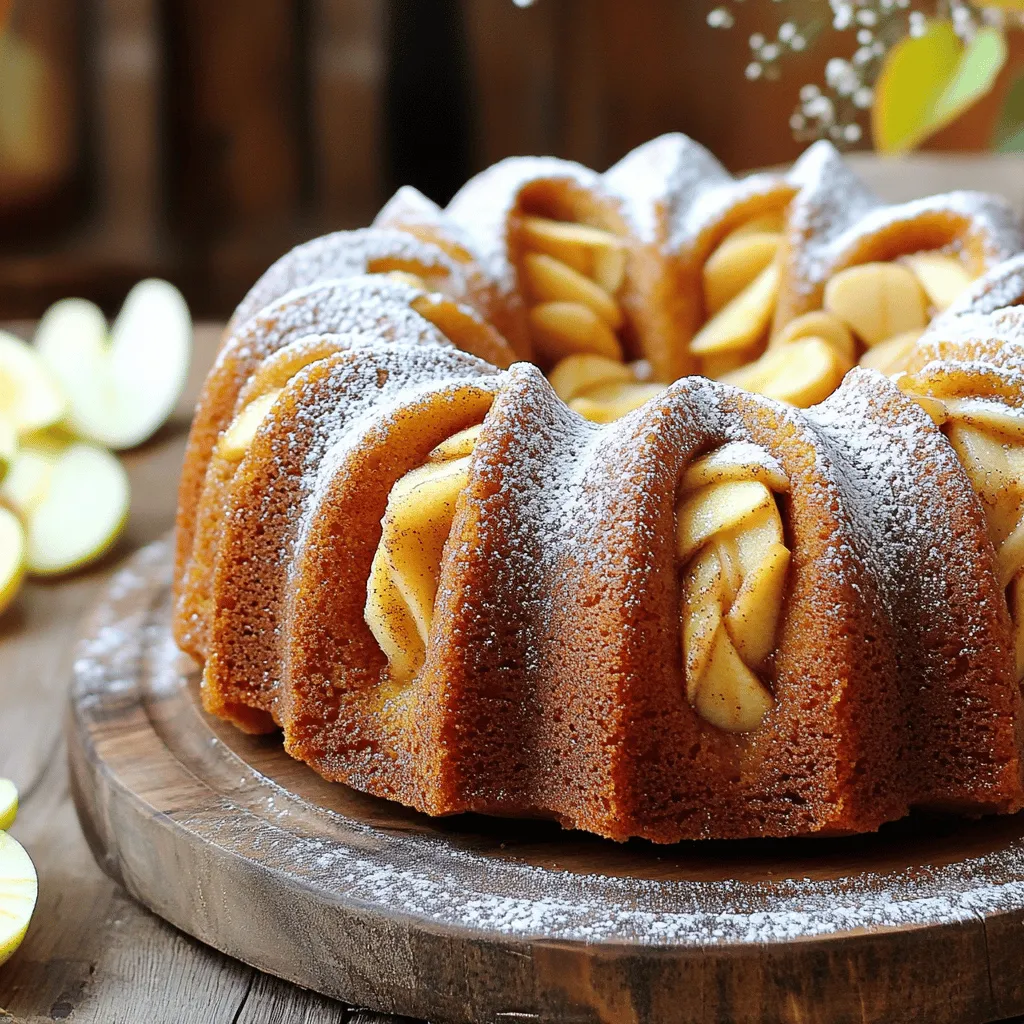

![To make a delightful pumpkin spice coffee cake, gather these essential ingredients: - 2 cups all-purpose flour - 1 cup granulated sugar - 1/2 cup brown sugar, packed - 1/2 cup unsalted butter, softened - 1 cup canned pumpkin puree These ingredients create the cake's base. All-purpose flour gives it structure. The sugars add sweetness and moisture. The butter brings richness, while pumpkin puree adds flavor and keeps the cake moist. Next, you'll need these key baking ingredients: - 2 large eggs - 1/2 cup buttermilk - 1 tablespoon pumpkin spice mix - 1 teaspoon baking powder - 1 teaspoon baking soda - 1/2 teaspoon salt Eggs help bind the cake. Buttermilk adds tang and moisture. The pumpkin spice mix brings that warm, fall flavor. Baking powder and baking soda make the cake rise. Salt enhances all the flavors. Using these ingredients will ensure your pumpkin spice coffee cake is tasty and fluffy. For the complete recipe, check the [Full Recipe]. - Preheat the oven to 350°F (175°C). - Grease and flour a 9x13 inch baking dish. - In a large bowl, cream the sugars and butter together. - Beat until the mixture looks light and fluffy, about 3-4 minutes. - Next, add the canned pumpkin and mix well. - Add the eggs, one at a time. Mix well after each egg. - In a separate bowl, whisk together the flour, pumpkin spice mix, baking powder, baking soda, and salt. - Gradually add the dry mix to the pumpkin mix. Alternate with buttermilk. - Mix until just combined. Avoid overmixing; this helps keep it light. - If you like nuts, fold in the chopped walnuts gently. - Pour the batter into the greased baking dish. Spread it evenly with a spatula. - Bake in the oven for 30-35 minutes. Check doneness with a toothpick. - If it comes out clean or with a few moist crumbs, it's ready! - Let the cake cool in the pan for about 10 minutes. - Then, move it to a wire rack to cool completely. Once cooled, you can drizzle the glaze for a sweet finish. For the full recipe, check the detailed instructions. Enjoy your cozy slice of pumpkin spice coffee cake! To make a great pumpkin spice coffee cake, avoid overmixing the batter. Overmixing creates a dense cake instead of a light one. Mix just until you see no dry flour, and then stop. This keeps the cake fluffy and soft. Also, use room temperature ingredients. Cold butter or eggs can slow down mixing. When ingredients are at room temperature, they blend better. This helps the cake rise and gives it a nice texture. For the glaze, you want a smooth, pourable mix. Start with powdered sugar and add milk slowly. If the glaze is too thick, add a bit more milk. If it’s too thin, add more sugar. The right consistency drizzles easily over your cake. When drizzling the glaze, use a spoon or a squeeze bottle. Hold it high above the cake for a nice, even drizzle. This creates a beautiful look and makes each slice special. For serving, cut the cake into nice, even slices. Place each slice on a decorative plate. Dust the top with more powdered sugar for a pretty finish. You can also add seasonal decorations. Small pumpkins or colorful leaves beside each plate create a warm, festive feel. These touches make your coffee cake look even more inviting and delicious. For the full recipe, check the recipe section above. {{image_4}} You can easily make this coffee cake your own. Adding nuts or chocolate chips brings a fun twist. I love using walnuts for a rich crunch. If you prefer a sweeter bite, add semi-sweet chocolate chips. Just mix them in gently before pouring the batter into the pan. You can also swap out the pumpkin for other purées. Applesauce gives a nice fruity flavor. Sweet potato purée can add a unique twist too. Each option offers a new taste while keeping the cake moist. If you want a gluten-free cake, use a 1:1 gluten-free flour blend. This keeps the texture light and fluffy. Make sure your baking powder is also gluten-free. For dairy-free options, substitute unsalted butter with coconut oil or vegan butter. You can replace buttermilk with almond milk mixed with a bit of vinegar. This keeps the cake moist without dairy. These changes let everyone enjoy this tasty treat! To keep your pumpkin spice coffee cake fresh, wrap it well. Use plastic wrap or foil to cover the cake. Store it in an airtight container. This method helps keep moisture in and air out. You can also place the cake in a cake dome for added protection. In the fridge, your cake stays fresh for about 5 days. This allows you to enjoy a slice each morning with your coffee. Just remember to take it out of the fridge a bit before serving. This brings back its soft texture and rich flavors. To freeze your pumpkin spice coffee cake, cut it into slices. Wrap each slice tightly in plastic wrap. Then, place all the wrapped slices in a freezer bag. This way, you can enjoy a piece whenever you want without losing quality. For best results, freeze the cake for up to 3 months. When you want to enjoy a slice, take it out and unwrap it. Place the slice on a plate. Let it thaw in the fridge overnight or at room temperature for a few hours. This method keeps the cake moist and tasty. To keep your pumpkin spice coffee cake fresh, store it in an airtight container. This method keeps moisture in and prevents it from drying out. You can also use plastic wrap if you don’t have a container. Make sure the cake is cool before covering it. If you keep it in the fridge, it can last up to a week. Yes, you can make pumpkin spice coffee cake a day or two ahead. To prep, bake the cake and let it cool completely. Wrap it tightly in plastic wrap. This keeps it fresh and moist. You can glaze it right before serving for the best look and taste. Pair your pumpkin spice coffee cake with several delicious options. A hot cup of coffee or tea works great. You can also add a scoop of vanilla ice cream or whipped cream on the side. For a fun twist, serve it with a drizzle of caramel sauce. Enjoy experimenting with different pairings to find your favorite! This blog post gave you an easy recipe for pumpkin spice coffee cake. We covered essential ingredients like flour, sugar, and pumpkin puree. You learned how to mix the batter and bake it perfectly. There are also tips for texture, glazing, and presentation. I shared ways to customize the cake and how to store leftovers. Baking this cake brings joy and warmth to your kitchen. Enjoy making it for yourself and others!](https://tastednest.com/wp-content/uploads/2025/08/31f31c09-2642-4ef1-8ff2-5eee53e49c33.webp)

![- 1 cup corn kernels - 1/2 cup shredded cheddar cheese - 1/4 cup grated Parmesan cheese - 2 large eggs - 1/2 cup milk The corn kernels are the star. You can use fresh or frozen. I love fresh corn when it’s in season. It adds a sweet crunch. The cheeses bring a rich flavor. Cheddar gives sharpness while Parmesan adds depth. Eggs and milk create a nice batter. They hold everything together well. - 1/4 cup finely chopped green onions - 1/2 teaspoon garlic powder Green onions add a fresh taste. Their mild flavor pairs perfectly with corn. Garlic powder gives a subtle warmth. You can adjust these ingredients based on your taste. - Mixing bowls - Skillet - Slotted spoon You need a few simple tools. Mixing bowls help combine all your ingredients. A skillet is essential for frying. The slotted spoon makes removing fritters easy. This setup keeps your cooking smooth. For the full recipe, check [Full Recipe]. First, gather your corn, cheese, and green onions. Take a large bowl and combine: - 1 cup corn kernels (fresh or frozen) - 1/2 cup shredded cheddar cheese - 1/4 cup grated Parmesan cheese - 1/4 cup finely chopped green onions Mix well. This step helps blend the flavors. All the ingredients should be evenly distributed. Next, you need to prepare the egg mixture. In a medium bowl, whisk together: - 2 large eggs - 1/2 cup milk Whisk until the mixture is smooth. This helps the eggs and milk mix well together. Now, let’s move on to the dry mix. In another bowl, combine: - 1 cup all-purpose flour - 1 teaspoon baking powder - 1/2 teaspoon salt - 1/4 teaspoon black pepper - 1/2 teaspoon garlic powder Whisk these dry ingredients together. This helps to ensure no lumps. Finally, it’s time to fry! Heat about 1/4 inch of oil in a skillet over medium heat. You can test if the oil is ready by dropping a bit of batter in. If it sizzles, it’s good to go. - Using a spoon, drop rounded spoonfuls of the batter into the hot oil. - Flatten them a little with the back of the spoon for even cooking. Fry for about 3-4 minutes on each side. Look for a golden brown color. Once done, use a slotted spoon to remove them. Place them on a paper towel to absorb extra oil. Keep frying the rest of the batter. Add more oil if needed. Enjoy your cooking! For the full recipe, check the details above. To make great corn fritters, you need a good batter. Avoiding overmixing is key. Overmixing makes your fritters tough. Instead, mix just until the dry and wet ingredients combine. This keeps your fritters light and fluffy. If you see some lumps, that’s okay! They will cook out during frying. Frying is where the magic happens. Oil temperature is crucial. If the oil is too cold, your fritters will absorb oil and become greasy. If it’s too hot, they will burn. Heat the oil until it shimmers. You can test it by dropping a small amount of batter in. If it sizzles, it’s ready! Fry in batches to avoid crowding the pan. This helps them cook evenly. Presentation makes a difference. Serve your warm fritters on a big platter. Garnish with chopped parsley or cilantro for color. Pair with a dollop of sour cream or spicy aioli for dipping. This adds flavor and looks great. You can also try serving them with a fresh salad for a nice touch. For the full recipe, check out the complete guide. {{image_4}} You can easily switch the cheese types in this recipe. If you love a stronger flavor, try using pepper jack or feta cheese. For a milder taste, mozzarella works well too. Mixing cheeses can add depth to your fritters. If you want extra creaminess, add some cream cheese to the mix. This small swap can make a big difference in flavor. Adding bell peppers or herbs can enhance the taste. Diced bell peppers bring sweetness and color to your fritters. Fresh herbs like cilantro, parsley, or chives can brighten up the dish. Just chop them finely and fold them into the batter. This adds freshness and makes your fritters more exciting. Pair your fritters with various sauces or sides. A spicy aioli or tangy salsa can add a zesty kick. You could also serve them with sour cream or Greek yogurt for creaminess. For a complete meal, add a simple salad or some roasted veggies on the side. These options can elevate your dish and please your guests. For the full recipe, check out the delicious cheesy corn fritters above. To store leftover fritters, first let them cool completely. Place them in an airtight container. Use parchment paper between layers to prevent sticking. They will last up to three days in the fridge. If you want them to stay fresh, do not stack them too high. This keeps them from becoming soggy. To reheat fritters, use the oven or a skillet. The oven helps retain crispiness. Preheat your oven to 375°F (190°C). Place fritters on a baking sheet for about 10 minutes. Flip them halfway through for even heating. If using a skillet, heat a little oil over medium heat. Cook each fritter for 2-3 minutes on both sides. This will restore their golden crisp. Enjoy your fritters warm and tasty! For the full recipe, check out the main article. You can tell when the fritters are cooked by looking at their color and texture. They should be golden brown and crispy on the outside. If you press them lightly, they should feel firm but not hard. The inside should be soft and warm. If you see no raw batter oozing out, your fritters are perfect! Yes, you can make the fritters ahead of time. Prepare the batter and store it in the fridge for up to two hours. This keeps the flavors fresh. Fry them just before serving for the best taste. You can also cook them, let them cool, and store them in the fridge. Reheat in a skillet to keep them crispy. Cheesy corn fritters pair well with many sides. Try serving them with a fresh salad for a light meal. A dollop of sour cream adds a nice creamy touch. You can also serve them with a spicy aioli for some kick. For a heartier option, pair them with grilled chicken or fish. In summary, cheesy corn fritters are easy and fun to make. With simple ingredients like corn, cheese, and eggs, you can whip up a tasty treat. The frying tips and variations let you customize them perfectly. Remember to store leftovers well and reheat for the best results. These fritters are great as snacks or sides. Enjoy your cooking adventure and share these yummy bites with friends and family!](https://tastednest.com/wp-content/uploads/2025/08/b85e6b31-db36-4eba-832d-7a023bfa4037.webp)
![- Sweet potatoes - Chicken sausage - Aromatics (onion, garlic) - Vegetable broth - Coconut milk - Spices (cumin, paprika, red pepper flakes) - Olive oil - Garnish (cilantro or parsley) For this creamy sweet potato and sausage soup, you will need: - Sweet Potatoes: Use 2 large sweet potatoes, peeled and diced into 1-inch cubes. Look for firm ones with smooth skin. - Chicken Sausage: One pound of chicken sausage works well. Crumble it into bite-sized pieces. Choose a brand that is low in fat for a healthier option. - Aromatics: One medium onion, finely chopped, and three cloves of garlic, minced, will add depth to your soup. Fresh garlic and onion offer the best flavor. - Vegetable Broth: Four cups of low-sodium vegetable broth create a nice base. Homemade broth will add more flavor. - Coconut Milk: A 14 oz can of full-fat coconut milk gives creaminess. This adds a rich texture and flavor. - Spices: You will need one teaspoon each of ground cumin and smoked paprika, and half a teaspoon of red pepper flakes. Adjust the red pepper for heat as you like. - Olive Oil: Use two tablespoons of extra virgin olive oil for sautéing. This adds healthy fat and flavor. - Garnish: Fresh cilantro or parsley, finely chopped, adds a bright finish. Use as much as you want for color. - Sweet Potatoes: Choose bright orange, firm potatoes. Avoid ones with soft spots. - Chicken Sausage: Look for options with fewer additives and no nitrates. - Aromatics: Always pick fresh. They enhance the taste of your dish. - Coconut Milk: Make sure the can is not dented. Check for a creamy texture. - Sausage: You can use turkey sausage or vegan sausage for alternatives. - Broth: If you want a meatier flavor, use chicken broth. - Coconut Milk: Substitute with almond milk or cashew cream for a lighter option. - Spices: Feel free to experiment with your favorite spices like thyme or basil. This recipe makes a cozy meal that you can enjoy any day of the week. For the full recipe, visit the complete guide. To make this tasty soup, you need some basic tools and a plan. First, gather your tools: - A large, heavy-bottomed pot - A wooden spoon - An immersion blender or regular blender - A chopping board and knife Start by prepping your ingredients. Peel and dice the sweet potatoes. Chop the onion and mince the garlic. This makes cooking easier and more fun. 1. Sautéing aromatics: Heat the olive oil in your pot over medium heat. Add the chopped onion. Cook for about 5 minutes until it softens. Then add the minced garlic, cumin, smoked paprika, and red pepper flakes. Stir for 1-2 minutes so the spices smell great. 2. Cooking the sausage: Now, add the crumbled chicken sausage. Use your wooden spoon to break it up into smaller bits. Cook for about 5-7 minutes until the sausage turns brown and is cooked through. 3. Simmering the sweet potatoes: Toss in the diced sweet potatoes. Pour in the vegetable broth. Bring this mix to a gentle boil. Reduce the heat and let it simmer for 15-20 minutes. You want the sweet potatoes to be tender enough to poke with a fork. 4. Blending the soup: Once the sweet potatoes are soft, use an immersion blender to puree the soup until smooth. If you want some chunks, blend just half. If you’re using a regular blender, blend in batches and let steam escape to avoid splatter. 5. Adding coconut milk: If you blended in batches, return the soup to the pot. Stir in the coconut milk and heat it gently on low for about 5 minutes. 6. Final seasoning and serving: Taste your soup. Add salt and black pepper as needed. Adjust the spice level with red pepper flakes to fit your taste. Ladle the soup into bowls and garnish with fresh cilantro or parsley. This adds color and flavor! Now you have a warm bowl of creamy sweet potato and sausage soup. Enjoy! For the full recipe, check the earlier section. To get the right soup texture, focus on your blending method. If you want a smooth soup, an immersion blender works great. It lets you blend right in the pot. For a chunkier texture, blend only half the soup. A traditional blender can also do the job, but remember to let steam out. This keeps the soup from splattering. Spices add depth to your soup. I recommend ground cumin and smoked paprika for warmth. Red pepper flakes give a nice kick. For fresh taste, use herbs like cilantro or parsley. Fresh herbs enhance flavor better than dried ones, but dried herbs can work too. Just use less; they are stronger. {{image_4}} You can make this soup fit your needs. To create a gluten-free option, use gluten-free sausage and check the broth label. For dairy-free soup, coconut milk is already a great choice. You can swap it for almond milk or oat milk if you prefer. If you want a vegetarian version, skip the sausage. Instead, add chickpeas or lentils for protein. You can also use vegetable broth to keep it tasty and hearty. You can mix it up with different veggies. Carrots and bell peppers add color and sweetness. Kale or spinach gives it a fresh touch and boosts nutrition. If you want to change the flavor profile, try adding fresh herbs like thyme or rosemary. A splash of lime or lemon juice can brighten the taste. You can also experiment with spices like curry powder or turmeric for a unique twist. For complete cooking instructions, check the [Full Recipe]. To keep your Creamy Sweet Potato and Sausage Soup fresh, use the right containers. Glass or BPA-free plastic containers work best. Make sure they have tight lids to avoid spills and keep the soup safe. - Let the soup cool down to room temperature before storing. - Fill the containers, leaving some space for expansion. - Label the containers with the date to track freshness. Store the soup in the fridge for up to five days. If you want to keep it longer, freezing is a great option. When it's time to enjoy your soup again, reheating properly will keep the flavor intact. The best method is to warm it on the stove over low heat. Stir often to prevent sticking and burning. - For quick heating, use the microwave. Place the soup in a microwave-safe bowl and cover it loosely. Heat in short bursts, stirring in between. To easily freeze the soup, let it cool completely. Then, pour it into freezer bags or containers. Remember to remove as much air as possible before sealing. Your soup will stay fresh for about three months in the freezer. For the best taste, thaw it in the fridge overnight before reheating. For the full recipe, check out the detailed steps to make this comforting soup. How long does Creamy Sweet Potato and Sausage Soup last in the fridge? This soup can last about 4 to 5 days in the fridge. Store it in an airtight container to keep it fresh. I always recommend letting it cool down before sealing. Can I use other types of sausage? Yes, you can use other types of sausage. Try turkey, pork, or even spicy sausage if you like heat. Each type will change the flavor a bit, but it will still taste great. What sides go well with this soup? I love pairing this soup with crusty bread or a fresh side salad. You can also add croutons on top for extra crunch. Can I make this soup vegan? You can make it vegan! Replace the chicken sausage with plant-based sausage. Use vegetable broth and coconut milk as usual. The taste will still be rich and creamy. Is it suitable for meal prep? Absolutely! This soup is perfect for meal prep. You can make a big batch and store it in portions. It reheats well, making it easy for lunches or quick dinners. For the full recipe, check out the [Full Recipe]. This blog provided a full guide to making creamy sweet potato and sausage soup. We covered ingredients, step-by-step cooking, and tips for perfecting the texture and flavor. I shared storage methods and variations to fit your needs. With these insights, you can create a delicious dish. Explore the ingredients and feel free to make it your own. Enjoy making this soup that warms both body and soul!](https://tastednest.com/wp-content/uploads/2025/08/5130036a-0d28-4679-8f4e-7c36981aac51.webp)