Skip to content
Tasted Nest
  • Home
  • Appetizers
  • Desserts
  • Salads
  • Breakfast
  • Dinner
  • Privacy Policy
  • Contact
  • About

Chef Tavio

Easy Dinners for Toddlers Quick and Healthy Options

July 31, 2025 by Chef Tavio
- 1 cup whole wheat flour - 1 cup grated zucchini - 1/2 cup grated carrot - 1/2 cup shredded cheddar cheese - 2 large eggs - 1/2 cup milk (or your preferred non-dairy milk) - 1 teaspoon baking powder - 1/2 teaspoon garlic powder - 1/2 teaspoon salt - 1 tablespoon olive oil (for cooking) These ingredients come together to create a tasty meal. The whole wheat flour gives fiber and a nice texture. Grated zucchini and carrot add moisture and nutrients. Cheddar cheese makes the pancakes cheesy and delicious. Eggs and milk bind the mix while adding protein. Baking powder helps the pancakes rise. Garlic powder and salt bring out all the flavors. Olive oil is perfect for cooking these pancakes to a golden brown. - Whole wheat flour: Rich in fiber, supports digestion. - Zucchini: Low in calories, high in vitamins A and C. - Carrot: Full of beta-carotene, good for vision. - Cheddar cheese: Offers calcium and protein for strong bones. - Eggs: Packed with protein, essential for growth. - Milk: Provides calcium and hydration. - Baking powder: Helps with rising, no calories. - Garlic powder: Adds flavor, may boost immunity. - Salt: Enhances taste but use sparingly. - Olive oil: Healthy fat, good for heart health. This mix not only fuels your toddler but also supports their growth. With these nutrients, you can feel good about what’s on their plate. - Look for firm zucchinis with a shiny skin. - Choose carrots that are bright orange and crisp. - Avoid any vegetables with soft spots or bruises. - Check for freshness by smelling the produce; it should smell fresh, not musty. - Buy organic when possible to avoid pesticides. - Seasonal veggies often taste better and cost less. Fresh produce makes a big difference in taste and nutrition. When you pick the best, you set your toddler up for a yummy meal. For the full recipe, check out Cheesy Veggie Pancakes. Start by gathering your ingredients. In a large bowl, combine the whole wheat flour, baking powder, garlic powder, and salt. Use a whisk to mix them well. This step ensures even taste in every bite. Next, take another bowl and crack the two large eggs. Whisk them with the milk until they blend smoothly. This mixture will make your pancakes fluffy and light. Now, add the grated zucchini, grated carrot, and shredded cheddar cheese to the egg mixture. Stir everything until well combined. You want to see the veggies and cheese evenly spread throughout. Then, gently fold the dry mixture into the wet ingredients. Mix until just combined; avoid overmixing, or your pancakes may turn tough. Heat a non-stick skillet over medium heat and add 1 tablespoon of olive oil. Allow it to shimmer before cooking. Pour about 1/4 cup of batter into the skillet for each pancake. Leave some space between them to spread. Cook for 2-3 minutes until small bubbles form on the surface. Flip them carefully once golden brown. Cook for another 2-3 minutes until both sides are cooked. Repeat this with the rest of your batter, adding more oil as needed. Enjoy your Cheesy Veggie Pancakes warm, served with fresh fruit and yogurt. To make your pancakes fluffy, use fresh baking powder. Mix dry and wet ingredients gently. Overmixing can make them tough. Let the batter rest for about five minutes before cooking. This helps the gluten relax and creates a lighter texture. Get creative with shapes! Use cookie cutters to make fun pancake shapes. Add colorful fruit on top for a splash of color. You can create a smiley face with banana slices and blueberries. Engaging their imagination makes meals exciting. If your toddler is a picky eater, offer dips. Serve yogurt, applesauce, or maple syrup in small bowls. This encourages them to experiment. Pair pancakes with a side of fresh fruit. Slices of strawberries or bananas can make the plate look appealing. For a balanced meal, you can add a protein, like scrambled eggs, on the side. These tips can turn simple meals into enjoyable experiences. Try the full recipe for Cheesy Veggie Pancakes for a delightful dinner option! {{image_4}} You can make Cheesy Veggie Pancakes even more fun by adding different vegetables. Try spinach for a boost of iron. Peppers add a sweet crunch. Sweet potatoes bring a nice, earthy flavor. You can even use peas for a pop of color and sweetness. Just remember to grate or finely chop any veggies you use. It helps them blend well into the batter. If you want to make these pancakes dairy-free, use almond milk or oat milk instead of regular milk. For a gluten-free version, swap out whole wheat flour for a gluten-free blend. There are many options available today. Look for one that you enjoy. You can still add cheese, like a dairy-free cheddar, to keep that cheesy taste. Herbs and spices can make your pancakes really pop! Basil and parsley add freshness. You could also use a pinch of oregano for a savory twist. If your toddler likes mild spice, try a dash of paprika. This gives a warm flavor without being too strong. Experiment with different combinations to find what your child loves the most. After making your cheesy veggie pancakes, you may have some left. To store them, let the pancakes cool completely. Then, stack them with parchment paper between each one. Place the stack in an airtight container. This method keeps them fresh and prevents sticking. To reheat your pancakes, use a microwave or skillet. For the microwave, place one pancake on a plate and heat it for about 20-30 seconds. If you prefer a skillet, warm it over medium heat for 1-2 minutes on each side. This keeps the pancakes soft and tasty. You can freeze these pancakes for later use. After cooling, place them in a single layer on a baking sheet. Freeze until solid, then transfer to a freezer-safe bag. When you want to eat them, take out the number you need and let them thaw in the fridge overnight. You can also reheat them directly from the freezer. Just add a few extra seconds in the microwave. Enjoy these easy dinners with your little ones! For the full recipe, check out the detailed instructions above. Yes, you can make these pancakes ahead of time. Just cook them, then cool them down. Store them in an airtight container in the fridge. They will stay fresh for up to three days. When you are ready to eat, just reheat them in the microwave or on a skillet. This makes meal prep easy for busy nights! You can serve these pancakes with many sides. Fresh fruit slices, like strawberries or bananas, add a sweet touch. A small bowl of yogurt makes a creamy dip. You could also add a drizzle of honey for extra sweetness. If your toddler likes it, a sprinkle of cinnamon can be a fun twist! To boost the nutrition of these pancakes, try adding more veggies. Spinach or finely chopped bell peppers work great. You can also use oats instead of some flour for extra fiber. Adding a spoonful of flaxseed can help too. These changes keep the pancakes tasty while packing in more nutrients for your toddler. These pancakes can be made allergy-friendly. For gluten-free options, use gluten-free flour. You can replace eggs with mashed banana or flaxseed meal mixed with water. If dairy is a concern, use non-dairy milk and dairy-free cheese. Always check labels to ensure safety for your child’s needs. These Cheesy Veggie Pancakes are easy to make and fun to eat. We covered the key ingredients, nutrition facts, and how to pick fresh veggies. I shared step-by-step instructions to help you cook perfect pancakes every time. Also, we explored tips to keep them fluffy and appealing for picky eaters. Remember, you can adjust ingredients for dietary needs. Store leftovers properly to enjoy later. With these tips, you can create meals your family will love. Enjoy making these tasty pancakes and watch everyone come back for more!

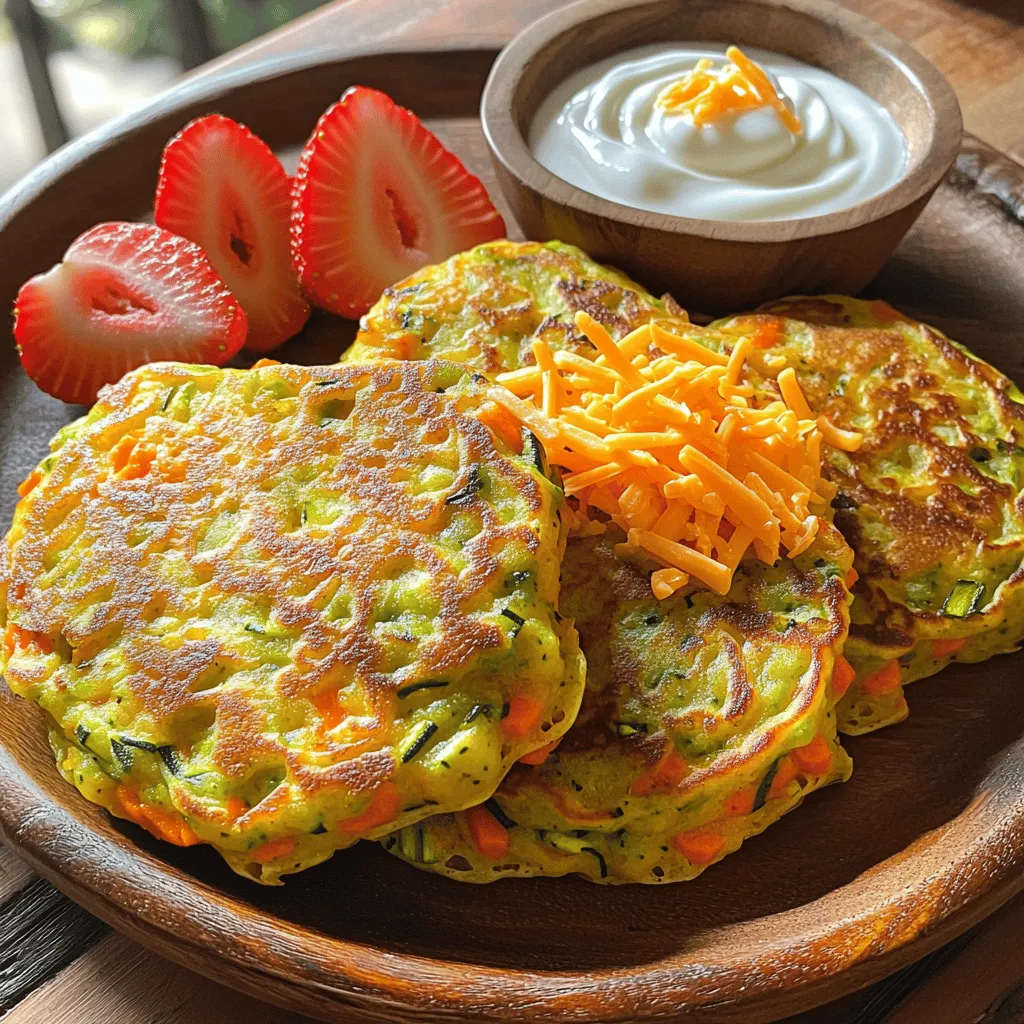
Are you struggling to find quick and healthy dinners for your toddler? You’re not alone! In this post, I’ll share simple recipes that make mealtime fun and nutritious. We’ll explore …

Read more

Categories Breakfast

15 Pumpkin Recipes for Fall That Delight Tastebuds

July 31, 2025 by Chef Tavio
Let’s dive into the key ingredients you need for these delightful pumpkin recipes. Each recipe has unique elements that bring out the best flavors of fall. - Pumpkin Spice Pancakes - 1 cup all-purpose flour - 1/4 cup pumpkin puree - 2 tablespoons granulated sugar - 1 tablespoon baking powder - 1 teaspoon pumpkin pie spice - 1/2 teaspoon salt - 1 cup milk - 1 large egg - 2 tablespoons unsalted butter, melted - Creamy Pumpkin Risotto - 1 cup Arborio rice - 1 can (15 oz) pumpkin puree - 4 cups vegetable stock, warmed - 1 small onion, finely chopped - 2 cloves garlic, minced - 1/2 cup grated Parmesan cheese - 2 tablespoons olive oil - Salt and pepper to taste - Fresh sage leaves for garnish - Savory Pumpkin Soup - 1 medium pumpkin, peeled, seeded, and cubed - 1 onion, chopped - 2 cloves garlic, minced - 4 cups vegetable broth - 1 teaspoon ground cumin - 1 teaspoon ground coriander - Salt and pepper to taste - 1 tablespoon olive oil - Pumpkin seeds for garnish - Pumpkin Chickpea Curry - 1 can (15 oz) chickpeas, drained and rinsed - 1 can (15 oz) pumpkin puree - 1 onion, diced - 2 cloves garlic, minced - 1 tablespoon fresh ginger, grated - 2 tablespoons curry powder - 1 can (14 oz) coconut milk - 2 tablespoons olive oil - Fresh cilantro for garnish For ingredients that are hard to find, you can swap them easily. For example, if you can't find Arborio rice, any short-grain rice can work in risotto. When it comes to pumpkin, you can use both fresh and canned options. Fresh pumpkin offers a bright flavor, while canned pumpkin is convenient and still tasty. If you use fresh, make sure to choose a sugar pumpkin, known for its sweetness and smooth texture. Check out the Full Recipe for detailed steps and more delicious options! 1. Pumpkin Spice Pancakes - In a large bowl, mix flour, sugar, baking powder, pumpkin pie spice, and salt. - In another bowl, whisk milk, egg, pumpkin puree, and melted butter. - Combine wet and dry ingredients gently. Do not overmix. - Heat a non-stick skillet on medium. Pour 1/4 cup of batter for each pancake. - Cook until bubbles form, flip, and brown both sides, about 2-3 minutes. - Serve warm with maple syrup and cinnamon. 2. Creamy Pumpkin Risotto - Heat olive oil in a skillet over medium heat. Add the chopped onion and sauté until soft. - Stir in garlic and Arborio rice, cooking until rice is lightly toasted. - Add warm vegetable stock one ladle at a time, stirring often until absorbed. - After 15 minutes, mix in pumpkin puree. Cook until creamy and rice is al dente. - Stir in Parmesan cheese, season, and garnish with sage leaves before serving. 3. Savory Pumpkin Soup - Heat olive oil in a pot over medium heat. Add onion and cook until soft. - Stir in garlic, cumin, and coriander; sauté until fragrant. - Add cubed pumpkin and vegetable broth. Bring to a boil, then simmer until tender. - Blend the soup until smooth using an immersion or regular blender. - Season with salt and pepper. Serve warm, garnished with pumpkin seeds. 4. Pumpkin Chickpea Curry - Heat olive oil in a pot over medium heat. Sauté diced onion until translucent. - Add garlic, ginger, and curry powder; cook for 1 minute until fragrant. - Mix in chickpeas, pumpkin puree, and coconut milk. Stir to combine. - Simmer for about 15-20 minutes until thickened. - Serve hot, garnished with fresh cilantro. 5. Pumpkin Bread - Preheat your oven to 350°F (175°C). Grease a loaf pan. - In a bowl, mix flour, sugar, baking soda, and spices. - In another bowl, whisk eggs, oil, and pumpkin puree. - Combine wet and dry ingredients until just mixed. - Pour into the loaf pan and bake for 60 minutes or until a toothpick comes out clean. - Let it cool before slicing. Each recipe showcases pumpkin's versatility and rich flavor. Use these steps to create delightful fall dishes that warm your home and heart. To get the best pumpkin flavor, choose fresh pumpkins. Look for pumpkins that feel heavy for their size and have a smooth skin. Here are some key methods to enhance your dishes: - Roasting: Roasting pumpkin brings out its natural sweetness. Cut it into cubes, toss with oil, and roast until tender. - Puree: If you use fresh pumpkin, cook it first, then blend until smooth. This gives a richer taste than canned puree. - Spices: Use warm spices like cinnamon and nutmeg to elevate your pumpkin dishes. They pair well with pumpkin's earthy flavor. Common mistakes can ruin your dish. Here’s how to avoid them: - Overcooking: Don’t overcook pumpkin. It can become mushy and lose flavor. Cook just until tender. - Skimping on seasoning: Pumpkin is mild. Use enough salt and spices to bring out its taste. - Ignoring texture: A creamy soup or risotto is great, but don’t let it become too thick. Add broth if needed. For tools and equipment, here are some must-haves: - Sharp knife: A good knife makes cutting pumpkins easier and safer. - Blender: An immersion blender works well for soups. It’s easy to use and clean. - Baking sheet: Use a sturdy baking sheet for roasting. Line it with parchment for easy cleanup. Using these tips will help you create perfect pumpkin dishes every time. For more ideas, check out the Full Recipe. {{image_4}} You can tweak classic pumpkin recipes to fit your needs. If you're vegan, swap the egg in pancakes for a flax egg. Just mix one tablespoon of flaxseed meal with two and a half tablespoons of water. Let it sit for about five minutes until it thickens. For gluten-free options, use a mix of almond flour and coconut flour instead of all-purpose flour. Try fun flavor pairings with pumpkin. Add maple syrup for sweetness or mix in some nutmeg for spice. You can also blend in roasted garlic for a savory kick. Different regions have their own special pumpkin recipes. In Italy, you might find pumpkin risotto with sage. In Mexico, they use pumpkin in sweets like flan or empanadas. Each twist brings a new taste and story to your table. If you want to explore more recipes, check out the full recipe list for even more delicious options! To keep your pumpkin dishes fresh, store them in airtight containers. This helps lock in moisture and flavor. Always allow the dish to cool before sealing. If you have leftovers, eat them within three to four days. For pumpkin puree, freezing is a great option. You can freeze it in small portions using ice cube trays. Once frozen, pop them into a bag. This way, you can easily use the amount you need later. Different pumpkin recipes have varying shelf lives. Here’s a quick guide: - Pumpkin Soup: Lasts about 3-5 days in the fridge. - Pumpkin Bread: Stays fresh for up to a week at room temperature. - Pumpkin Pancakes: Best consumed within 2-3 days for optimal texture. - Pumpkin Risotto: Enjoy within 2-3 days, as it may dry out. Proper storage keeps your pumpkin dishes tasty and safe. For full details on recipes, check the Full Recipe section. Can I use fresh pumpkin instead of canned? Yes, you can use fresh pumpkin. It adds a great taste. To prepare, roast or steam your pumpkin until soft. Then, blend it until smooth. This gives you fresh pumpkin puree. What are the best pumpkins for cooking? Sugar pumpkins are best for cooking. They are sweet and smooth. Other good choices are pie pumpkins and small carving pumpkins. Avoid large pumpkins meant for decoration. How long can I store pumpkin puree? You can store pumpkin puree in the fridge for up to one week. If you freeze it, it lasts for about three months. Just put it in an airtight container. Can I make pumpkin recipes in advance? Yes, many pumpkin recipes can be made ahead. Dishes like soups and casseroles taste great after sitting. Just store them in the fridge or freezer. Reheat them before serving for the best flavor. For more delicious pumpkin ideas, check out the Full Recipe. This blog post explored the world of pumpkin dishes. We broke down unique ingredients and offered substitutes. Step-by-step instructions made cooking simple and fun. I shared tips to enhance flavor and avoid mistakes. We also looked at creative twists and variations for every diet. Lastly, I gave storage advice to keep your dishes fresh. With this knowledge, you can enjoy delicious pumpkin meals year-round. Happy cooking!

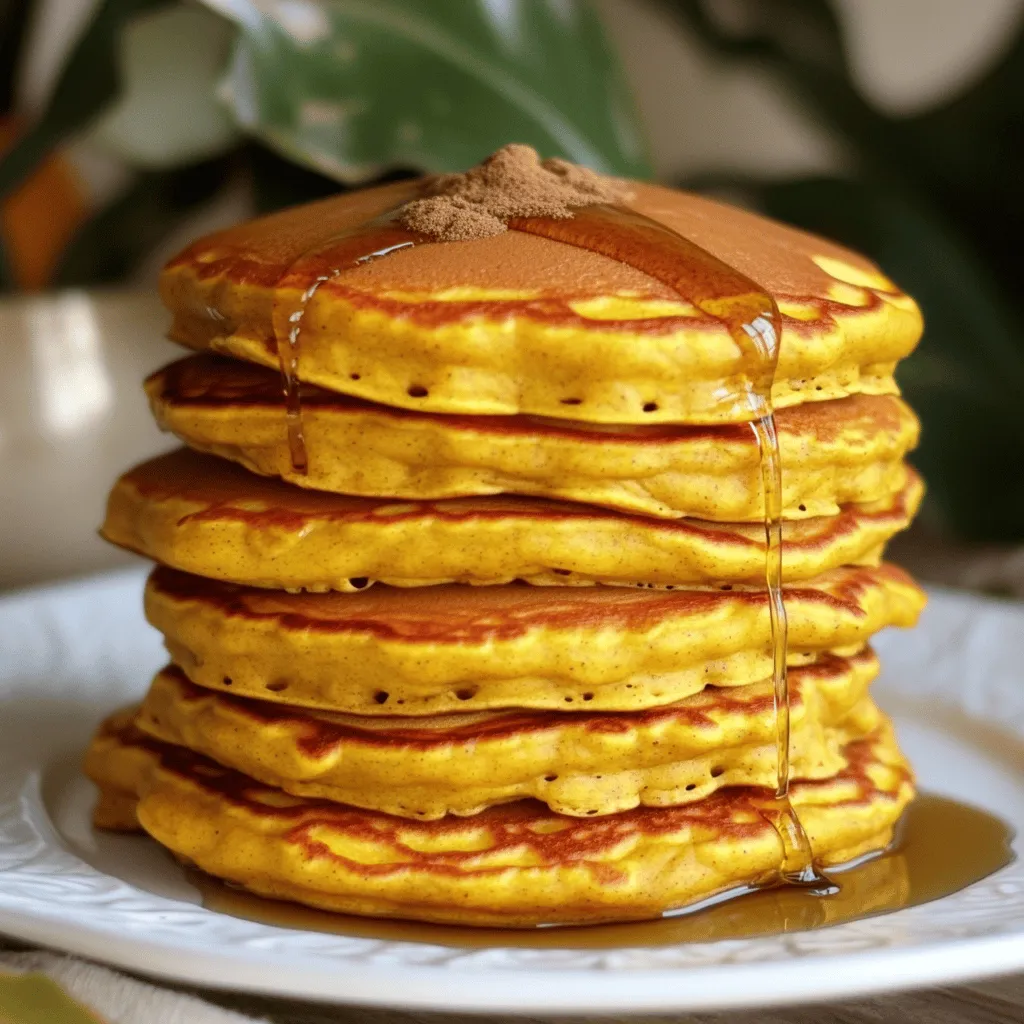
Are you ready to celebrate fall with amazing pumpkin recipes that will delight your taste buds? I’ve gathered 15 easy and delicious pumpkin dishes you’ll love. From savory to sweet, …

Read more

Categories Breakfast

Healthy School Lunch Ideas That Kids Will Love

July 31, 2025 by Chef Tavio
Healthy lunches can be fun and tasty. Here are key ingredients you can use: - 1 large whole wheat tortilla - 1/4 cup hummus (choose your favorite flavor) - 1/2 cup fresh spinach leaves, washed and dried - 1/4 cup shredded carrots - 1/4 cup assorted bell peppers, thinly sliced (red, yellow, and green) - 1/4 cup cucumber, diced into small pieces - 1/4 ripe avocado, thinly sliced - Salt and pepper, to taste - 1 tablespoon fresh lemon juice - Optional: 1 tablespoon sunflower seeds, for added crunch These ingredients make a great base for a nutritious wrap. They provide a mix of flavors and colors that kids love. Each ingredient in this wrap offers unique benefits: - Whole wheat tortilla: High in fiber, it keeps kids full longer. - Hummus: Packed with protein and healthy fats. - Spinach: Rich in iron and vitamins A and K, good for growth. - Carrots: Great for eye health with beta-carotene. - Bell peppers: Full of vitamin C, which boosts the immune system. - Cucumber: Hydrating and low in calories, perfect for kids. - Avocado: Contains healthy fats that support brain health. - Lemon juice: Adds flavor and vitamin C without extra calories. - Sunflower seeds (optional): Add crunch and extra protein. Together, these ingredients create a balanced meal that fuels kids for their day. To keep things exciting, you can mix in some fun add-ins: - Cooked chicken or turkey: Adds protein for growing kids. - Cheese slices: For a creamy texture and extra flavor. - Olives or pickles: For a tangy kick that kids might enjoy. - Fresh herbs: Like basil or cilantro for added freshness. - Sliced apples or berries: For a sweet touch that pairs well. By adding these options, you can create new flavors and textures. This makes lunch fun and keeps your child interested in healthy foods. For a full recipe, check out the Rainbow Veggie Wrap. 1. Start by laying the large whole wheat tortilla flat on a clean surface. 2. Spread 1/4 cup of your favorite hummus evenly across the tortilla. Leave about an inch from the edges. 3. Place 1/2 cup of fresh spinach leaves in the center of the tortilla. 4. Add 1/4 cup of shredded carrots on top of the spinach. 5. Next, layer 1/4 cup of assorted bell peppers and 1/4 cup of diced cucumber over the carrots. 6. Top it off with 1/4 sliced avocado. Sprinkle a bit of salt, pepper, and drizzle with 1 tablespoon of lemon juice. 7. If you want a bit of crunch, add 1 tablespoon of sunflower seeds. 8. Fold in the sides of the tortilla. Start rolling from the bottom to keep the filling packed tight. 9. Slice the wrap in half diagonally with a sharp knife. 10. Wrap it in parchment paper or place it in a lunch container for easy transport. - Make sure to keep the filling tight so it doesn’t spill. - Use parchment paper to hold the wrap together. - Choose a sturdy lunch container to keep it fresh. - Consider using toothpicks to secure the wrap if needed. - Prepare the veggies ahead of time and store them in the fridge. - Make several wraps at once and wrap them in parchment. - Use leftovers from dinner in the wraps for quick meals. - Keep the wraps simple, focusing on a few fresh ingredients for ease. This way, you can craft delicious, healthy lunches that kids will love in no time! For more ideas, check out the Full Recipe. You can make lunches fun by adding a twist. Change up the fillings in your wraps. Use different spreads like cream cheese or guacamole. Try various veggies, cheeses, or proteins like turkey or chicken. You can even add fruits like apple slices or grapes. Mix colors and textures for a vibrant look. Kids love variety, so keep it interesting! To make lunches more appealing, involve your kids in the process. Let them pick their favorite ingredients. Use cookie cutters to shape sandwiches into fun designs. Brightly colored containers can also catch their attention. Offer dips like ranch or yogurt for veggies. Including a small treat, like dark chocolate, can make lunch exciting. Keeping it simple and fun will help kids eat healthier. Pack lunches in insulated containers to keep food fresh. Use ice packs to maintain cool temperatures. Seal wraps in parchment paper to hold them together, making them easy to grab. Layer items in the lunchbox to prevent sogginess. Place drier items at the bottom and wetter items on top. Encourage your kids to help you pack their lunch. They will feel proud and more likely to eat it. For a great recipe, try the Rainbow Veggie Wrap! {{image_4}} You can easily swap ingredients in the Rainbow Veggie Wrap. For gluten-free diets, use a gluten-free tortilla. If your child dislikes hummus, try cream cheese or nut butter as a spread. You can also use different veggies like kale or sprouts. If they need more protein, add sliced turkey or hard-boiled eggs. These small changes keep meals fun and tasty. Wraps are great, but sandwiches can be just as fun. Use whole grain bread for a classic twist. Spread avocado or yogurt-based dressing instead of butter. Fill the sandwich with turkey, cheese, and spinach for a tasty meal. You can also create a mini bagel sandwich with cream cheese and smoked salmon. Remember, kids love variety, so mix it up often! Leftovers can be a time-saver for school lunches. If you have grilled chicken, slice it for a wrap or sandwich. Use extra veggies from dinner to add crunch and color. Rice or quinoa can also be packed in a small container. Kids love these creative meals, and it reduces food waste. By using leftovers, you save time and keep lunch exciting! To keep school lunches tasty and safe, follow these tips. Use airtight containers to stop air from spoiling food. Pack items separately to keep them fresh. A lunch bag with ice packs helps keep everything cool until lunchtime. If you make a rainbow veggie wrap, wrap it tightly in foil or parchment paper. This keeps it from falling apart and makes it easy to grab. Fresh ingredients are key to yummy lunches. Store veggies in a damp paper towel to keep them crisp. If you use avocado, add lemon juice to slow browning. Keep fruits like apples and grapes in containers with a little space. This helps air circulate and keeps them fresh. If you have leftovers, store them in the fridge right away to avoid spoilage. Safety is crucial when packing lunch. Always wash your hands before preparing food. Clean all surfaces and utensils with hot, soapy water. When using meat or dairy, make sure they are cold when packed. Check the expiration dates on all items, too. If your child’s lunch has been out for more than two hours, it’s better to throw it away. Keeping these practices in mind helps ensure your child eats healthy and safe meals at school. Some quick healthy lunch ideas include wraps, salads, and bento boxes. A fun wrap, like the Rainbow Veggie Wrap, takes only 10 minutes to prepare. You can fill it with fresh veggies and hummus. Kids love colorful food. You can also try whole grain sandwiches with lean meats and veggies. Don't forget fruit! Sliced apples or grapes are easy and healthy. To ensure your child gets enough nutrients, include a variety of foods. Aim for fruits, veggies, whole grains, and proteins. Each meal should have at least one food from each group. This helps kids get vitamins and minerals. You can also talk to a doctor for advice on nutrition. They can help you choose the right foods for your child. Good snack options include yogurt, nuts, and cheese sticks. You can also try veggie sticks with dip or whole grain crackers. Dried fruit or popcorn can be fun, too! These snacks add energy and nutrition. Make sure to check for allergies before packing snacks. Healthy snacks keep kids happy and focused in school. Yes, you can prepare school lunches the night before! This saves time in the morning. You can pack wraps, salads, and snacks in containers. Just keep them in the fridge overnight. It helps to choose foods that stay fresh, like the Rainbow Veggie Wrap. Make sure to add a cold pack to keep everything cool until lunchtime. In this article, we explored how to prepare healthy school lunches. We discussed essential ingredients and their nutritional value. You learned step-by-step instructions for making a rainbow veggie wrap and packing tips. We also shared creative ways to customize lunches and different dietary options. Remember, storing lunches properly keeps them fresh and safe. By using these tips, you can make tasty, nutritious lunches your kids will love. Happy packing!

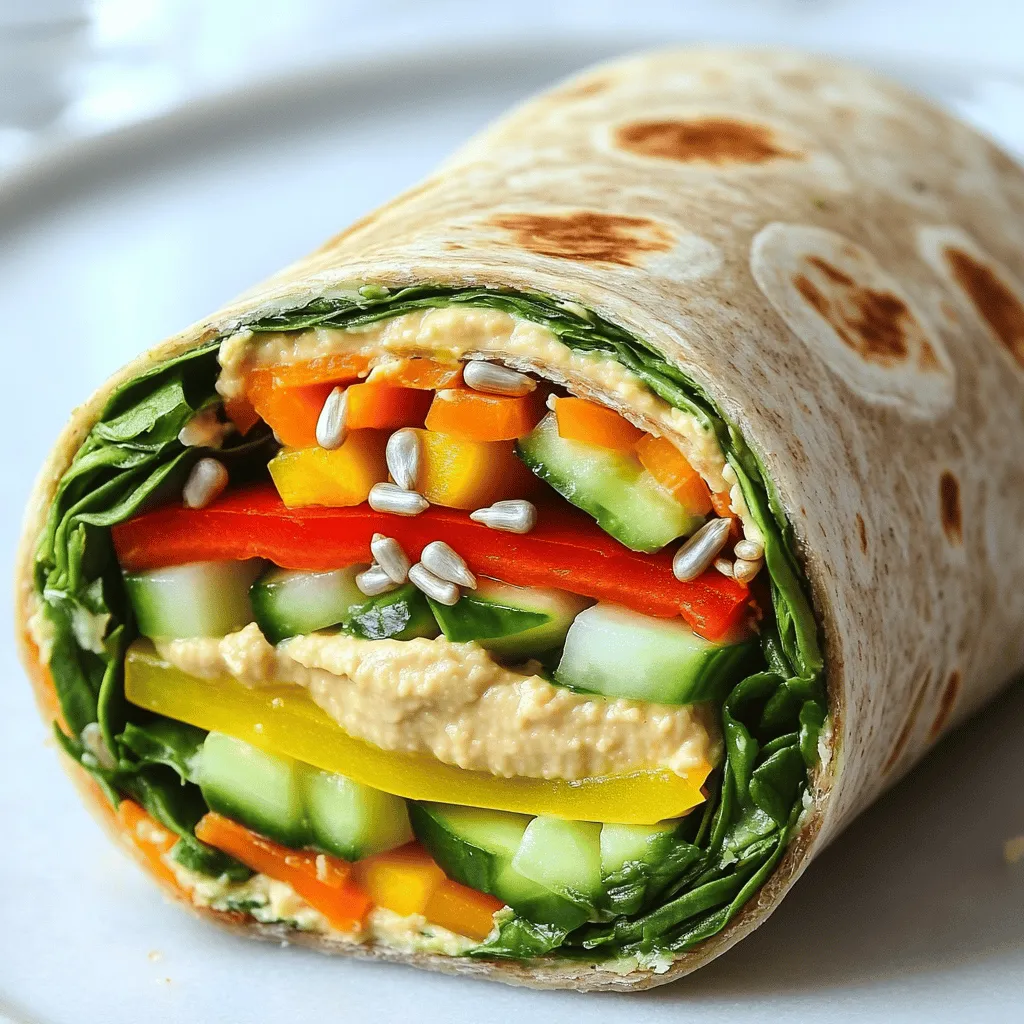
Are you tired of the same old school lunches that your kids ignore? I understand the struggle! In this blog, you’ll discover healthy school lunch ideas that kids will actually …

Read more

Categories Salads

Cream Cheese Apple Dip Delicious and Simple Treat

July 30, 2025 by Chef Tavio
To make this tasty dip, you need a few key items. Here’s what you will need: - 8 oz cream cheese, softened to room temperature - 1/2 cup powdered sugar - 1/4 cup brown sugar, packed - 1 tsp vanilla extract - 1/4 cup caramel sauce - 1/2 tsp ground cinnamon - 4 fresh apples (like Fuji or Honeycrisp), cored and sliced These ingredients work together to create a creamy, sweet dip that pairs perfectly with apples. You can make your dip even more fun with toppings. Here are some ideas: - Chopped nuts, such as pecans or walnuts - A sprinkle of cinnamon - Extra caramel drizzle These toppings add crunch and flavor. They also make your dip look beautiful! Not all apples are the same for dipping. I recommend using these types: - Fuji apples for their sweetness - Honeycrisp apples for their crispness - Granny Smith apples for a tart punch These apples enhance the dip's taste and provide a nice texture. Enjoy your Cream Cheese Apple Dip with these delicious choices! You can find the full recipe in the main article. Start by gathering your ingredients. You will need: - 8 oz cream cheese, softened to room temperature - 1/2 cup powdered sugar - 1/4 cup brown sugar, packed - 1 tsp vanilla extract - 1/4 cup caramel sauce - 1/2 tsp ground cinnamon - 4 fresh apples, cored and sliced - Chopped nuts for topping Make sure the cream cheese is soft. This helps it blend well. I like to leave it out for about 30 minutes. Wash and slice your apples thinly. This makes them perfect for dipping. In a mixing bowl, add the softened cream cheese. Then, add the powdered sugar, brown sugar, vanilla, and cinnamon. Use an electric mixer on medium speed. Mix until smooth, about 2-3 minutes. Scrape the bowl to mix well. Next, fold in half of the caramel sauce. Stir gently until it is mixed in. Spoon the mixture into a serving dish. Smooth the top with a spatula. Then drizzle the other half of the caramel sauce on top. Arrange your apple slices around the dip. This makes it easy to grab a slice. If you want extra crunch, sprinkle chopped nuts on top. For a nice touch, you can sprinkle a bit of cinnamon. This dip is perfect for parties or snacks. You can serve it right away. For more detailed steps, check the Full Recipe. Enjoy! To get that smooth and creamy dip, start with softened cream cheese. If it’s too cold, it won’t mix well. Leave it out for 30 minutes before you start. I use an electric mixer to blend everything. This helps create that velvety texture. Remember to scrape the bowl's sides while mixing. This step ensures everything is mixed evenly. You can easily add a twist to your dip. Try mixing in chopped nuts for crunch. Pecans or walnuts work great! Fresh fruit like berries or bananas also adds fun flavors. You can even add a splash of maple syrup instead of brown sugar. This will make it taste unique and delicious. Make your dip look as great as it tastes. Arrange apple slices in a circle around the dip. This makes it easy for everyone to grab a slice. Drizzle extra caramel sauce on top. A sprinkle of cinnamon adds a lovely touch. If you want, toss in some extra chopped nuts for extra flair. Use a beautiful bowl to serve, and you have a showstopper! {{image_4}} You can switch up the flavors in your cream cheese apple dip. Try adding chocolate syrup for a sweet treat. A sprinkle of cocoa powder gives a rich twist. You can also mix in peanut butter for a nutty taste. If you want a fruity kick, add a splash of orange juice. Each change can make your dip exciting and new. If you want a healthier dip, use Greek yogurt instead of cream cheese. It gives a creamy texture and adds protein. You can also reduce sugar by using honey or maple syrup. For a lower-calorie option, skip the caramel. Instead, try fresh fruit like berries mixed in for flavor. These swaps keep the dip tasty and fun. Seasonal ingredients can elevate your dip. In fall, add spices like nutmeg or pumpkin pie spice. This adds warmth and makes it cozy. During summer, toss in fresh berries or peaches for a bright flavor. You can even mix in some mint for a refreshing touch. These seasonal twists can keep your dip lively throughout the year. To keep your Cream Cheese Apple Dip fresh, store it in an airtight container. This helps to keep out air and moisture. If you have leftovers, cover the container with plastic wrap or a lid. Ensure it seals well. You can also place a piece of parchment paper between the dip and the lid. This prevents the dip from sticking. When stored correctly, your dip can last in the fridge for about 3 to 5 days. Always check for any changes in smell or texture before eating. If the dip develops a sour smell or looks off, it’s best to throw it away. This dip is best enjoyed fresh, so try to eat it within a few days for the best taste. You don’t need to heat this dip. It’s best served cold or at room temperature. However, if you prefer it warm, gently heat it in the microwave. Use a low power setting and heat in short bursts. Stir between each burst to ensure even warming. Avoid overheating, as this may change its texture. Enjoy your Cream Cheese Apple Dip straight from the fridge or warmed up! For the full recipe, check the section above. Yes, you can make this dip ahead of time. Prepare the dip and store it in the fridge. Cover it tightly with plastic wrap. This keeps it fresh. You can make it up to two days in advance. Just remember to add the caramel on top before serving. This keeps the look nice and fresh. If you need a cream cheese substitute, use Greek yogurt or ricotta cheese. These options give a similar creamy texture. You can also try vegan cream cheese for a dairy-free choice. The flavor may change a bit, but the dip will still taste good. To make a vegan version, use vegan cream cheese. You can also blend soaked cashews with a bit of lemon juice. This creates a creamy base. Use maple syrup instead of powdered sugar for sweetness. With these swaps, you keep the dip delicious and vegan-friendly. This blog post covered all you need for a tasty Cream Cheese Apple Dip. We explored key ingredients, from apples to flavorful toppings. You learned step-by-step how to prepare, mix, and serve the dip. Tips helped achieve a creamy texture and unique flavors. We shared fun variations and easy storage methods too. Enjoy this dip at your next gathering. It’s a hit for all ages! Keep experimenting with flavors and toppings. Make it yours and have fun while doing it!

Looking for a quick, tasty treat? This Cream Cheese Apple Dip is both simple and delicious! With just a few ingredients, you can whip up a sweet and creamy dip …

Read more

Categories Desserts

Mini Pumpkin Pie Crescent Rolls Delightful Treats

July 30, 2025 by Chef Tavio
- Canned pumpkin puree - Refrigerated crescent roll dough - Brown sugar - Pumpkin pie spice - Vanilla extract - Egg wash - Granulated sugar for topping For this recipe, I use canned pumpkin puree. It’s smooth and rich, making it perfect for our filling. The refrigerated crescent roll dough is so easy to work with. It saves time and adds a flaky texture. Brown sugar gives a nice sweetness, while pumpkin pie spice adds warmth. Vanilla extract enhances all the flavors. You will also need an egg wash. This helps the rolls get that nice golden color when baked. Lastly, a sprinkle of granulated sugar on top adds a sweet crunch. Gather these ingredients before you start. Having everything ready makes the process smooth and fun. If you want to see the full recipe, look for the section with all the steps. Enjoy your cooking! 1. Preheat your oven to 375°F (190°C). This helps the rolls bake evenly. 2. Line a baking sheet with parchment paper. This keeps the rolls from sticking. 1. In a medium bowl, combine the pumpkin puree, brown sugar, pumpkin pie spice, and vanilla extract. 2. Mix well until the filling is smooth. This filling will be creamy and sweet. 1. Unroll the crescent roll dough on a clean surface. Make sure to keep it flat. 2. Carefully separate the dough into triangles. Each triangle will hold the filling. 3. Spoon about 1 tablespoon of pumpkin filling onto the wide end of each triangle. Don’t overfill, or it may spill out. 4. Starting from the wide edge, roll the dough towards the pointy end. Make sure the filling is inside. 5. Place the rolled crescents on the baking sheet, leaving space between them. They will puff up as they bake. To get that perfect golden brown color on your mini pumpkin pie crescent rolls, an egg wash is key. The beaten egg gives the rolls a nice shine and color as they bake. Just brush the egg on top before baking. Also, keep a close eye on the baking time. These rolls usually take 12 to 15 minutes. If you leave them in too long, they can burn. Check them around the 12-minute mark for that beautiful golden hue. Filling is fun, but too much can cause a mess. I recommend using about 1 tablespoon of filling per crescent roll. This amount keeps the filling inside while baking. If you add more, the filling may leak out during baking, and nobody wants that! Serving your mini pumpkin pie crescent rolls with whipped cream adds a lovely touch. A dollop on the side makes them feel extra special. For presentation, arrange the rolls on a pretty plate. Dust them lightly with powdered sugar for a sweet look. You can also add a few cinnamon sticks or small pumpkins around them. This makes your dessert feel festive and inviting! For the full recipe, check the provided link. {{image_4}} You can make these mini pumpkin pie crescent rolls even better. Try adding cream cheese to the filling. This makes the rolls creamy and rich. Just mix 4 oz of softened cream cheese with the pumpkin filling. It adds a smooth texture that you will love. Another fun option is to add chocolate chips. Simply mix in 1/2 cup of semi-sweet chocolate chips with the pumpkin filling. This gives a sweet twist that kids adore. You get the warm pumpkin flavor with a hint of chocolate. It’s a delightful surprise! If you need a gluten-free treat, don’t worry! You can use gluten-free crescent roll dough. Many brands offer this option. Just check the package for instructions. The taste stays delicious, and the texture remains fluffy. You won’t miss out on the fun flavors! Want to spice things up? You can add more spices to the filling. Try mixing in a pinch of cinnamon or nutmeg. These spices boost the warmth and richness of the pumpkin. You can also use ginger or allspice for a unique twist. Experiment with flavor to find your favorite mix! For the full recipe, check out the Mini Pumpkin Pie Crescent Rolls section. Enjoy making these delightful treats! To store your mini pumpkin pie crescent rolls, place them in an airtight container. This keeps them fresh and tasty. You can put them in the fridge for up to three days. If you want to enjoy them later, let them cool first. This step helps avoid sogginess. Wrap them tightly with plastic wrap for extra protection from air. Freezing these treats is easy! First, let them cool completely. Then, place the rolls in a single layer on a baking sheet. Freeze them for about two hours until they are firm. Once frozen, transfer them to a freezer bag. Be sure to remove as much air as possible. You can keep them in the freezer for up to three months. When you want to enjoy your crescent rolls again, preheat your oven to 350°F (175°C). Place the rolls on a baking sheet and cover them with foil. This keeps them moist. Heat for about 10-15 minutes, or until warm. You can also use a microwave if you are in a hurry. Just heat them for 15-30 seconds. However, the oven method gives the best results. Yes, you can prepare mini pumpkin pie crescent rolls ahead of time. Make the filling and fill the rolls. Then, cover them and store in the fridge for up to 24 hours before baking. This saves time and lets the flavors blend. Just remember to let them sit at room temperature for about 15 minutes before baking. This helps them bake evenly and puff up nicely. If you can't find canned pumpkin, try using butternut squash puree. It has a similar taste and texture. You can also use sweet potato puree for a fun twist. Just make sure it is smooth and free of lumps for the best filling. Both options will keep the flavor rich and delicious. Once baked, mini pumpkin pie crescent rolls stay fresh for about 2 days at room temperature. Store them in an airtight container to keep them soft. If you want them to last longer, put them in the fridge for up to a week. Reheat them in the oven or microwave before serving to enjoy their warm, gooey filling again. This blog post covered delicious mini pumpkin pie crescent rolls. We explored the simple ingredients, step-by-step instructions, and helpful tips. You learned how to make a tasty filling and assemble the rolls perfectly. Remember to use an egg wash for color and enjoy them warm. You can also try different fillings or gluten-free dough. Store any leftovers well or freeze them for later. With these tips, baking can be fun and easy. Enjoy these treats with friends and family!

Get ready to impress your friends with a delicious treat that screams fall! Mini Pumpkin Pie Crescent Rolls are simple to make, using just a few ingredients like canned pumpkin …

Read more

Categories Desserts

Apple Chutney Recipe Flavorful and Easy to Make

July 30, 2025 by Chef Tavio
To make a tasty apple chutney, you will need the following: - 4 medium apples, peeled, cored, and diced into small chunks - 1 cup onion, finely chopped - 1 cup brown sugar, packed - 1/2 cup apple cider vinegar - 1 teaspoon freshly grated ginger - 1 teaspoon ground cinnamon - 1/2 teaspoon ground allspice - 1/2 teaspoon ground cloves - 1/2 teaspoon mustard seeds - Salt, to taste - 1 cup dried cranberries - 1 tablespoon olive oil You can also add optional ingredients for extra flavor, like chopped nuts or a pinch of chili flakes. These can add a nice crunch or a bit of heat, making your chutney even more delightful. This full recipe gives you all the details to create a flavorful dish you’ll love. Start by heating the olive oil in a large saucepan over medium heat. Wait until it shimmers, then add your finely chopped onions. Sauté the onions for about five minutes. Stir them often to keep them from browning. The goal is to make them soft and clear. This step is key for building flavor. If the heat is too high, the onions may burn, which can ruin the taste of your chutney. Once the onions are ready, it’s time to add the diced apples. Stir them in well. Next, add the brown sugar, apple cider vinegar, freshly grated ginger, ground cinnamon, ground allspice, ground cloves, and mustard seeds. Mix everything together so the flavors blend. Increase the heat to bring the mixture to a gentle boil. When it bubbles, reduce the heat to low. You will simmer it uncovered for 30 to 40 minutes. Stir it every so often. The apples will soften, and the chutney will thicken. Look for the apples to break down and the mixture to coat the back of a spoon. About ten minutes before you finish cooking, add the dried cranberries to the pan. Stir them in well. This timing is important. Adding them too soon can make them mushy. When you add them later, they stay chewy and enhance the flavor and texture. The chutney will become even more delicious with their sweet tang. To make your apple chutney truly shine, you need to balance sweetness and acidity. I suggest starting with the brown sugar. You want it sweet but not overly so. If the chutney feels too sweet, add a splash of apple cider vinegar. This will add a nice tang. Spices can make a big difference too. Ground cinnamon is a must. It gives warmth. I love adding ground allspice and cloves for depth. If you want more heat, try mustard seeds or a pinch of cayenne pepper. Each spice brings its own flair. You need a few essential tools to make this chutney. A large saucepan is key for cooking. A wooden spoon helps you stir and mix well. You also need a sharp knife and cutting board for chopping. When it comes to storage, use clean glass jars with tight lids. They keep the chutney fresh. You can also use freezer-safe containers if you want to freeze some. Make sure to leave space at the top, as chutney expands when frozen. {{image_4}} You can change up your apple chutney with different fruits or spices. Try adding pears or peaches instead of apples. You can mix in some dried apricots for a sweet twist. If you want more heat, add a few diced jalapeños or a pinch of cayenne pepper. For a sweeter chutney, use extra brown sugar or mix in honey. This lets you make the chutney fit your taste perfectly. Making this chutney gluten-free is easy. All the ingredients are naturally gluten-free. Just check any spice blends you use to ensure they are safe. To make it vegan, simply replace the brown sugar with coconut sugar or maple syrup. This keeps the chutney tasting great. If you're watching your sugar intake, you can reduce the amount of brown sugar. You might want to add extra apples or cranberries to keep it flavorful. To keep your apple chutney fresh, use glass or plastic jars. Glass jars work best as they do not absorb flavors. Make sure the containers are clean and dry before filling them. Store the chutney in the fridge for up to two weeks. If you can the chutney, it can last for a year or more when sealed properly. Freezing apple chutney is easy. First, let the chutney cool completely. Next, pour it into freezer-safe bags or containers. Make sure to leave some space for expansion. Seal the bags tight and label them with the date. When you want to use it, take the chutney out of the freezer. Thaw it in the fridge overnight for best results. You can also thaw it in a bowl of cold water if you need it sooner. After thawing, give it a good stir before using. Enjoy your tasty chutney with your favorite dishes! Apple chutney pairs well with many dishes. It works great with: - Grilled meats like chicken or pork - Cheese platters, especially sharp cheeses - Sandwiches, adding a tasty zing - Savory pastries for extra flavor - Curries, enhancing the spice profile This chutney adds a sweet and tangy kick to your meals. Homemade apple chutney can last quite a while. When stored in the fridge, it stays fresh for about 2 to 3 weeks. If you can it properly, it can last for up to a year when kept in a cool, dark place. Be sure to check for any signs of spoilage before using. Yes, making apple chutney ahead of time is a great idea. You can prepare it up to a week in advance. Store it in airtight jars in the fridge. This allows the flavors to meld together, making it even tastier. Just be sure to let it cool completely before sealing. Apple chutney and apple sauce are not the same. Chutney is thicker, with chunks of fruit. It has spices and vinegar, giving it a sweet, tangy, and spicy flavor. Apple sauce is smooth and sweet, often eaten as a dessert or snack. Use chutney to add flavor to savory dishes, while apple sauce is best for sweet treats. This blog post covered how to make apple chutney from scratch. I shared detailed ingredient lists and step-by-step cooking instructions. You learned how to adjust flavors, use the right tools, and explore variations to suit your taste. Proper storage tips ensure your chutney stays fresh. Apple chutney is a fun way to add flavor to meals. Try making it your own with different fruits or spices. Enjoy your tasty creation!

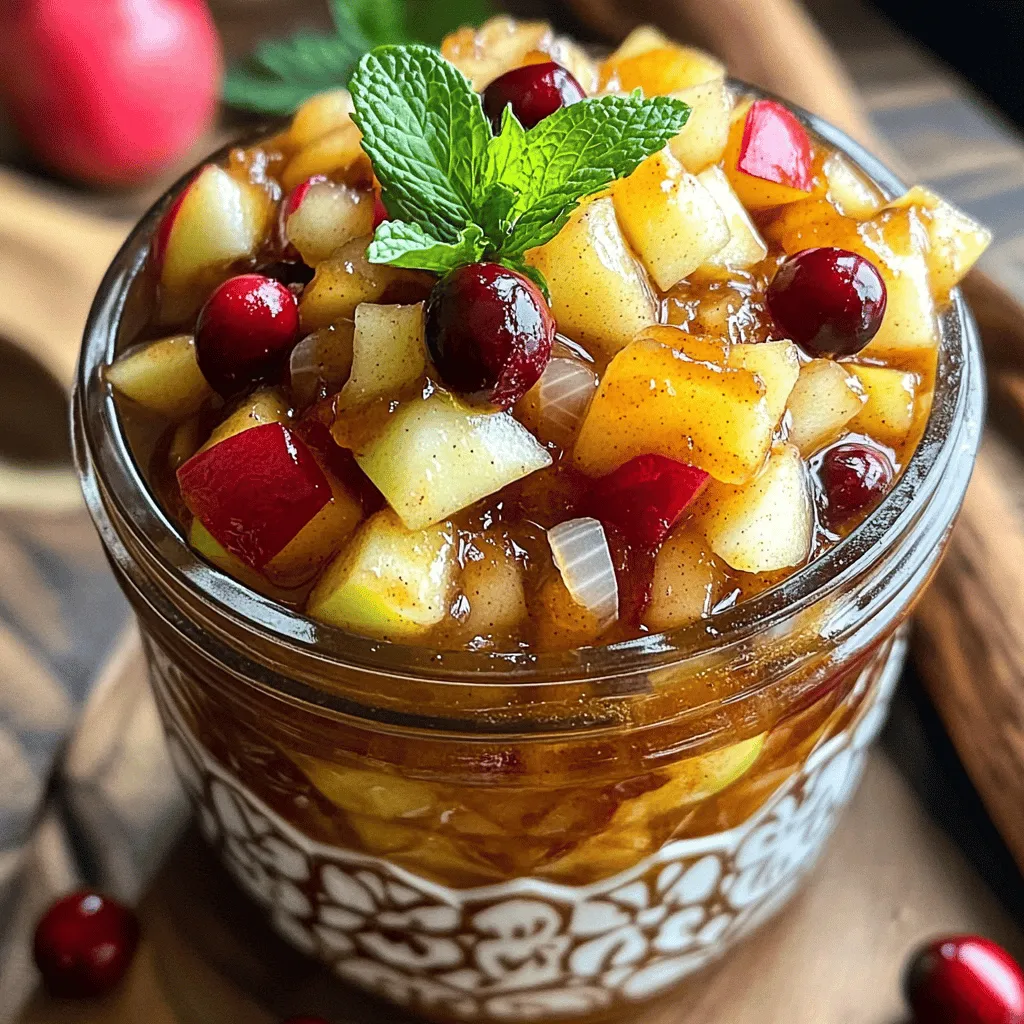
Are you ready to whip up something delicious? This Apple Chutney Recipe is both flavorful and easy to make. You’ll learn how to blend sweet apples with spices and tang. …

Read more

Categories Appetizers

Moist Chocolate Pumpkin Bread Easy and Delicious Recipe

July 30, 2025 by Chef Tavio
- 1 ½ cups canned pumpkin puree - 1 cup granulated sugar - ½ cup packed brown sugar - ½ cup vegetable oil - 2 large eggs - 1 teaspoon vanilla extract - 2 cups all-purpose flour - ½ cup unsweetened cocoa powder - 1 teaspoon baking soda - ½ teaspoon baking powder - 1 teaspoon salt - 1 teaspoon ground cinnamon - ½ teaspoon ground nutmeg - ½ cup semi-sweet or dark chocolate chips Each ingredient in this recipe plays a key role. The pumpkin puree gives the bread its moist texture and subtle sweetness. The sugars, both granulated and brown, add depth of flavor. The vegetable oil keeps the bread tender. Eggs help bind everything together while adding richness. Flour is the base, and cocoa powder gives it that rich chocolate taste. Baking soda and baking powder help it rise, ensuring a soft crumb. Salt enhances all the flavors, while cinnamon and nutmeg add warmth and spice. Finally, the chocolate chips provide delightful bursts of chocolate in every bite. - Gluten-free flour alternative - Dairy-free chocolate chips - Nuts or seeds for added texture You can easily adapt this recipe. If you want a gluten-free option, use a gluten-free flour blend. Substitute dairy-free chocolate chips for a vegan twist. Adding nuts or seeds gives the bread extra crunch and flavor. You can make this recipe truly your own! For the full recipe, check out the details. - Preheat your oven to 350°F (175°C). - Grease a 9x5-inch loaf pan or line it with parchment paper. - In a large bowl, mix the canned pumpkin puree, granulated sugar, brown sugar, vegetable oil, eggs, and vanilla extract. Whisk until smooth. - In another bowl, sift together flour, cocoa powder, baking soda, baking powder, salt, cinnamon, and nutmeg. - Slowly add the dry mix to the wet mix. Stir gently to combine. - It is okay to have some lumps; don’t overmix! - Carefully fold in the chocolate chips. You can save a few for the top. - Pour the batter into the loaf pan, smoothing the top. - If you saved chocolate chips, sprinkle them on top. - Bake for 60-70 minutes. Check doneness with a toothpick; it should come out clean. - After baking, cool in the pan for 10 minutes. Then, move it to a wire rack to cool completely. Follow these steps, and you'll have a warm, moist chocolate pumpkin bread. For the full recipe, refer to the earlier section. To make this moist chocolate pumpkin bread, keep a few tips in mind. First, avoid overmixing the batter. This keeps the bread light and fluffy. Stir the batter until just combined. It is okay if some lumps remain. Second, measure your flour accurately. Too much flour can make the bread dry. Use a spoon to fluff the flour. Then, scoop it into your measuring cup and level it off with a knife. Third, use room temperature ingredients. This helps them mix well, creating a smooth batter. Dusting the bread with powdered sugar can add a lovely touch. It gives a nice sweetness to each slice. You can also pair the bread with whipped cream or ice cream for a rich dessert. The creamy texture complements the chocolate and pumpkin flavors. For drinks, enjoy the bread with hot coffee or tea. A glass of cold milk works well too. These options enhance the flavors and make your meal special. For more ideas, check out the Full Recipe to explore different serving styles. {{image_4}} You can make a gluten-free version of this bread. I recommend using a blend of gluten-free flours. Look for blends that have brown rice flour, tapioca flour, and potato starch. These blends keep the bread moist and light. When using gluten-free flour, you may need to add more moisture. Try adding an extra tablespoon of vegetable oil or an extra egg. This helps the bread stay tender and not dry. If you want a vegan version, you can replace the eggs and dairy. Use 1/4 cup of applesauce for each egg. This keeps the bread moist and adds a nice flavor. For the milk, you can use almond milk or oat milk instead of dairy milk. To sweeten the bread, consider using maple syrup or agave nectar. These sweeteners add a unique taste and keep it healthy. Just reduce the granulated sugar by 1/4 cup when using these. For the full recipe, be sure to check the main section. Enjoy baking! To keep your moist chocolate pumpkin bread fresh, wrap it tightly. You can use plastic wrap or aluminum foil. This helps keep moisture in and prevents it from drying out. For added protection, store the wrapped bread in an airtight container. This shields it from air and light, which can affect freshness. A glass or plastic container works well. If you want to freeze the bread, slice it first. This makes it easier to enjoy later. Wrap each slice in plastic wrap, then put them in a freezer-safe bag. Be sure to remove as much air as possible before sealing. When you want to eat a slice, just take it out. To reheat, place the slice in a toaster or microwave. If using a microwave, heat it in short bursts. This keeps the bread moist. Avoid overheating, as it can make the bread dry. Enjoy your warm, tasty treat! For the full recipe, check the detailed instructions above. - How long does moist chocolate pumpkin bread stay fresh? This bread stays fresh for about 3 to 5 days at room temperature. Keep it in an airtight container. If you want it to last longer, refrigerate it for up to a week. - Can I use fresh pumpkin instead of canned? Yes, you can use fresh pumpkin. Cook and puree it first. Make sure it is smooth and not too watery. This can change the texture, so adjust the recipe as needed. - What can I substitute for eggs in a vegan recipe? You can use flaxseed meal or chia seeds. Mix 1 tablespoon of seeds with 2.5 tablespoons of water. Let it sit for 5 to 10 minutes until it thickens. This works well to bind the ingredients. - Why is my bread dense? A dense bread often comes from overmixing. When you mix too much, you develop gluten. This can make the bread heavy. Also, check if you measured flour correctly. Too much flour can cause density. - Can I add other flavors or spices to enhance the recipe? Absolutely! You can add vanilla, ginger, or even a pinch of cayenne for warmth. Experiment with spices like allspice or cloves for a unique twist. - How do I know when the bread is fully baked? To check, insert a toothpick into the center. It should come out clean or with a few moist crumbs. If the toothpick has wet batter, it needs more time in the oven. In this blog post, I shared a delicious chocolate pumpkin bread recipe. We covered essential ingredients and optional variations to suit your taste. I provided step-by-step instructions for easy baking, along with tips for perfect results. You learned about storage and freezing methods to keep your bread fresh. Enjoy making this treat! It's a simple way to combine flavors and impress your family. Whether you stick to the classic or try variations, your delicious creation awaits. Happy baking!

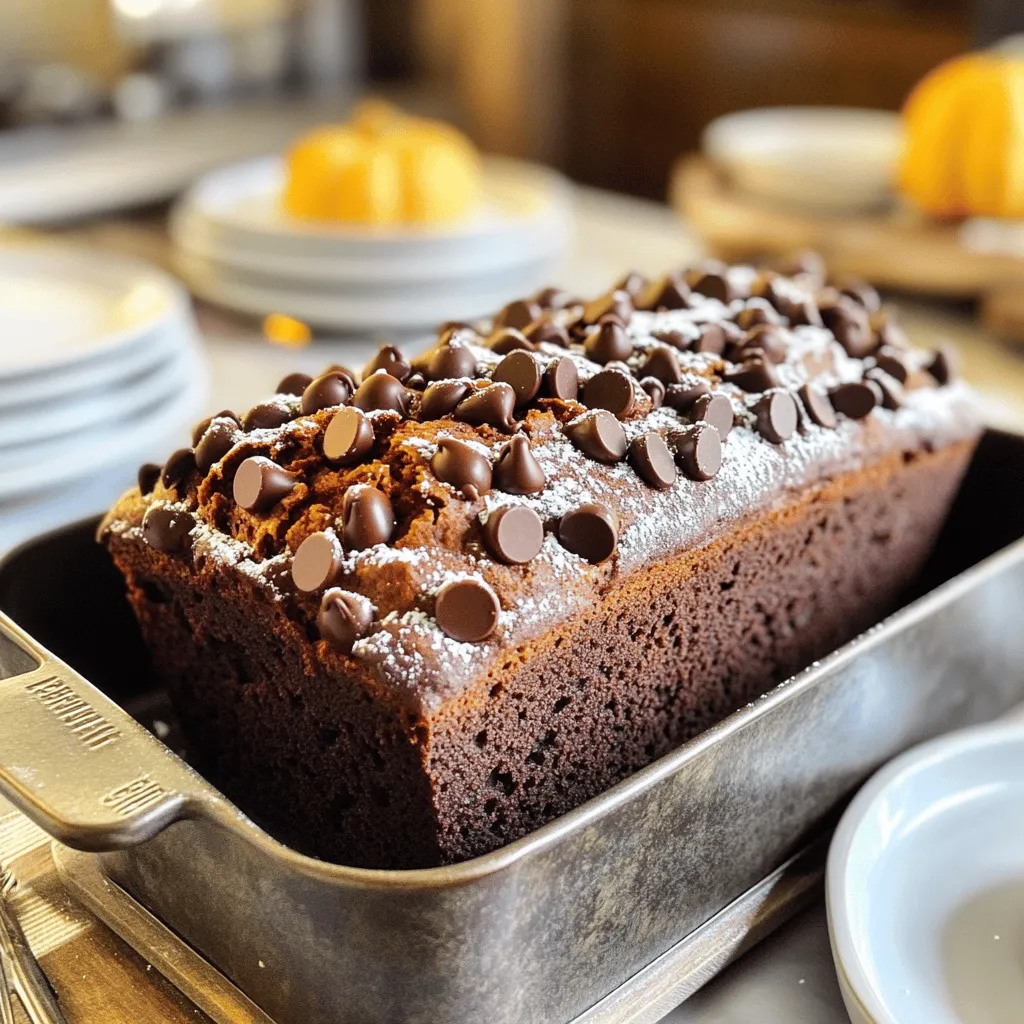
Are you ready to enjoy a treat that combines chocolate and pumpkin in the most delicious way? This moist chocolate pumpkin bread is easy to make and bursting with flavor. …

Read more

Categories Desserts

Easy Apple Casserole Simple and Delicious Recipe

July 30, 2025 by Chef Tavio
- 4 medium apples (Granny Smith or Honeycrisp recommended) - 1 cup rolled oats - 1 cup packed brown sugar - ½ cup walnuts or pecans (optional) - ½ cup unsalted butter - 1 cup whole milk - 1 teaspoon pure vanilla extract - 1 teaspoon ground cinnamon - ½ teaspoon ground nutmeg The ingredients here make your apple casserole simple and tasty. You want to start with fresh apples. Granny Smith apples give a nice tartness. Honeycrisp apples are sweet and crisp. Either choice works well. Next, rolled oats add texture and heartiness. Brown sugar brings a lovely sweetness. If you like nuts, add walnuts or pecans for a crunchy twist. You can skip them if you prefer a smoother dish. For the baking essentials, use unsalted butter to control the salt level. Whole milk adds creaminess, while pure vanilla extract gives a warm flavor. Finally, cinnamon and nutmeg spice up your dish. They create a cozy aroma and taste. Together, these ingredients create a delightful apple casserole that anyone can enjoy. For the full recipe, check out the details below. - First, preheat your oven to 350°F (175°C). - Lightly grease a 9x13-inch baking dish with butter or cooking spray. - Next, peel, core, and slice the apples. I like using Granny Smith or Honeycrisp for a nice tart flavor. - In a large bowl, combine the sliced apples, rolled oats, brown sugar, cinnamon, nutmeg, and nuts if you choose. - Mix it well, so the apples are coated nicely. - In another bowl, whisk together the melted butter, milk, and vanilla extract until smooth. - Pour the wet mixture over the dry ingredients, stirring gently. - Transfer everything to the greased baking dish and spread it evenly. - Bake in the preheated oven for 40-45 minutes. Look for soft apples and a golden top. - Once done, take it out and let it cool for about 10 minutes before serving. For the full recipe, check out the details above and enjoy this delicious dish! Choose tart apples for the best flavor. Tart apples balance the sweetness of the dish. I like using Granny Smith or Honeycrisp apples. Both add a nice zing to the casserole. Their firm texture holds up well during baking, making them ideal for this recipe. To know when your casserole is done, check the apples. They should be soft but not mushy. A golden brown top is a sign of perfection. For a crispy top layer, sprinkle a few extra oats before baking. You can also broil the casserole for a minute at the end. Just keep an eye on it to avoid burning. You can add more depth to your casserole with spices. A pinch of ginger or allspice can elevate the taste. For extra crunch, consider adding nuts like walnuts or pecans. If you want a sweet finish, top it with whipped cream or vanilla ice cream. You can also drizzle caramel sauce on top for a treat. For more tips, check the Full Recipe. {{image_4}} To make this easy apple casserole gluten-free, swap rolled oats with gluten-free oats. This simple change lets everyone enjoy the dish without worry. Just make sure the oats are certified gluten-free. You’ll still get that great texture and flavor. For a vegan version, you can replace butter and milk with plant-based options. Use coconut oil or vegan butter instead of regular butter. Almond milk, soy milk, or oat milk work great in place of whole milk. This way, you can keep the dish creamy and delicious without any animal products. You can add other fruits to the casserole for extra flavor. Pears, peaches, or berries can pair well with apples. Just chop them up and mix them in with the apples. This adds a fun twist and diverse tastes to your dish. Feel free to experiment with what you have on hand! For the full recipe, check out the complete instructions! To store leftover casserole, let it cool first. Then, place it in an airtight container. This helps keep it fresh. I recommend using glass containers. They seal well and are easy to clean. You can also use plastic containers with tight lids. Make sure to eat it within three to five days for the best taste. If you want to freeze it, let it cool completely. Then, cut it into portions. Wrap each piece in plastic wrap. This keeps it safe from freezer burn. After wrapping, put the pieces in a freezer bag. Be sure to label the bag with the date. To reheat, thaw it in the fridge overnight. Then, bake at 350°F (175°C) until warm. This keeps the flavor and texture nice. In the fridge, the casserole lasts about three to five days. In the freezer, it can last for two to three months. After that, the taste may fade. Enjoy your delicious casserole while it’s fresh! Yes, you can use different apple types. Granny Smith apples bring a nice tartness. Honeycrisp apples are sweet and crisp. Other options include Fuji or Braeburn. Each variety adds its own flavor, so choose what you like best. Mixing apples can also create a more complex taste. Don't be afraid to experiment! You can tell the casserole is done by checking the apples. They should feel soft when pierced with a fork. The top should be golden brown and slightly crisp. A good rule is to bake for 40-45 minutes at 350°F (175°C). Your kitchen will smell amazing when it's ready! You can prepare this dish ahead of time. Just follow the steps up to mixing the ingredients. Cover the dish and store it in the fridge. When you're ready, bake it for 40-45 minutes. If you want to reheat leftovers, do so at 350°F until warm. Enjoy the ease of making this ahead! For the full recipe, check out the details provided earlier. This article covered a simple apple casserole recipe. We discussed the main ingredients, baking steps, and helpful tips. You learned how to choose the best apples and achieve the right texture. I also shared variations and storage tips to keep it fresh. Remember, cooking should be fun and easy. Enjoy trying this recipe with your favorite apples! Happy baking!

Looking for an easy and tasty dessert? This Easy Apple Casserole recipe is perfect for you! With just a few simple ingredients, you can create a warm, comforting dish that …

Read more

Categories Desserts

Slow Cooker Burrito Meat Rich and Flavorful Dish

July 30, 2025 by Chef Tavio
- 2 lbs beef chuck roast - 1 can (15 oz.) black beans - 1 can (15 oz.) diced tomatoes with green chilies - Additional ingredients: onion, garlic, spices - Optional toppings: cheese, sour cream, avocado I love using beef chuck roast for this dish. It becomes tender and juicy when slow-cooked. You can find this cut at most grocery stores. The black beans add protein and fiber. They also give a nice texture to the burrito meat. Diced tomatoes with green chilies bring a lovely flavor and some heat. When it comes to spices, I like to keep it simple but bold. Onion and garlic form the base for a savory taste. The chili powder, cumin, smoked paprika, and oregano add depth. These spices work together to create that classic burrito flavor. Don't forget about the toppings! Cheese, sour cream, and avocado make each bite creamy and delicious. You can mix and match your toppings to suit your taste. If you want to try this recipe, check out the Full Recipe for all the details you need! 1. Start by cutting the beef chuck roast into bite-sized chunks. Make sure they are even for good cooking. 2. Heat the olive oil in a large skillet over medium-high heat. Once hot, add the beef chunks in batches. Sear the beef for about 4-5 minutes, turning them until they are brown on all sides. Transfer the beef to your slow cooker. 3. In the same skillet, add the finely diced onion. Sauté the onion for about 3 minutes until it turns tender and translucent. Then add the minced garlic. Cook for one more minute until you smell its great aroma. 4. Next, sprinkle in the chili powder, ground cumin, smoked paprika, and dried oregano. Stir the mix constantly for 1-2 minutes to toast the spices. This step helps release their rich flavors. 5. Pour the seasoned onion and spice mix over the seared beef in the slow cooker. Make sure it spreads evenly. 6. Now, add the drained black beans, diced tomatoes (with their juice), and beef broth to the slow cooker. Gently stir everything to combine. 7. Season with salt and freshly ground black pepper to taste. Cover the slow cooker and set it to cook on low for 8 hours or on high for 4 hours. This slow cooking melds the flavors beautifully. 8. When the cooking time is up, remove the lid. Use two forks to shred the beef directly in the slow cooker. Mix it well with the juices for added flavor. 9. To serve, spoon the shredded burrito filling into warm tortillas. Let everyone top their burritos how they like, using options like cheese, sour cream, diced avocado, and fresh cilantro. For the complete experience, don't forget to check the Full Recipe for additional tips and serving suggestions. - Importance of searing: Searing your beef is key for great taste. It creates a rich crust that locks in juices. Start by heating olive oil in a skillet over medium-high heat. Add the beef in batches, letting it brown for 4-5 minutes. This step brings out deep flavors. - Choosing the right spices: The spices set the tone for your burrito meat. I use chili powder, cumin, smoked paprika, and oregano. They add warmth and depth. Toast these spices in the skillet with the onions and garlic to enhance their flavors. This small step makes a big difference. - Customizing burritos with toppings: Burritos are fun because you can make them your own. Set out toppings like shredded cheese, sour cream, and diced avocado. Fresh cilantro adds a nice touch too. Let everyone build their burrito just how they like it. - Presentation tips for serving: Presentation matters. Serve the burrito filling in a big bowl surrounded by warm tortillas. This invites guests to take part in the fun. Garnish with cilantro for a pop of color. A well-arranged table always impresses. - Creating a vegetarian version: You can make a tasty vegetarian burrito. Swap the beef for black beans or lentils. Use vegetable broth instead of beef broth. This keeps the dish hearty and full of flavor. - Low-sodium alternatives: For a lower-sodium option, choose low-sodium broth. Rinse canned beans well to cut down on salt. You can also reduce the amount of added salt. This way, you enjoy delicious burritos without the extra sodium. {{image_4}} You can change the protein in slow cooker burrito meat. Try chicken or pork for a twist. Chicken cooks quickly and stays tender. Use boneless chicken thighs for the best flavor. Pork adds a sweet touch. Use pork shoulder for juicy meat. For plant-based options, use lentils or jackfruit. Lentils cook well and soak up flavors. Jackfruit shreds like meat and has a nice texture. Both options make tasty burrito fillings. You can make your burrito meat bolder with extra spices. Add more chili powder for heat. Try jalapeños for a kick, or use hot sauce. Adjust the spice level to suit your taste. Incorporating fresh herbs like cilantro or parsley brightens the dish. Add them at the end for freshness. You can also use lime juice for a zesty touch. These additions bring new life to your meal. Switch up how you serve your slow cooker burrito meat. Burrito bowls are a fun option. Layer rice, beans, and meat in a bowl. Top with cheese, salsa, and guacamole. You can also try taco-style serving. Use crunchy tortillas or tortilla chips. This gives texture and fun to your meal. Let everyone build their own tacos for a casual vibe. Check out the Full Recipe for more ideas! To keep your Slow Cooker Burrito Meat fresh, cool it first. Store it in the fridge within two hours. Use airtight containers for best results. Glass or plastic containers work well. Label them with the date, so you know how long they last. You can also freeze your burrito filling. To freeze, let it cool completely. Then, place it in freezer-safe bags. Remove as much air as possible. Write the date on the bag for easy tracking. When ready to eat, thaw it in the fridge overnight. You can reheat it on the stove or in the microwave. For food safety, consume your burrito meat within three to four days when refrigerated. If frozen, it lasts about three months. Look for signs of spoilage. If it smells off or has a strange color, do not eat it. Always prioritize your health and safety. You can store Slow Cooker Burrito Meat in the fridge for up to four days. Make sure to keep it in an airtight container to maintain its flavor and freshness. If you want to keep it longer, freezing is your best option. Yes, you can cook this on the stovetop. First, brown the beef in a large pot. Then, add onions, garlic, and spices, cooking until fragrant. Once that's done, add the beans, tomatoes, and broth. Cover and let it simmer on low heat for about one hour, stirring occasionally. You can serve this burrito meat with a variety of side dishes. Here are a few ideas: - Spanish rice - Refried beans - Fresh salad - Tortilla chips with salsa - Guacamole These sides complement the rich flavors and add more variety to your meal. For more ideas, check the Full Recipe. This blog post covered how to make tasty Slow Cooker Burrito Meat. We looked at ingredients like beef, beans, and spices. I shared step-by-step methods for prep and cooking. You now have tips for flavor, variations, and storage. In closing, this recipe is both easy and customizable. Enjoy your delicious burritos and feel free to get creative with the ingredients!

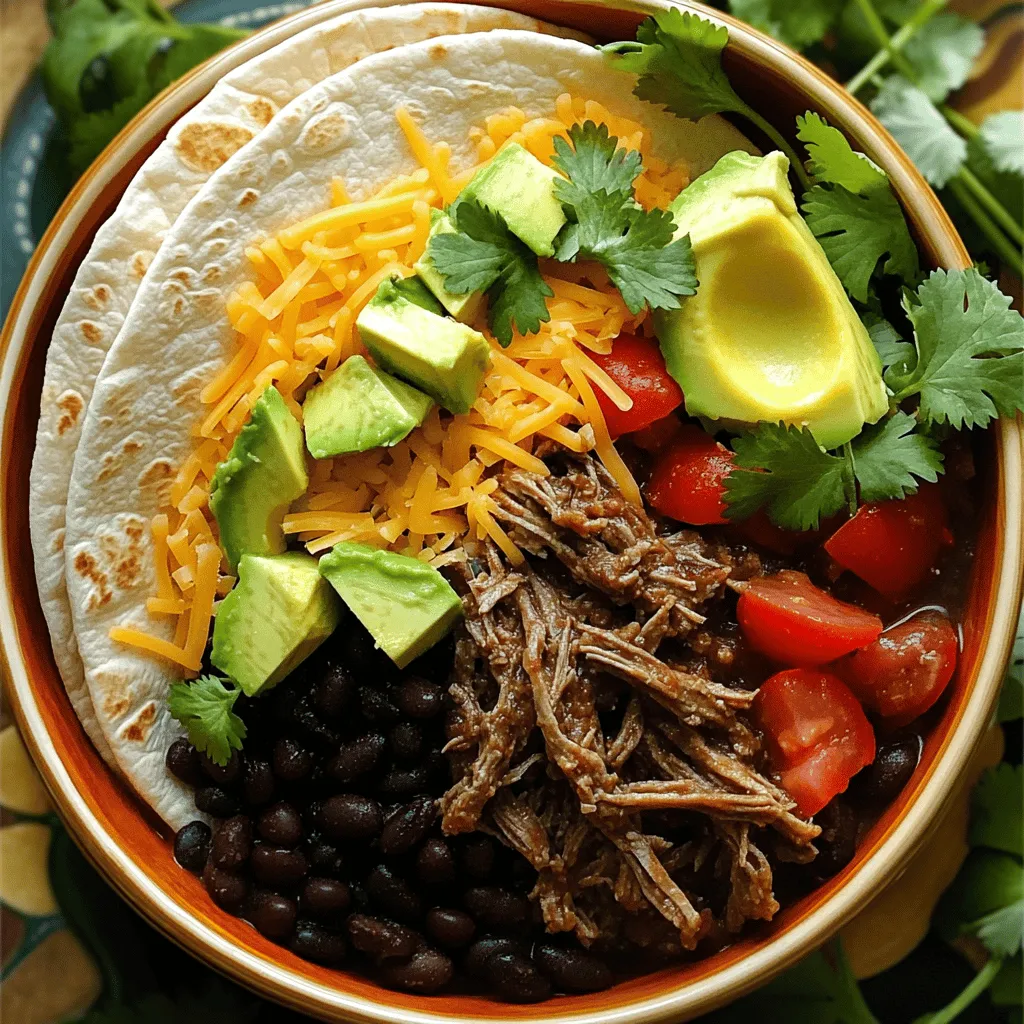
Are you ready to dive into a bowl of rich and flavorful Slow Cooker Burrito Meat? I’ll guide you through a simple recipe that elevates your burritos with juicy beef, …

Read more

Categories Dinner

Spaghetti Lunchbox Idea Fresh and Tasty Meal Prep

July 30, 2025 by Chef Tavio
- 8 oz (225g) spaghetti - 1 cup cherry tomatoes, halved - 1 small zucchini, spiralized or finely chopped - 1 cup fresh spinach leaves - ½ cup mozzarella balls, halved - ¼ cup black olives, sliced - 2 tablespoons extra virgin olive oil - 1 tablespoon balsamic vinegar - 1 teaspoon Italian seasoning blend - Salt and black pepper, to taste - Fresh basil leaves, for garnish To create a tasty Spaghetti Lunchbox Delight, gather these simple ingredients. The spaghetti acts as the base, providing a filling and hearty texture. Fresh cherry tomatoes add a burst of sweetness. The zucchini brings crunch, while spinach adds nutrients. Mozzarella balls give creaminess, and black olives offer a salty kick. For the dressing, mix olive oil and balsamic vinegar for a light, tangy flavor. Italian seasoning blends perfectly with the fresh ingredients. Adjust salt and pepper to enhance taste. This meal is colorful and fun. As you pack it, layer the ingredients for a lovely look. Each bite offers a tasty experience, making it great for lunch. For the complete cooking steps, check the Full Recipe. - Bring salted water to a rolling boil. - Cook spaghetti until al dente, about 8-10 minutes. - Drain and rinse with cold water. To cook your spaghetti, start by filling a large pot with water. Add a good amount of salt; this helps flavor the pasta. Once the water bubbles, add the spaghetti. Stir it gently to prevent clumping. After 8-10 minutes, taste a strand. It should be firm but not hard. Drain the spaghetti in a colander and rinse it under cold water. This stops the cooking process and keeps it from getting mushy. - Whisk together olive oil, balsamic vinegar, Italian seasoning, salt, and pepper. - Taste and adjust seasoning if needed. For the dressing, grab a small bowl. Pour in the extra virgin olive oil and balsamic vinegar. Add the Italian seasoning blend, salt, and pepper. Use a whisk to mix them well. This step is key; a good dressing makes the meal pop. After mixing, taste it. If it needs more salt or vinegar, add a little more. Adjusting flavors helps make the dish perfect for you. - Toss together all main ingredients in a mixing bowl. - Pour dressing over and mix gently. - Divide into lunchboxes and garnish. In a large mixing bowl, combine the cooled spaghetti, halved cherry tomatoes, chopped zucchini, fresh spinach, mozzarella balls, and black olives. Toss them gently to mix. Next, pour the dressing over the salad. Mix everything again, but be careful. You don’t want to break the mozzarella balls. Finally, pack the salad into lunchboxes. Top each with fresh basil leaves for a nice touch. Your Spaghetti Lunchbox Delight is ready to go! For the complete recipe, check out the Full Recipe section. Rinsing pasta is a key step. It cools the pasta and stops the cooking. This keeps the spaghetti firm and prevents it from getting mushy. After cooking your spaghetti, drain it well. Then rinse it under cold water. This simple step makes a big difference in texture. To maintain firmness, cook the spaghetti until al dente. This means it should be slightly firm when you bite it. Follow the package instructions closely. Usually, this takes about 8 to 10 minutes. Checking it a minute or two early helps avoid overcooking. Choosing the right lunchbox is vital. Look for containers with tight lids to avoid spills. Divided lunchboxes also work well to keep items separate. You can pack the spaghetti on one side and fresh veggies on the other. This keeps everything looking fresh and tasty. Make-ahead tips help your meal shine. Prepare the spaghetti and dressing a day before. Let the flavors blend overnight. This allows the dressing to soak into the pasta and veggies. It makes every bite taste better. Serve your spaghetti cold or at room temperature. Cold spaghetti is refreshing on warm days. It is a great way to enjoy a meal on the go. If you prefer it warm, you can heat it gently. Just be careful not to overdo it, as you want to keep the pasta's texture. Pair your spaghetti with tasty sides. Fresh fruit, crunchy carrots, or a simple salad work well. These add color and nutrients to your meal. You can also include a small dessert. A cookie or a piece of dark chocolate makes a nice treat. {{image_4}} You can switch up the vegetables in your spaghetti lunchbox. Try using bell peppers or cucumbers. These veggies add crunch and color. You can also use different cheese options. Feta or goat cheese can give a nice twist. They add a tangy flavor that pairs well with the pasta. Want to boost the taste? Add some protein. Chicken, tuna, or chickpeas work great. They make the meal more filling. You can also play with different dressings or sauces. A creamy ranch or zesty Italian can change the whole dish. This way, you can enjoy a new flavor every time. You can also transform your spaghetti lunchbox into a wrap or sandwich. Just use a tortilla or your favorite bread. Spread the filling and roll it up for easy eating. Another fun idea is to make a spaghetti frittata. This dish works for breakfast or brunch. Just mix the spaghetti with eggs and cook it until set. It’s a tasty way to enjoy leftovers! To store your spaghetti lunchbox leftovers, use airtight containers. These help keep your food fresh. Make sure the pasta is cool before you pack it away. This prevents excess moisture. I recommend glass or BPA-free plastic containers. They are safe and easy to clean. Your spaghetti salad can last up to two days in the fridge. Always check for signs of spoilage. Look for changes in smell or color. If it smells sour or looks slimy, it’s best to toss it. Trust your senses; they will guide you well. If you want to reheat your spaghetti, do it gently. Use a microwave or a stovetop. Add a splash of water to keep it moist. Heat it slowly; this helps preserve flavor. If you prefer a cold dish, enjoy it straight from the fridge. A quick toss with fresh basil can refresh its taste. For the full recipe, check back and enjoy! Yes, you can use gluten-free spaghetti! Many brands offer great options. Look for brands like Barilla, Banza, or Tinkyada. They cook well and taste good. Just follow the package instructions for the best results. You’ll enjoy the same great flavors without gluten. To make this recipe vegan, swap the mozzarella for dairy-free cheese. Brands like Daiya or Violife work well. You can also add nuts or seeds for extra texture. Use olive oil and balsamic vinegar as your dressing, which is already dairy-free. Enjoy a fresh and tasty meal! Spaghetti Lunchbox Delight pairs well with a simple green salad. A side of fruit is also great for a sweet touch. Try adding carrot sticks or cucumber slices for crunch. You can even serve iced tea or sparkling water for a refreshing drink. Yes, you can freeze this spaghetti dish! To freeze, pack it in airtight containers. Leave some space for expansion. It can stay good for up to three months. To reheat, let it thaw in the fridge overnight. Then, warm gently in a pan or microwave. Enjoy your meal anytime! This blog post explored a delicious and easy spaghetti salad recipe. You learned about the main ingredients, simple steps to prepare, and helpful tips for meal prep. We also shared variations and storage info to keep your dish fresh. Remember, making this recipe is fun, and you can customize it. Enjoy your tasty, healthy lunchbox delight anytime you want!

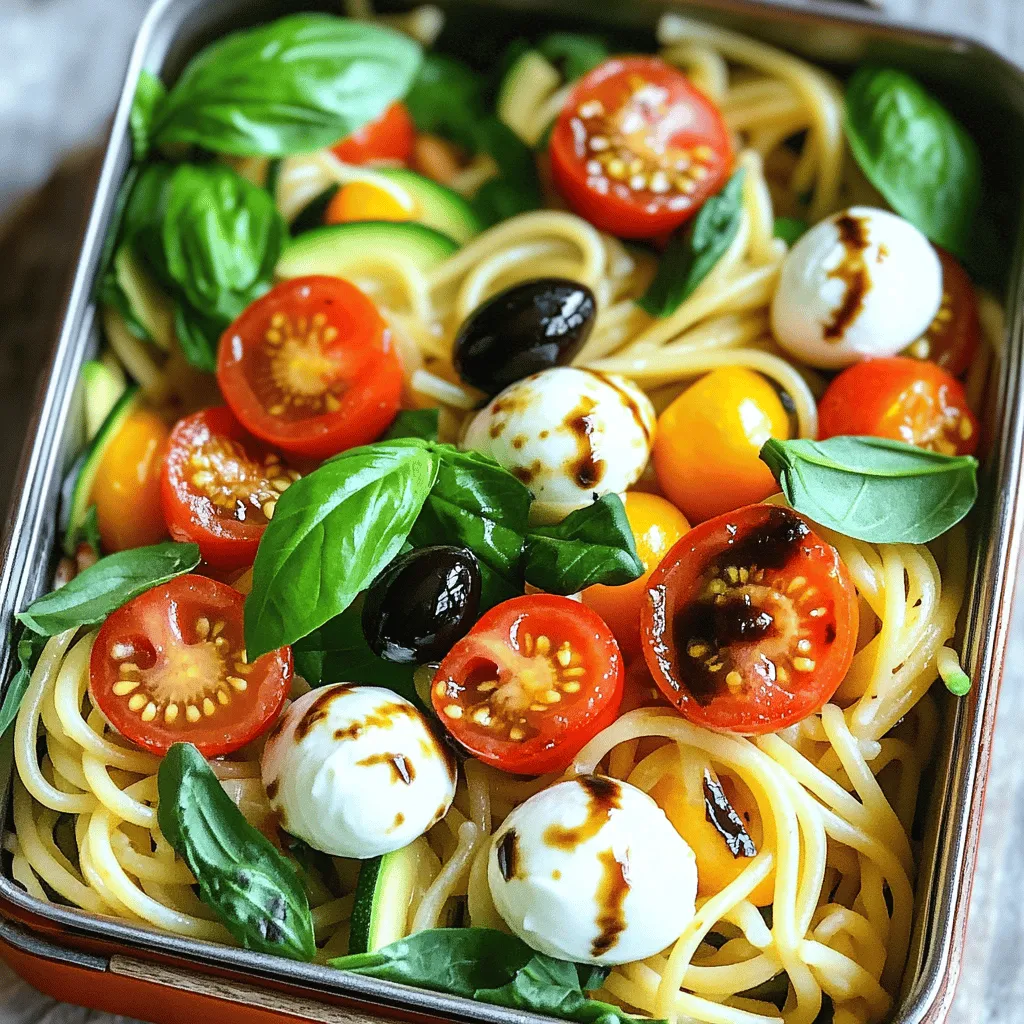
Looking for a fresh, tasty meal prep idea? Let me introduce you to my Spaghetti Lunchbox! It’s packed with vibrant veggies and delicious flavors, perfect for school or work breaks. …

Read more

Categories Salads
Older posts
Newer posts
← Previous Page1 … Page27 Page28 Page29 … Page92 Next →

TASTED NEST

Where Flavor Finds a Home 🍳🏡 — warm, simple, and crave-worthy recipes made for real life, from stovetop mornings to backyard dinners.

PAGES

Home About Contact Privacy Policy Terms & Conditions Cookie Policy GDPR Policy Copyright Policy Disclaimer

CATEGORIES

Appetizers Desserts Salads Breakfast Dinner

Contact

  • Pinterest
  • Mail
Copyright © 2025 Tasted Nest. All rights reserved.