Skip to content
Tasted Nest
  • Home
  • Appetizers
  • Desserts
  • Salads
  • Breakfast
  • Dinner
  • Privacy Policy
  • Contact
  • About

Chef Tavio

Pumpkin Spice Donuts Irresistible Fall Treats

July 28, 2025 by Chef Tavio
To make pumpkin spice donuts, gather these simple ingredients: - 1 cup all-purpose flour - 1/2 cup pumpkin puree - 1/4 cup granulated sugar - 1/4 cup packed brown sugar - 1/2 teaspoon baking powder - 1/2 teaspoon baking soda - 1 teaspoon pumpkin pie spice - 1/2 teaspoon ground cinnamon - 1/4 teaspoon salt - 1/2 cup Greek yogurt (plain) - 1 large egg - 1 teaspoon vanilla extract - 2 tablespoons melted coconut oil For the glaze: - 1 cup powdered sugar - 2 tablespoons milk - A pinch of ground cinnamon These ingredients create a tasty treat that captures the essence of fall. The pumpkin puree gives the donuts moisture and flavor. The spices, like pumpkin pie spice and cinnamon, add warmth and comfort. The Greek yogurt helps keep the donuts light and fluffy. Each donut has about 150 calories. They contain carbs, protein, and fat in balanced amounts. A single donut includes: - Carbohydrates: 22g - Protein: 2g - Fat: 7g These numbers make these donuts a perfect fall snack. Enjoy them fresh or glazed for a sweet twist. For the full recipe, check out the details above. - Preheat the oven to 350°F (175°C). - Grease the donut pan with cooking spray or butter. - In a medium bowl, whisk together: - 1 cup all-purpose flour - 1/2 teaspoon baking powder - 1/2 teaspoon baking soda - 1 teaspoon pumpkin pie spice - 1/2 teaspoon ground cinnamon - 1/4 teaspoon salt - In a large bowl, combine: - 1/2 cup pumpkin puree - 1/4 cup granulated sugar - 1/4 cup packed brown sugar - 1/2 cup Greek yogurt (plain) - 1 large egg - 1 teaspoon vanilla extract - 2 tablespoons melted coconut oil - Mix the wet ingredients until smooth. - Gradually add the dry mix to the wet mix. - Stir gently until just combined. A few lumps are okay. - Using a spoon or piping bag, fill each cavity in the donut pan about 3/4 full. - Place the pan in the oven and bake for 10-12 minutes. - Test for doneness with a toothpick. It should come out clean. - Let the donuts cool in the pan for 5 minutes. - Transfer them to a wire rack to cool completely. - While cooling, prepare the glaze: - In a small bowl, mix together: - 1 cup powdered sugar - 2 tablespoons milk - A pinch of ground cinnamon - Once cooled, dip the tops of the donuts into the glaze. - Allow excess glaze to drip back into the bowl. - Set the glazed donuts on a wire rack to let them dry. For the full recipe, check out the complete details above. Enjoy these pumpkin spice donuts as an irresistible fall treat! To get soft and fluffy donuts, avoid overmixing the batter. When you mix dry and wet ingredients, stop as soon as they come together. Lumps in the batter are fine. This helps keep your donuts light. For baking, set your oven to 350°F (175°C). Bake for 10 to 12 minutes. Use a toothpick to check doneness. If it comes out clean, your donuts are ready! To boost flavor, try adding more spices. Nutmeg and ginger work well with pumpkin. You can also use fresh pumpkin instead of canned. Fresh pumpkin adds a vibrant taste and moisture. If you use canned, make sure it’s pure pumpkin, not pie filling. Make your donuts look great! Place them on a colorful plate. For a fall touch, sprinkle extra cinnamon on top or add small pumpkins around them. They pair perfectly with coffee or warm tea. A nice drink completes your cozy treat! {{image_4}} You can easily make these donuts vegan. Replace the egg with unsweetened applesauce. Use 1/4 cup of applesauce for each egg. For the Greek yogurt, try using almond yogurt or coconut yogurt. These swaps keep the donuts moist and tasty. If you need a gluten-free option, use almond flour or a gluten-free all-purpose blend. Both options work well. Almond flour gives a nutty flavor, while the all-purpose blend mimics traditional flour. Remember to check that your baking powder is gluten-free. For a fun twist, add chocolate chips or chopped nuts to the batter. They add texture and flavor. You can mix in 1/2 cup of chocolate chips or nuts. For toppings, drizzle melted chocolate or sprinkle crushed nuts on the glaze. These additions make your donuts festive and even more delicious. You can find the full recipe for these delightful treats in the previous section. To keep your pumpkin spice donuts fresh, store them in the fridge. Wrap each donut in plastic wrap. Place them in an airtight container to lock in moisture. This keeps them soft and tasty for up to four days. If you want to save some for later, freezing is a great option. First, let the donuts cool completely. Place them in a single layer on a baking sheet. Freeze them for about one hour. Once frozen, transfer the donuts to an airtight container or freezer bag. They will stay fresh for up to three months. To reheat, simply take them out and let them thaw at room temperature. For a warm treat, pop them in the microwave for about 10-15 seconds. This gives them back their soft texture and makes the flavors pop again. Enjoy these delicious pumpkin spice donuts anytime! Don't forget to check out the Full Recipe for all the steps. Yes, you can! If you lack a donut pan, use a muffin tin. Just fill the cups about halfway. You can create a fun shape by using a small oven-safe cup in the center. This will give you a donut shape. Remember, baking time may change. Keep an eye on them! Look for a golden color on the edges. The tops should be firm. A toothpick test works great, too. Insert a toothpick into the center of a donut. If it comes out clean, the donuts are done. If there's batter on it, bake a few more minutes. Yes, you can! To make muffins, pour the batter into muffin cups. Fill each cup about 2/3 full. Bake for about 15-20 minutes. Check with a toothpick to ensure they are cooked through. Muffins will be a bit denser but just as tasty. For the full recipe, see the detailed instructions above. You now know how to make delicious pumpkin spice donuts from scratch. We covered key ingredients, step-by-step instructions, and helpful tips for the best results. You can even try variations like vegan or gluten-free donuts. Store leftovers wisely to keep them fresh. Enjoy experimenting with different flavors and presentation ideas. You will impress friends and family with your baking skills. These donuts are perfect for fall or any time you crave a sweet treat. Happy baking!

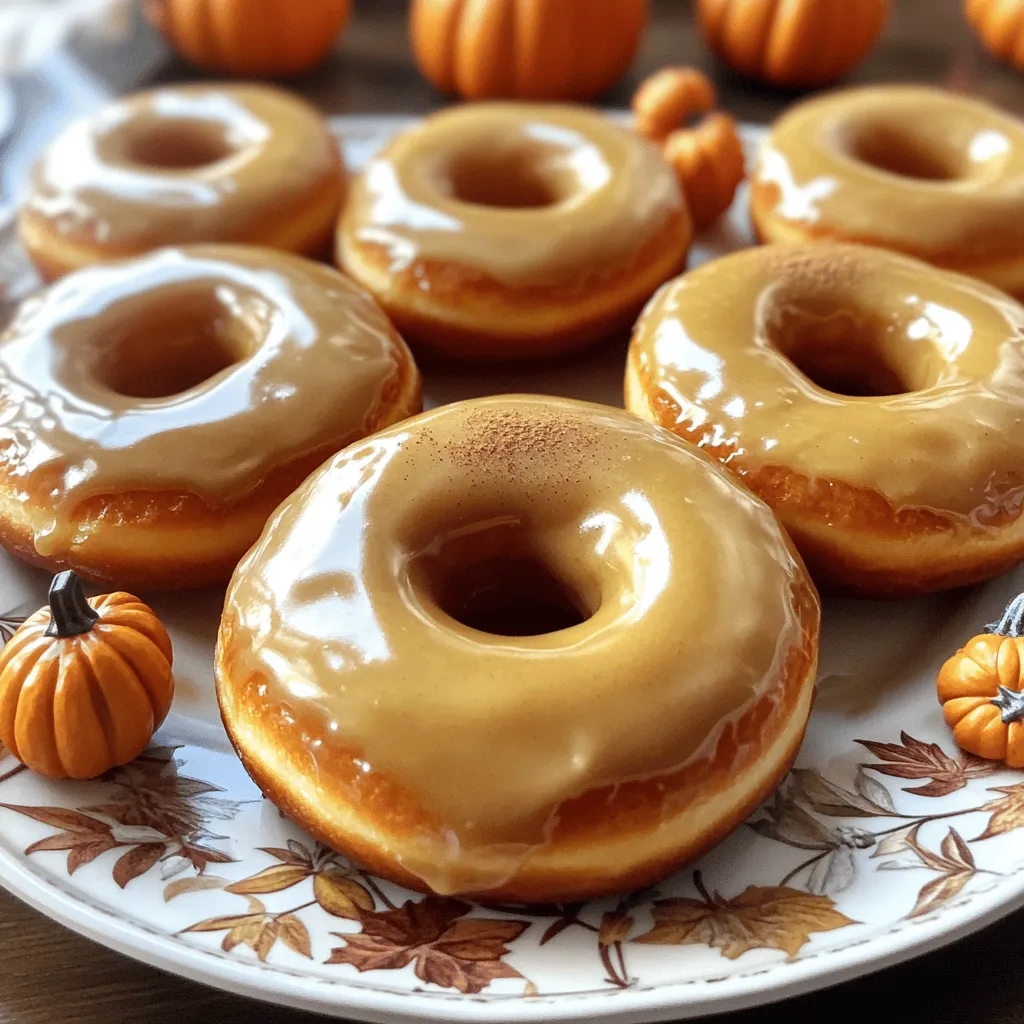
Fall is here, and that means it’s pumpkin spice season! Nothing beats the aroma of fresh Pumpkin Spice Donuts wafting through your kitchen. They’re soft, sweet, and packed with that …

Read more

Categories Desserts

Pumpkin Chocolate Chip Pancakes Savory Breakfast Delight

July 28, 2025 by Chef Tavio
To make delicious pumpkin chocolate chip pancakes, gather these simple ingredients: - 1 cup all-purpose flour - 1/2 cup pumpkin puree - 1 tablespoon packed brown sugar - 1 teaspoon baking powder - 1/2 teaspoon baking soda - 1/2 teaspoon ground cinnamon - 1/4 teaspoon ground nutmeg - 1/4 teaspoon salt - 1 large egg, beaten - 3/4 cup milk (almond, soy, or oat) - 1 teaspoon vanilla extract - 1/2 cup semi-sweet chocolate chips - Butter or vegetable oil for cooking Each ingredient plays a vital role. The flour gives structure, while pumpkin adds moisture and flavor. Brown sugar sweetens and enriches the taste. Baking powder and soda help the pancakes rise. Spices like cinnamon and nutmeg bring warmth. The egg binds everything together, and milk creates a smooth batter. Chocolate chips add that sweet touch. Use butter or oil to ensure a perfect cook. With these ingredients, you can create a breakfast that is both tasty and fun. For the full recipe, check out the detailed instructions to bring these pancakes to life! - Combine Dry Ingredients: Start by taking a large mixing bowl. Add 1 cup of all-purpose flour, 1 tablespoon of packed brown sugar, 1 teaspoon of baking powder, 1/2 teaspoon of baking soda, 1/2 teaspoon of ground cinnamon, 1/4 teaspoon of ground nutmeg, and 1/4 teaspoon of salt. Whisk these together well. This mix gives your pancakes a great rise and flavor. - Mix Wet Ingredients: In another bowl, blend together 1/2 cup of pumpkin puree, 1 large beaten egg, 3/4 cup of milk (feel free to use almond, soy, or oat milk), and 1 teaspoon of vanilla extract. Mix until smooth. This step adds moisture and that lovely pumpkin taste. - Combine Mixtures: Pour the wet mix into the dry ingredients bowl. Stir gently with a spatula until just combined. Don't over-mix, as this can make your pancakes chewy. Fold in 1/2 cup of semi-sweet chocolate chips. They will melt a bit while cooking, creating pockets of chocolate goodness. - Preheat Cooking Surface: Heat a non-stick skillet or griddle over medium heat. Add a small amount of butter or vegetable oil to coat the surface lightly. This helps prevent sticking and adds flavor. - Cook Pancakes: Pour about 1/4 cup of batter for each pancake onto the skillet. Cook until bubbles form on the surface and the edges look set, about 2-3 minutes. Carefully flip and cook for another 1-2 minutes until golden brown. - Repeat Cooking Process: Keep cooking the remaining batter. Add more butter or oil as needed to the skillet. Stack the finished pancakes high on a plate and enjoy with maple syrup! These pancakes are a delightful treat for breakfast or brunch. For the complete recipe, check out the [Full Recipe]. - Perfecting Pancake Texture For fluffy pancakes, avoid over-mixing your batter. Mix until just combined. Small lumps are okay. This keeps the pancakes light and airy. - Ideal Cooking Temperature Preheat your skillet over medium heat. If it’s too hot, pancakes burn outside and stay raw inside. A hot but not smoking skillet is key. - Avoiding Over-Mixing Stir gently when you mix wet and dry ingredients. Over-mixing makes the pancakes tough. Fold in the chocolate chips lightly for the best results. - Stacking and Toppings Stack pancakes high for a beautiful display. Drizzle with maple syrup to add sweetness. Use extra chocolate chips on top for a treat. - Serving with Syrups and Fruits Fresh fruits like bananas or berries pair well. They add color and flavor. You can also try whipped cream for a creamy touch. - Garnishing Ideas A sprinkle of powdered sugar adds a nice finish. A sprig of mint can brighten the plate. For something fun, add a dollop of whipped cream on top. These tips will help you create the perfect pumpkin chocolate chip pancakes. For the complete recipe, refer to the Full Recipe section. {{image_4}} Adding spices or extracts can elevate your pancakes. Try these ideas: - Ground Ginger: Add a pinch for warmth. - Allspice: This brings a holiday flavor. - Vanilla Extract: A splash can deepen sweetness. You can also incorporate nuts or seeds for texture. Here are some suggestions: - Chopped Walnuts: They add crunch and flavor. - Pecans: These give a nice buttery taste. - Chia Seeds: They boost nutrition without changing flavor. If you need a gluten-free option, use almond flour or gluten-free flour blends. These work well in this recipe. Just follow the same steps as with regular flour. For a vegan alternative, swap the egg for a flax egg. Mix one tablespoon of flaxseed meal with three tablespoons of water. Let it sit for five minutes to thicken. Use almond, soy, or oat milk instead of regular milk. This keeps your pancakes fluffy and delicious. You can find the full recipe to make these delightful pancakes in the previous sections. Enjoy your cooking! Refrigeration Tips Store leftover pancakes in an airtight container. Place parchment paper between each pancake to keep them from sticking. They will last for about three days in the fridge. When you want to eat them, just take out what you need. Freezing Instructions For longer storage, freeze pancakes. First, let them cool completely. Then, stack them with parchment paper between each one. Wrap the stack in plastic wrap and place it in a freezer bag. They can stay frozen for up to three months. When ready to eat, thaw in the fridge overnight. Best Methods for Reheating The best way to reheat pancakes is in the toaster or on a skillet. For the toaster, set it to medium heat. For the skillet, heat it on low and add a little butter. Both methods keep the pancakes soft and tasty. Ideal Serving Temperature Pancakes are best served warm. Aim for a temperature around 160°F (70°C). This is when the flavors shine and the chocolate chips will melt just a bit. Enjoy them right after reheating for the best taste! Yes, you can use fresh pumpkin. First, cook it until soft, then mash it. Make sure to drain excess water for the best texture. Fresh pumpkin adds a lovely taste and nutrition. To achieve fluffy pancakes, use baking powder and baking soda. Don't over-mix the batter; gentle stirring keeps air bubbles intact. Let the batter rest for a few minutes before cooking. This helps create a lighter texture. Absolutely! Almond, soy, or oat milk works well. Choose a milk that fits your taste and diet. This substitution won’t change the flavor much, and it keeps the pancakes moist. Store pancakes in an airtight container for up to four days. Reheat them in a pan or microwave when ready to eat. They taste great warmed up. Maple syrup is a classic choice and adds sweetness. Whipped cream, chopped nuts, or fresh fruit make great additions, too. Try adding a sprinkle of cinnamon for an extra flavor boost. Explore different toppings to find your favorite! For a full recipe, check out the detailed instructions above. Enjoy your delicious pancakes! You learned how to make delicious pumpkin chocolate chip pancakes. We covered key ingredients and detailed each step. I shared tips for cooking and serving, plus variations and storage ideas. Enjoying these pancakes can brighten your day. Remember, you can get creative with flavors and toppings. Whether for breakfast or a snack, these pancakes will impress. Try them, and you’ll see how simple and tasty they can be.

Looking for a breakfast that’s both tasty and fun? You’ll love these Pumpkin Chocolate Chip Pancakes! With warm spices and sweet chocolate, they turn a regular morning into a special …

Read more

Categories Breakfast

Air Fryer Chicken Taquitos Crunchy Flavor Burst

July 28, 2025 by Chef Tavio
- 2 cups cooked chicken, shredded - 1 cup cream cheese, softened - 1 cup shredded cheddar cheese - 1/2 cup salsa - 1 teaspoon ground cumin - 1 teaspoon garlic powder - Salt and pepper to taste - 10 small corn tortillas - Olive oil spray In making Air Fryer Chicken Taquitos, the right ingredients matter. Start with cooked chicken, which gives the filling a savory base. I prefer using shredded chicken for better texture. Next, cream cheese adds a rich and smooth consistency. This helps bind the filling. Shredded cheddar cheese brings a nice flavor and melts well during cooking. Salsa adds zest and moisture, keeping taquitos from being dry. For spices, ground cumin and garlic powder enhance the taste, giving it warmth and depth. Adjust salt and pepper to suit your taste. Choose small corn tortillas for the best crunch. They roll easily without tearing. Lastly, a light olive oil spray helps achieve that crispy finish in the air fryer. These simple ingredients combine to create a crunchy flavor burst you won’t forget! For the complete recipe, check out the Full Recipe section. In a large mixing bowl, combine the following ingredients: - 2 cups cooked chicken, shredded - 1 cup cream cheese, softened - 1 cup shredded cheddar cheese - 1/2 cup salsa - 1 teaspoon ground cumin - 1 teaspoon garlic powder - Salt and pepper to taste Mix these items well with a spatula or fork. You want a creamy and smooth blend, where every part complements the others. To roll the taquitos, start by warming the corn tortillas. Heat them in the microwave for about 30 seconds. This step makes the tortillas soft and easy to roll without breaking. Next, lay a tortilla flat on a clean surface. Scoop around 2 tablespoons of the chicken mixture into the center. Start rolling the tortilla tightly from one end. Tuck in the sides as you roll to keep the filling secure. Repeat this for each tortilla until all the mixture is used. Now it’s time to air fry! Preheat your air fryer to 375°F (190°C). While it heats, lightly coat each rolled taquito with olive oil spray. This helps them crisp up nicely. Place the taquitos in the air fryer basket. Make sure they are in a single layer with space in between. Avoid stacking them to get an even cook. Air fry for 10-12 minutes. Flip the taquitos halfway through cooking. This helps them turn golden brown and crispy on all sides. Once they are done, remove them from the air fryer. Follow this cooking process for any remaining taquitos from the filling. You can find the full recipe in the article to ensure you capture all the flavors! To get the best crispy taquitos, always preheat your air fryer. Preheating ensures even heat. This helps cook your taquitos just right. I suggest setting it to 375°F (190°C) before starting. Using olive oil spray is key for crispiness. It creates a golden crust as the taquitos fry. I like to spray them lightly but evenly. This small step makes a big difference in texture. Cooking times can vary with different air fryer models. Some may cook faster, while others take a bit longer. I recommend checking your taquitos after 8 minutes. If they aren't golden yet, give them a few extra minutes. To check doneness, look for a golden brown color. You can also poke one with a fork. If it’s hot inside and crispy outside, it’s ready! {{image_4}} You can switch up the filling for your taquitos. Try adding black beans, corn, or bell peppers. Each option gives a new taste and texture. Black beans add protein and fiber, while corn brings sweetness. Bell peppers add crunch and color. For a vegetarian twist, use mushrooms or lentils. Both options are hearty and delicious. Mushrooms have a rich flavor, while lentils provide a nice bite. These variations can please everyone at your table. Want to make your taquitos spicy? Add jalapeños or a splash of hot sauce. This extra kick can make them exciting. If you're cooking for kids, consider mild cheese options. Cheddar is great, but mozzarella offers a softer taste. You can mix the cheeses for more flavor. Adjusting spice levels helps cater to all tastes. Remember, you can always add more heat, but you can't take it away! To keep your leftover taquitos fresh, store them in an airtight container. Place a piece of parchment paper between layers to avoid sticking. You can keep them in the fridge for up to three days. If you want to save them longer, freeze the taquitos. Wrap each one in plastic wrap, then place them in a freezer bag. They will stay good for up to three months. For the best crispiness, reheat taquitos in the air fryer. Set the air fryer to 375°F (190°C). Place the taquitos in a single layer. Heat for about 5-7 minutes. Check them halfway through to ensure they warm evenly. If you have frozen taquitos, add a few extra minutes to the time. This method keeps them crunchy and delicious. Enjoy your tasty snack all over again! Yes, you can make these taquitos ahead of time. I suggest preparing the filling and rolling the taquitos. Then, store them in the fridge for up to 24 hours. You can also freeze them for longer storage. Just place them in a single layer on a baking sheet first. After they freeze, put them in a zip-top bag. This keeps them from sticking together. You can use flour tortillas, but the texture will change. Flour tortillas are softer and may not hold their shape as well. Corn tortillas add a nice crunch and flavor. If you use flour, warm them to make them easy to roll. This helps prevent tearing. Leftover taquitos last about 3 to 4 days in the fridge. Make sure to store them in an airtight container. If you want to keep them longer, freezing is a great option. They can last up to 2 months in the freezer. Just reheat them in the air fryer for that crispy finish. Air Fryer Chicken Taquitos are full of flavor and easy to make. You learned about key ingredients and seasonings, plus how to roll and cook them. I shared tips for crispy results and fun filling ideas, so your meals can be exciting. You can store leftovers for later, too. Try out variations to find your favorite. Enjoying your homemade taquitos will surely impress friends and family. Perfect each time, they are a great meal choice for anyone. Happy cooking!

Looking for a quick meal that packs a punch? Air Fryer Chicken Taquitos are your answer! With a crunchy outside and a flavor burst inside, these taquitos are easy to …

Read more

Categories Appetizers

Pumpkin Cobbler Irresistible Dessert Delight Recipe

July 28, 2025 by Chef Tavio
- 1 can (15 oz) pure pumpkin puree - 1 cup granulated sugar - 1/2 cup packed brown sugar - 1 teaspoon pure vanilla extract - 2 large eggs - 1 teaspoon ground cinnamon - 1/2 teaspoon ground nutmeg - 1/2 teaspoon ground ginger - 1/4 teaspoon fine sea salt - 1 cup all-purpose flour - 1 teaspoon baking powder - 1 cup whole milk - 1/2 cup unsalted butter, melted - 1 cup pecans or walnuts, chopped (optional) - Vanilla ice cream (for serving) You will need a mix of sweet and warm flavors. Pumpkin puree gives a rich taste. Sugar adds sweetness, while brown sugar brings a hint of caramel. Vanilla extract will make your dessert smell amazing. Eggs are key for the right texture. Spices are where the magic happens! Ground cinnamon, nutmeg, and ginger create that warm fall flavor. The fine sea salt enhances everything. All-purpose flour and baking powder give structure. Whole milk keeps your cobbler moist and delicious. Finally, melted butter adds richness, and nuts are optional for crunch. I love serving it warm with vanilla ice cream on top. It's a treat you won't forget! Preparation Time and Serving Size - Prep Time: 15 minutes - Cook Time: 45-55 minutes - Servings: 8-10 You can whip this up quickly and serve a crowd. Enjoy this easy and comforting dessert! For the full recipe, check out the details above. Preheat your oven to 350°F (175°C). Grease a 9x13 inch baking dish with cooking spray or butter. This helps the cobbler not stick. In a large bowl, combine the pumpkin puree, granulated sugar, brown sugar, and vanilla extract. Use a whisk or mixer to blend until smooth. This is the base of your cobbler. Add the eggs one at a time to the pumpkin mix. Stir well after each egg. Next, in a different bowl, mix the flour and baking powder. Alternate adding this dry mix and milk to the pumpkin batter. Start and end with the flour mix. Stir gently to keep it tender. Pour the melted butter into the greased baking dish. Then, gently pour the pumpkin batter over the butter. Do not mix! Bake the cobbler for 45-55 minutes. It’s ready when a toothpick comes out clean. Enjoy your delicious Pumpkin Bliss Cobbler! For the full recipe, check the previous section. - Avoid overmixing for a tender texture. This keeps the cobbler light and fluffy. - Ensure the eggs are at room temperature for better incorporation. Warm eggs mix in smoothly, giving you a creamier batter. - Pair with vanilla ice cream for a classic dessert experience. The cold ice cream balances the warm cobbler perfectly. - Dust with cinnamon for added flavor. This simple touch enhances the pumpkin taste and looks great too. - Not preheating the oven properly can lead to uneven baking. Always set your oven ahead of time. - Substituting ingredients without adjusting ratios can ruin your cobbler. Stick to the recipe, especially for baking! {{image_4}} You can easily make this cobbler gluten-free. Simply swap the all-purpose flour with a gluten-free blend. Look for blends that include xanthan gum for better texture. You can also try almond flour or coconut flour, but adjust the amount. Use about 3/4 cup of almond flour or 1/2 cup of coconut flour. Both options will give a unique flavor and texture to your cobbler. To make a vegan version, replace the eggs with flaxseed meal. Use 1 tablespoon of flaxseed meal mixed with 2.5 tablespoons of water for each egg. Let it sit for a few minutes until it thickens. For the dairy, use almond milk or coconut milk instead of whole milk. You can also use coconut oil in place of butter for a richer taste. Want to spice things up? Add chocolate chips to the pumpkin batter for a sweet twist. You can use semi-sweet or dark chocolate chips. Consider adding a pinch of cayenne pepper for a hint of heat. Want a fruity flair? Toss in some fresh blueberries or cranberries. These little changes can make your pumpkin cobbler a new favorite! To keep your pumpkin cobbler fresh, chill it in the fridge. Place it in an airtight container. This way, it will stay good for about three days. Make sure to let it cool to room temperature before sealing it. This helps avoid extra moisture. If you want to save your cobbler longer, freezing works great. Cut it into slices and wrap each piece in plastic wrap. Then, place the wrapped slices in a freezer bag. Press out the air before sealing. Your cobbler can last up to three months in the freezer. When you're ready to enjoy it, just thaw it in the fridge overnight. To heat up your cobbler, you can use the oven or a microwave. For the oven, preheat it to 350°F (175°C). Place the cobbler in a baking dish and cover it with foil. Heat for about 15-20 minutes. This keeps the texture nice. If using a microwave, warm a slice for about 30-45 seconds. Enjoy it warm, maybe with a scoop of ice cream for a special treat! You can tell when your pumpkin cobbler is done by checking a few signs. Look for a firm center that is set. A toothpick inserted in the middle should come out clean. The edges will be slightly golden, and the cobbler will have risen. Allow it to cool for about 15 minutes before serving, as it will continue to firm up as it cools. Yes, you can use fresh pumpkin! To do this, start with a sugar pumpkin. Roast or steam it until soft, then scoop out the flesh. Blend it until smooth to make pumpkin puree. This can give a fresher taste to your cobbler. Just be sure to measure the same amount as the canned version. Pumpkin cobbler pairs well with many treats. A scoop of vanilla ice cream adds creaminess and balances the flavors. Whipped cream also works great. For drinks, try spiced cider or a hot cup of coffee. These pairings enhance the cozy feel of this dessert. Traditional pumpkin cobbler contains flour, which has gluten. To make it gluten-free, you can use a gluten-free flour blend instead. Almond flour or coconut flour can also work, but you may need to adjust the liquid in the recipe. Always check ingredient labels to ensure they are gluten-free. Store leftover pumpkin cobbler in an airtight container. Keep it in the fridge for up to three days. To preserve the texture, let it cool completely before covering. If you have a lot left, you can freeze it. Just slice it up, wrap in plastic wrap, and store in a freezer-safe container for up to three months. For the complete Pumpkin Bliss Cobbler recipe, including detailed steps and instructions, refer to the full recipe. This blog post covered everything you need for the perfect pumpkin cobbler. You now know the key ingredients, step-by-step instructions, and tips for serving. Consider trying variations like gluten-free or vegan options to suit your needs. Remember to store leftovers properly for the best taste later. Enjoy a warm slice topped with vanilla ice cream. This dish brings comfort and joy, making it great for any gathering or cozy night in. Happy baking!

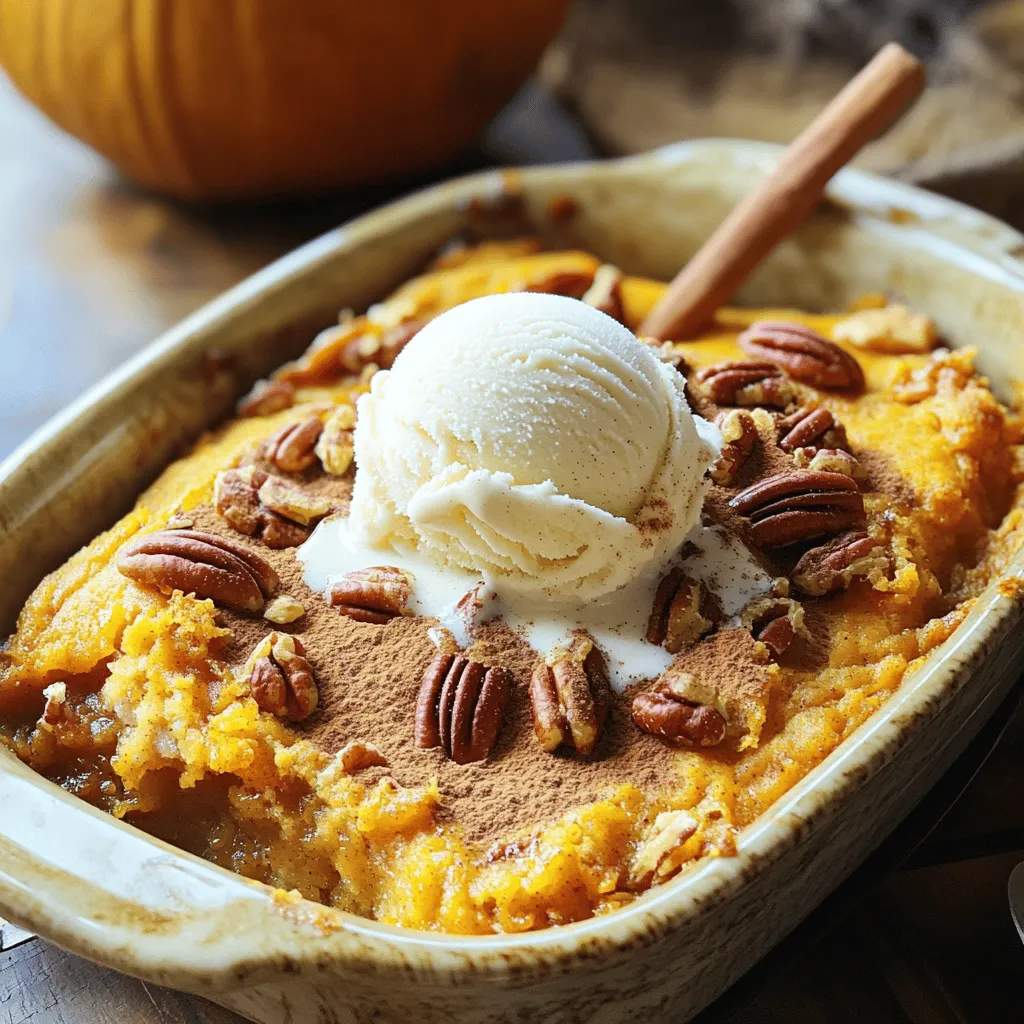
Craving a fall dessert that’s warm, cozy, and packed with flavor? Look no further than my Pumpkin Cobbler Irresistible Dessert Delight Recipe! This easy-to-make treat combines rich pumpkin puree with …

Read more

Categories Desserts

Kids’ Pasta Salad Fresh and Fun Meal Idea

July 28, 2025 by Chef Tavio
To make a tasty kids' pasta salad, gather these main ingredients: - 2 cups rotini pasta - 1 cup cherry tomatoes, halved - 1 cup cucumber, diced - 1/2 cup carrots, grated - 1/2 cup assorted bell peppers (red, yellow, green), diced - 1/4 cup black olives, sliced - 1/4 cup feta cheese, crumbled - 1/4 cup zesty Italian dressing - 1 tablespoon olive oil - Salt and freshly ground black pepper to taste - Fresh parsley, chopped (for garnish) These colorful ingredients create a fun and bright dish that kids will love! Add a twist to your pasta salad with these optional ingredients: - Cooked chicken or turkey for protein - Diced avocado for creaminess - Corn for a sweet crunch - Peas for added nutrition - Fresh herbs like basil or dill for extra flavor Mix and match these options to keep the salad exciting! If your family has dietary needs, here are some ideas: - Use gluten-free pasta for a gluten-free option. - Swap feta cheese with dairy-free cheese for a vegan dish. - Replace Italian dressing with a homemade vinaigrette for a lighter option. - Ensure all ingredients are nut-free if allergies are a concern. These substitutions help everyone enjoy this meal without worry. For the full recipe, check out the details above! To start, boil water in a large pot. Add a pinch of salt to the water. Once it boils, add 2 cups of rotini pasta. Cook the pasta until it is al dente, about 8-10 minutes. When done, drain the pasta in a colander. Rinse it under cold water to stop the cooking. This keeps the pasta firm. Set the cooled pasta aside in a large mixing bowl. Next, grab your fresh veggies. Add 1 cup of halved cherry tomatoes, 1 cup of diced cucumber, and 1/2 cup of grated carrots to the bowl. Then, add 1/2 cup of diced bell peppers in red, yellow, and green. These colors make your salad fun and bright! Gently toss all the ingredients together. In a small bowl, whisk together 1/4 cup of zesty Italian dressing and 1 tablespoon of olive oil. Add a pinch of salt and freshly ground black pepper for flavor. This dressing brings everything together. Taste it to make sure you like the flavor before adding it to the salad. Now, it's time to combine! Pour the dressing over the pasta and veggies. Gently toss everything together until all the ingredients are coated. This is where the magic happens! If you think it needs more flavor, add a bit more dressing. Let the salad chill in the fridge for at least 30 minutes. This helps the flavors blend. Before serving, give it a gentle toss and garnish with fresh parsley. Serve in bright bowls to make it extra special! For the full recipe, check out the detailed steps above. Letting kids help in the kitchen makes cooking fun. They can measure pasta, wash veggies, and stir. This brings excitement to meal prep. Hand them a safe knife to chop soft veggies, like cucumbers. Teaching kids basic skills builds their confidence. Plus, they feel proud to eat what they made. For a tastier salad, think about adding herbs. Fresh basil or parsley can boost the flavor. Try mixing in some lemon juice for a zesty kick. You can also swap out the Italian dressing for a ranch or vinaigrette. These changes keep things exciting and cater to picky eaters. Kids love colorful food! Use fun, bright bowls for serving. You can even shape the salad into a rainbow. Layer the ingredients by color for a visual treat. Add playful garnishes, like parsley or edible flowers, to make it pop. The more fun it looks, the more kids will want to dig in! You can find the full recipe for Rainbow Kids' Pasta Salad to try these tips out. {{image_4}} For a gluten-free version, use gluten-free pasta. Many brands offer rotini made from rice or corn. They cook just like regular pasta. This swap keeps the dish fun and tasty for everyone. To make the salad vegetarian, skip the feta cheese or use a plant-based option. You can add more veggies like broccoli or snap peas. This keeps the salad colorful and packed with nutrients. Change the ingredients with the seasons. In summer, add fresh corn or zucchini. In fall, use roasted butternut squash or spinach. These swaps bring new flavors and keep things interesting. To keep your kids' pasta salad fresh, let it cool first. Store it in an airtight container. This helps keep flavors intact and prevents drying out. If you made a big batch, divide it into smaller portions. This makes it easier to grab a quick snack later. Always use clean utensils to serve. This way, you avoid bacteria growth. Use glass or plastic containers with tight lids for storing. Glass containers work well since they don't stain and are easy to clean. Plastic containers are lighter and often easier for kids to handle. Make sure to choose containers that are safe for the fridge and freezer. If you plan to freeze, ensure they are freezer-safe to avoid cracks. Kids' pasta salad stays good in the fridge for about three days. After that, flavors may change and it can spoil. If you freeze it, it can last up to two months. However, the texture may change once thawed. Always check for any signs of spoilage before serving. If it smells off or looks unusual, it’s best to throw it out. Yes, you can make Kids' Pasta Salad ahead of time. It tastes even better after sitting. I recommend making it the night before. This allows all the flavors to mix well. Just store it in the fridge until you are ready to serve. If you want a change, try using ranch or balsamic vinaigrette. Both add nice flavors. You can also use a simple mix of olive oil and lemon juice. This keeps it light and fresh. Feel free to experiment with your favorite dressings. To boost nutrition, add more veggies like spinach or broccoli. You can also use whole wheat pasta for extra fiber. Consider tossing in some cooked chicken or chickpeas for protein. These small changes make the salad healthier without losing taste. Yes, be aware of common allergens like gluten and dairy. If someone is gluten-free, use gluten-free pasta. For dairy allergies, skip the feta cheese or use a dairy-free alternative. Always check labels for potential allergens in dressings as well. This blog post covered how to make a tasty kids' pasta salad. We explored main and optional ingredients to suit different tastes. I shared simple steps for cooking, mixing, and dressing. You learned tips to involve kids and make it fun. We discussed variations, storage tips, and answered common questions. In making this salad, you can have fun and get creative. Enjoy this meal together, knowing it’s healthy and delicious.

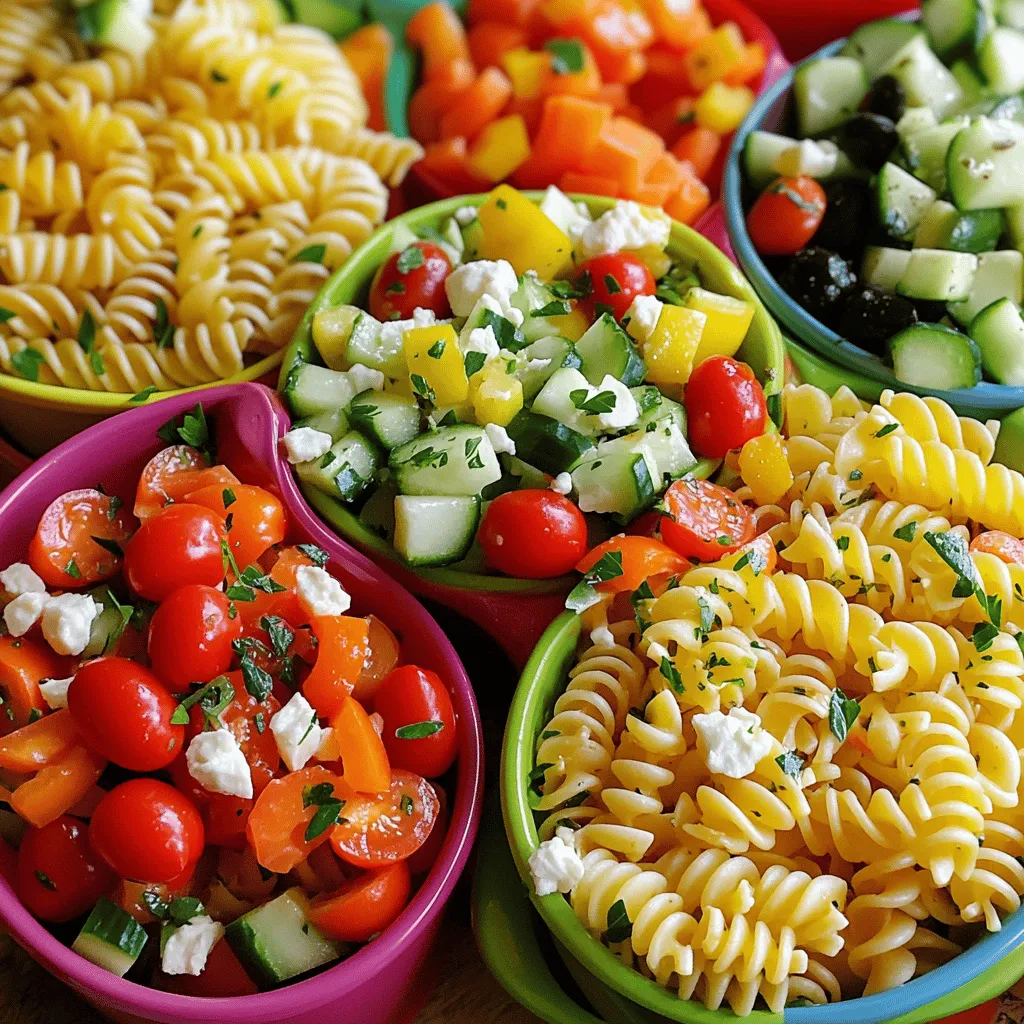
Looking for a meal that kids love? Kids’ Pasta Salad is fresh, fun, and easy to make! Packed with colorful veggies and tasty flavors, this dish lets your little ones …

Read more

Categories Salads

Air Fryer Eggplant Recipe for Crisp and Flavorful Bites

July 27, 2025 by Chef Tavio
To make these tasty bites, gather these main ingredients: - 1 medium eggplant, cut into uniform bite-sized cubes - 1 cup breadcrumbs (your choice of seasoned or plain) - 1/2 cup finely grated Parmesan cheese - 2 large eggs, beaten until frothy - 1 teaspoon garlic powder - 1 teaspoon onion powder - 1/2 teaspoon smoked paprika - 1/2 teaspoon freshly cracked black pepper - Salt, to taste - Olive oil spray for crisping These ingredients work together to give the eggplant a crunchy outside and a soft inside. The eggplant is the star, and it takes on all the flavors well. Feel free to mix in some fun flavors! Here are a few ideas: - Add 1 teaspoon of Italian seasoning for a herby kick. - Use panko breadcrumbs for extra crunch. - Try substituting the Parmesan with nutritional yeast for a vegan twist. - Mix in some fresh herbs like basil or parsley for freshness. These options let you customize the flavor to your taste. They can turn a classic recipe into something special. These eggplant bites are not just tasty; they are also healthy! Here’s a simple breakdown: - Serving Size: 4 bites - Calories: About 200 - Protein: 10g - Carbohydrates: 25g - Fat: 8g Eggplant is low in calories and high in fiber. It’s a great choice if you want a light snack or appetizer. You also get protein from the cheese and eggs, making it a balanced bite. For the full recipe, check out the detailed instructions! First, turn on your air fryer and set it to 375°F (190°C). This helps heat the fryer evenly. Preheating is key to getting that perfect crispiness. It usually takes about 5 minutes to heat up. While it warms, you can prepare your eggplant and coating. For the eggplant, take one medium eggplant. Cut it into small, even cubes. Aim for uniform sizes so they cook evenly. This step is important for consistent texture. You can sprinkle a little salt on the cubes. This helps draw out moisture, making them less soggy. Now, let's coat those eggplant cubes. Grab a bowl and mix your breadcrumbs, Parmesan cheese, garlic powder, onion powder, smoked paprika, black pepper, and a pinch of salt. In a second bowl, beat the two eggs until they are frothy. Dip each eggplant cube in the egg mixture, covering all sides. Then, roll it in the breadcrumb mix, pressing gently to ensure a solid coating. Place the coated eggplant bites in the air fryer basket in a single layer. Lightly spray them with olive oil for extra crispiness. Cook the eggplant bites for 15-20 minutes. Remember to shake the basket halfway through. This helps them brown evenly. You want them golden brown and crispy. Once done, take them out and let them cool a bit before serving. You can find the full recipe [here](#). To get that perfect crispiness, follow these tips. First, cut the eggplant into even cubes. This helps them cook at the same rate. Next, coat each piece with egg. This step is key for the breadcrumbs to stick. Don't rush this part. Make sure every side is covered. Then, roll the cubes in the breadcrumb mix. Press gently to ensure a good coating. Finally, spray the bites lightly with olive oil before cooking. This will help them get crispy in the air fryer. Many people make simple mistakes that can ruin their eggplant bites. One big mistake is not preheating the air fryer. This can lead to uneven cooking. Another mistake is overcrowding the basket. If you pile too many eggplant pieces together, they won’t crisp up well. Always leave space between the bites. Lastly, skip the salt before cooking. Instead, add it to the breadcrumb mix. This will enhance the flavor without making them soggy. Serving your eggplant bites is fun! I love to place them on a rustic platter. This makes the dish look inviting. You can sprinkle fresh parsley on top for color. For dipping, a small bowl of marinara sauce is perfect. The sauce adds tang and flavor. You can also serve them with yogurt or a spicy sauce for extra kick. These bites can be a tasty appetizer or a side dish. They also make a great snack for game day or movie night. For the full recipe, check out the details above. {{image_4}} To make a vegan version of air fryer eggplant, swap eggs with a flax egg. Mix one tablespoon of ground flaxseed with three tablespoons of water. Let it sit for five minutes until it thickens. This mix will help the breadcrumbs stick to the eggplant. Use vegan breadcrumbs for a fully plant-based dish. You can still enjoy the crispy bites without using any animal products. If you need a gluten-free option, replace regular breadcrumbs with gluten-free ones. You can also use crushed rice or cornflakes for a unique crunch. For a lighter breading, try using chickpea flour mixed with spices. Just coat the eggplant cubes in the flour mix and air fry them. Each method offers a different texture and taste, allowing you to customize the recipe to your liking. You can change the flavor of your eggplant bites by adding different herbs and spices. For a Mediterranean twist, use oregano, basil, and thyme. To spice things up, add cayenne pepper or chili flakes for heat. Experiment with cumin, coriander, or smoked paprika for a unique flavor. These variations can elevate your dish and surprise your taste buds. After you enjoy your eggplant bites, store any leftovers in an airtight container. Make sure to let them cool first. Place parchment paper between layers to keep them crisp. Store in the fridge for up to three days. This helps the bites stay fresh and tasty. To reheat your eggplant bites, use the air fryer again. Preheat it to 375°F (190°C). Place the bites in the basket in a single layer. Heat for about 5-7 minutes or until they are hot and crispy. This method keeps them from getting soggy. You can also use an oven if you prefer. Just bake them at the same temperature for about 10 minutes. If you want to save some for later, freezing works well. First, let the cooked bites cool completely. Then, place them in a single layer on a baking sheet and freeze for about 1 hour. Once frozen, transfer them to a freezer bag or container. They can stay frozen for up to three months. When you want to eat them, reheat straight from frozen, adding a few extra minutes to the time. This method keeps them delicious and crispy. For the full recipe, check out the crispy air fryer eggplant bites! You should cook eggplant bites in the air fryer for 15 to 20 minutes. This time will give you a crispy texture. Midway, shake the basket. This step helps all sides cook evenly. Yes, you can use other vegetables! Try zucchini, bell peppers, or mushrooms. Cut them into similar sizes for even cooking. The same coating works well for these veggies, too. Serve air fryer eggplant bites with marinara sauce for dipping. You can also pair them with a fresh salad. A yogurt sauce or garlic aioli adds a nice touch, too. For a fun twist, try them on a sandwich or in a wrap. In this post, I covered how to make delicious air fryer eggplant bites. We explored key ingredients, step-by-step cooking instructions, and helpful tips for crispiness. I shared various ways to adapt the recipe with different flavors and dietary needs. We also discussed storage options and answered common questions. Now, you can enjoy tasty eggplant bites any time. Get creative and try new flavors. They are simple to make and a healthy snack option. Enjoy your cooking journey!

If you’re searching for a tasty snack, you’ve found it! This Air Fryer Eggplant Recipe gives you crispy, flavorful bites that everyone will love. I’ll guide you step by step, …

Read more

Categories Appetizers

Chicken Caesar Pasta Salad Fresh and Flavorful Recipe

July 27, 2025 by Chef Tavio
- 2 cups rotini pasta - 1 cup cooked chicken breast, diced - 1 cup romaine lettuce, chopped - ½ cup cherry tomatoes, halved - ¼ cup grated Parmesan cheese - ½ cup Caesar dressing (store-bought or homemade) - 1 tablespoon olive oil - 1 teaspoon garlic powder - Salt and pepper, to taste - Croutons, for garnish For a great Chicken Caesar Pasta Salad, you need fresh and tasty ingredients. Start with rotini pasta. It holds the dressing well and adds a fun twist. Use cooked chicken breast for protein. You can grill or sauté it with olive oil, garlic powder, salt, and pepper for extra flavor. Next, chop some romaine lettuce. It gives a nice crunch and freshness. Halve cherry tomatoes to add sweetness and color. Don’t forget the grated Parmesan cheese. It adds a rich, creamy taste that pairs well with Caesar dressing. You can pick store-bought Caesar dressing or make your own. It should be creamy and tangy. Finally, croutons make the salad fun and crispy. - Calories per serving: Approximately 350 - Macronutrient breakdown: - Proteins: 25g - Fats: 18g - Carbohydrates: 30g This salad is not just tasty; it’s also filling. It gives you a good balance of proteins, fats, and carbs. Enjoy your meal! For the complete method, check out the Full Recipe. To cook rotini pasta, bring a large pot of salted water to a rolling boil. Add 2 cups of rotini pasta. Stir it gently to prevent sticking. Boil according to the package instructions, usually about 8-10 minutes. You want it to be al dente, which means it should be firm but not hard. To check, taste a piece a minute or two before the time is up. Once done, drain the pasta and rinse it quickly with cold water. This stops the cooking and cools it down. Let it sit in the colander to drain well. You can grill or sauté chicken for this salad. If grilling, heat your grill to medium-high. For sautéing, use a skillet on medium heat. Coat the chicken breast lightly with olive oil. Season it with garlic powder, salt, and pepper. Grill or sauté for about 6-7 minutes on each side. The chicken is done when juices run clear. Once cooked, let it rest for a few minutes, then dice it into bite-sized pieces. If you use pre-cooked chicken, just dice it up. In a large mixing bowl, combine the cooled rotini pasta, diced chicken, chopped romaine lettuce, and halved cherry tomatoes. Use a gentle hand to mix everything. This way, you keep the lettuce and pasta intact. Sprinkle ¼ cup of grated Parmesan cheese on top. Be sure to mix it all well for balanced flavor. For the dressing, drizzle about ½ cup of Caesar dressing over the salad mixture. To coat everything evenly, use tongs or a spatula. Gently toss the ingredients together until all are coated with dressing. You can taste your salad to see if you need more seasoning or dressing. Adjust as needed, adding more salt, pepper, or dressing to fit your taste. This process creates a fresh and flavorful Chicken Caesar Pasta Salad. For the full recipe, refer to the beginning of this article. You can easily change this recipe to suit your taste. For the pasta, try using penne or fusilli instead of rotini. If you want a lighter dish, swap the chicken for chickpeas or grilled shrimp. Want to add more crunch? Toss in some diced bell peppers or cucumbers. You can also use kale or spinach instead of romaine for a different texture. To add extra flavors, consider mixing in some fresh herbs. Chopped parsley or basil boosts the taste and freshness. A squeeze of fresh lemon juice brightens the salad, adding zing. You might also try a sprinkle of red pepper flakes for a bit of heat. When storing leftovers, keep the dressing separate. This helps the salad stay fresh longer. Place the pasta, chicken, and veggies in one container. Store the dressing in a small jar. This way, you can dress the salad just before eating. If you want to make the salad ahead of time, you can prep everything a day in advance. Cook the pasta and chicken, then chop the veggies. Keep everything in the fridge. Combine them when you are ready to serve. Serving your salad in a large bowl makes a great impression. You can also serve it on individual plates for a more personal touch. To make it look fancy, add a sprinkle of extra Parmesan cheese on top. Whole cherry tomatoes can add a splash of color too. For garnishing, croutons are a must! They add a nice crunch. You might also drizzle a bit of extra dressing over the top for visual appeal. Remember, we eat with our eyes first! {{image_4}} To make a meat-free version of Chicken Caesar Pasta Salad, simply swap the chicken. You can use chickpeas, tofu, or roasted vegetables. These options add protein and flavor. For added protein, consider using nuts or seeds. They bring a nice crunch and extra nutrients. If you want heat, add some red pepper flakes or sliced jalapeños to your salad. This gives it a nice kick. You can also choose spicy dressings like chipotle Caesar or sriracha ranch. These options add depth and flavor to your dish. To keep this salad gluten-free, substitute regular pasta with gluten-free rotini or quinoa. There are many great brands available today. Always check the labels to ensure they are gluten-free. For a fresh twist, consider using spiralized vegetables like zucchini or carrots. They make the salad light and bright. To keep your Chicken Caesar Pasta Salad fresh, store it in an airtight container. This will help prevent it from drying out or absorbing other odors in your fridge. If stored properly, it stays fresh for up to three days. After that, the pasta can become mushy, and the lettuce may wilt. Before serving leftovers, give it a good stir. This helps to redistribute the dressing and flavors. You can freeze this salad, but I don’t recommend it. Freezing can change the texture of the pasta and lettuce. If you still want to freeze it, separate the dressing and add it later. To reheat, let it thaw in the fridge overnight. Then, mix in fresh lettuce and dressing before serving. This will help revive some of the textures and flavors. Yes, you can use leftover chicken in this salad. It saves time and adds flavor. Just dice the chicken into bite-sized pieces. If the chicken is cold, it works great in the salad. You can also warm it slightly before adding it. This makes your meal even more delicious and reduces food waste. Yes! Making Caesar dressing at home is easy. You need a few simple ingredients. Here’s a quick homemade Caesar dressing recipe: - 1/2 cup mayonnaise - 1 tablespoon Dijon mustard - 1 tablespoon Worcestershire sauce - 1 tablespoon lemon juice - 1/4 cup grated Parmesan cheese - Salt and pepper to taste Mix all the ingredients in a bowl until smooth. Taste and adjust as needed. This dressing will make your salad fresh and tasty. Absolutely! This Chicken Caesar Pasta Salad is perfect for meal prep. You can make it ahead for lunches or dinners. Store it in airtight containers in the fridge. It stays fresh for about 3 days. Just keep the croutons separate until you serve. This keeps them crispy and crunchy. You can make this salad healthier in a few ways: - Use whole wheat rotini for more fiber. - Swap regular Caesar dressing for a light version to cut calories. - Add extra veggies like bell peppers, cucumbers, or carrots for more nutrients. - Choose grilled chicken over fried chicken for a lower fat option. These simple swaps keep the salad tasty while making it better for you. You can enjoy delicious flavors without guilt. For the full recipe, check out the details above. This Chicken Caesar Pasta Salad is easy to make and full of flavor. You learned about the key ingredients, cooking methods, and tips for a tasty salad. We explored variations for different diets and how to store your leftovers. Remember, meal prep can save time and make eating healthy simple. You can easily customize this dish to fit your taste. Try this recipe and enjoy a balanced meal that’s quick and satisfying. Your kitchen adventures await!

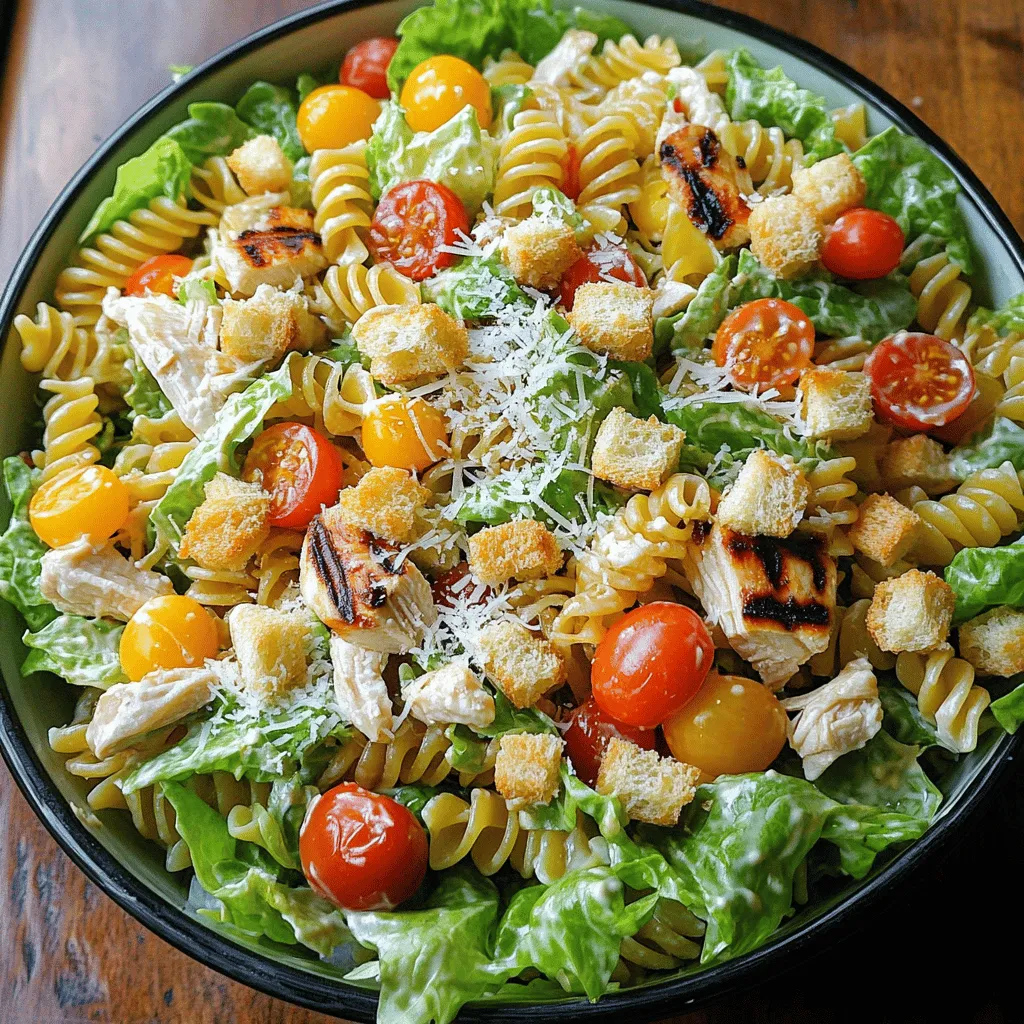
Are you craving a fresh and tasty dish? This Chicken Caesar Pasta Salad is just the answer! It combines juicy chicken, crisp lettuce, and tangy dressing, making it perfect for …

Read more

Categories Salads

Baked Pumpkin Spice Donuts Irresistible Fall Treat

July 27, 2025 by Chef Tavio
- 1 cup pumpkin puree (can be canned or made fresh) - 1/2 cup granulated sugar - 1/2 cup packed brown sugar - 2 large eggs - 1/4 cup unsweetened applesauce - 1/4 cup vegetable oil - 1 teaspoon vanilla extract - 1 1/2 cups all-purpose flour - 1 teaspoon baking powder - 1/2 teaspoon baking soda - 1 teaspoon ground cinnamon - 1/2 teaspoon ground nutmeg - 1/2 teaspoon ground ginger - 1/4 teaspoon salt - 1/4 teaspoon ground cloves - Optional: powdered sugar or cinnamon sugar for a delightful dusting When I make these donuts, I focus on the best ingredients. The pumpkin puree is key. Fresh pumpkin adds a rich flavor, but canned works well too. Always check labels for pure pumpkin. The sugars enhance sweetness and moisture. I love using a mix of granulated and brown sugar. Brown sugar adds depth with its molasses flavor. Eggs are vital for structure. They help the donuts rise and stay fluffy. Unsweetened applesauce keeps them moist and adds nutrition. For oils, I prefer vegetable oil. It has a neutral taste and keeps the donuts soft. Flour is the base. All-purpose flour gives the right texture. Baking powder and baking soda help them rise. The spices bring fall to life! Cinnamon, nutmeg, ginger, and cloves create a warm aroma. Finally, optional toppings like powdered sugar or cinnamon sugar make these donuts special. They add sweetness and charm. Using quality ingredients makes a big difference in taste. Always pick fresh and organic when you can. Your donuts will thank you! For the full recipe, check out the links provided. 1. Preheat your oven to 350°F (175°C). Grease a donut pan with non-stick spray. A silicone mold works great, too. 2. Mix the wet ingredients in a large bowl. Combine pumpkin puree, granulated sugar, brown sugar, eggs, applesauce, vegetable oil, and vanilla extract. Whisk until smooth and creamy. 3. Combine the dry ingredients in another bowl. Whisk together the flour, baking powder, baking soda, ground cinnamon, nutmeg, ginger, salt, and ground cloves. This mix helps create a fluffy texture. 4. Fill the donut pan correctly. Gradually fold the dry mixture into the wet ingredients. Use a spatula and mix gently. A few lumps are okay; don’t overmix! - Time and temperature: Bake your donuts for 10-12 minutes at 350°F. This heat cooks them evenly and keeps them soft. - Check if the donuts are baked: Insert a toothpick in the center of a donut. If it comes out clean, your donuts are done! - Cooling methods: Let the donuts cool in the pan for 5 minutes. Then transfer them to a wire rack. This step keeps them from getting soggy. - Options for dusting or glazing: Once cool, dust your donuts with powdered sugar or roll them in cinnamon sugar. Both choices make them even more delicious! For the full recipe, check the earlier section on ingredients. Enjoy making these treats! To get soft and fluffy donuts, mix your wet and dry ingredients well. Use a gentle folding motion when combining them. This helps keep air in the batter, giving it the best texture. Avoid overmixing, as this can lead to tough donuts. If you see lumps in your batter, don't worry; they are fine. Another common mistake is not greasing the pan well. If you skip this step, your donuts may stick. Always ensure your pan is ready for easy release. Want to spice things up? You can add more flavors. Try a pinch of cardamom or allspice for a new twist. You can also play with sweetness. Use brown sugar for a rich taste or coconut sugar for a hint of caramel. Adjusting the sugar lets you find the right balance for your taste. Don't forget to check the Full Recipe for more ideas on how to customize your donuts! {{image_4}} To switch things up, you can modify this recipe for chocolate or vanilla donuts. For chocolate donuts, replace 1/2 cup of flour with cocoa powder. This gives them a rich chocolate flavor. For vanilla donuts, simply add 1 tablespoon of vanilla extract. This enhances the sweetness and aroma. You can also play with seasonal spices. Instead of just cinnamon, try adding cardamom or allspice. These spices bring warmth and depth to your donuts. They can create a unique twist to classic pumpkin spice. If you need gluten-free options, swap all-purpose flour for a gluten-free blend. Make sure it includes xanthan gum for better texture. For a vegan version, replace the eggs with 1/4 cup of unsweetened applesauce per egg. You can also use plant-based milk instead of vegetable oil. For health concerns, consider using less sugar. You can cut the granulated sugar by half and use a sugar substitute. This way, you can enjoy your donuts with less guilt. Always check food labels to ensure they meet your dietary needs. Remember, these small changes can make a big difference. Enjoy experimenting with flavors and ingredients! For the full recipe, you can refer to the earlier section. To keep your baked pumpkin spice donuts fresh, store them in an airtight container. This method prevents them from drying out. You can keep them at room temperature for up to three days. If you want to save them longer, freezing is a great option. To freeze your donuts, let them cool completely. Then, place them in a single layer in a freezer-safe bag. Remove as much air as possible before sealing. You can freeze them for up to three months. Just remember to label the bag with the date! Warming up leftover donuts is easy and quick. You can use the oven or microwave. If you use the oven, preheat it to 350°F (175°C). Place the donuts on a baking sheet for about 5-7 minutes. This method keeps them soft and tasty. For the microwave, heat each donut for about 10-15 seconds. Check to ensure they are warm, but not hot. This way, you can enjoy your delicious treats days later without losing quality. You can find the full recipe for these delightful donuts in the earlier sections. Enjoy your fall treat! Can I use fresh pumpkin instead of canned? Yes, you can use fresh pumpkin. Just cook and mash the pumpkin until smooth. Canned pumpkin is also great for ease. Both options work well in the recipe. How do I know if my donuts are baked properly? To check if your donuts are ready, insert a toothpick into the center. If it comes out clean, your donuts are baked. They should also spring back slightly when touched. What is the best way to decorate baked donuts? Decorating donuts is fun! You can dust them with powdered sugar or roll them in cinnamon sugar. Drizzling with a glaze or using sprinkles adds a festive touch too. Why are my donuts dense or soggy? Dense or soggy donuts may be due to overmixing the batter. Make sure to mix just until combined. Also, check that you measured your ingredients accurately. How can I prevent sticking to the pan? To prevent sticking, grease your pan well with non-stick spray. You can also use silicone molds, which make it easy to release the donuts. This blog post covered everything you need for baking delicious donuts. You learned about essential ingredients and step-by-step instructions to make the perfect batch. I shared tips for texture, flavor, and storage. You can even adapt the recipe for different diets. Donuts can be fun to make and enjoy. Remember, practice makes perfect. With these guidelines, you can bake tasty donuts that friends and family will love. Happy baking!

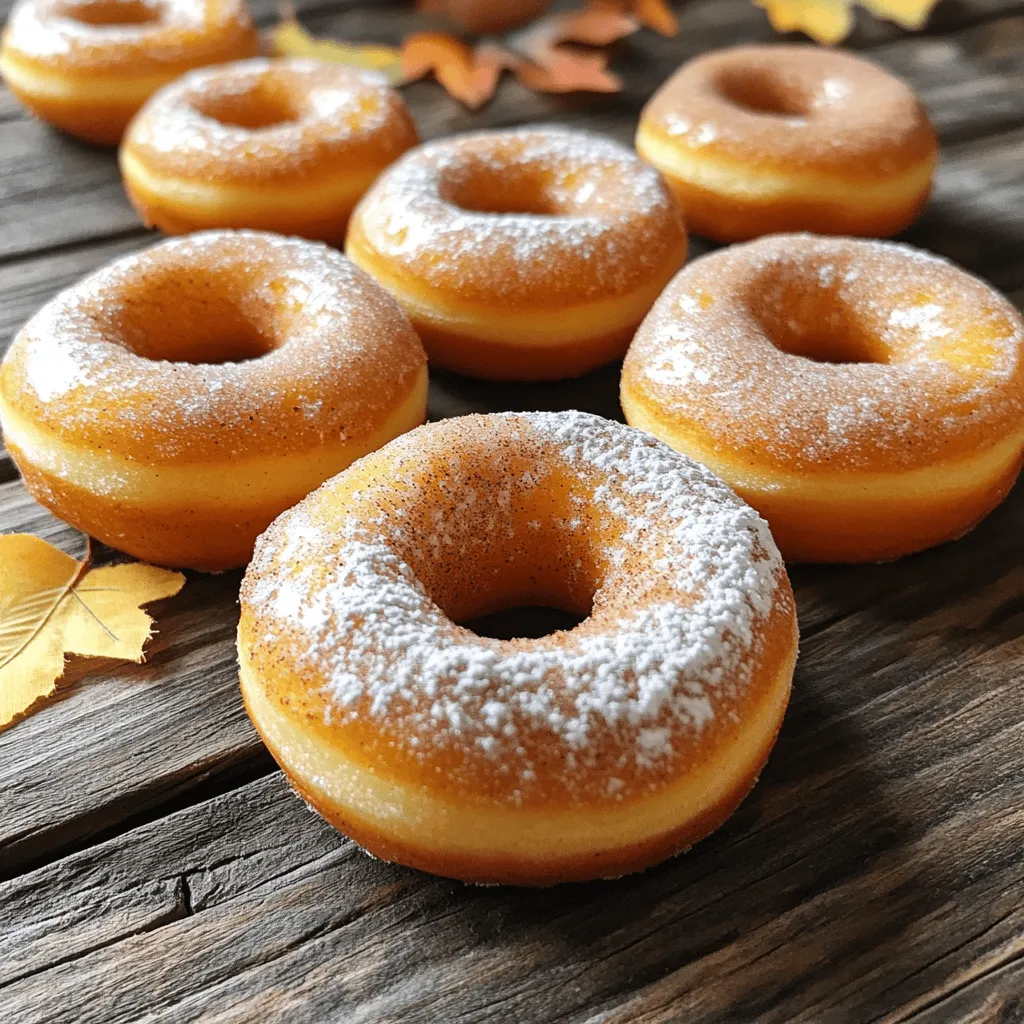
Fall is here, and that means it’s pumpkin spice season! If you crave cozy flavors and warm treats, my Baked Pumpkin Spice Donuts are a must-try. These donuts are simple …

Read more

Categories Desserts

Baked Pears with Feta, Honey, and Cranberries Delight

July 27, 2025 by Chef Tavio
To make baked pears, you need simple yet tasty ingredients. Here’s what you need: - 4 ripe yet firm pears, halved and cored - 1 cup crumbled feta cheese - 1/2 cup dried cranberries - 1/4 cup honey - 2 tablespoons chopped walnuts (optional for added crunch) - 1 teaspoon ground cinnamon - 1 tablespoon fresh lemon juice - Fresh mint leaves for a garnish Each ingredient adds a unique touch. The pears provide sweetness and softness. Feta adds a creamy, salty taste. Cranberries give a burst of tart flavor. Honey brings in natural sweetness. Walnuts can add a nice crunch if you choose to include them. You can customize your baked pears with some fun add-ins. Here are a few ideas: - A sprinkle of nutmeg for warmth - A dash of vanilla extract for extra flavor - Chopped pecans instead of walnuts for a different crunch - A dollop of Greek yogurt when serving for creaminess These options can change the taste and make your dish special. Feel free to mix and match! Choosing the right pears is key for this dish. Here are some tips to help you: - Look for pears that are firm but slightly soft at the stem. - Check for any bruises or dark spots; avoid those. - Choose pears that have a nice, sweet smell. Common varieties for baking are Bosc and Anjou. They hold their shape well when cooked. Selecting good pears ensures your baked pears turn out delicious. First, grab your ripe yet firm pears. You want them sweet but not too soft. Slice each pear in half and remove the core. This step is key for making space for the filling. To keep the pears from turning brown, squeeze some fresh lemon juice on the cut sides. The lemon not only stops browning but adds a nice tangy flavor. Now, let’s make the filling. In a bowl, mix together the crumbled feta cheese, dried cranberries, and optional chopped walnuts. This mix gives a great taste and texture. Add in the ground cinnamon for warmth and stir it all together. You want everything well blended, so the flavors come together nicely. Preheat your oven to 350°F (175°C) now. This ensures the pears cook evenly. Once your mixture is ready, fill each pear half with the feta mix. Press it in gently to pack it well. Place the stuffed pears in a baking dish, cut side up. Drizzle honey all over them so it seeps into the filling. Cover the dish with aluminum foil and bake for 25 minutes. This helps the pears soften. After 25 minutes, remove the foil. Bake them for another 10 to 15 minutes. You want the pears to be fork-tender and the tops golden-brown. Once done, let them cool for a few minutes. Serve warm, garnished with fresh mint leaves for a beautiful touch. For the full recipe, check out the details above. To make your baked pears shine, choose ripe yet firm ones. This helps them hold shape during baking. Use a mix of sweet and tart pears for a well-rounded flavor. Make sure to core the pears deeply, allowing room for the delicious filling. Drizzle lemon juice on the cut sides to prevent browning. This step keeps your pears looking fresh and vibrant. Serve your baked pears warm on a beautiful platter. Drizzle any leftover honey from the baking dish over them. This adds a sweet touch and enhances the flavor. Garnish with fresh mint leaves for a lovely contrast. You can pair them with a scoop of vanilla ice cream or a dollop of Greek yogurt for a creamy finish. Want to boost the taste? Add a pinch of nutmeg or cloves to the feta mix. You can also experiment with fresh herbs, like rosemary or thyme, for a savory twist. If you like a touch of crunch, sprinkle chopped walnuts or pecans on top right before serving. For a hint of tartness, mix in some orange zest. Each small change can create a new experience with every bite. For the full recipe, check the section above. {{image_4}} You can change the cheese in this recipe. Goat cheese adds a tangy twist. Cream cheese gives a rich and creamy texture. Try ricotta for a softer filling. Each option changes the taste but keeps it delicious. While pears shine here, you can use apples. They bake well and have a sweet flavor. Peaches also work well, offering a juicy and soft bite. Just make sure the fruit is ripe enough for baking. In fall, add spices like nutmeg or cloves. They pair well with the warm flavors. During summer, fresh berries can brighten the dish. Use whatever is in season for the best taste. You can find the Full Recipe for more ideas. To store leftover baked pears, let them cool first. Place them in an airtight container. You can keep them in the fridge for up to three days. If you want to keep them longer, freezing is a great option. Just remember to use a container that seals well. Reheat your baked pears in the oven for the best results. Set the oven to 350°F (175°C). Place the pears on a baking sheet. Cover them with foil to prevent drying out. Heat for about 10 to 15 minutes. You can also use a microwave, but the oven keeps them soft and tasty. You can freeze baked pears for later use. After cooling, wrap each pear half in plastic wrap. Then, place them in a zip-top bag. Make sure to squeeze out any air before sealing. They will last up to three months in the freezer. When ready to eat, thaw in the fridge overnight and reheat. Enjoy the sweet taste of baked pears anytime! For the full recipe, refer back to the section above. Yes, you can use fresh cranberries. Fresh cranberries give a tart taste. However, they are more sour than dried ones. If you prefer a sweeter dish, add more honey. Use about half the amount of fresh cranberries as dried ones. This way, you keep the balance of flavors in check. If you want a different flavor, try goat cheese or ricotta. Both options work well with pears. Goat cheese is tangy, while ricotta is creamy. You can also use a plant-based cheese if you are vegan. Just pick one that crumbles easily. Each option will change the taste slightly, but they will still be delicious. Baked pears are great for meal prep! They store well in the fridge for up to three days. Just keep them in an airtight container. You can easily reheat them in the oven or microwave. For a quick snack or dessert, they are perfect. You can also enjoy them cold as a refreshing treat. Check out the Full Recipe for a detailed guide on preparation and storage! Baked pears are a simple and tasty treat. We covered key ingredients, preparation steps, and helpful tips. You learned how to choose the best pears and make a great filling. I shared ideas for serving and storing leftovers, plus fun variations. Now, you can enjoy baked pears any time with confidence. Try out the suggestions and make this dish your own. Your kitchen will smell amazing, and your guests will be impressed!

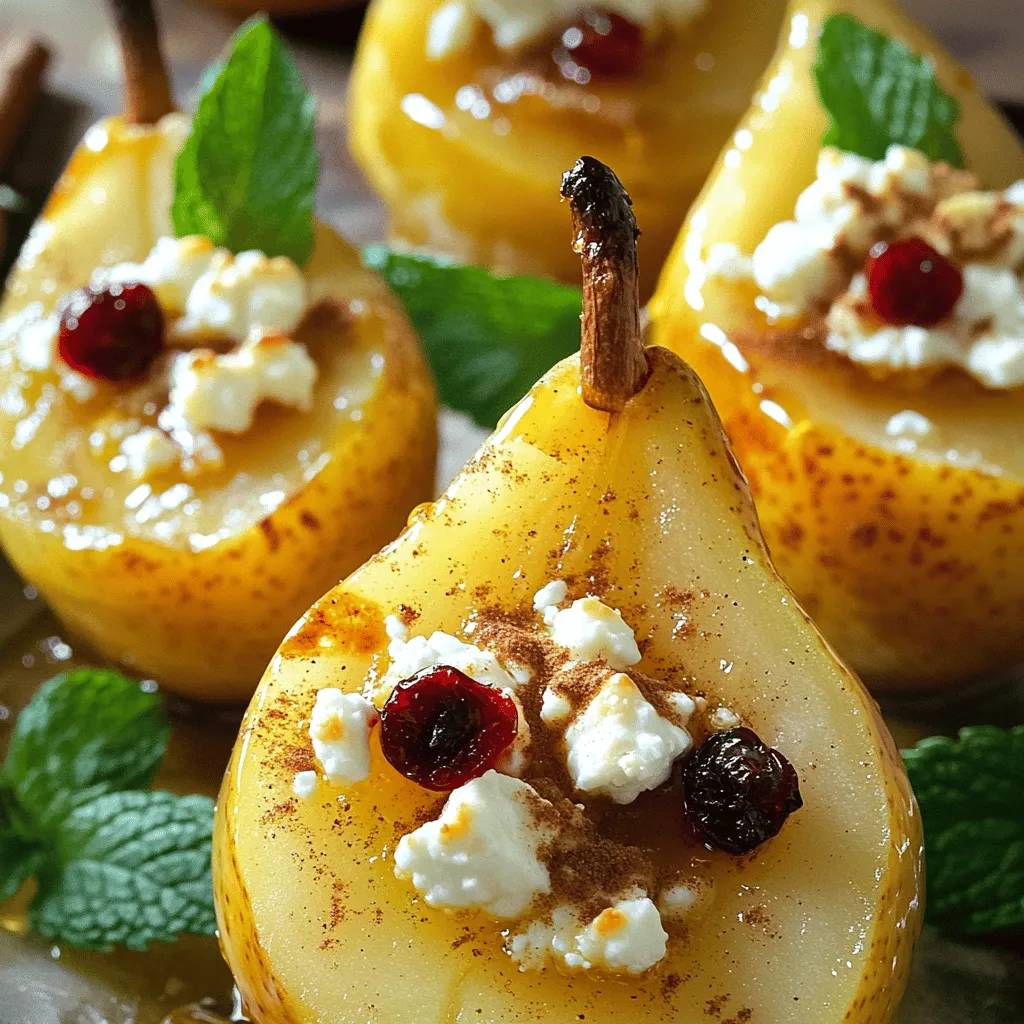
Craving a sweet and savory treat? Baked Pears with Feta, Honey, and Cranberries are the answer. This delicious dish combines warm, tender pears with creamy feta and tangy cranberries, topped …

Read more

Categories Desserts

Gluten-Free Apple Cider Donuts Healthy Fall Treat

July 27, 2025 by Chef Tavio
- 1 cup apple cider - 1 ½ cups gluten-free all-purpose flour - ½ cup almond flour - ½ cup granulated sugar - 1 teaspoon baking powder - 1 teaspoon baking soda - 1 teaspoon ground cinnamon - ½ teaspoon ground nutmeg - ¼ teaspoon salt - 2 large eggs - ¼ cup unsweetened applesauce - ¼ cup melted coconut oil - 1 teaspoon vanilla extract - ½ cup powdered sugar (for dusting) - Additional cinnamon (for dusting) When I gather my ingredients for gluten-free apple cider donuts, I focus on quality. For the gluten-free all-purpose flour, look for a blend that has xanthan gum. This ingredient helps bind the flour and improves texture. Brands like Bob's Red Mill and King Arthur Flour offer great options. Almond flour adds a nice nutty flavor. If you have nut allergies, you can use more gluten-free flour instead. I love using fresh apple cider for its rich taste. If you can’t find it, apple juice works as a substitute. Just be sure to reduce the sugar slightly, as juice may be sweeter. When sourcing ingredients, always check labels carefully. Some products may contain gluten or cross-contamination. Health food stores often have a wide range of gluten-free options. Online stores also provide many choices if you want to shop from home. One last tip: don’t skip the spices! The ground cinnamon and nutmeg make these donuts taste warm and cozy. These ingredients are easy to find and will elevate your flavors. For your convenience, the full recipe can guide you through each step. Enjoy making these tasty fall treats! To prepare the apple cider, start with a medium saucepan. Pour in one cup of apple cider and bring it to a gentle boil over medium heat. This step is key for thickening the cider. Once it boils, reduce the heat and let it simmer for about 10 to 15 minutes. The goal is to reduce the liquid slightly. This method enhances the flavor and makes your donuts richer. After simmering, let the cider cool before you use it. Temperature control is crucial here. If the cider boils too fast, it can scorch. A gentle simmer gives the best results. Make sure to stir occasionally to prevent sticking. In a large mixing bowl, combine your dry ingredients. Use 1 ½ cups of gluten-free all-purpose flour, along with ½ cup of almond flour. Add ½ cup of granulated sugar, 1 teaspoon of baking powder, 1 teaspoon of baking soda, 1 teaspoon of ground cinnamon, ½ teaspoon of ground nutmeg, and ¼ teaspoon of salt. Whisk these ingredients together well. Whisking is vital as it helps to aerate the flour. This process makes your donuts light and fluffy. You can use a gluten-free flour blend that has xanthan gum for an even better texture. Now, let’s combine the wet and dry mixtures. In a separate bowl, crack two large eggs and beat them lightly. Add the cooled apple cider, ¼ cup of unsweetened applesauce, ¼ cup of melted coconut oil, and 1 teaspoon of vanilla extract. Whisk until smooth. Gradually add the wet mixture to the dry ingredients. Gently fold them together with a spatula. Be careful not to overmix, as this can lead to tougher donuts. Stop mixing when you no longer see dry flour. The batter should look slightly lumpy. Preheat your oven to 350°F (175°C). Grease your donut pan with non-stick spray or coconut oil. Fill each mold about ¾ full with the batter using a spatula. This gives room for the donuts to rise. Bake the donuts for 12 to 15 minutes. To check if they are done, insert a toothpick into the center of one donut. If it comes out clean, they are ready. Once they are done, cool them in the pan for 5 minutes. Then, remove the donuts and let them cool completely on a wire rack. For storage, keep them in an airtight container. This helps keep your donuts fresh and tasty for a longer time. Enjoy your homemade gluten-free apple cider donuts! To make your gluten-free apple cider donuts fluffy, you need to focus on two main areas: the right flour and the mixing method. - Adjustments for fluffiness: Use a blend of gluten-free all-purpose flour and almond flour. This mix gives your donuts a light texture. When combining wet and dry ingredients, mix gently. Overmixing can make the donuts tough. - Flavor variations with spices: Adding spices can elevate the flavor. Try mixing in a pinch of ginger or allspice. These spices work well with cinnamon and nutmeg. You can also experiment with cardamom for a unique twist. Dusting and toppings can take your donuts from good to great. Here are some fun ideas: - Creative ways to dust with cinnamon sugar: After cooling, dip each donut in melted coconut oil. Then, roll them in a mix of powdered sugar and cinnamon. This gives a sweet and spicy kick. - Adding toppings for enhanced flavor: You can add toppings like crushed nuts, chocolate drizzle, or caramel sauce. These not only add flavor but also make your donuts look stunning. Sliced apples on top can add a fresh touch. For the full recipe, check out the complete guide and enjoy your baking adventure! {{image_4}} You can easily add your twist to these gluten-free apple cider donuts. Try mixing in pumpkin spice. Just a teaspoon can make a warm, cozy flavor. If you love chocolate, add some cocoa powder or chocolate chips. This gives a rich taste that kids adore. Incorporating nuts or fruits can also enhance the flavor. Chopped walnuts or pecans add a nice crunch. Diced apples or raisins bring extra sweetness and moisture. These changes keep the recipe fun and fresh. If you want a vegan option, you can skip the eggs. Use flax eggs instead. To make one flax egg, mix one tablespoon of flaxseed meal with three tablespoons of water. Let it sit for five minutes to thicken. This will help bind the donuts without eggs. For a healthier sweetener, consider using maple syrup or honey. These options add unique flavors and sweetness. You can adjust the amount of sugar in the recipe. Just remember, if using a liquid sweetener, reduce the apple cider slightly for balance. Explore these variations to make your gluten-free apple cider donuts even more delightful! For the complete recipe, check out the Full Recipe section. To keep your donuts fresh, store them in an airtight container. This helps prevent them from drying out. I recommend using a glass or plastic container with a tight lid. If you have a lot, separate layers with parchment paper. This way, they won’t stick together. For the best taste and texture, eat your donuts within three days. After this, they may start to lose their soft charm. If you have extras, consider freezing them for later. Freezing donuts is a great way to save them for when you crave a sweet treat. To freeze, let the donuts cool completely first. Then, wrap each one in plastic wrap. Place them in a freezer-safe bag or container. This protects them from freezer burn. When you want to enjoy a donut, simply reheat it. You can use the microwave or the oven. For the microwave, heat each donut for about 15 seconds. For the oven, preheat to 350°F (175°C) and warm them for 5-7 minutes. This method brings back their fresh-baked taste. No, I do not recommend using regular flour in this recipe. Gluten-free flour blends are made from different grains and starches. They offer a lighter texture, which is key for donuts. Regular flour contains gluten, which gives baked goods their chewy structure. Gluten-free flour lets us make a soft and fluffy donut without gluten. To make sure your donuts are fluffy, mix the wet and dry ingredients gently. Overmixing can make them dense. Use a light hand when folding them together. Adding a bit more baking powder can also help. It gives the donuts a nice lift while baking. Many people love gluten-free donuts! They taste great, and most cannot tell the difference. I’ve had many taste testers enjoy these treats without knowing they are gluten-free. They are just as tasty as regular donuts. The spices and apple cider add rich flavors. You can find gluten-free apple cider donuts at local bakeries or health food stores. Some brands offer them in the frozen section. Check farmers' markets, as many local bakers sell fresh, gluten-free treats. You might also find them at specialty stores. Creating delicious gluten-free apple cider donuts involves knowing the right ingredients and techniques. We've explored essential ingredients, from sourcing gluten-free options to perfecting your mixtures. You learned how to bake with attention to texture, flavor, and creative decoration. In conclusion, making these donuts can be fun and rewarding. With the tips and variations provided, you can tailor them to your taste. Enjoy these treats fresh or stored for later, knowing everyone can share in the joy of good food. Your gluten-free baking will impress friends and family!

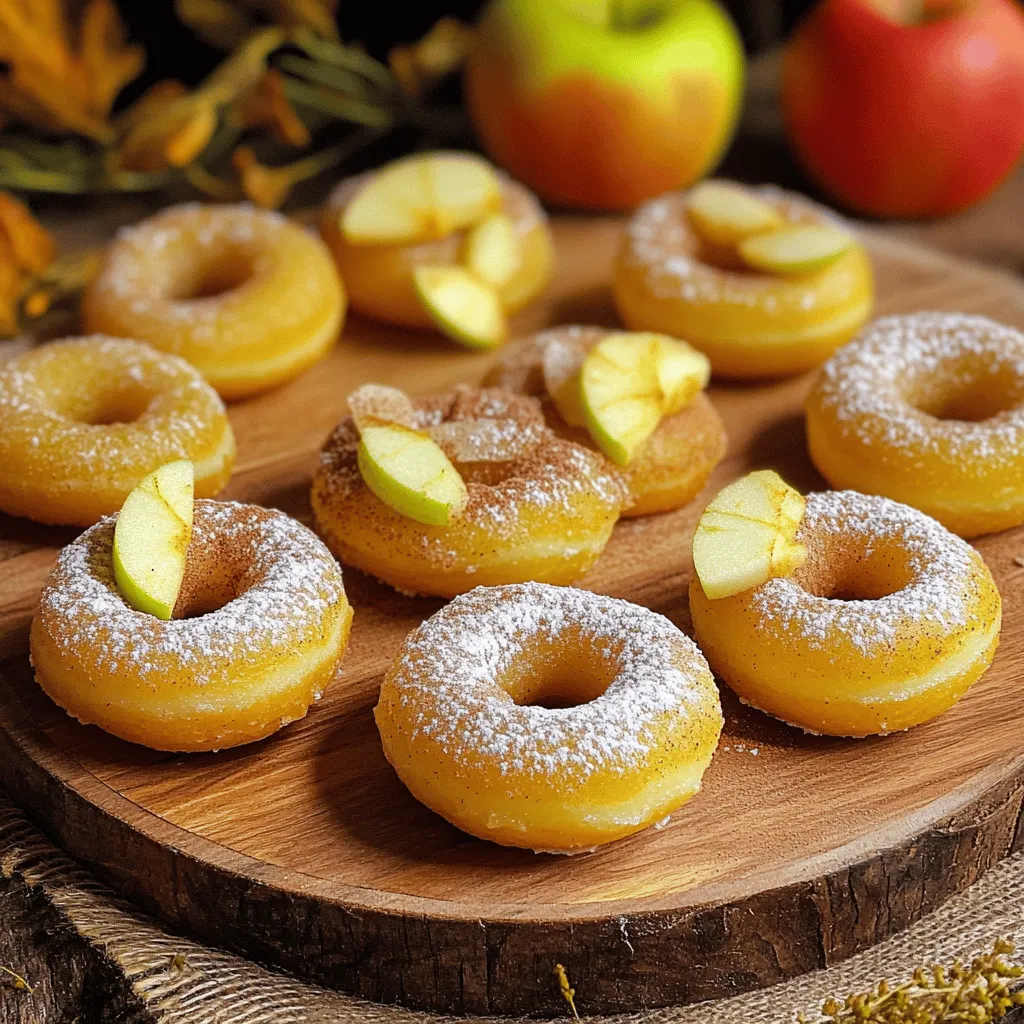
Fall is here, and that means it’s time for a delicious treat—Gluten-Free Apple Cider Donuts! These warm, spiced donuts are not only tasty but also a healthy option for everyone. …

Read more

Categories Desserts
Older posts
Newer posts
← Previous Page1 … Page30 Page31 Page32 … Page93 Next →

TASTED NEST

Where Flavor Finds a Home 🍳🏡 — warm, simple, and crave-worthy recipes made for real life, from stovetop mornings to backyard dinners.

PAGES

Home About Contact Privacy Policy Terms & Conditions Cookie Policy GDPR Policy Copyright Policy Disclaimer

CATEGORIES

Appetizers Desserts Salads Breakfast Dinner

Contact

  • Pinterest
  • Mail
Copyright © 2025 Tasted Nest. All rights reserved.