Homemade Cinnamon Swirl Banana Bread Delightful Recipe
![- 3 ripe bananas, thoroughly mashed - 1/3 cup unsalted butter, melted - 1 teaspoon baking soda - Pinch of sea salt - 3/4 cup granulated sugar - 1 large egg, well-beaten - 1 teaspoon pure vanilla extract - 1 cup all-purpose flour - 1/2 teaspoon ground cinnamon - 1/4 cup light brown sugar - 1/2 cup walnuts, finely chopped (optional) To make this delicious cinnamon swirl banana bread, you need the right ingredients. Each one plays a big part in creating the best flavors and textures. The bananas should be very ripe. They must be soft to mash well. This gives the bread its natural sweetness. The unsalted butter adds richness. Baking soda helps the bread rise. A pinch of sea salt balances the sweetness. Granulated sugar gives it a lovely taste. The beaten egg binds the mix together. Pure vanilla extract adds depth to the flavor. All-purpose flour is the base. The ground cinnamon brings warmth and spice. Light brown sugar adds moisture and a hint of caramel flavor. The walnuts are optional, but they add a nice crunch. - Alternative sweeteners: You can use honey or maple syrup instead of sugar. - Gluten-free flour options: Try almond flour or a gluten-free blend. - Egg replacements: Use flaxseed meal mixed with water or applesauce as a binder. Finding substitutes can make this recipe work for you. Each swap can change the taste slightly, but it will still be delicious. You can experiment and make this banana bread suit your needs. For the full recipe, follow the steps I provide later! 1. Preheat your oven to 350°F (175°C). This step helps the bread bake evenly. 2. Prepare a standard 9x5-inch loaf pan. Grease it well with butter or use parchment paper for easier removal later. 1. In a large bowl, add 3 ripe bananas that you have mashed well. 2. Pour in 1/3 cup of melted unsalted butter. Mix these two ingredients until smooth and blended. 3. Next, add 1 teaspoon of baking soda and a pinch of sea salt. This helps the bread rise nicely. 4. Now, stir in 3/4 cup of granulated sugar, 1 well-beaten egg, and 1 teaspoon of pure vanilla extract. Mix until everything is smooth. 5. Gradually add 1 cup of all-purpose flour. Fold it in gently. Stop mixing when you can’t see dry flour anymore. 1. In a small bowl, combine 1/2 teaspoon of ground cinnamon and 1/4 cup of light brown sugar. This will be your swirl mixture. 2. Pour half of the banana batter into the prepared loaf pan. Sprinkle half of the cinnamon mixture over this layer. 3. Carefully add the rest of the banana batter on top. Then, sprinkle the remaining cinnamon mixture on top. 4. Use a knife or toothpick to gently swirl the mixtures together. This creates a beautiful marbled effect. 1. Place the loaf pan in your preheated oven. Bake for 60 to 65 minutes. 2. Check for doneness by inserting a toothpick into the center. It should come out clean with a few moist crumbs. 3. Once done, take the pan out of the oven. Let it cool for about 10 minutes. 4. After cooling, carefully transfer the loaf to a wire rack. Allow it to cool completely before slicing. Enjoy this delightful Homemade Cinnamon Swirl Banana Bread! For the full recipe, check the details above. To make the best banana bread, avoid overmixing the batter. Mix just until you see no dry flour. This keeps your bread light and fluffy. Overmixing can make it dense and chewy. Check your bananas for ripeness. They should be brown and soft. The riper the bananas, the sweeter your bread will be. If they are too green, wait a few days. You can add spices like nutmeg to boost flavor. A little pinch makes a big difference. It adds warmth and depth to your bread. Using different types of nuts can also change the taste. Walnuts are great, but try pecans or almonds. They each give a unique crunch and flavor. Once your bread cools, slice it and arrange it nicely. A rustic wooden cutting board looks great. You can also lightly dust the top with powdered sugar. For a sweet touch, drizzle a simple glaze on top. Mix powdered sugar with a splash of milk for a quick glaze. It adds shine and sweetness to your banana bread. Check the [Full Recipe] for more tips! {{image_4}} You can make your banana bread even better with some tasty add-ins. Here are two great options: - Chocolate chips: These add a sweet burst of flavor. I recommend using semi-sweet or dark chocolate chips. They melt nicely and mix well with the bananas. - Dried fruits: You can use raisins or cranberries. They add a chewy texture and a bit of tartness. Just make sure to chop them if they are large. If you have special dietary needs, you can still enjoy this banana bread. Here are two easy adaptations: - Vegan adaptations: Replace the egg with a flaxseed meal. Mix one tablespoon of flaxseed meal with three tablespoons of water. Let it sit for a few minutes to thicken. You can also swap the butter for coconut oil or a vegan butter alternative. - Low-sugar versions: You can cut down on sugar by using natural sweeteners. Try using mashed dates or applesauce instead of granulated sugar. This will keep the bread sweet while making it healthier. Want to change up the swirl in your banana bread? Here are some fun ideas: - Nutella or peanut butter swirls: Spread a layer of Nutella or peanut butter between the batter layers. This gives your bread a rich, creamy taste. - Fruit preserves: Use your favorite fruit jam or preserves. Swirl it through the batter for a fruity kick that complements the bananas. These variations can help you create a unique version of this classic banana bread. Explore your creativity and make it your own! For the complete recipe, check out the Full Recipe section. You can store leftover banana bread at room temperature for up to three days. Keep it in a cool, dry place away from sunlight. For longer freshness, place it in the fridge. Use an airtight container to keep it moist. If you use the fridge, the bread may last up to a week. Just remember that cold storage can change the texture a bit. To freeze banana bread, first, let it cool completely. Wrap it tightly in plastic wrap. Then, place it in a freezer bag or airtight container. This helps prevent freezer burn. You can freeze it for up to three months. When you want to enjoy it, simply take it out and let it thaw at room temperature. If you're in a hurry, you can microwave individual slices for about 15 seconds. Fresh banana bread is best enjoyed within a week when stored properly. Look for signs of spoilage, like mold or a sour smell. If your bread feels dry or crumbly, it may not be fresh anymore. For the best taste, enjoy it while it's still soft and moist. With proper storage, you can savor your homemade cinnamon swirl banana bread for days! Yes, you can use frozen bananas. Thaw them first, then mash. Frozen bananas work well because they become very soft. This makes them easy to mix into the batter. Just make sure to drain any extra liquid before adding them. You can check using a toothpick. Insert it in the center of the loaf. If it comes out clean or with a few crumbs, it’s done. Another sign is a golden-brown top. Your kitchen will also smell amazing when it’s ready. To slice banana bread, use a sharp knife. A serrated knife works best. Let the bread cool completely first. This helps prevent squishing the loaf. Slice it while it’s firm for neat pieces. Aim for about half an inch thick. Absolutely! You can turn this recipe into muffins. Use a muffin tin instead of a loaf pan. Fill each cup about two-thirds full. Bake for about 20 to 25 minutes. Check them with a toothpick just like the bread. To add more moisture, use extra ripe bananas. You can also add yogurt or applesauce. These ingredients keep the bread soft and fluffy. Another tip is to avoid overmixing the batter. This keeps the bread light and airy. If you want, add a little more butter too. For the full recipe, check out the [Full Recipe]. In this blog post, we explored the ingredients and steps for making delicious banana bread. We provided clear instructions on mixing, baking, and enhancing flavors. You learned about ingredient substitutions and variations to suit your taste and diet. Remember to check banana ripeness for the best results. With these tips, you can bake a perfect loaf or try fun twists like chocolate chips or nut butter swirls. Enjoy your baking journey and share your tasty creations!](https://tastednest.com/wp-content/uploads/2025/07/cdc7a8f6-8bb5-4e9c-bb04-0d401f3991b2.webp)
Are you ready to bake something delightful? This Homemade Cinnamon Swirl Banana Bread recipe turns simple ingredients into a warm, comforting treat. With just a few ripe bananas and easy …
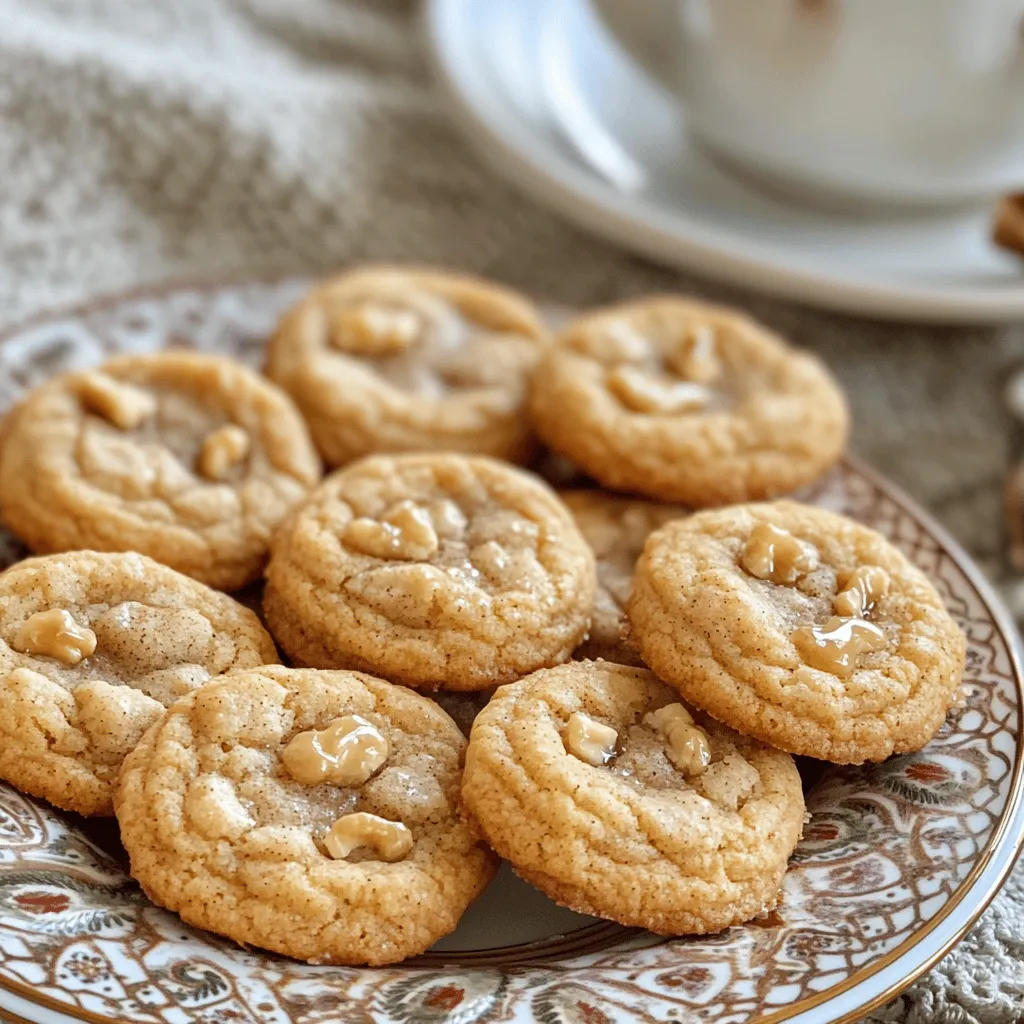
![- 1 cup canned pumpkin puree - 1/2 cup almond butter (or any nut butter of your choice) - 1/4 cup pure maple syrup or honey The key to these cookies is the canned pumpkin puree. It gives moisture and flavor. Almond butter adds creaminess and healthy fats. Use maple syrup or honey for a natural sweet touch. - 1 1/2 cups whole wheat flour - 1 teaspoon baking soda - 1 teaspoon baking powder - 1 teaspoon ground cinnamon - 1/2 teaspoon ground nutmeg - 1/4 teaspoon fine sea salt Whole wheat flour keeps the cookies hearty. Baking soda and powder help them rise. The spices add warmth and depth to the flavor. Don't skip the salt; it enhances all the tastes. - 1/2 cup dark chocolate chips (dairy-free preferred for a vegan option) - 1/4 cup walnuts or pecans, finely chopped (optional) Dark chocolate chips bring a rich sweetness. Chopped nuts add a nice crunch. You can mix and match these add-ins based on your taste. For the full recipe, check out the Ultimate Healthy Pumpkin Chocolate Chip Cookies. 1. Preheat the Oven: Start by preheating your oven to 350°F (175°C). This helps the cookies bake evenly. Next, line a baking sheet with parchment paper. This keeps the cookies from sticking. 2. Mix Wet Ingredients: In a large bowl, add the canned pumpkin puree, almond butter, maple syrup, and vanilla extract. Use a whisk or spoon to blend these ingredients until smooth. This mixture forms the base of your cookie dough. 1. Whisk Together Dry Ingredients: In a separate bowl, whisk together the whole wheat flour, baking soda, baking powder, ground cinnamon, ground nutmeg, and fine sea salt. Make sure everything is well mixed. This helps the cookies rise and taste great. 2. Incorporate Dry Mixture: Slowly add the dry mix to the wet ingredients. Stir gently until just combined. Avoid overmixing to keep the cookies soft and chewy. 1. Add Chocolate and Nuts: Carefully fold in the dark chocolate chips and chopped nuts, if using. Ensure they are spread evenly throughout the dough for a delicious bite in every cookie. 2. Scoop the Cookie Dough: Use a tablespoon or cookie scoop to drop rounded tablespoons of dough onto the prepared baking sheet. Leave space between each scoop. The cookies will spread while baking. 3. Bake: Place your baking sheet in the oven. Bake for 10-12 minutes or until the edges are lightly golden. The centers should stay soft. Remember, the cookies will firm up as they cool. For the full recipe, check out the Ultimate Healthy Pumpkin Chocolate Chip Cookies. To prevent cookie spread, chill the dough for 30 minutes before baking. This helps keep the shape. Use parchment paper on your baking sheet to avoid sticking. Make sure to space the dough scoops well, about two inches apart. For perfect doneness, watch the edges closely. They should turn light golden brown while the centers stay soft. When in doubt, take them out! Cookies will firm up as they cool. Creative stacking can make your cookies look great. Stack two or three cookies on a plate. Dust them lightly with cinnamon for a nice touch. You can also drizzle some melted chocolate over the top for added flair. For serving, try to serve the cookies warm. This melts the chocolate chips and enhances the flavor. You can warm them in the microwave for just a few seconds before serving. If you want to swap out nut butter, try sunflower seed butter or tahini. These options work well and keep the cookies tasty. For sweeteners, you can use coconut sugar or agave nectar instead of maple syrup. They add sweetness without refined sugars. Just adjust the amount to match your taste. You can find the full recipe for these cookies in the section above. Happy baking! {{image_4}} You can easily modify this recipe to fit different diets. For a vegan option, swap the honey with maple syrup. Use dairy-free chocolate chips for a completely plant-based treat. Almond butter is great, but any nut butter works well too. For gluten-free cookies, replace whole wheat flour with a gluten-free blend. Look for one that has xanthan gum for the best texture. You can also use almond flour, which adds a nutty taste and keeps them moist. To make these cookies even more exciting, try adding different spices. A dash of ground ginger adds a warm kick. You can also mix in a hint of allspice for a unique flavor twist. Dried fruits can elevate the taste too. Adding cranberries lends a tartness that balances the sweetness. You can also try raisins or chopped dates for a chewy texture. For more texture, explore other mix-ins. Shredded coconut adds a tropical flair. Chia seeds or sunflower seeds provide a nice crunch and boost nutrition. You can even try pumpkin seeds for a fun twist. These variations keep the cookies interesting and fun. Check out the full recipe to create your perfect batch! Store your cookies at room temperature. Place them in an airtight container. This keeps them fresh for about 3-5 days. If you stack them, use parchment paper between layers. This helps prevent sticking. For longer enjoyment, freeze the cookies. Place them in a freezer-safe bag. Make sure to remove as much air as possible. They will last up to 3 months in the freezer. To thaw, leave them at room temperature for about 30 minutes. This keeps their soft texture intact. These cookies stay fresh for several days at room temperature. After that, they may lose moisture. Look for signs of spoilage, like a dry or hard texture. If they smell off or have mold, discard them. Enjoy your healthy pumpkin chocolate chip cookies while they are fresh! For the full recipe, check the link provided. Can I substitute pumpkin puree with fresh pumpkin? Yes, you can. To use fresh pumpkin, cook it until soft. Then, mash it well to get a smooth puree. This might change the cookie's moisture a bit. Make sure to drain any excess water. How do I make these cookies less sweet? To reduce sweetness, cut back on maple syrup or honey. You can use half the amount. You might also add more spices like cinnamon and nutmeg for flavor without adding sugar. Why did my cookies turn out dense? Dense cookies often come from too much flour or overmixing. Be sure to measure flour correctly. Use the spoon-and-level method to avoid packing it too tightly. Mix just until combined for a lighter texture. How can I prevent cookies from sticking to the baking sheet? To prevent sticking, line your baking sheet with parchment paper. You can also lightly spray the paper with cooking spray. This helps the cookies lift off easily after baking. Can I use a different type of flour? Yes, you can. If you want a gluten-free option, try almond flour or oat flour. Keep in mind that this may change the cookie's texture slightly, so adjustments may be needed. Are there alternatives for almond butter? Absolutely! You can use peanut butter, sunflower seed butter, or even coconut butter. Each will bring its own flavor, but all work well in this recipe. Make sure the butter you choose is smooth for the best results. For the full recipe, check out [Full Recipe]. You can create tasty cookies with simple ingredients like pumpkin, nut butter, and spices. We covered essential ingredients, step-by-step instructions, and helpful tips to make your baking easy. Don't forget to try variations and healthier options to suit your taste. Store cookies properly for the best flavor and texture. Remember, baking should be fun, so feel free to explore! Enjoy your delicious creations and share them with loved ones.](https://tastednest.com/wp-content/uploads/2025/07/58649165-c7ae-46b4-8704-05ad37b54a51.webp)
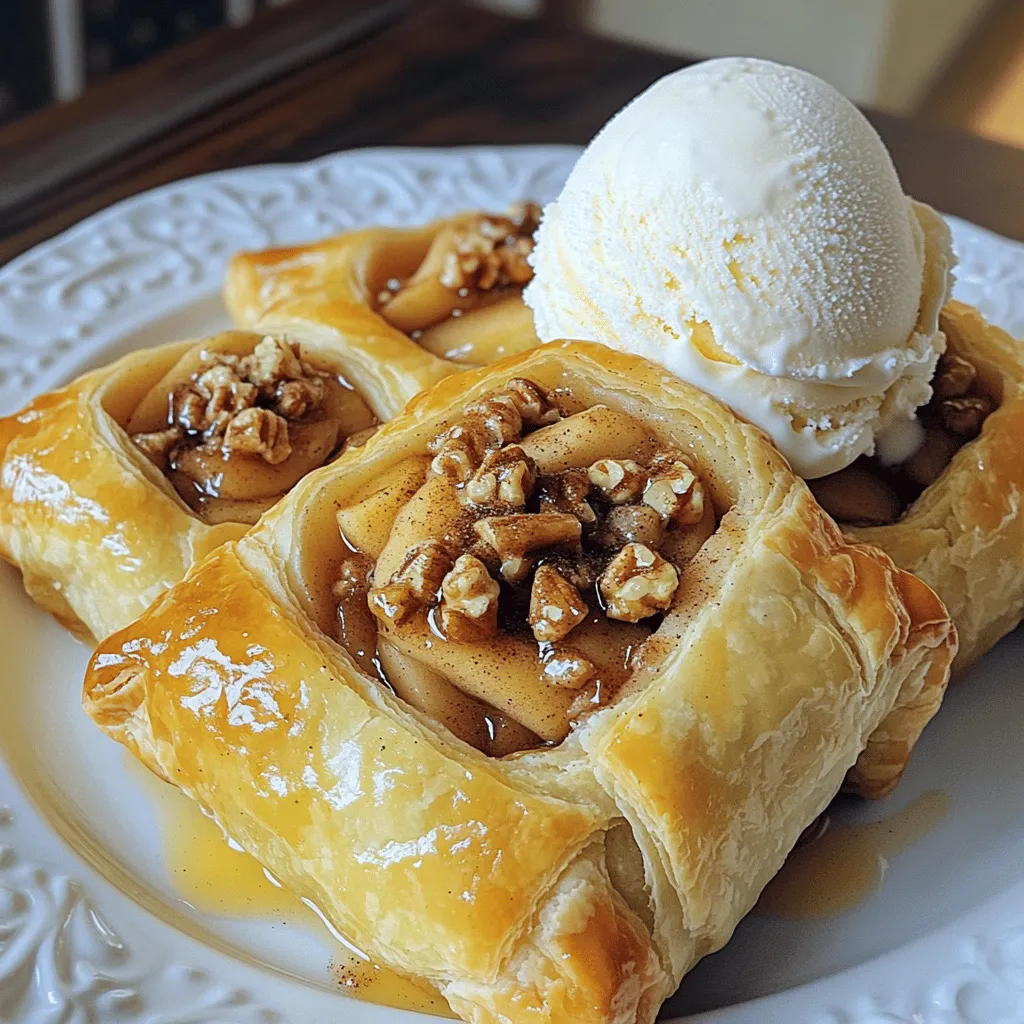

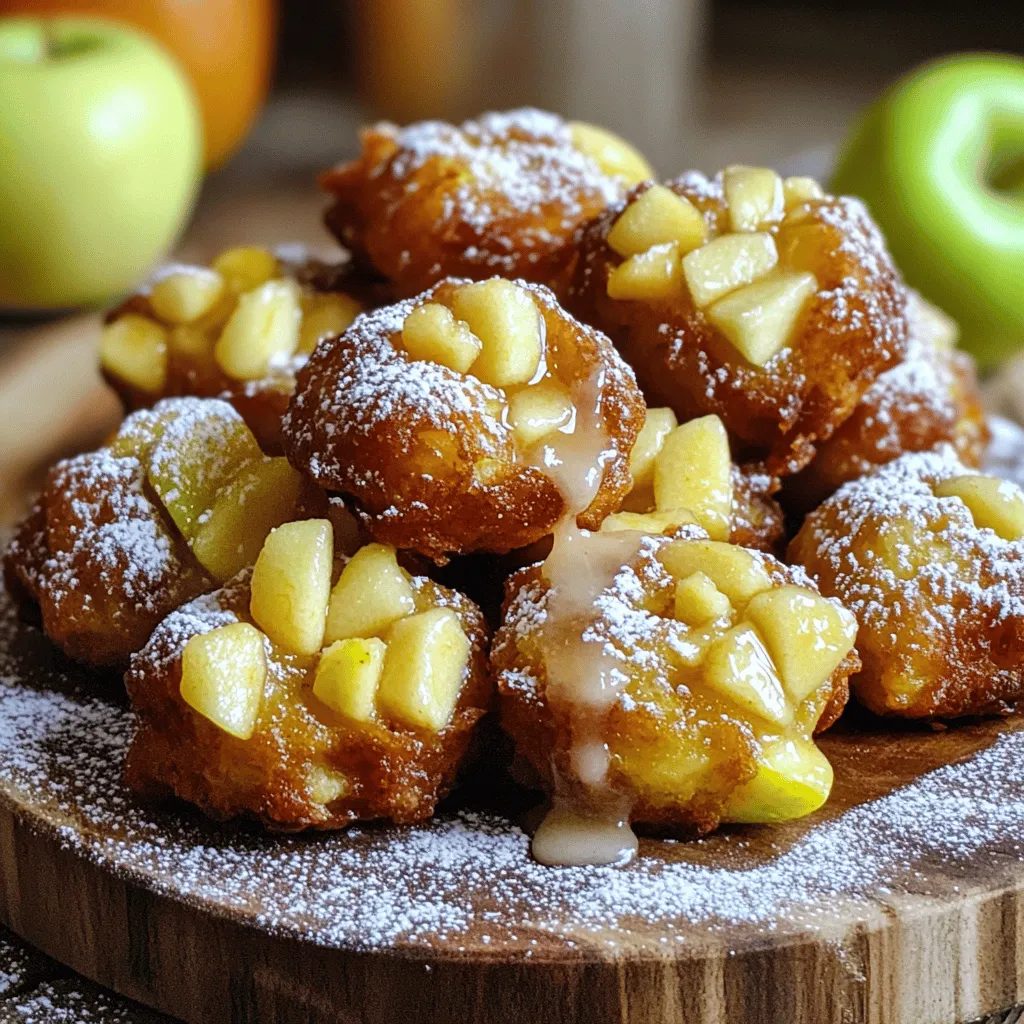
![- 3 large Granny Smith apples, peeled, cored, and sliced - 1 cup packed brown sugar - 2 tablespoons all-purpose flour - 2 teaspoons ground cinnamon, plus more for sprinkling - 1/4 teaspoon ground nutmeg - 1 tablespoon fresh lemon juice - 1 teaspoon pure vanilla extract - 1 pre-made pie crust (store-bought or homemade) - 2 tablespoons unsalted butter, cut into small cubes The star of this dessert is the Granny Smith apple. Its tartness balances the sweetness of brown sugar. Mixing the apples with flour, cinnamon, nutmeg, lemon juice, and vanilla gives the filling a rich flavor. The flour helps thicken the juices, making every slice neat and tidy. - Vanilla ice cream - Fresh mint leaves When it comes to serving your pie, vanilla ice cream is a must. Its creaminess pairs perfectly with warm pie. A few fresh mint leaves add a touch of brightness and color. You can find the full recipe to create this delightful treat and impress your friends and family. First, grab a large bowl. You will need to combine your sliced Granny Smith apples with a few simple ingredients. Take 1 cup of packed brown sugar and 2 tablespoons of all-purpose flour. Add 2 teaspoons of ground cinnamon, 1/4 teaspoon of ground nutmeg, 1 tablespoon of fresh lemon juice, and 1 teaspoon of pure vanilla extract. These ingredients bring out the best in the apples. Now, gently toss the apple slices with your hands or a spatula. Make sure every apple slice gets a nice coating of sugar and spices. This step is key to a flavorful filling. Next, it's time to assemble your pie. Take your pre-made pie crust and lay it carefully into a 9-inch pie dish. Press it down to fit snugly against the bottom and sides. This will hold all that delicious filling. Once your crust is ready, spoon the apple filling into the pie crust. Spread the apples out evenly. This ensures that every slice has that sweet, spiced apple goodness. Don't forget to place small cubes of unsalted butter on top of the filling. This helps create a rich flavor as it bakes. Now, let’s bake! Preheat your oven to 425°F (220°C). Once it reaches that temperature, insert your assembled pie and bake it for 15 minutes. This initial blast of heat helps the crust start to cook. After 15 minutes, lower the oven temperature to 350°F (175°C). Continue to bake for another 30 to 35 minutes. You’ll want to see the apples turn tender and the crust turn golden brown. When the pie is done, carefully remove it from the oven. Let it cool for at least 30 minutes. This cooling time allows the filling to set, making it easier to slice. Now, you are ready to serve a slice of warm pie with a scoop of vanilla ice cream on top. Enjoy this delightful treat! Choosing the right apples is key. I love using Granny Smith apples. They are tart and hold their shape well. You can also mix in some sweet apples like Honeycrisp for balance. This mix brings out great flavors. Adjusting sweetness levels is also important. Taste your apples first. If they are very tart, add more brown sugar. If they are sweet, use less. This helps the pie taste just right. Baking temperature tips matter. Start with a high temperature, like 425°F (220°C). This helps the crust get nice and brown. After 15 minutes, lower the heat to 350°F (175°C) to cook the apples through. To prevent a soggy bottom, use a pre-made crust. It gives the best crispness. You can also try baking the crust for a few minutes before adding the filling. This gives it a head start and keeps it firm. The best way to dish up à la mode is to slice the pie warm. A warm slice pairs perfectly with cold vanilla ice cream. This mix of hot and cold is pure bliss. When pairing flavors, think about beverages. A warm cup of spiced cider or a nice coffee works well. These drinks complement the pie and ice cream beautifully. For the full recipe, check out the [Full Recipe]. {{image_4}} You can easily add more flavors to your cinnamon apple pie. Try mixing in other fruits like blueberries or cranberries. They add a sweet twist and bright color. You can also blend in some pears for a softer texture. Using different spices can change the taste too. Add a pinch of ginger for warmth or some cloves for depth. Mix it all into the apple filling. Just remember, balance is key! You can choose between a homemade crust or a store-bought one. A homemade crust gives you control over the ingredients. It can taste fresher and flakier. If you're short on time, a store-bought crust works just fine. For those with gluten issues, there are gluten-free crusts available. These can be found in stores or made with almond or rice flour. Just roll it out and fill it like normal! Not everyone can have dairy, but you can still enjoy this treat. Look for dairy-free ice cream options made from coconut or almond milk. They are creamy and delicious. You can also try other toppings. Whipped cream adds a light touch. Caramel sauce gives a sweet kick. Try chopped nuts for crunch or a sprinkle of cinnamon for added flair! This delightful dessert gives you many ways to customize it. Check out the Full Recipe for more details on how to create your perfect pie à la mode. To keep your delicious Cinnamon Apple Pie à la Mode fresh, follow these simple steps: - Refrigeration guidelines: Place slices of leftover pie in an airtight container. Store it in the fridge for up to 3-4 days. This helps keep the crust crispy and the filling tasty. - Freezing apple pie: If you have more pie than you can eat, freeze it! Wrap the whole pie tightly in plastic wrap, then in foil. You can also freeze individual slices. They last up to 3 months in the freezer. When you're ready to eat, just thaw it in the fridge overnight. When you want to enjoy your pie again, here’s the best way to warm it up: - Best methods for warming up: Preheat your oven to 350°F (175°C). Place the slices on a baking sheet. Heat for about 10-15 minutes until warm. This keeps the crust nice and crisp. You can also microwave a slice for about 30-45 seconds, but the crust may not be as crunchy. If you love your pie à la mode, add that scoop of ice cream right before serving! The best apple for pie is the Granny Smith. This apple is tart and firm. It holds its shape well when baked. You can also mix it with sweet apples like Honeycrisp. This mix gives a nice balance of flavors. Other good choices include Fuji and Braeburn apples. These varieties add sweetness and depth. Yes, you can make this pie ahead of time! Bake the pie and let it cool completely. Once cool, cover it tightly with plastic wrap or foil. You can store it in the fridge for up to three days. If you want to prepare it further ahead, you can freeze it. To freeze, wrap the pie in plastic and then foil. When you are ready to eat, thaw it overnight in the fridge before baking it again. To make your pie crust flakier, keep your ingredients cold. Use cold butter and ice water in your dough. Avoid overworking the dough; mix just until combined. You can also add a bit of vinegar or vodka to the dough. This helps create a tender crust. Finally, roll it out on a lightly floured surface to avoid sticking. Yes, you can make a vegan version of this pie! Use a vegan pie crust instead of a regular one. Replace butter with coconut oil or vegan butter. For the filling, use maple syrup instead of brown sugar for sweetness. This keeps the delicious flavor while making it plant-based friendly. You can still enjoy it with dairy-free ice cream for your dessert! Making a great Cinnamon Apple Pie is simple and fun. We covered the key ingredients, like Granny Smith apples and brown sugar. I shared step-by-step instructions for making the filling, assembling the pie, and baking it to perfection. With tips for a tasty filling and golden crust, you can impress anyone. Explore variations like adding other fruits or trying different crusts. Store your pie properly for later and enjoy it reheated. Now, it’s time to create your pie masterpiece!](https://tastednest.com/wp-content/uploads/2025/07/2f7d13ed-9a6c-47c5-914a-2f305fb11400.webp)
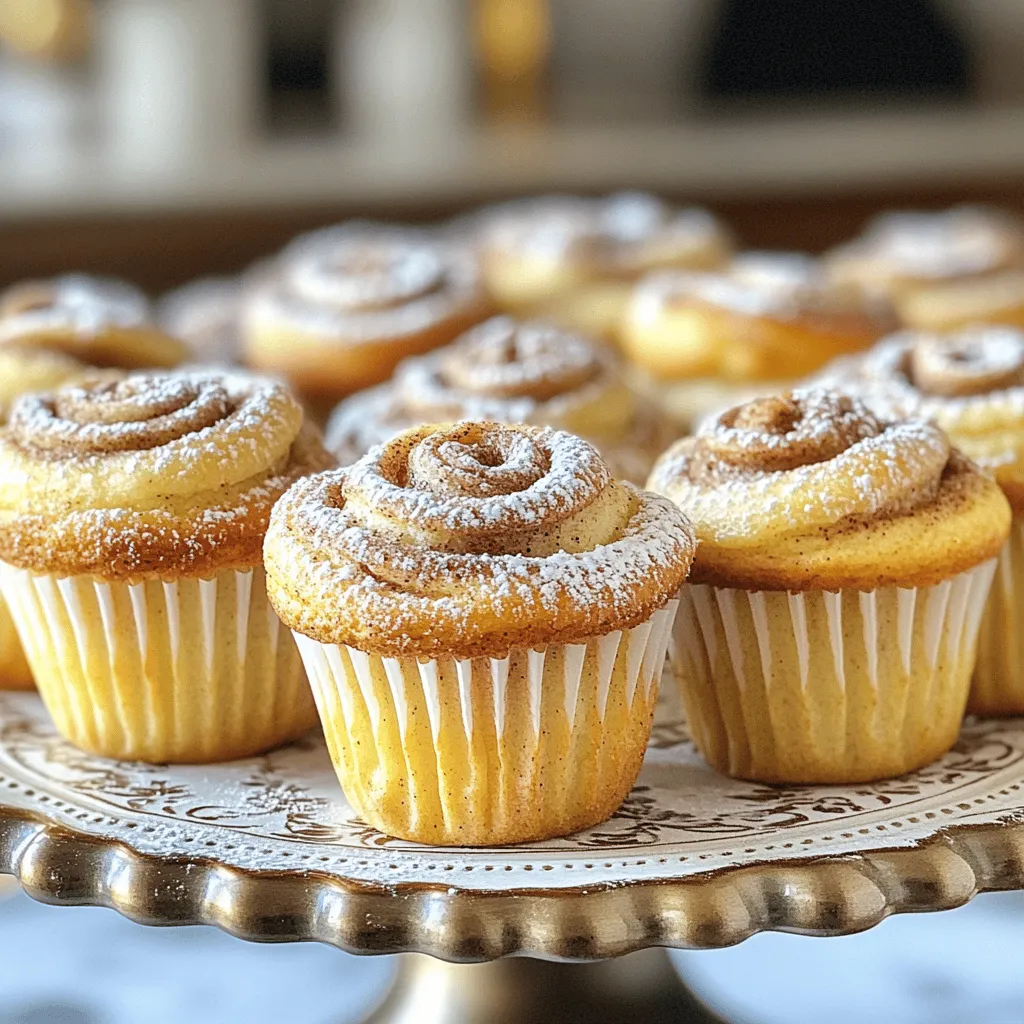
![To make the perfect apple cheesecake buns, you'll need: - 2 cups all-purpose flour - 1/4 cup granulated sugar - 1 packet (2 1/4 teaspoons) instant yeast - 1/2 teaspoon salt - 1/2 cup milk, warmed to about 110°F (43°C) - 1/4 cup unsalted butter, melted and slightly cooled - 1 large egg - 1 teaspoon pure vanilla extract - 1 medium apple, peeled and diced (I like Granny Smith for its tartness) - 1 teaspoon ground cinnamon - 1/2 cup cream cheese, softened - 1/4 cup powdered sugar - 1 teaspoon fresh lemon juice - 1 egg, beaten (for egg wash) - Extra cinnamon and sugar (for topping) I trust these brands for quality and taste: - Flour: King Arthur Flour - Sugar: Domino Sugar - Yeast: Red Star Yeast - Butter: Land O'Lakes - Cream Cheese: Philadelphia Cream Cheese These brands help achieve the best flavor and texture in your buns. If you have dietary needs, here are some swaps: - Gluten-Free: Use a gluten-free flour blend. - Dairy-Free: Substitute almond or coconut milk and use vegan cream cheese. - Low Sugar: Replace granulated sugar with a sugar substitute like erythritol. These alternatives keep your apple cheesecake buns delicious and friendly for different diets. For the full recipe, check out the details above! To start, gather your ingredients. In a large bowl, mix 2 cups of flour, 1/4 cup sugar, 2 1/4 teaspoons instant yeast, and 1/2 teaspoon salt. Whisk these dry ingredients well. In a separate bowl, combine 1/2 cup warmed milk, 1/4 cup melted butter, 1 beaten egg, and 1 teaspoon vanilla. Slowly pour this wet mixture into the dry mix, stirring as you go. This forms a soft dough. Next, place the dough on a floured surface. Knead it for 5-7 minutes until it feels smooth. Put the dough in a greased bowl and cover it. Let it rise in a warm spot for about 1 hour or until it doubles in size. While the dough rises, prepare the apple filling. Take 1 medium apple, peel it, and dice it into small pieces. In a bowl, mix the diced apple with 1 teaspoon ground cinnamon. This lets the flavors blend well. Set this mixture aside. Next, in another bowl, combine 1/2 cup softened cream cheese, 1/4 cup powdered sugar, and 1 teaspoon fresh lemon juice. Beat this mixture until it is creamy and smooth. Set it aside as well. Once the dough has risen, gently punch it down to let the air out. Roll it out on a floured surface into a rectangle, about 1/4-inch thick. Spread the cream cheese mixture evenly over the dough, leaving a 1/2-inch border around the edges. Then, sprinkle the cinnamon apple mixture on top. Now, start rolling the dough from the long edge to form a tight log. Slice the log into 12 equal pieces. Place the buns in a greased baking dish, leaving some space between each. Cover the dish with a towel and let them rise for another 30 minutes. Preheat your oven to 350°F (175°C) while the buns rise. Once they have puffed up, brush the tops with a beaten egg for a nice shine. Sprinkle extra cinnamon and sugar on each bun. Bake for 20-25 minutes, until they turn golden brown. Let them cool in the pan for a few minutes before serving warm. For the full recipe, check the link. To make your buns soft and fluffy, start with warm milk. Use milk around 110°F (43°C) to wake up the yeast. Let the dough rise in a warm spot. A good place is near a warm oven. Knead the dough well for at least 5-7 minutes. This helps create gluten, which gives structure. After shaping the buns, let them rise again. This second rise is key for fluffiness. One common mistake is using cold ingredients. Cold milk or eggs can shock the yeast. Make sure your butter isn’t too hot, as it can kill the yeast. Another mistake is skipping the second rise. This step adds air and lightness to the buns. Lastly, don’t overbake them. Keep an eye on the color to avoid dry buns. Always preheat your oven. A hot oven helps the buns rise well. Use a baking dish that is just the right size. If it’s too big, the buns may not touch and will be flat. Brush the tops with egg wash for a nice shine. After baking, let the buns cool slightly before serving. This helps them set and keeps them soft. For the full recipe, check out the details above. {{image_4}} You can spice up your apple cheesecake buns with more flavor. Try adding nutmeg or ginger to the apple filling. Just use a pinch of each for a warm, cozy taste. You can also include allspice for a unique twist. Mixing spices can make your buns more exciting and memorable. Feel free to experiment and find what you love best. While apples are the star of this recipe, you can switch things up. Pears work well, too, offering a sweet and soft texture. Cherries or blueberries can add a burst of color and flavor. Just remember to adjust the sugar based on the fruit's sweetness. Each fruit can change the whole feel of your buns, so have fun trying new options. If you're looking for a different creaminess, swap out the cream cheese. Mascarpone cheese offers a rich and smooth texture. Greek yogurt can also work well, giving a tangy taste. Use a dairy-free cream cheese for a vegan option. Each alternative brings its own flavor and texture, so choose what best fits your taste or dietary needs. For the full recipe, check the earlier section. To keep your apple cheesecake buns fresh, place them in an airtight container. Let them cool completely before storing. This way, they won’t get soggy. You can keep them at room temperature for up to two days. If you want to store them longer, opt for the fridge. They will stay good there for up to a week. Reheating your buns is simple. You can warm them in the oven or microwave. For the oven, preheat it to 350°F (175°C). Place the buns on a baking sheet and cover them with foil to keep moisture in. Heat for about 10 minutes. In the microwave, warm one bun for about 20-30 seconds. This method is quick but may not keep them as soft. Freezing is a great option if you want to save some buns for later. Wrap each cooled bun tightly in plastic wrap. Then, place them in a freezer bag. They can last for up to three months in the freezer. To enjoy them later, simply thaw overnight in the fridge. Then, reheat in the oven for the best taste. This method keeps the buns soft and tasty. If you want the full recipe, check it out! To make Apple Cheesecake Buns from scratch, follow this simple process. First, mix 2 cups of flour, 1/4 cup of sugar, 2 1/4 teaspoons of instant yeast, and 1/2 teaspoon of salt in a bowl. In another bowl, combine 1/2 cup of warm milk, 1/4 cup of melted butter, 1 beaten egg, and 1 teaspoon of vanilla. Slowly pour the wet mix into the dry mix. Knead the dough on a floured surface for 5-7 minutes. Let it rise for about an hour. While it rises, prepare the apple filling with one diced apple and cinnamon. Mix cream cheese, powdered sugar, and lemon juice for the filling. After the dough rises, roll it out, spread the cream cheese mix, and add the apples. Roll, slice, and let it rise again before baking. Check the [Full Recipe] for detailed steps. You can find pre-made Apple Cheesecake Buns at local bakeries or grocery stores. Many grocery chains carry fresh baked goods. Check the bakery section to see if they have them. If you prefer to buy online, look at bakery delivery services. They often offer a variety of treats, including these buns. Keep an eye on seasonal sales at local shops for fresh options. Yes, you can use other types of apples for this recipe. While Granny Smith apples are tart and great, you can try Fuji or Honeycrisp apples. These apples add sweetness to the buns. When choosing apples, look for firm ones. Avoid mushy apples, as they won't hold their shape. Just remember, the type of apple will change the flavor, so pick what you enjoy! This article covered key steps for making apple cheesecake buns. You learned about essential ingredients, brands, and options for special diets. I shared step-by-step instructions for the dough, filling, and assembly. Tips to avoid common mistakes helped ensure fluffy buns. I also discussed fun variations and storage tips for leftovers. As you try this recipe, remember to enjoy the process. Your kitchen adventures will bring sweet rewards. Happy baking!](https://tastednest.com/wp-content/uploads/2025/07/e74596ee-1e5a-41b3-a145-dd3a1ada7791.webp)
 for more details and ideas! To keep your quesadillas fresh, store them in an airtight container. You can place parchment paper between layers to prevent sticking. Refrigerate them for up to three days. For longer storage, freeze them. Wrap each quesadilla tightly in plastic wrap, then place them in a freezer bag. They can last up to three months in the freezer. When you’re ready to enjoy leftovers, reheat them in a skillet. This keeps them crispy. Heat the skillet over medium heat and add a little butter. Place the quesadilla in the pan and cook for 2 to 3 minutes on each side. You can also use an oven. Preheat it to 350°F (175°C) and bake for about 10 minutes. This method works well too! In the fridge, your quesadillas will stay good for about three days. Look for signs of spoilage, such as a sour smell or visible mold. If you see any of these, it's best to toss them out. Always trust your senses when checking food safety! For a delicious treat, enjoy them fresh or reheated. For the full recipe, check [Full Recipe]. Yes, you can make these quesadillas ahead. Prepare them and keep them in the fridge. Wrap them in foil or plastic wrap. When you’re ready to eat, just heat them in a skillet. This method keeps them warm and tasty. Yes, you can find gluten-free tortillas at most grocery stores. Look for ones made from brown rice or corn. These work well and taste great, too. You can enjoy the same yummy flavors without gluten. To keep your quesadilla crispy, avoid overloading it with fruit. Use a light layer of Nutella. Make sure to cook it on medium heat. This helps crisp the outside while warming the inside. Cooking it properly gives you a perfect crunch. These quesadillas pair well with fresh fruit or a scoop of ice cream. You can also serve them with whipped cream or yogurt. A drizzle of honey or maple syrup adds a nice touch, too. Absolutely! You can try almond butter, peanut butter, or any nut spread you like. For a fruity twist, use fruit preserves or chocolate spread. Each option gives a unique flavor to your quesadilla. Don't hesitate to get creative! This article shared a tasty recipe for Strawberry Banana Nutella Quesadillas. We explored key ingredients, cooking steps, and tips for perfecting each dish. You also learned about variations and storage options. These quesadillas are simple and fun to make. Overall, this recipe lets you mix flavors and customize to your taste. Enjoy creating your own delicious treats!](https://tastednest.com/wp-content/uploads/2025/07/62ed2a06-4da1-4917-811d-3ceb41d5beea.webp)