Minute Beef Zucchini Boats Tasty and Quick Recipe
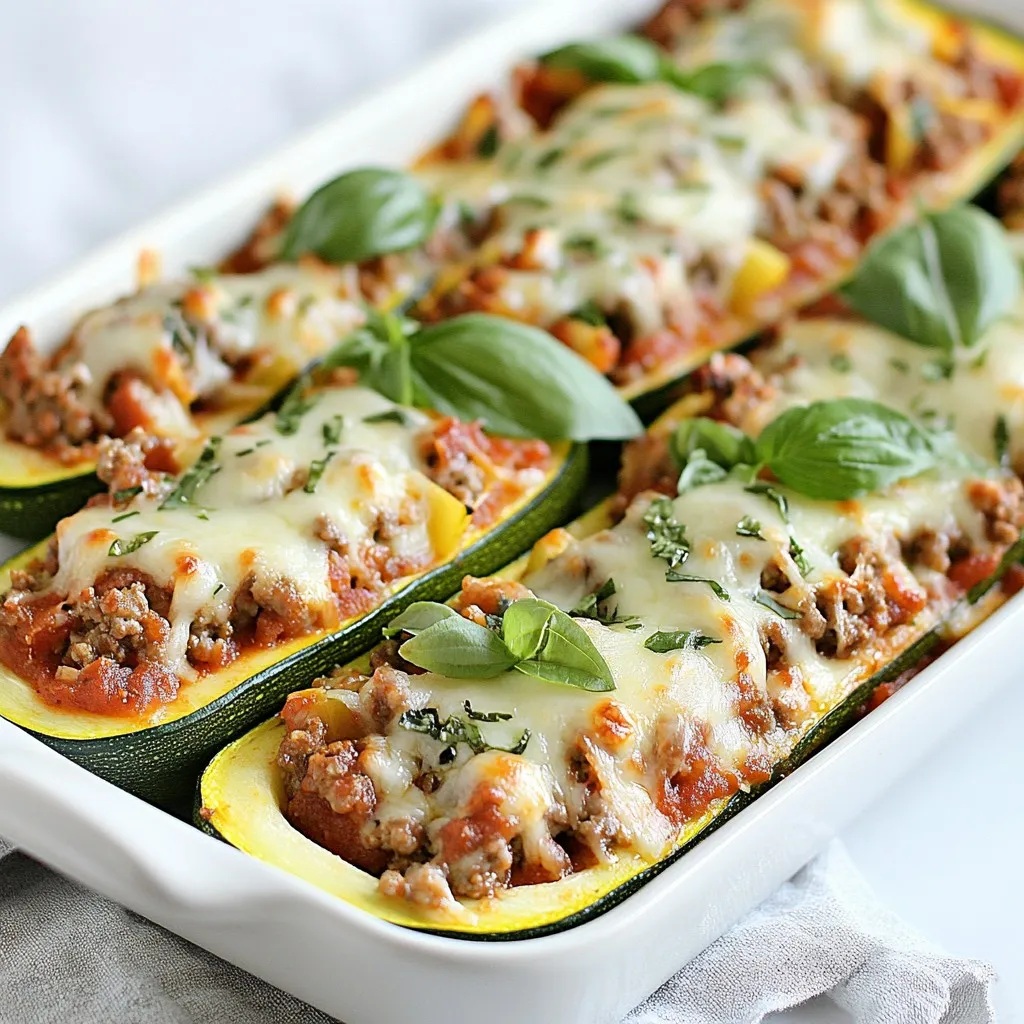
Do you want a meal that’s quick, tasty, and healthy? These Minute Beef Zucchini Boats are just what you need! Filled with savory beef and fresh veggies, they can be …
Do you want a meal that’s quick, tasty, and healthy? These Minute Beef Zucchini Boats are just what you need! Filled with savory beef and fresh veggies, they can be …
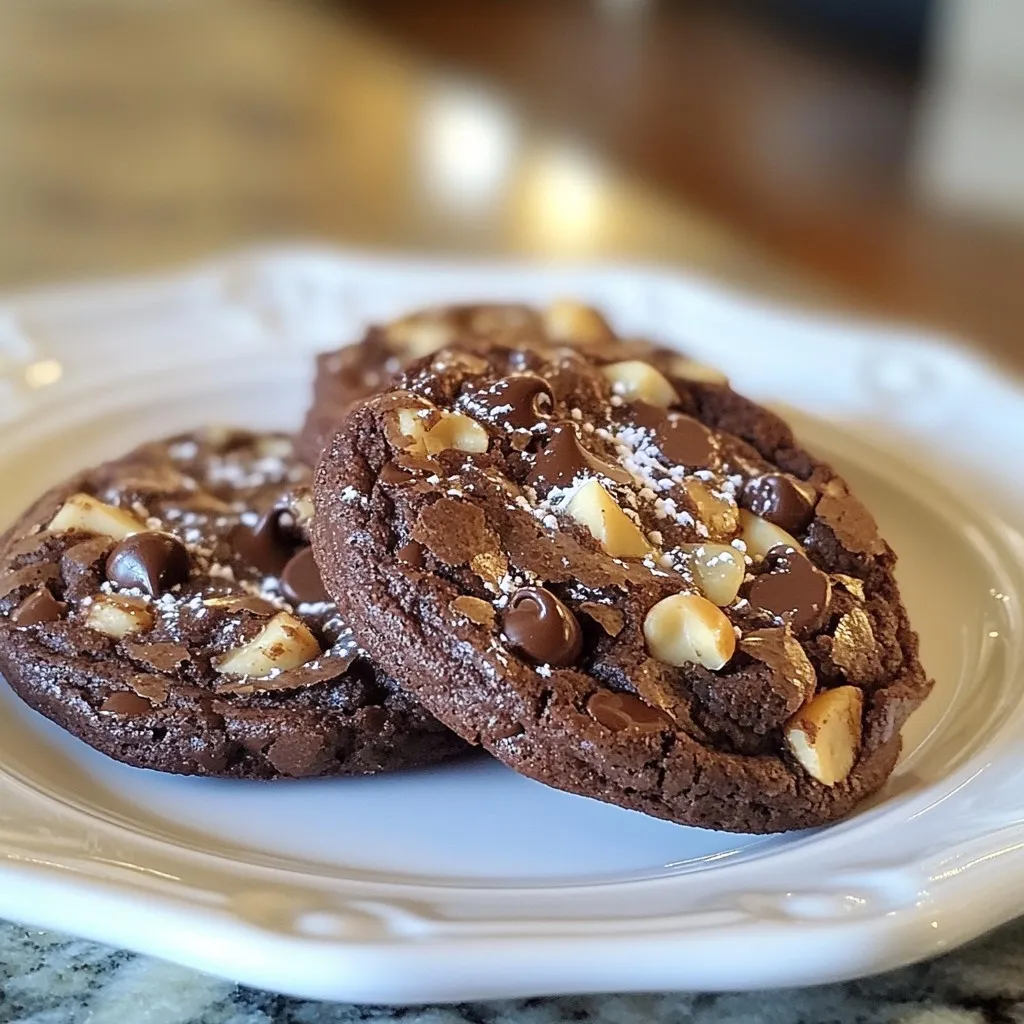
Craving a treat that’s both chewy and rich? Fudgy brownie cookies are your answer! In this easy recipe, I’ll guide you through all the steps to create these delightful cookies. …
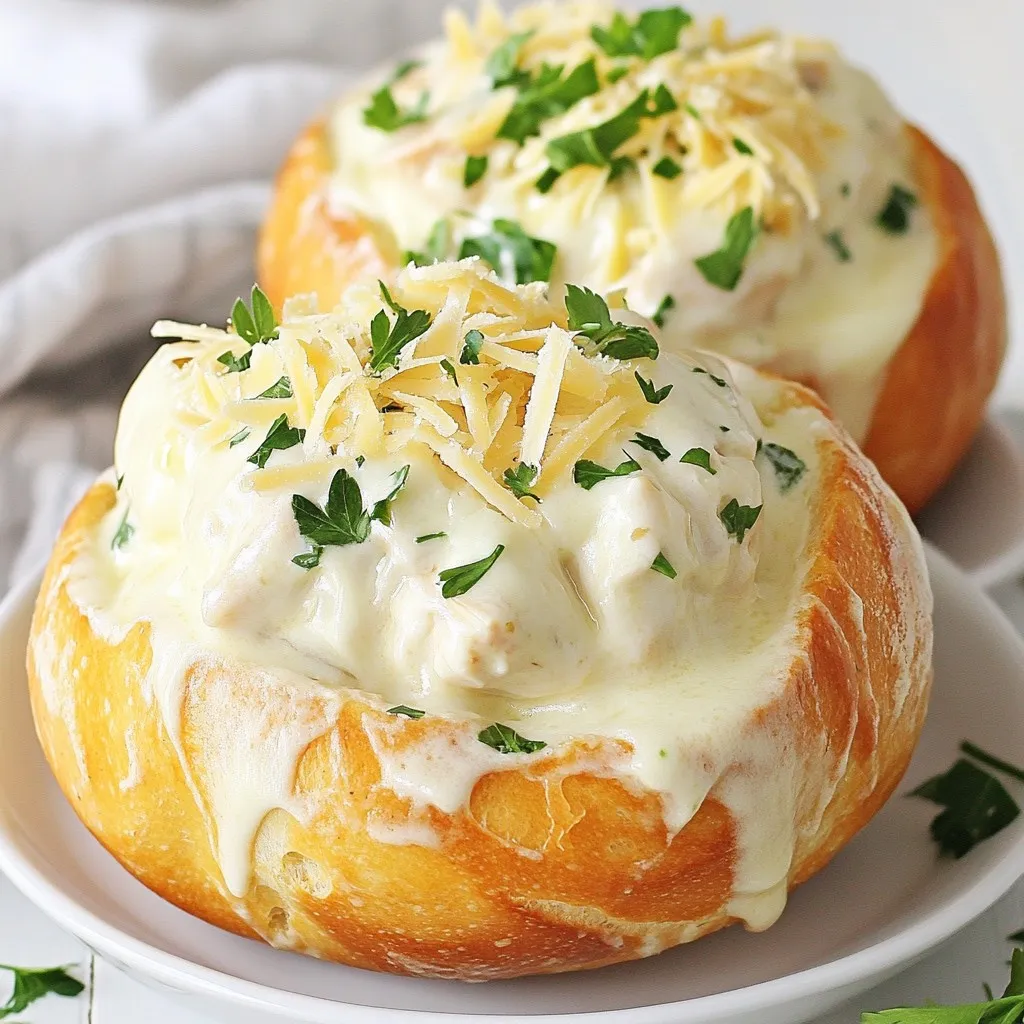
Welcome to the tastiest adventure you’ll have in the kitchen! In this post, I’ll guide you through making Chicken Alfredo Bread Bowls. Imagine creamy chicken alfredo nestled in warm, crusty …
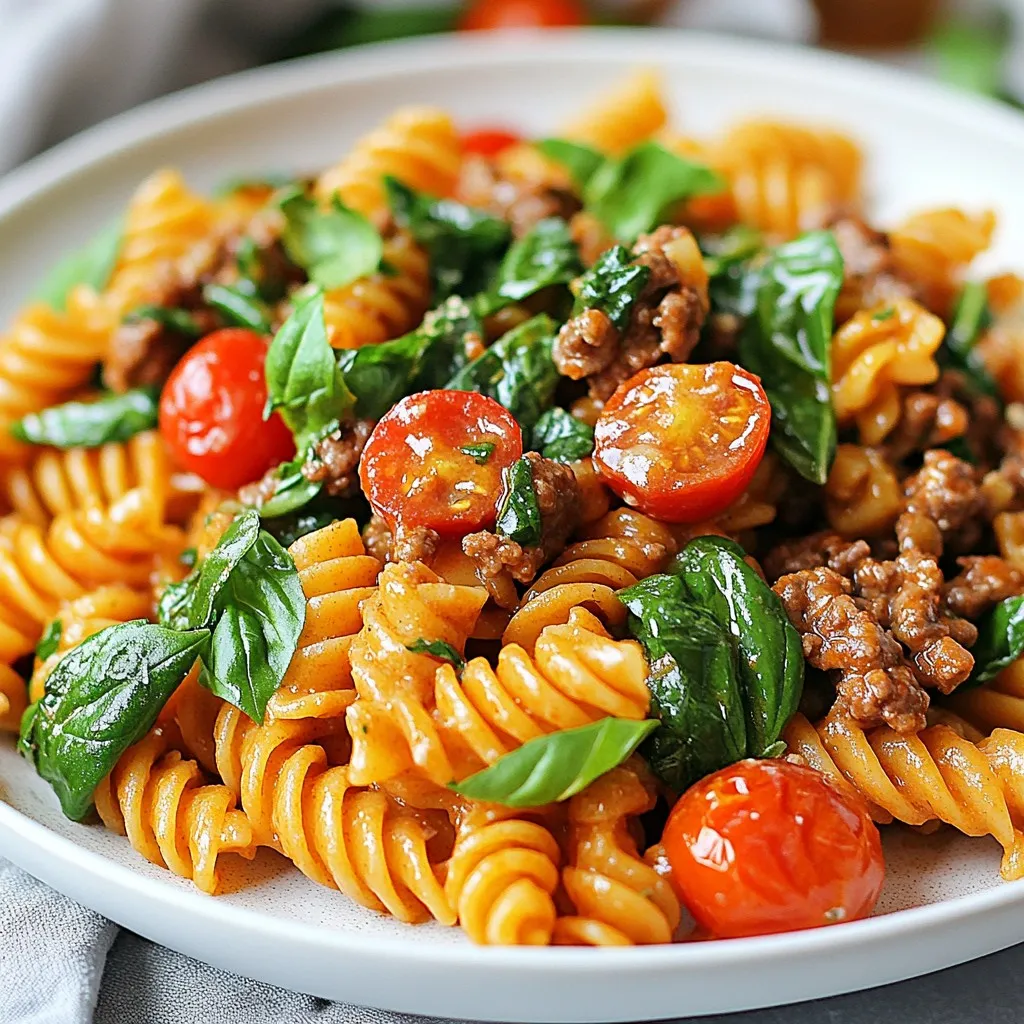
Do you want a quick meal that packs a protein punch? Then you’ve come to the right place! This High Protein Creamy Beef Pasta recipe is not only easy to …
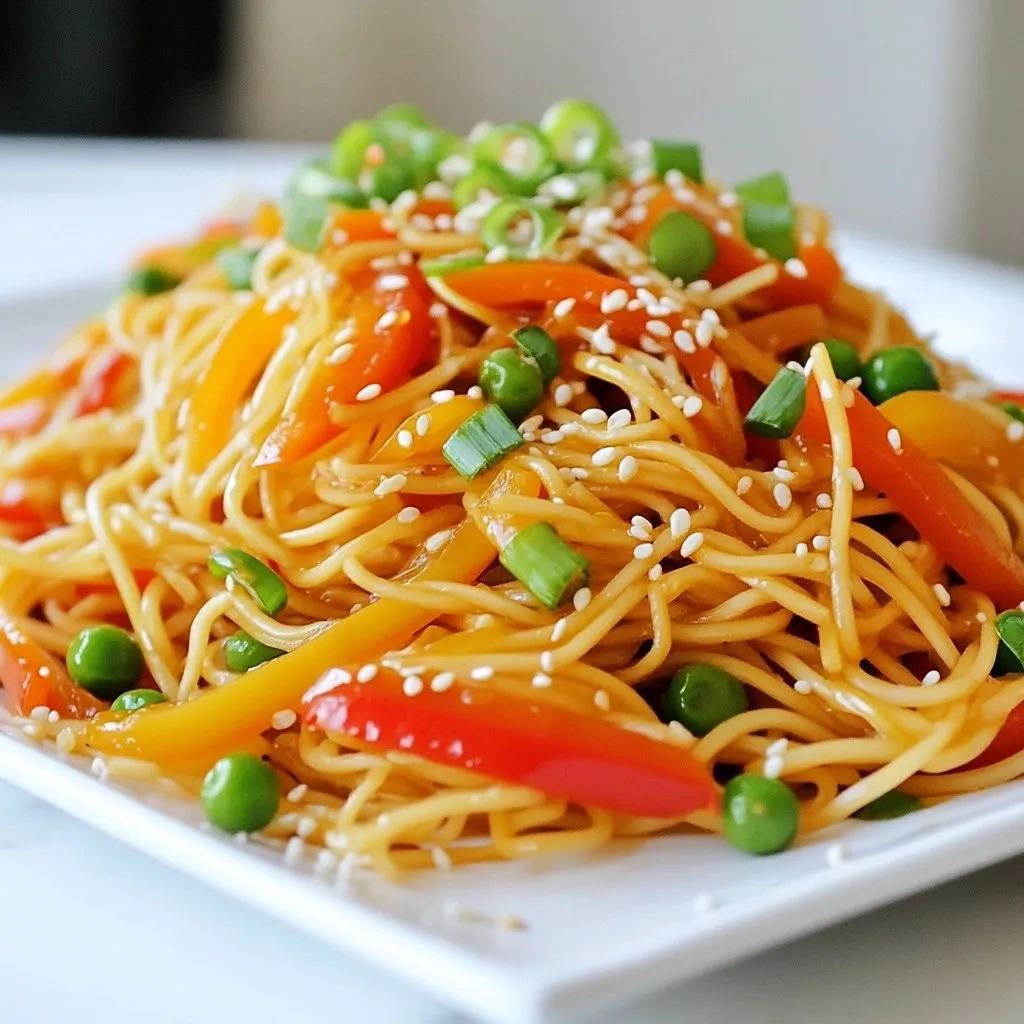
Craving chow mein that’s better than takeout? You’re in the right place! I’ll guide you through a quick and easy recipe with fresh ingredients. We’ll use simple steps to cook …
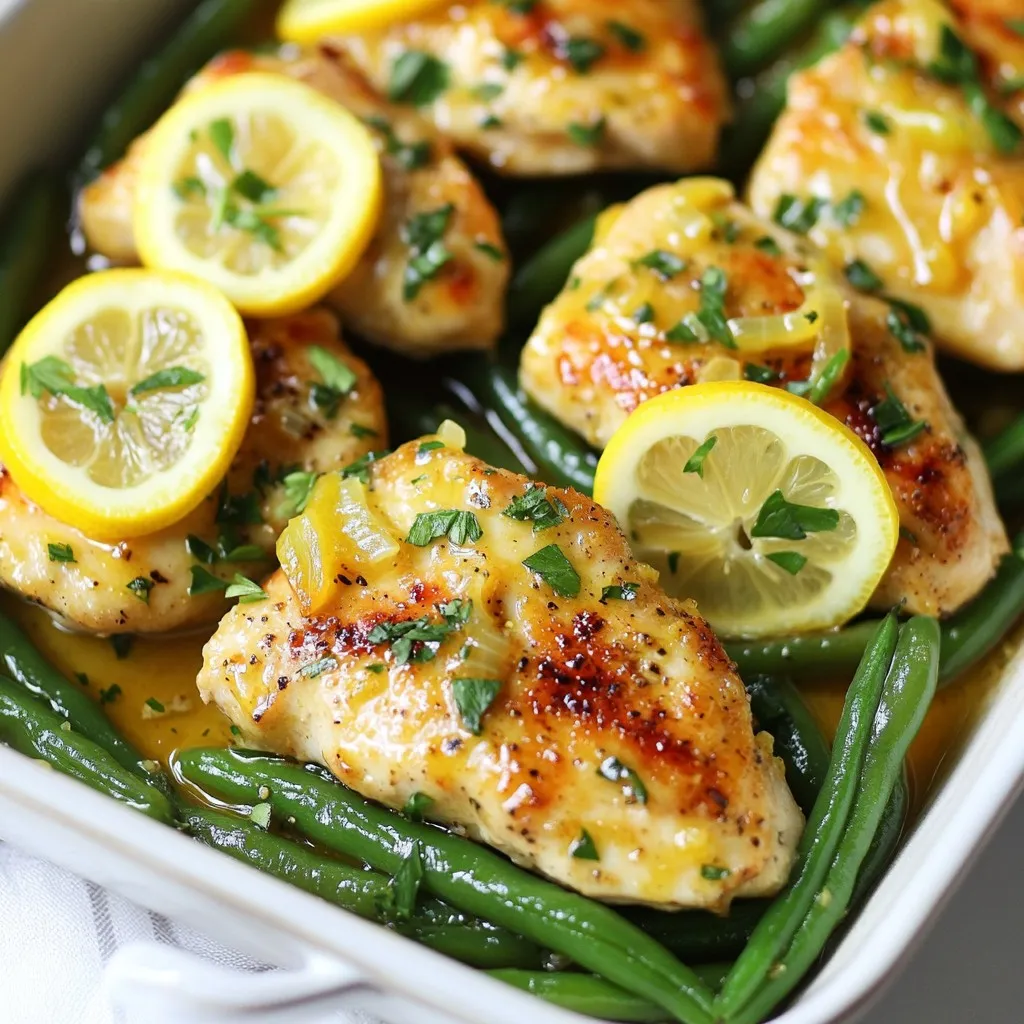
Are you ready for a quick and tasty meal? This Lemon Garlic Chicken & Green Beans Skillet is your answer! It combines simple ingredients like chicken, fresh green beans, and …
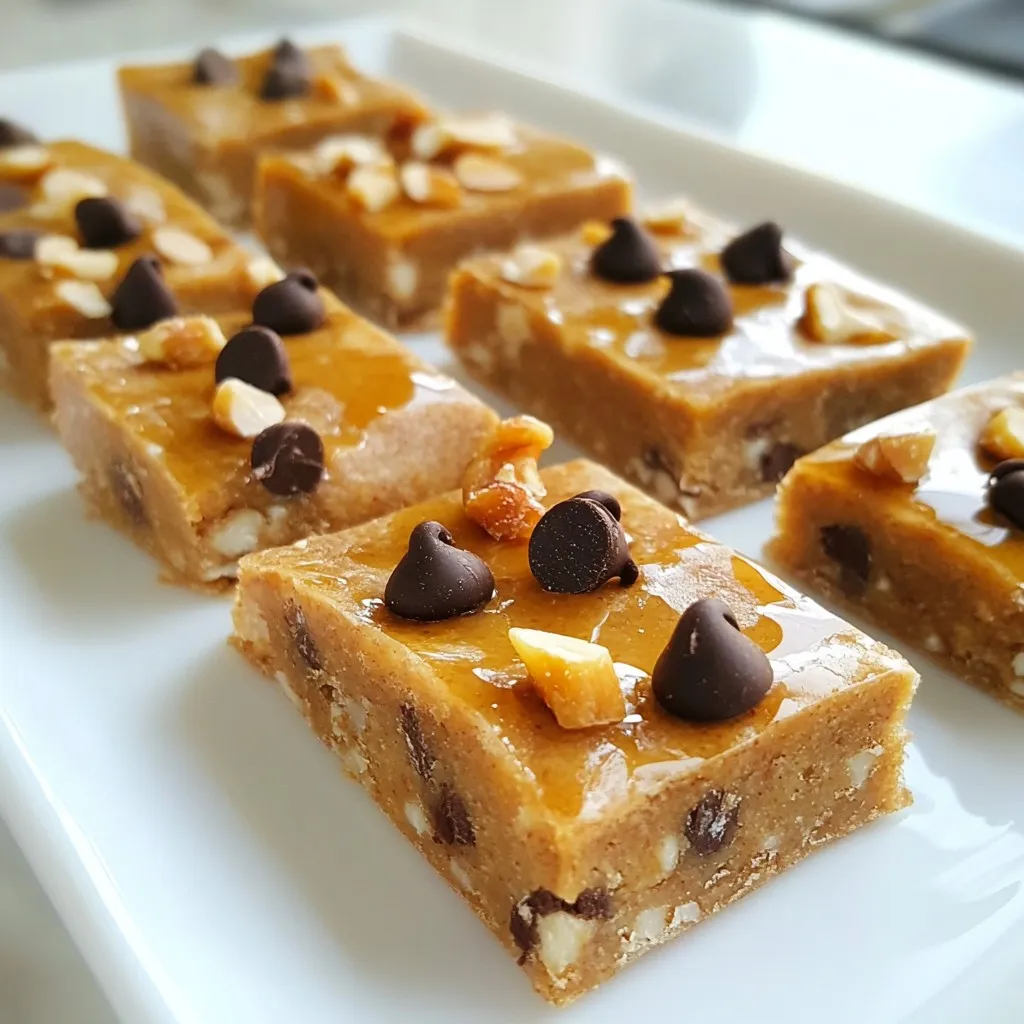
Are you looking for a delicious, protein-packed snack? Try these Greek Yogurt Peanut Butter Protein Bars! Made with simple ingredients like Greek yogurt and peanut butter, they are easy to …
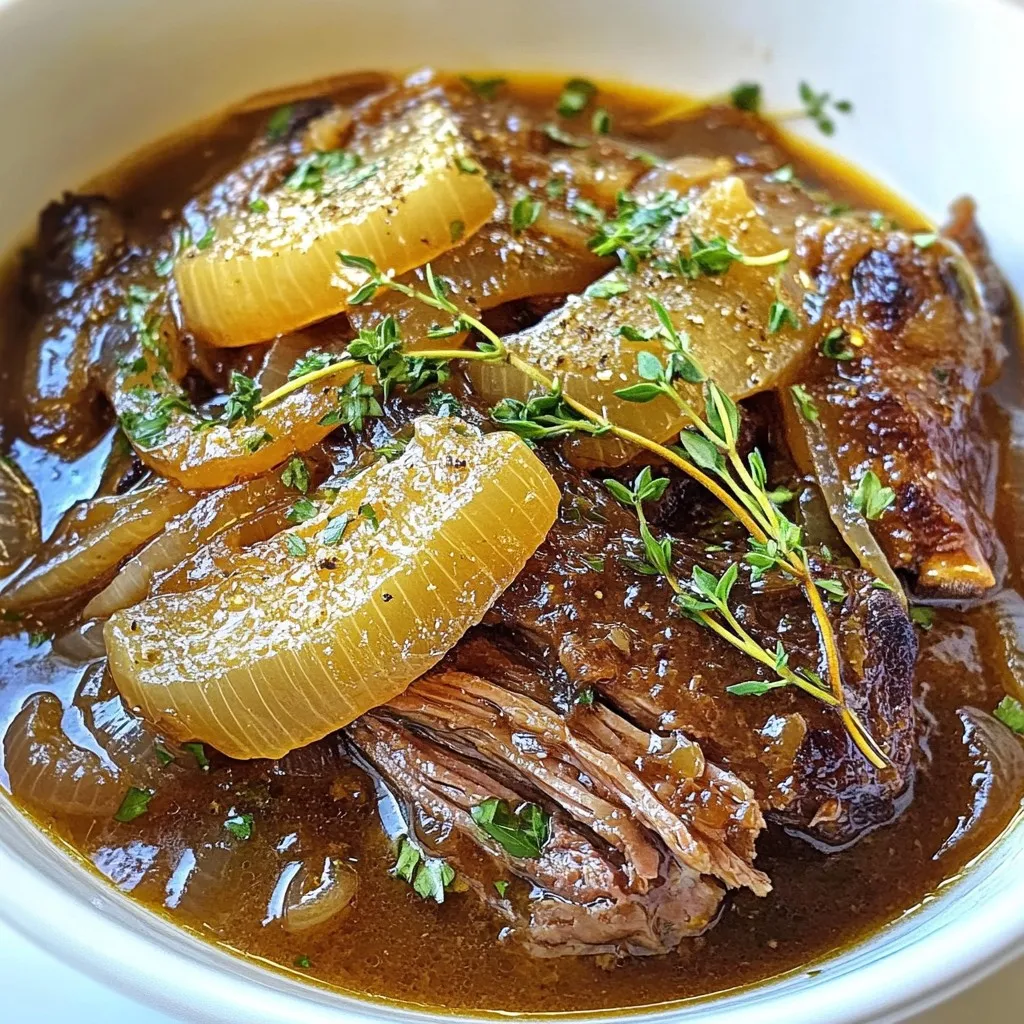
If you’re craving a meal that warms your heart and fills your belly, look no further! My French Onion Pot Roast is just what you need. This dish combines tender …
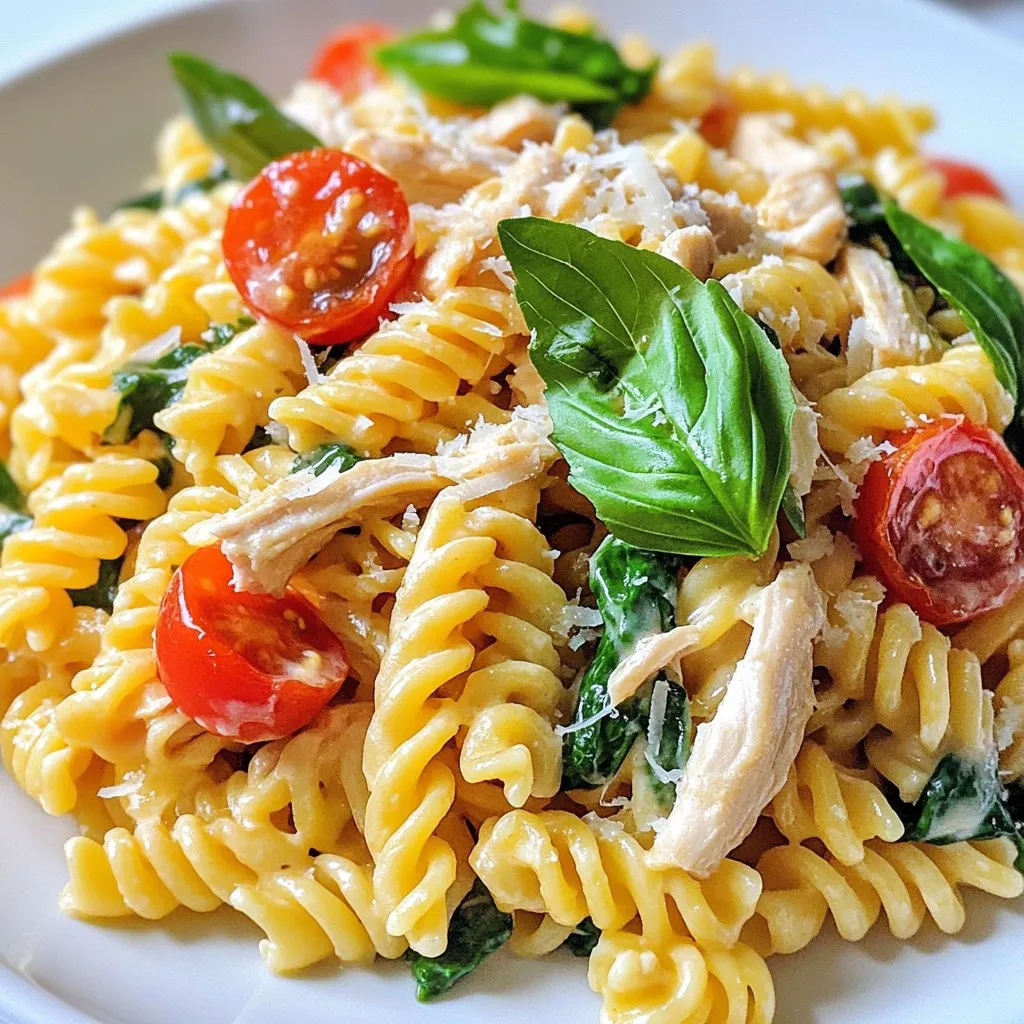
If you’re craving a comforting meal that’s quick and easy, look no further! My Creamy Rotisserie Chicken Pasta hits the spot with its rich flavors and creamy goodness. Made with …
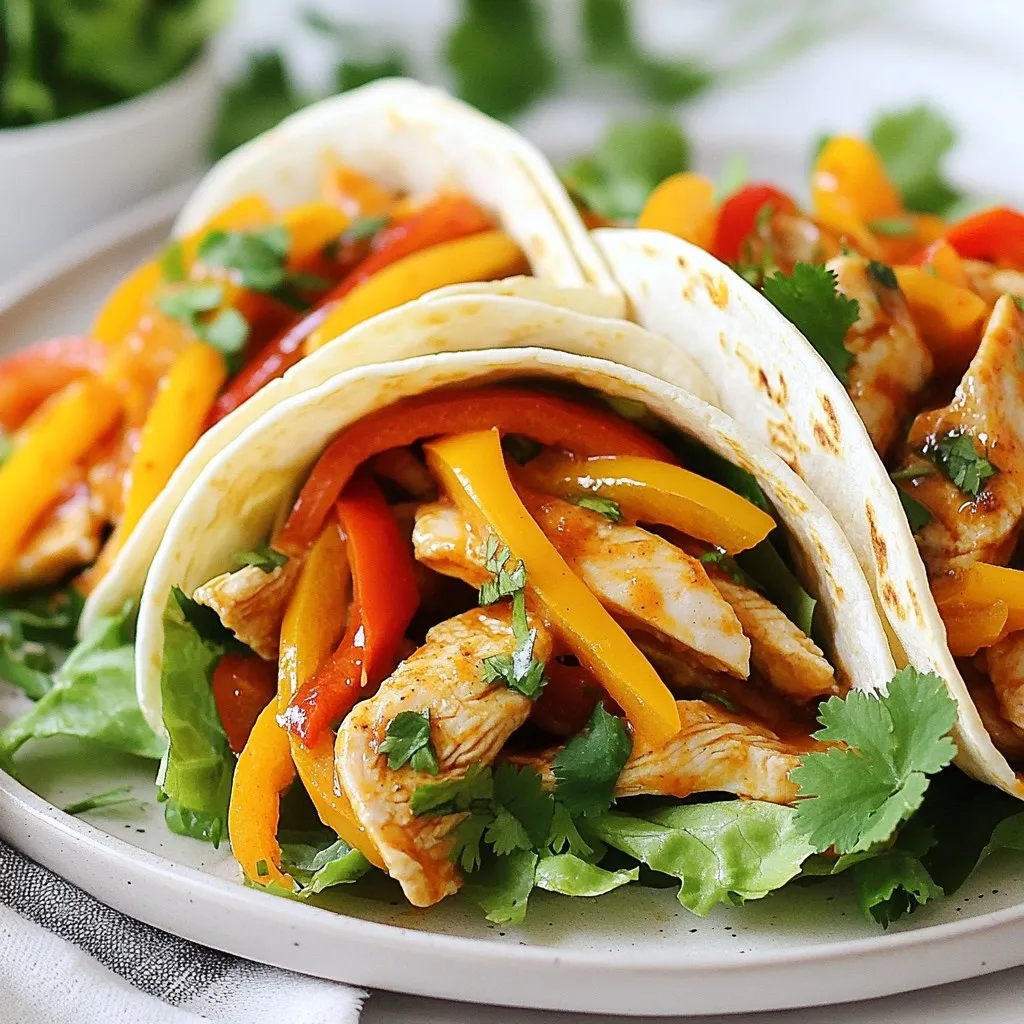
Looking for a quick, tasty meal? Sweet Chili Chicken Wraps are the answer! These wraps blend tender chicken, vibrant veggies, and a tangy sweet chili sauce. They’re not just delicious; …