Skip to content
Tasted Nest
  • Home
  • Appetizers
  • Desserts
  • Salads
  • Breakfast
  • Dinner
  • Privacy Policy
  • Contact
  • About

Chef Tavio

Irresistible Blueberry Muffin Cookies Easy Treat Recipe

May 29, 2025 by Chef Tavio
To make the best blueberry muffin cookies, gather these simple ingredients: - 1 cup all-purpose flour - 1/2 teaspoon baking powder - 1/4 teaspoon baking soda - 1/4 teaspoon salt - 1/2 cup unsalted butter, softened - 1/2 cup brown sugar, firmly packed - 1/4 cup granulated sugar - 1 large egg, at room temperature - 1 teaspoon pure vanilla extract - 1/2 teaspoon ground cinnamon - 1 cup fresh or frozen blueberries - 1/4 cup rolled oats - 1/4 cup chopped walnuts (optional) These ingredients combine to create a soft and chewy treat. The fresh blueberries add a burst of flavor. The oats give it a nice texture, while the cinnamon offers warmth. If you choose to add walnuts, they provide a lovely crunch. You can find the full recipe in the previous section. First, preheat your oven to 350°F (175°C). This step is key for even baking. While the oven warms up, line a baking sheet with parchment paper. This helps the cookies not stick. It also makes cleanup easier. In a small bowl, combine the all-purpose flour, baking powder, baking soda, salt, and ground cinnamon. Whisk these ingredients well to mix them evenly. Set this bowl aside; we will use it later. Grab a large mixing bowl. Use a hand mixer or a wooden spoon to cream together the softened butter, brown sugar, and granulated sugar. Mix until the blend is light and fluffy. Then, crack the egg into the bowl. Add the vanilla extract next. Mix until everything is smooth. Ensure there are no streaks of egg left. Now, it’s time to mix the wet and dry ingredients. Gradually add the dry mix to the wet mix. Stir gently until just combined. It’s okay if there are a few lumps. Take care not to over-mix the dough. Carefully fold in the fresh blueberries, rolled oats, and chopped walnuts if you want them. Use a spatula to ensure even distribution without crushing the blueberries. This keeps the cookies juicy and yummy. Using a cookie scoop or a tablespoon, drop rounded portions of dough onto your prepared baking sheet. Leave about 2 inches between each cookie to allow for spreading. Place the baking sheet in the oven and bake for 12 to 15 minutes. The edges should turn a light golden brown. The centers may look soft; they will set as they cool. After baking, let the cookies cool on the sheet for about 5 minutes. Then, move them to a wire rack to cool completely. For the full recipe, check the section above. To make sure your cookies turn out chewy, you need to pay attention. Start by measuring your ingredients accurately. Use a kitchen scale if you have one. This helps avoid dry cookies. Another key tip is to mix the dough just enough. Over-mixing can lead to tough cookies. You want some lumps in the dough; that’s okay! When serving these cookies, a little presentation goes a long way. Arrange the cookies on a fun platter. Dust them lightly with powdered sugar for a sweet touch. You can also offer honey or maple syrup on the side. Dipping the cookies takes them to a new level of yummy! Many people overlook the temperature of their ingredients. Make sure your butter and egg are at room temperature. Cold ingredients can stop the dough from mixing well. Another mistake is mixing too much. Remember, a few lumps are fine. This keeps your cookies soft and tasty. {{image_4}} You can make these cookies even better with just a few tweaks. Adding lemon zest gives a bright, fresh taste. It balances the sweetness of the blueberries. Just a teaspoon will do! You can also swap in other fruits. Raspberries or cranberries work well too. These fruits add a fun twist and new flavors. If you need a gluten-free option, use almond flour or a gluten-free blend. This works great in the recipe. For a vegan version, replace the egg with a flax egg. Mix one tablespoon of flaxseed meal with three tablespoons of water. Let it sit for a few minutes until it thickens. Use coconut oil instead of butter for a dairy-free treat. Want to switch things up? Try adding chocolate chips for a sweet surprise. White chocolate or dark chocolate both taste amazing. You can also add coconut flakes for a chewy texture. These mix-ins add fun and flavor to your cookies. Just remember to keep the total mix-ins around one cup for the best cookie dough consistency. To keep your blueberry muffin cookies fresh, store them in an airtight container. This helps prevent them from drying out. Layer parchment paper between the cookies to avoid sticking. Place the container in a cool, dry place. Avoid the fridge, as it can make them stale faster. You can freeze both raw dough and baked cookies. To freeze raw dough, scoop the dough onto a baking sheet. Freeze until solid, then transfer to a freezer bag. For baked cookies, let them cool completely first. Then, layer them with parchment paper in a freezer bag. This keeps them fresh for later use. Baked blueberry muffin cookies last about a week at room temperature. If stored properly, they stay soft and tasty. For frozen cookies, expect a shelf life of about three months. To enjoy them, thaw at room temperature or warm them in the oven. Blueberry muffin cookies combine the best of both worlds. They have a soft, cake-like texture, similar to muffins. The burst of fresh blueberries gives them a fruity flavor. Regular cookies tend to be crunchier and flatter, lacking that muffin-like fluffiness. This difference makes blueberry muffin cookies a unique treat. Yes, you can use frozen blueberries! They work just as well as fresh ones. When using frozen blueberries, do not thaw them first. Thawing can cause them to bleed and turn the dough blue. Just toss them in directly for that vibrant, fruity taste. Check your cookies around the 12-minute mark. The edges should turn a light golden brown. The centers might look soft, but they will firm up as they cool. If the edges are golden and the center is set, they are ready to come out of the oven. Yes, you can use a sweetener instead of sugar. Choose a sweetener that measures like sugar, such as coconut sugar or a sugar alternative. Just keep in mind that this might change the flavor a bit. Always check the package for specific measurements and baking advice. Enjoy these cookies warm right out of the oven! They pair well with a cup of tea or coffee. For extra delight, try dipping them in honey or maple syrup. You can also serve them with a side of fresh fruit for a fun twist. For the full recipe, check out the Blueberry Muffin Cookies section. Making blueberry muffin cookies is simple and fun. We discussed the key ingredients, from flour and sugar to fresh blueberries. Following clear steps ensures great results, like mixing and baking correctly. I shared tips to get the right texture and avoid common mistakes. You can try fun variations and modify for dietary needs too. Now, you can enjoy these tasty treats fresh or stored for later. Happy baking!

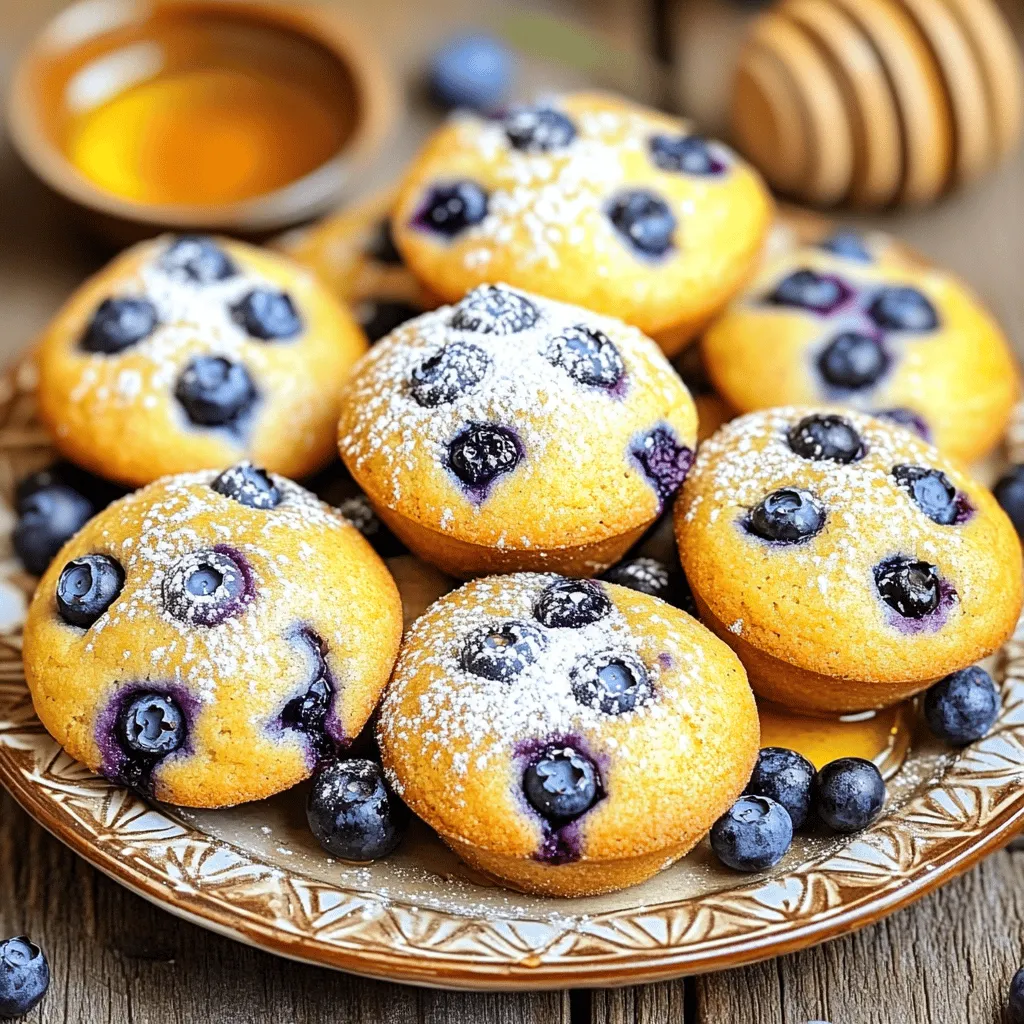
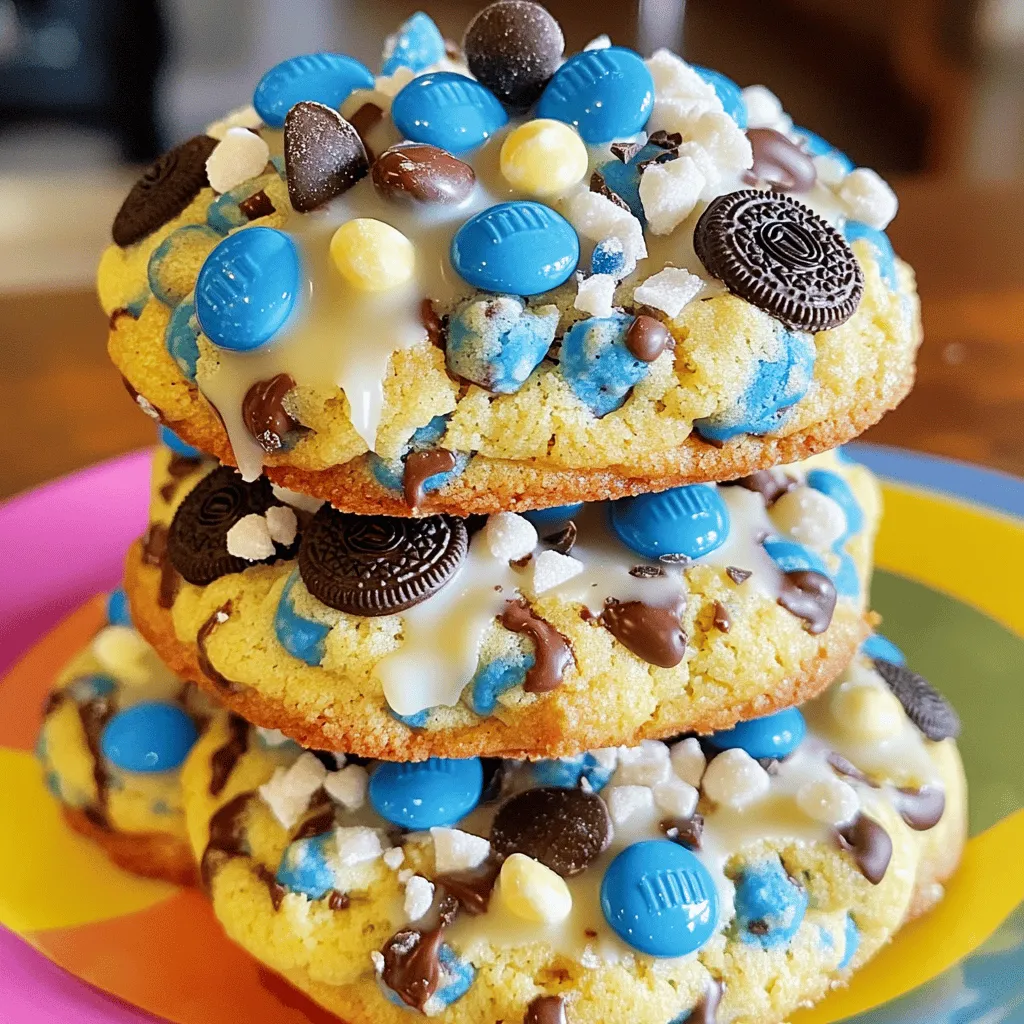
Get ready to indulge in a delightful treat with my easy recipe for blueberry muffin cookies! These cookies blend the soft, warm flavor of classic blueberry muffins with the chewy …
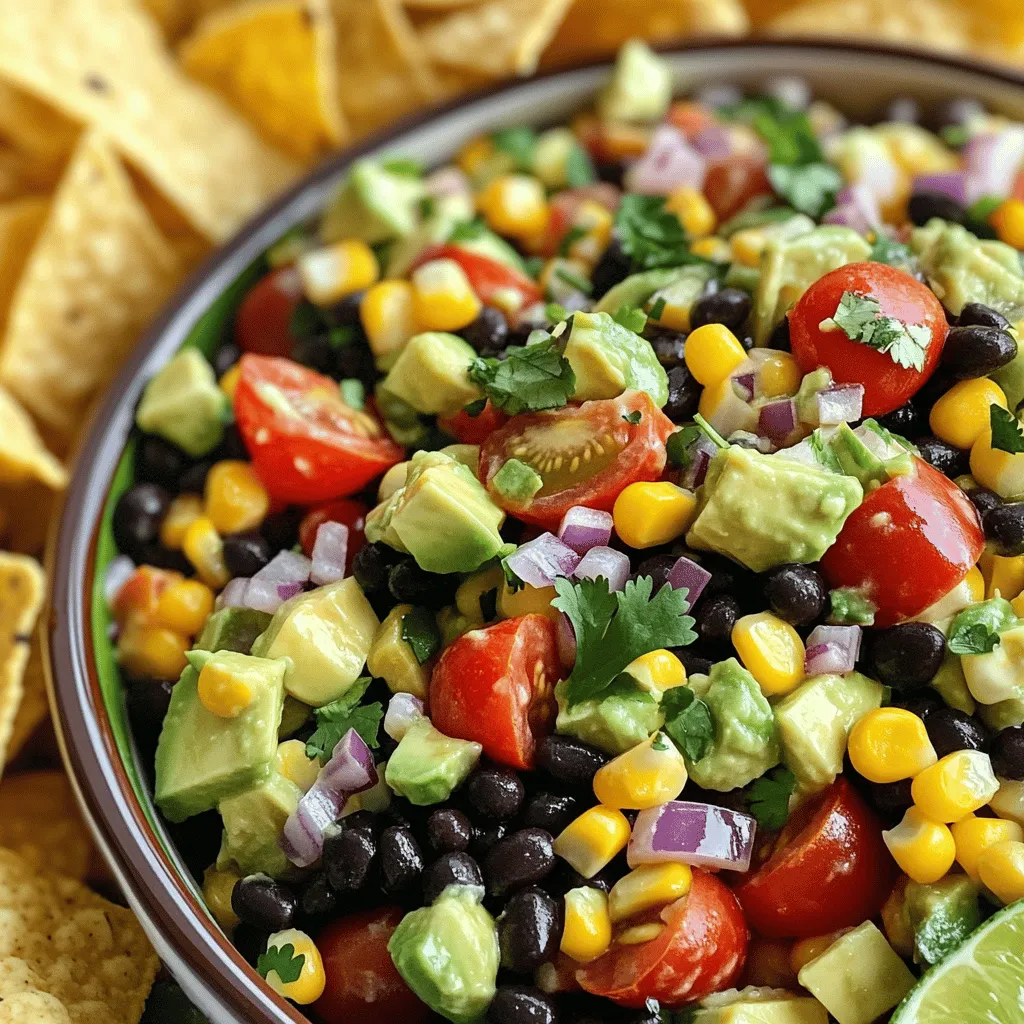
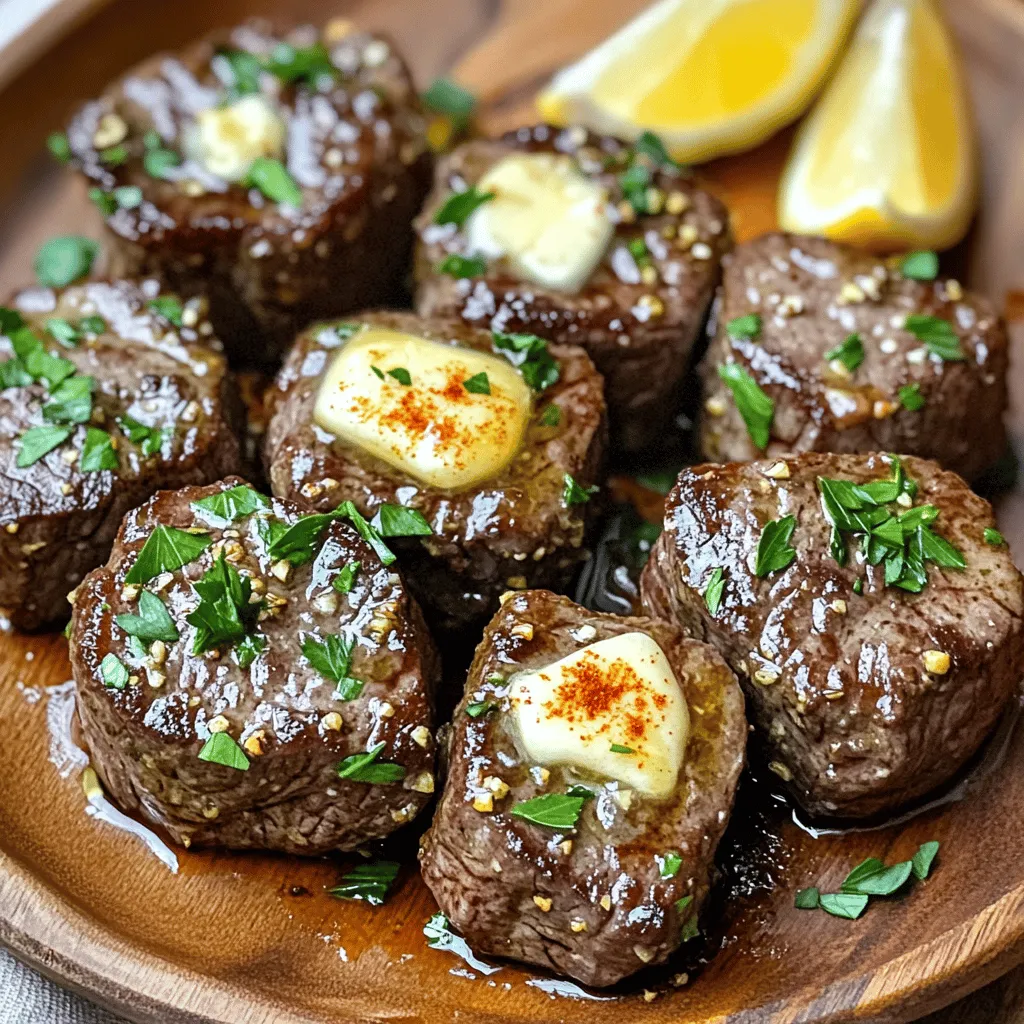
Read more

Categories Desserts

The Best Cowboy Caviar Flavorful and Easy Recipe

May 29, 2025 by Chef Tavio
To make the best Cowboy Caviar, gather these key ingredients: - 1 can (15 oz) black beans, rinsed and drained - 1 can (15 oz) sweet corn, drained - 1 red bell pepper, diced into small pieces - 1 green bell pepper, diced into small pieces - 1 small red onion, finely chopped - 1 jalapeño, finely chopped (seeds removed for reduced heat) - 1 cup cherry tomatoes, halved - 1 ripe avocado, diced - 1/4 cup fresh cilantro, finely chopped - Juice of 2 fresh limes - 3 tablespoons extra-virgin olive oil - 1 teaspoon ground cumin - Salt and black pepper to taste - Tortilla chips for serving These ingredients give Cowboy Caviar its colorful look and fresh taste. Each bite bursts with flavor, making it a perfect snack or side dish. Using fresh ingredients makes a big difference in flavor and texture. Fresh vegetables bring crunch and brightness. Canned beans and corn save time and still taste great. Rinsing and draining them helps remove excess salt. You can mix fresh and canned for convenience. Feel free to customize Cowboy Caviar to fit your taste. Want more protein? Add black-eyed peas or grilled chicken. Prefer a milder taste? Skip the jalapeño or use a sweet pepper instead. You can also swap lime juice for lemon juice or use herbs like parsley instead of cilantro. This dish is flexible, so make it your own! For the full recipe, check out The Ultimate Cowboy Caviar. First, gather your ingredients. You need black beans, sweet corn, and fresh veggies. Open the cans of black beans and sweet corn. Rinse and drain the black beans. Drain the corn too. Next, grab a large mixing bowl. Dice the red and green bell peppers into small pieces. Chop the red onion finely. If you want some heat, finely chop the jalapeño. Remember to remove the seeds if you want less spice. Cut the cherry tomatoes in half. Combine all these ingredients in the mixing bowl. Stir them together until well mixed. Now, let’s make the dressing. Take a small bowl and squeeze the juice from two limes. Add three tablespoons of extra-virgin olive oil to the lime juice. Then, mix in one teaspoon of ground cumin. Sprinkle in some salt and black pepper to taste. Whisk this mixture well until it blends smoothly. Pour the dressing over the bean and vegetable mix. Gently toss everything together. Be careful not to mash the avocado when you add it. Add the diced avocado and chopped cilantro last. Taste your Cowboy Caviar. Adjust the lime juice or salt if needed. Cover the bowl with plastic wrap or a lid. Place it in the fridge for at least 30 minutes. This wait lets the flavors blend nicely. When you're ready to serve, dish it out with crispy tortilla chips. Enjoy the fresh and vibrant flavors! For the Full Recipe, check out the detailed instructions. Choosing a great avocado is key. Look for avocados that feel slightly soft but not mushy. The skin should be dark green or almost black. If it has a few brown spots, that’s okay. Just avoid any that feel very hard or have deep dents. Ripe avocados taste rich and creamy in your cowboy caviar. Spice can make or break your cowboy caviar. I recommend using jalapeños for heat. If you want it milder, remove the seeds. For more heat, leave them in or add a bit of hot sauce. You can even add a pinch of cayenne pepper to the dressing. Just start small and taste as you go. This way, you can make it perfect for you. Marinating is important for flavor. After mixing all the ingredients, cover the bowl and chill it for at least 30 minutes. This lets the flavors blend and deepen. The lime juice will soften the veggies, making everything taste better. If you can, let it sit longer, even overnight. Just remember to taste it again before serving. You might want to add a little more lime juice or salt after marinating. Try these tips for the best cowboy caviar experience! For the complete recipe, check out the Full Recipe. {{image_4}} You can make Cowboy Caviar even more filling by adding protein. Try mixing in black beans or pinto beans for a hearty texture. If you like meat, grilled chicken works well. Just dice it into small pieces before adding. For a vegetarian option, use firm tofu. Press it to remove excess water, then cube it. This addition boosts protein and keeps the dish satisfying. The dressing is key to your Cowboy Caviar's flavor. While lime juice and olive oil are classic, you can switch it up. Try using lemon juice for a zestier taste. A splash of vinegar adds a nice tang. For a spicy kick, mix in some hot sauce or chopped chipotle peppers. These changes give your dish a new twist and keep it exciting. Fresh produce can change the game for Cowboy Caviar. In summer, add diced peaches or mango for sweetness. Fall brings the chance to use roasted butternut squash. In winter, try using pomegranate seeds for a pop of color and taste. Each season offers unique flavors, making it fun to adapt this recipe. To keep your Cowboy Caviar fresh, store it in an airtight container. This helps keep moisture out and flavors in. Choose a glass or plastic container with a tight lid. Avoid leaving it uncovered, as this can lead to spoilage. Keeping it in the fridge is key. Always use a clean spoon to serve, to avoid adding bacteria. Cowboy Caviar lasts about 3 to 5 days in the fridge. The flavors improve as it sits, but the veggies can get soft. Check for any signs of spoilage, like a sour smell or discoloration. If it looks or smells off, it's best to throw it away. To enjoy it at its best, eat it within the first few days. I recommend refrigerating Cowboy Caviar rather than freezing it. Freezing can change the texture of the fresh veggies. If you freeze it, the beans and corn will hold up, but the fresh produce won't taste the same. If you want to save it for later, refrigerate it and enjoy it fresh. For the best flavor, always serve it cold or at room temperature. For a delicious Cowboy Caviar recipe, check out the Full Recipe. Cowboy caviar is a fresh, colorful dip. It combines beans, corn, peppers, tomatoes, and avocado. The dish is bright and healthy, perfect for any gathering. The name comes from its Tex-Mex roots. It's not really caviar, but it's just as fancy in flavor. You can serve it with tortilla chips for a fun snack or side dish. Yes, you can make cowboy caviar a day ahead. Preparing it early allows the flavors to mix well. Just keep it in the fridge in a sealed container. The longer it sits, the better it tastes. Just remember to add the avocado right before serving. This keeps it fresh and green, not brown. To spice up your cowboy caviar, add more jalapeños. You can keep the seeds for extra heat. Another option is to add hot sauce. A few dashes can make a big difference. You can also try using a spicy pepper, like serrano. Mix in some crushed red pepper flakes for another kick. Experiment with what you like best! For the full recipe, check the section above. Cowboy caviar is a colorful mix of fresh veggies, beans, and a zesty dressing. You learned how to choose the best ingredients and customize your dish. Preparation steps help you create a tasty, refreshing dip. Remember to adjust the spice level and store it right for later. Dive into the variations to keep things exciting. Enjoy making this dish your own, and don’t hesitate to experiment. With its vibrant flavors and simple steps, cowboy caviar can please any crowd. Make it often, share recipes, and savor every bite.

Are you ready to whip up a dish that’s both tasty and fun? Cowboy caviar is the perfect crowd-pleaser! This easy recipe mixes fresh flavors with beans, veggies, and a …

Read more

Categories Appetizers

Strawberry Pineapple Salsa Flavorful Summer Delight

May 29, 2025 by Chef Tavio
- Ripe strawberries (1 cup) - Fresh pineapple (1 cup) - Red onion (1/4 cup) - Fresh cilantro (1/4 cup) - Jalapeño pepper (1, optional) - Fresh lime juice (2 tablespoons) - Salt (to taste) Every ingredient plays a key role in making my Strawberry Pineapple Salsa burst with flavor. I always use ripe strawberries and fresh pineapple. They add natural sweetness and a bright taste. The red onion gives a nice crunch, while cilantro adds freshness. If you like heat, you can add jalapeño pepper. It brings a spicy kick, but feel free to skip it if you prefer mild flavors. Fresh lime juice is a must. It adds acidity and brightens the dish. Salt ties everything together, enhancing the natural flavors. You can adjust it to your taste. When you gather these ingredients, you create a delicious salsa. This recipe is perfect for summer gatherings or anytime you crave something fresh and tasty. Check out the Full Recipe for more details. 1. Start by washing the strawberries and pineapple under cold water. 2. Hull the strawberries and chop them into small pieces. Make sure they are bite-sized. 3. Cut the fresh pineapple into small chunks. Aim for pieces that match the strawberry size. 4. Place both fruits in a mixing bowl, ensuring they mix well. 1. Add the finely chopped red onion to the bowl. This gives a nice sweetness. 2. Chop the fresh cilantro and mix it in for a burst of flavor. 3. If you like some spice, add the minced jalapeño. Adjust it to your taste. 4. Squeeze in the fresh lime juice. This will brighten the salsa's flavor. 1. Use a spatula to gently fold the ingredients together. Be careful not to crush the fruit. 2. Season the salsa with salt to taste. This helps bring all the flavors together. 3. Chill the salsa in the fridge for about 15-20 minutes. This allows the flavors to blend. Enjoy this sweet and tangy Strawberry Pineapple Salsa with your favorite dishes. For a complete guide, check out the Full Recipe. To make the best strawberry pineapple salsa, use ripe fruits. Ripe strawberries and pineapples bring out great flavors. When fruits are at their peak, they taste sweeter and juicier. Next, chill your salsa before serving. This helps the flavors mix well. Letting it rest in the fridge for about 20 minutes really boosts the taste. You can also adjust the spice level. If you like heat, add jalapeño. If not, skip it or use less. Presentation matters too! Serve your salsa in vibrant bowls. Bright colors make the dish inviting. For added appeal, garnish with whole strawberries or cilantro leaves. This makes your dish look professional. You can pair the salsa with crispy tortilla chips. It also works well as a topping for grilled chicken or fish. This mix of flavors makes any meal exciting. {{image_4}} Adding different fruits can make your strawberry pineapple salsa even better. Here are some fun ideas: - Mango for tropical sweetness: Mango adds a rich, juicy sweetness. It pairs well with strawberries and pineapple. Just dice one cup of ripe mango and mix it in. - Avocado for creaminess: Avocado brings a nice creaminess to the salsa. Dice half an avocado and fold it in carefully. This will create a smooth texture that balances the fruit. - Additional berries for varied flavors: You can also add other berries like blueberries or raspberries. They add a new twist while keeping the salsa fruity and fresh. Now, let's spice it up! - More jalapeño or add a dash of hot sauce: If you love heat, add more jalapeño or a few drops of hot sauce. This will give the salsa a nice kick. Adjust the amount to fit your taste. - Use different herbs like mint: Swap cilantro for fresh mint. This will add a refreshing twist to your salsa. Mint pairs nicely with fruity flavors and makes it unique. For serving suggestions, strawberry pineapple salsa shines in many ways. - As a dip with tortilla chips: Serve it as a dip at your next gathering. Tortilla chips are perfect for scooping up the salsa. - Topping for grilled meats: Use it as a topping for grilled chicken or fish. The salsa adds a bright, fresh flavor that complements the smoky taste of grilled food. - Drizzle over salads or tacos: You can drizzle the salsa over a mixed salad or tacos. It adds a fun burst of flavor to any dish. Try these variations and enjoy your delicious strawberry pineapple salsa! For the full recipe, check out the details above. After making your strawberry pineapple salsa, store it in an airtight container. This keeps the salsa fresh and tasty. You should enjoy your leftovers within 3-5 days. Be mindful of any changes in texture or color. If it looks or smells off, it’s best to discard it. Can you freeze salsa? Yes, you can freeze it! However, salsa changes in texture when frozen. The fruits may become mushy once thawed. To freeze, use a freezer-safe container and leave space for expansion. When you want to use it, thaw the salsa in the fridge overnight. This way, it stays cold and safe to eat. For best results, mix it well after thawing. You can pair this salsa with many foods. Here are some great ideas: - Tortilla chips: A classic choice for dipping. - Grilled chicken: It adds a fresh twist to the meat. - Fish tacos: The salsa complements fish beautifully. - Salads: Use it as a topping for extra flavor. - Pork: This salsa adds a sweet and tangy touch. These options make your summer meals exciting and tasty. Yes, you can prep this salsa in advance. Here are some tips: - Store it in an airtight container in the fridge. - It stays fresh for 3-5 days. - Make sure to stir it before serving. This helps mix the flavors again. This makes it easy for parties or busy days. You can easily change the sweetness level. Here’s how: - Add more pineapple if you want it sweeter. - Use ripe strawberries for natural sweetness. - If it’s too sweet, add a bit more lime juice. This balances the flavors. Experiment to find your perfect taste! To sum up, this blog post guides you through making a fresh strawberry pineapple salsa. We covered choosing ripe ingredients, preparing the fruits, mixing flavors, and adding final touches. You can also explore variations with different fruits and spice levels. Remember, storing leftovers properly helps maintain flavor. I hope you enjoy trying this simple recipe. With a little practice, you’ll impress everyone with your salsa-making skills. Make it your own, and have fun with it!

Summer is here, and it’s time to spice up your meals with a fresh twist! Strawberry Pineapple Salsa is a vibrant mix of sweet and savory flavors that will brighten …

Read more

Categories Appetizers

Air Fryer Garlic Butter Steak Bites Tender and Flavorful

May 29, 2025 by Chef Tavio
- 1 lb filet mignon or sirloin steak, cut into 1-inch cubes - 4 tablespoons unsalted butter, melted - 4 cloves garlic, minced - 1 tablespoon fresh parsley, finely chopped - 1 teaspoon salt - ½ teaspoon black pepper - 1 teaspoon smoked paprika - 1 tablespoon olive oil - Optional: Fresh lemon wedges, for serving To create the best Air Fryer Garlic Butter Steak Bites, you need just a few quality ingredients. Start with good cuts of meat. Filet mignon gives a nice tender bite. Sirloin also works well if you prefer. Butter is key in this recipe. Use unsalted butter, so you can control the salt. The garlic adds a rich flavor. Fresh garlic is best, but you can use pre-minced if you are short on time. The parsley adds a fresh touch to the dish. It gives a nice color too. Salt and black pepper season the steak, while smoked paprika adds a hint of smokiness. Do not forget olive oil! It helps prevent sticking in the air fryer. Lastly, fresh lemon wedges are optional but great for adding a zesty finish. - Air fryer - Mixing bowl - Measuring spoons - Cutting board - Knife Having the right tools makes cooking easier. An air fryer is a must for this recipe. It cooks the steak bites quickly and evenly. A mixing bowl helps combine your marinade well. You will need measuring spoons for accuracy. A cutting board and knife are essential for cutting the steak into cubes. These tools make the cooking process smooth and enjoyable. Once you have everything ready, you can focus on making these tasty steak bites. For the full recipe, check out the detailed instructions. To start, you will need to combine melted butter and minced garlic in a bowl. This mix gives your steak bites a rich flavor. Next, add chopped parsley, salt, black pepper, and smoked paprika. Stir the mix well so the flavors blend nicely. Now, take your cubed steak and toss it in the marinade. Make sure each piece is fully coated. For the best taste, let it marinate for 15 to 30 minutes. This will let the flavors soak in. While the steak marinates, it’s time to prep your air fryer. Preheat it to 400°F (200°C). This step helps cook the steak bites evenly. Once heated, drizzle olive oil in the air fryer basket. This will keep the steak from sticking during cooking. When the air fryer is ready, arrange the marinated steak bites in a single layer in the basket. Avoid crowding them; this helps them cook better. Air fry the steak bites for 8 to 10 minutes, shaking the basket halfway through. To check for doneness, use a meat thermometer. For medium-rare, aim for 130°F (54°C). Once they are done, carefully take the bites out of the air fryer. Let them rest for a couple of minutes. This allows the juices to settle. For serving, warm steak bites look great on a plate. You can drizzle any leftover garlic butter over them for extra flavor. Enjoy your savory garlic butter steak bites! For the full recipe, see above. Use a meat thermometer to check the steak. This tool helps you get it just right. For medium-rare, aim for 130°F (54°C). Adjust cooking time based on how you like your steak. For well-done, aim for 160°F (71°C). Remember, cooking times may vary based on the size of your steak bites. Marinating the steak bites is key. I recommend marinating for 15 to 30 minutes. This short wait helps the flavors blend well. For deeper flavor, marinate overnight in the fridge. The longer the steak sits in the garlic butter, the tastier it will be! Presentation matters! Garnish with fresh parsley for color. Add lemon wedges around the plate for brightness. You can serve the steak bites on a rustic wooden platter or stylish white plates. Drizzle any leftover garlic butter on top for added flavor. This makes the dish look great and taste even better. {{image_4}} You can change up the flavor of your steak bites easily. Try using herbs like rosemary, thyme, or oregano. Each herb brings its own taste. Rosemary adds a fresh, woodsy note. Thyme offers a subtle earthiness. Oregano gives a bright, peppery kick. You can also swap out spices for extra flavor. Add some chili powder for heat or cumin for a warm, nutty taste. The options are endless! If you want to try different cuts, consider ribeye or flank steak. Ribeye is rich and tender, with lots of marbling. Flank steak is leaner and has great flavor but can be chewier. Each cut will change the cooking time. Ribeye may need less time, while flank might need a bit longer. Remember to adjust your air fryer time based on the cut you choose! You can adapt this recipe to fit your needs. For a gluten-free option, ensure the spices and butter are gluten-free. If you want a dairy-free version, use a plant-based butter. You can also pair your steak bites with low-carb sides. Think of serving them with a fresh salad or sautéed veggies. This keeps your meal light but still full of flavor. To store leftovers, place them in an airtight container. This keeps the steak bites fresh. They can last in the fridge for 3 to 4 days. Make sure they cool down before sealing the container. For best results, freeze cooked steak bites after they cool. Use a freezer-safe bag or container. Squeeze out excess air to prevent freezer burn. They can last up to 3 months in the freezer. When ready to eat, thaw them in the fridge overnight before reheating. To reheat, use an air fryer for best results. Set it to 350°F (175°C) and cook for about 5 minutes. You can also use the microwave, but it may make the steak less crispy. If using a microwave, cover the steak with a damp paper towel. This helps keep the moisture in. Always check to ensure they are warm all the way through, but avoid overcooking. Yes, you can use frozen steak for this recipe. However, there are some things to think about. Frozen steak takes longer to cook. You will need to adjust the air frying time. On the plus side, frozen steak can be more tender if cooked right. It also keeps well in the freezer, so it’s handy. But fresh steak usually has better flavor and texture. If you can, use fresh steak for the best taste. To check if the steak bites are done, use a meat thermometer. For medium-rare, aim for 130°F (54°C). For medium, look for 140°F (60°C). If you like your steak well-done, go for 160°F (71°C). You can also check the texture. It should feel firm but springy. The color is key, too. Medium-rare will look pink inside, while well-done will be brown throughout. You can cook steak bites in a skillet or oven. For a skillet, heat oil in a pan over medium-high heat. Cook the steak bites for 3 to 4 minutes on each side. For the oven, preheat it to 400°F (200°C). Spread the steak bites on a baking sheet and cook for about 10 to 12 minutes. Both methods work well, but an air fryer gives a nice crispness that’s hard to beat. For the full recipe, check out the details above. This blog post gave you a clear guide to making delicious steak bites. We covered the ingredients, tools, marinating, and cooking techniques. Don’t forget the tips to ensure perfect doneness and enhance flavors. You can even explore variations and storage options. When done right, these steak bites will be a hit at your table. So, gather your ingredients and tools, and enjoy cooking! You’ll impress everyone with your tasty results in no time.

If you’re craving a dish that’s quick, juicy, and packed with flavor, look no further! Air Fryer Garlic Butter Steak Bites are tender morsels of beef, bursting with mouthwatering garlic …

Read more

Categories Dinner

Burger Bowls Fresh and Flavorful Meal Idea

May 28, 2025 by Chef Tavio
- 1 lb ground beef (or your choice of plant-based alternative) - 1 teaspoon garlic powder - 1 teaspoon onion powder - 1 teaspoon smoked paprika - Salt and freshly cracked black pepper, to taste - 4 cups assorted lettuce (mixed greens or your preferred variety) - 1 cup cherry tomatoes, halved for freshness - 1 cucumber, sliced into rounds - 1/4 cup red onion, carefully thinly sliced - 1 cup shredded cheese (cheddar or your favorite type) - 1/2 cup pickles, sliced into rounds - 1/4 cup burger sauce or creamy mayonnaise - 2 tablespoons mustard (optional, for an extra kick) - Fresh parsley or chives, finely chopped for garnish You can try adding some extra ingredients to amp up the flavor. Consider these options: - Avocado slices for creaminess - Jalapeños for heat - Roasted corn for sweetness - Quinoa for added texture Toppings can make your burger bowl even better. Here are some great choices: - Crispy bacon bits for crunch - Sliced olives for a briny taste - Fresh herbs like cilantro for brightness - Crunchy tortilla strips for a fun twist Your burger bowls will shine with these ingredients. Mix and match to create your perfect dish. Enjoy the process and taste! For a full recipe, be sure to check out the [Full Recipe]. To start, gather your ingredients. Use one pound of ground beef or a plant-based option. In a bowl, mix the beef with garlic powder, onion powder, smoked paprika, salt, and pepper. Use your hands or a spoon to blend everything well. This step is key for flavor. Shape the mix into equal patties. Aim for uniform thickness to ensure even cooking. Now, let’s build your burger bowl. Lay down a generous layer of mixed greens as the base. This gives you a fresh crunch. Place the cooked burger patty right in the center. Next, add halved cherry tomatoes, sliced cucumber, and thin red onion around the patty. Sprinkle shredded cheese and top with pickle rounds. Drizzle your favorite burger sauce or creamy mayonnaise over the toppings. If you like a kick, add mustard too. For great burgers, preheat your skillet to medium-high heat. Cook each patty for 4-5 minutes on each side. Check for a nice brown color to know they’re done. If you’re using plant-based patties, follow the cooking instructions on the package. Remember, don’t press down on the patties while they cook. This keeps them juicy. For more tips on burger perfection, check out the Full Recipe. Start with fresh ingredients. This makes your burger bowls taste great. Use your favorite greens for the base. Wash and dry them well. Slice your veggies thin for easy bites. Halved cherry tomatoes add color and sweetness. When you chop the red onion, soak it in cold water. This helps reduce its sharpness. For beef, use 80/20 ground beef for juicy burgers. Mix in spices like garlic and onion powder for flavor. Shape the patties evenly. This ensures they cook well. If you’re using a plant-based option, follow package directions closely. Cook until they are golden brown and hot all the way through. This will give the best taste and texture. To make your burger bowl filling, add lots of toppings. Use shredded cheese, pickles, and olives for more flavor. Drizzle burger sauce or creamy mayo on top. This ties all the flavors together. Serve with a side of sweet potato fries or a fresh fruit salad. This adds balance to your meal. For an extra touch, garnish with fresh herbs. They give a pop of color and taste. You can find the full recipe above for more details. {{image_4}} You can easily swap the meat in burger bowls. Use black beans, lentils, or chickpeas. These options add protein and fiber. You can mash them or leave them whole for texture. Season them with garlic powder, onion powder, and smoked paprika for rich flavor. Add a plant-based cheese for creaminess. You can also use grilled veggies like zucchini or bell peppers. They bring a nice char and sweetness to the dish. For a keto version, skip the buns and focus on low-carb veggies. Use leafy greens like spinach or kale as your base. Instead of regular cheese, try cream cheese or feta for a flavor boost. You can add avocado slices for healthy fats. For added crunch, sprinkle some nuts or seeds on top. Keep your sauces low in sugar; use mustard or homemade mayo. Get creative with your burger bowl by trying new flavor themes. A Mediterranean burger bowl could feature feta, olives, and a drizzle of olive oil. For a Mexican twist, use taco-seasoned meat, corn, and salsa. You might enjoy an Asian-inspired bowl with soy sauce, sesame seeds, and crunchy cabbage. Don’t forget to mix and match your sauces for exciting tastes. Each theme makes your meal fun and fresh. For detailed steps, refer to the Full Recipe. To store your leftover burger bowls, let them cool first. Use airtight containers for the best results. Keep the veggies and sauces separate from the meat to prevent sogginess. Store in the fridge for up to three days. If you want to keep them longer, consider freezing the meat patties. They freeze well and can last up to three months. When you're ready to enjoy your leftovers, reheat them for the best taste. Remove the toppings first. Warm the meat in a skillet over medium heat. This keeps it juicy. You can also use the microwave, but be careful not to overcook it. Add the toppings back once the meat is hot. This way, your burger bowl will taste fresh and delicious. Meal prepping burger bowls is a great time-saver. Cook a batch of patties and store them in the fridge. Prepare your veggies and store them in separate containers. When you're ready to eat, just assemble your bowl quickly. This method helps you enjoy healthy meals without a lot of fuss. You can mix and match your toppings for variety throughout the week. Try different sauces to keep it exciting. For the full recipe, check out Burger Bowls. Burger bowls are a fun twist on classic burgers. They combine all your favorite burger toppings in a bowl instead of a bun. This dish gives you the same great taste but with a fresh twist. You can load them with greens, veggies, and proteins. It’s a great way to enjoy burgers in a lighter way. You can customize your burger bowl in many ways. Start with your protein choice. You can use ground beef, turkey, or a plant-based option. Next, choose your greens. Romaine or spinach works great. Add your favorite toppings, like cheese, onions, and pickles. You can also choose dressings like burger sauce or ranch. Get creative! Try adding avocado or jalapeños for extra flavor. Yes, burger bowls can be a healthy option! They are packed with veggies and protein. You control the portion sizes and toppings. You can also swap out high-calorie dressings for lighter options. Using lean meat or plant-based protein adds nutrition. Overall, they can fit well into a balanced diet. You learned about making delicious burger bowls. We covered key ingredients, cooking steps, and helpful tips. You can customize based on your taste, from vegetarian to keto-friendly options. Storing leftovers and reheating them keeps meals fresh. Burger bowls are fun, healthy, and adaptable for everyone. Now, mix and match flavors to create your perfect bowl. Enjoy every bite!

Looking for a fresh and fun meal idea? Burger bowls are your answer! They mix all your favorite burger flavors into a tasty bowl, making meals quick and easy. Whether …

Read more

Categories Dinner

Peanut Butter Brownie Cookies Rich and Chewy Delight

May 28, 2025 by Chef Tavio
- 1 cup creamy peanut butter - 1 cup granulated sugar - 1 large egg - 1 teaspoon pure vanilla extract - 1/2 cup unsweetened cocoa powder - 1/2 teaspoon baking soda - 1/4 teaspoon salt - 1/2 cup semi-sweet chocolate chips (optional) When making these peanut butter brownie cookies, it's key to gather all your ingredients first. This will make the process smoother and more enjoyable. Each ingredient plays a role in the flavor and texture of your cookies. The creamy peanut butter gives a rich taste and a chewy texture. The sugar adds sweetness and helps the cookies spread. The egg binds everything together, while the vanilla extract adds a lovely depth. Cocoa powder brings that classic chocolate flavor which makes it a brownie cookie. Baking soda helps the cookies rise, and salt balances the sweetness. You can also add chocolate chips for an extra chocolate burst. It’s all about personal choice. Just remember, each ingredient matters. - Mixing bowls - Hand mixer or spatula - Baking sheet - Parchment paper - Cookie scoop or tablespoon To bake these cookies, you’ll need some basic tools. A mixing bowl is a must for combining your ingredients. A hand mixer or spatula helps mix everything well. A baking sheet lined with parchment paper keeps cookies from sticking. Finally, a cookie scoop or tablespoon helps you measure out the dough. Gathering your tools before you start will help you feel organized. It also makes the baking process a lot of fun! Use the [Full Recipe] for step-by-step guidance. - Preheat oven to 350°F (175°C) - Prepare the baking sheet with parchment paper Start by preheating your oven. This step is key for even baking. While the oven warms up, grab a baking sheet. Line it with parchment paper. This helps stop the cookies from sticking. - Blend peanut butter and sugar until smooth - Add egg and vanilla, mixing until fully combined In a large bowl, add your creamy peanut butter and granulated sugar. Use a hand mixer or spatula to blend them. You want a smooth, creamy mix. Next, crack in a large egg. Add the teaspoon of pure vanilla extract. Mix until everything is well combined. - Whisk together cocoa, baking soda, and salt - Gently mix dry ingredients into wet mixture In a separate bowl, whisk together the unsweetened cocoa powder, baking soda, and salt. This helps to evenly distribute the dry ingredients. Now, gently mix this dry blend into your wet peanut butter mixture. Be careful not to overmix. - Scoop out dough on baking sheet, spacing 2 inches apart - Flatten slightly with fork, then bake for 10-12 minutes Using a tablespoon or cookie scoop, scoop out rounded balls of dough. Place them on the lined baking sheet. Make sure to leave about 2 inches between each ball. This space is important for spreading. Once they are all on the sheet, slightly flatten each dough ball using a fork. This helps them bake evenly. Now, place the baking sheet in the oven. Bake for about 10 to 12 minutes. Keep an eye on them. They should look set at the edges but soft in the center. After baking, let them cool slightly before transferring to a wire rack. Enjoy your cookies! For the full recipe, refer to the complete instructions above. To get that perfect chewy texture, avoid overmixing the dough. Mix until just combined. Overmixing will make your cookies tough instead of fudgy. Baking time is also key. Check your cookies at 10 minutes; they should look soft in the middle. The edges should be set, but the center will firm up as they cool. These cookies pair wonderfully with milk or coffee. The rich flavors balance perfectly with a hot drink. You can also make ice cream sandwiches using these cookies. Just add a scoop of your favorite ice cream between two cookies for a tasty treat. For a stunning look, drizzle melted chocolate over the cookies. It adds a nice touch and extra flavor. You can also sprinkle crushed peanuts on top for added crunch. This not only enhances the taste but also makes your cookies look fancy and inviting. {{image_4}} You can play around with flavors to make these cookies unique. - Add chopped nuts for crunch: Walnuts or pecans add a great bite. - Substitute almond butter for a different taste: Almond butter gives a nice twist. You can also modify the recipe to fit your dietary needs. - Make it gluten-free by using gluten-free cocoa powder: This keeps the cookies safe for gluten-sensitive folks. - Sweeten with honey or agave for a healthier option: These natural sweeteners can cut refined sugar. Get creative with how you bake these cookies. - Bake as a brownie instead of cookies: Just spread the batter in a pan and bake. - Use mini muffin tins for bite-sized treats: These little bites are perfect for parties or snacks. For the full recipe and more details, check out the [Full Recipe]. To keep your peanut butter brownie cookies fresh, store them in an airtight container at room temperature. This helps prevent them from drying out. If you want them to last longer, place them in the fridge. The cold will keep them tasty for about a week. You can easily freeze these cookies for future use. First, make sure they are fully cooled. Next, place them in a single layer on a baking sheet. Freeze until solid, then transfer them to a freezer bag. This method saves space and keeps them fresh for up to three months. When you're ready to enjoy them, simply take them out and let them thaw at room temperature. For the best taste, you can warm them slightly in the oven. This way, they will taste fresh and chewy, just like when you first baked them. Yes, but it may alter the texture of the cookies. Crunchy peanut butter adds a fun twist. You will get little bits of peanuts in each bite. This can make the cookies feel more rustic and textured. Edges should be set, with slightly soft centers. The cookies will continue to cook after you take them out. Look for a firm edge and a soft middle. If you wait too long, they can become dry. Yes, they freeze well for up to 3 months. Let the cookies cool completely before freezing. Place them in a single layer in an airtight container. When you want one, just take it out and let it thaw. Enjoy your treat anytime! You now have a simple recipe for peanut butter cookies. From using the right ingredients to following easy steps, this guide makes baking fun and simple. Remember to store your cookies in an airtight container for freshness. Don't be afraid to try variations, like adding nuts or making brownies. Enjoy making these treats with friends or family. Baking can bring joy, and these cookies are sure to please everyone. Now, grab your ingredients and start creating!

Craving a sweet treat that hits all the right notes? Let me introduce you to Peanut Butter Brownie Cookies! These rich, chewy delights combine the creamy goodness of peanut butter …

Read more

Categories Desserts

Zesty Cilantro Lime Shrimp Tacos for a Flavorful Meal

May 28, 2025 by Chef Tavio
- 1 lb shrimp, peeled and deveined - 2 tablespoons extra virgin olive oil - 3 cloves garlic, finely minced - Zest and juice of 2 fresh limes - 1 teaspoon ground cumin - 1 teaspoon smoked paprika - 1/2 teaspoon chili powder - Salt and freshly ground black pepper to taste - 8 small corn tortillas - 1 cup red cabbage, very thinly sliced - 1 ripe avocado, sliced into wedges - 1/2 cup fresh cilantro, roughly chopped - 1/4 cup salsa (your choice, store-bought or homemade) - Lime wedges, for serving For four servings, use 1 lb of shrimp. If you need to make fewer, cut the shrimp down to 1/2 lb. You can replace shrimp with chicken if you like. Keep the spices to make sure the flavor stays strong. If you want more shrimp, just double the amount. Lime and cilantro are key. Lime adds a bright, zesty taste. Fresh cilantro gives a herbaceous note that enhances the dish. The spices, like cumin and smoked paprika, build a warm and rich flavor. Together, these elements create a taco that is both fresh and bold. The balance between lime and spices makes each bite exciting. Enjoy the mix of flavors in every taco. For the full recipe, check the details above. To start, gather your shrimp and marinade ingredients. You need shrimp, garlic, olive oil, lime zest, lime juice, cumin, smoked paprika, chili powder, salt, and pepper. 1. In a medium bowl, mix the shrimp with the minced garlic and olive oil. 2. Add the lime zest and lime juice for that fresh flavor. 3. Sprinkle in the cumin, smoked paprika, chili powder, and a pinch of salt and pepper. 4. Stir everything well until the shrimp are fully coated. Let the shrimp marinate for 15-20 minutes. This time allows the shrimp to soak up all the zesty flavors. Next, let’s cook the shrimp. You can grill or pan-sear them. Each method gives a tasty result. 1. Preheat your grill pan or skillet over medium-high heat. 2. Once hot, add the marinated shrimp in a single layer. Don’t overcrowd the pan. 3. Cook for about 2-3 minutes on each side. The shrimp should turn pink and opaque. For perfect texture, be careful not to overcook them. Overcooked shrimp can turn rubbery. While the shrimp cooks, it's time to warm the tortillas. Warm tortillas make a big difference in taste and texture. 1. Use another skillet or a gas flame to heat the corn tortillas. 2. Heat each tortilla for about 30 seconds on each side. They should be soft and slightly toasted. This step helps make the tortillas more pliable and flavorful. Now comes the fun part—assembling your tacos. 1. Start with a layer of shredded red cabbage on a warmed tortilla. 2. Add a few pieces of cooked shrimp on top. 3. Next, place avocado slices and a sprinkle of fresh cilantro. 4. Finish with a spoonful of your favorite salsa. Layering the ingredients this way ensures you get a burst of flavor in every bite. Enjoy your Zesty Cilantro Lime Shrimp Tacos, best served warm! For more detailed instructions, check the Full Recipe. To make your tacos pop with flavor, balance is key. Use lime juice and zest to give a bright taste. The lime works well with spices like cumin and paprika. Together, they create a wonderful mix. Marinating shrimp is a must for great flavor. In a bowl, combine shrimp with garlic, olive oil, and lime. Let it sit for 15 to 20 minutes. This helps the shrimp soak up all the zesty goodness. The longer you marinate, the more intense the taste. Serving your tacos in a fun way makes them more inviting. Stack them on a colorful platter to catch the eye. You can add lime wedges and extra salsa around the tacos. This adds color and makes the dish look fresh. For garnishing, sprinkle chopped cilantro on top. This adds a bright green touch and a fresh flavor. You could also slice radishes or add pickled onions for extra flair. Using the right pans can make a big difference. A grill pan or a cast-iron skillet works best for shrimp. These tools help you get that nice sear. They also cook the shrimp evenly, so they turn out perfect. For taco assembly, a sturdy spatula is helpful. It allows you to lift and flip without breaking the tortillas. A small bowl for salsa can keep it handy while you build your tacos. For the full recipe, check out the details above! {{image_4}} You can switch out shrimp for other proteins. Fish works well, especially white fish like tilapia or cod. Chicken is another great choice. You can grill or sauté it with the same marinade for a tasty twist. If you're looking for vegetarian options, consider black beans or grilled vegetables. These choices add flavor and texture without meat. Corn tortillas are traditional and have a nice flavor. They are also gluten-free. Flour tortillas are softer and more pliable, making them easy to fold. You can customize the size too. Small tortillas are perfect for appetizers, while larger ones can be great for hearty meals. Choose based on what you like best. Want more heat? Add diced jalapeños or a splash of your favorite hot sauce to the shrimp. For a fresh touch, mix in seasonal vegetables like bell peppers or zucchini. These add color and crunch to your tacos. You can find the full recipe to explore even more ideas. To keep your shrimp fresh, store it in an airtight container in the fridge. Shrimp is best if used within two days. If you have extra shrimp, freeze it for later. Wrap it tightly in plastic wrap and then place it in a freezer bag. This keeps it safe for up to three months. For tortillas, keep them in a separate bag at room temperature. If you have sliced avocado or other toppings, store them in small containers. This prevents them from getting soggy or mushy. When reheating shrimp, use a skillet over medium heat. Add a splash of oil and heat for a few minutes. This helps the shrimp warm evenly and stay juicy. Avoid using high heat, as it can make the shrimp tough. For tortillas, heat them in a dry skillet for about 30 seconds on each side. This keeps them from getting too soft. If you have leftover tortilla wraps, wrap them in foil while reheating. This helps maintain their shape and texture. Shrimp lasts about 1-2 days in the fridge. If it smells off or looks discolored, it’s time to toss it. Tortillas can last up to a week in the pantry. Check for mold or a dry texture. Fresh cilantro keeps for about a week in the fridge. If it wilts or turns brown, it's best to discard it. The same goes for the red cabbage; use it within a week for the best crunch. Remember to check your salsa as well, which lasts about a week once opened. Yes, you can prep some parts ahead. Marinate the shrimp for up to two hours. You can also slice the cabbage and avocado in advance. Keep the shrimp and toppings in separate containers. Just warm the tortillas and cook the shrimp when ready to eat. You can use frozen shrimp. Just thaw them before cooking. If you prefer, try diced chicken or tofu. Both options will absorb the marinade well, giving you great flavor. Add more chili powder or some diced jalapeños to the shrimp. You can also serve with a spicy salsa. Hot sauce is another easy way to kick up the heat. Yes! Look for corn tortillas, as they are gluten-free. Check the label to make sure they don't have added gluten. You can also use lettuce wraps for a low-carb option. Great sides include Mexican rice or black beans. You can also serve a fresh salad with lime vinaigrette. Grilled corn on the cob adds a nice touch too. For a fun twist, try tortilla chips with salsa or guacamole. For the full recipe, check out the complete instructions and details! This blog post covered how to make zesty cilantro lime shrimp tacos. We discussed main ingredients, measurements, and essential flavors. I shared step-by-step instructions for marinating and cooking shrimp. You learned tips for assembling tacos and suggested variations for different diets. In conclusion, these tacos are easy and fun to make. Enjoying bold flavors will impress your friends and family. Don’t hesitate to experiment with ingredients or sides. Happy cooking!

Ready to spice up your dinner? You’ll love these Zesty Cilantro Lime Shrimp Tacos! They blend fresh shrimp, zesty lime, and vibrant cilantro for a bright flavor punch. Whether you’re …

Read more

Categories Dinner

COOKIE MONSTER COOKIES Delightful and Fun Treats

May 28, 2025 by Chef Tavio
Making Cookie Monster cookies is easy and fun. This recipe makes about 24 cookies. You will spend about 15 minutes prepping and 30 minutes total to make them. These cookies are soft, chewy, and full of fun colors and flavors. Here are the key ingredients you will need: - 1 cup unsalted butter, softened to room temperature - 1 cup packed brown sugar - 1/2 cup granulated sugar - 2 large eggs, at room temperature - 2 teaspoons pure vanilla extract - 3 cups all-purpose flour - 1 teaspoon baking soda - 1/2 teaspoon fine sea salt - 1 cup blue chocolate candies (like M&M’s) - 1/2 cup semi-sweet chocolate chips - 1/2 cup crushed Oreo cookies These ingredients create a rich dough that is both sweet and fun. The blue candies give them that Cookie Monster look. You can add a few more items to change the taste a bit: - 1/2 cup chopped nuts (like walnuts or pecans) - 1/2 teaspoon almond extract for a nutty twist - 1/4 cup of coconut flakes for extra texture These optional ingredients can add a great crunch or new flavor to your cookies. Feel free to mix and match based on your taste. Enjoy the process and get creative! Start by preheating your oven to 350°F (175°C). This step is key for even baking. While the oven heats, prepare your baking sheets. Line them with parchment paper to stop the cookies from sticking. This small step makes cleanup easy too. In a large bowl, cream together the softened butter, brown sugar, and granulated sugar. Use an electric mixer on medium speed. Beat until the mix is light and fluffy, about 2-3 minutes. Next, add the eggs one at a time. Mix well after each addition. Now, add the vanilla extract and stir to combine. In another bowl, whisk the flour, baking soda, and fine sea salt together. Slowly add this dry mix to the wet mixture. Stir gently until just combined. Don’t overmix; this keeps your cookies soft. Finally, fold in the blue chocolate candies, chocolate chips, and crushed Oreo cookies. Make sure they are evenly spread in the dough. Scoop rounded tablespoons of dough onto the prepared baking sheets. Leave about 2 inches between each scoop to allow for spreading. Bake the cookies in your preheated oven for 10-12 minutes. The edges should be lightly golden, while the centers can be soft. This is okay; they will firm up as they cool. Once baked, take the cookies out and let them rest on the sheets for 5 minutes. Then, move them to a wire rack to cool completely. For a fun touch, stack the cookies on a bright plate. Drizzle melted white chocolate on top for added sweetness. Enjoy your colorful Cookie Monster Cookies! For the full recipe, check out the earlier section. When making Cookie Monster Cookies, some common mistakes can ruin your fun. Here are a few to watch out for: - Overmixing the Dough: Mixing too much can make cookies tough. Mix just until combined. - Not Measuring Properly: Use the scoop and level method for flour. It helps avoid dense cookies. - Skipping the Chill: If dough feels soft, chill for 30 minutes. It helps cookies hold their shape. To get the right texture in your Cookie Monster Cookies, follow these tips: - Use Room Temperature Ingredients: Softened butter and eggs mix better. This gives a smooth dough. - Don’t Overbake: Keep an eye on your cookies. They should look soft in the middle. - Let Them Cool: Letting cookies cool on a rack helps them firm up. This keeps them chewy. Decorating your cookies can be just as fun as making them! Here are some ideas: - Melted White Chocolate: Drizzle melted white chocolate on top for a sweet touch. - Extra Candies: Scatter more blue chocolate candies on top before baking. It adds color and fun. - Cookie Monster Faces: Use frosting to create eyes and a mouth. Transform each cookie into a cute character! These tips will help you create delightful and fun Cookie Monster Cookies. For the full recipe, check out the previously mentioned section! {{image_4}} You can make your Cookie Monster cookies even more exciting! Here are some fun ideas to add flavor: - Peanut Butter Chips: Add 1 cup of peanut butter chips for a nutty twist. - Mint Chocolate: Swap blue candies for mint chocolate candies for a fresh taste. - Sprinkles: Mix in colorful sprinkles for a festive look. - Coconut: Add 1 cup of shredded coconut for extra texture. These add-ins can change the taste and look of your cookies. Experiment and find your favorites! If you need gluten-free cookies, don’t worry! Here’s how to adapt the recipe: - Gluten-Free Flour: Use a 1:1 gluten-free flour blend in place of all-purpose flour. Brands like Bob’s Red Mill work well. - Baking Powder: Make sure it’s labeled gluten-free. Some brands might have gluten. These swaps keep your cookies soft and delicious. You won’t miss the gluten! Want to make vegan Cookie Monster cookies? It’s simple! - Butter: Replace unsalted butter with coconut oil or vegan butter. - Eggs: Use flax eggs instead. Mix 1 tablespoon of ground flaxseed with 2.5 tablespoons of water for each egg. - Chocolate Chips: Use dairy-free chocolate chips for a vegan treat. These changes keep the cookies tasty while fitting a plant-based diet. You'll love these vegan versions just as much! To keep your Cookie Monster cookies fresh, store them in an airtight container. This will help keep moisture inside and prevent the cookies from drying out. Place a slice of bread in the container. The bread will absorb any excess moisture. This trick works great! Store your cookies at room temperature for up to a week. Freezing cookie dough is simple and useful. To freeze, scoop the dough into balls and place them on a baking sheet. Make sure they are not touching. Freeze for about 2 hours, then transfer the balls to a freezer-safe bag. Label the bag with the date. You can keep the dough frozen for up to three months. When you're ready to bake, just take out the dough and let it thaw in the fridge overnight. If you want to enjoy warm cookies again, reheating is easy. Preheat your oven to 300°F (150°C). Place the cookies on a baking sheet. Heat them for about 5-7 minutes. This warms them up without making them hard. Enjoy your Cookie Monster cookies warm and soft, just like fresh out of the oven! If you need the full recipe, check out the Full Recipe link for all the steps. Cookie Monster Cookies come from the fun world of baking. They are inspired by the beloved Sesame Street character, Cookie Monster. This blue furry friend loves cookies, especially chocolate ones. The cookie's blue color and fun mix-ins make it a hit at parties and gatherings. The bright blue candies and crushed Oreos mirror Cookie Monster's playful spirit. These cookies became popular as a treat for kids and adults alike, combining joy with flavor. Yes, you can use many candy types! Feel free to swap the blue chocolate candies for any color or type you like. Try using peanut butter cups, chocolate-covered pretzels, or even gummy candies. Each candy adds a unique twist to the cookie's flavor. You can mix and match according to your taste buds. The key is to keep the total amount of mix-ins the same for balance. To lower the sugar in these cookies, reduce the brown and granulated sugars. You might try cutting each by a quarter cup. This will still give you sweet cookies but with less sugar. You can also use sugar substitutes like stevia or monk fruit. Keep in mind that these substitutes can change the texture slightly. Always taste the dough to ensure it meets your sweet tooth! For a more wholesome option, add mashed bananas or applesauce, which adds sweetness and moisture. In this blog post, we covered the essential ingredients for Cookie Monster Cookies and how to mix and bake them perfectly. You learned common mistakes to avoid and tips for decorating. We also explored tasty variations and storage methods to keep your cookies fresh. Making these cookies is fun and easy. With a few tweaks, you can customize them to fit your needs. Enjoy creating your own version of this delightful treat!

Are you ready for a sweet adventure? Cookie Monster Cookies are not just playful treats; they are a fun way to brighten up your baking routine. Bursting with color and …

Read more

Categories Desserts

Easy Grandma’s Goulash Simple and Hearty Dish

May 28, 2025 by Chef Tavio
To make Easy Grandma's Goulash, gather these key items: - 1 lb ground beef - 1 medium onion, finely chopped - 2 cloves garlic, minced - 1 bell pepper, chopped (choose your favorite color) - 1 can (15 oz) diced tomatoes (with juice) - 2 cups beef broth (low-sodium recommended) - 1 cup elbow macaroni - 1 tsp smoked paprika - 1 tsp Italian seasoning - Salt and black pepper to taste These main ingredients create a warm and filling dish. The ground beef provides protein, while the pasta makes it hearty. Diced tomatoes add moisture and flavor. Beef broth enhances the taste and ties everything together. You can adjust the recipe to fit your taste. Here are some ideas: - Swap ground beef for turkey or chicken. - Add vegetables like zucchini or corn. - Use whole wheat pasta for extra fiber. - Toss in some frozen peas for color. - Spice it up with red pepper flakes. These options let you make the dish your own, bringing in new flavors or textures. Finishing touches can elevate your goulash. Consider these toppings: - 1 cup shredded sharp cheddar cheese (optional) - Fresh parsley, chopped (optional) A sprinkle of cheese makes it creamy and rich. Fresh parsley adds a pop of color and freshness. You can serve the goulash in deep bowls and pair it with crusty bread for a cozy meal. This simple dish is perfect for sharing! For the full recipe, check out the details above. To start, gather all your ingredients. This makes cooking smooth and easy. You will need: - 1 lb ground beef - 1 medium onion, finely chopped - 2 cloves garlic, minced - 1 bell pepper, chopped - 1 can (15 oz) diced tomatoes (with juice) - 2 cups beef broth (low-sodium recommended) - 1 cup elbow macaroni - 1 tsp smoked paprika - 1 tsp Italian seasoning - Salt and black pepper to taste - 1 cup shredded sharp cheddar cheese (optional) - Fresh parsley, chopped (optional) Next, finely chop the onion and bell pepper. Mince the garlic. This will help them cook fast. Heat a large pot or Dutch oven on medium. Add the ground beef. Cook for 5-7 minutes. Break it apart with a wooden spoon. Once browned, drain any excess grease. Now, add the chopped onion and minced garlic. Sauté for 3-4 minutes. Stir until the onion is soft and fragrant. Add the chopped bell pepper next. Cook for 3 more minutes. This softens the pepper and adds flavor. Pour in the diced tomatoes, beef broth, and elbow macaroni. Stir well to mix every ingredient. Season the mix with smoked paprika, Italian seasoning, salt, and pepper. Turn up the heat to high. Bring it to a gentle boil. After boiling, lower the heat to low. Cover the pot and let it simmer for 15-20 minutes. Stir occasionally. This keeps the macaroni from sticking. If you want a cheesy touch, add the shredded cheese in the last few minutes. Cover the pot to let the cheese melt. Once done, remove the pot from heat. Let it sit, covered, for a few minutes. This helps the flavors mix well. To get the best texture, stir often. This stops the macaroni from sticking and helps it cook evenly. If the goulash seems too thick, add more beef broth. If you prefer a saucier dish, add more diced tomatoes. Adjust the seasonings to your taste. Enjoy this cozy meal! For a full recipe, see the full recipe section. To make goulash really pop, start with browning the beef. This adds rich flavor. Use a heavy pot for even cooking. When you add garlic and onion, stir them until they smell sweet. This step builds a solid base for your dish. Don't rush it. Let the bell pepper cook until soft. This brings out its natural sweetness. Smoked paprika is a game-changer. It adds depth and a nice smoky note. One common mistake is overcooking the macaroni. Cook it just right and add it in the last stages. If you add it too early, it can turn mushy. Another mistake is not seasoning enough. Always taste your dish and adjust salt and pepper. Lastly, don’t skip the cheese if you love it! It adds creaminess and ties all the flavors together. Serve your goulash in deep bowls for a warm feel. A sprinkle of fresh parsley adds color and freshness. Pair it with crusty bread to soak up the sauce. A simple side salad can also brighten the meal. If you want a drink, consider a light red wine. It's a perfect match for goulash. For a cozy night, serve it with a warm dessert like apple pie. Check out the Full Recipe for more tips! {{image_4}} If you want a vegetarian version of goulash, you can skip the meat. Use mushrooms for a hearty texture. You can also add cooked lentils for protein. Both options give great flavor. Use vegetable broth instead of beef broth. This keeps the dish rich and satisfying. For a twist, try using ground turkey or chicken. They are leaner than beef and still tasty. You can also use tofu for a protein boost. Crumble it into the pot for a nice texture. Another option is to add chickpeas or black beans. They add fiber and are filling. Feel free to mix in extra vegetables. Carrots and zucchini work well in this dish. You can also add corn for sweetness. Experiment with different spices like cumin or chili powder for a kick. If you love cheese, try adding cream cheese for a richer sauce. These creative additions will make your goulash unique and fun. Check out the Full Recipe for more tips! To store your goulash, let it cool first. Place it in an airtight container. Make sure to keep it in the fridge. It will stay fresh for about three to four days. This is great for quick meals later in the week. You can also freeze goulash for longer storage. Divide it into portions before freezing. Use freezer-safe bags or containers. Remove as much air as possible to prevent freezer burn. Goulash can last up to three months in the freezer. When ready, just thaw it in the fridge overnight. When it's time to eat, reheat goulash on the stove. Use a medium heat and stir often. You can add a splash of beef broth if it seems dry. For microwave reheating, use a microwave-safe bowl. Heat in short bursts, stirring in between. Make sure it's hot all the way through before serving. Enjoy your comforting meal! For the full recipe, check out Grandma's Comforting Goulash. Goulash comes from Hungary. It started as a simple stew for herdsmen. Over time, it grew popular in other countries. Each place added its twist. In the U.S., we often make it with ground beef and pasta. Grandma's goulash reflects this mix of cultures. It's a warm dish that many love. Yes, you can make goulash ahead of time. It tastes even better the next day! Just let it cool before storing it in the fridge. Use a tight container to keep it fresh. When you’re ready to eat, heat it on the stove. Add a splash of broth if it seems dry. To spice up your goulash, add red pepper flakes. You can also try cayenne pepper or hot sauce. Start with a little and taste as you go. If you like a smoky flavor, add more smoked paprika. This way, you can find the right heat for your taste. This blog post covered everything you need for Grandma's goulash. We explored key ingredients, from the main staples to tasty toppings. You learned step-by-step how to prepare and cook the dish. Tips and tricks showed you how to avoid mistakes and enhance flavor. We discussed tasty variations, storage tips, and reheating methods. In the end, goulash is a flexible dish. You can make it your own and enjoy it again and again.

If you’re craving a dish that warms the heart and fills the belly, look no further than Easy Grandma’s Goulash. This simple and hearty recipe combines flavors and textures your …

Read more

Categories Dinner

Oven Roasted Garlic Cabbage Steaks Tasty and Simple

May 28, 2025 by Chef Tavio
- 1 large head of green cabbage - 4 tablespoons olive oil - 4 cloves garlic, finely minced - 1 teaspoon smoked paprika - 1 teaspoon sea salt - 1/2 teaspoon freshly ground black pepper - 1 teaspoon balsamic vinegar - Fresh parsley, finely chopped (for garnish) When making oven roasted garlic cabbage steaks, choose a large head of fresh green cabbage. The size matters since it helps create thick, juicy steaks. Olive oil is key for flavor and helps the garlic roast nicely. Finely minced garlic gives a strong taste that pairs well with the cabbage. For seasoning, smoked paprika adds warmth and depth. Sea salt and black pepper enhance the taste, while balsamic vinegar adds a sweet tang. A sprinkle of fresh parsley at the end adds color and brightness. These ingredients make this dish simple yet flavorful. You can find the full recipe for more detailed steps on how to prepare these delicious cabbage steaks. - Preheat the oven to 400°F (200°C). - Remove the outer leaves and rinse the cabbage. Start by preheating your oven. This step is key for even cooking. While the oven warms, take your cabbage. Remove any wilted or damaged outer leaves. Rinse it under cold water. This helps clean off any dirt. Make sure to dry it well before slicing. - Cut the cabbage into 1-inch thick steaks. - Yield: 4 to 6 steaks. Next, place the cabbage on your cutting board. Use a sharp knife to cut it into 1-inch thick slices. Each slice is a steak. Aim for about 4 to 6 steaks, based on the cabbage size. This thickness helps them hold up while roasting. - Whisk together garlic-oil mixture. - Brush mixture onto both sides of each steak. Now, grab a medium bowl. Whisk together the olive oil, minced garlic, smoked paprika, sea salt, black pepper, and balsamic vinegar. This mixture adds tons of flavor. Use a brush to coat both sides of each cabbage steak. Make sure every piece gets a nice layer. - Arrange steaks on baking sheet. - Roast for 25-30 minutes, flipping halfway. Lay the coated cabbage steaks on a baking sheet. You can line it with parchment paper for easy cleanup. Place the sheet in the oven. Roast for 25 to 30 minutes. Flip the steaks halfway through. This helps them brown evenly and taste amazing. To get the best flavor and texture from your cabbage steaks, focus on two main areas: browning and tenderness. First, make sure to slice your cabbage into thick 1-inch steaks. This thickness helps them stay juicy. Next, watch your cooking time and temperature. Roast at 400°F for 25-30 minutes. Flip the steaks halfway through. This flipping gives both sides a nice, golden color. While the basic seasoning is great, you can try adding more spices for extra flavor. Cumin gives a warm, earthy taste. Chili flakes add a nice kick if you like heat. If you run out of olive oil, avocado oil works well too. It has a mild taste and can handle high heat. To impress your guests, think about how you present the dish. Serve the cabbage steaks on a rustic wooden board. Drizzle any leftover garlic oil on top for added flavor. A sprinkle of chopped parsley brightens the dish and makes it look fresh. For special occasions, consider pairing with a simple salad or grilled protein for a complete meal. {{image_4}} You can make oven roasted garlic cabbage steaks even better by adding other vegetables. Carrots and bell peppers work great. Slice the carrots thinly to match the cabbage's cooking time. Bell peppers add sweetness and color. Mixing these veggies balances flavors, giving your dish a fresh twist. Try to think of what you enjoy. You can even add zucchini or asparagus for a fun change. The key is to cut them to the same size as your cabbage steaks. This way, they cook evenly and taste delicious together. Herbs can elevate your cabbage steaks. I love adding thyme or rosemary to the garlic-oil mix. These herbs bring warmth and depth to the dish. You can also sprinkle some cheese on top. Feta adds a tangy flavor, while Parmesan gives a nutty touch. Mixing in these flavors makes each bite special. If you want something different, consider adding a squeeze of lemon juice before serving. It brightens the dish and balances the richness of the oil. You can easily make this dish vegan-friendly. Just swap the cheese for a dairy-free alternative. Check labels when buying products to ensure they're vegan and gluten-free. Most olive oils are gluten-free, but always double-check. You can even use coconut aminos instead of balsamic vinegar for a fun twist. These small changes help you enjoy a tasty meal that fits your dietary needs. Enjoy exploring these options for oven roasted garlic cabbage steaks! For the full recipe, check out the link. To keep your oven roasted garlic cabbage steaks fresh, start by letting them cool. Once cool, place them in an airtight container. Store them in the refrigerator. They will stay good for 3 to 4 days. When it's time to reheat, use a skillet on low heat. This method helps keep the texture crisp. Avoid using the microwave, as it can make the cabbage soggy. If you want to store your cabbage steaks for longer, freezing is a great option. First, let them cool completely. Wrap each steak in plastic wrap or foil. Then, place them in a freezer-safe bag. This way, they stay fresh for up to 2 months. When you're ready to eat, take them out and thaw in the fridge overnight. Reheat in the oven at 350°F (175°C) for about 15 minutes. This will bring back their tasty crunch. For more ideas, you can check the Full Recipe for inspiration! Roast your cabbage steaks for 25 to 30 minutes. This time gives them a nice crisp and tender inside. Flip them halfway through to get that golden-brown crust on both sides. Yes, you can prepare cabbage steaks ahead of time. Slice and coat them with the garlic-oil mixture. Then, store them in the fridge for up to 24 hours. When ready, just pop them in the oven. These cabbage steaks pair well with many dishes. Try serving them with grilled chicken or fish for protein. They also go great with a fresh salad or roasted potatoes. For a fun twist, serve with a creamy dip or sauce on the side. For the full recipe, check out the complete details above. Oven roasted garlic cabbage steaks are simple yet flavorful. We covered the key ingredients, like cabbage, garlic, and olive oil, and detailed the step-by-step process for preparation and roasting. I shared tips for perfecting your dish and offered storage advice. These recipes suit many tastes, making them great for any meal. Enjoy exploring variations and serving suggestions. You’ll find delicious ways to make healthy eating easy and fun. Give this dish a try, and you’ll love the results!

Looking for a tasty and simple dish that’s packed with flavor? Oven-roasted garlic cabbage steaks are the answer! With just a few ingredients, you can create a satisfying side that …

Read more

Categories Dinner
Older posts
Newer posts
← Previous Page1 … Page40 Page41 Page42 … Page53 Next →

TASTED NEST

Where Flavor Finds a Home 🍳🏡 — warm, simple, and crave-worthy recipes made for real life, from stovetop mornings to backyard dinners.

PAGES

Home About Contact Privacy Policy Terms & Conditions Cookie Policy GDPR Policy Copyright Policy Disclaimer

CATEGORIES

Appetizers Desserts Salads Breakfast Dinner

Contact

  • Pinterest
  • Mail
Copyright © 2025 Tasted Nest. All rights reserved.