Skip to content
Tasted Nest
  • Home
  • Appetizers
  • Desserts
  • Salads
  • Breakfast
  • Dinner
  • Privacy Policy
  • Contact
  • About

Chef Tavio

Quick Italian Cream Cake Delightful and Easy Recipe

May 28, 2025 by Chef Tavio
To make Quick Italian Cream Cake, you need some key ingredients. Here’s what you’ll need: - 1 ½ cups all-purpose flour - 1 cup granulated sugar - 1 teaspoon baking powder - ½ teaspoon baking soda - ½ teaspoon salt - ½ cup unsalted butter, softened to room temperature - 1 cup buttermilk, at room temperature - 3 large eggs, at room temperature - 1 teaspoon pure vanilla extract - ½ cup sweetened shredded coconut - ½ cup finely chopped pecans - 1 cup heavy whipping cream - ¼ cup confectioners’ (powdered) sugar - 1 teaspoon pure vanilla extract (for the whipped cream) For a lovely touch, you might want to add some garnishes. Here are some tasty options: - Fresh berries (like strawberries or blueberries) - Fresh mint leaves If you need to make some changes, here are some tips: - Use coconut milk if you need a dairy-free option. - Almond flour can replace all-purpose flour for a gluten-free cake. - You can swap pecans with walnuts or almonds for a different flavor. This recipe is all about balance and flavor. Feel free to play around with these key ingredients! For the full recipe, click [Full Recipe]. Start by preheating your oven to 350°F (175°C). Next, take two 9-inch round cake pans. Grease them with butter and dust them with flour. This helps the cakes come out easily later. In a medium bowl, mix the dry ingredients. Combine 1 ½ cups of all-purpose flour, 1 teaspoon of baking powder, ½ teaspoon of baking soda, and ½ teaspoon of salt. Use a whisk to blend them well. Set this bowl aside for now. In a large bowl, cream together the softened butter and granulated sugar. Use an electric mixer on medium speed for about 2-3 minutes. You want the mix to be light and fluffy. This step is key for a soft cake. Add the eggs one at a time to the butter-sugar mix. Mix well after each egg. After adding all three large eggs, pour in 1 teaspoon of pure vanilla extract. Blend until everything is just combined. Gradually add the dry ingredients to the wet mix. Start with one-third of the flour mix, then add half of the buttermilk. Repeat this step, ending with the flour. Mix just until combined. Be careful not to overmix; this keeps your cake light. Gently fold in ½ cup of sweetened shredded coconut and ½ cup of finely chopped pecans. Use a spatula to ensure they are evenly mixed into the batter. This adds great flavor and texture. Carefully pour the batter into the prepared cake pans. Smooth the tops with a spatula for even baking. Place them in the oven and bake for 25-30 minutes. Check with a toothpick; it should come out clean. Let the cakes cool in the pans for about 10 minutes, then move them to a wire rack. In a medium bowl, beat 1 cup of heavy whipping cream with ¼ cup of confectioners' sugar and 1 teaspoon of vanilla extract. Whip until soft peaks form. This should take about 2-3 minutes. This will be the frosting for your cake. Once the cakes are cool, place one layer on a serving plate. Spread a good layer of whipped cream on top. Place the second layer on it. Use the remaining whipped cream to frost the top and sides of the cake. For a fun touch, add fresh berries and mint leaves on top. For the complete recipe, you can check the Full Recipe provided. Enjoy your creation! To make your cake fluffy, start with room temperature ingredients. Use eggs and buttermilk that are not cold. This helps the batter mix well. Cream the butter and sugar until light and airy. This step is key to adding air. Mix just until combined when adding dry ingredients. Overmixing can lead to a dense cake. To save time, gather all your ingredients first. Measure them out before you start mixing. This keeps you organized and speeds up the process. Use an electric mixer to save energy and time. Clean as you go to keep your workspace tidy. If you are in a rush, consider using store-bought whipped cream. It can cut down on your prep time. One common mistake is not greasing the cake pans. This can cause your cake to stick. Always remember to dust them with flour after greasing. Another mistake is opening the oven door too soon. This can make your cake sink. Lastly, avoid using cold ingredients. They can affect how well the cake rises. For the best results, follow the Full Recipe closely. {{image_4}} You can switch up the flavors in Quick Italian Cream Cake. Try almond extract instead of vanilla. This change adds a lovely nutty taste. You can also add chocolate chips for a sweet twist. Dark chocolate pairs well with the cream and coconut. Substitute the pecans with walnuts or hazelnuts for a new texture. If you need a gluten-free cake, use a gluten-free flour blend. Make sure it has xanthan gum for binding. This will help your cake rise and hold together well. You can find gluten-free flour at most grocery stores. Just follow the same measurements in the recipe. To make the cake dairy-free, replace buttermilk with almond or oat milk. You can add a splash of vinegar to sour it, mimicking the buttermilk taste. Use dairy-free butter for the cake and whipped cream. There are many great dairy-free options available now. This way, everyone can enjoy a slice of your cake. For the whipped cream, coconut cream also works well and adds a nice flavor. Explore these variations to make the cake your own. You’ll impress your friends and family with these fun twists. For the full recipe, check out the link provided. To keep your Quick Italian Cream Cake fresh, store it in the fridge. Place the cake in an airtight container. If you can't find one, cover the cake tightly with plastic wrap. This keeps it moist and tasty. Enjoy the cake within three to four days for the best flavor. If you want to save cake layers for later, freeze them. Wrap each layer in plastic wrap. Then, place them in a freezer bag. This method helps keep the cake layers fresh for up to three months. When you're ready to eat, thaw the layers in the fridge overnight before icing and serving. Whipped cream is best when fresh, but you can store it too. Keep it in an airtight container in the fridge. Use it within two days for the best taste. If you notice it starting to separate, gently re-whip it before using. This keeps your cake looking and tasting great. For the full recipe, check out the Quick Italian Cream Cake directions. To make Quick Italian Cream Cake from scratch, follow these steps: 1. Preheat your oven to 350°F (175°C). 2. Grease and flour two 9-inch round cake pans. 3. Mix flour, baking powder, baking soda, and salt in a bowl. 4. In a larger bowl, cream softened butter and sugar together. 5. Add in eggs, mixing well after each one. 6. Pour in vanilla extract and mix until combined. 7. Gradually add the flour mixture and buttermilk, alternating between them. 8. Fold in shredded coconut and chopped pecans. 9. Divide the batter into the prepared pans and bake for 25-30 minutes. 10. Cool the cakes, then frost with whipped cream. For more details, check the Full Recipe. Yes, you can swap pecans for other nuts. Walnuts or almonds work well, too. They add nice texture and flavor. Just chop them finely before adding them to the batter. This change can give your cake a new twist! If you don’t have buttermilk, here are good substitutes: - Mix 1 cup of regular milk with 1 tablespoon of vinegar or lemon juice. - Let it sit for about 5 minutes. - You can also use plain yogurt or sour cream, thinned with a bit of water. These options keep your cake moist and tasty. The Quick Italian Cream Cake stays fresh for about 3-4 days in the fridge. Store it in an airtight container. This helps keep it moist and tasty. If you notice any changes in texture or smell, it’s best to discard it. Yes, you can make this cake ahead of time! Bake the layers and let them cool completely. Wrap them in plastic wrap and store them in the fridge. You can also freeze them for a longer period. Just remember to frost the cake right before serving for the best taste. You learned about the key ingredients and steps for making Quick Italian Cream Cake. I shared tips for a fluffy texture and offered variations for different diets. Remember, this cake is versatile and fun to make. With proper storage, it stays fresh longer. These insights will help you bake confidently and enjoy this delightful treat. Trust in your baking skills, and have fun sharing your creation!

Are you ready to impress your friends with an easy yet delightful treat? My Quick Italian Cream Cake is the perfect dessert that combines rich flavors without a lengthy process. …

Read more

Categories Desserts

Savory Mac and Cheese Meatloaf Casserole Recipe

May 28, 2025 by Chef Tavio
- 1 lb (450g) ground beef - 1 cup (100g) breadcrumbs - 1 large egg - 2 cups (200g) shredded cheddar cheese (divided) - 1 cup (240ml) milk - 1/2 cup (120g) sour cream - 1 teaspoon garlic powder - 1 teaspoon onion powder - 1 teaspoon smoked paprika Gathering the right ingredients is key. Start with ground beef, which gives the casserole its hearty base. Breadcrumbs help bind the meat, making it hold together. The egg adds moisture and richness. Next, we have cheese and dairy. Cheddar cheese brings that classic flavor to the dish. Sour cream adds creaminess, while milk makes everything smooth. For flavor, we use garlic powder and onion powder. These give a savory kick. Smoked paprika adds depth and a slight warmth. With these ingredients, you're set to create a delicious Mac and Cheese Meatloaf Casserole. For more details, check out the Full Recipe. 1. Preheat your oven to 350°F (175°C). This helps the casserole cook evenly. 2. In a large mixing bowl, combine the ground beef, breadcrumbs, egg, garlic powder, onion powder, and smoked paprika. Add salt and pepper to taste. Use your hands to mix everything until well blended. 1. Grease a 9x13 inch casserole dish with non-stick spray. Spread the meat mixture evenly on the bottom. This forms a strong base for your casserole. 2. In another bowl, mix the cooked macaroni with 1 cup of shredded cheddar cheese, milk, and sour cream. Stir well until the macaroni is coated. 1. Layer the macaroni mixture over the meat layer in the dish. Make sure it covers the meat fully. 2. Pour marinara sauce over the macaroni. Spread it out to keep the dish moist and tasty. 3. Sprinkle the remaining cheddar cheese and grated Parmesan cheese on top. 4. Bake the casserole for 30-35 minutes. It should be bubbly and golden. 5. Once done, let it sit for about 5 minutes. This helps it set and makes serving easier. You can find the Full Recipe to guide you through this process. To ensure even cooking, spread the meat mixture flat in the dish. This helps it cook uniformly. Use a spatula to level it out. Layer the macaroni carefully on top. This keeps the flavors balanced and each bite delicious. For presentation, slice the casserole into squares. Place each square on a plate. Add a sprinkle of parsley on top for color. Serve it with a simple green salad. The salad adds freshness and balances the rich flavors. Avoid overmixing the meat mixture. This can make the meatloaf tough. Mix just until combined. Also, let the casserole rest after baking. This helps it set up, making it easier to slice. Enjoy the full recipe for more details on the steps! {{image_4}} You can swap ground beef for ground turkey or chicken. This change makes the dish leaner. You can also use gluten-free breadcrumbs. This option suits those with gluten sensitivities. Both swaps keep the dish tasty while fitting different diets. Adding vegetables boosts the nutrition and flavor. You can mix in sautéed spinach, bell peppers, or zucchini. Feel free to experiment with different cheese combinations too. Try pepper jack for a kick or mozzarella for a milder taste. Each choice gives the casserole a unique twist. For vegetarian options, replace the meat with lentils or black beans. This keeps the protein while making it meat-free. You can also make low-carb substitutions. Use cauliflower rice instead of macaroni. This change lowers the carbs and adds veggies to the meal. Check out the Full Recipe for more ideas on making this dish your own! To keep your Mac and Cheese Meatloaf Casserole fresh, store leftovers in an airtight container. This prevents drying out and keeps it tasty. The best spot is the fridge. You can keep it there for up to three days. After that, the quality can drop, so enjoy it soon! When it’s time to enjoy leftovers, I recommend reheating in the oven. Preheat your oven to 350°F (175°C). Place the casserole in a baking dish and cover it with foil. Heat for about 15-20 minutes. This method helps keep the cheese melty and the meat moist. You can also use a microwave. Heat it in short bursts, about 1-2 minutes, stirring in between. This ensures even warming and keeps it from drying out. If you want to save some for later, freezing is a great option. First, let the casserole cool completely. Then, wrap it tightly in plastic wrap and foil. This protects it from freezer burn. You can freeze it for up to three months. When you’re ready to eat, move it to the fridge to thaw overnight. To reheat, bake it in the oven at 350°F (175°C) for about 30-40 minutes. Ensure it’s heated through before serving. For best results, check that the cheese is bubbly and the center is hot. Yes, you can prepare this casserole ahead of time. To do this, follow these steps: - Prep the meat mixture: Mix all the meat ingredients as you normally would. - Layer the casserole: Spread the meat mixture in the dish, add the macaroni, and pour on the sauce. Do not bake it yet. - Cover and chill: Wrap the dish in plastic wrap. Store it in the fridge for up to 24 hours. - Baking: When ready to bake, just remove the wrap. Preheat the oven and bake as directed. This makes it easy to serve a tasty meal on busy days. If you love heat, try these ideas: - Hot sauce: Add a few dashes of your favorite hot sauce to the meat mixture. - Spices: Mix in some cayenne pepper or crushed red pepper flakes for an extra kick. - Spicy cheese: Use pepper jack cheese instead of cheddar for a spicy twist. These options can help you create a casserole that packs a flavorful punch. Pair this casserole with simple sides for a great meal: - Green salad: A fresh salad with lettuce, tomatoes, and cucumbers adds crunch. - Steamed veggies: Broccoli or green beans balance the rich flavors. - Garlic bread: Serve warm garlic bread to soak up the sauce. These sides make your meal even more enjoyable. For the full recipe, visit the link provided. This blog post showed you how to create a tasty mac and cheese meatloaf casserole. We covered the needed ingredients, from ground beef to cheddar cheese, and how to layer it all perfectly. I shared tips to avoid common mistakes and ideas for tasty variations. Lastly, we discussed how to store and reheat your leftovers. Now you can impress friends and family with this fun dish. Enjoy your cooking!

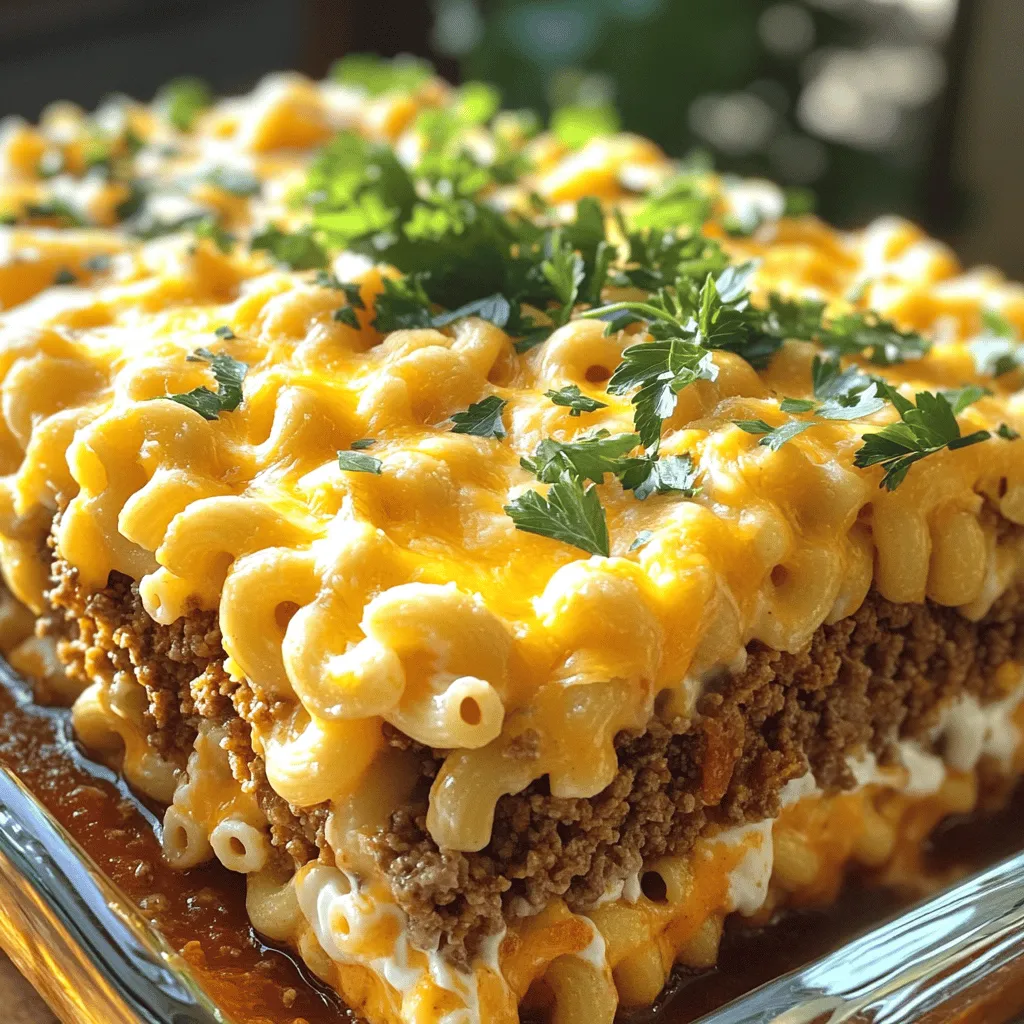
Craving comfort food? My Savory Mac and Cheese Meatloaf Casserole has your back! This dish combines hearty meatloaf with creamy mac and cheese, forming a flavor-packed meal that’s perfect for …

Read more

Categories Dinner

Chicken Potato Broccoli Casserole Simple and Tasty

May 28, 2025 by Chef Tavio
- 2 cups cooked chicken, shredded - 2 large potatoes, thinly sliced - 2 cups broccoli florets The main ingredients in this casserole are simple yet delicious. I love using cooked chicken because it saves time. You can use leftovers or rotisserie chicken. Potatoes add heartiness, while broccoli gives it color and crunch. - 1 cup shredded cheddar cheese - 1 cup milk - 1 cup chicken broth For a creamy texture, I always add milk and chicken broth. The cheese melts into the dish, making it extra tasty. Cheddar cheese is my go-to because it has a rich flavor. - 1 small onion, finely diced - 2 cloves garlic, minced - 2 tablespoons olive oil - 1 teaspoon dried thyme - 1 teaspoon paprika - Salt and pepper, to taste - 1/2 cup breadcrumbs (optional, for a crispy topping) Onion and garlic give this dish an amazing aroma. I sauté them in olive oil for a few minutes. Thyme and paprika add depth to the flavor. If you like a crispy top, sprinkle breadcrumbs before baking. You can find the full recipe for this casserole in the article above. - Preheat oven to 375°F. - Sauté onion and garlic. Heat olive oil in a skillet over medium heat. Add diced onion and minced garlic. Cook for 3-4 minutes. Stir until the onion turns soft and fragrant. - Mix chicken, potatoes, and broccoli. In a large bowl, add shredded chicken, thinly sliced potatoes, and broccoli florets. Gently fold in the sautéed onion and garlic. - Whisk together liquid ingredients. In another bowl, mix milk, chicken broth, dried thyme, paprika, salt, and pepper. Pour this over the chicken and veggie mix, stirring until everything is coated. - Transfer to baking dish and add cheese. Pour the casserole mix into a greased 9x13 inch baking dish. Evenly sprinkle shredded cheddar cheese on top. - Cover and bake initially. Tightly cover the dish with aluminum foil. Bake for 25 minutes to let the flavors blend. - Finish baking uncovered. Remove the foil and bake for another 15 minutes. The cheese should bubble and turn golden. For more details, check the Full Recipe. To make sure your chicken potato broccoli casserole turns out great, follow these tips. - Best practices for shredding chicken: Use cooked chicken that is warm. This makes shredding easier. Grab two forks and pull the chicken apart. Aim for bite-sized pieces to blend well in the casserole. - How to achieve a creamy texture: Mix milk and chicken broth well. This will help create a smooth sauce. Adding cheese to the top also gives that creamy feel. If you want it creamier, add more cheese or a splash of cream. Serving is just as important as cooking. Here are some ideas to make your casserole look amazing. - Presentation tips for serving: Serve the casserole warm right from the oven. Use a large spoon to scoop it out. Try to keep the layers intact for a nice look. - Garnishes to enhance flavor: Fresh herbs like parsley or chives add color and taste. You can also add a squeeze of lemon juice for brightness. Having the right tools makes cooking easier and more fun. - Recommended bakeware: A 9x13-inch baking dish is perfect for this recipe. Make sure it’s deep enough to hold all the layers. - Useful kitchen gadgets: Use a good knife for slicing potatoes. A mixing bowl and whisk help combine the liquids well. A good spatula can help you mix everything without breaking the veggies. For the full details on making this dish, check out the Full Recipe. {{image_4}} You can switch out the chicken for turkey. This works well and adds a nice twist. If you want to try different veggies, green beans are a great choice. They add a nice crunch and flavor. For a gluten-free version, use gluten-free breadcrumbs. They keep the crunch without the gluten. If you want it dairy-free, almond milk works well instead of regular milk. You can also use dairy-free cheese for the topping. Adding herbs and spices can boost the flavor. Try fresh parsley or basil. They add a bright taste. You can also add a tangy element, like lemon juice. This gives the dish a refreshing kick. For the full recipe, check out the Cheesy Chicken Potato Broccoli Bake. To store your leftover casserole, use airtight containers. Glass or plastic containers work well. Make sure to let the casserole cool before sealing. This helps keep moisture inside. Store it in the fridge for up to three days. You can reheat the casserole in the oven or the microwave. For the oven, preheat it to 350°F (175°C). Cover the dish with foil to keep it moist. Heat for about 20 minutes. In the microwave, place a portion in a bowl. Heat for 2-3 minutes, checking to ensure it warms evenly. If you want to keep the texture nice, the oven is best. You can freeze the casserole before or after baking. If freezing before baking, wrap the dish tightly with plastic wrap and foil. This will help prevent freezer burn. When ready to bake, thaw it overnight in the fridge before cooking. If you freeze it after baking, let it cool completely first. Then, wrap it well and store it for up to three months. To reheat, thaw it in the fridge overnight and then bake as usual. Enjoy your Chicken Potato Broccoli Casserole later with no fuss! For the full recipe, check out the complete instructions. Chicken Potato Broccoli Casserole can last in the fridge for about 3 to 4 days. Store it in an airtight container to keep it fresh. The flavors blend even more over time, making it a great leftover meal. Yes, you can make this casserole ahead of time. Prepare it fully, then cover it and place it in the fridge. Bake it the next day, adding a few extra minutes to the cooking time. This saves you time during busy days. You can use turkey or cooked mushrooms as a substitute for chicken. Both options add unique flavors and textures. If you prefer vegetarian options, try chickpeas or lentils for extra protein. Definitely! This casserole works well for meal prep. You can portion it into containers. Reheat each serving as needed. It’s a great way to have a tasty, balanced meal ready quickly. Yes, you can add other vegetables to this casserole. Consider spinach, carrots, or bell peppers. Just make sure to chop them evenly. This adds color and nutrition, making your meal even more exciting. For the full recipe, check out the Cheesy Chicken Potato Broccoli Bake instructions. This chicken, potato, and broccoli casserole recipe blends simple ingredients for a delicious meal. You preheat your oven and sauté onions and garlic to kick things off. Mixing the chicken, veggies, and creamy goodness creates a hearty dish. Don't forget to add your favorite herbs or toppings to enhance flavors. In conclusion, this recipe is flexible and easy to modify for dietary needs. It stores well, making it perfect for leftovers. Get creative with ingredients and enjoy a cozy, satisfying casserole any time!

Do you want a simple and tasty dinner that your whole family will love? Look no further than this Chicken Potato Broccoli Casserole! Packed with tender chicken, fluffy potatoes, and …

Read more

Categories Dinner

Oreo No-Bake Cheesecake Cups Easy and Delicious Treat

May 28, 2025 by Chef Tavio
To make these yummy Oreo No-Bake Cheesecake Cups, you need: - 1 package (14-16) Oreo cookies, crushed - 4 tablespoons unsalted butter, melted - 16 ounces cream cheese, softened to room temperature - 1 cup powdered sugar - 1 teaspoon vanilla extract - 2 cups heavy whipping cream - 12 additional Oreo cookies, finely crushed for topping - Chocolate syrup (optional, for drizzling) You will need some basic tools to make this easy treat: - Mixing bowls - Electric mixer or hand mixer - Measuring cups and spoons - Spoon or spatula - Dessert cups or jars for serving - Plastic wrap or lids for chilling You can swap some ingredients if needed: - Use gluten-free Oreo cookies for a gluten-free option. - Swap cream cheese for dairy-free cream cheese if you want a dairy-free dessert. - If you don’t have heavy cream, use whipped topping. It works well too. - You can use any sweetener instead of powdered sugar, but it may change the taste. These ingredients and tools will help you create these delightful Oreo No-Bake Cheesecake Cups from the full recipe. Enjoy the fun of making this sweet treat! To start, you need to make the Oreo crust. In a medium bowl, mix together the crushed Oreo cookies and melted butter. Stir until the crumbs look like damp sand. This step is simple but key. It gives your cheesecake a great base. Next, take your mixture and divide it evenly among dessert cups or jars. You want each cup to have a good layer of crust. Use the back of a spoon or your fingers to press it down. Make it nice and compact. After that, put the cups in the fridge to chill. This helps the crust firm up while you work on the filling. Now it’s time to whip up the cheesecake filling. Start with a large mixing bowl. Beat the softened cream cheese with a hand mixer. Mix until it’s smooth and creamy. This step is crucial for a lump-free filling. Once your cream cheese is smooth, add the powdered sugar and vanilla extract. Keep mixing until everything is well combined. The mixture should look fluffy and light. In another bowl, whip the heavy cream. Use an electric mixer until stiff peaks form. This means the cream holds its shape when you lift the beaters. Gently fold this whipped cream into your cream cheese mixture. Be careful not to deflate it. Fold until it’s fully mixed and light. Take your chilled cups from the fridge. Spoon the cheesecake filling on top of the Oreo crust. Fill each cup to just below the rim. This leaves room for toppings later. Now for the fun part! Sprinkle the finely crushed Oreo cookies on top of the filling. This adds texture and flavor. Finally, cover the cups with plastic wrap. Chill them in the fridge for at least four hours. This helps the cheesecake set up nicely. If you want, drizzle chocolate syrup on top before serving. Follow the Full Recipe for more details and tips! When making Oreo No-Bake Cheesecake Cups, avoid using cold cream cheese. Cold cream cheese can create lumps. Always let it soften to room temperature. Another common mistake is not whipping the cream enough. It should form stiff peaks. If the cream is too soft, your cheesecake may not set well. Lastly, don’t overmix the whipped cream with the filling. Gentle folding keeps it airy. For a smooth texture, ensure all your ingredients are at room temperature. This helps them blend well. Mix the cream cheese until it’s very creamy and lump-free. While folding in the whipped cream, use a spatula and be gentle. This keeps the mixture light and fluffy. Allow the cups to chill for at least four hours. This helps the flavors meld and the texture firm up nicely. To make your cheesecake cups extra special, top them with a half Oreo and a dollop of whipped cream. This adds a nice touch. You can also drizzle chocolate syrup for a sweet finish. For fun, serve these cups on a colorful platter or with decorative spoons. This makes them eye-catching and adds to the experience. For the full recipe, check out the complete guide to Oreo No-Bake Cheesecake Cups. {{image_4}} You can easily switch up the flavors in your Oreo No-Bake Cheesecake Cups. Here are some fun ideas: - Peanut Butter: Mix in ½ cup of creamy peanut butter with the cream cheese. - Mint: Add a few drops of mint extract for a fresh twist. - Chocolate: Blend in cocoa powder for a rich chocolate flavor. - Fruit: Fold in crushed strawberries or raspberries for a fruity touch. Each option brings a new taste. Feel free to mix and match! The toppings can make your cheesecake cups look great and taste even better. Here are a few ideas: - Whipped Cream: A dollop on top adds a light touch. - Fresh Berries: Use strawberries, blueberries, or raspberries for color and flavor. - Crushed Nuts: Sprinkle chopped nuts for a crunchy texture. - Caramel Sauce: Drizzle caramel for a sweet surprise. These toppings can change the whole vibe of your dessert! You can adapt this recipe for different diets. Here’s how: - Gluten-Free: Use gluten-free Oreo cookies for the crust. - Dairy-Free: Swap cream cheese with a dairy-free alternative, like cashew cheese. - Vegan: Use coconut cream instead of heavy cream and a vegan cream cheese. These changes make the treat suitable for more people while keeping it delicious. Check out the Full Recipe for detailed instructions! To keep your Oreo No-Bake Cheesecake Cups fresh, store them in the fridge. Use an airtight container to prevent them from absorbing odors. If you stack the cups, place a piece of parchment paper between them. This method keeps the layers intact and avoids mess. These cheesecake cups stay fresh for about 4 to 5 days in the fridge. After that, the texture may change, and the taste might not be as great. Make sure to check for any signs of spoilage before enjoying. You can freeze the Oreo No-Bake Cheesecake Cups for later use. Freeze them before adding the toppings. Place them in a freezer-safe container. They can last up to 2 months in the freezer. To thaw, move them to the fridge overnight. Add toppings just before serving for the best taste. No, you should not use regular cream cheese. Softened cream cheese works best for this recipe. It blends easily, creating a smooth and creamy texture. Regular cream cheese is too firm and may leave lumps in your cheesecake. Always let your cream cheese sit at room temperature for about 30 minutes before using. This simple step makes a big difference in your dessert's final texture. You can tell the cheesecake is set when it feels firm to the touch. After chilling for at least four hours, gently press your finger on the top. If it holds its shape and does not jiggle, it is ready. You can also check the edges. They should look slightly pulled away from the cup. This means the filling has set well. Yes, you can make these cheesecake cups in advance. They are perfect for meal prep or parties. Just store them in the fridge for up to three days before serving. This allows the flavors to blend and enhances the taste. If you plan to freeze them, do so without the toppings. Add the toppings after thawing for the best look and taste. You can find the full recipe in the recipe section. Oreo No-Bake Cheesecake Cups are fun and easy to make. We covered key ingredients, steps, and tips. You learned to avoid common mistakes for a perfect texture. Different variations let you be creative and suit dietary needs. Store your cups properly for best taste and freshness. Now, it’s time for you to try this tasty treat. Enjoy every bite and share with friends!

If you love Oreo cookies and cheesecake, you’re in for a treat! These Oreo No-Bake Cheesecake Cups are simple, fun, and super tasty. You won’t need an oven, so it’s …

Read more

Categories Desserts

Blueberry Peach Feta Salad Fresh and Flavorful Delight

May 27, 2025 by Chef Tavio
- 2 cups fresh baby spinach - 1 cup ripe peaches, sliced into wedges - 1 cup succulent fresh blueberries - 1/4 cup red onion, very thinly sliced - 1/2 cup creamy feta cheese, crumbled - 1/4 cup pecans, coarsely chopped - 3 tablespoons rich balsamic vinegar - 2 tablespoons extra virgin olive oil - 1 teaspoon pure honey - Salt and freshly ground pepper to taste The key to a great Blueberry Peach Feta Salad lies in using fresh, high-quality ingredients. Each item plays a part in creating a lovely mix of flavors and textures. Start with fresh baby spinach. This will be the base of your salad. It adds a crisp and light taste. Ripe peaches are next. The sweet, juicy wedges elevate the salad. They bring a burst of summer flavor. Fresh blueberries add a sweet-tart note. Their vibrant color makes the salad pop. Red onion gives a sharp bite. Slice it thinly for a milder taste. Feta cheese adds creaminess and a salty punch. It balances the sweetness from the fruit. Pecans bring crunch and earthy flavor. They also add healthy fats. For the dressing, use rich balsamic vinegar and high-quality olive oil. Honey adds a touch of sweetness. Don't forget salt and pepper for seasoning. Combine these elements for a salad that feels gourmet. You can find the Full Recipe for this delightful salad to guide you through each step. To start, you need to make a tasty dressing. In a small bowl, combine: - 3 tablespoons rich balsamic vinegar - 2 tablespoons extra virgin olive oil - 1 teaspoon pure honey - Salt and freshly ground pepper to taste Whisk these ingredients together until they blend well. You want it to be smooth and creamy. Next, it's time to build your salad. In a large salad bowl, layer: - 2 cups fresh baby spinach This will be the base of your salad. Then, arrange the toppings on the spinach. Start with: - 1 cup ripe peaches, sliced into wedges - 1 cup succulent fresh blueberries - 1/2 cup creamy feta cheese, crumbled This mix of colors and flavors will be beautiful and tasty. Now, let’s add more flavor and crunch. Scatter on: - 1/4 cup red onion, very thinly sliced - 1/4 cup pecans, coarsely chopped These add a nice bite and texture. Drizzle your dressing over the salad, making sure every part gets some. Finally, gently toss the salad to mix everything well. Be careful not to squish the fruit. Enjoy this delicious Blueberry Peach Feta Salad! For the full recipe, refer to the detailed instructions above. Serve this salad in individual bowls for a nice look. This makes it feel special. You can top each bowl with extra blueberries and crumbled feta. It boosts both taste and color. You can save time by preparing the dressing ahead. Mix the balsamic vinegar, olive oil, honey, salt, and pepper in advance. Store it in the fridge until you need it. Assemble the salad just before serving. This keeps the spinach fresh and crisp. For added flavor, try fresh herbs like basil or mint. They give a nice twist and brighten the taste. You can also play around with different nuts or cheeses. Almonds or goat cheese can add new textures and tastes. Each change can make the salad feel fresh again. For the full recipe, check out the detailed steps above. {{image_4}} You can change this salad based on the fruits in season. Instead of peaches, try nectarines or strawberries. Both fruits offer a sweet taste. They also add a nice color to your dish. You can use kale instead of spinach for a different texture. Kale gives a hearty crunch and more nutrients. If you want a vegan salad, simply remove the feta cheese. You can use a plant-based cheese instead. This keeps the flavor while making it dairy-free. For those who love protein, adding grilled chicken is a great option. Chicken adds heartiness and makes the salad more filling. Feel free to switch up the dressing for a new taste. You can use apple cider vinegar or red wine vinegar for a tangy twist. These vinegars bring their unique flavors to the mix. If you want a creamy dressing, try a yogurt-based option. It adds richness while keeping the salad light. For the complete recipe, check out the Full Recipe. After making the Blueberry Peach Feta Salad, store any leftovers in an airtight container. This keeps the salad fresh for up to 2 days. Make sure to seal it well to prevent any odors from your fridge. If you want to keep the salad for longer, store the dressing separately from the salad. This helps maintain the freshness of the greens and fruits. If you make the salad ahead of time, consider storing each ingredient individually. This way, you can mix them fresh when you’re ready to enjoy the salad. Before serving, always check for signs of spoilage. Look for wilting spinach or mold on the fruit. If you notice any off smells or unusual appearances, it’s best to discard the salad. Trust your senses to ensure your meal is safe and tasty! Yes, but fresh blueberries are recommended for the best texture. Frozen berries can lose their shape and become mushy when thawed. Fresh blueberries add a firm bite and vibrant color to your salad. They burst with juice, enhancing the overall flavor profile. Goat cheese or a plant-based alternative works well. Goat cheese offers a creamy texture with a tangy flavor. If you prefer a vegan option, try using a plant-based cheese that mimics feta. Both choices will keep the salad rich and delicious. Adding grilled chicken, quinoa, or chickpeas can enhance satiety. Grilled chicken adds protein and makes the salad heartier. Quinoa offers a nutty flavor and extra fiber. Chickpeas also add protein and a nice texture. Choose any option to turn this salad into a satisfying meal. For the full recipe, check out [Full Recipe]. This blog post covers how to make a fresh and tasty salad. You learned about the key ingredients like spinach, peaches, and blueberries. I shared easy steps for making the dressing and assembling the salad. Tips, like adding fresh herbs and different cheeses, can boost flavor. Plus, you can store the salad for later use. In closing, enjoy experimenting with this salad. It’s versatile and delicious. You can make it your own. Simple changes can lead to unique flavors. Happy salad-making!

Are you ready to bite into a salad that sings with fresh, vibrant flavors? My Blueberry Peach Feta Salad combines juicy peaches and sweet blueberries with creamy feta and crunchy …

Read more

Categories Salads

Honey Peach Cream Cheese Cupcakes Irresistible Delight

May 27, 2025 by Chef Tavio
To create Honey Peach Cream Cheese Cupcakes, gather these simple ingredients: - 1 ½ cups all-purpose flour - 1 cup granulated sugar - ½ teaspoon baking powder - ½ teaspoon baking soda - ¼ teaspoon salt - ½ cup unsalted butter, softened to room temperature - 2 large eggs - 1 teaspoon vanilla extract - ½ cup sour cream - 1 cup fresh peaches, diced (about 2 medium peaches) - 4 oz cream cheese, softened - ⅓ cup honey - 1 teaspoon ground cinnamon These ingredients blend together to create a sweet and moist cupcake with a fluffy texture. Fresh peaches add a burst of flavor. Honey and cream cheese frosting give it a rich and sweet finish. Each bite feels like a warm hug on a sunny day. You can find the full recipe to guide you step by step. Enjoy crafting these delightful treats! - Preheat your oven to 350°F (175°C) - Line a 12-cup muffin tin with cupcake liners Start by getting your oven nice and hot. This step is key for fluffy cupcakes. While the oven warms, grab your muffin tin and line it with cupcake liners. These liners help the cupcakes pop out easily after baking. - Whisk all-purpose flour, baking powder, baking soda, and salt Next, take a large bowl and add the dry ingredients. Whisk together the all-purpose flour, baking powder, baking soda, and salt until well mixed. This helps the cupcakes rise evenly as they bake. - Cream butter and granulated sugar together - Add eggs, vanilla, and sour cream to the mixture - Combine wet and dry ingredients gradually Now, in another bowl, cream the softened butter and granulated sugar. Mix until it’s fluffy and light. Then add the eggs one by one, mixing well after each. Stir in the vanilla and sour cream, making it nice and smooth. Gradually add the dry mix to the wet mixture. Be gentle; overmixing can make your cupcakes tough. - Fold diced peaches and ground cinnamon into the batter It’s time to add flavor! Gently fold in the diced peaches and ground cinnamon. The peaches will add sweetness, while the cinnamon gives warmth. Make sure they are evenly spread throughout the batter. - Fill cupcake liners with batter and bake for 18-20 minutes Using a spoon or ice cream scoop, fill each cupcake liner about two-thirds full with batter. Place the muffin tin in the oven and bake for 18-20 minutes. Check with a toothpick; it should come out clean when they are done. - Combine softened cream cheese and honey until smooth While your cupcakes cool, let’s make the frosting. In a mixing bowl, beat the softened cream cheese and honey until smooth. This creamy frosting will pair perfectly with your sweet cupcakes. - Frost cooled cupcakes and add peach slices and honey drizzle Once your cupcakes are completely cool, it’s time to frost them. You can pipe or spread the honey cream cheese frosting on top. For a pretty touch, add a slice of fresh peach and a drizzle of honey on each cupcake. This will make them look as good as they taste! For the full recipe, check out the details above! - Ensure butter is room temperature. This helps it blend smoothly. - Do not overmix the batter. Mix just until combined for light cupcakes. - Experiment with spices like nutmeg or cardamom. These can add warmth. - Use different types of honey for varied flavor. Each honey brings its own taste. - Pair with fresh fruit or a scoop of ice cream. This adds brightness and creaminess. - Serve with tea or coffee for a delightful afternoon treat. The flavors complement each other well. {{image_4}} You can make these cupcakes even better with simple swaps. If you need gluten-free options, try using almond flour instead of all-purpose flour. It gives a nice nutty flavor. You can also switch fresh peaches for other fruits. Mango and strawberries work great too, adding their own unique taste. If you want to change up the frosting, consider using mascarpone cheese. It creates a rich and creamy texture. You can also swap honey for maple syrup if you prefer a different sweetness. Both options taste great and keep the cupcakes delightful. Making these cupcakes vegan is easy! Use flax eggs instead of regular eggs. You can also use plant-based cream cheese for the frosting. If you want fewer calories, reduce the sugar. This way, you can enjoy a tasty treat without worry. For the full recipe, check out the complete guide on Honey Peach Cream Cheese Cupcakes. Store your honey peach cream cheese cupcakes in an airtight container at room temperature. They stay fresh for 2-3 days. This method keeps them soft and tasty. Avoid direct sunlight to maintain their flavor. You can refrigerate the cupcakes for up to a week. If you want to keep them longer, freeze them for up to 3 months. Freezing is great for meal prep or saving for a special occasion. For the best results, freeze cupcakes without frosting. This way, they keep their texture and flavor. When you're ready to enjoy, just thaw them and add the frosting. This keeps every bite as delightful as the first. To make your cupcakes moist, ensure the butter and eggs are at room temperature. Cold ingredients can lead to a dense texture. Also, do not overbake the cupcakes. Keep a close eye on them in the oven. Bake until golden brown and a toothpick inserted in the center comes out clean. Yes, you can use canned peaches. However, it’s important to drain and pat them dry. This removes excess moisture that can make the batter too wet. Fresh peaches bring a bright flavor, but canned can work in a pinch. If you need a substitute for cream cheese, try Greek yogurt or silken tofu. Greek yogurt gives a nice tang, while silken tofu adds creaminess. Both options keep the frosting smooth and tasty! To check if the cupcakes are done, insert a toothpick into the center. If it comes out clean, they are ready. If there’s batter on the toothpick, bake them a little longer. This step ensures you get perfect, fluffy cupcakes. These cupcakes combine the sweetness of peaches with a soft, moist texture. We covered the ingredients, simple steps, and tips for success. You can adjust flavors or try new ingredients for added variety. Remember to store them properly to keep them fresh. Baking is fun and rewarding, so don’t hesitate to experiment. Enjoy your time in the kitchen, and share these treats with others when you can!

If you’re craving a sweet treat that blends rich cream cheese, fresh peaches, and golden honey, you’re in for a real delight! These Honey Peach Cream Cheese Cupcakes are not …

Read more

Categories Desserts

Delicious Birthday Snack Board Simple and Fun Setup

May 27, 2025 by Chef Tavio
- 1 cup assorted nuts (almonds, cashews, walnuts) - 1 cup assorted cheeses (cheddar, gouda, mozzarella) - 1 cup fresh fruits (grapes, strawberries, apple slices) When I create a birthday snack board, I always start with the essentials. The nuts are a great choice. Almonds, cashews, and walnuts add crunch and flavor. They also provide healthy fats that everyone will love. Next, I pick cheeses. Cheddar gives a strong taste, while gouda is creamy. Mozzarella offers a mild flavor that kids adore. Cut them into bite-sized pieces for easy grabbing. Fresh fruits add color and sweetness. I often use grapes, strawberries, and apple slices. They make the board look bright and inviting. Plus, they balance the savory flavors of nuts and cheese. - 1 cup colorful vegetables (carrot sticks, cucumber slices, bell pepper strips) - 1/2 cup hummus or dip (roasted red pepper hummus or tzatziki) - 1 pack of assorted crackers - 1/2 cup dark chocolate squares or chocolate-covered pretzels To make the board even more fun, I add colorful veggies. Carrot sticks, cucumber slices, and bell pepper strips are perfect. They bring crunch and freshness to every bite. Hummus or another dip is a must. I love roasted red pepper hummus for its rich taste. Tzatziki is cool and refreshing. Place a small bowl of dip in the center for easy access. Assorted crackers add a delightful crunch. I choose a mix of flavors to keep things interesting. Finally, I sprinkle in some sweet treats. Dark chocolate squares or chocolate-covered pretzels are always a hit. They give a sweet ending to the savory snacks. If you want the full recipe, check it out! Start with a large, flat wooden or ceramic board. This will be your canvas for the snack board. Choose a surface that is easy to clean and fits your table. Begin by clustering the bite-sized pieces of cheese around the board. Space them out evenly. This makes the board look nice and inviting. Next, fill empty spots with assorted nuts. Let some nuts spill over the edges. This gives a casual, fun vibe. Now it's time for the fresh fruits! Place them in small groups across the board. Tuck grapes and strawberries among the cheese and nuts. This will create a bright and colorful display. For the veggies, arrange the colorful sticks in charming groups. You can stand them in small jars or lay them down in a fan shape. This adds interesting shapes to the board. Now, let’s add the dip! Put a small bowl of hummus or dip right in the center. This makes it easy for everyone to reach. For the assorted crackers, stack them in little piles. Distribute them around the board. This way, every bite has a nice crunch. Finally, scatter dark chocolate squares or chocolate-covered pretzels around the edge. This creates sweet spots for dessert lovers. To make it extra special, garnish with a few edible flowers. This adds a festive and colorful touch to your birthday snack board. You can find the Full Recipe for more details! To make your snack board shine, focus on color coordination. Choose items that contrast well. For example, pair bright fruits with dark cheeses. This adds life and makes your board pop. Use small bowls for dips. They create points of interest and keep things tidy. Labels for each snack help guests know what to try. This simple touch can spark conversation. Balancing colors and shapes is key. Mix round fruits with long veggie sticks. This adds variety and keeps the eye moving. Incorporate height by stacking crackers or placing jars of veggies upright. These small changes make your board more dynamic. Don’t forget to add a few edible flowers for a fun touch. They bring elegance and joy to your snack board. For a full recipe and further details, check out the complete guide. {{image_4}} The fun of a birthday snack board lies in its endless variations. You can create a board for any theme or event. Seasonal variations are a great way to celebrate different times of the year. For a summer board, use bright fruits like watermelon and berries. In the winter, think about cozy treats like hot cocoa and gingerbread cookies. Kid-friendly options can make your board a hit for younger guests. Use fun shapes with cookie cutters to create cheese stars or fruit hearts. Include favorite snacks like mini pretzels and gummy bears to keep kids excited. If you have guests with food restrictions, consider gluten-free alternatives. Use rice crackers or gluten-free pretzels. You can also add gluten-free nut mixes for added crunch. For a vegan snack board, choose plant-based cheeses and dips. Fresh fruits and veggies are always a hit. You can even add vegan chocolate to satisfy the sweet tooth. This way, everyone can enjoy the celebration without worry. For the full recipe, check out the complete guide on creating your delightful birthday snack board! After the party, cover your leftover snack board. Use plastic wrap or a lid. Place it in the fridge right away. This keeps snacks fresh and tasty. For cheese, wrap it in wax paper. Then, put it in a sealed bag. This helps it breathe and stay good. For fruits and veggies, store them in airtight containers. This will keep them crisp and juicy. Got some snacks left? Don't let them go to waste! Use leftover cheese in a sandwich or salad. Mix nuts into yogurt for a quick snack. Fruits can be blended into smoothies or added to oatmeal. If you have extra crackers, crush them for a crunchy topping on casseroles. Get creative! You can transform these snacks into new meals. This way, you keep enjoying the flavors from your birthday snack board. For the full recipe, check out the festive details in the main article. To make a birthday snack board, start with a large flat board. Gather your ingredients first. Arrange cheese, nuts, fruits, and veggies in clusters. Place a dip in the center for easy access. Finally, add crackers and sweet treats around the edges. This simple process turns your snacks into a fun feast. You want a mix that has textures and flavors. Here are some great options: - Nuts: Almonds, cashews, walnuts - Cheese: Cheddar, gouda, mozzarella - Fruits: Grapes, strawberries, apple slices - Vegetables: Carrot sticks, cucumber slices, bell pepper strips - Dips: Hummus or tzatziki - Crackers: Choose assorted flavors - Sweet Treats: Dark chocolate squares, chocolate-covered pretzels These snacks create a colorful and tasty board that everyone will love. To make your snack board stand out, use these tips: - Color Scheme: Arrange snacks by color. This adds fun and cheer. - Height and Shape: Vary heights by stacking crackers or using jars for veggies. - Clusters: Group snacks in small clusters. This makes it easy to grab. - Labels: Consider adding little labels for each snack. It helps guests know what they are enjoying. These steps will make your board look great and tempting to all! Creating a birthday snack board is fun and simple. Start with nuts, cheese, and fresh fruits for the base. Add colorful veggies, dips, and sweet treats for variety. Arrange everything well to make it look great. Remember, presentation is key. Use themes and consider dietary needs to please everyone. After the party, store leftovers properly to keep them fresh. You can use extras in new and tasty ways. Now you are ready to make a fantastic birthday snack board everyone will love!

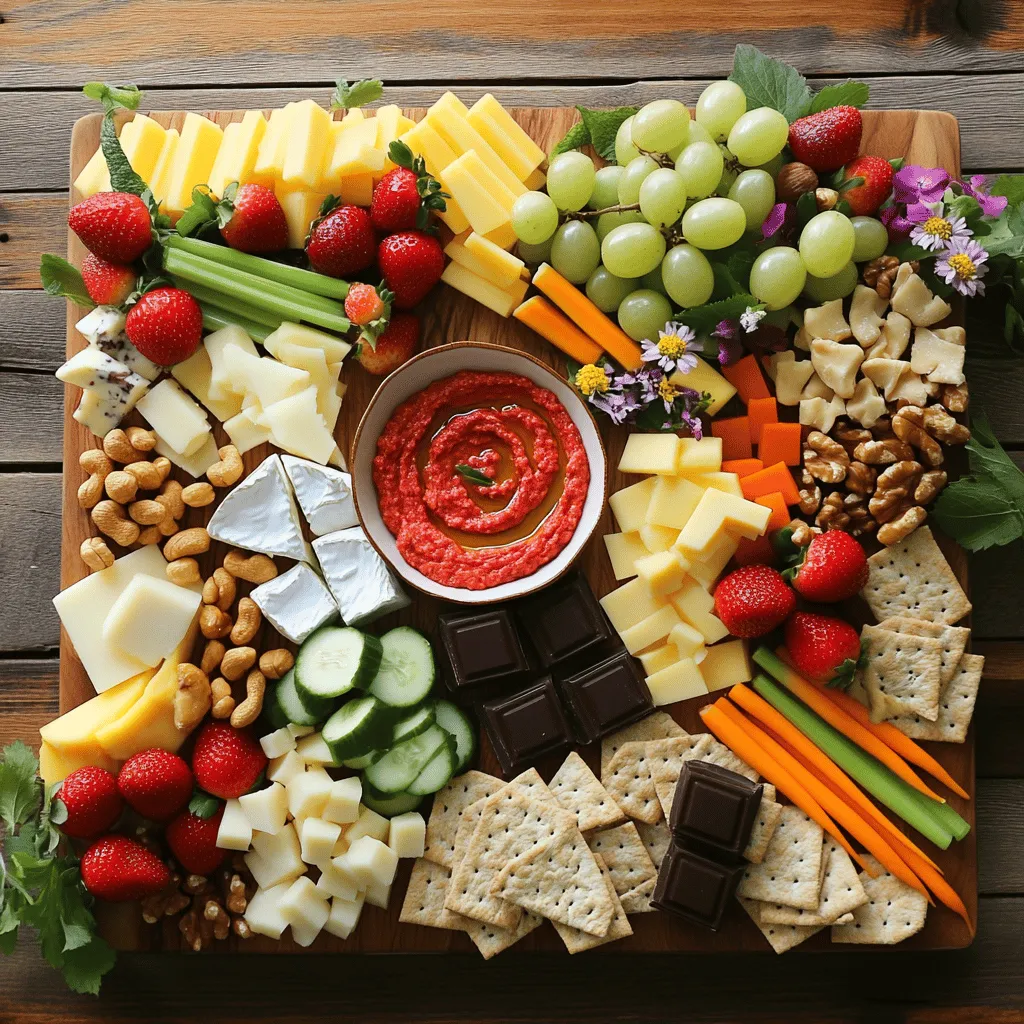
Want to impress your guests with a fun and tasty birthday snack board? I’ve got you covered! In this guide, I’ll show you how to create a colorful and exciting …

Read more

Categories Appetizers

Grilled Mexican Shrimp Salad Fresh and Flavorful Meal

May 27, 2025 by Chef Tavio
For this salad, start with: - 1 pound large shrimp, peeled and deveined - 2 tablespoons extra virgin olive oil - 1 teaspoon smoked paprika - 1 teaspoon ground cumin - 1 teaspoon garlic powder - 1 teaspoon chili powder - Salt and freshly cracked black pepper to taste These ingredients create a flavorful marinade. The shrimp soak up all the spices, making each bite delightful. Next, gather your salad base: - 4 cups mixed salad greens (like arugula, spinach, and romaine) - 1 cup cherry tomatoes, halved - 1 ripe avocado, diced - 1 cup corn kernels (fresh or frozen, thawed) - 1/4 red onion, thinly sliced - 1/4 cup fresh cilantro, chopped - Juice of 2 zesty limes These veggies add freshness and nutrition. The lime juice brightens the entire dish. For those who want a spicy kick, consider: - Sliced jalapeños They bring heat and extra flavor. Feel free to mix and match as you like. For the full recipe, check out the details above. Enjoy making your Grilled Mexican Shrimp Salad! Preparing the Marinade First, grab a mixing bowl. In it, combine 2 tablespoons of extra virgin olive oil, 1 teaspoon of smoked paprika, 1 teaspoon of ground cumin, 1 teaspoon of garlic powder, and 1 teaspoon of chili powder. Add salt and freshly cracked black pepper to taste. Whisk these together until they blend well. Coating the Shrimp Next, add 1 pound of peeled and deveined shrimp to the bowl. Make sure each shrimp gets fully coated in the marinade. Allow the shrimp to sit for 15-20 minutes at room temperature. This helps the flavors soak in well. Preparing the Grill While the shrimp marinates, preheat your grill to medium-high heat. You want it hot enough to get a nice sear on the shrimp. If you have skewers, thread the marinated shrimp onto them. This makes grilling easier. Cooking Time and Techniques Place the skewers on the grill. Cook the shrimp for about 2-3 minutes on each side. They are done when they turn a vibrant pink. Once cooked, carefully remove the skewers from the grill and set the shrimp aside to rest. Layering the Salad Ingredients In a large salad bowl, start layering. First, add 4 cups of mixed salad greens. Then, toss in 1 cup of halved cherry tomatoes, 1 diced avocado, 1 cup of corn kernels, and 1/4 sliced red onion. Finally, sprinkle 1/4 cup of chopped fresh cilantro on top. Adding the Dressing Squeeze the juice of 2 limes over the salad. Gently toss the salad to mix everything together. Make sure all the ingredients are well coated with the zesty lime juice. Finally, place the grilled shrimp on top. If you like spice, add sliced jalapeños for an extra kick. Now your Grilled Mexican Shrimp Salad is ready to enjoy! For the full recipe, check out the details provided earlier. Achieving the Right Cooking Temperature For grilled shrimp, the key is medium-high heat. This temperature helps the shrimp cook evenly. When the grill is hot, place the shrimp on it. This way, you get that nice char. Aim for a grill temperature of about 400°F to 450°F. Use a thermometer if you have one. Avoiding Overcooking Shrimp cook fast. You only need about 2-3 minutes per side. Watch them change color. They will turn pink and opaque when done. If you leave them too long, they can become tough. Remove them from the grill as soon as they are cooked. Choosing the Right Greens A mix of greens adds great texture. Use arugula, spinach, and romaine for crunch and flavor. Each green has its unique taste, making the salad more fun. You can also add kale for extra nutrients. Adding Spices or Dressings Spices can elevate your salad. A simple lime juice dressing works well. You can also mix olive oil with chili powder for a kick. If you want extra flavor, try adding cumin or paprika to the dressing. Accompaniments to Pair To make your meal complete, serve with tortilla chips. You can also add a side of black beans or corn salsa. These dishes complement the shrimp and salad well. They add color and flavor to your plate. Creative Presentation Ideas Presentation matters. Serve the salad in a large bowl for sharing. You can also use individual plates for a fancy touch. Arrange the shrimp on top with lime wedges on the side. This adds a pop of color and makes it look appetizing. For a detailed guide on making this dish, refer to the Full Recipe. {{image_4}} Making it Gluten-Free This salad is naturally gluten-free. Use gluten-free ingredients for the marinade. Ensure your spices do not contain gluten. You can enjoy this meal without worry. Vegan or Vegetarian Alternatives To make this dish vegan, swap shrimp for grilled tofu or chickpeas. Use the same marinade to add flavor. For a vegetarian option, you can use halloumi cheese. It grills well and adds a nice texture. Adding Tropical Fruits Add mango or pineapple for a sweet twist. These fruits pair well with the shrimp. Their natural sugars balance the spices in the salad. Just chop them up and toss them in. Experimenting with Different Herb Combinations Try mint or basil for fresh notes. These herbs bring a new layer of flavor. Mix them in with the cilantro for a unique taste. You can also use parsley if you want something milder. Oven or Stovetop Techniques If you don't have a grill, you can use your oven. Set it to broil and place the shrimp on a baking sheet. Cook for about 6-8 minutes. You can also sauté the shrimp in a pan over medium heat. Shrimp Cooking in Air Fryer An air fryer cooks shrimp quickly and keeps them juicy. Toss the marinated shrimp in the air fryer basket. Cook at 400°F for about 5-6 minutes. This method gives you a nice char without the grill. For the Full Recipe, check the details above. To store your Grilled Mexican Shrimp Salad, use airtight containers. Glass containers work best since they do not hold odors. You can also use plastic containers with tight lids. - Recommended Container Types: - Glass containers - Plastic containers with lids For the best taste, eat leftovers within two days. After that, the shrimp can lose their fresh flavor. - Storage Duration Guidelines: - Consume within 2 days for best taste - Store in the fridge To reheat your salad, gently warm the shrimp in a pan. Avoid high heat, as it can dry them out. You want to keep the shrimp juicy and flavorful. - Best Practices for Retaining Flavor: - Use low heat in a pan - Cover the pan to trap moisture Stay away from the microwave. It can make the shrimp rubbery and the vegetables soggy. - Avoiding Sogginess: - Do not microwave - Reheat on the stove instead If you want to save some salad for later, you can freeze the shrimp. But be careful with the salad greens and veggies. They do not freeze well. - How to Freeze the Salad: - Freeze the shrimp alone - Store shrimp in a single layer on a tray, then transfer to a bag For thawing, place the shrimp in the fridge overnight. This keeps them tender and tasty. - Best Practices for Thawing: - Thaw in the fridge overnight - Avoid thawing at room temperature You can add heat by using fresh jalapeños or diced serrano peppers. These peppers pack a punch. Another option is to sprinkle in some red pepper flakes or cayenne pepper. Both will add warmth without changing the dish too much. For the best flavor, use fresh peppers. They have a bright taste that dried spices lack. If you want a smoky flavor, consider using chipotle peppers in adobo sauce. It adds a unique twist to the shrimp salad. Yes, you can use frozen shrimp! Start by thawing the shrimp before you cook them. Place them in a bowl of cold water for about 15-20 minutes. This method is quick and effective. Frozen shrimp may differ in texture from fresh shrimp. They can be slightly softer but will still work well in this salad. Just make sure to drain them well after thawing to avoid excess water in your salad. If you need a substitute for lime juice, consider using lemon juice. It has a similar tangy taste. You can also try orange juice for a sweeter flavor profile. For a different twist, use apple cider vinegar or white wine vinegar. Both will add acidity but with a unique taste. Adjust the amount to your liking, as these liquids can be stronger than lime juice. Grilled Mexican Shrimp Salad draws from Mexican cuisine. It features fresh ingredients like lime, cilantro, and shrimp. These ingredients are staples in many Mexican dishes. The salad showcases how simple flavors can create a vibrant dish. You can find similar salads served in beach towns along the Mexican coast. They often serve it with tortilla chips or as a light main course, highlighting its cultural roots. For the full recipe, refer to the [Full Recipe]. Grilled Mexican shrimp salad combines fresh shrimp, vibrant greens, and zesty flavors. I covered the ingredients, step-by-step instructions, and helpful tips for the perfect dish. You can customize it easily for dietary needs and flavor preferences. Remember to store leftovers properly and reheat without losing taste. Whether you're grilling for family or friends, this salad will impress. With practice, you can master this dish and enjoy it often. Now, go ahead and make your own delicious version!

Are you ready to spice up your dinner routine? This Grilled Mexican Shrimp Salad is a fresh and flavorful meal that will impress your taste buds. With simple ingredients and …

Read more

Categories Salads

Triple Chocolate Mousse Cake Indulgent Dessert Delight

May 27, 2025 by Chef Tavio
For this Triple Chocolate Mousse Cake, you need a mix of simple ingredients that create rich flavors. Let’s break it down into three main parts: the cake base, the mousse layers, and optional garnishes. - 1 cup all-purpose flour - 1 cup granulated sugar - 1/2 cup unsweetened cocoa powder - 1/2 teaspoon baking powder - 1/2 teaspoon baking soda - 1/4 teaspoon salt - 1/2 cup unsalted butter, melted - 2 large eggs - 1/2 cup whole milk - 1 teaspoon vanilla extract The cake base is rich and moist. It gives the whole dessert a solid foundation. The cocoa powder adds deep chocolate flavor. - 4 ounces dark chocolate (70% cocoa), chopped - 4 ounces milk chocolate, chopped - 4 ounces white chocolate, chopped - 3 cups heavy whipping cream - 3 tablespoons powdered sugar - 1 teaspoon vanilla extract Each mousse layer brings its own flavor and texture. The dark chocolate adds depth. The milk chocolate gives creaminess. The white chocolate adds sweetness. - Chocolate shavings or curls - Whipped cream - Fresh berries Garnishes add a fun touch. They make the cake look fancy and inviting. You can use chocolate shavings for a rich touch. Fresh berries add color and a fresh taste. For the full recipe, check out the detailed instructions on how to make this delicious cake! - Preheat your oven to 350°F (175°C). - Grease and flour a 9-inch round cake pan. - In one bowl, mix 1 cup all-purpose flour, 1 cup granulated sugar, 1/2 cup cocoa powder, 1/2 teaspoon baking powder, 1/2 teaspoon baking soda, and 1/4 teaspoon salt. - In another bowl, mix 1/2 cup melted butter, 2 eggs, 1/2 cup milk, and 1 teaspoon vanilla until smooth. - Slowly combine the wet and dry mixes. Be gentle; do not overmix. - Pour the batter into the prepared pan. Bake for 25-30 minutes. - Check with a toothpick. It should come out clean. Let the cake cool completely. - Melt 4 ounces of dark chocolate in a bowl over simmering water (double boiler). - In another bowl, whip 1 cup of cream until soft peaks form. - Add 1 tablespoon powdered sugar and 1 teaspoon vanilla to the cream. - Fold the whipped cream into the melted chocolate. Do this in stages. - Chill the dark chocolate mousse in the fridge while you prepare the next layer. - Repeat the melting method with 4 ounces of milk chocolate. - In a new bowl, whip another cup of cream until soft peaks form. - Gently fold the whipped cream into the melted milk chocolate. - Place this mousse in the fridge to set. - Melt 4 ounces of white chocolate using the same double boiler method. - For this layer, whip the last cup of cream with 2 tablespoons of powdered sugar until soft peaks form. - Fold this whipped cream into the melted white chocolate. Chill until you are ready to assemble. - After the cake cools, place it on a serving plate. - Start with the dark chocolate mousse, spreading it evenly on the cake. - Next, add the milk chocolate mousse layer. - Finally, top it off with the white chocolate mousse. - Cover and refrigerate for at least 4 hours, or overnight. This helps the mousse set well. - Before serving, decorate the cake with chocolate shavings, whipped cream, and fresh berries. - Slice the cake, and enjoy the rich flavors of this triple chocolate delight! You can find the complete recipe in the Full Recipe section. To create the best mousse, start with melting the chocolate correctly. Use a double boiler. This method gently heats the chocolate without burning it. Stir often until it is smooth. Next, whip the cream well. You want soft peaks, not stiff peaks. Soft peaks fold into the chocolate easily. If you over-whip, the mousse can become grainy. To check if the cake is done, use a toothpick. Insert it into the center. If it comes out clean, the cake is ready. If not, give it a few more minutes. Cooling is key. Let the cake cool in the pan for about 10 minutes. Then, transfer it to a wire rack. This helps prevent sogginess. Layering mousse takes some care. Start with the dark chocolate layer. Spread it evenly on the cooled cake. Then, follow with the milk chocolate layer. Finish with the white chocolate layer on top. Refrigerate the cake for at least 4 hours. This time allows the mousse layers to set properly. For best results, leave it in the fridge overnight. For a complete guide, check the Full Recipe. {{image_4}} You can switch up the chocolate in your mousse. Try using dark chocolate with different cocoa percentages. A higher percentage gives a richer taste. If you prefer a sweeter flavor, use milk chocolate instead. You can even use white chocolate for a lighter mousse. If you have dietary needs, vegan chocolate is a great choice. Many brands now offer vegan options that taste just as good. Look for dark chocolate made without dairy or milk. This way, everyone can enjoy this dessert. Want to make your mousse even better? Add some espresso or coffee! A small amount boosts the chocolate flavor. It gives depth and a hint of bitterness. You can also try flavors like peppermint or orange. Just add a little extract or zest to the mousse. These flavors add a fun twist to the cake. You can make individual servings of this mousse cake. Use small cups or jars for a fun dessert. Layer the mousse in each cup, starting with dark chocolate. Then add milk chocolate and white chocolate on top. It’s an easy way to serve guests. Layering in individual serving dishes also looks beautiful. You can make the dessert more personal this way. Plus, they are perfect for parties or special events. Enjoy the same rich taste in a fun new way! For the full recipe, check out the details above. To store leftovers, cover the cake tightly with plastic wrap. This keeps the mousse fresh and prevents it from absorbing other smells. You can also use an airtight container if you have one. The cake stays good in the fridge for up to 3 days. You can freeze the cake for later enjoyment. First, let it cool completely. Then, wrap the cake tightly in plastic wrap. For extra protection, add a layer of aluminum foil. The cake can stay frozen for up to 2 months. When you're ready to eat it, move the cake to the fridge for several hours to thaw. For the best texture, thaw it slowly in the fridge, not at room temperature. If you want to enjoy the cake warm, use a microwave. Heat a slice on low power for about 10-15 seconds. This method helps keep the mousse creamy and the flavors intact. Avoid using an oven, as it can dry out the cake. Enjoy your indulgent dessert delight! Yes, you can use store-bought cake. Choose a plain chocolate cake for the best flavor. This option saves time and is easy. Look for cakes that are moist and rich. You can also layer store-bought cake with mousse like in the full recipe. To check if the cake is done, insert a toothpick into the center. If it comes out clean, the cake is ready. If there’s wet batter, bake for a few more minutes. Keep an eye on the edges; they should pull away from the pan slightly. The mousse should set for at least 4 hours in the fridge. If you can, let it chill overnight for the best texture. This time allows the mousse to firm up nicely. The longer it sits, the better the layers blend together. Yes, you can make this cake in advance. Prepare the mousse layers and the cake base a day or two ahead. Store them separately in the fridge. Assemble the cake the day you plan to serve it. This keeps it fresh and tasty. Serve the cake chilled for the best taste. Slice it carefully to keep the layers intact. Top each piece with chocolate shavings or whipped cream. Fresh berries add color and flavor too. This cake looks great on any dessert table! In this post, we explored how to make a delicious Triple Chocolate Mousse Cake. We covered the key ingredients for the cake and mousse layers. We also shared tips for perfect texture and assembly. Remember, the right techniques lead to amazing results. Personalize with flavors or mini versions for variety. Enjoy every bite and impress your friends with your baking skills!

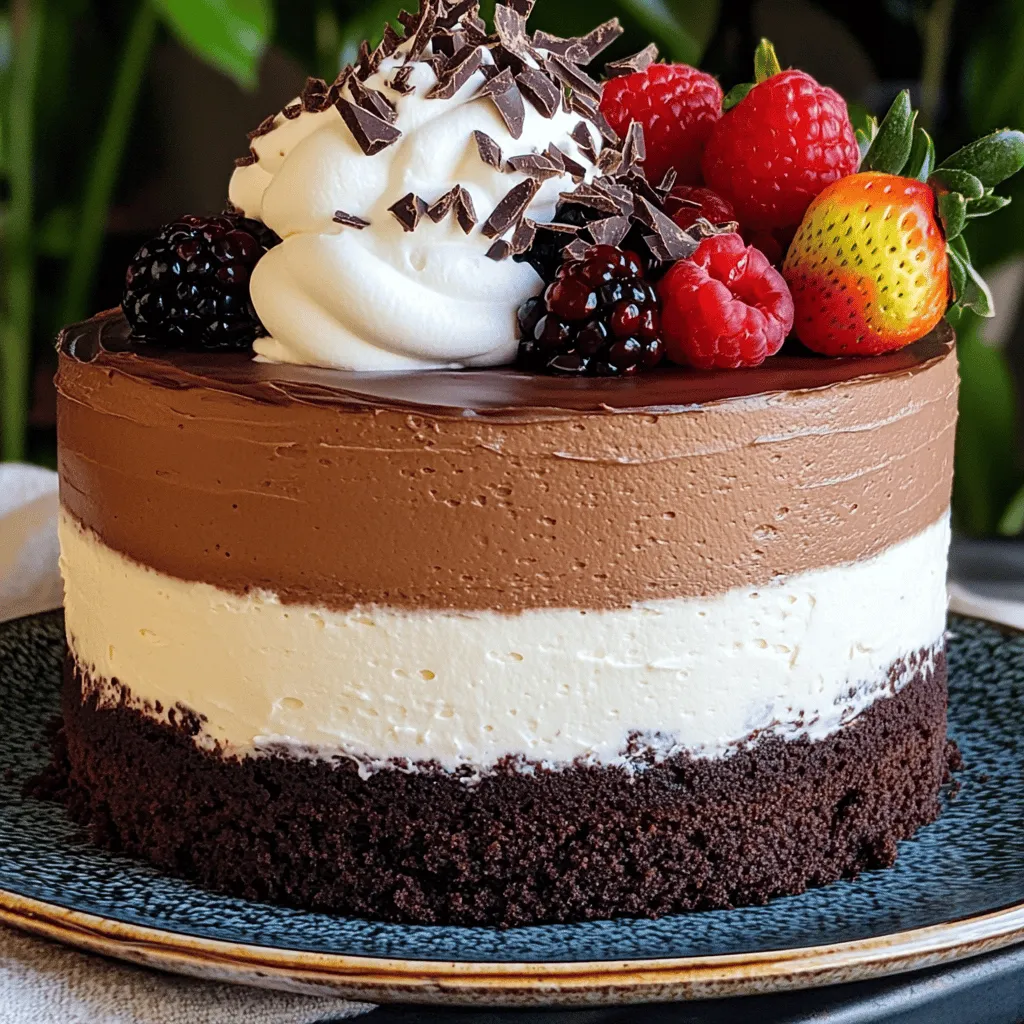
Are you ready for a dessert that’ll wow your taste buds? The Triple Chocolate Mousse Cake is the ultimate treat, blending rich flavors and creamy textures. This cake features three …

Read more

Categories Desserts

Birria Enchiladas Easy and Flavorful Dinner Idea

May 27, 2025 by Chef Tavio
- 2 cups cooked and shredded birria meat (beef or goat) - 8 medium corn tortillas - 1 cup birria broth - 1 cup shredded mozzarella or queso Oaxaca cheese - 1 medium onion, finely chopped - 1 cup fresh cilantro, finely chopped - 1/2 cup sour cream or Mexican crema - Slices of radish and lime wedges for garnish - Salt and pepper to taste When I create birria enchiladas, I focus on fresh and quality ingredients. First, the birria meat needs to be tender and flavorful. Using either beef or goat works well. Shredding the meat helps it mix nicely in the enchiladas. Corn tortillas are key, too. They provide that perfect base for the dish. I soak them briefly in the birria broth to make them soft and easy to roll. Cheese adds a creamy texture. I love using mozzarella or queso Oaxaca for their melting qualities. The onion adds a sweet crunch that balances the rich meat. For those who want to personalize their dish, fresh cilantro is a bright touch. Sour cream or Mexican crema can make it creamy and cool. Radish slices and lime wedges add color and zest to the plate. You can adjust the seasoning with salt and pepper to your taste. This way, the flavors shine through. With these ingredients, you are on your way to a delicious meal. For the full recipe, check the link above and dive into this tasty dish! First, heat a tablespoon of olive oil in a medium skillet over medium heat. Add the finely chopped onion. Sauté the onion for about 3-4 minutes. Cook until it turns translucent and fragrant. Stir it from time to time to avoid burning. Next, in a bowl, combine your shredded birria meat. Season it well with salt and pepper. Mix it thoroughly to ensure even flavor. To make soft tortillas, dip each one quickly into warm birria broth. Let it soak for just a second. This will help the tortillas become pliable and easy to roll. Start with a dipped tortilla on a flat surface. Place a generous portion of the seasoned birria meat in the center. Add a sprinkle of cheese and some chopped cilantro on top. Roll it up tightly, tucking in the ends. Place it seam side down in a baking dish. Repeat this with the other tortillas until you fill the dish. Now, pour the remaining birria broth over the rolled enchiladas. Make sure to cover them well. Sprinkle the extra cheese on top, ensuring every enchilada is covered. Cover the baking dish tightly with aluminum foil. Bake it in a preheated oven at 350°F (175°C) for 20 minutes. This helps the flavors blend and warms the enchiladas through. After 20 minutes, carefully remove the foil. Return the dish to the oven and bake uncovered for 10 more minutes. This will give the cheese a lovely golden brown finish. Finally, let the enchiladas cool for a few minutes before serving. This will help the flavors settle. When ready to serve, top the enchiladas with sour cream or Mexican crema. Add fresh cilantro and slices of radish for crunch. Don’t forget lime wedges for a zesty touch! Enjoy your delicious Birria Enchiladas! For more details, check out the Full Recipe. To get the best taste from your birria meat, season it well. Use salt and pepper generously. This simple step can boost the flavors. For cheese, always choose high-quality options. Mozzarella or queso Oaxaca melts beautifully and adds creaminess. This will elevate your enchiladas. When softening tortillas, dip each one in warm birria broth quickly. Do not soak too long, or they may break. A quick dip keeps them flexible. For even cooking, ensure that the enchiladas are not crowded in the baking dish. Leave some space between them for the heat to circulate. Garnishing makes a big difference. Top your enchiladas with fresh cilantro and a dollop of sour cream. Add thin slices of radish for a crunchy texture. Serve the enchiladas on a large platter, showcasing the vibrant colors. This makes the dish look even more appealing. Add extra lime wedges on the side for a zesty touch. {{image_4}} You can use other meats in your birria enchiladas. Chicken or pork birria works great. Just cook and shred the meat as you would with beef or goat. This gives you a lighter flavor but still keeps the dish hearty. If you want a vegetarian option, try using mushrooms or jackfruit. Both options soak up flavors well. Cook them in the same spices as the birria for a rich taste. You can even make a spicy mushroom stew to mimic the classic birria. The cheese you choose can change the whole dish. Shredded mozzarella is creamy and melts nicely. Queso Oaxaca adds a stretchy texture that is fun to eat. You can mix cheeses for more flavor. Salsa or guacamole can add a fresh touch. A spicy salsa brings heat, while guacamole adds creaminess. Top your enchiladas with your favorite sauce to make them special. You can even add sliced jalapeños for an extra kick. Birria enchiladas pair well with many sides. Mexican rice or refried beans are popular choices. You can also try a light salad with lime dressing. These sides add color and balance to your meal. For drinks, serve a cold beer or a refreshing agua fresca. A fruity cocktail can also complement the spices in the dish. With the right sides and drinks, your meal will feel complete. Explore the [Full Recipe] to find your perfect twist on birria enchiladas! To keep leftover enchiladas fresh, follow these steps: - Let them cool: Allow the enchiladas to cool to room temperature. - Use airtight containers: Store them in airtight containers or wrap them tightly in plastic wrap. This prevents moisture loss and keeps them tasty. - Refrigerate: Place the containers in the fridge. They should stay fresh for 3-4 days. When reheating, aim to keep the texture just right. Here’s how: - Oven method: Preheat your oven to 350°F (175°C). Place the enchiladas in a baking dish, cover with foil, and heat for about 15-20 minutes. This method warms them evenly. - Microwave method: For a quick option, use the microwave. Place one or two enchiladas on a microwave-safe plate, cover with a damp paper towel, and heat for 1-2 minutes. This helps keep them moist. If you want to prepare ahead, you can freeze the enchiladas. Here are some tips: - Freeze after assembly: Before baking, wrap the enchiladas tightly in plastic wrap and place them in a freezer-safe bag. - Thawing: When ready to eat, thaw them in the fridge overnight. Bake as directed in the full recipe. These methods ensure your Birria Enchiladas stay delicious and inviting every time! Birria enchiladas come from Mexico. This dish has roots in Jalisco, a state known for its rich food. Birria is a savory stew made from goat or beef. People often serve it during special events and family gatherings. It reflects deep cultural traditions. The enchiladas add a twist, making it a fun meal. Yes, you can prepare birria enchiladas in advance. Cook the meat and make the sauce first. Then, assemble the enchiladas. You can cover them and keep them in the fridge. They stay fresh for up to two days. To freeze, wrap them well in foil. When you’re ready to eat, cook from frozen. There are many great sides to serve with birria enchiladas. Here are a few ideas: - Mexican rice - Refried beans - Fresh guacamole - Simple green salad - Pickled onions These dishes add flavor and balance to your meal. If you want to lower the spice, try these tips: - Use less chili powder in the sauce. - Add more broth to dilute the heat. - Serve with sour cream or crema to cool the dish. These methods help make it milder without losing flavor. For more details on making birria enchiladas, check out the Full Recipe. Birria enchiladas are a fantastic way to enjoy rich flavors and traditions. We covered key ingredients, like shredded meat and tortillas, and explored step-by-step cooking. Flavor tips and common mistakes help you create the best dish. You even learned about tasty variations and how to store leftovers. Remember, making them your own is part of the fun. Dive in and enjoy this delicious meal at home!

Are you ready to spice up your dinner routine? Birria Enchiladas are not just delicious; they are easy to make! With savory birria meat wrapped in warm tortillas, this dish …

Read more

Categories Dinner
Older posts
Newer posts
← Previous Page1 … Page41 Page42 Page43 … Page53 Next →

TASTED NEST

Where Flavor Finds a Home 🍳🏡 — warm, simple, and crave-worthy recipes made for real life, from stovetop mornings to backyard dinners.

PAGES

Home About Contact Privacy Policy Terms & Conditions Cookie Policy GDPR Policy Copyright Policy Disclaimer

CATEGORIES

Appetizers Desserts Salads Breakfast Dinner

Contact

  • Pinterest
  • Mail
Copyright © 2025 Tasted Nest. All rights reserved.