Skip to content
Tasted Nest
  • Home
  • Appetizers
  • Desserts
  • Salads
  • Breakfast
  • Dinner
  • Privacy Policy
  • Contact
  • About

Chef Tavio

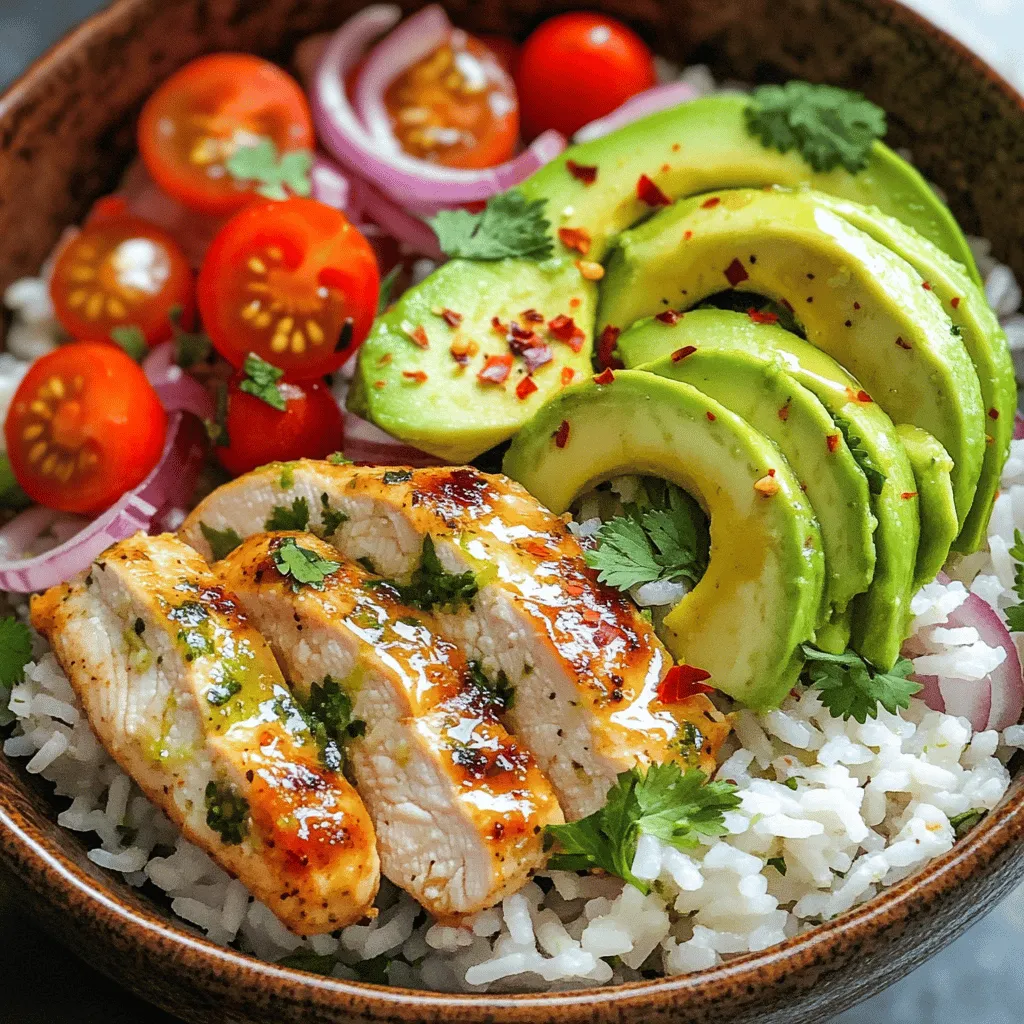
Cheesesteak Tortellini Flavorful Comfort Food Dish

May 27, 2025 by Chef Tavio
To create a mouth-watering cheesesteak tortellini, you'll need: - 12 ounces cheese tortellini (fresh or frozen) - 1 pound ribeye steak, thinly sliced against the grain - 1 medium onion, sliced into thin rings - 1 medium bell pepper (any color), sliced into thin strips - 2 cloves garlic, minced - 1 cup provolone cheese, shredded - 2 tablespoons olive oil, divided - 1 tablespoon Worcestershire sauce - Salt and pepper to taste - Fresh parsley, finely chopped (for garnish) Each ingredient plays a key role. The cheese tortellini provides a creamy base. The ribeye steak gives a hearty flavor, while the onion and bell pepper add sweetness. Garlic brings depth, and provolone cheese melts beautifully, tying everything together. Don’t forget the Worcestershire sauce; it adds a savory kick. The salt and pepper boost all the flavors, and fresh parsley brightens the dish. This combination creates a comforting meal that warms the heart and satisfies the taste buds. For the full recipe, check out the Cheesesteak Tortellini Delight. To cook the tortellini, start by boiling water in a large pot. Add a good amount of salt to the water. When it boils, add the cheese tortellini. If you use fresh tortellini, cook it for about 3-5 minutes. For frozen, cook for 5-7 minutes. When they are tender, drain the tortellini and set them aside. In a large skillet, heat 1 tablespoon of olive oil over medium heat. Once the oil is hot, add the sliced onions and bell peppers. Cook these for about 5-7 minutes until the onions are see-through and the bell peppers are soft. Add minced garlic and cook for another minute. This makes the veggies smell great! After cooking, take the veggies out of the skillet and set them aside in a bowl. Without cleaning the skillet, add the other tablespoon of olive oil. Heat it on medium-high. When the oil is hot, add the thinly sliced ribeye steak. Spread it evenly in the pan. Season it with salt, pepper, and Worcestershire sauce. Cook for 3-4 minutes, stirring often. You want the steak to turn brown and be fully cooked. Aim for medium doneness for a tender bite. Now, put the sautéed vegetables back into the skillet with the cooked steak. Next, add the drained tortellini. Gently toss everything together until it is well mixed. Keep cooking for another 2-3 minutes until it is all hot. Finally, take the skillet off the heat. Sprinkle the shredded provolone cheese over the top of the tortellini and steak mix. Cover the skillet with a lid for about 2 minutes. This helps the cheese melt nicely. The melted cheese will blend into the dish, making it creamy and delicious. You can find the full recipe for Cheesesteak Tortellini Delight above. Enjoy your cooking adventure! To make sure your steak is tender, use ribeye. This cut has great flavor and stays juicy. Slice the steak thin against the grain. This helps break down tough fibers. Cook it on high heat for a short time. This keeps it juicy and flavorful. To avoid mushy tortellini, keep an eye on the cooking time. Follow the package instructions closely. Fresh tortellini cooks fast, usually in 3-5 minutes. Frozen tortellini takes a bit longer. Drain them right away to stop the cooking. Toss them gently with olive oil to keep them from sticking. If you want to prepare ahead, cook the steak and veggies first. You can store them in the fridge. Cook the tortellini fresh just before serving. This keeps them from getting too soft. For reheating, use a skillet over low heat. Add a splash of water or broth to help with steam. Cover the skillet to keep moisture in. Stir gently to avoid breaking the tortellini. Always check the temperature before serving. To make your cheesesteak tortellini look great, use wide bowls. This allows the dish to spread out nicely. Sprinkle fresh parsley on top for a pop of color. You can also drizzle a bit of olive oil for shine. For extra flavor, add crushed red pepper flakes. This gives a fun kick. You can even top with extra cheese before serving. This will melt slightly and look inviting. Enjoy making your dish not just tasty, but also beautiful! {{image_4}} You can easily change the protein in this dish. If you want a lighter option, try chicken or turkey. For a vegetarian twist, use mushrooms or tempeh. These swaps still keep the flavors strong and tasty. You can also swap the cheese. While provolone is great, try mozzarella or gouda. Both add a unique twist. If you're dairy-free, use a vegan cheese that melts well. You can also change up the veggies. Zucchini or spinach work well in this dish. To take your cheesesteak tortellini to the next level, add spices. A pinch of smoked paprika or cayenne pepper adds warmth. Fresh herbs like basil or thyme can brighten the dish. Mix them in while cooking for extra flavor. Different sauces can also change the taste. Instead of Worcestershire, try soy sauce for a salty kick. A splash of balsamic glaze can add sweetness, too. Each choice brings a new vibe to this comfort food. Pair your cheesesteak tortellini with side dishes that complement its rich flavors. A simple green salad adds a fresh crunch. Roasted vegetables or garlic bread can enhance the meal nicely. When it comes to drinks, think about a chilled lemonade or iced tea. Both provide a refreshing contrast to the warm, cheesy dish. For a cozy vibe, a light red wine also works well. For the full recipe, check out Cheesesteak Tortellini Delight. Enjoy making this delicious meal! To keep your cheesesteak tortellini fresh, store it in an airtight container. Make sure to let it cool down first. Place it in the fridge for up to three days. If you want to save it longer, freeze it. Divide the dish into portions, then wrap them tightly in plastic wrap. Place the wrapped portions in a freezer-safe bag. This helps prevent freezer burn. You can keep it in the freezer for about three months. When you are ready to enjoy your leftovers, there are a few great ways to reheat. The best method is using the stove. Place the tortellini in a skillet over medium heat. Add a splash of water or broth to keep it moist. Stir gently until it warms up. This helps keep the flavor rich. You can also use the microwave if you’re in a hurry. Place the tortellini in a microwave-safe bowl. Cover it with a damp paper towel. Heat in short bursts to avoid overcooking. Stop to stir every minute until it is warm. Both methods help maintain the dish's yummy texture and flavor. Enjoy your tasty cheesesteak tortellini again! Cheesesteak tortellini is a fun twist on the classic cheesesteak. It combines stuffed pasta with steak and cheese. This dish blends Italian and American flavors. Originating from the need for comfort food, it quickly became a favorite. You get the rich taste of a cheesesteak in every bite. The creaminess of the cheese pairs well with the savory steak. It’s a great meal for busy nights or gatherings. Yes, you can use various pasta types! If you want a different shape, try penne or rigatoni. Both hold sauces well and add a unique look. You could even use gluten-free pasta for a healthier option. Just make sure to adjust the cooking time based on the pasta type. The key is to keep that cheesy, meaty filling intact! To make cheesesteak tortellini vegetarian, swap the steak for mushrooms or tofu. Both options absorb flavors well and add texture. You can also use black beans or lentils for a protein boost. For the cheese, try a plant-based option or leave it out entirely. This way, you still enjoy a hearty meal with great taste. Many restaurants offer their take on cheesesteak tortellini. Look for Italian-American spots or gastropubs in your area. These places often serve creative fusion dishes. If you want quality versions, check reviews online or ask locals. You may discover hidden gems that serve this delightful dish. Enjoy tasting different styles and flavors! This blog post covered how to make a delicious cheesesteak tortellini dish from start to finish. You learned about the ingredients, cooking methods, and tips for the best flavors. Remember, the right steak, fresh tortellini, and a good cheese melt make a big difference. Don't hesitate to try variations or serve it with sides you enjoy. With the skills shared here, you can impress anyone with this tasty meal. Happy cooking!

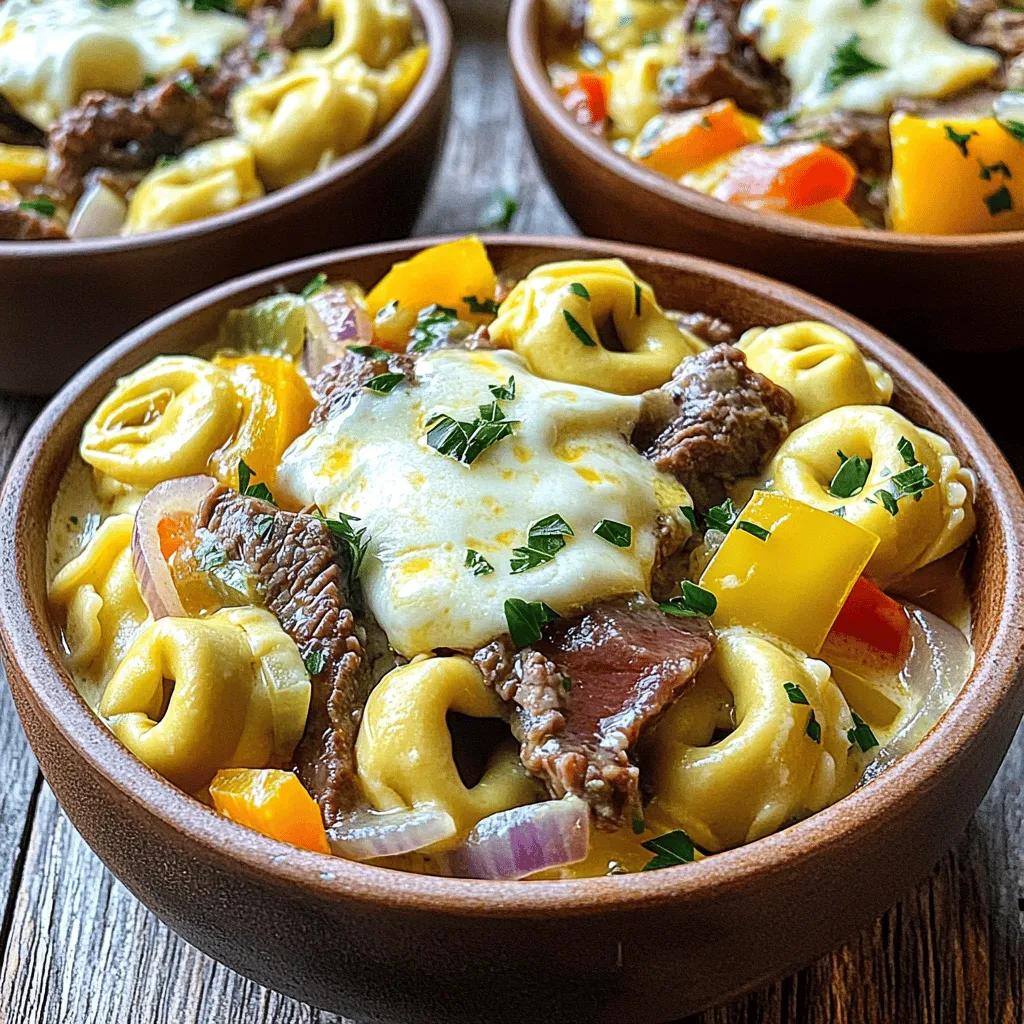
If you love comfort food, then get ready for a tasty twist! Cheesesteak Tortellini combines the heartiness of a classic cheesesteak with the delightful bite of tortellini. This dish is …

Read more

Categories Dinner

Irresistible Cheesecake Danish Easy and Tasty Recipe

May 27, 2025 by Chef Tavio
To make a delicious Irresistible Cheesecake Danish, gather these simple ingredients: - 1 package (8 oz) cream cheese, softened to room temperature - 1/4 cup granulated sugar - 1/2 teaspoon vanilla extract - 1 tablespoon freshly squeezed lemon juice - 1 package (1 lb) refrigerated crescent dough - 1 egg, beaten (for egg wash) - 1/4 cup powdered sugar (for drizzling) - Fresh berries (raspberries, blueberries, or strawberries) for garnish - Optional: 1/2 teaspoon almond extract for an enhanced flavor profile These ingredients create a rich and creamy filling. The crescent dough adds a flaky, buttery touch. You can also adjust the flavor with optional extracts. This easy recipe lets you enjoy a sweet treat in no time. Don't forget to check the Full Recipe for more details! - Preheat oven to 375°F (190°C). - Line a large baking sheet with parchment paper. Start by preheating your oven. This gets the heat ready for the danishes. Next, take a baking sheet and line it with parchment paper. This helps the danishes not stick. - Combine cream cheese, sugar, vanilla, and lemon juice. - Use hand mixer for smooth consistency. Now, let’s make the cream cheese filling. In a bowl, mix together the cream cheese, granulated sugar, vanilla extract, and lemon juice. The lemon juice adds a nice zing! Use a hand mixer to blend everything until it is smooth. Make sure there are no lumps for a creamy texture. - Prepare and flatten crescent dough. - Fill and shape each danish. - Apply egg wash before baking. Next, unroll the crescent dough. You’ll want to separate it into rectangles. Pinch the seams to seal them. Use a rolling pin or your hands to flatten each rectangle a bit. Now, take two tablespoons of the creamy filling and place it in the center of each rectangle. Leave about an inch from the edges so you can seal them. Fold over the edges to make a neat shape. Pinch the seams well to keep the filling inside. Finally, take your beaten egg and brush it on top of each danish. This makes them golden and shiny when baked. Now, you are ready to bake! Check the [Full Recipe] for more details. To handle crescent dough well, keep it cold. Cold dough is easier to work with. When you unroll it, lay it flat on a clean surface. Pinch the seams to make rectangles. Use a rolling pin to flatten them slightly. This helps them bake evenly. To ensure even baking, space the danishes well on the baking sheet. Leave room between them. This allows hot air to flow around each one. Bake them until they turn golden brown. Check them at the 12-minute mark. If they look puffy and brown, they are likely ready. For added flavor, consider extra extracts. Almond extract adds a nice twist. You can also try orange or coconut extract. Each brings a new taste to your danish. Think about what you like most! You can modify the filling too. Try adding a bit of fruit puree to the cream cheese. You can swirl in raspberry or blueberry puree for a fruity kick. This makes your filling even more exciting! To serve your danishes attractively, think about the plate. A rustic wooden board or a white platter works well. This makes the golden color pop. You can dust them with powdered sugar for a touch of elegance. Garnishing with fresh berries adds color and freshness. Place a few berries on top of each danish. You can use raspberries, blueberries, or strawberries. They not only look good but taste great too. Enjoy your beautiful and tasty creation! {{image_4}} You can switch up the cheese in your Danish. Ricotta or mascarpone cheese makes a great filling. Both add a creamy texture and a mild taste. You can also mix in flavors like melted chocolate or fruit purees. Chocolate gives a rich twist. Fruit purees like raspberry or strawberry add a fruity zing. Both options make your cheesecake Danish even more fun. Seasonal fruits can elevate your Danish. Use fresh berries in summer, like strawberries or blueberries. In fall, try apples or pears for a cozy touch. You can also get creative with your icing. A lemon glaze adds brightness. A chocolate drizzle gives a sweet finish. Each season brings different flavors, making every Danish unique. If you're gluten-free, don’t worry. You can still enjoy this treat. Use gluten-free crescent dough instead of regular dough. Many brands make great options. Always check the label for safe ingredients. Adjust your filling to suit your diet. For example, use gluten-free powdered sugar for the icing. These changes let everyone enjoy the cheesecake Danish without missing out. Store your leftover danishes in the fridge. Place them in an airtight container. They will stay fresh for up to three days. If you want to keep them longer, freeze them. Wrap each danish in plastic wrap, then place them in a freezer bag. They will last up to three months in the freezer. Just remember to label the bag with the date. When it’s time to enjoy your danishes again, you can reheat them in different ways. The oven works best for keeping them crispy. Preheat the oven to 350°F (175°C). Place the danishes on a baking sheet and heat for about 10 minutes. If you’re short on time, use the microwave. Heat each danish for about 15-20 seconds. However, this method can make the pastry soft. To keep the pastry crispy, avoid using the microwave for longer. Enjoy your danishes warm! They taste best fresh out of the oven. A Cheesecake Danish is a soft pastry filled with a creamy cheese mixture. It typically uses cream cheese, sugar, and a hint of vanilla and lemon. The base is often made from crescent dough, which gives it a flaky texture. This treat combines sweet and tangy flavors, making it a favorite for breakfast or dessert. Yes, you can prepare the danishes in advance. Mix the cream cheese filling and store it in the fridge. You can also shape the danishes and leave them unbaked in the fridge for a few hours. When you’re ready, just bake them fresh. They will taste amazing! For longer storage, you can freeze unbaked danishes. Just wrap them well and bake straight from the freezer, adding a few extra minutes to the baking time. You can use puff pastry instead of crescent dough. Puff pastry will give you a lighter and crispier result. You can also try phyllo dough for a unique texture. Each type of dough can change the taste and feel of the final product, so experiment and see which you like best! Look for a golden brown color on the danishes. They should puff up nicely. If they are golden and no longer shiny, they are done. You can also check the bottom; it should be firm and not doughy. Trust your eyes and your nose; they will guide you to perfect danishes! This blog post covered how to make a Cheesecake Danish, from ingredients to storage. You learned about simple steps to prepare the filling and assemble the danish using crescent dough. Tips for perfecting the dough and enhancing flavor added extra value. Remember, variations with different cheeses or fruits can keep things fresh. Proper storage and reheating ensure your danish stays tasty. Enjoy making them for any occasion! They'll impress friends and family alike. Happy baking!

If you’re craving a sweet treat with a creamy twist, you’re in for a delight! This simple Cheesecake Danish recipe combines rich cream cheese with flaky crescent dough. It’s easy …

Read more

Categories Desserts

Garlic Butter Cheese Bombs Tasty and Easy Recipe

May 27, 2025 by Chef Tavio
- 1 can (16 oz) refrigerated biscuit dough - 1 cup shredded mozzarella cheese - 1/2 cup cream cheese, softened - 1/4 cup unsalted butter, melted - 4 cloves garlic, minced - 1 tablespoon fresh parsley, finely chopped - 1 teaspoon Italian seasoning - 1/2 teaspoon salt - 1/4 teaspoon black pepper - Optional: pinch of red pepper flakes for a spicy kick You can use any brand of refrigerated biscuit dough. If you want a lighter option, try reduced-fat cream cheese. You can swap mozzarella for cheddar or another cheese you love. For a vegan option, use dairy-free cream cheese and vegan butter. Adjust the garlic to your taste. If you like heat, add more red pepper flakes to the mix. Each cheese bomb contains about 150 calories. They provide 8 grams of fat and 3 grams of protein. You get 1 gram of carbs, which makes these a tasty snack. The garlic and herbs add flavor without extra calories. If you want to make them healthier, you can cut back on the butter. Adding veggies can boost the fiber and nutrients as well. Enjoy your Garlic Butter Cheese Bombs guilt-free! Start by preheating your oven to 375°F (190°C). This step is key for great baking. Line a baking sheet with parchment paper. This helps the cheese bombs not stick. In a bowl, mix the melted butter, minced garlic, and chopped parsley. Stir this well. The smell will be amazing! Next, in another bowl, combine shredded mozzarella and softened cream cheese. Mix until smooth. Add salt, black pepper, and Italian seasoning. Make sure to mix these well for even taste. Now, open the can of biscuit dough. Carefully separate the biscuits. Roll each one into a small circle with your hands. This part is fun! Take a spoonful of the cheese mixture and place it in the center of each biscuit. Leave space around the edges. Fold the edges of the biscuit over the cheese filling. Pinch the seams to seal them tight. Form them into nice balls. Dip each ball into the garlic butter mixture. Make sure they are well coated. Place the cheese bombs on the prepared baking sheet. Leave some space between them to bake evenly. Bake for 15 to 18 minutes. Look for a golden brown color. You’ll know they’re ready when they smell delicious! Once done, take them out of the oven. Brush the tops with any leftover garlic butter while warm. This adds even more flavor! To make the best garlic butter cheese bombs, use fresh ingredients. Always measure your cheese and spices. This helps keep the taste balanced. If you want a spicy kick, add red pepper flakes to the cheese mix. For a fun twist, try mixing in different cheeses. Serve the cheese bombs warm on a platter. Garnish with extra parsley for color. Pair with marinara sauce for dipping. Trust me, these tips make a big difference! For the full recipe, check out the details above. When making garlic butter cheese bombs, a few mistakes can ruin your dish. First, avoid using cold cheese. Always let your cream cheese soften first. This helps it mix well with mozzarella. If you skip this step, the filling won’t be smooth. Next, don’t skip the garlic butter dip. This adds flavor and keeps the bombs moist. Lastly, watch the baking time. Overbaking can lead to dry cheese bombs. Check them at 15 minutes; they should be golden brown. You can make these cheese bombs your own. Start by changing the cheese. Use cheddar for a sharper taste or pepper jack for heat. Add herbs like oregano or basil for extra flavor. You can even mix in chopped sun-dried tomatoes or spinach. For a twist, sprinkle in some cooked bacon bits. Each change can lead to a new flavor adventure. Just remember to keep the balance of cheese and dough. Having the right tools makes this recipe easier. Here’s what you need: - Baking sheet - Parchment paper - Mixing bowls - Spoon for filling the dough - Brush for the garlic butter Using these tools helps keep your kitchen neat and your cheese bombs perfect. A good baking sheet ensures they cook evenly. Parchment paper makes cleanup a breeze. With these basics, you can focus on making your cheese bombs delicious and fun to eat. You can find the full recipe above and make your own tasty garlic butter cheese bombs! {{image_4}} You can mix and match flavors to create your own cheese bombs. Try adding cooked bacon bits for a smoky taste. You can also include fresh herbs like basil or chives for a fresh touch. If you love heat, add jalapeños or some spicy cheese. A little bit of ranch seasoning can also bring a fun twist. Feel free to experiment with these options! To make these delicious bombs vegan, use dairy-free cheese and vegan butter. Look for gluten-free biscuit dough if you need a gluten-free option. Many brands make great gluten-free dough that works well. Just make sure to check the labels for any hidden gluten. With these simple swaps, everyone can enjoy these tasty treats! While mozzarella and cream cheese are classic, you can explore other cheeses. Cheddar adds a sharp flavor that many love. Pepper jack gives a nice kick and melts beautifully. For a gourmet touch, try goat cheese or feta. Each cheese brings its own unique flavor. Mix and match to find your perfect combo for your cheese bombs! For the full recipe, refer to the earlier section. After enjoying your Garlic Butter Cheese Bombs, store any leftovers in an airtight container. This keeps them fresh for up to three days. If you want to keep them longer, consider freezing them. When you're ready to enjoy your leftovers, reheat them in the oven. Preheat your oven to 350°F (175°C). Place the cheese bombs on a baking sheet and heat for about 10 minutes. This method keeps them crispy and warm. You can also use a microwave, but be careful. Microwaving may make them chewy instead of crispy. To freeze your cheese bombs, let them cool completely first. Then, place them in a single layer on a baking sheet and freeze. After they are frozen, transfer them to a freezer-safe bag. They will stay good for about two months. When you're ready to bake them, no need to thaw! Just bake at 375°F (190°C) for a few extra minutes. Enjoy your Garlic Butter Cheese Bombs anytime! For the full recipe, check the main section. To make Garlic Butter Cheese Bombs healthier, you can swap the biscuit dough for whole wheat or gluten-free options. Use low-fat cheese instead of regular mozzarella and cream cheese. You can also reduce the amount of butter or use olive oil to cut down on saturated fat. Adding vegetables like spinach or diced peppers can boost the nutrition without losing flavor. Yes, you can make these cheese bombs ahead of time. Prepare the cheese filling and assemble the bombs, then cover them and refrigerate. Bake them when you’re ready to serve. This way, you enjoy fresh, warm cheese bombs without last-minute work. Just remember to let them sit at room temperature for a bit before baking. Garlic Butter Cheese Bombs pair well with many sides. You can serve them with marinara sauce for dipping. A fresh salad with a light vinaigrette complements the richness of the cheese bombs. You might also try a savory soup or a simple garlic bread for a complete meal. For a fun twist, add some spicy dipping sauces or flavored oils. Feel free to check out the Full Recipe for more detailed instructions! In this post, we explored the key ingredients, step-by-step instructions, and helpful tips for making cheese bombs. We shared customization ideas, variations for different diets, and storage methods. Remember, avoiding common mistakes will ensure a delicious outcome. Experimenting with flavors can add your special twist. Enjoy these cheesy delights fresh or saved for later. Happy cooking, and relish every bite!

Are you ready for a cheesy treat that’s both tasty and super easy to make? These Garlic Butter Cheese Bombs will delight your taste buds and impress your friends. With …

Read more

Categories Appetizers

Easy S’mores Pie Heavenly Dessert for Any Occasion

May 27, 2025 by Chef Tavio
Here’s what you need to make this delightful Easy S'mores Pie. Each ingredient plays a vital role in creating the perfect blend of flavors and textures. - 1 pre-made graham cracker pie crust - 1 cup semi-sweet or milk chocolate chips - 1 cup mini marshmallows - 1/2 cup heavy cream - 1/4 cup powdered sugar - 1 teaspoon vanilla extract - 1/4 cup crushed graham crackers (for topping) - Optional garnishes: chocolate shavings or extra mini marshmallows The graham cracker pie crust gives a nice crunch and holds everything together. The chocolate chips melt to form a rich layer of chocolate goodness. Mini marshmallows add that classic s'mores touch. Heavy cream adds creaminess, while powdered sugar and vanilla extract sweeten and flavor the whipped cream topping. The crushed graham crackers on top provide extra texture and charm. Feel free to get creative with optional garnishes. A sprinkle of chocolate shavings or more mini marshmallows can elevate this pie. Check out the Full Recipe for detailed steps on how to put these ingredients together. - Preheat the oven to 350°F (175°C). - In a medium saucepan, heat 1/2 cup of heavy cream over medium heat. Stir it gently. - When the cream starts to simmer, add 1 cup of chocolate chips. Mix until smooth. - Pour this chocolate mixture into the graham cracker pie crust. Spread it evenly. - Layer 1 cup of mini marshmallows over the melted chocolate. Cover it well. - Bake the pie for about 5-7 minutes. Watch closely until the marshmallows turn golden. - Let the pie cool for about 10 minutes at room temperature. - In a bowl, whip the remaining heavy cream with 1/4 cup powdered sugar and 1 teaspoon vanilla extract. - Spread the whipped cream over the pie, covering the marshmallows and chocolate. - Sprinkle 1/4 cup crushed graham crackers on top for added crunch. - For a special touch, add chocolate shavings or more mini marshmallows as a garnish. - Refrigerate the pie for at least 1 hour before serving. This helps the flavors blend. You can find the Full Recipe for more details on making this delectable dessert. To get the best marshmallows, toast them until they turn golden brown. This means they should puff up nicely but not burn. Keep a close eye on them as they bake. The smell of toasted marshmallows is a great sign! For the chocolate mixture, it should be smooth and glossy. If it feels grainy or thick, it may need more heat. Just gently warm it again and stir until it’s perfect. You want it silky for the best texture. When serving, I like to slice the pie into neat wedges. This makes it look pretty on the plate. You can also add a drizzle of chocolate sauce on top for more fun. Pair this pie with ice cream for a cool contrast. Vanilla or chocolate ice cream works great! Fresh fruit like strawberries or raspberries also adds a nice touch. It makes the dessert feel light and fresh. For the full recipe, check out the earlier section. Enjoy your S'mores Pie! {{image_4}} You can easily change the taste of your Easy S'mores Pie. One fun idea is adding peanut butter. Just mix in half a cup of creamy peanut butter with the chocolate chips when you heat the cream. This gives your pie a rich, nutty flavor that pairs well with chocolate. Another option is to use flavored chocolate. Try dark chocolate or caramel chocolate chips for a twist. Dark chocolate adds depth, while caramel brings a sweet, buttery taste. Both choices make the pie unique and exciting! If you need a gluten-free option, you can use a gluten-free graham cracker crust. Many brands offer this, and it works just as well. You can find these crusts at most grocery stores. You can also make your own graham cracker crust. Simply crush 1 ½ cups of graham crackers and mix them with 6 tablespoons of melted butter. Press this mixture into a pie pan and bake at 350°F for 8 minutes. This homemade crust adds a fresh taste to your pie. For the full recipe, check out the details in the earlier sections. To keep your leftover S'mores Pie fresh, cover it tightly with plastic wrap or foil. This prevents air from drying it out. You can also store slices in airtight containers. The pie stays good in the fridge for up to 3 days. After that, it might lose its flavor and texture. If you want to enjoy your pie later, you can freeze it. First, let the pie cool completely. Then, wrap it in plastic wrap and foil. This way, it won't get freezer burn. You can freeze it for up to 2 months. When you're ready to eat, take the pie out of the freezer. Place it in the fridge overnight to thaw. For the best taste, let it sit at room temperature for about 30 minutes before serving. This helps restore its creamy texture and flavor. How can I make it ahead of time? You can prepare this pie a day in advance. Just follow the recipe, then chill it. Store it in the fridge until you are ready to serve. This allows the flavors to meld. Can I use a different type of cream? Yes, you can. If you don’t have heavy cream, use half-and-half or whipped topping. Just note that the texture may differ slightly. You want a creamy filling, so choose a rich option. What if I don’t have mini marshmallows? If mini marshmallows are missing, use regular ones. Cut them into smaller pieces. You can also use marshmallow fluff as a spread over the chocolate layer. Why did my marshmallows burn? Marshmallows burn if they bake too long or at too high a temperature. Keep an eye on them while baking. Remove the pie when they are golden and puffy, not brown. How to fix a runny filling? A runny filling may happen if the chocolate doesn’t set. Make sure to heat the cream just until it simmers. If the filling is still runny, refrigerate the pie longer to firm it up. Substitutes for ingredients if needed You can swap chocolate chips with chocolate bars. If you want a nutty flavor, add crushed nuts to the topping. For a different taste, try flavored chocolate like caramel or mint. This blog post showed you how to make a tasty s'mores pie. We covered ingredients, steps, tips, and even variations. You learned the best ways to store and enjoy your pie. With these ideas, you can make a delicious dessert for any occasion. Remember, you can switch flavors or adjust the crust to fit your needs. I hope you feel inspired to create this treat. Enjoy your baking and impress your friends and family!

If you love s’mores, you’ll adore this Easy S’mores Pie! Perfect for parties or quiet nights at home, this dessert combines creamy chocolate, toasted marshmallows, and a crunchy crust. In …

Read more

Categories Desserts

Balsamic Chicken & Rice Flavorful Meal Made Easy

May 27, 2025 by Chef Tavio
To make Balsamic Chicken & Rice, you will need: - 4 boneless, skinless chicken breasts - 1 cup balsamic vinegar - 2 tablespoons honey - 2 tablespoons Dijon mustard - 4 cloves garlic, minced - 1 teaspoon dried oregano - 1 teaspoon salt - 1/2 teaspoon black pepper - 1 cup long-grain white rice - 2 cups chicken broth - 1 cup cherry tomatoes, halved - 1 cup fresh spinach - 2 tablespoons olive oil These ingredients come together to create a dish that is rich in flavor and easy to prepare. The chicken absorbs the tangy taste of balsamic vinegar, while the rice soaks up all the delicious juices. For a beautiful finish, add: - Fresh basil - Balsamic glaze Using fresh basil adds a burst of color and aroma. The balsamic glaze enhances the dish's sweetness and depth. These garnishes elevate the meal and make it visually appealing. The combination of flavors in this recipe makes every bite a delight. Start by combining the balsamic vinegar, honey, Dijon mustard, minced garlic, dried oregano, salt, and black pepper in a bowl. Whisk them together until you have a smooth mix. This marinade adds flavor to the chicken, making it juicy and tasty. Marinating the chicken is key. It helps the meat soak up all the flavors. I recommend marinating for at least 30 minutes. If you have more time, go for 4 hours for an even better taste. Next, heat olive oil in a large skillet over medium heat. Take the chicken out of the marinade, but save the leftover marinade for later. Place the chicken in the hot skillet. Cook it for about 5 to 7 minutes on each side. Look for a golden brown color and check that the chicken is fully cooked. It should reach an internal temperature of 165°F. While the chicken is cooking, rinse the rice under cold water. This removes extra starch and helps the rice become fluffy. After rinsing, toast the rice in the same skillet for 1 to 2 minutes. Stir it often to avoid burning. Once toasted, pour in the chicken broth and the reserved marinade. Bring the mix to a boil, then reduce the heat. Cover the skillet and let it simmer for about 15 minutes, until the rice is tender and absorbs the liquid. After 15 minutes, gently stir in the halved cherry tomatoes and fresh spinach. Cover the skillet again and let it cook for another 5 minutes. The spinach should wilt and turn bright green. Slice the cooked chicken and place it over the rice. Drizzle any remaining balsamic marinade on top for an extra flavor boost. To serve, transfer the dish to a platter and garnish with fresh basil leaves. Enjoy your delicious Balsamic Chicken & Rice! For the full recipe, check out the detailed instructions above. To boost flavor, you can try different herbs. Fresh thyme or rosemary work well. You might also add a splash of lemon juice for brightness. When marinating chicken, use a zip-top bag. This ensures every piece gets coated. Seal it tightly and refrigerate. Aim for at least 30 minutes, but 4 hours makes a big difference in taste. Using a skillet gives you a nice sear on the chicken. It also helps lock in the juices. If you prefer, you can use the oven. Bake at 375°F for about 25-30 minutes. To keep chicken juicy, don’t overcook it. Check the internal temperature. It should reach 165°F to be safe and tasty. Serve the chicken on a bed of rice for visual appeal. This creates a lovely contrast in colors. For added flair, drizzle balsamic glaze around the edge of the plate. Garnish with fresh basil leaves. They add a pop of color and a nice aroma. You can also use cherry tomatoes for a bright touch. {{image_4}} You can make this balsamic chicken even better by adding spices or herbs. Try adding rosemary or thyme for a fresh twist. A pinch of red pepper flakes can give it a nice kick. The key is to think about what flavors you love. You can also swap the chicken for other proteins. Pork works great with balsamic flavors. Tofu is a good choice for a vegetarian option. Just make sure to adjust the cooking time. Each protein has its own cooking needs. For a complete meal, pair this dish with sides that balance the flavors. A simple green salad with a light dressing is refreshing. Roasted broccoli or asparagus adds nice texture and color. You can also make quick vegetable sides. Sautéed green beans with garlic are fast and tasty. Steamed carrots with a bit of honey can add a sweet touch. Each side will enhance your balsamic chicken and rice, making it a feast for the eyes and the palate. When you have leftover Balsamic Chicken & Rice, store it properly. First, wait for the dish to cool down. Then, place it in an airtight container. This helps keep the flavors fresh. Store the container in the fridge. It should last for up to three days. If you want to save it for later, freezing is a great option. Divide the chicken and rice into smaller portions. Use freezer-safe bags or containers. Label them with the date. You can freeze it for up to three months. This way, you can enjoy a quick meal later. To reheat Balsamic Chicken & Rice, you have a few options. The best method is to use the oven. Preheat it to 350°F. Place your dish in an oven-safe container. Cover it with foil to keep moisture in. Heat it for about 20-25 minutes. This helps keep the chicken juicy and the rice fluffy. If you’re short on time, you can use the microwave. Place your portion in a microwave-safe dish. Add a splash of water to keep it moist. Cover it with a lid or microwave-safe wrap. Heat on medium for about 2-3 minutes. Check if it's hot throughout. If not, heat in 30-second bursts until warm. Marinating chicken takes at least 30 minutes. This time allows the chicken to soak in the flavors. If you want a bolder taste, marinate for up to 4 hours. The longer the chicken sits, the more flavorful it gets. Just be careful not to over-marinate, as it can change the texture. Yes, you can use brown rice. However, brown rice has a longer cooking time. It usually takes about 40-50 minutes to cook. White rice cooks faster, around 15 minutes. Also, brown rice has a nuttier flavor and a chewier texture. Choose based on your taste and time. Balsamic chicken can be gluten-free. The main ingredients are naturally gluten-free. Use gluten-free honey and Dijon mustard if needed. Always check labels for hidden gluten sources. This makes the dish safe for those with gluten sensitivities. Enjoy a tasty meal without worry! This article covered how to make a tasty balsamic chicken and rice dish. You learned about key ingredients and the importance of marinating. I shared step-by-step cooking instructions, tips for juicy chicken, and ideas for great presentation. Variations let you get creative, and storage tips ensure meals last longer. Enjoy cooking your dish with fresh flavors and simple techniques that impress. This meal will surely please your taste buds!

Looking for a quick and tasty meal? My Balsamic Chicken & Rice is just the answer! With simple ingredients like chicken, balsamic vinegar, and veggies, you can whip up a …

Read more

Categories Dinner

Taco Lasagna Loaded with Flavorful Ingredients

May 27, 2025 by Chef Tavio
- 1 lb ground beef or turkey - 12 corn tortillas - 1 can (15 oz) black beans, drained and rinsed Taco lasagna starts with your choice of meat. Ground beef adds richness, while turkey keeps it lean. I suggest using fresh corn tortillas. They hold the layers without falling apart. Black beans offer a nice texture and extra protein. Together, these create a hearty base. - 2 cups shredded cheddar cheese - 1 cup sour cream For the creamy goodness, I use shredded cheddar cheese. It melts beautifully and adds a sharp flavor. Sour cream brings a cool contrast to the dish. It also helps balance the spices, making each bite delightful. - 1 red bell pepper, diced - 1 can (10 oz) diced tomatoes with green chilies (plus juices) - 1 packet taco seasoning (about 1 oz) The red bell pepper adds sweetness and color to the lasagna. Diced tomatoes with green chilies provide moisture and a slight kick. Taco seasoning is key for that authentic flavor. It mixes all these tasty ingredients together. You will love how vibrant and rich this dish becomes. For the full recipe, you can explore the detailed steps to create this flavor-packed taco lasagna. - Preheat oven to 375°F (190°C). - Chop the onion and red bell pepper. - Mince the garlic and measure the taco seasoning. - In a large skillet, sauté the onions and garlic. - Cook for about 3-5 minutes until soft. - Add the ground beef or turkey to the skillet. - Brown the meat for about 6-8 minutes. - In an 8x11 inch baking dish, place 4 corn tortillas at the bottom. - Make sure they slightly overlap for full coverage. - Spread half of the meat and bean mixture on top. - Add half of the sour cream, dolloping it over the meat. - Sprinkle 1 cup of cheese over everything. - Repeat with another layer of 4 tortillas. - Add the rest of the meat mixture, sour cream, and cheese. - Finish with the last 4 tortillas on top. - Spread the last cheese evenly on the top layer. - Cover with foil and bake for 25 minutes. - Remove the foil and bake for another 15 minutes until bubbly. - Let it rest for 10 minutes before slicing. - Garnish with fresh cilantro and jalapeños if desired. Sautéing is key to great flavors. Start by heating a skillet over medium heat. Add oil, then onions and garlic. Stir for 3-5 minutes until soft. This step builds a good base. For even cooking, break up the meat as it browns. This ensures no big clumps remain. Cook until no pink is left, about 6-8 minutes. Spices can boost your taco lasagna. Taco seasoning is a must, but feel free to add more. Try chili powder for heat or cumin for depth. Fresh herbs like cilantro add brightness. You can also customize it. Add black olives or diced jalapeños for extra flavor. Don't be shy with your choices. Pair taco lasagna with fresh sides for a great meal. A simple green salad helps balance the dish. Consider serving with corn on the side for sweetness. Presentation is also important. Serve on a colorful plate. Add a sprinkle of cilantro and a dollop of sour cream. This makes the dish pop and look inviting. For the full recipe, check out Taco Lasagna Delight . {{image_4}} You can choose different meats for your taco lasagna. Ground beef is classic and full of flavor. Ground turkey is a great lean option that still tastes good. If you want to skip meat, try using lentils or mushrooms. Both give a hearty flavor and texture. You can make a tasty vegetarian taco lasagna that everyone will enjoy. Cheese makes taco lasagna creamy and rich. Shredded cheddar cheese is a top choice. You can also use mozzarella for a milder taste. Mixing cheeses adds depth to the dish. Try combining pepper jack for a little kick. This mix creates a great cheese blend that melts perfectly. Want some spice? You can add heat to your taco lasagna in many ways. Mix in jalapeños or crushed red pepper for a zesty touch. You can adjust how spicy your dish is. Just add a little at a time until it’s right for you. Even a hint of hot sauce can enhance the flavors. Make your taco lasagna as spicy or mild as you like! To store taco lasagna in the fridge, let it cool completely. Cover it tightly with plastic wrap or foil. You can also use an airtight container. This keeps the flavors fresh and prevents drying out. It’s best to eat it within 3-4 days for the best taste. If you want to freeze taco lasagna, let it cool first. Cut it into serving sizes. Wrap each piece in plastic wrap and then aluminum foil. Place the wrapped pieces in a freezer bag or container. This way, they stay fresh for up to 3 months. To thaw, put it in the fridge overnight. For reheating, use an oven at 350°F (175°C) for about 20-30 minutes. You can also microwave individual pieces for quick meals. Taco lasagna lasts about 3-4 days in the fridge. If frozen, it can last up to 3 months. Always check for signs of spoilage before eating. Enjoy the flavors at their best by following these tips! Yes, you can make taco lasagna ahead of time. Prepare it up to the baking step. Then, cover it tightly with foil and store it in the fridge. It stays fresh for 2-3 days. When you're ready to bake, heat your oven to 375°F (190°C). Bake it for about 40-50 minutes, or until it’s hot and bubbly. This option saves you time on busy days. If you need a substitute for sour cream, you have options. Greek yogurt works well and has a similar tangy flavor. You can also use cottage cheese or a dairy-free yogurt for a lighter touch. For those with allergies, consider using silken tofu blended until smooth. Each option keeps your taco lasagna creamy and delicious. To check if your lasagna is fully cooked, look for a bubbly texture. The cheese should be golden and slightly crisp. You can also insert a knife in the center. It should feel hot to the touch. If it’s still cold or firm, it needs more time. Allow it to rest for 10 minutes before slicing for best results. Yes, taco lasagna can be gluten-free. Use corn tortillas as a base instead of flour ones. Check the labels to ensure they are certified gluten-free. You can also swap in gluten-free pasta sheets for a unique twist. This way, everyone can enjoy this tasty dish without worry. Reheating taco lasagna is easy. Preheat your oven to 350°F (175°C). Place the slices in an oven-safe dish and cover with foil. Bake for about 20 minutes or until heated through. You can also microwave slices for 1-2 minutes, but be careful not to dry it out. Adding a bit of water before covering can help keep it moist. For the [Full Recipe], check out the complete guide on making this delightful dish. This blog post covered all the steps to make a delicious taco lasagna. We discussed the main ingredients like ground beef, corn tortillas, and black beans. I shared tips on cooking and layering for the best results. I also highlighted variations, storage methods, and answered common questions. Taco lasagna is fun and easy to make! You can customize it to fit your taste. Enjoy this tasty dish for your next meal or gathering.

Are you ready to elevate your dinner game? Taco Lasagna is a fun twist on classic lasagna, packed with rich flavors and easy-to-find ingredients. This dish layers hearty ground meat, …

Read more

Categories Dinner

Lemon Cheesecake Squares Delightful and Creamy Treat

May 27, 2025 by Chef Tavio
- 1 cup graham cracker crumbs - 1/4 cup unsalted butter, melted - 2 tablespoons granulated sugar - 16 ounces cream cheese, softened to room temperature - 1 cup granulated sugar - 3 large eggs, at room temperature - 1/4 cup fresh lemon juice (about 2 lemons) - Zest of 2 lemons - 1 teaspoon vanilla extract - 1/4 teaspoon salt - Powdered sugar, for dusting - Fresh berries (such as strawberries, blueberries, or raspberries), for garnish (optional) Using fresh ingredients is key for great taste. Fresh lemons give the best flavor. Pre-packaged items may lack that bright zing. For example, real cream cheese makes a big difference. It should be smooth and rich. Quality ingredients lead to better texture too. Cream cheese should be soft and lump-free. Each serving has about 180 calories. There are 12 grams of fat and 16 grams of carbs. You also get 3 grams of protein. These squares are rich and tasty. Enjoy them as a treat, but keep portion sizes in mind. 1. Preheat your oven to 325°F (160°C). 2. Grease an 8x8-inch baking pan with cooking spray. 3. Line the pan with parchment paper, leaving some paper hanging over the edges. 4. In a bowl, combine 1 cup graham cracker crumbs, 1/4 cup melted butter, and 2 tablespoons sugar. 5. Stir until the crumbs feel like wet sand. 6. Press the crumb mixture into the bottom of the pan, making it even. 7. Bake this crust for 10 minutes, then let it cool a bit. 1. In a large bowl, beat 16 ounces of softened cream cheese until smooth. 2. Add 1 cup of sugar slowly while mixing. 3. Beat until the mixture is light and fluffy. 4. Add 3 large eggs one at a time, mixing on low. 5. Don't overmix; just blend until combined. 6. With the mixer on low, add 1/4 cup lemon juice, lemon zest, 1 teaspoon vanilla, and 1/4 teaspoon salt. 7. Mix until smooth, creating a creamy filling. 8. Pour this filling over the cooled crust, smoothing it with a spatula. 1. Bake the cheesecake for 30-35 minutes. 2. The edges should look set, but the center will be a bit jiggly. 3. Once done, take it out of the oven and cool it for 1 hour at room temperature. 4. After that, move it to the fridge for at least 4 hours, or overnight for the best texture. 5. When ready, lift it out using the parchment paper. 6. Cut into squares and dust with powdered sugar. 7. Add fresh berries if you like for a colorful touch. For the full recipe, check out the link provided. To make smooth lemon cheesecake squares, avoid cracks on top. Start by mixing the cream cheese until it's very smooth. Use a mixer on medium speed for 2-3 minutes. This helps break down lumps. When adding eggs, do it one at a time. Mix on low speed. Overmixing can add air, which causes cracks. Bake at the right temperature. If the edges are set and the center jiggles slightly, it’s ready. Let it cool slowly to keep it from cracking. Want more zing? Add flavor extracts or zest. A splash of almond extract can add depth. You can mix lemon zest in for a stronger citrus flavor. Balancing sweetness is key. If your cheesecake is too sweet, add a touch more lemon juice. This gives a nice tartness. Taste as you mix to ensure it’s just right for your liking. Plating makes your dessert pop. Cut the squares evenly for a nice look. Use a colorful plate or platter to make it inviting. Dust with powdered sugar for a sweet touch. Fresh berries add color and taste. Arrange them artfully around the squares. Add mint leaves for a fresh look. These little touches make your lemon cheesecake squares shine at any gathering. For the full recipe, check the earlier section. {{image_4}} You can switch up the crust for your lemon cheesecake squares. If you want a fun twist, try using crushed Oreos. They add a rich chocolate taste. Just mix the crumbs with melted butter. For a gluten-free option, use almond flour or gluten-free graham crackers. The taste remains great while keeping it safe for gluten-sensitive guests. Want to change the flavor? You can use lime or orange juice instead of lemon. These citrus fruits bring a fresh and bright taste. If you love chocolate, swirl in melted chocolate into the filling. You can also add fruit purees, like raspberry or strawberry, for a fruity surprise. Each option gives your cheesecake squares a new identity. Elevate your presentation with tasty toppings. You can dust the squares with powdered sugar for a sweet finish. Adding a layer of fruit compote on top adds flavor and color. A drizzle of chocolate sauce makes it look fancy and delicious. Fresh mint leaves can also make your dessert pop. These simple touches make your lemon cheesecake squares even more appealing. For the complete recipe, refer to the [Full Recipe]. To keep your lemon cheesecake squares fresh, store them in the fridge. Use an airtight container. This helps maintain their creamy texture and zesty flavor. Always let them cool completely before covering. If they’re warm, condensation can form and affect the taste. You can freeze lemon cheesecake squares for later enjoyment. First, cut them into squares. Wrap each piece tightly in plastic wrap. Place the wrapped squares in a freezer-safe bag. They can stay frozen for about three months. When ready to eat, thaw them in the fridge overnight for the best texture. Lemon cheesecake squares are best enjoyed within five days when stored in the fridge. Check for any signs of spoilage. If you see mold or an off smell, it's time to toss them. Keeping an eye on freshness helps you enjoy these treats at their best. For the full recipe, check out [Full Recipe]. To tell if your lemon cheesecake squares are done, look for a few signs. First, the edges should appear set and firm. The center will have a slight jiggle, which is normal. You can also check with a toothpick. Insert it in the center; it should come out mostly clean but may have a few crumbs. If it’s too wet, bake for a few more minutes. Keep an eye on them to avoid overbaking. Yes, you can make lemon cheesecake squares ahead of time. This treat actually tastes better when it sits. Prepare them the day before, then chill in the fridge for at least four hours. For best taste, overnight chilling is best. Once cooled, cover them tightly with plastic wrap. This keeps them fresh and tasty. Just remember to dust with powdered sugar right before serving. Yes, you can substitute some ingredients in this recipe. For a dairy-free option, use vegan cream cheese. You can also use almond or coconut milk for the cream cheese. If you need an egg substitute, use flaxseed meal or applesauce. For each egg, mix one tablespoon of flaxseed with three tablespoons of water. Let it sit for a few minutes to thicken. This keeps your squares moist and tasty. In this article, we explored how to create delicious lemon cheesecake squares. We discussed essential ingredients, emphasizing the quality of each one. I shared step-by-step instructions for making your dessert, from preparation to baking. Tips on achieving the perfect texture and flavor were included, along with variations and storage information. Remember, using fresh ingredients makes a big difference in taste. Keep experimenting with flavors and presentations. Enjoy your baking journey!

Are you ready to indulge in a treat that balances tart and sweet perfectly? My Lemon Cheesecake Squares are creamy, zesty, and utterly delightful! In this post, I’ll guide you …

Read more

Categories Desserts

Delectable Apple Cheesecake Tacos Easy Dessert Idea

May 27, 2025 by Chef Tavio
- 1 large apple (preferably Granny Smith or Honeycrisp), peeled, cored, and diced - 1 tablespoon unsalted butter - 1 teaspoon ground cinnamon - 2 tablespoons packed brown sugar - 1 cup cream cheese, softened at room temperature - 1/2 cup powdered sugar - 1 teaspoon pure vanilla extract - 8 small flour tortillas - 1/4 cup chopped walnuts (optional for extra crunch) - Whipped cream, for topping - Fresh mint leaves, for optional garnish I often use brands like Philadelphia for cream cheese. Their cream cheese gives a smooth and creamy texture. For tortillas, I like to choose Mission or TortillaLand. Both brands offer fresh and soft tortillas. For apples, Granny Smith and Honeycrisp are my go-to choices. They add the right tartness and sweetness to the dish. If you don’t have cream cheese, try using mascarpone. It works well and tastes great. For a dairy-free option, look for vegan cream cheese. In place of brown sugar, you can use coconut sugar for a different flavor. If you need a gluten-free version, swap the flour tortillas for corn tortillas. They will still hold the filling nicely. To make the apples soft and sweet, start by melting unsalted butter in a skillet over medium heat. Once the butter melts, add the diced apples. Sprinkle in ground cinnamon and brown sugar. Stir everything well to coat the apples. Cook them for about 5-7 minutes. You want the apples to become tender and a bit caramelized. When they are done, take them off the heat and let them cool slightly. For the creamy filling, take a medium bowl. Mix together softened cream cheese, powdered sugar, and vanilla extract. Use an electric mixer or a whisk to beat this mixture until it is smooth and creamy. Make sure there are no lumps. This will create a nice texture for your tacos. Now, let’s put it all together. First, warm your flour tortillas. You can do this in a skillet for 20-30 seconds on each side or in the microwave for 10-15 seconds while wrapped in a damp paper towel. This makes them soft and easy to fold. Lay each warm tortilla flat on a plate. Spread a generous layer of the cream cheese filling in the center. Be careful not to let it spill over the edges. Next, spoon the sautéed apple mixture over the cheesecake layer. Make sure to distribute it evenly. If you want some crunch, sprinkle chopped walnuts over the apples. Now, fold each tortilla in half to make a taco shape. Place them neatly on serving plates. Finally, top each taco with whipped cream. For extra flair, add fresh mint leaves as a garnish. Enjoy your delicious Apple Cheesecake Tacos! You can find the full recipe in the section above. To make the apples shine, choose the right kind. Granny Smith apples add tartness. Honeycrisp apples offer sweetness. Both types have a crisp bite. Sauté the apples until they caramelize. This step enhances their natural sweetness. Use ground cinnamon to boost flavor. You can also try nutmeg or allspice for variety. The key is to balance the sweet and tart notes. For a creamy filling, use room-temperature cream cheese. This helps it mix smoothly. Combine cream cheese, powdered sugar, and vanilla extract well. Beat until you have a lump-free texture. If you want a lighter filling, fold in some whipped cream. This adds air and makes it fluffy. Warm tortillas before using them. This makes them soft and easy to fold. You can heat them in a skillet or microwave. If using the microwave, wrap them in a damp paper towel. This keeps them moist. Handle them gently to avoid tearing. If they do tear, don’t worry! Just use them as is. You can still fill and enjoy them. For a unique twist, try frying the tortillas for a crispy shell. You can find the full recipe to guide you further. {{image_4}} You can change up the flavors in your apple cheesecake tacos. Try adding spices like nutmeg or ginger for a warm kick. You can also mix in other fruits. Pears or berries add a fresh burst of flavor. Each fruit brings its own taste, making every bite unique. This keeps your dessert exciting and fun. Toppings can elevate your tacos. A drizzle of caramel sauce adds sweetness and richness. Chocolate chips offer a delightful contrast to the creamy filling. You could also try crushed graham crackers for a crunchy bite. Don't forget whipped cream on top; it adds a fluffy texture that everyone loves. If you need to make this dish fit your diet, it’s easy to modify. For a vegan version, use plant-based cream cheese and replace butter with coconut oil. You can also use corn tortillas for a gluten-free option. These swaps keep the flavor while fitting different dietary needs. Enjoy your dessert without worry! To keep your Apple Cheesecake Tacos fresh, place them in an airtight container. Use parchment paper between the layers to prevent sticking. Store the tacos in the fridge if you plan to eat them within a few days. Reheat your tacos in a skillet over medium heat. This keeps the tortillas soft and warm. Heat them for about 1-2 minutes on each side. You can also warm them in the microwave. Just place them on a plate and cover with a damp paper towel. Heat for 15-20 seconds. Apple Cheesecake Tacos stay fresh for about 3 days in the fridge. They taste best when eaten right away, but you can still enjoy them later. If you freeze them, use them within a month for the best flavor. When ready to eat, thaw in the fridge overnight and reheat. You can use corn tortillas if you prefer a gluten-free option. Corn tortillas are sturdy and will hold the filling well. You can also try large lettuce leaves for a lighter touch. They add a nice crunch and fresh flavor. If you want something sweet, consider using crepes. They give a unique twist to the classic taco. Yes, you can prepare parts of this recipe ahead of time. You can sauté the apples and make the cream cheese filling a day in advance. Just store them in the fridge. When you're ready to serve, warm the tortillas and assemble the tacos. This way, you save time and still enjoy a fresh dessert. To keep your tacos crisp, warm the tortillas just before serving. Avoid overfilling them. Use a paper towel to absorb any excess moisture from the apple filling. If you want extra crunch, serve the tacos immediately after filling them. Enjoy them fresh for the best taste and texture. In this post, we covered the key ingredients, from recommended brands to substitutions. You learned how to sauté apples, make a creamy filling, and assemble tasty tacos. We shared tips for flavor, texture, and handling tortillas. Plus, we explored variations to suit your taste and dietary needs. Don't forget to store your leftovers properly for the best taste later. With these steps and tricks, you can whip up delicious apple tacos that impress anyone. Enjoy the process and have fun experimenting with flavors!

If you’re craving a fun twist on dessert, you’re in for a treat! Apple Cheesecake Tacos combine sweet apples and creamy cheesecake in crispy tortillas. This easy dessert idea is …

Read more

Categories Desserts

Chocolate Cherry Cookies Delightfully Sweet Treats

May 27, 2025 by Chef Tavio
To bake these delightful cookies, you need a few key items. Gather the following essential ingredients: - 1 cup all-purpose flour - 1/2 cup unsweetened cocoa powder - 1/2 teaspoon baking soda - 1/4 teaspoon salt - 1/2 cup unsalted butter, softened - 3/4 cup brown sugar, tightly packed - 1/4 cup granulated sugar - 1 large egg, at room temperature - 1 teaspoon vanilla extract - 1 cup dark chocolate chips - 1/2 cup dried cherries, finely chopped These ingredients create a rich and sweet flavor that makes each bite a treat. You can elevate your cookies even more by adding optional ingredients. Consider these: - 1/4 teaspoon almond extract Almond extract gives a nice nutty hint. It pairs well with chocolate and cherries, making your cookies even more special. If you have dietary needs, you can make swaps. Here are some substitutions: - Use gluten-free flour instead of all-purpose flour for a gluten-free option. - Replace unsalted butter with coconut oil or vegan butter for a dairy-free version. - Use maple syrup or agave instead of brown sugar for a lower-glycemic sweetener. These changes keep the spirit of the cookies while catering to different diets. For the full recipe, check out the instructions above. First, preheat your oven to 350°F (175°C). While the oven heats, grab a baking sheet. Line it with parchment paper. This helps the cookies not to stick. In a medium bowl, mix your dry ingredients. Whisk together 1 cup of flour, 1/2 cup of cocoa powder, 1/2 teaspoon of baking soda, and 1/4 teaspoon of salt. Make sure they blend well. Set this bowl aside for later. Take a large bowl and add 1/2 cup of softened butter. Next, add 3/4 cup of packed brown sugar and 1/4 cup of granulated sugar. Use a hand mixer or stand mixer. Mix on medium speed until it gets light and fluffy. This should take about 2-3 minutes. Now, add 1 large egg and 1 teaspoon of vanilla extract to the butter-sugar mix. Blend these in until fully combined. If you want, you can add 1/4 teaspoon of almond extract for extra flavor. Gradually add the dry mix to the wet mix. Use a spatula to stir gently until everything just comes together. It’s fine if some flour is still visible. Then, fold in 1 cup of dark chocolate chips and 1/2 cup of finely chopped dried cherries. Make sure they spread evenly in the dough. Follow the [Full Recipe] for more details on baking. To get that ideal cookie texture, you want to balance softness and chewiness. Use room-temperature butter and egg. This helps mix them well, giving a smooth batter. Avoid overmixing when combining wet and dry ingredients. A few flour streaks are okay. This keeps the cookies soft. Also, watch the baking time. Pull them from the oven when the edges are firm, but the centers look soft. They will continue to cook after you take them out. Baking can be tricky, but some mistakes are easy to fix. First, always measure your ingredients accurately. Too much flour can make cookies dry. Use a kitchen scale or measuring cups. Second, make sure your oven is at the right temperature. An oven thermometer can help. If your cookies spread too much, chill the dough for 30 minutes before baking. This helps them hold their shape. Lastly, keep an eye on the cookies as they bake. Every oven is different. Let the cookies cool on the baking sheet for about 5 minutes. This lets them set. After that, transfer them to a wire rack. This helps air circulate and keeps them from getting soggy. Store the cookies in an airtight container at room temperature. They stay fresh for about a week. If you want to keep them longer, freeze them. Wrap the cookies in plastic and place them in a freezer bag. They last for up to three months. For the best flavor, let them thaw at room temperature before eating. {{image_4}} To make vegan chocolate cherry cookies, swap the egg for flaxseed meal. Mix 1 tablespoon of flaxseed meal with 3 tablespoons of water. Let it sit for a few minutes to thicken. Use coconut oil instead of butter. Choose dark chocolate chips that are dairy-free. This way, you can enjoy a tasty treat without any animal products. For gluten-free cookies, replace all-purpose flour with a gluten-free blend. Make sure it includes xanthan gum for better texture. Use gluten-free baking powder and check the chocolate chips to ensure they are gluten-free. This recipe still delivers that sweet chocolate and cherry flavor you love, with a safe option for gluten sensitivity. You can get creative with your cookies! Try adding nuts like walnuts or pecans for crunch. You can also mix in some orange zest for a citrus twist. If you love spice, a pinch of cinnamon can give your cookies a warm flavor. You can even swap dried cherries for dried cranberries or blueberries. These small changes can make your cookies unique. Each variation allows you to make a delightful treat that suits your tastes. For the full recipe, check out the details above! To keep your chocolate cherry cookies fresh, store them in an airtight container. This method keeps them moist and chewy. Place a piece of bread in the container to help with moisture. The bread absorbs air and keeps the cookies soft. Store them at room temperature for up to a week. If you want to keep them longer, freezing is a great option. You can freeze chocolate cherry cookies for up to three months. First, let the cookies cool completely. Then, place them in a single layer on a baking sheet and freeze for about an hour. This step helps keep their shape. After that, transfer the cookies to a freezer-safe bag or container. Label the bag with the date. When you want a cookie, just take out what you need. To keep cookies fresh, avoid storing them in the fridge. The cold air can dry them out. Instead, keep them in a cool, dry place. Ensure the container is sealed tightly to keep out air. You can also layer parchment paper between cookies to prevent sticking. With these tips, your chocolate cherry cookies will stay delicious and tempting! For the full recipe, check out the full recipe section. To make cookies soft, use more brown sugar. Brown sugar has moisture that helps keep cookies tender. You can also bake them for a shorter time. Remove them when the edges are set but the center is still soft. Yes, you can use fresh cherries. However, fresh cherries have more moisture. You should chop them and remove the pits. You may need to reduce other liquid ingredients in your recipe to balance the extra moisture. Chocolate Cherry Cookies go well with milk or coffee. The milk complements the chocolate, while coffee enhances the rich flavors. For a twist, try a cherry soda or a cherry-infused tea. These cookies can last about 3 to 5 days at room temperature. Store them in an airtight container to keep them fresh. You can also add a slice of bread to absorb moisture and help keep them soft. To reheat cookies, use an oven or microwave. In the oven, set it to 350°F (175°C) and bake for 5 minutes. In the microwave, heat each cookie for about 10-15 seconds. Both methods will help restore that warm, gooey texture. For the full recipe, check out Chocolate Cherry Bliss Cookies. You’ve learned how to make delicious chocolate cherry cookies. We covered essential and optional ingredients. You now know step-by-step instructions for perfect cookies. I shared tips to avoid mistakes and variations for special diets. Remember to store your cookies properly to keep them fresh. With this guide, you can impress your friends and family. Happy baking! Enjoy every bite of your cookies.

Indulging in Chocolate Cherry Cookies is a treat you don’t want to miss! These sweet delights blend rich chocolate and tart cherries, creating a cookie the whole family will love. …

Read more

Categories Desserts

Cilantro Lime Chicken & Rice Bowl Flavorful Delight

May 27, 2025 by Chef Tavio
- 2 boneless, skinless chicken breasts - 1 cup uncooked jasmine rice - 2 cups chicken broth - 1/4 cup fresh cilantro, finely chopped - 1 lime (zested and juiced) - 2 tablespoons extra virgin olive oil - 2 cloves garlic, finely minced - 1 teaspoon ground cumin - 1 teaspoon smoked paprika - Salt and freshly ground pepper to taste - 1 ripe avocado, sliced - 1/2 cup cherry tomatoes, halved - 1/4 cup red onion, finely diced - 1/4 teaspoon red pepper flakes (optional) The key to a great Cilantro Lime Chicken & Rice Bowl lies in its fresh ingredients. The chicken provides a juicy base. Jasmine rice adds a lovely texture. Chicken broth enhances the rice's flavor. I love using fresh cilantro for its bright taste. Lime juice gives a zesty kick. Extra virgin olive oil adds richness. Garlic, cumin, and smoked paprika blend well to create depth. For toppings, I suggest ripe avocado. It adds creaminess. Cherry tomatoes bring color and sweetness. Red onions provide a crisp bite. If you like heat, sprinkle red pepper flakes on top for extra spice. You can find the complete list of ingredients in the Full Recipe. 1. Heat olive oil and sauté garlic: In a medium saucepan, heat one tablespoon of olive oil over medium heat. Once the oil is hot, add two cloves of finely minced garlic. Sauté for about one minute until fragrant, being careful not to let it brown. 2. Add rice and coat with oil: Next, add one cup of uncooked jasmine rice to the saucepan. Stir the rice vigorously for one minute. This coats the rice grains in oil and enhances the flavor. 3. Cook with chicken broth: Pour in two cups of chicken broth. Bring the mixture to a rolling boil. Once boiling, reduce the heat to low, cover, and let it simmer for about 15 minutes. The rice should be tender and all liquid absorbed. Use a fork to fluff the rice and set it aside. 1. Prepare the lime seasoning mixture: In a small bowl, mix the zest and juice of one lime with one teaspoon of ground cumin and one teaspoon of smoked paprika. Add salt and pepper to taste. This mixture will give your chicken a bright flavor. 2. Sauté chicken in skillet: Heat the remaining tablespoon of olive oil in a large skillet over medium-high heat. Season both sides of two boneless, skinless chicken breasts with salt and pepper. Carefully place the chicken breasts in the skillet. 3. Brush lime mixture during cooking: Cook each side for about six to seven minutes. Check for doneness; the internal temperature should reach 165°F (75°C). Brush the prepared lime mixture generously over the chicken during the last two minutes of cooking for maximum flavor. 1. Let chicken rest before slicing: Once the chicken is done, remove it from the skillet. Allow it to rest for three to five minutes. This lets the juices redistribute, keeping the chicken moist. 2. Combine rice with cilantro and lime juice: In a separate bowl, combine the cooked rice with a quarter cup of finely chopped fresh cilantro. Add a squeeze of fresh lime juice for an extra zing. Stir gently to mix the flavors well. 3. Layer chicken and toppings in bowls: Start with a generous scoop of the cilantro lime rice as the base in your bowl. Layer on the sliced chicken. Then, add toppings like sliced avocado, halved cherry tomatoes, and diced red onion. For a spicy kick, sprinkle a quarter teaspoon of red pepper flakes on top before serving. Enjoy your delightful Cilantro Lime Chicken & Rice Bowl! For the complete recipe, refer to the Full Recipe section. - To achieve moist chicken, always let it marinate. The lime juice helps tenderize the meat. - For fluffy rice, rinse the jasmine rice under cold water before cooking. This removes excess starch. - Resting the chicken is key. Let it sit for 3-5 minutes after cooking. This keeps juices inside. - Use fresh cilantro for the best taste. Look for bright green leaves without wilting. - For alternative oils, try avocado oil or coconut oil. They add unique flavors. - Adjust spice levels by adding more or fewer red pepper flakes. Taste as you go. - Garnish with extra cilantro or lime wedges for a pop of color. - Arrange the chicken over the rice, then top with avocado and tomatoes. This makes it look appealing. - Add colors and textures by including crunchy radishes or colorful bell peppers. These make the bowl vibrant and fun. For more details, check the Full Recipe. {{image_4}} You can easily change some ingredients in this dish to suit your taste. Here are some ideas: - Brown rice: Swap jasmine rice for brown rice. It adds a nutty flavor and more fiber. - Shrimp or tofu: Instead of chicken, use shrimp or tofu for protein. They both soak up flavors well. - Add vegetables: Toss in bell peppers or corn for extra color and crunch. They make the bowl even more fresh. You can create different flavor profiles with simple swaps. Here are three tasty ideas: - Southwest version: Add black beans and corn for a hearty twist. This version is full of flavor and filling. - Mediterranean twist: Crumble feta cheese and add olives for a salty kick. It pairs well with the lime. - Asian-inspired: Mix in soy sauce or sesame oil for a unique taste. This adds depth and a savory touch. Pair your Cilantro Lime Chicken & Rice Bowl with these fun ideas: - Side dishes: Serve this bowl with a simple salad or tortilla chips. They add texture and balance. - Drink pairings: Enjoy with limeade or iced tea. Both drinks complement the bright flavors of the bowl. - Meal prep tips: Make extra rice and chicken for easy meals during the week. Store them in separate containers for quick assembly. For the full recipe, check out the detailed instructions provided. Enjoy your cooking adventure! To keep leftovers fresh, store the chicken and rice in an airtight container. Make sure to let them cool before sealing. This helps to avoid steam buildup. You can safely refrigerate your leftovers for up to three days. Always check for signs of spoilage before eating. If you want to freeze your bowls, it’s best to separate the components. Freeze the chicken and rice in different containers. This keeps both ingredients tasting fresh. Use freezer-safe bags or containers for best results. Make sure to label them with the date. You can store them for up to three months. To reheat the rice, add a splash of water and cover it. Use the microwave or a stovetop over low heat. For the chicken, use the microwave or skillet until it’s hot. Ensure both reach an internal temperature of 165°F to stay safe. This keeps the flavors intact while making sure your meal is safe to enjoy. How long does cooked chicken last in the fridge? Cooked chicken lasts about 3 to 4 days in the fridge. Store it in an airtight container. This keeps the chicken fresh and safe to eat. Can I use other types of rice for this recipe? Yes, you can use other types of rice. Brown rice or basmati rice work well too. Just adjust the cooking time as needed. What can I substitute for cilantro if I don’t like it? If you don’t like cilantro, try parsley or basil. Both add a fresh taste to your dish. You can also skip herbs for a different flavor. Can I make this dish ahead of time? Yes, you can prepare this dish ahead. Cook the chicken and rice, then store them separately. Reheat them when you are ready to serve. Is it possible to prepare the rice and chicken separately? Absolutely! You can cook the rice and chicken at different times. This allows you to control flavors and freshness. What kitchen tools do I need for this recipe? You will need a medium saucepan, a large skillet, and a cutting board. A sharp knife and measuring cups will also help with prep. Is this dish gluten-free? Yes, this dish is gluten-free. Use gluten-free chicken broth to keep it safe for those with gluten sensitivities. Tips for making a low-carb version To make a low-carb version, swap rice for cauliflower rice. This keeps the meal light yet still very tasty. How can this recipe be made dairy-free? This recipe is naturally dairy-free. Just avoid using any dairy toppings like cheese. Enjoy the fresh flavors as they are! This dish combines simple ingredients with big flavor. You can create a tasty meal with chicken, rice, and fresh toppings easily. From cooking tips to ingredient swaps, I’ve shared ways to make this recipe your own. Remember, taking time to rest the chicken and season well makes a big difference. With these steps, you can impress your family or friends. Enjoy your cooking journey, and feel proud of your flavorful bowls!

Are you ready to tantalize your taste buds? My Cilantro Lime Chicken & Rice Bowl brings fresh flavors straight to your kitchen. With juicy chicken, zesty lime, and fragrant cilantro, …

Read more

Categories Dinner
Older posts
Newer posts
← Previous Page1 … Page42 Page43 Page44 … Page53 Next →

TASTED NEST

Where Flavor Finds a Home 🍳🏡 — warm, simple, and crave-worthy recipes made for real life, from stovetop mornings to backyard dinners.

PAGES

Home About Contact Privacy Policy Terms & Conditions Cookie Policy GDPR Policy Copyright Policy Disclaimer

CATEGORIES

Appetizers Desserts Salads Breakfast Dinner

Contact

  • Pinterest
  • Mail
Copyright © 2025 Tasted Nest. All rights reserved.