Egg Roll in a Bowl Stir-Fry Flavorful Simple Meal
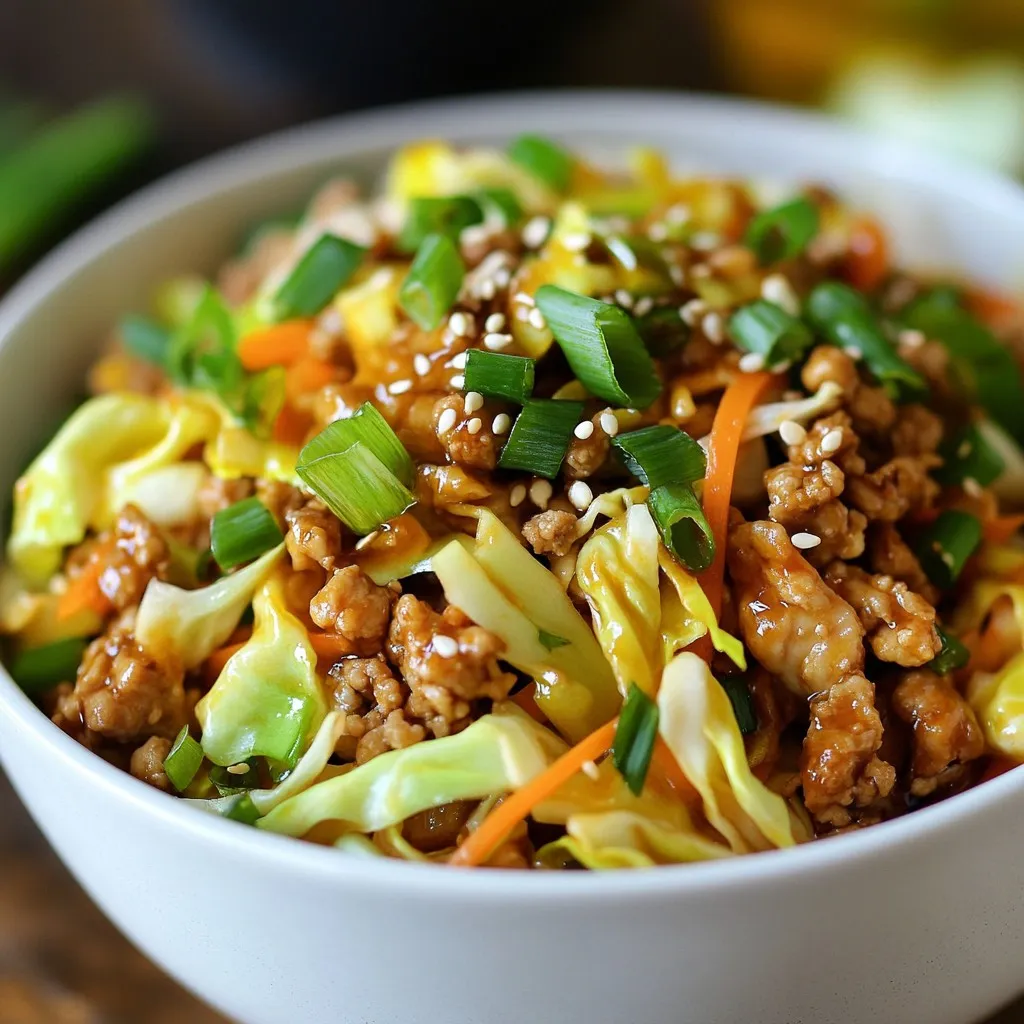
Are you craving a tasty meal that’s both quick and simple? Look no further than my Egg Roll in a Bowl Stir-Fry! This dish packs all the flavors of your …
Are you craving a tasty meal that’s both quick and simple? Look no further than my Egg Roll in a Bowl Stir-Fry! This dish packs all the flavors of your …
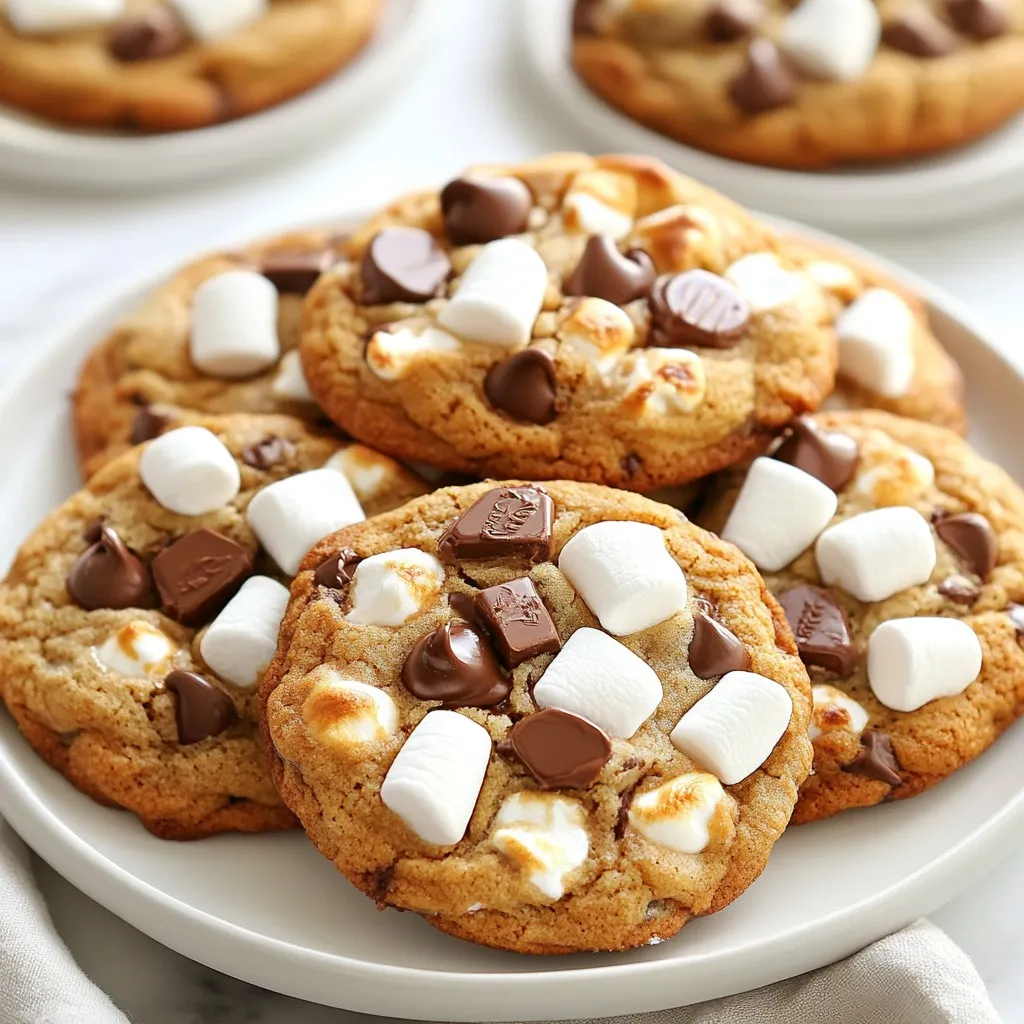
Get ready for a treat that combines campfire fun with kitchen magic—gooey s’mores cookies! Imagine soft, chewy cookies packed with chocolate, marshmallows, and graham crackers. This recipe is simple and …
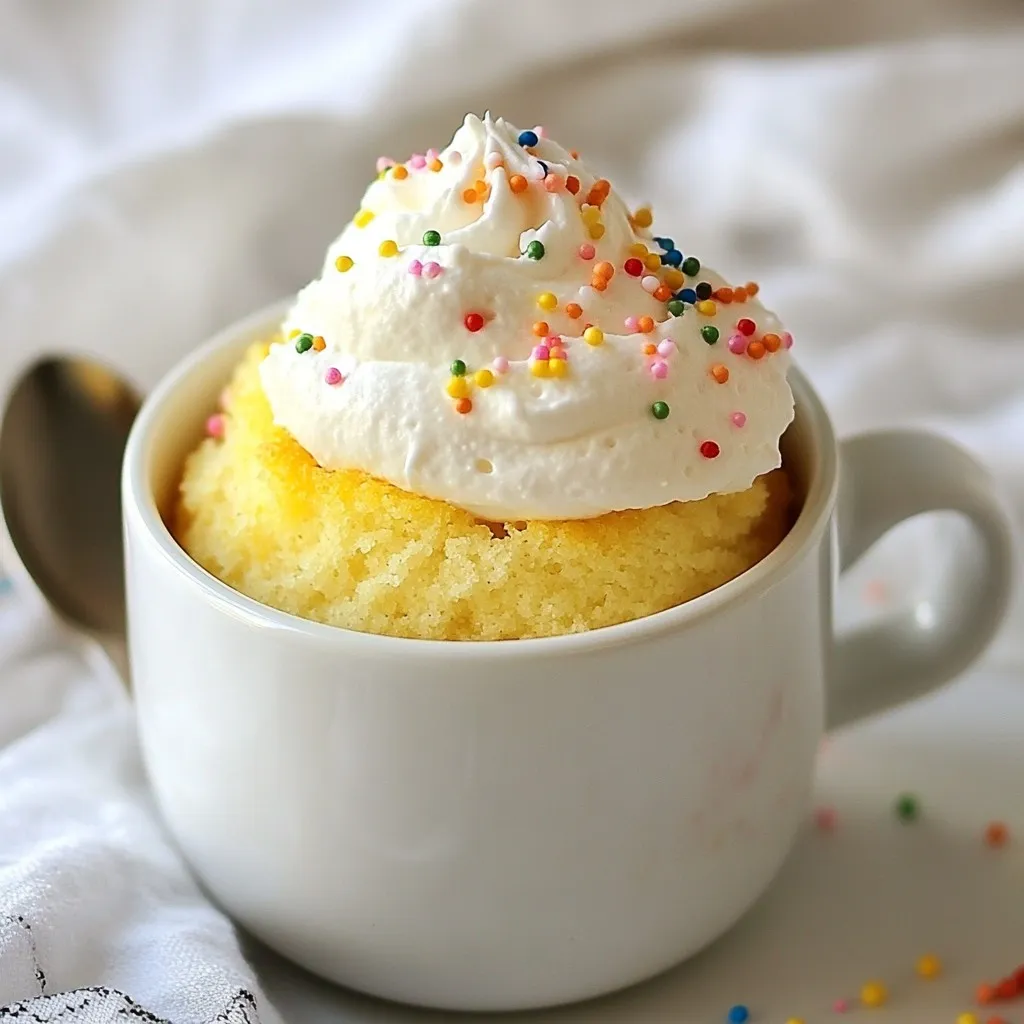
Craving a quick and tasty dessert? Look no further! This Second Vanilla Mug Cake recipe is simple and delicious, perfect for satisfying your sweet tooth in minutes. With just a …
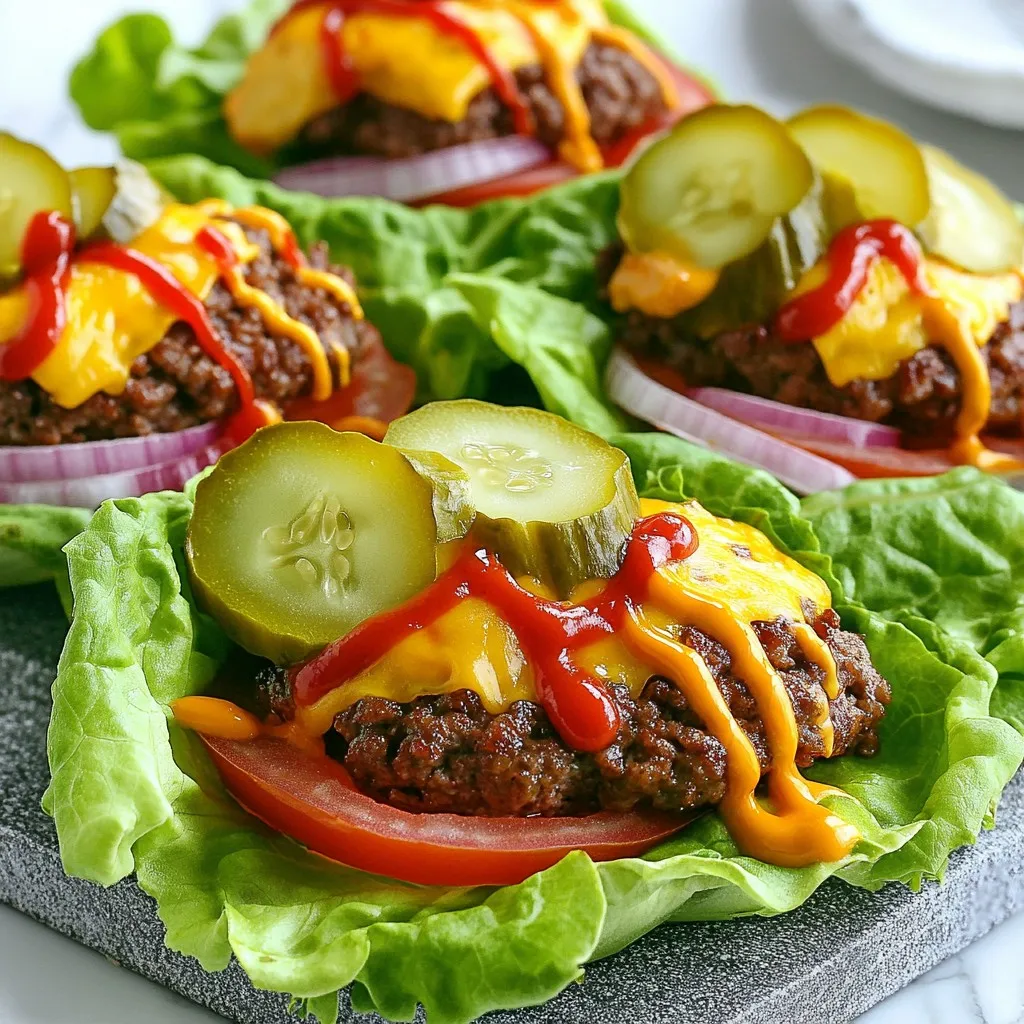
Are you craving a delicious twist on the classic cheeseburger? Try my Bunless Cheeseburger Lettuce Wraps! These wraps swap the bun for fresh, crunchy lettuce, making them light and flavorful. …
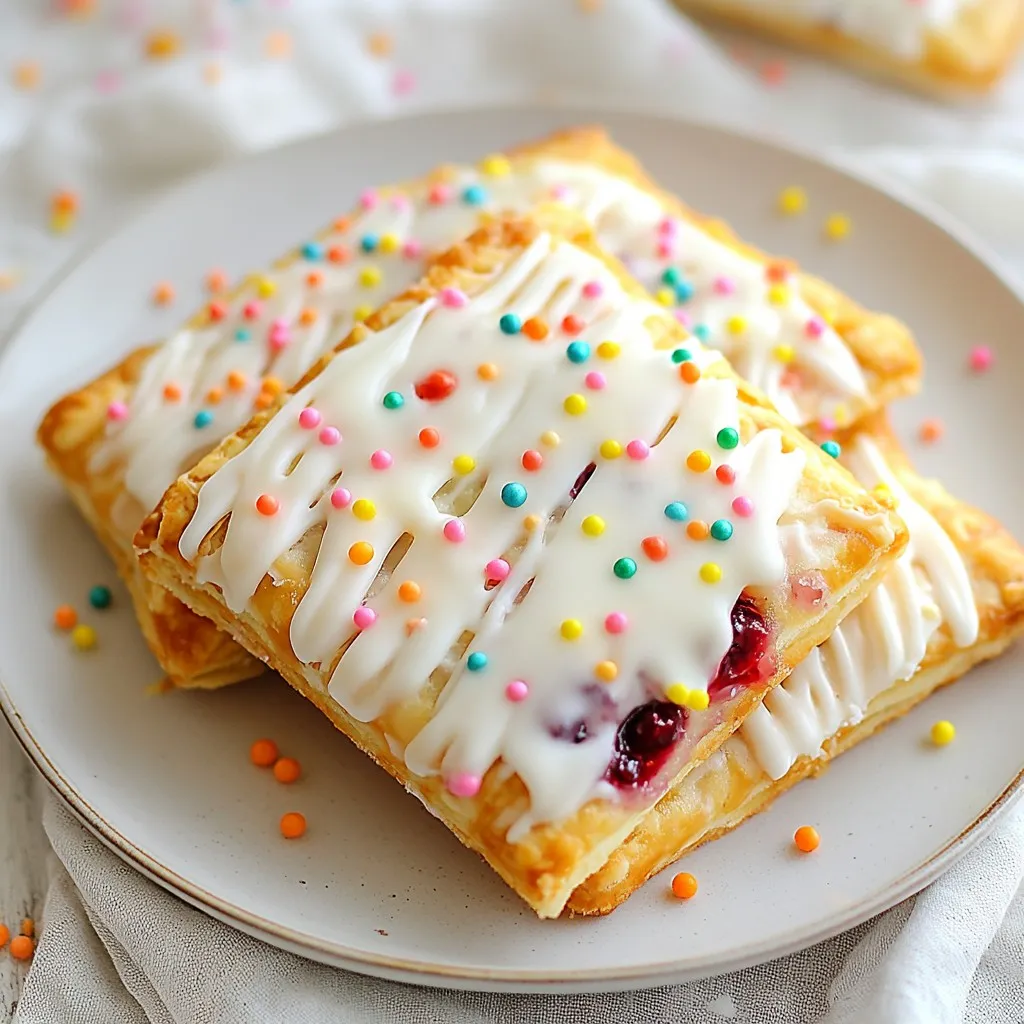
Who doesn’t love a delicious Pop Tart? Imagine making your own, fresh from the oven! In this guide, I’ll show you how to create Easy Homemade Frosted Pop Tarts that …
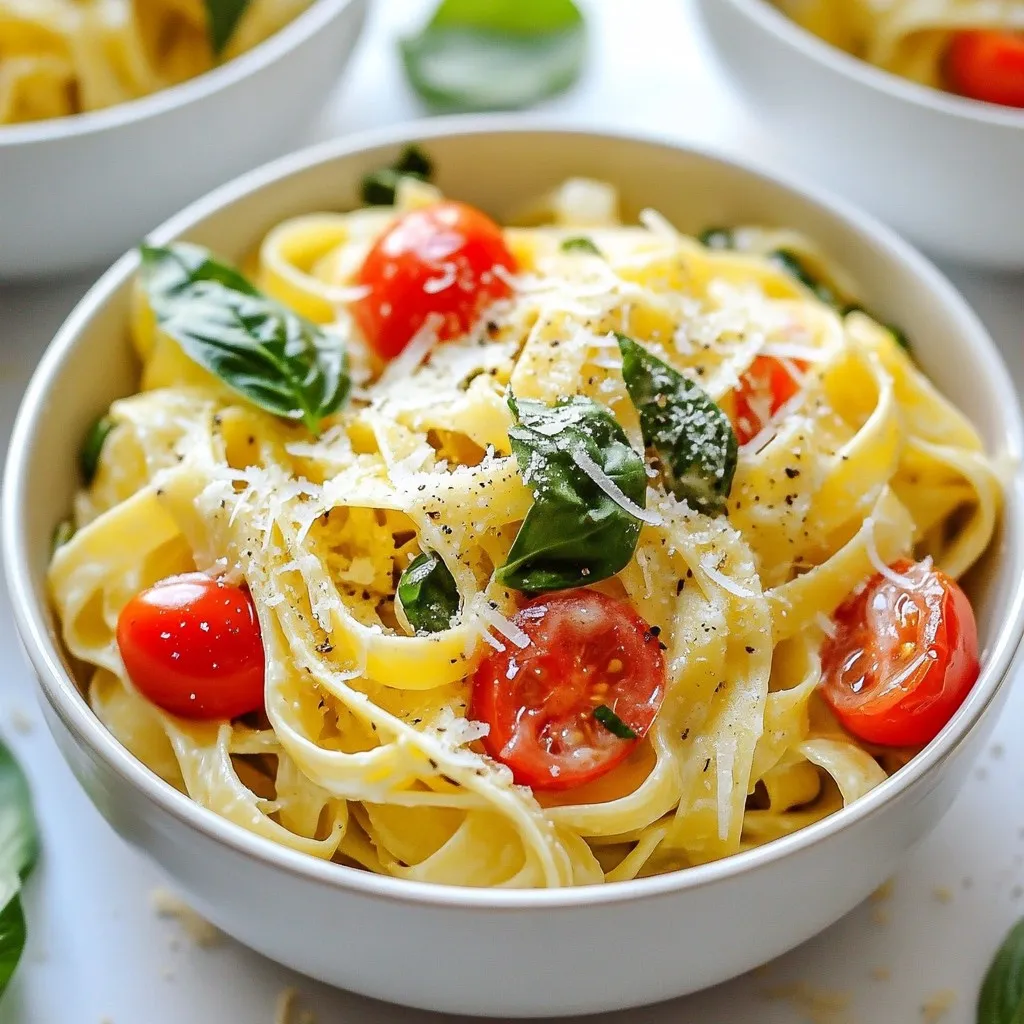
Are you ready for a quick and easy dinner that wows? This One Pot Creamy Garlic Pasta is your answer! With just a few simple ingredients, you’ll create a dish …
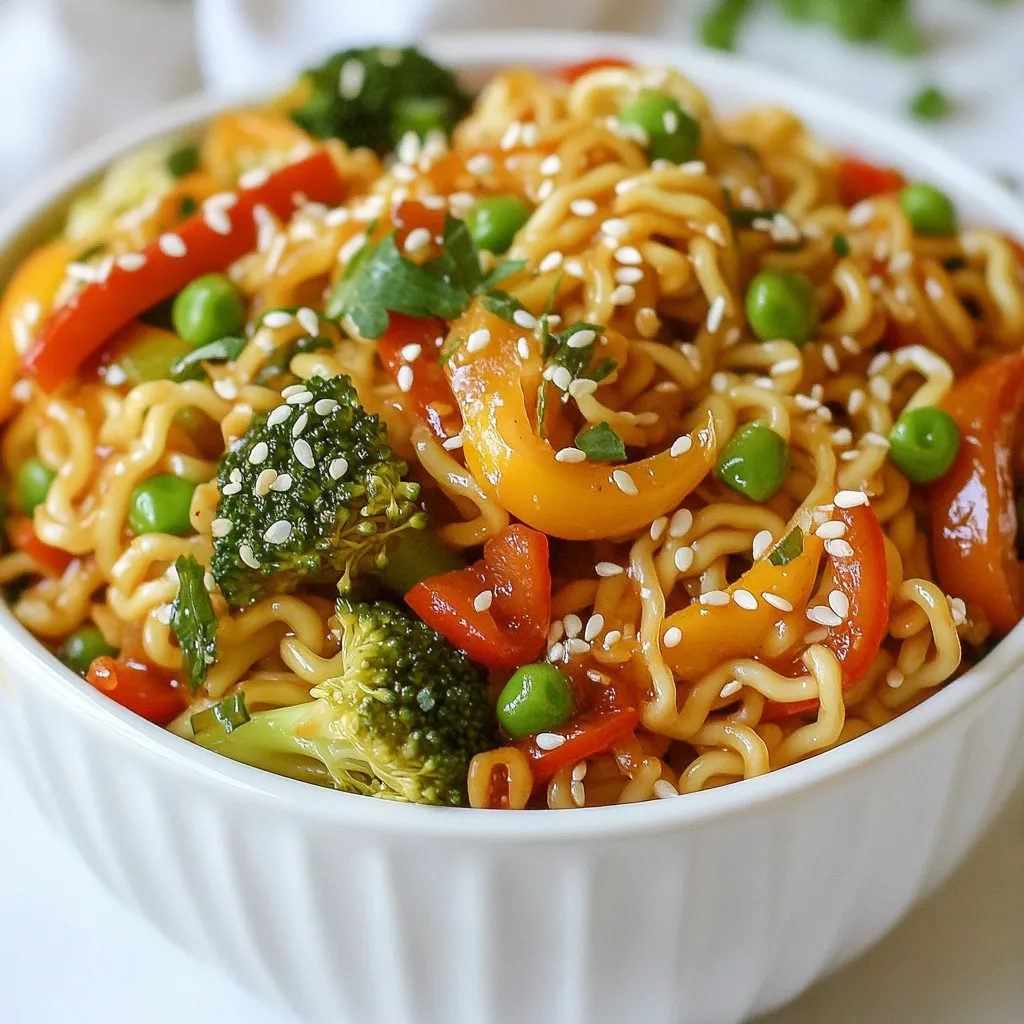
Looking for a quick, tasty meal? Try my Sweet & Spicy Ramen Stir Fry! This dish packs a punch with bold flavors and fresh veggies. You can make it in …
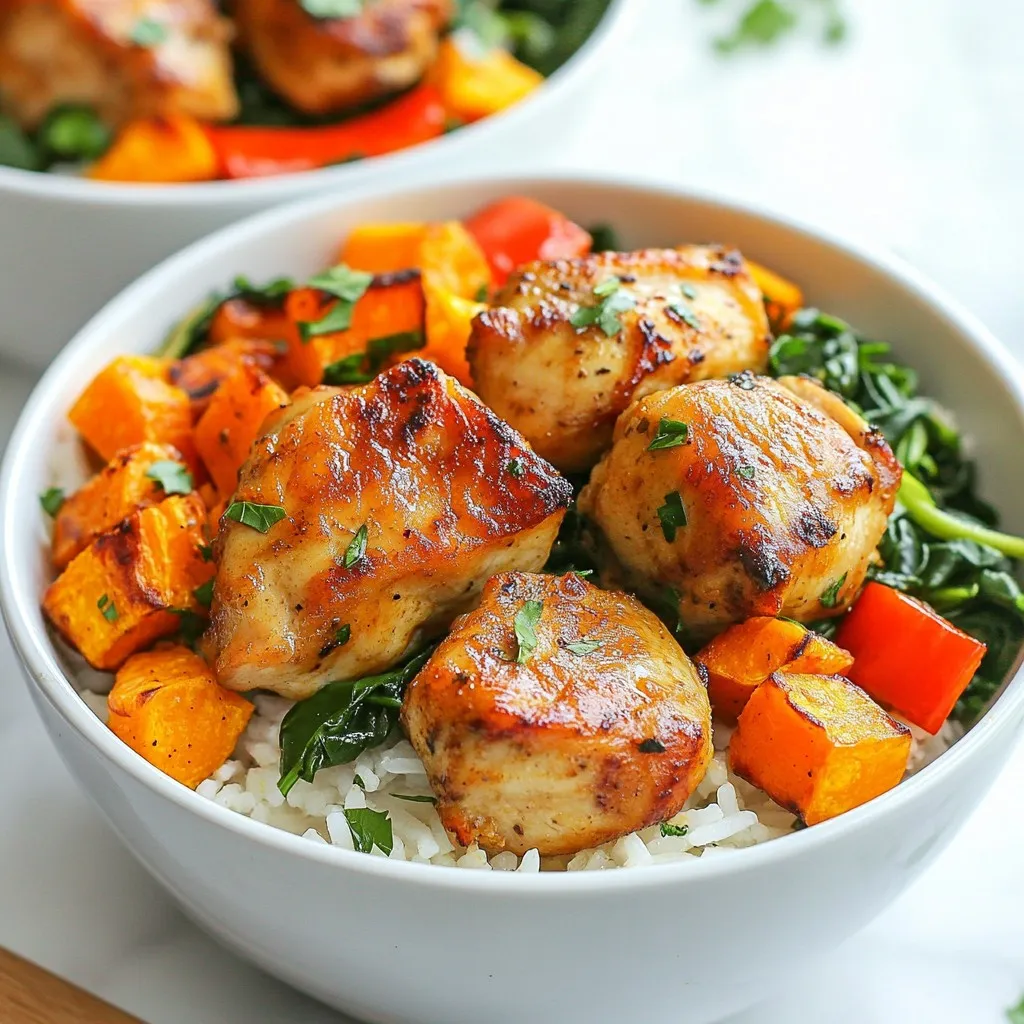
Are you ready to whip up a tasty, healthy meal? Chicken Sweet Potato Rice Bowls are a perfect choice! They are packed with protein, fiber, and plenty of flavor. In …
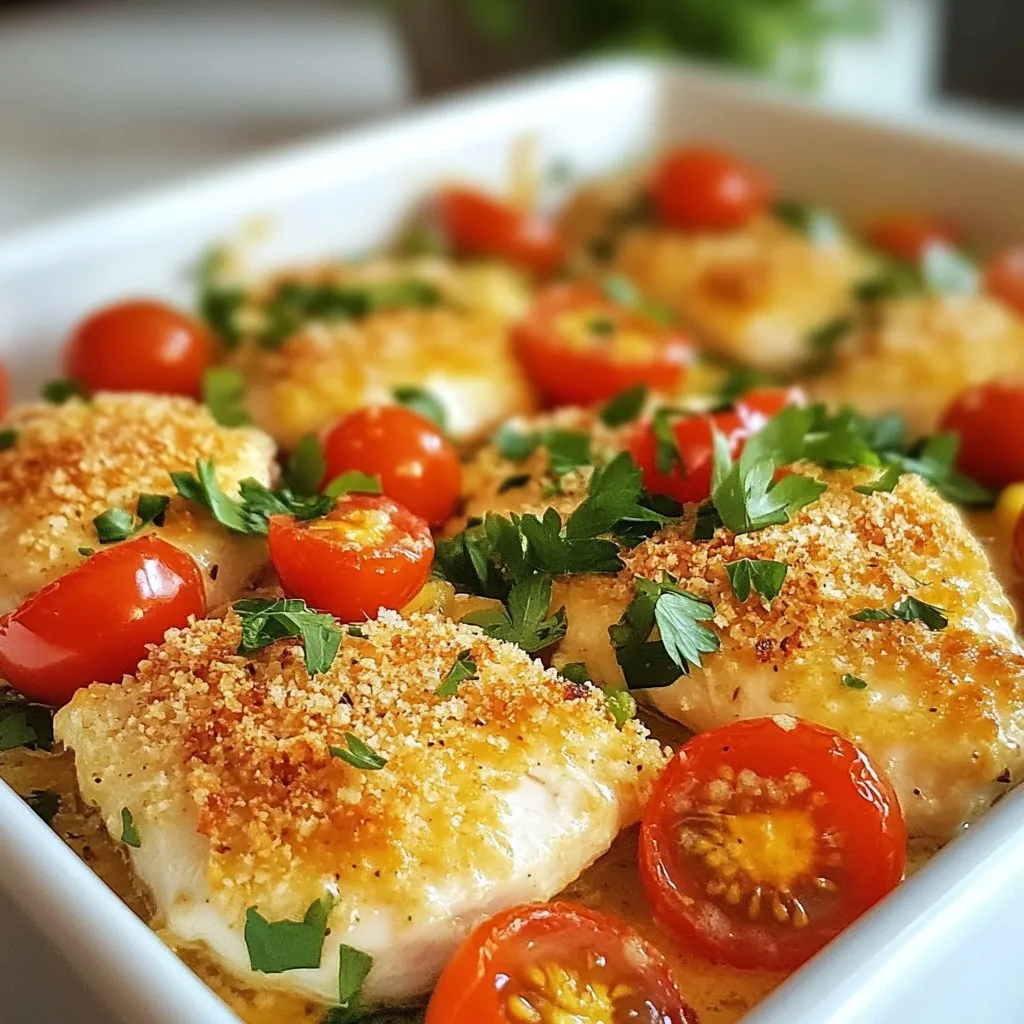
If you’re craving a dish that’s both simple and packed with flavor, look no further! This Garlic Parmesan Chicken Bake combines tender chicken with a crispy, cheesy coating that will …
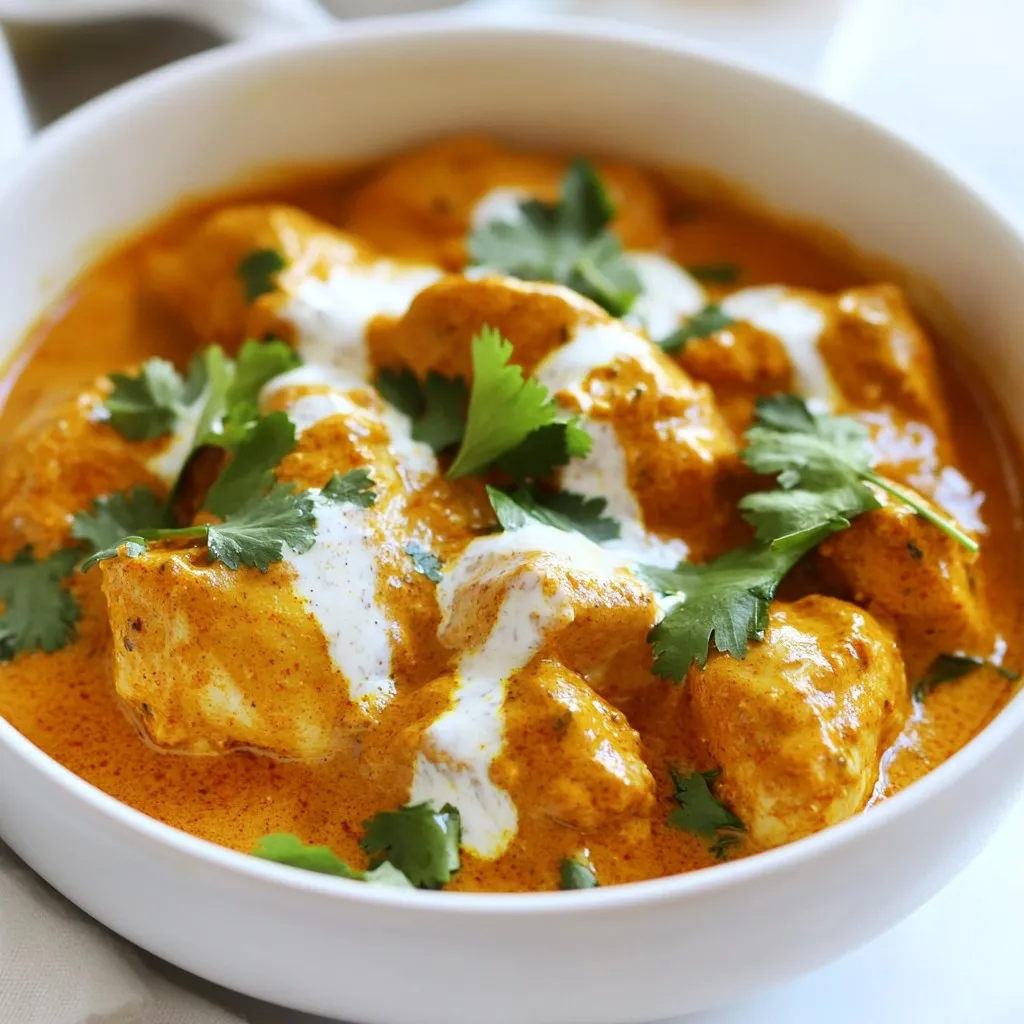
Do you crave comforting, rich flavors? My Easy Butter Chicken recipe hits the spot! With tender chicken thighs, creamy sauce, and simple spices, you’ll impress everyone at your dinner table. …