Skip to content
Tasted Nest
  • Home
  • Appetizers
  • Desserts
  • Salads
  • Breakfast
  • Dinner
  • Privacy Policy
  • Contact
  • About

Chef Tavio

Seared Salmon with Lemon Orzo Flavorful and Easy Recipe

June 13, 2025 by Chef Tavio
- 4 salmon fillets, skin on - 2 tablespoons extra virgin olive oil - 2 tablespoons fresh dill, chopped - 1 cup orzo pasta - 3 cups vegetable broth (or water) - Zest of 1 lemon - Juice of 1 lemon (approximately 2 tablespoons) - Salt and freshly ground black pepper - ½ cup cherry tomatoes, halved - 2 tablespoons capers, rinsed and drained - 1 tablespoon unsalted butter Gathering fresh ingredients makes a big difference. Salmon fillets should be bright and firm. Look for fillets with shiny skin. The extra virgin olive oil adds a rich flavor. Fresh herbs like dill elevate the dish. They provide a burst of taste and freshness. For the orzo, choose a small pasta that cooks quickly. The vegetable broth adds depth to the orzo. Using lemon zest and juice gives a bright, zesty kick. The combination of these flavors makes the dish shine. Seasoning is key. Use salt and freshly ground black pepper to taste. Cherry tomatoes add sweetness, while capers bring a briny note. The unsalted butter adds richness and helps blend flavors together. Check out the Full Recipe to see how to put it all together. - Boiling vegetable broth: In a medium pot, bring 3 cups of vegetable broth to a rolling boil. This adds rich flavor to the orzo. - Cooking orzo until al dente: Add 1 cup of orzo to the boiling broth. Stir it gently to keep it from sticking. Cook for about 8-10 minutes until the orzo is al dente. Drain it in a colander and set aside. - Combining lemon zest, juice, and herbs: In a small bowl, mix the zest of 1 lemon and the juice of 1 lemon. Add 2 tablespoons of chopped fresh dill. This mixture gives a bright flavor. - Incorporating tomatoes and capers: Add ½ cup of halved cherry tomatoes and 2 tablespoons of rinsed capers to the lemon mix. Stir well to combine and let it sit. - Seasoning and cooking the salmon skin-side down: Take 4 salmon fillets and season each with salt and black pepper. In a large skillet, heat 2 tablespoons of olive oil over medium-high heat. Place the salmon skin-side down and cook for about 5-6 minutes. The skin should turn golden and crispy. - Flipping and finishing the cooking process: Carefully flip the salmon using a spatula. Lower the heat to medium. Cook for another 4-5 minutes until the salmon is opaque and flakes easily with a fork. - Melting butter and mixing ingredients: In the pot where you cooked the orzo, add 1 tablespoon of unsalted butter. Let it melt over low heat. - Folding in cooked orzo: Stir in the lemon and tomato mixture. Mix well so everything is coated. Gently fold in the cooked orzo, allowing the flavors to blend. - Plating tips for presentation: On each plate, create a lovely bed of the lemon orzo. Place a seared salmon fillet on top. - Adding pan juices and garnishes: Drizzle some pan juices over the salmon for extra taste. Finish with a sprinkle of fresh parsley or dill for a pop of color. Enjoy this zesty dish! For the full recipe, you can find it above to recreate this delightful meal. To get crispy skin, start with dry salmon fillets. Pat them with a paper towel before cooking. Season both sides with salt and pepper. Heat the oil in the pan until it shimmers. Place the salmon skin-side down and don’t move it for the first few minutes. This helps the skin crisp up. For doneness, look for opaque flesh and an internal temperature of 145°F. The salmon should flake easily with a fork. To prevent overcooking orzo, follow the package instructions closely. Stir it often while it cooks. This helps keep the pasta from sticking. Using vegetable broth instead of water adds flavor to the orzo. The broth infuses the pasta with a rich taste that pairs well with the salmon. For sides, consider a fresh salad with mixed greens and vinaigrette. Roasted vegetables also work great alongside the salmon. If you like wine, a crisp white like Sauvignon Blanc pairs well with this dish. The acidity of the wine complements the lemon flavors in the orzo. For more details, check the Full Recipe for additional tips. {{image_4}} You can make this dish even better! Use whole grain orzo instead of regular orzo. Whole grain pasta has more fiber. Fiber helps you feel full and is good for your belly. You can also add more veggies. Try spinach, zucchini, or bell peppers. These add color and nutrients to your meal. Mix up the herbs for a new taste. Instead of dill, use basil or parsley. These herbs give a fresh lift to the dish. You can also add spices for extra flavor. A pinch of red pepper flakes or smoked paprika will add warmth and depth. Think of your own favorite flavors! If you want to switch the salmon, you have options. Trout works nicely and tastes great too. Chicken can be a good choice if you prefer poultry. For a vegan option, try marinated tofu or chickpeas. Both will soak up the lemony sauce well. You can still enjoy all the flavors! For the complete dish, check out the Full Recipe. To keep your seared salmon with lemon orzo fresh, start with the leftovers. Place the salmon and orzo in separate airtight containers. Store them in the fridge. Make sure to let them cool first. This helps prevent moisture buildup. If you want to save them longer, freezing is a great option. Wrap the salmon tightly in plastic wrap, then place it in a freezer bag. For the orzo, cool it completely, then spread it on a baking sheet. Freeze it for about an hour. After that, transfer it to a freezer bag. When it comes time to enjoy your leftovers, reheating salmon can be tricky. The best method is to use the oven. Set it to 300°F (150°C). Place the salmon on a baking sheet and heat for about 10-15 minutes. This keeps it moist without drying out. For the orzo, you can use the microwave. Add a splash of water to keep it from drying. Heat in short bursts, stirring in between. This will help keep the orzo fresh and tasty. In the fridge, your dish lasts about 3 days. After that, it may lose quality. Check for signs of spoilage, like a sour smell or slimy texture. If you see any of these signs, it’s best to discard it. Enjoy your flavorful meal while it’s fresh! For the full recipe, check out the earlier section. To check if your salmon is done, poke it gently with a fork. If it flakes easily, it's ready. Another way is to use a thermometer. The salmon should reach 145°F. Visual cues to look for: - The salmon should look opaque and not translucent. - The skin should be crispy and golden brown. - The meat should change from red to pink as it cooks. Yes, you can prep this dish before your meal. Cook the orzo and salmon and store them separately. Options for meal prep: - Cook the salmon and cool it completely before storing. - Make the orzo and mix in the lemon and veggies. How to store components separately: - Place salmon in an airtight container in the fridge. - Store the orzo mixture in another container. If you don’t have orzo, you can use other small pasta or grains. Some good options include quinoa or small shells. Other pasta types and grains: - Small pasta shapes like ditalini or acini di pepe. - Quinoa for a gluten-free choice. Cooking times for substitutions: - Small pasta usually takes 8-10 minutes to cook. - Quinoa takes about 15 minutes. Yes, seared salmon is a healthy choice. It is packed with omega-3 fatty acids, which support heart health. Nutritional benefits of salmon: - High in protein and low in saturated fat. - Rich in vitamins like B12 and D. Balancing the meal with orzo and veggies: - The orzo adds carbs for energy. - Cherry tomatoes and herbs add vitamins and fiber. This blog post covered key ingredients for seared salmon, orzo, and flavor tips. I shared step-by-step instructions for cooking the dish and ideas for perfecting it. We looked at variations, healthy swaps, and storage methods. Remember, cooking can be fun and creative. Don’t hesitate to experiment with flavors or pairings. With practice, you can make this meal your own. Enjoy your culinary journey with seared salmon and orzo!

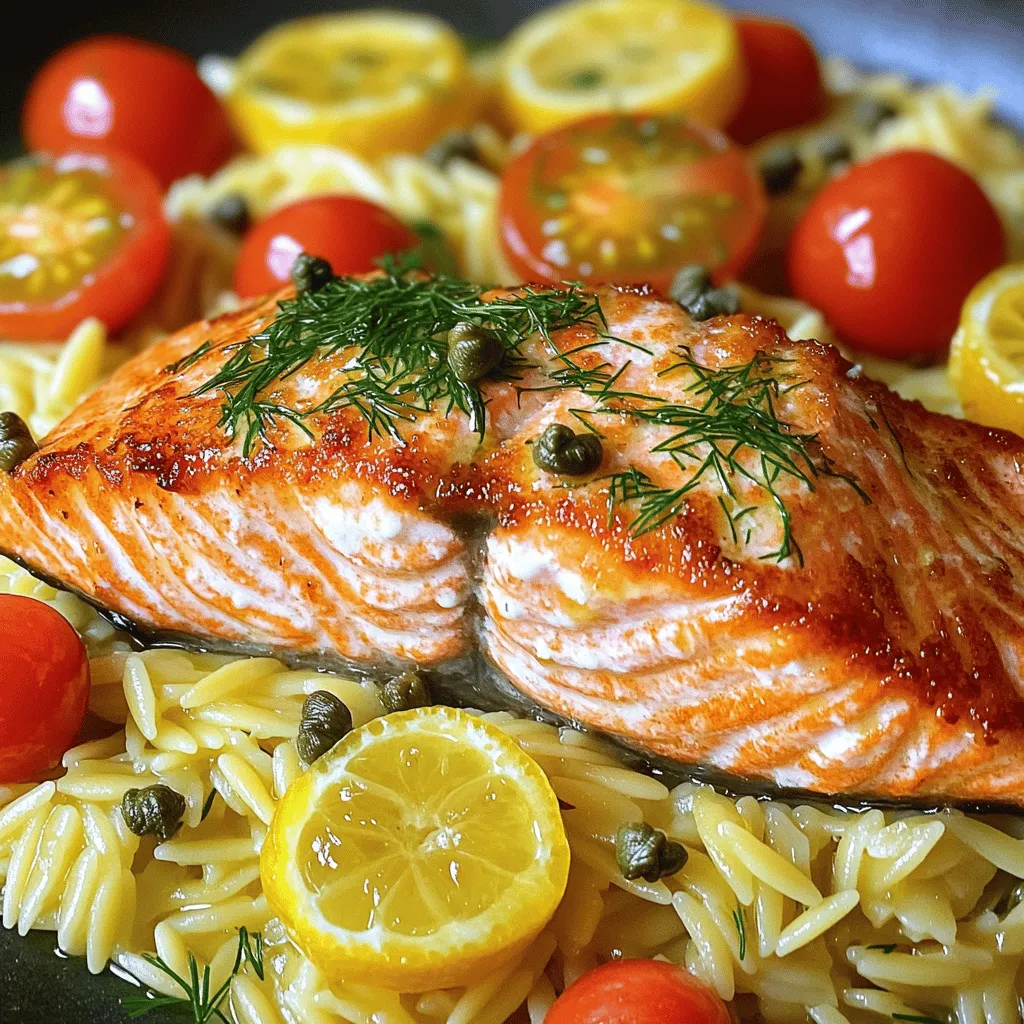
Are you ready to impress your family with a simple yet delicious meal? This Seared Salmon with Lemon Orzo recipe is your answer! You’ll learn how to cook tender salmon …

Read more

Categories Dinner

Blackened Fish Tacos Flavorful and Simple Recipe

June 13, 2025 by Chef Tavio
The main ingredients for blackened fish tacos are simple yet flavorful. You need: - 1 lb white fish fillets (tilapia or cod work well) - 8 small corn tortillas - 1 cup shredded cabbage - 1 avocado, sliced - 1/2 cup cilantro, chopped - 1 lime, cut into wedges These ingredients create the base of your tacos. The fish gives a tasty and flaky bite. The tortillas hold everything together. Cabbage adds crunch, while avocado and cilantro boost flavor. The magic happens with the spices in the blackening seasoning. You will use: - 2 tablespoons paprika - 1 tablespoon cayenne pepper - 1 tablespoon garlic powder - 1 tablespoon onion powder - 1 teaspoon dried thyme - 1 teaspoon dried oregano - Salt and pepper to taste This mix creates a bold flavor. Paprika brings warmth, while cayenne adds heat. Garlic and onion powder enhance the taste. Thyme and oregano introduce a fresh twist. These spices transform plain fish into a dish full of character. To make your tacos even better, consider these taste enhancers: - 1/2 cup sour cream or Greek yogurt Sour cream or yogurt adds creaminess. A squeeze of lime juice gives a refreshing zing. Together, they balance the spices and make each bite delightful. You can also serve extra lime wedges on the side for those who want more brightness. For the full recipe, check the complete instructions. To make the blackening spice, gather your spices. In a small bowl, mix together: - 2 tablespoons paprika - 1 tablespoon cayenne pepper - 1 tablespoon garlic powder - 1 tablespoon onion powder - 1 teaspoon dried thyme - 1 teaspoon dried oregano - Salt and pepper to taste Stir the spices well. This mix gives the fish its bold flavor. Make sure the spices blend evenly. Start by drying the fish fillets. Use paper towels to remove any moisture. Next, rub the blackening spice all over the fillets. Make sure to coat both sides well. Let the fish sit for about 15 minutes. This helps the flavors soak in. Now, heat 2 tablespoons of olive oil in a skillet over medium-high heat. When the oil shimmers, carefully place the fish in the skillet. Cook without moving it for 3 to 4 minutes. You want a nice golden-brown crust. Then flip and cook for another 3 to 4 minutes until the fish is flaky. Once the fish is done, let it rest for a minute. Then, use a fork to flake it into bite-sized pieces. Warm the corn tortillas. You can do this in a separate skillet for about 30 seconds on each side. Keep them warm by covering them with a towel. Now it’s time to assemble! On each tortilla, add a layer of shredded cabbage. Place a generous amount of the flaky fish on top. Add slices of avocado and sprinkle fresh cilantro over everything. For a creamy touch, drizzle sour cream or Greek yogurt on top. Squeeze lime juice for a zesty kick. Serve the tacos right away while they are warm and fresh. Enjoy your blackened fish tacos! Check out the Full Recipe for more details. To get that perfect blackened texture, heat is key. Use a cast-iron skillet if you have one. It holds heat well and gives a great crust. Preheat the skillet until it’s very hot. This helps the spices form a dark, crunchy layer on the fish. Don't rush this step; a hot skillet makes all the difference. Use fresh fish for the best flavor. Pat the fillets dry before seasoning. This helps the spices stick and prevents steaming. When cooking, let the fish rest in the skillet without moving it. This creates a nice sear. Flip the fillets carefully to keep them whole. Cook them just until flaky, which usually takes about 3-4 minutes per side. For a fun and colorful meal, add toppings like avocado, cilantro, and lime. The creamy avocado balances the spice of the blackened fish. You can also serve the tacos with a simple slaw made from shredded cabbage. This adds crunch and freshness. For drinks, try a cold beer or a refreshing limeade. These pair well with the bold flavors of the tacos. Check out the Full Recipe for more ideas! {{image_4}} You can use many types of fish for your tacos. Some great choices are mahi-mahi, snapper, or even salmon. Each fish brings its own flavor. If you like a milder taste, go with tilapia or cod. The key is to pick fish that can stand up to the blackening spices. While corn tortillas are classic, you can try flour tortillas for a softer bite. Lettuce wraps also work for a low-carb option. If you're feeling bold, use crispy tortilla chips for a crunchy twist. Think outside the box and find what you love most. Toppings can change your taco game. Swap sour cream for creamy avocado or a yogurt sauce. Try adding diced tomatoes or jalapeños for extra flavor. A mango salsa can add a sweet twist. Don't forget to experiment with fresh herbs like dill or parsley for new tastes. For more ideas, check the full recipe and get inspired! After you enjoy your blackened fish tacos, store any leftovers in a tight container. Place the fish in an airtight container to keep it fresh. You can also store the tortillas and toppings separately. This way, they maintain their texture and taste. Keep the leftovers in the fridge and use them within three days for the best flavor. To reheat your blackened fish, use a skillet over medium heat. This method keeps the fish moist and flavorful. Heat for about 2-3 minutes, flipping gently. If you prefer, you can microwave the fish in 30-second intervals, but this may not keep the texture as nice. For tortillas, warm them in a dry skillet for a few seconds on each side. This method brings back their softness. The shelf life of your ingredients varies. Fresh fish lasts about one to two days in the fridge. Tortillas can stay fresh for up to a week when stored properly. Fresh vegetables, like cabbage and avocado, last about three to five days. Always check for signs of spoilage before use. Proper storage helps maintain the quality and taste of your ingredients. For the full recipe, check the detailed instructions above. To make blackened fish tacos spicy, you can adjust the cayenne pepper. Increase the amount to enhance the heat. You can also add diced jalapeños or a spicy hot sauce to the toppings. Another option is to use a spicy seasoning blend with extra chili powder or smoked paprika. This adds flavor and heat to your tacos. Yes, you can prepare blackened fish tacos ahead of time. You can season the fish and store it in the fridge for a few hours. However, I recommend cooking the fish just before serving. This keeps the fish crispy and fresh. You can also warm the tortillas and prep the toppings ahead. Just assemble right before eating for the best taste. White fish works best for blackened tacos. My favorites are tilapia and cod. Both have a mild flavor that lets the spices shine. Other great options include snapper and mahi-mahi. They hold up well to the cooking process and stay flaky. For a richer flavor, you can try salmon, but it cooks differently. Adjust your cooking time to avoid overcooking. You learned how to make delicious blackened fish tacos. We covered key ingredients and spices that bring out rich flavors. I shared step-by-step instructions for easy cooking and tips for perfect results. You also explored fun variations and great storage methods. Embrace these tactics to elevate your taco night. Enjoy experimenting with flavors and ingredients. You now have all the tools for tasty blackened fish tacos!

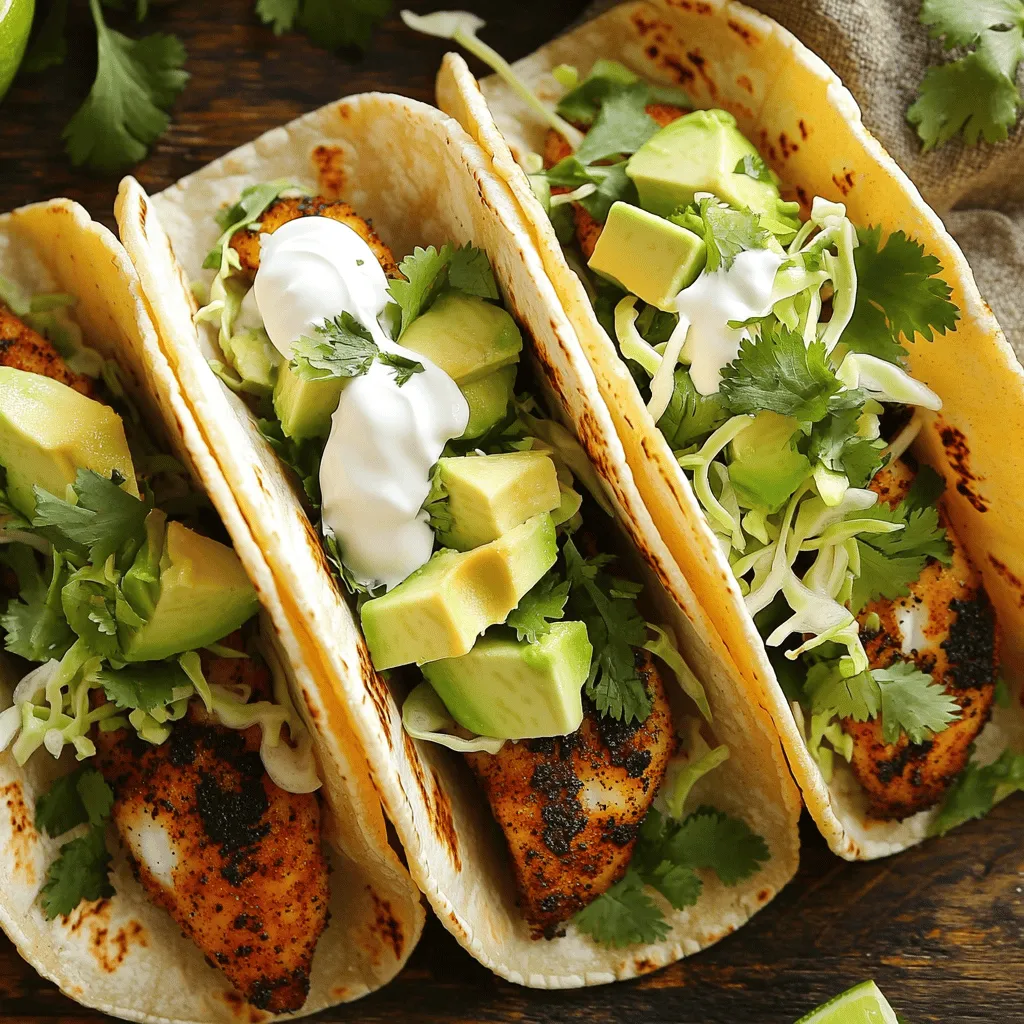
Looking to spice up your dinner rotation? Blackened fish tacos are a delicious solution. I’ll share a simple recipe that combines bold flavors with fresh ingredients. From choosing the right …

Read more

Categories Dinner

Cherry Cheesecake Puppy Chow Easy and Tasty Treat

June 13, 2025 by Chef Tavio
To make Cherry Cheesecake Puppy Chow, you need simple yet tasty ingredients. The mix of flavors makes it a fun snack. You can enjoy it anytime, whether you want a sweet treat or a fun dessert for a party. - 6 cups Rice Chex cereal - 1 cup white chocolate chips - 1/2 cup cream cheese, softened to room temperature - 1/2 cup powdered sugar, plus extra for dusting - 1 teaspoon pure vanilla extract - 1 cup freeze-dried cherries, coarsely crushed - 1/4 cup graham cracker crumbs - A pinch of salt Each ingredient has a role. Rice Chex gives a nice crunch and holds the coating well. White chocolate chips add sweetness, and cream cheese makes it creamy. The powdered sugar helps bind everything together. Freeze-dried cherries give that cherry flavor and a pop of color. Graham cracker crumbs add that classic cheesecake taste. A pinch of salt balances the sweetness. These ingredients create a delicious treat you’ll want to make again and again. Start by placing 6 cups of Rice Chex cereal into a large mixing bowl. This cereal gives the puppy chow its crunch. Make sure to break any clumps apart with your hands gently. Set the bowl aside while you prepare the coating. In a microwave-safe bowl, add 1 cup of white chocolate chips and 1/2 cup of softened cream cheese. Heat this in the microwave in 30-second bursts. Stir after each time, so it melts evenly. Keep doing this until the mix is smooth and creamy. Once it is melted, stir in 1 teaspoon of pure vanilla extract and a pinch of salt. This adds flavor and balance to the sweet mix. Next, mix together 1 cup of crushed freeze-dried cherries, 1/2 cup of powdered sugar, and 1/4 cup of graham cracker crumbs in a separate bowl. This will add that cherry cheesecake taste we love. Carefully pour the melted chocolate-cream cheese mix over the Rice Chex. Use a spatula to fold the cereal until every piece is coated. Be gentle to keep the cereal intact. After coating the cereal, transfer it to the bowl with the cherry mixture. Toss it all together carefully. You want to make sure each piece gets that lovely cherry and crumb coating. Spread the mix on a parchment-lined baking sheet. Let it cool for about 30 minutes. This helps the coating set nicely. If you want more sweetness, dust with extra powdered sugar before serving. Enjoy this easy and tasty treat! For more details, check the Full Recipe. To get the best coating on your Cherry Cheesecake Puppy Chow, follow these steps. First, make sure to melt the white chocolate and cream cheese smoothly. Heat them in short bursts and stir often. This keeps the mix creamy. After coating the cereal, be gentle. Fold the cereal carefully to avoid breaking it. Every piece should get a nice layer of the mix. When it's time to serve, think fun and colorful! You can place the puppy chow in clear bags and tie them with ribbons. This makes for a cute gift or party treat. If you want it to look fancy, use a nice bowl. Add some extra crushed cherries on top for a pop of color. This not only looks great but also adds even more cherry flavor. Want to make your puppy chow even better? Try these ideas. You can mix in mini chocolate chips for extra sweetness. You could also add some nuts for crunch. If you like a bit of spice, sprinkle in some cinnamon. This can give your treat a unique twist. The Full Recipe gives you a great base, but feel free to get creative! {{image_4}} You can swap Rice Chex with other cereals. Try Corn Chex or Crispix for a change. Each cereal brings a new crunch. You can also use gluten-free options if needed. Just make sure the texture fits your taste. Mix it up with different flavors. Use milk chocolate instead of white chocolate for richer taste. You could add peanut butter for a nutty twist. Experiment with other fruits like strawberries or blueberries. They add fun colors and new tastes. Change the recipe for holidays. For Christmas, add red and green sprinkles. For Easter, use pastel-colored candies. In the summer, mix in some toasted coconut for a tropical vibe. These tweaks make your treat special for any celebration. You can find the full recipe to guide you through these variations! To keep your Cherry Cheesecake Puppy Chow fresh, store it in an airtight container. Glass jars or plastic bins work well. Avoid using bags, as they do not seal tightly. Place the container in a cool, dry spot, away from sunlight. This way, the flavors stay strong and the texture remains crispy. Cherry Cheesecake Puppy Chow can last up to two weeks when stored properly. However, for the best taste, eat it within the first week. Check for any signs of moisture. If it feels soft or sticky, it’s time to toss it. You want that crunchy texture! If your Puppy Chow loses its crunch, you can refresh it. Preheat your oven to 250°F (120°C). Spread the Puppy Chow on a baking sheet. Heat it for about 10 minutes. This will help restore some of the crispiness. Let it cool before enjoying it again. Always check the taste after reheating; it should be just as tasty as before. Yes, you can! While white chocolate gives a sweet taste, you can use milk or dark chocolate. This will change the flavor, making it richer. Just melt the chocolate the same way as in the recipe. If you don't have Rice Chex, use corn or wheat cereal. These cereals will work, but they may change the flavor a bit. Just make sure they are crunchy. You can skip the cream cheese if you want a lighter treat. Use only white chocolate and add a little more powdered sugar. This will keep it sweet and tasty without the cream cheese texture. Feel free to explore the [Full Recipe] for more details on making this fun treat! This blog post covered the essentials for making tasty puppy chow. We explored the key ingredients and the step-by-step process to create this treat. I shared helpful tips to get a perfect coating and creative serving ideas. You can make variations using different cereals or flavors. Storing puppy chow correctly will keep it fresh longer. In the end, making puppy chow is fun and easy. Enjoy sharing this snack with your friends and family!

If you’re looking for a fun and easy treat, Cherry Cheesecake Puppy Chow is a must-try! This sweet snack combines creamy flavors and crunchy cereal for a tasty twist on …

Read more

Categories Desserts

Easy Shrimp Tacos Flavorful and Quick Dinner Delight

June 11, 2025 by Chef Tavio
- 1 lb shrimp, peeled and deveined - 1 tablespoon olive oil - 1 teaspoon chili powder - 1 teaspoon ground cumin - 1 teaspoon garlic powder - Salt and freshly ground black pepper, to taste - 8 small corn tortillas - 1 cup green cabbage, finely shredded - 1 ripe avocado, sliced into thin wedges - 1/2 cup pico de gallo - Fresh cilantro leaves, for garnish - Lime wedges, for serving When I make easy shrimp tacos, I like to keep it simple yet tasty. These ingredients create a vibrant and fresh taco that everyone loves. The shrimp gives a nice protein boost while the spices add flavor. Using fresh ingredients is key. I always peel and devein the shrimp myself to ensure they taste their best. The olive oil helps the spices stick to the shrimp, making every bite flavorful. I enjoy mixing the spices together. Chili powder, cumin, and garlic powder create a nice kick. You can adjust the salt and pepper based on your taste. To warm the corn tortillas, I heat them in a skillet for a few seconds. This makes them soft and ready for filling. The green cabbage adds a nice crunch. Slicing the avocado into thin wedges gives a creamy contrast. Pico de gallo brings a fresh burst of flavor that brightens the dish. I garnish with fresh cilantro and serve lime wedges on the side. A squeeze of lime juice on the tacos makes them even better. For the full recipe, check out the instructions I’ve shared. Enjoy your cooking adventure! 1. Combine shrimp with spices and oil In a medium bowl, mix the shrimp with olive oil, chili powder, cumin, garlic powder, salt, and pepper. Toss gently to coat the shrimp evenly. This step adds great flavor to the shrimp. 2. Cooking the shrimp Heat a skillet over medium-high heat. Once hot, add the shrimp. Cook for 2-3 minutes on each side. The shrimp should turn pink and opaque. Remove the skillet from heat when done. 3. Preparing tortillas Use another skillet over medium heat to warm the corn tortillas. Heat each side for about 30 seconds. They should be soft and easy to fold. 1. Layering the ingredients Take a warm tortilla and place a few shrimp in the center. Add a handful of shredded cabbage on top. Then, add slices of avocado and a spoonful of pico de gallo. 2. Garnishing for flavor Finish your taco with fresh cilantro leaves. This adds a burst of flavor and makes the dish look nice. 1. How to present your shrimp tacos Arrange the tacos on a colorful platter. Add extra lime wedges and cilantro for a festive touch. 2. Ideal accompaniments Serve your shrimp tacos with lime wedges for drizzling. You can also add a side of chips and salsa for a complete meal. For the full recipe, check out the details above! To cook shrimp just right, look for a pink color. It should not be gray. Overcooking makes shrimp tough. Cook them for 2-3 minutes on each side. They cook fast, so keep an eye on them. For seasoning, use chili powder, cumin, and garlic powder. This combo adds great flavor. Always taste your shrimp before serving. Adjust salt and pepper as needed. A little goes a long way! To warm tortillas evenly, use a dry skillet over medium heat. Heat each side for about 30 seconds. This makes them soft and easy to fold. If you can’t find corn tortillas, try flour or whole wheat. These options work well too. Each type brings its own taste and texture. Serve your tacos on a colorful platter. This makes the meal inviting. Add lime wedges and cilantro for a pop of color. You can also serve shrimp tacos with sides like rice or beans. A fresh salad pairs well too. For extra fun, set up a taco bar. Let everyone build their own tacos! {{image_4}} You can give your shrimp tacos a twist by changing the spices or marinade. Try adding paprika for a smoky flavor. A bit of lime zest can brighten the shrimp. You can also use a spicy marinade with chipotle or sriracha for heat. When it comes to toppings, the options are endless. Swap out cabbage for crunchy radishes. Add mango salsa for a sweet kick. You can even use pickled onions to give your tacos a tangy punch. Making shrimp tacos gluten-free is simple. Just use corn tortillas, which are naturally gluten-free. Check the labels to ensure they are made in a gluten-free facility. For dairy-free options, skip the cheese and use avocado instead. You can also add a dairy-free yogurt or a vegan crema. These toppings keep your tacos fresh and tasty without dairy. For a smoky flavor, try grilled shrimp tacos. Marinate the shrimp first and then grill them over medium heat. This method adds a nice char and enhances the taste. If you prefer baking, use an oven-baked shrimp option. Spread the seasoned shrimp on a baking sheet and roast at 400°F for about 8-10 minutes. This method saves time and keeps the shrimp juicy. Explore these variations to make your easy shrimp tacos even more delightful! For a full recipe, check out the instructions provided above. Store leftover shrimp tacos in an airtight container. This keeps them fresh and prevents odors. If you have leftover shrimp, place them in a separate container. Shrimp can last in the fridge for up to two days. Keep the tortillas and toppings apart. This prevents sogginess and keeps the crunch. - Best practices for storing shrimp tacos: - Use airtight containers. - Store shrimp separately. - Keep tortillas and toppings apart. To reheat shrimp, use a skillet over medium heat. This method warms the shrimp evenly without drying them out. Stir gently to avoid overcooking. For tortillas, warm them in a dry skillet for about 15 seconds on each side. This keeps them soft and pliable. - Effective methods to reheat shrimp: - Use a skillet on medium heat. - Stir gently while reheating. - Reheating tortillas without them becoming tough: - Warm in a dry skillet. - Heat for 15 seconds on each side. You can prep shrimp and toppings ahead of time. This saves time on busy nights. Marinate the shrimp and store them in the fridge for up to a day. Chop the cabbage and slice the avocado just before serving for the best taste. - Prepping ingredients ahead of time: - Marinate shrimp up to a day ahead. - Chop cabbage in advance. - Making shrimp tacos in advance: - Assemble tacos right before serving. - Keep components separate until ready to eat. For the full recipe, check out the [Full Recipe]. Can I use frozen shrimp for this recipe? Yes, you can use frozen shrimp. Just thaw them first. Place them in cold water for about 15 minutes. This makes them easy to cook. Ensure they are peeled and deveined for the best taste. What can I use instead of pico de gallo? If you don't have pico de gallo, use any fresh salsa. You can also mix diced tomatoes, onions, and cilantro. This gives your tacos a fresh and tasty kick. Can I make this recipe without cabbage? Absolutely! If you don’t like cabbage, skip it. You can use lettuce or spinach instead. This keeps the tacos crunchy and fresh. How to customize the spice level of the shrimp? You can adjust the spice level easily. Add more chili powder for heat or use less. If you want a milder flavor, try smoked paprika. It adds depth without the heat. Calorie count per serving Each serving of these shrimp tacos has about 300 calories. This count includes shrimp, tortillas, and toppings. Nutritional benefits of the ingredients used Shrimp is high in protein. It is low in calories and fat. Cabbage offers fiber and vitamins. Avocado adds healthy fats. Together, they make a balanced meal. Enjoy these shrimp tacos for a healthy and tasty dinner. For the full recipe, check out the earlier section. These easy shrimp tacos bring together fresh shrimp, spices, and vibrant toppings. We covered the key ingredients and gave you simple steps for cooking and assembling. Don't forget the tips for perfect shrimp and tortilla techniques. You can also explore tasty variations and smart storage methods. Making shrimp tacos can be fun and flexible. Try creating your own unique version. Enjoy every bite of this delicious meal!

Are you looking for a quick and tasty dinner idea? Try these easy shrimp tacos! They are packed with flavor and take only 20 minutes to make. With just a …

Read more

Categories Dinner

Asian Chicken Crunch Salad Packed with Flavorful Goodness

June 11, 2025 by Chef Tavio
- 2 boneless, skinless chicken breasts - 4 cups of mixed salad greens - 1 cup shredded carrots - 1 red bell pepper - 1 cucumber - Fresh cilantro and green onions - 1/2 cup crispy fried wonton strips - 1/4 cup toasted sesame seeds - 1/4 cup low-sodium soy sauce - 2 tablespoons rice vinegar - 1 tablespoon honey - 1 tablespoon sesame oil - 1 teaspoon fresh ginger - 1 clove garlic This Asian Chicken Crunch Salad shines with fresh flavors and textures. You will love how easy it is to make. Salad Components bring a lot of color. The chicken breasts give protein and heartiness. Mixed salad greens create a crunchy bed. Shredded carrots add sweetness and color. The red bell pepper brings a sweet crunch. The cucumber cools the salad and adds more crunch. Fresh cilantro and green onions give great flavor. Crunchy Elements take this salad to the next level. The crispy fried wonton strips add a fun crunch. The toasted sesame seeds give a nutty taste and a bit of crunch. Dressing Ingredients tie everything together. Low-sodium soy sauce gives a salty kick. Rice vinegar adds a tangy bite. Honey brings a hint of sweetness. Sesame oil adds depth. Fresh ginger and garlic give a hit of flavor. You can find the full recipe above to make this vibrant salad. Enjoy the blending of tastes and textures! To start, season the chicken breasts well. Use salt and freshly ground black pepper. This gives the chicken a tasty base. You can grill or pan-sear the chicken. If grilling, preheat your grill to medium heat. Cook the chicken for about 6-7 minutes on each side. Look for the meat to be fully cooked and no longer pink in the center. If you choose to pan-sear, heat some oil in a skillet first. Follow the same cooking time. After cooking, let the chicken rest for 5 minutes. This keeps it juicy. Finally, slice the chicken into thin strips. Next, grab a large mixing bowl. Combine the salad greens, shredded carrots, sliced red bell pepper, and julienned cucumber. This mix gives you great color and crunch. Toss the ingredients gently. Make sure everything is mixed well. The veggies should be evenly spread throughout the bowl. This part is fun and gets you ready for the dressing! Now, let’s make the dressing. In a small bowl, whisk together the low-sodium soy sauce, rice vinegar, honey, sesame oil, grated ginger, and minced garlic. Add a pinch of salt and pepper for taste. Whisk until everything is smooth and combined. The dressing should not be too thick or too thin. If it needs adjusting, add a bit more vinegar for tang or honey for sweetness. Once your dressing is ready, drizzle it over the salad mixture. Use tongs or a large spoon to toss the salad gently. Make sure all the ingredients are coated. This brings out all the flavors in your Asian Chicken Crunch Salad. Enjoy the vibrant colors and fresh scents! You can find the full recipe for this dish to guide you through the process step by step. For a tastier chicken, marinate it before cooking. You can use soy sauce and ginger for a boost. Just let it sit for 30 minutes. This step adds depth to the chicken's taste. You can adjust the dressing to fit your taste. Add more honey for sweetness or more soy sauce for saltiness. A splash of lime juice can brighten the flavor too. For a beautiful salad, layer the ingredients in a bowl. Start with greens, then add veggies, and finish with chicken on top. This way, it looks fresh and colorful. Use large serving spoons or tongs for easy serving. This helps everyone take just the right amount. If you want variety, try baking or poaching the chicken. Baking at 375°F for 20-25 minutes keeps it juicy. Poaching in broth adds flavor without added fat. To keep the chicken tender, avoid overcooking it. Use a meat thermometer to check when it reaches 165°F. Let it rest for five minutes after cooking. This helps keep the juices inside. For the full recipe, check out the Crunchy Asian Chicken Delight. {{image_4}} You can switch out chicken for other proteins. Tofu, shrimp, or beef work well. For tofu, use firm or extra-firm. Cut it into cubes and pan-fry until golden. Shrimp can be sautéed quickly in a hot pan. Cook them just until pink. Beef should be thinly sliced and cooked to your liking. This adds variety to your salad. Feel free to change the greens and veggies. Instead of mixed salad greens, try arugula or kale. They both add unique flavors. You can also swap carrots for radishes for a spicy kick. More crunch? Add sliced almonds or sunflower seeds on top. These swaps keep your salad fresh and interesting. You can make a vegan or low-calorie dressing easily. For vegan, replace honey with maple syrup or agave. Use less sesame oil for a lighter option. Want some heat? Add chili paste to the dressing. For a citrus twist, mix in some lime juice or orange zest. These changes make the salad fit your taste. For the full recipe, refer to the Crunchy Asian Chicken Delight. To keep your Asian Chicken Crunch Salad fresh, store the salad and dressing separately. Place the salad in an airtight container. This helps the greens stay crisp. For the dressing, use a small jar with a tight lid. When ready to eat, simply toss the dressing with the salad. This method keeps everything fresh and tasty. You can make the salad ahead of time. Just chop the veggies and store them in the fridge. It’s best to wait to add the dressing until you’re ready to eat. You can also freeze cooked chicken for future use. To do this, let the chicken cool, then wrap it in plastic wrap. Put the wrapped chicken in a freezer bag. This will help you save time on busy days. Typically, the salad and dressing can last up to three days in the fridge. If you notice any wilting or browning on the greens, it's time to toss them out. The chicken should stay good for about four days. Always check for any strange smells or colors before eating. If something seems off, it's best to throw it away. To add more crunch, consider these toppings: - Chopped nuts, like almonds or cashews - Sliced radishes for a peppery bite - Crispy bean sprouts for lightness - Thinly sliced jicama for a sweet crunch - Extra crispy wonton strips or tortilla chips These toppings not only add crunch but also boost flavor. Yes, you can prep this salad ahead. Here are some tips: - Store dressing in a separate container. This keeps greens fresh. - Chop veggies a day before and keep them in the fridge. - Cook chicken and slice it a day ahead. Just chill it. - Mix everything just before serving for the best taste. This way, you save time and enjoy fresh flavors. If you want to swap chicken, try these options: - Tofu for a vegetarian choice, firm works best. - Shrimp is a quick alternative; just cook until pink. - Beef strips can add a hearty flavor; grill or stir-fry. - Chickpeas offer protein and a different texture. These swaps keep the salad tasty and fun. For the full recipe, check it out! This blog post covered how to create a delicious salad. We started with the right ingredients, including chicken and crunchy elements. Then, I shared step-by-step instructions to prepare and dress your salad. You also learned tips for flavor and serving, along with variations to fit your taste. Finally, I discussed storage tips to keep your salad fresh and tasty. Remember, salads are flexible and fun. Customize them for any occasion, and enjoy your healthy meal!

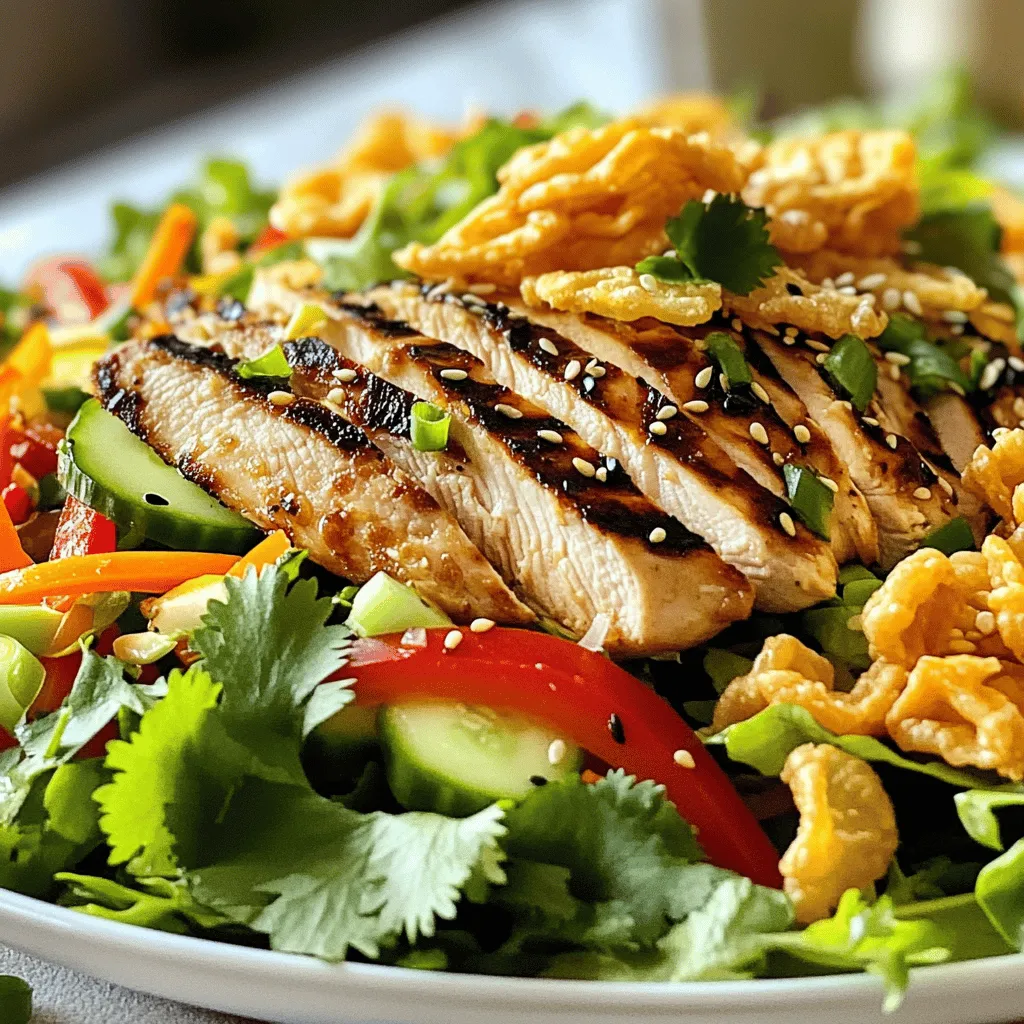
Looking for a fresh and tasty dish that’s easy to make? Try my Asian Chicken Crunch Salad! This vibrant salad is loaded with crunchy veggies, tender chicken, and a zesty …

Read more

Categories Salads

Quick & Easy Blackened Shrimp Delightful Meal Option

June 11, 2025 by Chef Tavio
- 1 lb large shrimp, peeled and deveined - 2 tablespoons olive oil - 1 tablespoon smoked paprika - 1 teaspoon onion powder - 1 teaspoon garlic powder - 1 teaspoon cayenne pepper (adjust for spice level) - ½ teaspoon dried thyme - ½ teaspoon salt - ½ teaspoon freshly ground black pepper - 1 lime, juiced - Fresh cilantro, chopped (for garnish) I love using fresh ingredients for my quick and easy blackened shrimp. The large shrimp really soak up the flavors well. Olive oil gives it a nice richness. Smoked paprika adds a warm, smoky taste that enhances the dish. For the spice blend, I mix onion powder, garlic powder, and cayenne pepper. You can change the cayenne to fit your spice preference. Dried thyme gives the shrimp an earthy note. Salt and black pepper round out the flavors. A squeeze of lime juice adds bright acidity. Finally, fresh cilantro is great for garnish. It adds color and freshness. The combination of these ingredients creates a vibrant dish that is sure to impress. You can find the full recipe above to guide you through the steps. Enjoy cooking! Combine these spices in a medium bowl: - 1 tablespoon smoked paprika - 1 teaspoon onion powder - 1 teaspoon garlic powder - 1 teaspoon cayenne pepper - ½ teaspoon dried thyme - ½ teaspoon salt - ½ teaspoon black pepper Mix them well. This blend gives your shrimp that bold blackened flavor. Pat the shrimp dry with paper towels. This step helps them sear nicely. Dry shrimp cook better. Drizzle 2 tablespoons of olive oil over the shrimp. Toss them with the spice blend. Make sure each shrimp is coated well. They should shine with spice. Heat a skillet over medium-high heat. Place the shrimp in a single layer. Cook them for about 2-3 minutes on each side. Look for them to turn opaque. This means they are done. Once cooked, squeeze juice from 1 lime over the shrimp. Toss them gently to coat. Garnish with chopped cilantro for a fresh touch. You can find the full recipe for more detailed cooking steps. Use a cast-iron skillet for optimal charring results. This pan gets hot and stays hot. It helps create a nice crust on the shrimp. The heat locks in all those bold flavors. If you don't have a cast-iron skillet, any heavy skillet will work. Just make sure it’s hot enough before adding shrimp. Modify cayenne pepper to personalize the heat level. If you like a milder taste, cut back on it. You can even skip it if you prefer no heat. For those who love spice, add more cayenne. This dish is all about your taste. Experiment with other spices such as cumin or chili powder for added depth. These spices can add layers to your dish. You can mix and match to find your favorite combo. Don't be afraid to be creative. This is your meal, and it should reflect your style. For a fun twist, try adding a pinch of lime zest to the spice mix for a fresh kick. Check out the Full Recipe for more details. {{image_4}} You can make blackened shrimp tacos for a fun meal. Start by warming soft tortillas. Place blackened shrimp in the center. Add creamy avocado and fresh salsa on top. The cool toppings balance the shrimp's spicy flavor. You can also add shredded cabbage for crunch. These tacos are easy and full of taste. For a new twist, serve blackened shrimp over pasta. Cook your favorite pasta according to the package. While it's cooking, make a simple cream sauce. Combine heavy cream, garlic, and parmesan in a pan. Toss the cooked pasta with the sauce and add blackened shrimp. This dish feels fancy but is simple to make. Another option is grilled blackened shrimp. Skewer the shrimp with wooden sticks. Preheat your grill to medium-high heat. Brush the skewered shrimp with olive oil and sprinkle with the spice blend. Grill for about 2-3 minutes on each side. This method gives a smoky flavor that is very tasty. Perfect for summer barbecues or easy dinners. Store cooked shrimp in an airtight container in the fridge for up to 2 days. This keeps the shrimp fresh and safe to eat. Make sure to let it cool down before sealing it in the container. If you notice any off smells or changes in texture, discard it. Freeze leftover blackened shrimp for up to 3 months in a freezer-safe bag. Before freezing, remove as much air as possible from the bag to prevent freezer burn. Label the bag with the date to keep track of its freshness. When you're ready to use it, thaw in the fridge overnight for the best results. Reheat in a skillet over low heat to maintain texture and flavor. Avoid using high heat, as this can make the shrimp tough. You can add a splash of water or broth to help steam the shrimp and keep it moist. Stir gently until heated through. Enjoy those bold flavors again! Approximately 2-3 minutes on each side until opaque. The shrimp cook quickly. Watch them change from transparent to white. This change shows they are done. Overcooking makes shrimp tough, so stay alert. Yes, but thaw them properly before cooking for best results. To thaw, place shrimp in the fridge overnight. For a quick option, run them under cold water. Do not use hot water, as it cooks them. Properly thawed shrimp cook evenly and taste better. Rice, salad, or grilled vegetables are great accompaniments. Fluffy rice soaks up the shrimp's spices. A crisp salad adds a fresh crunch. Grilled vegetables bring a nice smoky flavor. Mix and match sides to create a colorful plate. Yes, meal prep by cooking and storing for later use. Cook the shrimp and let them cool. Place in an airtight container. Store in the fridge for up to 2 days. Reheat gently to keep them tender. Check the [Full Recipe] for all details. In this post, we explored how to make perfect blackened shrimp. We covered the ingredients, detailed steps, and helpful tips. You learned how to prepare a tasty spice blend, cook the shrimp, and serve it with flair. Remember, you can adjust spices to match your taste. You also discovered various ways to enjoy this dish, like tacos or pasta. With storage tips, you can enjoy your shrimp later too. This simple recipe is sure to impress anyone at your table. Enjoy the flavor and share it with friends!

Are you ready to spice up your dinner routine? This Quick & Easy Blackened Shrimp recipe will have you enjoying bold flavors in just minutes. With simple ingredients and easy …

Read more

Categories Appetizers

Savory One Skillet Salmon with Lemon Orzo Recipe

June 11, 2025 by Chef Tavio
For this dish, you need two salmon fillets. Each fillet should weigh about 6 ounces. Salmon is rich in omega-3 fatty acids, which are great for your heart. Choose fresh salmon when you can. You can also use frozen salmon, but make sure it is fully thawed before cooking. You will need one cup of orzo pasta. Orzo looks like rice, but it is pasta. It cooks quickly and goes well with many flavors. Use two cups of low-sodium vegetable broth. This broth adds great depth to the dish without being too salty. For flavor, you will need the zest and juice of one lemon. Lemon gives bright, fresh notes to the meal. You also need two tablespoons of olive oil. This oil helps to cook the salmon and adds richness. Use one teaspoon of garlic powder for a savory taste. You should also add salt and freshly ground black pepper according to your liking. Finally, include one cup of halved cherry tomatoes and one cup of baby spinach. These veggies add color and nutrients. You can garnish with freshly chopped parsley for a nice finish. For the full recipe, check out the details above. Enjoy cooking! First, warm 2 tablespoons of olive oil in a large skillet over medium heat. While the oil heats, season 2 salmon fillets with 1 teaspoon garlic powder, salt, and black pepper. Once the oil is hot, place the salmon skin-side down in the skillet. Cook it for 4-5 minutes until the skin is crispy and golden. This adds great flavor and texture. Next, gently flip the salmon using a spatula. Cook for another 3-4 minutes. The salmon is ready when it looks opaque and flakes easily with a fork. Once cooked, transfer the salmon to a plate and set it aside. In the same skillet, add 1 cup of orzo pasta. Toast it for 1-2 minutes while stirring often. This step brings out the nutty flavor of the orzo. Now, pour in 2 cups of low-sodium vegetable broth. Add the zest and juice of 1 lemon. Stir well to combine everything. Bring the mixture to a gentle simmer. Lower the heat to low, cover the skillet, and let the orzo cook for about 10 minutes. Stir occasionally. Your goal is to absorb most of the broth and make the orzo tender. Once the orzo is cooked, fold in 1 cup of halved cherry tomatoes and 1 cup of baby spinach. Cook for another 2-3 minutes until the spinach wilts and the tomatoes warm through. Now, gently nestle the cooked salmon back into the skillet over the orzo. Scoop some of the cooking liquid over the salmon to keep it moist. Let everything meld together on low heat for about 2 minutes. Finally, remove the skillet from the heat. Sprinkle freshly chopped parsley on top for a burst of color and flavor. Serve warm and enjoy this vibrant dish. For the full recipe, check out the details above. To make your salmon flaky, start with fresh fillets. Look for bright, moist skin. Season the salmon well with salt and garlic powder. Heat the olive oil in the skillet until it shimmers. Place the salmon skin-side down and avoid moving it. This keeps the skin crispy. Cook it for 4-5 minutes before flipping. When it turns opaque, it’s ready to enjoy. Cook orzo in broth for extra flavor. Toast it in the skillet first to bring out its nutty taste. Stir it often while toasting. When you add the broth, let it simmer gently. Cover the skillet to keep steam in. Stir occasionally to prevent sticking. After about 10 minutes, check if the orzo is tender and has absorbed most of the broth. For added flavor, use fresh ingredients like lemon zest and juice. Cherry tomatoes add a pop of sweetness. Baby spinach gives a nice color and nutrients. Garnish with parsley for freshness. You can also try different herbs or spices to change the taste. Consider a dash of red pepper flakes for heat or fresh dill for a bright twist. These small changes make a big difference in your dish. For the complete recipe, check the Full Recipe section above. {{image_4}} If you don't have salmon, you can use other fish. Cod or trout work well as substitutes. They both have a mild flavor and cook quickly. You can also try chicken breast if you prefer poultry. Just adjust the cooking time, as chicken takes longer to cook through. Adding veggies can enhance your dish. You can toss in zucchini, bell peppers, or asparagus. These vegetables cook quickly and blend well with the orzo. For a crunch, consider adding peas or broccoli florets. They add color and nutrients. Feel free to switch up the flavors. Instead of lemon, try lime juice for a different zing. A splash of soy sauce can add depth, too. You might also like to add fresh herbs such as dill or basil. They can brighten up the whole dish. For extra heat, a pinch of red pepper flakes works nicely. Try the Full Recipe to explore these variations and make the dish your own! After enjoying your meal, let the leftovers cool. Store the salmon and orzo in an airtight container. It can last in the fridge for up to three days. Make sure to separate the salmon from the orzo if you prefer. This way, the salmon keeps its texture better. To reheat, you have a few options. You can use the microwave or a skillet. If using a microwave, warm it on medium power for about 1-2 minutes. Stir halfway through for even heating. If you choose the skillet, add a splash of water or broth. Heat on low until warm, stirring gently. This helps keep it moist. For meal prep, cook the orzo in advance. Store it in a separate container. You can also season and cook the salmon ahead of time. Just keep them both in the fridge. When it's time to eat, combine them like in the Full Recipe. This way, you save time and still enjoy a delicious meal! Cooking salmon takes about 10 minutes. Start on medium heat for 4-5 minutes on one side. Then, flip and cook for another 3-4 minutes. The salmon should look opaque and flake easily. This method gives you a juicy and tender fillet. Yes, you can use regular pasta instead of orzo. Just remember that cooking times may vary. Smaller pasta shapes like ditalini or fusilli work well. Make sure to adjust the liquid amount and cooking time based on the pasta you choose. This dish shines on its own, but you can add sides for variety. A fresh green salad pairs well, adding crunch. Roasted vegetables or a simple garlic bread also make great choices. Lemon wedges provide brightness and enhance the flavors beautifully. For more ideas, check the Full Recipe. In this post, we covered making One Skillet Salmon with Lemon Orzo. You learned about key ingredients, like salmon, orzo, and the right flavors. I shared step-by-step cooking tips and tricks to perfect your dish. We also discussed variations and how to store leftovers. Cooking should be fun and easy. With these steps, you can make a great meal. Enjoy your delicious salmon with lemon orzo anytime!

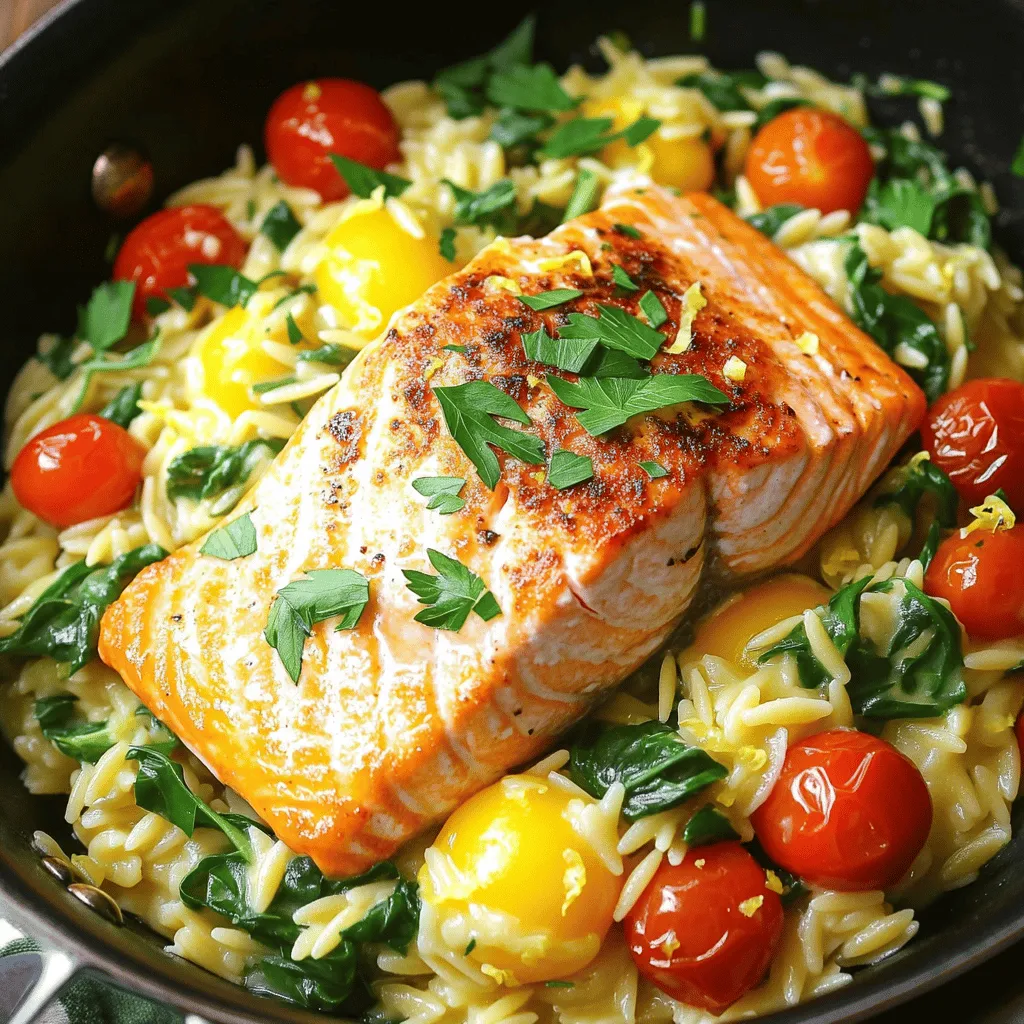
Looking for a quick, tasty meal? You’re in the right place! This One Skillet Salmon with Lemon Orzo dish is easy to make and full of flavor. You’ll have flaky …

Read more

Categories Dinner

High Protein Greek-style Breakfast Tortilla Delight

June 11, 2025 by Chef Tavio
- 4 large eggs - ½ cup plain Greek yogurt - ½ cup cooked quinoa - 1 small cucumber, finely diced - 1 medium tomato, diced - ¼ cup feta cheese, crumbled - 2 tablespoons fresh dill, chopped - ½ teaspoon garlic powder - Salt and freshly ground pepper to taste - 2 whole wheat tortillas - Olive oil for cooking - Eggs: Packed with protein, eggs help build muscle and keep you full. They also provide vitamins like B12 and D. - Greek yogurt: This adds creaminess and offers probiotics for gut health. It’s high in protein, which supports muscle repair. - Quinoa: A complete protein, quinoa gives you energy and fiber. It helps you feel full longer and is gluten-free. - Cucumber: This refreshing veggie adds hydration and crunch. It’s low in calories and high in vitamins K and C. - Tomato: Packed with antioxidants, tomatoes support heart health. They add flavor and juiciness to your dish. - Feta cheese: This cheese brings a tangy flavor. It has calcium and protein, which are great for bones. - Fresh dill: This herb adds a burst of flavor and is rich in antioxidants. It can aid digestion. - Garlic powder: It adds flavor and has health benefits, like boosting your immune system. - Whole wheat tortillas: These provide fiber and nutrients. They help keep your blood sugar steady. - Olive oil: A healthy fat, olive oil supports heart health and adds flavor to your dish. - For Greek yogurt, I like Fage or Chobani. They have a rich, creamy texture. - Use any brand of feta cheese that crumbles easily. Look for sheep's milk feta for a stronger flavor. - For quinoa, I recommend Bob's Red Mill or Ancient Harvest. They offer high-quality quinoa. - Choose whole wheat tortillas from brands like Mission or La Tortilla Factory for better flavor and texture. - For olive oil, extra virgin options like California Olive Ranch are excellent for cooking. This High Protein Greek-style Breakfast Tortilla is not just tasty; it’s also a smart way to fuel your day! For the full recipe, check below. Start by gathering your ingredients. You will need eggs, Greek yogurt, garlic powder, salt, and pepper. In a medium bowl, whisk the eggs and Greek yogurt together. Mix them until smooth. Add garlic powder, salt, and pepper to taste. Ensure everything blends well. This mixture gives your tortilla a creamy base. Next, heat a non-stick skillet over medium heat. Drizzle a light layer of olive oil in the pan. This step helps prevent sticking. Pour the egg mixture into the skillet. Let it cook undisturbed for 2 to 3 minutes. Use a spatula to gently fold the eggs. Stir until they start to set but still look a bit runny. Fold in cooked quinoa, diced cucumber, diced tomato, chopped dill, and crumbled feta cheese. Mix everything gently. Cook for about 2 more minutes until the eggs are fully cooked. Take the skillet off the heat. Let the filling cool for a minute. This way, you don't burn your fingers later. Now, grab a clean plate and place one tortilla on it. Spoon half of the egg filling onto one half of the tortilla. Spread it evenly for a good bite. Fold the tortilla over the filling. Press it down gently to keep the filling inside. Reheat the skillet over medium heat. If needed, add a bit more olive oil. Place the folded tortilla in the skillet. Cook for 2 to 3 minutes on each side. You want it golden brown and slightly crispy. Repeat this with the second tortilla and remaining filling. Once both tortillas are cooked, cut them in half. Serve warm for a tasty and nutritious breakfast. Enjoy this delightful dish! To make the best eggs, start with fresh ones. Crack them into a bowl and whisk well. I like to add Greek yogurt for creaminess. This makes the eggs rich and fluffy. Use a non-stick skillet to avoid sticking. Cook the eggs on medium heat for even cooking. Stir gently to keep them soft. Remember, you want them creamy, not dry. If they seem too dry, add a splash of water. This will help keep them moist. Spices can change the whole dish. For this recipe, I recommend garlic powder. It adds a nice kick without being too strong. Dill brings a fresh taste, making it perfect for breakfast. You can also try adding paprika or black pepper for a little heat. Taste as you go. If you want it bolder, add more spices. If it is too much, just add more yogurt to balance it. Cooking tortillas right is key. Use whole wheat for a nutty flavor and added fiber. Heat your skillet over medium heat and add a bit of olive oil. This prevents sticking and adds flavor. Place the tortilla in the skillet for 2-3 minutes on each side. Look for a golden brown color. This means they are ready. Do not rush this step; it makes all the difference. For a crispier texture, cook them a bit longer. Enjoy your warm tortillas filled with that delicious egg mixture from the Full Recipe. {{image_4}} You can easily make this dish vegetarian or vegan. For a vegetarian option, replace the eggs with scrambled tofu. Tofu has a similar texture and absorbs flavors well. Use firm tofu for the best results. For a vegan version, you can use chickpea flour. Mix chickpea flour with water to form a batter. Add spices like turmeric and black salt for a savory taste. This batter will give you protein and a nice texture. Feel free to change the flavors in your tortilla. Adding spinach gives you a nice green touch and boosts iron. Just sauté it lightly before adding to the eggs. You can also add avocado for creaminess. Slice or mash it and mix it in before folding the tortilla. Other great options include bell peppers, mushrooms, or fresh herbs like basil for a unique twist. Sauces can elevate your breakfast tortilla. Try a spicy salsa for a kick. You can also use tzatziki for a cool, creamy touch. Another option is hot sauce if you love heat. A drizzle of balsamic glaze adds a sweet tang. Each sauce brings a new flavor experience to your meal. Explore these variations to make your High Protein Greek-style Breakfast Tortilla even more exciting! For the complete recipe, check out the Full Recipe section. To keep your High Protein Greek-style Breakfast Tortilla fresh, store leftovers in the fridge. Place them in an airtight container. They can stay good for up to three days. Make sure to let them cool before sealing. This helps keep the tortillas from getting soggy. When you're ready to eat your leftovers, heat them gently. I recommend using a skillet over medium heat. This method keeps the tortillas crisp. Cook them for about 2–3 minutes on each side. You can also use a microwave, but the tortillas may become soft. If you opt for the microwave, cover them with a damp paper towel to keep moisture in. Heat for about 30 seconds, checking often. If you want to prep ahead, you can freeze these tortillas. Wrap each tortilla tightly in plastic wrap or foil. Place them in a freezer bag to prevent freezer burn. They can last up to three months in the freezer. When you're ready to eat, thaw them overnight in the fridge. Reheat as mentioned above to enjoy a tasty breakfast! Explore the Full Recipe to make this delightful meal for your mornings. Yes, you can use different cheeses. Feta gives a nice tangy flavor. You might try goat cheese or mozzarella for a milder taste. Each cheese adds a unique twist. Experiment with what you like best! For side dishes, fresh fruit works well. Sliced strawberries or a fruit salad adds sweetness. You can also serve yogurt on the side for creaminess. A small green salad can add crunch. These sides balance the meal nicely. To lower calories, you can skip the cheese. Use egg whites instead of whole eggs. You can also reduce the yogurt amount. Choosing smaller tortillas helps cut down calories too. Focus on fresh veggies for flavor without extra calories. This blog post covered how to make a delicious breakfast tortilla. We explored the key ingredients, their nutritional benefits, and recommended brands. I shared step-by-step cooking instructions and helpful tips for perfect eggs and tortillas. We also looked at variations to suit different diets and preferences. Finally, I provided storage tips to keep your breakfast tasty. In conclusion, this recipe is fun and flexible. You can customize it easily and enjoy a healthy meal. Happy cooking!

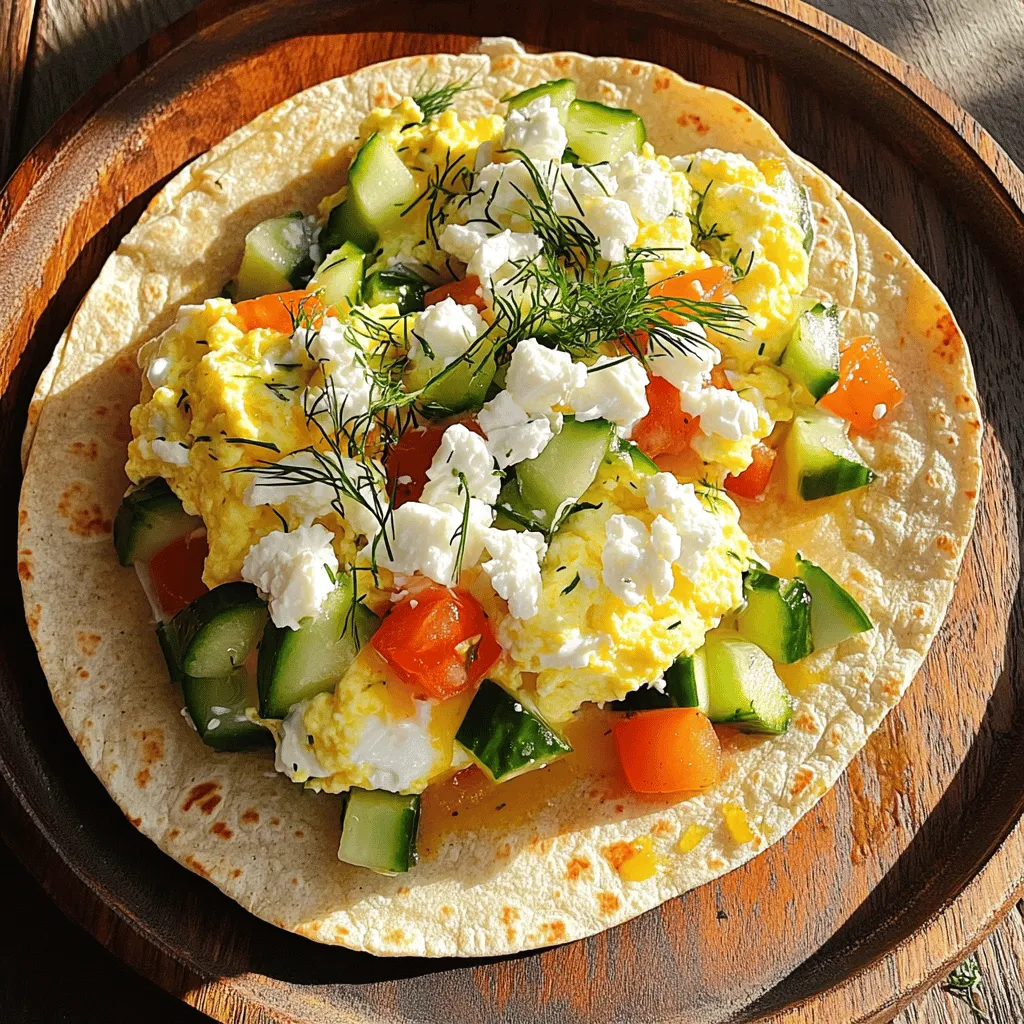
Start your day right with my High Protein Greek-style Breakfast Tortilla Delight! This easy recipe packs flavor and nutrients into one delicious meal. You’ll love the protein boost and wholesome …

Read more

Categories Breakfast

Ground Turkey Sweet Potato Skillet Flavorful Dinner

June 11, 2025 by Chef Tavio
To create a tasty Ground Turkey Sweet Potato Skillet, gather these simple ingredients: - 1 pound ground turkey - 1 large sweet potato, peeled and cut into ½-inch dice - 1 red bell pepper, chopped into bite-sized pieces - 1 yellow onion, finely chopped - 2 cloves garlic, minced - 1 teaspoon smoked paprika - 1 teaspoon ground cumin - ½ teaspoon chili powder - Salt and freshly ground black pepper, to taste - 2 tablespoons olive oil - 1 cup fresh spinach, roughly chopped - Fresh cilantro leaves for garnishing - Juice of 1 lime Using these fresh ingredients makes a meal that is not only healthy but also full of flavor. Ground turkey provides lean protein, while sweet potatoes offer natural sweetness and nutrients. The spices enhance the dish, bringing warmth and depth. You can find the full recipe for this delightful skillet dish above. Each ingredient plays a role in making your dinner special and satisfying. 1. Heating the olive oil Start by pouring 2 tablespoons of olive oil into a large skillet. Heat it over medium-high heat until it shimmers. This step helps to create a nice base for your dish. 2. Preparing sweet potatoes Toss in the diced sweet potato. Sauté for 5-7 minutes. Stir occasionally until the edges soften but stay firm. This gives the sweet potatoes a nice texture. 3. Incorporating aromatics Add the finely chopped onion and chopped red bell pepper. Cook for another 5 minutes. The onions will turn translucent, and the peppers will soften. This adds great flavor to the dish. 4. Seasoning the mixture Next, mix in the minced garlic, smoked paprika, cumin, and chili powder. Stir well and cook for 1-2 minutes. This step lets the spices bloom, filling your kitchen with a delicious aroma. 5. Cooking the ground turkey Push the veggies to one side of the skillet. Add the ground turkey to the other side. Use a wooden spoon to break it apart as it cooks. Brown for about 5-6 minutes until it’s no longer pink. This ensures even cooking. 6. Combining all ingredients Once the turkey is cooked, mix it with the veggies. Season the mixture with salt and pepper to taste. This step balances the flavors and makes every bite tasty. 7. Adding greens and finishing touches Fold in the chopped spinach and let it wilt for about 2 minutes. This adds a pop of color and nutrients to your meal. 8. Garnishing for presentation Remove the skillet from heat and drizzle with fresh lime juice. Just before serving, sprinkle with fresh cilantro leaves. This adds freshness and makes the dish look beautiful. Now, you have a colorful and flavorful Ground Turkey Sweet Potato Skillet ready to enjoy! Check out the [Full Recipe] for more details. - Ensuring sweet potatoes cook evenly: Cut the sweet potatoes into ½-inch dice. This size helps them cook through at the same time. Stir them every few minutes to cook all sides evenly. - Best practices for browning ground turkey: Use a hot skillet. Break the turkey apart as it cooks. This allows it to brown nicely. Avoid overcrowding the pan; cook in batches if needed. - How to enhance flavors with spices: Add spices early in the cooking process. This helps them bloom and release their flavors. Smoked paprika and cumin work wonders in this dish. Adjust the spice levels to your taste. - Pairing options for sides: Serve this dish with a side salad or steamed veggies. Brown rice or quinoa also complement it well. - Best accompaniments for the meal: Consider avocado slices or a dollop of yogurt on top. Fresh lime wedges add a nice touch, too. You can find the Full Recipe for more serving ideas. {{image_4}} You can switch up the protein in this dish. Ground turkey is great, but you can use chicken, beef, or even tofu if you prefer. Each option offers a different taste and texture. If you want to keep it light, try ground chicken. It has less fat but still adds good flavor. For a hearty meal, beef can work well. Tofu is perfect for a plant-based choice. You can also play with the vegetables. Seasonal veggies add fun and freshness. Try zucchini in summer or butternut squash in fall. Bell peppers are great, but you can also use carrots or green beans. The key is to use what you love and what is in season. If you need a gluten-free meal, this recipe is already safe! Just check your spices to ensure they are gluten-free. You can serve it with a gluten-free grain like quinoa or rice. To make this dish vegan or vegetarian, swap the ground turkey for lentils or chickpeas. They give protein and a nice texture. You can also add more veggies like mushrooms or eggplant to enhance flavor. With these changes, you’ll have a tasty meal that fits your diet. For the full recipe, check out the Ground Turkey and Sweet Potato Skillet Delight! To keep your Ground Turkey Sweet Potato Skillet fresh, follow these tips: - Refrigeration: Place leftovers in an airtight container. They last up to three days in the fridge. Make sure to cool it to room temperature before sealing. - Freezing: If you want to store it longer, freeze it. Use freezer-safe bags or containers. It can stay good for up to three months. Be sure to label your containers with the date. When it’s time to enjoy your leftovers, here’s how to do it right: - Best practices for maintaining texture: Reheat gently to keep the sweet potatoes and turkey from getting mushy. Add a splash of water or broth to help steam it. - Microwaving vs. stovetop reheating: The microwave is quick but can dry out the dish. For better texture, reheat on the stovetop over low heat. Stir often to ensure even warming. By following these storage and reheating tips, you can enjoy your flavorful dinner again and again! For the complete recipe, check out the Full Recipe section above. You can use ground chicken, beef, or tofu instead of ground turkey. Each option brings its own flavor. If you choose beef, it may add richness. Tofu is great for a plant-based choice. Yes, you can prep the sweet potatoes and veggies in advance. Chop them and store them in the fridge. This saves time on busy days. You can also cook the turkey ahead and reheat it when ready to serve. Sweet potatoes usually take about 15-20 minutes to cook in a skillet. Make sure to cut them into small, even pieces. This helps them cook quickly and evenly. Absolutely! This skillet dish is perfect for meal prep. You can portion it into containers for easy lunches or dinners. It stores well in the fridge for up to four days. To change the spice level, add more chili powder for heat. You can also use fresh peppers for a kick. If you prefer mild flavors, reduce the chili powder or skip it altogether. This recipe is a tasty and healthy option. It uses fresh ingredients like sweet potatoes, bell peppers, and ground turkey. The cooking steps help you create a flavorful dish easily. Remember to adjust spices and try different proteins based on your taste. Storing leftovers safely extends your meals. Overall, this dish is great for family dinners or meal prep. Enjoy exploring the various tips and options available!

Are you ready for a dinner that’s not just tasty but also quick to make? My Ground Turkey Sweet Potato Skillet is your answer! This one-pan meal combines lean turkey, …

Read more

Categories Dinner

The BEST Healthy Chocolate Chip Cookies Recipe

June 11, 2025 by Chef Tavio
- 1 cup almond flour - 1/2 cup rolled oats - 1/4 cup coconut sugar - 1/4 teaspoon baking soda - 1/4 teaspoon salt - 1/3 cup unsweetened applesauce - 1/4 cup almond butter - 1 teaspoon pure vanilla extract - 1/2 cup dark chocolate chips - 1/4 cup chopped walnuts (optional) I love using almond flour in these cookies. It's gluten-free and adds a nice nutty flavor. Rolled oats give cookies a chewy texture. Coconut sugar offers a rich, caramel-like sweetness that's lower on the glycemic index. The baking soda helps the cookies rise, while salt enhances all the flavors. Unsweetened applesauce is a fantastic way to keep these cookies moist without extra fat. Almond butter gives a creamy richness and healthy fat. Pure vanilla extract adds depth to the cookie's sweetness. Dark chocolate chips are a must for that classic chocolatey goodness. If you want more crunch, add chopped walnuts. - Calories per cookie: About 100 calories - Macronutrient breakdown: - Carbohydrates: 10g - Fats: 6g - Protein: 3g These cookies pack a good protein punch thanks to the almond flour and almond butter. The healthy fats from nuts support heart health. By using dark chocolate, you get antioxidants, too. Each ingredient brings its own health benefits, making these cookies a smart choice for a sweet treat. Check out the full recipe for more details on how to enjoy these healthy chocolate chip cookies! - Preheat oven to 350°F (175°C). - Prepare a baking sheet with parchment paper. - Combine dry ingredients in a large bowl. - Whisk wet ingredients in a separate bowl. Start by mixing the dry ingredients. In a large bowl, add 1 cup of almond flour, 1/2 cup of rolled oats, 1/4 cup of coconut sugar, 1/4 teaspoon of baking soda, and 1/4 teaspoon of salt. Stir these together well. This ensures they blend evenly for great flavor. Next, move to the wet ingredients. In another bowl, whisk 1/3 cup of unsweetened applesauce, 1/4 cup of almond butter, and 1 teaspoon of pure vanilla extract. Mix until smooth. This step creates a creamy base that adds moisture to the cookies. - Integrate wet and dry mixtures. - Scoop and shape the cookie dough. - Baking times and temperatures. Now, pour the wet mixture into the dry bowl. Stir gently until the dough is fully mixed. The dough should be a bit sticky. If it feels too dry, add a teaspoon of water. Next, fold in 1/2 cup of dark chocolate chips and 1/4 cup of chopped walnuts if you like. This adds sweetness and crunch to your cookies. Using a tablespoon, scoop out the dough and shape it into balls. Place these on the prepared baking sheet. Leave space between each ball since they will spread while baking. Lightly flatten each ball with your fingers. This helps them bake evenly. Bake the cookies in the preheated oven for 10-12 minutes. The edges should turn a golden brown. The centers should feel soft when touched. After baking, let the cookies cool on the baking sheet for about 5 minutes. Then, transfer them to a wire rack to cool completely. This helps them firm up nicely. For the full recipe, check out the complete guide to making these delicious cookies. Enjoy every bite! To achieve the right dough consistency, mix the dry and wet ingredients well. The dough should feel slightly sticky but not too wet. If it feels dry, add a teaspoon of water. This helps keep your cookies soft. How do you know when cookies are done? Look for golden edges and soft centers. They may seem underbaked at first, but they will firm up as they cool. Use light-colored baking sheets. These help cookies bake evenly. Dark sheets may cause cookies to burn. A sturdy mixing bowl is key for blending ingredients. A silicone spatula works great for folding in chocolate chips. Overmixing the dough can make cookies tough. Mix just until blended. Another mistake is not using parchment paper. It prevents sticking and makes cleanup easier. Always line your baking sheet for best results. {{image_4}} You can make these cookies extra tasty by adding spices. A pinch of cinnamon or nutmeg works wonders. These spices give the cookies warmth and depth. You can also switch up nut butters. Try peanut or cashew butter for a different flavor. Each nut butter brings a unique twist to the cookies. Want to make it vegan? Simply use flaxseed meal mixed with water instead of eggs. For gluten-free cookies, swap almond flour with a gluten-free flour blend. You can also use sugar substitutes like stevia or erythritol for keto or low-sugar diets. These options keep the cookies sweet without the extra carbs. Pair these cookies with a glass of almond milk for a tasty treat. You can also serve them with fresh fruit like berries or bananas. For a fun presentation, stack the cookies on a plate and drizzle some melted dark chocolate on top. It makes a beautiful display that everyone will love. If you want the full recipe, refer back to the section above. To cool cookies correctly, let them sit on the baking sheet for about 5 minutes. This helps them set up. Then, transfer the cookies to a wire rack. Cooling on the rack allows air to flow around them. This keeps the bottoms from getting soggy. Cooling before storage is key. Warm cookies can create steam in the container. This steam makes cookies soft and chewy, which is not what you want when storing. Use an airtight container for the best storage. Glass or plastic containers work well. If you have parchment paper, place it between layers of cookies. This keeps them from sticking together. At room temperature, the cookies last about 3 to 5 days. If you refrigerate them, they can last up to a week. However, the cookies may dry out in the fridge. So, room temperature is often best for taste and texture. To freeze cookies, first, let them cool completely. Then, place them in a single layer on a baking sheet. Freeze for about an hour until firm. After that, move the cookies to a freezer-safe bag or container. This method helps keep them fresh and prevents sticking. For thawing, simply take out the desired number of cookies. Let them sit at room temperature for about 30 minutes. You can also warm them in the oven for a few minutes. This makes them soft and yummy again. For the full recipe, be sure to check out the details above. These cookies are healthy due to their smart ingredients. They use almond flour, which is low in carbs and high in protein. Rolled oats add fiber and help keep you full. Coconut sugar is a better choice than white sugar, as it has a lower glycemic index. Unsweetened applesauce replaces extra fat and adds moisture. Dark chocolate chips provide antioxidants and make them delicious. Yes, you can substitute almond flour. Some good options are oat flour or coconut flour. Oat flour will add a slight nutty taste. Coconut flour absorbs more moisture, so use less of it. If you use coconut flour, add more applesauce to keep the dough moist. Each flour changes the cookie texture, so choose based on your taste. To make these cookies chewy, focus on two things: dough and baking time. Use more almond butter for added moisture. Also, do not overbake them; take them out when they are soft in the center. A shorter baking time keeps them chewy. If you want extra chewiness, add an extra tablespoon of applesauce to the mix. This recipe makes about 12 cookies. Each cookie is a nice size for a treat. If you want more, you can double the recipe. Be sure to adjust your baking time if you make larger cookies. Enjoy sharing or saving some for later! This blog post covered a tasty and healthy cookie recipe. You learned about the ingredients, step-by-step baking instructions, and tips for perfect results. I shared variations, storage methods, and helpful FAQs to guide you. Baking these cookies can be enjoyable and rewarding. You can customize them for your taste and diet. I hope you feel inspired to try this recipe soon. Happy baking!

If you love cookies but want a healthier option, you’re in the right place! I’m excited to share the BEST healthy chocolate chip cookies recipe that satisfies your sweet tooth …

Read more

Categories Desserts
Older posts
Newer posts
← Previous Page1 … Page61 Page62 Page63 … Page89 Next →

TASTED NEST

Where Flavor Finds a Home 🍳🏡 — warm, simple, and crave-worthy recipes made for real life, from stovetop mornings to backyard dinners.

PAGES

Home About Contact Privacy Policy Terms & Conditions Cookie Policy GDPR Policy Copyright Policy Disclaimer

CATEGORIES

Appetizers Desserts Salads Breakfast Dinner

Contact

  • Pinterest
  • Mail
Copyright © 2025 Tasted Nest. All rights reserved.