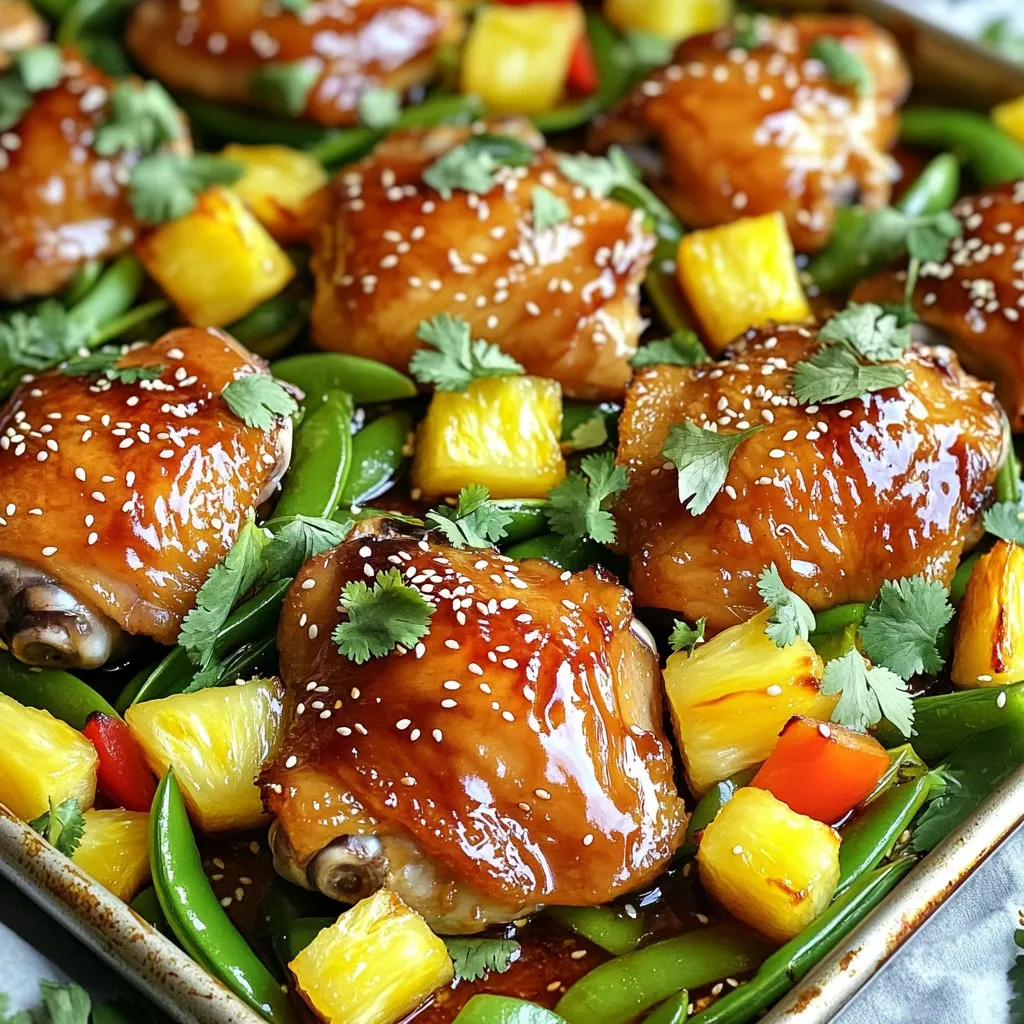
Skip to content
Tasted Nest
  • Home
  • Appetizers
  • Desserts
  • Salads
  • Breakfast
  • Dinner
  • Privacy Policy
  • Contact
  • About

Chef Tavio

Sauteed Zucchini with Sun Dried Tomatoes Delight

July 2, 2025 by Chef Tavio
To make sautéed zucchini with sun-dried tomatoes, you need fresh and flavorful ingredients. Here’s what you need to gather: - 3 medium zucchinis, sliced into half-moons - 1 cup sun-dried tomatoes, chopped - 1 medium onion, diced - 2 cloves garlic, minced - 1 tablespoon extra virgin olive oil - 1 teaspoon dried oregano - 1/2 teaspoon red pepper flakes (optional) - Salt and freshly ground black pepper - Fresh basil leaves for garnish - Grated parmesan cheese (optional) Each ingredient plays a key role in creating a dish that bursts with flavor. The zucchinis bring a mild and fresh taste, while sun-dried tomatoes add a rich, tangy kick. The garlic and onion provide depth, and the herbs enhance the overall profile. You can adjust the red pepper flakes based on your spice preference. If you want to elevate the dish, the optional parmesan adds a creamy finish. When you prepare this dish, focus on using good-quality sun-dried tomatoes, as they can make a big difference. For the best taste, try to find those packed in oil. This recipe is perfect for a quick meal or a side dish at dinner. You can also find the full recipe in the article. - Heat the Oil: Start by heating 1 tablespoon of extra virgin olive oil in a large skillet over medium heat. This oil will add flavor to your dish. - Sauté the Onion: Next, add 1 medium diced onion to the skillet. Cook for about 3-4 minutes. Stir it often until the onion becomes soft and clear. This shows it is ready. - Add Garlic: Now, stir in 2 cloves of minced garlic. Cook for another minute, stirring frequently. This will make your kitchen smell wonderful! - Prepare the Zucchini: Slice 3 medium zucchinis into half-moons. Toss the zucchini into the skillet along with some salt, freshly ground black pepper, and 1 teaspoon of dried oregano. If you like heat, add 1/2 teaspoon of red pepper flakes. - Cook the Zucchini: Sauté the zucchini for about 5-7 minutes. You want it to be soft yet still a bit crisp. This gives it a nice texture. - Add Sun-Dried Tomatoes: Next, mix in 1 cup of chopped sun-dried tomatoes. Cook for another 2-3 minutes. This will warm the tomatoes and let their tangy flavor blend into the dish. - Taste and Adjust: Remove the skillet from the heat. Taste the mix and add more salt, pepper, or red pepper flakes if you want. Adjust it to your liking. - Serve with Garnishes: Plate the warm sautéed zucchini. Garnish it with torn fresh basil leaves and a sprinkle of grated parmesan cheese if you like. This adds a rich touch to your dish. For the complete cooking experience, check out the Full Recipe. Enjoy your meal! - Ensure Zucchini Retains Crispness: Cook the zucchini on medium-high heat. This helps it stay firm. Sauté for just 5-7 minutes. You want it tender but still crunchy. - Use Fresh Ingredients for Best Flavor: Fresh zucchini and sun-dried tomatoes make a big difference. Look for bright zucchinis and plump tomatoes. Fresh herbs also boost the taste. - Presentation Tips: Serve the dish in a bright bowl. This makes the colors pop. Drizzle extra virgin olive oil around the edges for a tasty touch. - Recommended Pairings: This dish pairs well with grilled chicken or fish. You can also serve it with pasta or quinoa for a complete meal. {{image_4}} Using Different Varieties of Zucchini You can use yellow squash or pattypan squash if you want a twist. Both have similar textures and flavors. They will work well in this dish. You can also mix different types for fun colors and tastes. Alternative Seasonings If you like different flavors, try adding herbs like thyme or basil. You can also use lemon zest for a fresh kick. For a Mediterranean twist, add olives or capers. Experimenting keeps your meals exciting. Vegan Option This dish is already close to vegan. Just skip the parmesan cheese. You can also add nutritional yeast for a cheesy flavor without dairy. Gluten-Free Option This recipe is gluten-free as it stands. You don’t need any bread or grains. Enjoy it fresh and flavorful without worry. By exploring these variations, you can customize sautéed zucchini with sun-dried tomatoes to fit your taste and dietary needs. This makes it a versatile dish that everyone can enjoy. You can find the full recipe to get started on this delightful dish. - Refrigeration Guidelines: Place your sautéed zucchini in an airtight container. It stays fresh for 3 to 4 days in the fridge. Make sure it cools down before sealing. This way, it keeps its taste and texture. - Freezing Instructions: If you want to freeze the dish, let it cool first. Then, put it in a freezer-safe bag or container. It can last for 2 to 3 months. When ready to eat, thaw it in the fridge overnight before reheating. - Best Methods for Reheating: Reheat your zucchini on the stove over medium heat. This method helps it warm up evenly. Stir it often to avoid burning. You can also use the microwave, but heat it in short bursts. This way, it won’t get soggy. If you like, add a splash of olive oil for extra flavor. How long does sautéed zucchini last in the fridge? Sautéed zucchini can last up to 3 days in the fridge. Store it in an airtight container. To keep it fresh, let it cool before sealing. If you want to enjoy it longer, consider freezing it. Can I use fresh tomatoes instead of sun-dried? Yes, you can use fresh tomatoes. Fresh tomatoes will add moisture. Use about 2 medium tomatoes, diced. Keep in mind that the dish may taste different. Sun-dried tomatoes offer a rich, tangy flavor that fresh ones do not. What other dishes pair well with sautéed zucchini? Sautéed zucchini is versatile. It pairs well with pasta, grilled chicken, or fish. You can also serve it as a side with rice or quinoa. Try it on a bed of mixed greens for a light salad. What is the best way to slice zucchini for sautéing? Slice zucchini into half-moons for even cooking. Aim for ¼-inch thick slices. This size helps it cook quickly while keeping a nice texture. You can also cut them into sticks or rounds based on your preference. How do I know when zucchini is fully cooked? Zucchini is done when it is tender yet slightly crisp. It should have a bright color. If you press it gently with a fork, it should give but not be mushy. Cooking for 5-7 minutes usually achieves this ideal texture. This blog post covers all you need for making sautéed zucchini. You learned about key ingredients, step-by-step instructions, and helpful tips. Variations, storage, and common questions ensure you're prepared. Cooking should be fun and tasty. Try this recipe your way, and enjoy the great flavors. Remember, fresh ingredients make a big difference. Happy cooking!

Are you ready to spice up your meals with a simple yet delicious dish? This Sautéed Zucchini with Sun-Dried Tomatoes is packed with flavor and perfect for any occasion. In …

Read more

Categories Dinner

Delicious Baked Zucchini Parmesan Casserole Recipe

July 2, 2025 by Chef Tavio
- 4 medium zucchinis, thinly sliced - 1 cup cherry tomatoes, halved - 1 cup creamy ricotta cheese - 1 cup shredded mozzarella cheese, divided - 1/2 cup finely grated Parmesan cheese - 1 cup fresh basil leaves, chopped - 2 cloves garlic, minced - 1 teaspoon dried oregano - 1 teaspoon fine sea salt - 1/2 teaspoon freshly cracked black pepper - 1 tablespoon extra virgin olive oil The ingredients for baked zucchini parmesan casserole are fresh and simple. You start with zucchinis. They offer a mild taste and great texture. Cherry tomatoes add a sweet burst. Ricotta cheese makes the dish creamy. Mozzarella gives a cheesy pull. Parmesan adds a salty kick. For herbs, fresh basil brings bright flavor. Garlic adds depth. Oregano gives a classic Italian touch. Sea salt and black pepper bring out all the flavors. Finally, olive oil helps blend everything together and adds richness. - Calories: 300 - Total Fat: 18g - Saturated Fat: 10g - Protein: 15g - Carbohydrates: 20g - Fiber: 3g This baked zucchini parmesan casserole is filling and nutritious. Each serving is packed with flavor and good ingredients. - Gluten-Free Options: This recipe is already gluten-free. Just check all labels if needed. - Dairy Alternatives: Use vegan ricotta or mozzarella cheese for a dairy-free dish. Nut-based cheese works well too. Feel free to make this dish your own! You can mix in your favorite veggies or herbs. Enjoy the fresh ingredients and the joy of cooking! For the complete recipe, check out the Full Recipe. 1. Preheat your oven to 375°F (190°C). This helps the casserole cook evenly. 2. Lightly grease a 9x13-inch baking dish with olive oil. This prevents sticking. 3. In a large mixing bowl, mix the ricotta cheese, half of the shredded mozzarella, grated Parmesan, chopped basil, minced garlic, oregano, salt, and pepper. Stir until creamy and smooth. 1. Start with half of your sliced zucchini. Lay it evenly across the bottom of the dish. 2. Spread half of the ricotta mixture over the zucchini layer. Smooth it out for even coverage. 3. Scatter half of the halved cherry tomatoes on top of the ricotta layer. This adds tasty bursts of flavor. 4. Repeat this layering with the remaining zucchini, followed by the rest of the ricotta mixture. 5. Finish with the rest of the halved cherry tomatoes on top. 1. Sprinkle the remaining mozzarella cheese generously over the top of the casserole. 2. Drizzle olive oil over the entire dish to boost flavor and keep it moist. 3. Cover the dish tightly with aluminum foil. Place it in the preheated oven. Bake for 30 minutes to blend the flavors. 4. After 30 minutes, carefully remove the foil. Bake for another 15-20 minutes. Check that the cheese is bubbly and golden brown. 5. Let it cool for about 10 minutes. This helps the casserole set before slicing. For the full recipe, check the main article. To bake your zucchini casserole evenly, ensure your oven is at 375°F (190°C). Preheating helps cook everything just right. Use a baking dish that’s 9x13 inches. This size allows for proper heat circulation. When layering, spread ingredients evenly. This will keep the textures uniform and avoid sogginess. For a great presentation, serve the casserole warm. Garnish with fresh basil leaves to add color. You can also drizzle balsamic glaze on top. This simple touch provides a sweet and tangy flavor. It makes your dish look fancy for guests. Pair your casserole with a light salad. A simple arugula salad with lemon vinaigrette works well. You can also serve crusty bread on the side for a heartier meal. If you like spice, sprinkle red pepper flakes on top before serving. Add fresh herbs for an extra pop of flavor. {{image_4}} You can swap zucchini for other veggies. Eggplant, yellow squash, or even cauliflower work well. For cheese, try feta or goat cheese instead of ricotta. You can also use cheddar for a stronger flavor. Fresh herbs like thyme or parsley can replace basil for a different taste. If you want to save time, use an Instant Pot. Cook on high for about 10 minutes. For a slow cooker, layer your ingredients and cook on low for 4-6 hours. Both methods keep the flavors rich and delicious. Want a vegan option? Use tofu or cashew cheese instead of dairy. For low-carb or keto diets, skip the tomatoes and use more zucchini. You can also replace ricotta with a mix of cream cheese and herbs. These variations keep the dish tasty while meeting your dietary needs. For the full recipe, check out the Heavenly Baked Zucchini Parmesan Casserole 🥒. After enjoying your baked zucchini parmesan casserole, let it cool completely. This helps keep the flavors fresh. Use an airtight container to store the leftovers. Place the casserole in the fridge. It will stay good for about 3 to 5 days. For the best taste, try to eat it within this time frame. When you’re ready to enjoy the leftovers, preheat your oven to 350°F (175°C). Place the casserole in an oven-safe dish. Cover it with foil to keep it moist. Heat for about 20 minutes or until warm. You can also microwave individual portions. Just heat for 1 to 2 minutes, checking often. This keeps the texture and flavor nice. If you want to save some for later, freezing works well! Cut the casserole into portions. Wrap each one tightly in plastic wrap. Then, put the wrapped portions in a freezer bag. Make sure to label the bag with the date. You can freeze it for up to 3 months. To defrost, move a portion to the fridge overnight. Reheat it using the instructions above. Enjoy your meal! The baked zucchini Parmesan casserole lasts about 3 to 5 days in the fridge. Store it in an airtight container to keep it fresh. Make sure to let it cool before putting it in the fridge. If you see any signs of spoilage, like an off smell or mold, toss it out. Yes, you can prepare this casserole in advance. You can assemble it the night before and cover it tightly. Just keep it in the fridge until you are ready to bake. This makes dinner easy on busy days. If you want to freeze it, do so before baking. It can last for about 2 to 3 months in the freezer. This casserole pairs well with many side dishes. You can serve it with a fresh salad, like a simple green salad or a Caesar salad. Some crusty bread or garlic bread also works great. If you want to keep it light, try serving it with steamed vegetables. Each option adds a nice touch to your meal while balancing the flavors of the casserole. For the full recipe, check out the Heavenly Baked Zucchini Parmesan Casserole! In this blog post, I shared a delicious zucchini casserole recipe. You learned about the fresh ingredients, tips for cooking, and variations to try. I also covered storage and reheating methods to keep leftovers tasty. I hope you feel inspired to make this dish and enjoy it with family or friends. Cooking can be fun and rewarding, especially with simple recipes like this one. Remember, you can always mix things up to make it your own. Enjoy your cooking journey!

Are you ready to enjoy a dish that’s both scrumptious and simple? My Delicious Baked Zucchini Parmesan Casserole brings fresh flavors right to your table. With layers of tender zucchini, …

Read more

Categories Dinner

Gluten-Free Chocolate Zucchini Bread Irresistible Recipe

July 2, 2025 by Chef Tavio
- 1 ½ cups grated zucchini - 1 cup almond flour - ½ cup unsweetened cocoa powder - ½ cup gluten-free all-purpose flour - ½ cup coconut sugar - Chocolate chips (dairy-free options) - Other sweeteners (brown sugar, honey) - 9x5 inch loaf pan - Mixing bowls - Whisk and spatula You need fresh, grated zucchini for this recipe. It adds moisture and flavor. Make sure to squeeze out the excess water. Almond flour and cocoa powder create a rich base. Gluten-free all-purpose flour helps give the bread structure. Coconut sugar adds sweetness without being too overpowering. You can also add chocolate chips for extra sweetness. They melt and create little pockets of chocolate bliss. If you want, you can try using different sweeteners, like brown sugar or honey. For this recipe, you will need basic kitchen tools. A 9x5 inch loaf pan is perfect for baking. Mixing bowls help keep your ingredients organized. A whisk and spatula make mixing easy. You can find the full recipe in the article. It includes all you need to know to make this delicious treat! - First, grate 1 ½ cups of zucchini. Use a box grater for best results. - Sprinkle a pinch of salt on the grated zucchini. Let it sit for 10 minutes. This helps remove water. - After resting, take a clean kitchen towel and squeeze the zucchini. Remove extra moisture well. - In a large bowl, combine 1 cup almond flour, ½ cup cocoa powder, and ½ cup gluten-free flour. - Add 1 teaspoon baking soda, 1 teaspoon baking powder, and ½ teaspoon salt to the mix. Whisk until smooth. - In another bowl, whisk together ½ cup coconut sugar and ½ cup pure maple syrup. - Add 2 large eggs and whisk until mixed well. - Pour in ¼ cup melted coconut oil and 1 teaspoon vanilla extract. Mix until smooth. - Pour the wet mix into the dry mix. Stir gently until no dry flour shows. - Fold in the squeezed zucchini. Make sure it spreads evenly in the batter. - Add ½ cup chocolate chips and gently mix them in. If you want, save some chips for the top. - Pour the batter into your greased 9x5-inch loaf pan. Smooth the top with a spatula. - If you saved chocolate chips, sprinkle them on top now. - Bake in your preheated oven at 350°F (175°C) for 50-60 minutes. - Check if it’s done by inserting a toothpick. It should come out clean or with a few crumbs. Enjoy making this delicious Gluten-Free Chocolate Zucchini Bread! You can find the full recipe for all the details. You can swap coconut sugar for brown sugar if you want. Brown sugar gives a similar sweet flavor. If you prefer, use honey or agave syrup. Just remember to adjust the liquid in your recipe. For gluten-free flour, try different blends. Almond flour works great, but you can also use oat flour or a gluten-free all-purpose mix. Each flour gives a unique texture. Mix and match to find what you like best. Make sure your oven is at the right temperature. An accurate oven helps the bread bake evenly. Use an oven thermometer to check if needed. Don’t overmix your batter. Mix just enough to combine everything. Overmixing can make the bread dense and tough. Gently fold in the zucchini and chocolate chips to keep it light. To serve the bread, slice it and arrange it on a nice plate. You can drizzle melted chocolate over the top for a special touch. Pair the bread with toppings like whipped cream or a scoop of ice cream. A little bit of coconut whipped cream adds a tropical flavor. Enjoy your delicious creation! {{image_4}} You can make this gluten-free chocolate zucchini bread even more delicious. Try adding nuts like walnuts or pecans. They add a nice crunch and flavor. Just chop them up and fold them into the batter. You can also enhance the flavor with spices. A dash of cinnamon gives warmth. A little espresso powder adds depth. Both are simple ways to make this recipe your own. Want to switch it up? You can make chocolate zucchini muffins instead of bread. Just prepare the batter as usual. Instead of a loaf pan, use a muffin tin. Fill each cup about two-thirds full. Bake the muffins for about 20-25 minutes. Check them with a toothpick. If it comes out clean, they are done. This is a fun twist that kids love! If you want a vegan version, it’s easy to make. Substitute the eggs with flax eggs. Mix one tablespoon of flaxseed meal with two and a half tablespoons of water. Let it sit for a few minutes to thicken. Make sure all your ingredients are dairy-free. Use dairy-free chocolate chips and coconut oil. This way, everyone can enjoy your chocolate zucchini bread! For the full recipe, check out the recipe section above. To store leftover gluten-free chocolate zucchini bread, let it cool completely. Wrap it tightly in plastic wrap. You can also put it in an airtight container. This keeps it moist. Store it at room temperature for up to three days. If you want to keep it longer, refrigeration is a good option. Place the wrapped bread in the fridge. It will stay fresh for about a week this way. For long-term storage, freezing is the best method. Slice the bread first, so you can take out only what you need. Wrap each slice in plastic wrap. Then, place all slices in a freezer-safe bag or container. This keeps them safe from freezer burn. When you're ready to eat, take out a slice. Thaw it in the fridge overnight or on the counter for a few hours. You can reheat it in the oven for a warm treat. The shelf life of your gluten-free chocolate zucchini bread depends on how you store it. At room temperature, it lasts for about three days. In the fridge, it can stay fresh for up to one week. If you freeze it, it can last for about three months. Always check for signs of spoilage, like mold or an off smell, before enjoying your bread. You should not use regular flour. Regular flour has gluten, which helps bread rise. Gluten-free flour blends have different properties. They often contain a mix of flours and starches. This mix gives a good texture and taste. Almond flour adds moisture and flavor. Gluten-free all-purpose flour helps with structure. Each type of flour plays a unique role in this recipe. To check if your zucchini bread is done, use a toothpick. Insert it into the center of the bread. If it comes out clean or has a few moist crumbs, it’s done. The top should look slightly cracked and spring back when pressed. If it’s still wet, bake it for a few more minutes. Keep an eye on it to avoid overbaking. Yes, you can use frozen zucchini. Thaw it before using in your recipe. Make sure to squeeze out excess water after thawing. This will help keep your bread from becoming too wet. Frozen zucchini works well, but fresh zucchini gives the best flavor. Just remember to handle it carefully while mixing into the batter. This zucchini bread recipe combines simple, healthy ingredients for a tasty treat. You learned how to prepare, mix, and bake your own bread. I shared tips for substitutions and variations to suit your taste. Remember, this bread can be stored or frozen for later enjoyment. Enjoying a slice of this gluten-free delight with your favorite toppings can elevate any snack time. Bake, taste, and share. Your kitchen will be filled with deliciousness!

Are you craving a treat that’s both delicious and healthy? My Gluten-Free Chocolate Zucchini Bread is just what you need! Packed with moist, rich chocolate flavor and a hidden veggie …

Read more

Categories Desserts

Joanna Gaines’s Zucchini Bread Tasty and Simple Recipe

July 2, 2025 by Chef Tavio
To make Joanna Gaines's zucchini bread, gather these key ingredients: - 2 cups grated zucchini (about 1 medium zucchini) - 1 ½ cups all-purpose flour - 1 teaspoon baking soda - ½ teaspoon baking powder - 1 teaspoon ground cinnamon - ½ teaspoon ground nutmeg - ½ teaspoon salt - 1 cup granulated sugar - 2 large eggs - ⅓ cup vegetable oil - 1 teaspoon vanilla extract - ½ cup chopped walnuts or pecans (optional) - ½ cup chocolate chips (optional) You can customize this recipe with some fun add-ins. Here are a few ideas: - Chopped nuts add a nice crunch. - Chocolate chips bring a sweet twist. - Dried fruits like raisins or cranberries can add flavor too. Feel free to mix and match these options to find what you love best! When choosing zucchini, look for these tips: - Pick zucchini that feels firm and heavy. - Look for smooth skin without blemishes. - Choose smaller zucchinis for better flavor and texture. - If possible, opt for organic zucchini to avoid pesticides. Fresh zucchini will give your bread a moist and tasty base. Enjoy the process! Start by washing your zucchini well. Grate it using a box grater or a food processor. You need about 2 cups of grated zucchini. Place the zucchini in a bowl, sprinkle with a pinch of salt, and let it sit for ten minutes. This helps draw out excess moisture. After that, take a clean kitchen towel and squeeze out any extra liquid. This step is key to preventing soggy bread. In a medium bowl, whisk together the dry ingredients. Combine 1 ½ cups of flour, 1 teaspoon of baking soda, ½ teaspoon of baking powder, 1 teaspoon of ground cinnamon, ½ teaspoon of ground nutmeg, and ½ teaspoon of salt. Make sure these ingredients are mixed well. This blend will give your bread a perfect rise and great flavor. Now, grab a large bowl. Beat 1 cup of granulated sugar and 2 large eggs together. Use a hand mixer or whisk until the mixture is light and fluffy. This should take about 2-3 minutes. Slowly add in ⅓ cup of vegetable oil while mixing. Finally, stir in 1 teaspoon of vanilla extract. This adds a lovely aroma and sweetness to the bread. Now it’s time to combine the mixtures. Carefully fold the dry ingredients into the wet mixture. Use a spatula and mix until just combined. Avoid overmixing; this keeps the bread light and fluffy. Then, gently fold in the grated zucchini. If you’d like, you can add in ½ cup of chopped walnuts or chocolate chips for extra flavor. Pour the batter into a greased or lined 9x5 inch loaf pan. Smooth the top with a spatula. Preheat your oven to 350°F (175°C). Bake the bread for 50-60 minutes. To check if it’s done, insert a toothpick into the center. If it comes out clean, the bread is ready. Allow it to cool in the pan for about 10 minutes before transferring it to a wire rack. Let it cool completely before slicing. Enjoy your delicious creation! To keep your zucchini bread from being soggy, start with the water in the zucchini. After grating, sprinkle a bit of salt on the zucchini and let it sit. This helps draw out excess moisture. Then, use a towel to squeeze out the liquid. This step is key! If you skip it, your bread might turn out wet and dense. The toothpick test is simple but effective. After baking for about 50 minutes, insert a toothpick into the center of your bread. If it comes out clean, your bread is ready. If it has wet batter on it, bake for a few more minutes. Check every five minutes until it’s done. This way, you avoid undercooking your bread! Greasing the pan well makes it easy to remove the bread later. Use butter or vegetable oil to coat the inside of the pan. You can also use parchment paper for added ease. Line the bottom and sides, making sure it hangs over the edges. This helps lift the bread out cleanly once it cools. By following these tips, you can enjoy perfect zucchini bread each time! You can find the full recipe for Joanna Gaines’s Zucchini Bread [here]. {{image_4}} You can easily change the taste of your zucchini bread by adding nuts. Walnuts and pecans work well. They add a nice crunch and flavor. Chop them up and fold them into the batter. You can use about half a cup. If you want a sweeter twist, try adding chocolate chips instead. Mix them in with the nuts for a fun treat. Fruits and spices can make your zucchini bread unique. Think about adding dried fruits like raisins or cranberries. They add a burst of sweetness. You can also add spices like ginger or cardamom for extra warmth. Just remember to keep the total amount of mix-ins balanced. This way, the bread stays moist and tasty. If you want a gluten-free option, swap the all-purpose flour. Use a gluten-free flour blend instead. Make sure it has a mix of flours like almond or coconut. This change will give the bread a different texture. It may be denser, but it will still taste great. Always check the labels to ensure the flour is gluten-free. For more details, check the Full Recipe. Store leftover zucchini bread in an airtight container. This keeps it fresh. You can also wrap it tightly in plastic wrap. Keep it at room temperature for up to three days. If you live in a warm place, the fridge may help. However, the cold can change the bread's texture. To freeze zucchini bread, first let it cool completely. Then, wrap it in plastic wrap. Follow that with aluminum foil for extra protection. You can store it in the freezer for about three months. When you want to enjoy it, just thaw it in the fridge overnight. To reheat, slice the bread for even warming. You can warm it in an oven at 350°F for about 10-15 minutes. If you prefer the microwave, heat it for about 20 seconds. Enjoy it warm with butter or your favorite spread. This makes each slice taste fresh and delightful. Zucchini bread lasts about 1 week at room temperature. Store it in an airtight container. If you want it to last longer, put it in the fridge. This can keep it fresh for up to 2 weeks. You can also freeze zucchini bread for up to 3 months. Just wrap it tightly in plastic wrap and foil. Yes, you can use yellow squash as a substitute for zucchini. They taste similar and have a similar texture. Just prepare it the same way. Grate it and squeeze out the extra moisture before mixing it into your batter. If your zucchini bread is too dense, check your mixing method. Overmixing can cause this issue. Make sure to fold the wet and dry ingredients gently. You can also add a bit more baking soda to give it a lift. You can definitely make muffins instead of a loaf. Just pour the batter into a muffin tin. Bake at the same temperature but check for doneness earlier, around 20-25 minutes. This way, you can enjoy smaller, easier-to-eat portions. The best way to serve Joanna Gaines’s Zucchini Bread is warm. Slice it and spread on some butter or cream cheese. You can also top it with fresh herbs or a light dusting of powdered sugar. This adds a nice touch and makes it even more delightful. For the full recipe, check out the details above. In this post, we covered making zucchini bread from start to finish. We explored key ingredients and tips for picking fresh zucchini. I shared step-by-step instructions for mixing and baking. You learned tricks to avoid soggy bread. We also discussed tasty variations and smart storage tips. Remember, zucchini bread is easy to make and fun to customize. Use these tips to create a delicious treat every time. Enjoy your baking journey!

Are you ready to bake something delicious? Joanna Gaines’s zucchini bread is both tasty and simple! With just a few fresh ingredients, you can create a warm, comforting treat for …

Read more

Categories Desserts

Chocolate Zucchini Cake Moist and Simple Delight

July 2, 2025 by Chef Tavio
To make a rich and moist chocolate zucchini cake, gather these key ingredients: - 1 ½ cups all-purpose flour - ½ cup unsweetened cocoa powder - 1 tsp baking soda - ½ tsp baking powder - ½ tsp salt - 1 cup granulated sugar - ½ cup brown sugar, packed - ¾ cup vegetable oil - 3 large eggs - 2 tsp vanilla extract - 1 ½ cups grated zucchini (about 1 medium zucchini) These ingredients create the perfect balance of flavors in your cake. You can add extra flavors and textures by including optional mix-ins: - ½ cup semi-sweet chocolate chips - ¼ cup chopped walnuts These add-ins can make your cake even more delightful! Sometimes, you may not have all the ingredients. Here are some swaps you can use: - Instead of all-purpose flour, use whole wheat flour for a healthier option. - Replace vegetable oil with applesauce for a lower-fat cake. - If you want to skip eggs, try using ½ cup of yogurt as a binder. These substitutions can make your cake fit your needs while keeping it delicious. For the full recipe, check the complete details provided earlier. Start by preheating your oven to 350°F (175°C). While the oven warms up, grab a 9x13 inch baking pan. Grease and flour it well. Alternatively, you can line the pan with parchment paper. This makes removing the cake easy later on. In a medium bowl, whisk together these dry ingredients: - 1 ½ cups all-purpose flour - ½ cup unsweetened cocoa powder - 1 tsp baking soda - ½ tsp baking powder - ½ tsp salt Mix them well until they are fully combined. Set this bowl aside for now. Take a large mixing bowl and add: - 1 cup granulated sugar - ½ cup brown sugar, packed - ¾ cup vegetable oil Mix these ingredients together until they are smooth and glossy. This step is key for a moist cake. Next, add three large eggs one at a time. Make sure each egg mixes in fully before adding the next. Finally, stir in 2 tsp of vanilla extract to boost the flavor. Now it's time to add the star of the cake: the zucchini. Grate 1 ½ cups of zucchini. Fold this into your wet mixture carefully. Make sure the zucchini spreads evenly throughout the batter. If you want a little extra treat, you can also fold in: - ½ cup semi-sweet chocolate chips (optional) - ¼ cup chopped walnuts (optional) These add-ins give the cake a delightful texture and rich flavor. Pour your thick batter into the prepared pan. Use a spatula to smooth the top for even baking. Bake the cake in the preheated oven for about 30 to 35 minutes. To check if it's done, stick a toothpick in the center. If it comes out clean, your cake is ready. Once baked, take the pan out of the oven. Let it cool in the pan for about 10 minutes. After that, move the cake to a wire rack to cool completely. You can find the full recipe for more details. To get a moist and fluffy cake, start with fresh zucchini. Grate it finely and squeeze out excess moisture. This helps keep the cake from getting soggy. Mix the dry and wet ingredients separately first. Then, combine them gently to avoid overmixing. Overmixing can lead to a dense cake, which we want to avoid. One common mistake is using too much flour. Always measure it correctly. Too much flour can make your cake dry. Another mistake is not checking the doneness. Use a toothpick to test the center. If it comes out clean, your cake is ready. If you take it out too soon, the center may be gooey. You can add unique flavors to your cake. Try adding a teaspoon of cinnamon or nutmeg for warmth. For a richer taste, mix in coffee or espresso powder. If you want a double chocolate treat, add more chocolate chips. You can also swap out the zucchini for carrots for a different twist. These variations can elevate your cake and keep it exciting. For the complete details on how to make this delightful cake, check out the Full Recipe. {{image_4}} You can easily make this chocolate zucchini cake gluten-free. Just swap the all-purpose flour for a gluten-free flour blend. Make sure the blend you choose has a good structure, like one that includes xanthan gum. This change keeps the cake moist and delicious while being safe for those with gluten sensitivities. If you want a vegan version, replace the eggs with flaxseed meal. Mix 1 tablespoon of flaxseed meal with 2.5 tablespoons of water for each egg. Let it sit for a few minutes until it thickens. You can also use unsweetened applesauce instead of eggs. Replace the vegetable oil with a neutral oil like canola or melt coconut oil for a tasty twist. This way, you keep the cake moist and rich without using animal products. To spice up your chocolate zucchini cake, consider adding a pinch of cinnamon or nutmeg. These spices bring warmth and depth to the cake. You can also enhance the flavor with extracts. A splash of almond extract or a hint of orange zest can make a big difference. If you like a little kick, try adding a touch of espresso powder. This addition can elevate the chocolate flavor and make it even more rich and inviting. You can find the full recipe for this delightful chocolate zucchini cake above to get started on your baking journey! To keep your chocolate zucchini cake fresh, store it in an airtight container. This helps prevent it from drying out. You can also wrap it tightly in plastic wrap. If you want to keep the cake for longer, place it in the fridge. Just remember to let it cool completely before wrapping. This keeps the moisture in and the cake soft. If you want to freeze the cake, slice it first. Wrap each slice in plastic wrap. Then, place the wrapped slices in a freezer bag. This way, you can take out just what you need. When you are ready to eat, thaw the slices in the fridge overnight. For a quicker option, you can let them sit at room temperature for a few hours. Your chocolate zucchini cake lasts about three days at room temperature. If stored in the fridge, it can last up to a week. In the freezer, it stays good for about three months. Always check for any signs of spoilage before eating. Enjoy the cake while it's fresh for the best taste! You can find the full recipe earlier in this article. Absolutely! Chocolate zucchini cake is perfect for any event. Its rich taste and moist texture impress everyone. You can serve it at birthdays, family gatherings, or potlucks. Many people love the surprise of zucchini hidden in a sweet cake. It adds moisture without changing the flavor. You can dress it up with a nice frosting. Or, serve it plain and let the chocolate shine. Either way, it will be a hit! To check if the cake is done, insert a toothpick into the center. If it comes out clean or with a few crumbs, the cake is ready. It usually takes about 30-35 minutes at 350°F. Keep an eye on it, as ovens can vary. If the top looks too dark but the toothpick is not clean, cover it with foil. This prevents burning while it finishes baking. You have many tasty options to serve with chocolate zucchini cake. Here are a few ideas: - A scoop of vanilla ice cream adds a creamy touch. - Whipped cream gives it a light, fluffy feel. - Fresh berries can add a pop of color and flavor. - Chocolate sauce drizzled on top enhances the chocolate flavor. - A light dusting of powdered sugar makes it look fancy. Explore these options to find your favorite combo! You can find the full recipe for the cake above. In this blog post, we explored making a delicious chocolate zucchini cake. We discussed key ingredients and fun mix-ins. The step-by-step guide helps you prep and bake with ease. I shared tips for the best texture and common mistakes to avoid. Plus, there are variations for gluten-free and vegan diets. Finally, we covered storage tips to keep your cake fresh. Enjoy baking, and have fun experimenting with your own twists on this tasty treat!

Are you ready for a sweet twist on a classic treat? My Chocolate Zucchini Cake is a moist, easy delight that hides veggies in a rich chocolate flavor. This cake …

Read more

Categories Desserts

Soft Zucchini Taco Shells Nutritious and Easy Recipe

July 2, 2025 by Chef Tavio
- 2 cups zucchini, grated - 1/2 cup almond flour - 1 large egg - 1/4 teaspoon garlic powder - 1/4 teaspoon onion powder - Salt and pepper, to taste - 1 tablespoon fresh cilantro, chopped (optional) - 1 tablespoon olive oil (for cooking) These ingredients come together to create soft, nutritious taco shells. Zucchini makes these shells light and healthy. Almond flour adds a nice texture and flavor. The egg acts as a binder, helping everything stay together. Garlic and onion powder bring in a savory touch. Add salt and pepper to taste for extra seasoning. If you want a fresh kick, toss in some chopped cilantro. Lastly, olive oil is key for cooking the shells. You can find the full recipe for these tasty taco shells in the earlier sections. Enjoy experimenting with these ingredients! To start, grate 2 cups of zucchini using a box grater. Next, you need to remove the moisture. Place the grated zucchini in a clean kitchen towel or cheesecloth. Twist the towel tightly to squeeze out as much water as you can. This step is key. If you skip it, your taco shells may turn out soggy. You want them to hold their shape and be firm. Now, grab a mixing bowl. Combine the drained zucchini with 1/2 cup of almond flour, 1 large egg, 1/4 teaspoon of garlic powder, 1/4 teaspoon of onion powder, and some salt and pepper. If you want to add a burst of flavor, toss in 1 tablespoon of chopped fresh cilantro. Stir the mix until it looks like a dough. This will help your taco shells hold together well. Before cooking, preheat a non-stick skillet over medium heat. Once it’s hot, drizzle in some olive oil. Make sure to tilt the pan so the oil coats the bottom evenly. Now, take about 1/4 cup of the zucchini mix and place it in the skillet. Flatten it gently to make a round shape, about 1/4 inch thick. Make sure to leave space between each shell. Cook the shells for about 3-4 minutes on one side until they turn golden brown. Use a spatula to flip them carefully. Cook the other side for another 3-4 minutes until they are set and lightly browned. After cooking, transfer the shells to a plate to cool. Repeat this until you finish all the zucchini mixture. Add more olive oil as needed. Once cooled, fill your taco shells with your favorite toppings. Try seasoned black beans, grilled veggies, zesty salsa, or creamy avocado for a tasty treat. For the full recipe, check out the details above. To avoid soggy shells, always drain the zucchini well. Grate it and then squeeze out the moisture using a towel. This step is key. Too much water makes your shells fall apart. Ensure even cooking by keeping the shells the same size. Use a measuring cup to scoop the mix. Flatten each shell to about 1/4 inch thick. This helps them cook evenly. Don't crowd the pan. Leave space between shells for air to circulate. Pair your zucchini taco shells with fresh, vibrant fillings. Try seasoned black beans, grilled veggies, or zesty salsa. You can even add creamy avocado for a rich touch. For presentation, arrange the filled shells on a colorful platter. Add lime wedges and extra cilantro for a pop of color. A sprinkle of chili flakes can add a nice kick. These small touches make your dish look great and taste even better! For the full recipe, check out the Soft Zucchini Taco Shells recipe. {{image_4}} To make your soft zucchini taco shells more exciting, you can add herbs and spices. Fresh herbs like basil or oregano can boost the flavor. A dash of cumin or smoked paprika adds warmth. If you prefer heat, try a pinch of cayenne pepper. If you need a substitute for almond flour, try coconut flour. Keep in mind, coconut flour absorbs more moisture. Use half the amount of coconut flour compared to almond flour. Adding a little extra egg can help bind the mixture together. You can fill your zucchini taco shells with many healthy toppings. Seasoned black beans, grilled chicken, or sautéed mushrooms are all tasty options. You can also use fresh veggies like bell peppers or corn for crunch. For vegetarian or vegan options, consider using lentils or quinoa. These provide protein and texture. Avocado or a dollop of cashew cream can add creaminess. Top your filled shells with fresh salsa or pico de gallo for a zesty kick. For the full recipe, check out the detailed instructions above. To keep your leftover taco shells fresh, store them in an airtight container. Place a paper towel at the bottom to absorb any moisture. This helps the shells stay crisp. Seal the container tightly and place it in the fridge. They will last for about three days. When you're ready to eat them, you can reheat the shells. Heat a non-stick skillet over medium heat. Place the shells in the skillet for about one minute on each side. This brings back their warmth and a bit of crispness. You can freeze both uncooked and cooked taco shells. To freeze uncooked shells, shape them and place them on a baking sheet. Make sure they don't touch each other. Freeze until firm, then transfer them to a freezer-safe bag. You can store these for up to three months. To freeze cooked shells, let them cool completely. Place them in an airtight container, separating layers with parchment paper. They will also stay good for about three months. When you're ready to use them, defrost the shells in the fridge overnight. For reheating, place them in a hot skillet for a couple of minutes. This keeps them tasty and warm. To make zucchini taco shells, start by grating 2 cups of zucchini. After grating, use a clean kitchen towel to squeeze out the extra moisture. This step is key to keeping the shells firm. In a bowl, mix the drained zucchini with 1/2 cup of almond flour, 1 egg, and seasonings like garlic powder and onion powder. Stir until it forms a dough. Next, heat a non-stick skillet over medium heat and add olive oil. Scoop 1/4 cup of the mixture into the skillet, flatten it to about 1/4 inch thick, and cook for 3-4 minutes until golden brown. Flip the shell and cook for another 3-4 minutes. Once done, cool the shells and fill them with your favorite toppings, like seasoned black beans or grilled veggies. Yes, zucchini taco shells are very healthy! Zucchini is low in calories and high in vitamins and minerals. It's rich in Vitamin C, which helps boost your immune system. Plus, zucchini contains fiber, aiding digestion and keeping you full. Almond flour is a great source of healthy fats and protein, making these shells a smart choice. Using fresh herbs like cilantro can also add flavor and nutrients. Overall, this recipe offers a tasty way to enjoy a nutritious meal. Yes, you can prepare these taco shells in advance! After cooking, let them cool and store them in an airtight container in the fridge for up to three days. You can also freeze the uncooked mixture. Just spoon the mixture onto parchment paper, freeze until solid, then transfer to a freezer bag. When ready to cook, thaw them in the fridge overnight and follow the cooking steps. This way, you can enjoy fresh taco shells whenever you want! For the complete recipe, check out the Full Recipe. Zucchini taco shells are a fun and healthy twist on a classic dish. We covered ingredients, preparation steps, and cooking tips. You learned how to avoid soggy shells and add flavorful toppings. Remember, these shells are not just tasty; they also pack good nutrition. You can store leftovers or freeze extras for later use. Enjoy experimenting with different flavors and fillings. Your meals can be both fun and healthy. Now, get cooking and enjoy these delicious zucchini taco shells!

Looking for a healthy twist on taco night? You’ll love these Soft Zucchini Taco Shells! They’re not only simple to make but also packed with nutrients. With just a few …

Read more

Categories Dinner

Cottage Cheese Blueberry Muffins Tasty and Healthy Snack

July 2, 2025 by Chef Tavio
Let’s dive into what you'll need for these tasty cottage cheese blueberry muffins. The ingredients are simple and wholesome. Here’s the list: - 1 cup creamy cottage cheese - 1/2 cup milk (whole or low-fat) - 1/4 cup honey or maple syrup - 2 large eggs - 1 teaspoon pure vanilla extract - 1 1/2 cups all-purpose flour - 1/2 teaspoon baking soda - 1 tablespoon baking powder - 1/2 teaspoon fine salt - 1 1/2 cups fresh blueberries - Zest of 1 lemon - 1/4 teaspoon ground cinnamon (optional) - 1/4 cup granola (optional topping) Each ingredient adds to the flavor and texture of the muffins. The cottage cheese gives them a nice creaminess and boosts protein. Using milk helps keep the muffins moist. Honey or maple syrup adds natural sweetness, making these muffins a great snack. The eggs help bind everything together, while the vanilla gives a lovely aroma. The flour, baking powder, and baking soda work together to give the muffins a light and fluffy rise. Adding fresh blueberries brings bursts of juicy flavor. The lemon zest adds brightness, and a pinch of cinnamon can warm up the taste. Lastly, granola on top gives a nice crunch. For the full recipe and instructions, check out the [Full Recipe]. - Preheat oven to 375°F (190°C) - Prepare muffin tin with liners or grease Start by preheating your oven to 375°F. This step is key to making sure your muffins rise nicely. Next, grab a muffin tin and either line it with paper liners or grease it lightly. This will help the muffins come out easily after baking. - Combine cottage cheese, milk, honey, eggs, and vanilla in a bowl - Whisk until smooth In a large bowl, mix the creamy cottage cheese, milk, honey, eggs, and vanilla. I like to use a whisk here, as it helps blend everything together smoothly. Make sure there are no lumps, as a smooth batter leads to fluffy muffins. - Whisk together flour, baking soda, baking powder, salt, lemon zest, and cinnamon - Ensure even distribution of ingredients Now, take another bowl and whisk the dry ingredients. Combine all-purpose flour, baking soda, baking powder, salt, lemon zest, and cinnamon. This step is important because mixing these ingredients evenly prevents any clumps. - Gradually combine wet and dry ingredients - Avoid overmixing Slowly add your dry mix to the wet ingredients. Use a spatula or wooden spoon to fold them together. Be gentle here! Overmixing can make your muffins tough. Just mix until you see no dry flour. - Fold in blueberries carefully - Spoon batter into muffin tin, filling each cup two-thirds full Next, fold in the fresh blueberries. Be careful not to smash them! Their juice will create lovely spots in your muffins. Then, spoon the batter into the muffin cups, filling each about two-thirds full. This gives them room to rise. - Bake for 18-20 minutes until cooked through - Let cool before serving Place the muffin tin in your preheated oven. Bake for about 18 to 20 minutes. To check if they are done, insert a toothpick in the center. If it comes out clean, they are ready! Let them cool in the tin for a few minutes, then transfer to a wire rack. Enjoy these tasty snacks! For the full recipe, check the title above. - Use room temperature ingredients for better mixing. - Avoid overmixing for fluffy muffins. Using room temperature ingredients is key. It helps your batter blend smoothly, making the muffins light and airy. Cold ingredients can create lumps in your batter, which you want to avoid. Overmixing is a common mistake. When you mix too much, the muffins can turn out dense. Stir just until the ingredients are combined. This keeps your muffins tender and soft. - Add nuts or seeds for extra crunch. - Experiment with spices like nutmeg or cardamom. To make your muffins even tastier, add nuts or seeds. They give a nice crunch and boost nutrition. Walnuts or sunflower seeds are great choices. Spices can take your muffins to the next level. A pinch of nutmeg adds warmth, while cardamom brings a unique flavor. Try different combinations to find your favorite. - Pair muffins with cottage cheese or yogurt. - Garnish with fresh blueberries. For a fun twist, serve your muffins with cottage cheese or yogurt. It adds creaminess and makes a filling snack. Garnishing with fresh blueberries not only looks pretty, but it also enhances the flavor. Scatter a few berries on top before serving for a pop of color and taste. {{image_4}} You can change the fruit in these muffins. Use raspberries, blackberries, or strawberries instead of blueberries. Each fruit gives a unique taste. If you want something different, try adding a banana. This gives a nice, sweet flavor and moisture. You don’t have to use honey. You can swap it for agave syrup or coconut sugar. Each option changes the taste slightly. Feel free to adjust the sweetness based on your taste. You can add more or less to make it just right for you. If you need a gluten-free choice, it’s easy to swap the flour. Replace all-purpose flour with a gluten-free blend. Just make sure to check the blend's instructions. This will help you get the best results in your muffins. For the full recipe, check out the Cottage Cheese Blueberry Muffins section. After baking, let the muffins cool completely. This step is key to keeping them fresh. Once cool, place them in an airtight container. This will help keep the muffins moist and tasty for longer. If you want to save muffins for later, wrap them in plastic wrap. Then, put them in a freezer bag. They can stay in the freezer for up to three months. This way, you can enjoy a quick snack anytime! To enjoy your muffins again, reheat them in the microwave. You can also use a toaster oven for the best results. Just heat them until warm to bring back their soft texture. For more ideas, check the Full Recipe. Yes, plain yogurt can be a good substitute. It adds creaminess and moisture. The flavor will shift slightly, but the muffins will still taste great. Use flax eggs and a plant-based milk alternative. Replace honey with maple syrup for sweetness. This keeps the muffins moist and delicious without dairy. Frozen blueberries work well. Just rinse and drain them before adding to the batter. They keep the muffins juicy and flavorful. Check for a toothpick inserted in the center to come out clean or with a few moist crumbs. This ensures they are baked but still soft. Yes, simply double all the ingredients. You may need to adjust baking times slightly. Keep an eye on them to make sure they don’t overbake. For the full recipe, refer to the detailed instructions above. These muffins are easy to make and taste great! We mixed cottage cheese, fresh blueberries, and simple ingredients to create a fluffy treat. Remember to not overmix the batter for the best texture. Feel free to customize your muffins with different fruits or sweeteners to match your taste. Enjoy them fresh or store them for later. Happy baking!

Looking for a snack that’s both tasty and healthy? You’ve come to the right place! My Cottage Cheese Blueberry Muffins are the perfect blend of flavor and nutrition. Packed with …

Read more

Categories Breakfast

Easy Baked Zucchini Sticks Crispy and Delicious Snack

July 2, 2025 by Chef Tavio
- 2 medium zucchinis - 1 cup whole wheat breadcrumbs - ½ cup freshly grated Parmesan cheese - 1 teaspoon garlic powder - 1 teaspoon onion powder - ½ teaspoon smoked paprika - 2 large eggs - Salt and freshly ground black pepper - Olive oil spray Each ingredient plays a key role in making your zucchini sticks crispy and tasty. Zucchini is low in calories and high in nutrients, making it a perfect base. Whole wheat breadcrumbs add crunch while keeping it healthy. Parmesan cheese gives a rich, cheesy flavor that pairs well with the spices. Garlic and onion powder bring out the natural sweetness of zucchini. Smoked paprika adds a delightful smokey taste. Eggs help the breadcrumbs stick, ensuring a nice coating. Salt and pepper enhance all the flavors, while olive oil spray keeps things light. - Calories per serving: About 150 - Macronutrient breakdown: - Protein: 8 grams - Carbohydrates: 18 grams - Fat: 6 grams This snack is not just delicious but also packed with nutrients. Each serving offers a balanced mix of protein, carbs, and healthy fats. Enjoy these baked zucchini sticks as a guilt-free treat or a side dish. You can find the full recipe above to make this tasty snack! - Preheat oven to 425°F (220°C). - Line a baking sheet with parchment paper. First, set your oven to 425°F (220°C). This high heat helps the zucchini sticks become crispy. Next, take a baking sheet and line it with parchment paper. This makes cleanup easy and prevents sticking. - Prepare breadcrumb mixture. - Dip zucchini in egg mixture. Now, let’s make the breading. In a shallow bowl, mix the whole wheat breadcrumbs, grated Parmesan cheese, garlic powder, onion powder, and smoked paprika. Add salt and pepper for flavor. Stir well. In another bowl, beat the eggs until they are smooth. Take each zucchini stick and dip it in the egg mixture. Let any extra egg drip off. Then, roll the zucchini in the breadcrumb mixture. Press gently to help the crumbs stick well. - Arrange zucchini on the baking sheet. - Bake time and flipping instructions. Lay the breaded zucchini sticks on the baking sheet. Make sure they do not touch each other. This helps them bake evenly. Lightly spray the tops with olive oil spray for extra crispiness. Place the sheet in the oven and bake for 20-25 minutes. Be sure to flip the sticks halfway through baking. This step ensures they brown evenly. When they turn golden brown and feel crispy, they are ready. After baking, let them cool for a few minutes before serving. Check out the Full Recipe for more details on presentation and serving. To get your zucchini sticks nice and crispy, avoid overcrowding the baking sheet. When zucchini sticks touch, they steam instead of bake. This can lead to sogginess, which is not what we want. Keep them in a single layer. This ensures hot air can reach all sides evenly. Using olive oil spray is another great tip. It helps create a crispy layer on the outside. A light spray adds flavor without extra calories. Just a quick spritz before baking makes a big difference. You can easily boost the flavor of your zucchini sticks. Try adding herbs or spices to your breadcrumb mix. For example, dried oregano or Italian seasoning works well. You can also use chili powder for a kick. Don’t forget about dips and sauces! Marinara sauce is a classic choice. You can also pair these sticks with ranch dressing or aioli. These dips add a fun twist to your snack. For more ideas, check out the Full Recipe. {{image_4}} You can make easy baked zucchini sticks even healthier. Try using gluten-free breadcrumbs instead of regular ones. This swap keeps the crunch while catering to dietary needs. You can also adjust the cheese types for flavor. For example, use nutritional yeast for a dairy-free option or swap Parmesan for a sharper cheese, like cheddar. Each change adds a unique twist to the taste without losing that crunch. Want to spice things up? Incorporate different seasonings into your breadcrumb mix. Italian herbs like oregano and basil can give these sticks a fresh, aromatic touch. You can also add a dash of cayenne for heat. For a richer taste, blend cheeses. Mixing mozzarella with Parmesan can create a gooey, cheesy delight that will impress your friends and family. Don't be afraid to get creative; these zucchini sticks can be a fun canvas for your flavor ideas! To keep your leftover zucchini sticks fresh, store them in an airtight container. Place a paper towel inside to absorb extra moisture. This helps maintain their crispiness. Keep them in the fridge for up to three days. If you have a lot of leftovers, consider freezing them. Just layer them between parchment paper to avoid sticking. To reheat your zucchini sticks and keep them crispy, use an oven or air fryer. Preheat the oven to 375°F (190°C). Place the sticks on a baking sheet and heat for about 10 minutes. This method revives their crunch. If using an air fryer, set it to 350°F (175°C) and heat for about 5-7 minutes. Avoid using a microwave, as it can make them soggy. Enjoy your crispy snack again! To make baked zucchini sticks crispy, start with fresh zucchini. Cut them into even sticks, so they cook evenly. Use whole wheat breadcrumbs for a crunchier texture. The key is in the egg wash. Dip each stick thoroughly, then coat with the breadcrumb mix. Press the breadcrumbs onto the zucchini for a nice layer. Bake at a high temperature, around 425°F (220°C). This helps achieve that golden color and crispiness. Don’t forget to space them out on the baking sheet! If they touch, they’ll steam instead of bake. A light spray of olive oil on top adds extra crunch. Flip them halfway during baking to ensure even crisping. Using frozen zucchini is not recommended for this recipe. Frozen zucchini tends to be mushy after cooking. It loses its crunch and can make the sticks soggy. Fresh zucchini holds texture and flavor much better. If you only have frozen zucchini, let it thaw completely. Then, drain any excess water before coating and baking. Zucchini sticks pair well with a variety of dipping sauces. Here are some popular choices: - Marinara sauce for a classic Italian touch - Ranch dressing for a creamy, cool option - Garlic aioli for a garlic kick - Spicy ketchup for those who like a bit of heat Feel free to get creative! You can even mix sauces or add spices to your favorites for a fun twist. For more ideas, check out the Full Recipe for tasty suggestions. We covered the essentials for making tasty baked zucchini sticks. You learned about ingredients, prep, baking, and storage. I shared tips to get the perfect crunch and keep leftovers tasty. Remember, you can adjust seasonings for fun flavor twists. Baked zucchini sticks are a healthy snack option for everyone. Try pairing them with your favorite dips for an extra kick. Enjoy your cooking, and have fun experimenting with this easy recipe!

Are you craving a tasty snack that’s both crispy and healthy? Look no further! I’m about to share my easy baked zucchini sticks recipe, perfect for satisfying your snack cravings …

Read more

Categories Appetizers

Garlic Butter Chicken Bites Simple and Flavorful Dish

July 2, 2025 by Chef Tavio
- 1 lb (450g) chicken breast, cut into bite-sized pieces - 4 tablespoons unsalted butter - 4 cloves garlic, minced - 1 teaspoon dried oregano - 1 teaspoon dried thyme - 1 teaspoon smoked paprika - 2 tablespoons fresh parsley, finely chopped (for garnish) - Lemon wedges (for serving) When it comes to creating garlic butter chicken bites, simplicity shines. First, the chicken breast acts as the star, offering a tender base. I always choose fresh chicken. It holds flavor well and cooks evenly. The unsalted butter gives richness and a creamy texture. The garlic, oh the garlic, adds a punch of flavor that makes this dish pop. For seasonings, dried oregano and thyme are my go-tos. They add warmth and earthiness. Smoked paprika brings a subtle smokiness that elevates the dish. Adjust the seasonings based on your taste, but these three work wonderfully together. Garnishing is just as important. Fresh parsley brightens up the plate. It adds a splash of color and a hint of freshness. Lemon wedges serve as a zesty contrast. When you squeeze lemon juice over the bites, it enhances the flavors even more. You can find the full recipe for garlic butter chicken bites to guide you through the cooking process. Enjoy these bites as a quick meal or serve them at your next gathering! - Seasoning the Chicken Pieces: Start with 1 pound of chicken breast. Cut it into bite-sized pieces. In a mixing bowl, toss the chicken with salt, black pepper, smoked paprika, and a pinch of dried oregano. Make sure each piece is coated well. This step adds great flavor to every bite. - Ensuring Even Coating: After seasoning, mix thoroughly. You want each piece to be evenly coated. This helps the chicken absorb the flavors during cooking. - Melting the Butter: Heat a large skillet over medium heat. Add 4 tablespoons of unsalted butter. Let it melt completely. Keep an eye on it as it melts. You want it to foam but not brown. - Sautéing Garlic: Once the butter is melted, add 4 cloves of minced garlic. Stir gently for 1 to 2 minutes. You should smell the garlic's aroma, but take care not to let it brown. Burnt garlic can taste bitter. - Adding the Chicken: Now, add your seasoned chicken pieces to the skillet. Cook for about 5 to 7 minutes. Stir occasionally to ensure even cooking. The chicken should turn golden brown and reach an internal temperature of 165°F. - Integrating Herbs: After the chicken is cooked, sprinkle 1 teaspoon of dried thyme and the remaining oregano over it. Stir well to mix. This will let the herbs infuse their flavors into the chicken bites. For the full recipe, check out the detailed instructions! - Ideal Skillet Temperature Start with medium heat. This helps the butter melt without burning. A hot skillet cooks the chicken quickly and evenly. Keep an eye on it as you don’t want it too hot. - Preventing Garlic from Burning Add garlic after the butter melts. Stir it gently for 1-2 minutes. If it turns brown, it can taste bitter. You want fragrant garlic, not burnt. - Adjusting Seasoning to Taste Taste the chicken bites as you cook. If you want more salt, add it slowly. You can also add a bit more paprika for a smoky flavor. Adjust to your liking. - Incorporating Other Herbs Try adding basil or rosemary for a twist. Fresh herbs can brighten the dish. Just remember to add them near the end of cooking for the best flavor. - Arrangement on the Plate Serve the chicken bites in a shallow dish. Arrange them in a circle or a nice pile. This makes your food look more inviting and tasty. - Garnishing Suggestions Sprinkle extra parsley on top for color. You can also add a few lemon wedges. This not only looks good but adds a fresh taste when squeezed over the dish. For the full recipe, check out the [Full Recipe]. {{image_4}} - Adding Vegetables You can enhance your garlic butter chicken bites by adding vegetables. Think of colorful bell peppers, green beans, or zucchini. Cut them into bite-sized pieces. Just toss them in with the chicken while cooking. They add flavor and nutrition to your dish. - Incorporating Different Proteins While chicken is great, you can also use shrimp or tofu. These alternatives offer new textures and flavors. Cook them in the same garlic butter and spices. Adjust cooking times to ensure they are cooked through. - Spicy Garlic Butter Chicken Bites Want some heat? Add red pepper flakes or cayenne pepper to the mix. Start with a small amount and taste as you go. This gives your chicken bites a nice kick without overpowering the garlic flavor. - Lemon Herb Garlic Chicken Bites For a fresh twist, add lemon zest and juice. Mix these into the garlic butter before cooking the chicken. You can also include fresh herbs like basil or dill for a bright taste. This variation is perfect for summer meals. - Side Dish Suggestions Garlic butter chicken bites pair well with rice, quinoa, or a simple salad. Consider roasted potatoes or sautéed greens for a hearty meal. These sides complement the rich flavors of the chicken. - Pairing with Dips Serve your bites with dips like ranch or garlic aioli. These add a creamy element to the dish. You can even make a spicy dip using yogurt and hot sauce. It’s a fun way to enjoy the bites with friends. For the full recipe and more ideas, check out the [Full Recipe]. Store your garlic butter chicken bites in an airtight container. This helps keep them fresh. The flavor stays strong for up to three days. The texture may change slightly, but they still taste great. Make sure to cool them down before sealing. This prevents steam from building up inside the container. To freeze, first let the chicken bites cool completely. Then, pack them in freezer bags. Remove as much air as possible before sealing. This keeps freezer burn away. They can stay in the freezer for up to three months. When you're ready to eat, thaw them overnight in the fridge. Reheating is simple. You can use a skillet over medium heat. Add a little butter to keep them moist. Heat until warmed through, about 5-7 minutes. Don’t waste any leftovers! You can add them to salads for extra protein. Toss them in pasta for a quick meal. They also work great in wraps with fresh veggies. Transforming these bites into new dishes is fun and easy. Get creative with your meals! Check out the Full Recipe for more inspiration. To season garlic butter chicken bites well, use simple herbs and spices. Start with salt and pepper. Add smoked paprika for a nice kick. Dried oregano and thyme bring out rich flavors. For a burst of freshness, finish with chopped parsley. You can also mix in a pinch of red pepper flakes for heat. Adjusting cooking time is easy. If you use larger chicken pieces, increase the cook time by a few minutes. Smaller pieces will cook faster, so check them at around 5 minutes. Always ensure the chicken reaches 165°F (74°C) inside. This keeps it safe and tasty. Use a meat thermometer for accuracy. Yes, you can make garlic butter chicken bites ahead of time. Cook the chicken and let it cool. Store it in an airtight container in the fridge for up to three days. When ready to eat, just reheat it in a skillet or microwave. This way, you save time on busy nights. For the full recipe, check out the complete guide. This blog covers the key steps to make delicious garlic butter chicken bites. We discussed the main ingredients like chicken, butter, and garlic, along with the right seasonings and herbs. You learned the cooking process and tips for better flavor and presentation. I shared variations so you can customize the dish. Finally, we touched on storage and meal prep ideas. Enjoy making this dish, and don't hesitate to experiment to match your taste! Your kitchen creativity will enhance every bite.

Craving a dish that packs a punch of flavor without all the fuss? Garlic Butter Chicken Bites are here to save your dinner! With just a few simple ingredients and …

Read more

Categories Dinner

Zucchini Noodles Perfectly Cooked Easy and Flavorful Meal

July 2, 2025 by Chef Tavio
- 4 medium zucchinis, spiralized into noodles - 2 tablespoons extra virgin olive oil - 4 cloves of fresh garlic, finely minced - 1 teaspoon red pepper flakes (adjust according to your spice preference) - Zest of 1 medium lemon - Juice of 1 medium lemon - Salt and freshly ground black pepper to taste Zucchini is the star of this dish. Its mild taste lets other flavors shine. Olive oil adds richness, while garlic gives a nice punch. Red pepper flakes add heat, but feel free to adjust. Lemon brings brightness, making the dish lively. - Fresh basil leaves, chopped - Grated Parmesan cheese Fresh basil adds a pop of color and flavor. If you like cheese, sprinkle some grated Parmesan on top. It adds a nice salty touch. - Salt - Black pepper Seasoning is key. Use salt and black pepper to enhance the dish. Taste as you go to find your perfect balance. For the full recipe, refer to the [Full Recipe]. To start, we need to prepare the zucchini. You can use a spiralizer for the best noodles. This tool makes long, thin strands that mimic pasta. If you don’t have a spiralizer, you can use a vegetable peeler. Simply peel the zucchini into thin ribbons. Both methods work well, so choose what you have. Once you finish, set the zucchini noodles aside for later. Now, let’s cook those zucchini noodles! First, heat the olive oil in a large skillet over medium heat. Wait until the oil shimmers but does not smoke. This is the right temperature for cooking. Next, add the minced garlic and red pepper flakes. Stir them for about 1-2 minutes. You want the garlic to smell great, but be careful not to let it burn. When the garlic is fragrant, it’s time to add the zucchini noodles. Toss them in the skillet, coating them well in the garlic oil. Cook for about 2-3 minutes. We want them warm but still firm, just like al dente pasta. After cooking, fold in the lemon zest and lemon juice. This adds a bright flavor to the dish. Make sure all the noodles are coated well. Now, season generously with salt and freshly ground black pepper. Taste as you go. You can add more if needed. Once seasoned, remove the skillet from the heat. Transfer the zesty zucchini noodles to a serving platter. They should look colorful and inviting. For a finishing touch, garnish with chopped basil and a sprinkle of grated Parmesan cheese if you like. This dish is now ready to enjoy! For the full recipe, check out the details above. To get the right texture, cook zucchini noodles for just 2-3 minutes. This keeps them firm. Overcooking makes them mushy. Sogginess can ruin your dish. Use a large skillet to give noodles room to cook evenly. - Cooking Time Guidelines: Stick to 2-3 minutes for optimal crunch. - Avoiding Sogginess: Use high heat and don’t crowd the pan. Want to kick up the flavor? Try adding more garlic or a splash of soy sauce. Fresh herbs can also make a big difference. You can swap lemon for lime for a twist. - Additional Seasoning Ideas: Add herbs like thyme or parsley for freshness. - Substituting Ingredients: Use coconut aminos instead of soy sauce for a different taste. Serving style can elevate your dish. Use a wide, shallow bowl to show off the noodles. A sprinkle of fresh basil adds color and flavor. You can also add lemon wedges on the side for brightness. - Serving Styles: Present in a large bowl or on a platter for sharing. - Garnishing Techniques: Top with basil and a light dusting of Parmesan for visual appeal. For the complete guide on making these delicious noodles, check out the [Full Recipe]. {{image_4}} You can make noodles from many veggies. Here are two fun options: - Carrot Noodles: Use a spiralizer on carrots. They add a sweet crunch. Cook them like zucchini noodles, but for less time. - Sweet Potato Noodles: These are a bit sweeter. Spiralize sweet potatoes and cook them a little longer. They give a hearty feel to your dish. Switch up the flavors to keep things exciting. Here are some ideas: - Spicy Options: For a kick, add more red pepper flakes or a dash of hot sauce. You can also mix in some chopped jalapeños. This gives your meal a nice heat. - Herb-Infused Versions: Add fresh herbs like thyme or oregano. A splash of balsamic vinegar can also boost flavor. These additions create a fresh taste that brightens the dish. Make your zucchini noodles fit your diet. Here are some ideas: - Vegan Options: Skip the Parmesan cheese. You can use nutritional yeast for a cheesy flavor without dairy. - Gluten-Free Adaptations: This dish is naturally gluten-free. Just ensure all ingredients are labeled gluten-free. You can enjoy this meal without worry. Experiment with these variations to keep your zucchini noodles fresh and fun. For a complete guide, check out the Full Recipe. To keep your cooked zucchini noodles fresh, start with refrigeration. Place them in an airtight container. Make sure to cool them down before sealing. They stay good in the fridge for about 3 days. If you want to keep them longer, freezing is an option. Spread the noodles on a baking sheet to freeze them first. Once frozen, transfer them to a freezer-safe bag. They can last up to 3 months in the freezer. To maintain freshness, keep cooked zucchini noodles dry. Excess moisture leads to spoilage. Always check for any sliminess, discoloration, or a foul smell. If you notice these signs, it's best to toss them. Zucchini noodles should be bright and firm when stored properly. When reheating, you have two main options: the microwave or the stove. The microwave is quick, but it may make the noodles soggy. If you use this method, heat them in short intervals. Stir in between to ensure even warming. The stove is my preferred method. It helps the noodles maintain their texture. Heat a skillet over medium heat, add a splash of oil, and toss the noodles gently. This keeps them crisp and delicious. You can cut zucchini for noodles in a few ways. The best method is using a spiralizer. It makes long, curly noodles that look great. If you don’t have a spiralizer, a vegetable peeler works too. Just peel the zucchini into thin strips. You can also use a knife to cut them into thin matchsticks. All methods give you tasty noodles that cook well. Yes, you can overcook zucchini noodles. Overcooked noodles become mushy and lose their shape. Signs of overcooked noodles include a limp texture and watery appearance. You want them to stay slightly firm, or al dente. Cooking them for about 2-3 minutes is usually enough. Keep an eye on them while they cook to avoid this issue. Zucchini noodles pair well with many dishes. You can serve them with marinara sauce for a classic taste. They also go great with grilled chicken or shrimp for added protein. If you want something lighter, top them with fresh veggies or a simple olive oil dressing. Consider a side salad to complete the meal. Enjoy experimenting with flavors! Zucchini noodles are simple to make and healthy to eat. You learned about key ingredients, step-by-step prep, and various flavor tips. I shared storage advice to keep your noodles fresh. You can also try different vegetables for fun twists. Whether you prefer classic flavors or bold spices, zucchini noodles match any meal. With the right techniques, you can enjoy tasty, perfectly cooked noodles. Dive into this dish to impress yourself and others. Enjoy your cooking journey!

If you’re searching for a quick and tasty meal, zucchini noodles are the answer. They’re healthy, easy to make, and packed with flavor. In this guide, I’ll show you how …

Read more

Categories Dinner
Older posts
Newer posts
← Previous Page1 … Page8 Page9 Page10 … Page51 Next →

TASTED NEST

Where Flavor Finds a Home 🍳🏡 — warm, simple, and crave-worthy recipes made for real life, from stovetop mornings to backyard dinners.

PAGES

Home About Contact Privacy Policy Terms & Conditions Cookie Policy GDPR Policy Copyright Policy Disclaimer

CATEGORIES

Appetizers Desserts Salads Breakfast Dinner

Contact

  • Pinterest
  • Mail
Copyright © 2025 Tasted Nest. All rights reserved.