Skip to content
  • GDPR Privacy Policy
  • Copyright Policy
  • Disclaimer
  • Terms & Conditions
Tasted Nest
  • Home
  • Appetizers
  • Desserts
  • Salads
  • Breakfast
  • Dinner
  • Privacy Policy
  • Contact
  • About

NO-ING-IMG

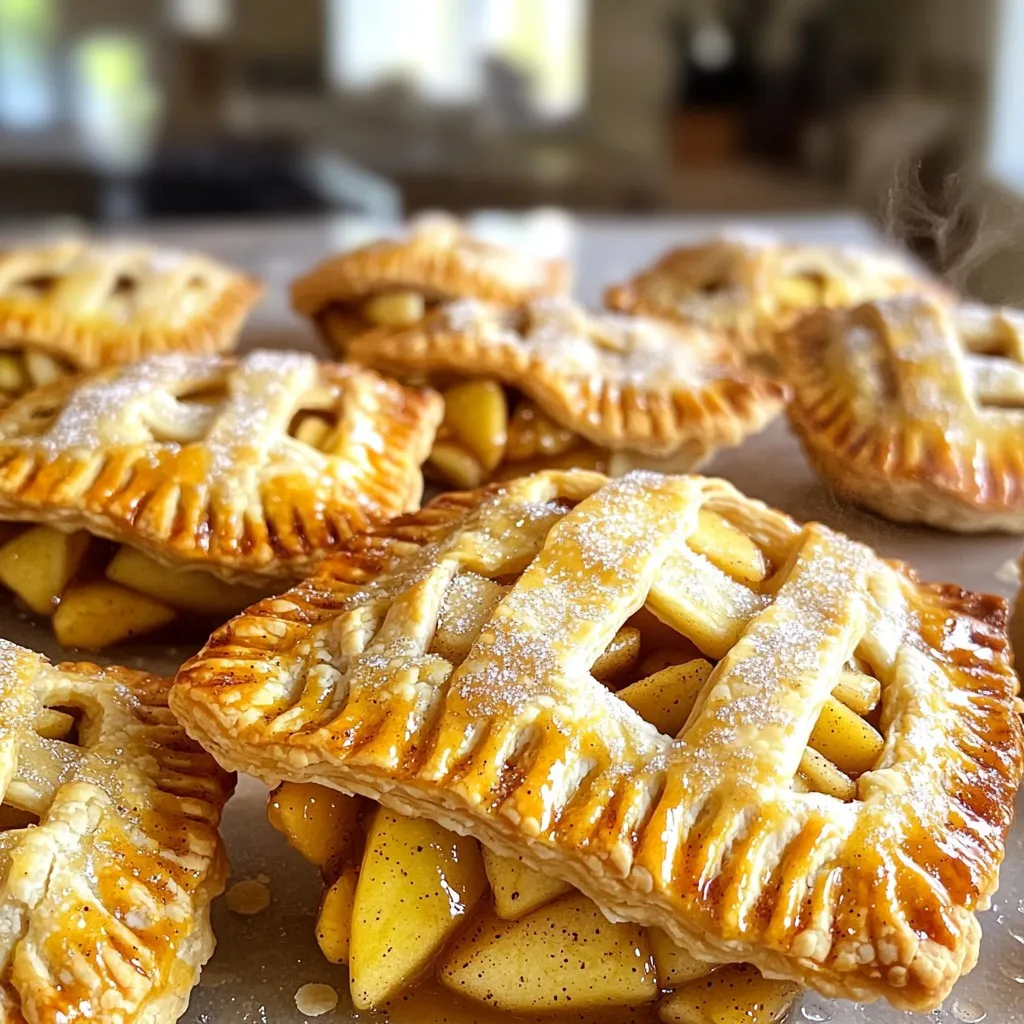
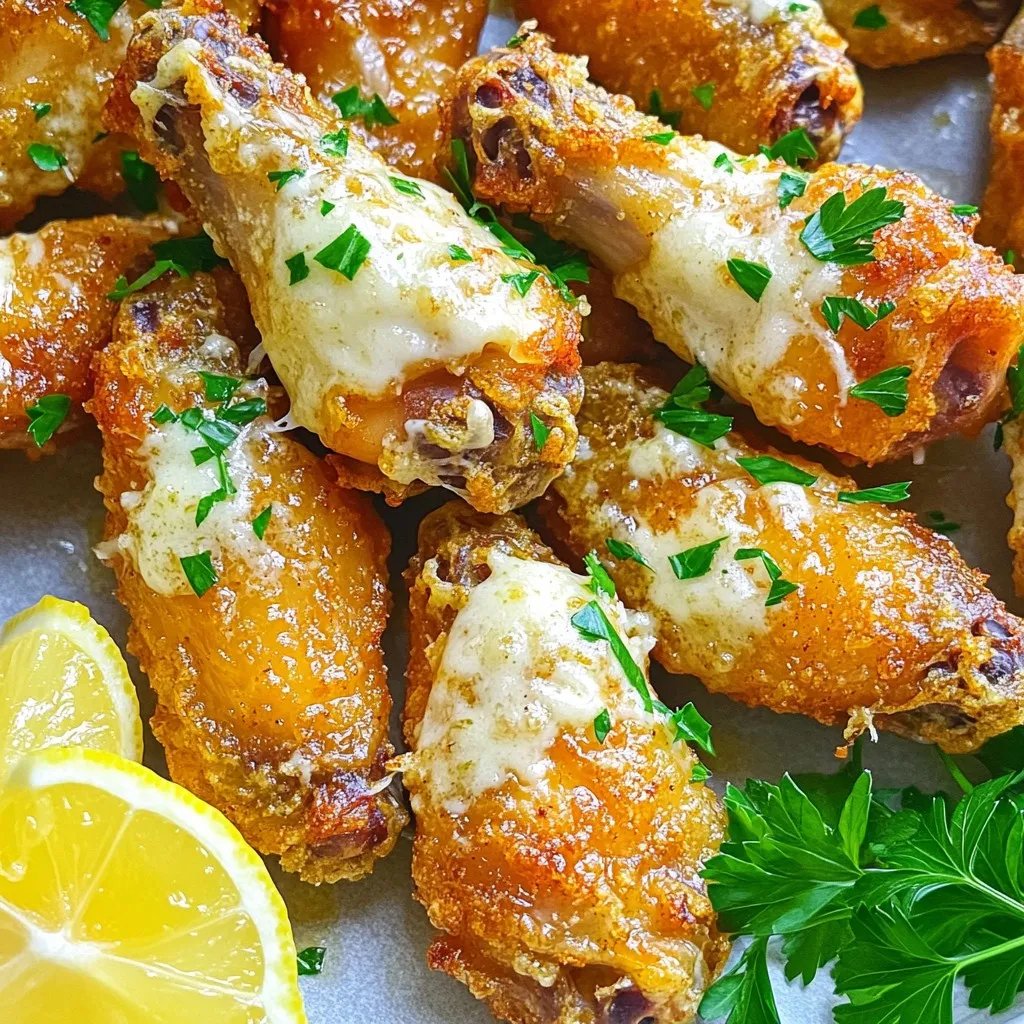
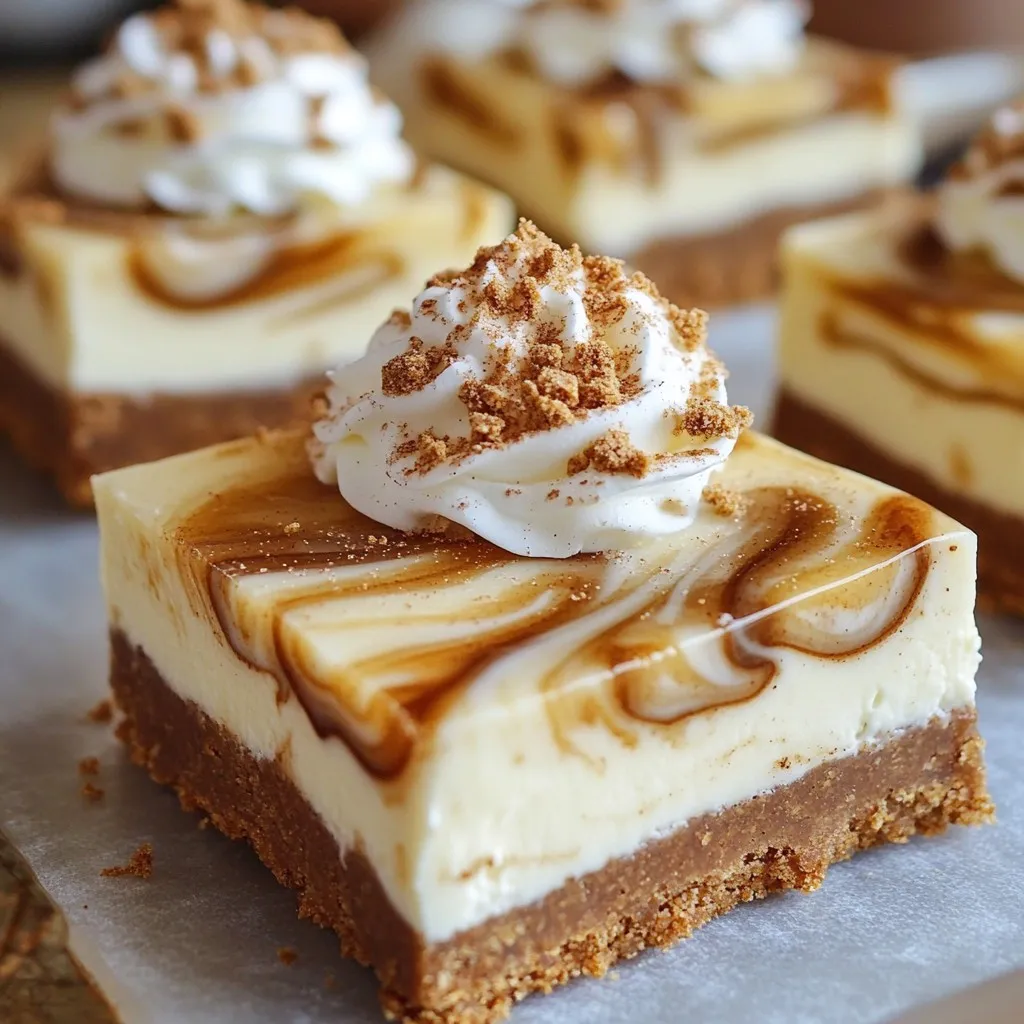
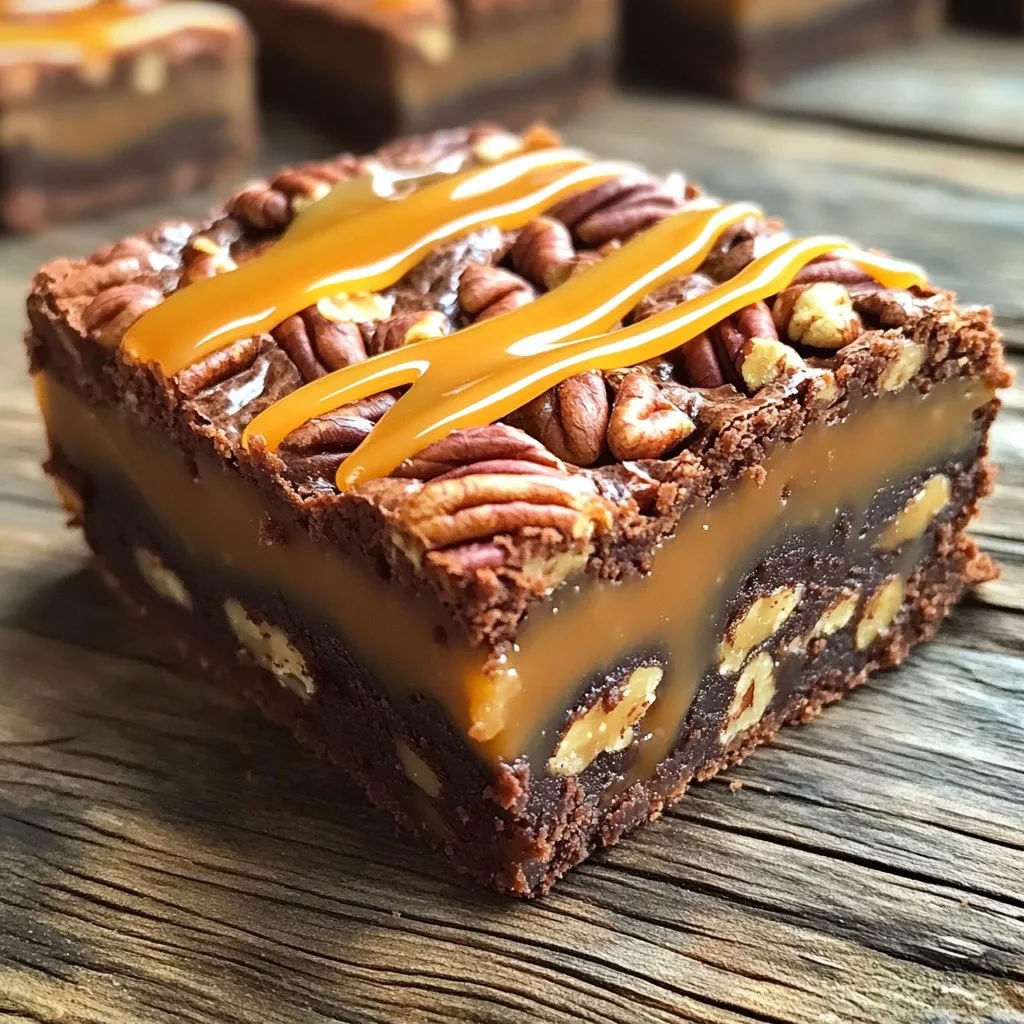
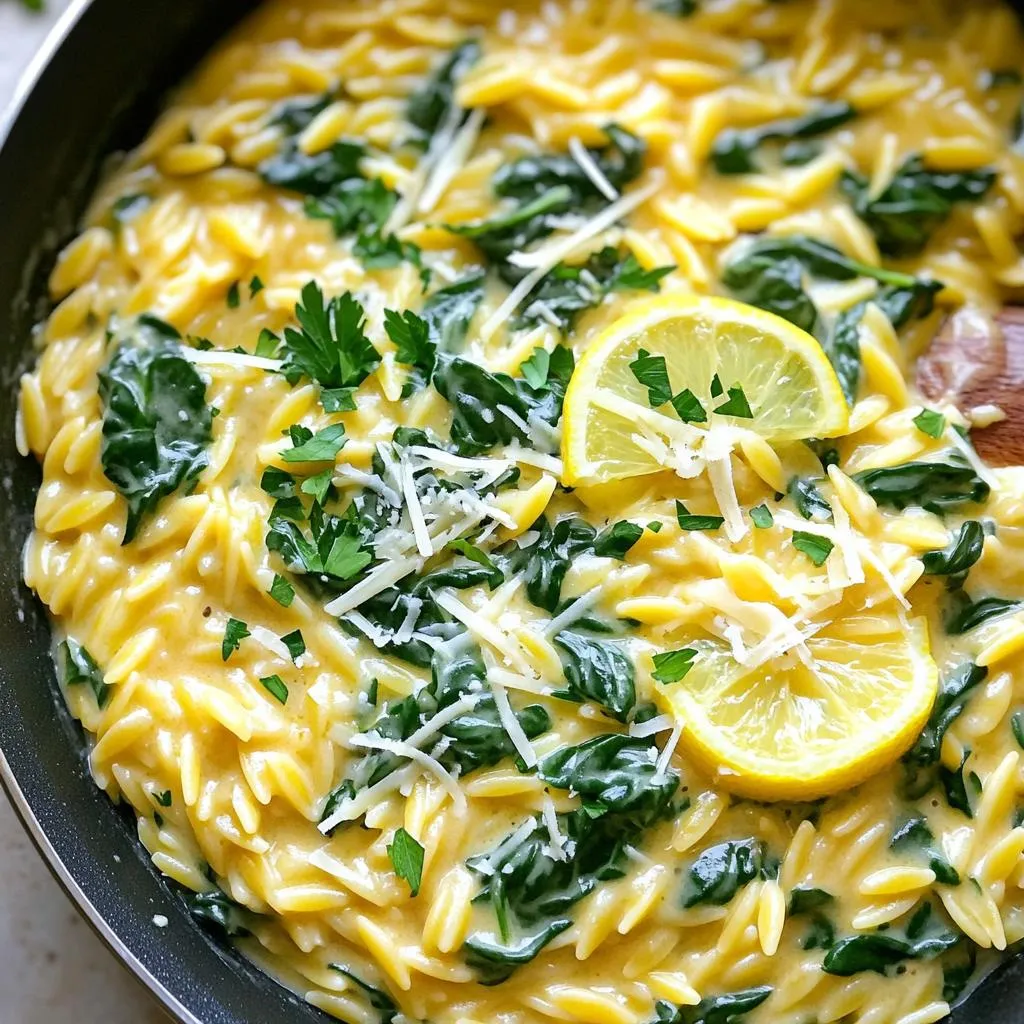
Caramel Apple Cheesecake Brownie Bars Irresistible Treat

January 14, 2026October 3, 2025 by Chef Tavio
- 1 cup unsalted butter, melted - 1 cup granulated sugar - 2 large eggs - 1 teaspoon vanilla extract - 1 cup all-purpose flour - 1/3 cup unsweetened cocoa powder - 1/4 teaspoon salt - 1/4 teaspoon baking powder To make the brownie layer, you need melted butter. This is key for a fudgy texture. You’ll mix the butter with sugar until it feels creamy. Then, add eggs one by one. Each egg adds moisture and helps bind the mix. Don't forget vanilla for flavor! Sift the dry ingredients together. This helps avoid lumps. Finally, fold the dry mix into the wet mix gently. - 16 oz cream cheese, softened at room temperature - 1/2 cup granulated sugar - 1 large egg - 1 teaspoon vanilla extract For the cheesecake layer, you want your cream cheese soft. This makes it easy to blend. Cream the cheese with sugar until it’s smooth. Then add an egg and vanilla. Mix until it is well combined. This will create a rich and creamy layer that pairs well with the brownies. - 2 cups apples, peeled, cored, and diced (preferably Granny Smith for a tart flavor) - 1/4 cup granulated sugar - 1 teaspoon ground cinnamon - 1 tablespoon lemon juice - 1/2 cup caramel sauce (store-bought or homemade) For the topping, choose tart apples for a nice balance. Mix the diced apples with sugar, cinnamon, and lemon juice. This brightens the flavors and helps keep the apples fresh. Finally, drizzle caramel over the apples. This gives a sweet touch. The mix of flavors in this topping makes the bars special. Start by preheating your oven to 350°F (175°C). Grease a 9x13 inch baking pan with cooking spray or line it with parchment paper. This helps the bars come out easily later. In a large bowl, whisk together 1 cup of melted butter and 1 cup of granulated sugar. Beat in 2 large eggs, one at a time. Stir in 1 teaspoon of vanilla extract. In another bowl, sift together 1 cup of all-purpose flour, 1/3 cup of unsweetened cocoa powder, 1/4 teaspoon of salt, and 1/4 teaspoon of baking powder. Slowly add the dry mix to the wet ingredients. Stir gently until just combined. Pour this brownie batter into the prepared pan. Spread it out evenly. In a medium bowl, beat 16 oz of softened cream cheese with 1/2 cup of granulated sugar. Use an electric mixer for a smooth consistency. Add 1 large egg and 1 teaspoon of vanilla extract. Mix until everything is blended well. Gently pour this cheesecake mix over the brownie layer. Spread it evenly with a spatula. In a separate bowl, toss together 2 cups of diced apples, 1/4 cup of granulated sugar, 1 teaspoon of ground cinnamon, and 1 tablespoon of lemon juice. Mix until all the apple pieces get coated. Carefully spoon this apple mixture over the cheesecake layer. Make sure it is evenly spread. Drizzle 1/2 cup of caramel sauce over the apple layer. Let it flow naturally over the apples. For a fun look, use a knife or toothpick to swirl the caramel lightly into the apples. Bake in the preheated oven for 40-45 minutes. Check that the edges are set. Insert a toothpick in the center; it should come out clean. Once baked, remove the pan from the oven. Allow the bars to cool in the pan on a wire rack. After the bars cool, move the pan to the fridge. Chill for at least 2 hours to let the layers set. When ready to serve, cut into squares or bars. Enjoy your delicious treat! To get soft and fudgy brownies, use melted butter. This adds moisture. Mix the butter and sugar well. Add eggs one at a time, mixing after each. Don't overmix the flour; just stir until combined. This helps keep the brownies chewy and rich. If you forgot to take out the cream cheese early, don’t worry! Cut it into small cubes. Place it in a microwave-safe bowl. Heat it in the microwave for about 15 seconds. Check it and stir. Repeat until it’s soft but not melted. This makes blending easy. For the topping, I recommend using Granny Smith apples. They have a nice tartness that balances the sweet cheesecake and caramel. Their firm texture holds up well when baked. If you want a sweeter option, try Honeycrisp or Fuji apples. Both add a lovely flavor. To make your caramel drizzle look great, use a squeeze bottle. This gives you control over the amount. If the caramel is too thick, warm it slightly in the microwave. Drizzle it over the apples, letting it flow naturally. You can swirl it with a toothpick for extra flair. {{image_4}} You can make this recipe fit your needs. If you're dairy-free, swap cream cheese for a plant-based option. Use coconut cream or a nut cheese. For gluten-free bars, use almond or oat flour instead of all-purpose flour. You can also use a sugar substitute, like stevia or monk fruit, for a low-sugar version. Want to mix it up? Add chocolate chips to the brownie layer for extra richness. You can also stir in some chopped nuts like pecans or walnuts for a nice crunch. If you love spices, add a pinch of nutmeg to the apple topping for warmth and depth. Get creative with your toppings! Instead of caramel, try a drizzle of chocolate sauce. You can also use a sprinkle of crumbled graham crackers for a nice texture contrast. Fresh whipped cream on top adds a creamy touch. For a fruity twist, add some berries or sliced bananas next to the apples. To keep your caramel apple cheesecake brownie bars fresh, store them in an airtight container. This helps maintain their soft texture and rich flavor. Place a piece of parchment paper between layers if you stack them. This prevents sticking. Keep the container in the refrigerator. The bars will stay good for up to five days. If you want to enjoy these bars later, freezing is a great option. First, cut the bars into squares. Wrap each square tightly in plastic wrap. Then place them inside a freezer-safe bag or container. These bars can last up to three months in the freezer. When you're ready to eat, let them thaw in the fridge overnight. To enjoy these bars warm, take them out of the fridge. Heat them in the microwave for about 10-15 seconds. Check to see if they are warm enough. You can also reheat them in the oven. Preheat your oven to 350°F (175°C) and warm them for about 5-10 minutes. This keeps the cheesecake layer creamy and delicious. If you need a cream cheese substitute, try Greek yogurt. It gives a nice tang and creaminess. You can also use mascarpone cheese for a rich flavor. For a dairy-free option, consider using cashew cream. Simply blend soaked cashews with a bit of lemon juice. This will mimic the creamy texture of cream cheese. Check the edges of the bars. They should look set and slightly pull away from the pan. Insert a toothpick into the center. If it comes out clean or with just a few crumbs, the bars are ready. Don’t overbake, as they will continue to cook while cooling. Yes, you can make these bars a day or two ahead. Just store them in the fridge after they cool. This helps the flavors meld together. When you are ready to serve, cut them into squares. You can even warm them slightly for a fresh-out-of-the-oven taste. I love to serve these bars chilled, drizzled with extra caramel sauce. A sprinkle of chopped nuts adds a nice crunch. You can also add a dollop of whipped cream on top. Present them on a wooden platter for a rustic look. It's a treat that will impress your guests! This article has covered how to make delicious caramel apple cheesecake brownie bars. You learned about the key ingredients, step-by-step instructions, and helpful tips. I shared ways to customize the bars and how to store leftovers. You now have the tools to create this tasty treat at home. Get creative and enjoy every bite!

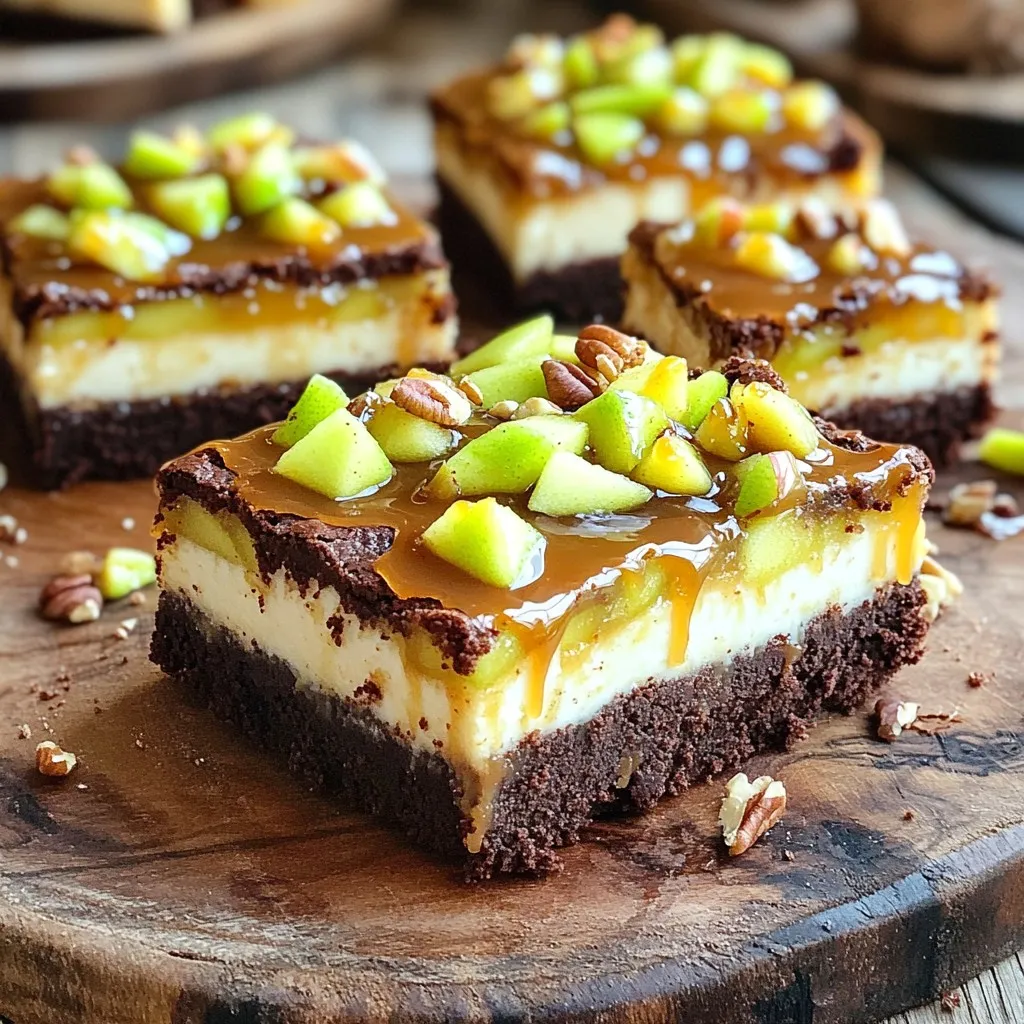
If you love dessert, you’ll adore these Caramel Apple Cheesecake Brownie Bars! This sweet treat layers rich brownie, creamy cheesecake, and warm caramel apples. It’s like a hug in dessert …

Read more

Categories Desserts Tags NO-ING-IMG

Air Fryer Apple Cinnamon Hand Pies Simple Delight

January 14, 2026October 3, 2025 by Chef Tavio
- 2 cups all-purpose flour - 1/2 teaspoon salt - 1/4 cup granulated sugar - 1/2 cup unsalted butter, chilled and cubed - 1/4 cup cold water - 2 medium apples, peeled, cored, and diced into small pieces - 1 teaspoon ground cinnamon - 1/4 teaspoon ground nutmeg - 1 tablespoon fresh lemon juice - 1 egg (for egg wash) - Additional granulated sugar for sprinkling These ingredients create a tasty treat. The all-purpose flour helps make the crust flaky. The butter adds richness, and the apples provide sweet flavor. - 1/2 teaspoon vanilla extract - 1 tablespoon brown sugar - A pinch of salt for balance Adding vanilla enhances the taste. Brown sugar gives a deeper sweetness. A pinch of salt brings out the flavors too. - Use whole wheat flour for a healthier crust. - Swap fresh apples for canned pie filling. - Replace butter with coconut oil for a dairy-free option. These swaps keep the hand pies delicious. You can still enjoy great flavor and texture with these changes. To start, grab a large mixing bowl. In this bowl, whisk together 2 cups of all-purpose flour, 1/2 teaspoon of salt, and 1/4 cup of granulated sugar. Mix until everything blends well. Next, add 1/2 cup of chilled and cubed unsalted butter. Use a pastry cutter or your fingertips to work the butter into the dry mix. You want it to look like coarse crumbs with pea-sized bits of butter. Now, it's time to add the cold water. Gradually pour in 1/4 cup of cold water, one tablespoon at a time. Use a fork to gently mix until the dough starts to come together. Be careful not to overwork it. Once it’s mixed well, shape the dough into a disk. Wrap it in plastic wrap and chill it in the fridge for at least 30 minutes. While the dough chills, let’s prepare the apple filling. Take 2 medium apples and peel, core, and dice them into small pieces. In a separate bowl, mix the diced apples with 1 teaspoon of ground cinnamon, 1/4 teaspoon of ground nutmeg, and 1 tablespoon of fresh lemon juice. Toss everything together until the apples are well-coated. Set the filling aside to let the flavors come together. Once the dough is chilled, it's time to roll it out. On a clean, floured surface, roll the dough to about 1/8 inch thick. Use a round cutter or a drinking glass to cut out circles of dough. Aim for circles that are about 4-5 inches in diameter. Gather any scraps, re-roll, and cut more circles if needed. Take one circle of dough and place about one tablespoon of the apple filling in the center. Carefully fold the dough over to form a half-moon shape. Press the edges firmly to seal. Use a fork to crimp the edges. This not only makes it look nice but also helps keep the filling inside. Now, let’s cook these little delights. Preheat your air fryer to 350°F (175°C). Depending on your air fryer size, place a few hand pies in the basket. Make sure they do not touch. Cook for about 10-12 minutes, or until they turn golden brown and crispy outside. You might need to adjust the cook time based on your air fryer's performance. Once they are done, carefully remove the hand pies from the air fryer. Let them cool for a few minutes before enjoying. To make flaky dough, start with cold butter. Cut the butter into small cubes and keep it chilled. When mixing, work quickly. You want small pieces of butter in the dough. This helps create layers. Don’t overmix the dough; just combine until it forms a ball. After mixing, wrap it in plastic and chill for at least 30 minutes. This resting time lets the gluten relax, making it easier to roll out. To ensure even filling, avoid overstuffing the hand pies. Use about one tablespoon of filling per pie. Place the filling in the center of the dough circle. Leave enough space around the edges to seal the pie well. If the filling spills out, it could create a mess while cooking. Press the edges firmly to keep the filling inside. Use a fork to crimp the edges, which also helps seal them tightly. Preheat your air fryer to 350°F (175°C). This temperature is key for crispiness. Depending on your air fryer’s size, arrange the hand pies in a single layer. Avoid crowding them; they need space for air to circulate. Cook for about 10-12 minutes, but check them often. If your air fryer runs hot, reduce the time slightly. Look for a golden brown color, which means they are done. Adjust cooking time as needed based on your air fryer’s performance. {{image_4}} You can swap apples for other fruits. Try pears for a sweet twist. Cherries add a tart flavor that works well. You can also use berries like blueberries or raspberries. These fruits bring their own unique taste and texture. Just remember to adjust the spices to match the fruit you choose. Cinnamon is a classic choice, but you can mix it up. Add ginger for warmth and depth. You might also try cardamom for a fragrant kick. For a more tropical vibe, sprinkle in some coconut or nutmeg. Feel free to experiment with your favorite spices to create new tastes. To make these hand pies vegan, use plant-based butter instead of regular butter. You can also replace the egg wash with a mixture of almond milk and maple syrup. For gluten-free options, swap regular flour with a gluten-free blend. Ensure that all your ingredients are certified gluten-free to avoid cross-contamination. These changes allow everyone to enjoy this treat! To keep your hand pies fresh, let them cool completely first. Place them in an airtight container. They will stay good at room temperature for about two days. If you want them to last longer, store them in the fridge for up to five days. Always cover them to avoid drying out. You can freeze these hand pies for later. After they cool, wrap each pie in plastic wrap. Then, place them in a freezer-safe bag or container. They can stay in the freezer for up to three months. When you're ready to eat them, just thaw in the fridge overnight. To reheat, use your air fryer for the best results. Set it to 350°F (175°C) and heat for about 5-7 minutes. This will help keep the crust crispy. You can also use an oven set to the same temperature. Avoid the microwave, as it may make the pies soggy. Yes, you can use store-bought pastry. It saves time and effort. Look for pie crust or puff pastry. This can make your hand pies quicker to prepare. Just follow the same steps for filling and sealing. You will know the hand pies are done when they are golden brown. The outside should look crisp and flaky. After about 10-12 minutes, check for the nice color. If they are not brown enough, cook for a few more minutes. These hand pies taste great on their own. You can serve them warm with vanilla ice cream. A drizzle of caramel sauce adds a nice touch too. Dusting with powdered sugar makes it pretty and sweet. These hand pies last for about two days at room temperature. Keep them in an airtight container. This helps to keep them fresh. If you want to store them longer, consider freezing them. You now have all you need to make delicious Air Fryer Apple Cinnamon Hand Pies. With the right ingredients, easy steps, and helpful tips, you'll enjoy a tasty treat. Don’t forget to try different fruits and spices to make it your own. Remember, storage and reheating methods can help keep these pies fresh. Whether for a snack or dessert, these hand pies are sure to impress. Dive in and let your creativity shine in the kitchen!

If you love warm, sweet treats, you’re in for a real treat! These Air Fryer Apple Cinnamon Hand Pies are simple to make and packed with flavor. With easy instructions …

Read more

Categories Desserts Tags NO-ING-IMG

Bakery Style Apple Fritter Bread Irresistible Treat

January 14, 2026October 2, 2025 by Chef Tavio
- 3 cups all-purpose flour - 1 tablespoon baking powder - 1 teaspoon ground cinnamon - ½ teaspoon ground nutmeg - ½ teaspoon salt - ½ cup granulated sugar - ½ cup packed brown sugar - ½ cup unsalted butter, melted and slightly cooled - 1 large egg, at room temperature - 1 cup milk, at room temperature - 1 teaspoon vanilla extract For the best flavor, I recommend using a mix of apple varieties. Granny Smith apples bring a tartness, while Honeycrisp adds sweetness. Aim for about 2 cups of apples, peeled, cored, and diced. This step is simple: just slice off the skin, remove the core, and chop the apples into small pieces. This way, they will blend perfectly into the bread. 1. Preheat your oven to 350°F (175°C). This step warms up the oven for even baking. 2. Grease a 9x5 inch loaf pan. This helps the bread slide out easily after baking. 1. In a large bowl, whisk together 3 cups of flour, 1 tablespoon of baking powder, 1 teaspoon of ground cinnamon, ½ teaspoon of ground nutmeg, and ½ teaspoon of salt. Mix these dry ingredients well. 2. In another bowl, combine ½ cup of granulated sugar, ½ cup of packed brown sugar, ½ cup of melted butter, 1 large egg, 1 cup of milk, and 1 teaspoon of vanilla extract. Whisk until smooth. 3. Gradually add the wet mixture to the dry mix. Stir gently with a spatula or wooden spoon until just combined. Don’t overmix, as this can change the bread’s texture. 4. Carefully fold in 2 cups of diced apples. Use a spatula to ensure they are evenly mixed. 1. Pour the batter into the greased loaf pan. If needed, smooth the top with a spatula. 2. Place the pan in the oven and bake for 55-65 minutes. To check if it’s done, insert a toothpick into the center. It should come out clean. If the top browns too fast, cover it lightly with aluminum foil for the last 10-15 minutes. 1. While the bread bakes, prepare the glaze. In a small bowl, whisk together 1 cup of powdered sugar, 2 tablespoons of milk, and ½ teaspoon of vanilla extract until smooth. Adjust the milk to get your preferred thickness. 2. After baking, let the bread cool in the pan for about 10 minutes. Then, transfer it to a wire rack to cool completely. 3. Just before serving, drizzle the glaze over the cooled bread. Let it soak in a little for extra flavor. To get a soft and fluffy bread, avoid overmixing. When you mix the wet and dry ingredients, stir just until combined. This keeps the bread light. After mixing, check for doneness by inserting a toothpick into the center of the bread. It should come out clean. If it has batter on it, bake for a few more minutes. For the best flavor, combine Granny Smith and Honeycrisp apples. The tartness of Granny Smith balances the sweetness of Honeycrisp. For a richer glaze, add a bit more vanilla extract or a pinch of cinnamon. This small touch adds depth to the sweetness. Serve the apple fritter bread on a rustic wooden board for a charming look. Drizzle extra glaze on top for a beautiful finish. Garnish with thinly sliced apple rounds to add color and a fresh touch. This makes your dish stand out and look appetizing. {{image_4}} You can change the flavor of your apple fritter bread. Here are a few ideas: - Adding nuts or dried fruits: You can add chopped walnuts or pecans for a nice crunch. Dried cranberries or raisins also work well and add a sweet touch. - Alternative spices: Try adding a pinch of cardamom or allspice. These spices give a warm and cozy flavor that pairs well with apples. Need to make this bread fit a special diet? Here are two great options: - Gluten-free options: Use a gluten-free flour blend in place of all-purpose flour. Ensure all other ingredients are also gluten-free. - Vegan substitutions: Swap the egg for a flax egg. Mix 1 tablespoon of flaxseed meal with 3 tablespoons of water. Use plant milk instead of regular milk. Pairing your apple fritter bread with drinks can elevate your meal: - Pairing with beverages: This bread goes well with coffee or tea. A warm cup of cider is also a great match, especially in fall. - Transforming into a dessert: Serve it warm with a scoop of vanilla ice cream. Drizzle extra glaze on top for a sweet finish. To keep your apple fritter bread fresh, store it in an airtight container. This keeps moisture in and prevents it from drying out. I recommend placing it at room temperature for up to three days. Avoid the fridge, as it can make the bread stale faster. For longer storage, you can freeze the bread. Wrap it tightly in plastic wrap and then in foil. This helps prevent freezer burn. It can last in the freezer for up to three months. When you’re ready to enjoy it, thaw the bread overnight in the fridge. Reheat it in the oven at 350°F for about 10-15 minutes. This warms it gently and revives its soft texture. In the pantry, apple fritter bread stays fresh for about three days. After that, it may start to dry out. You will notice signs of spoilage, like a hardened crust or an off smell. If you see mold, discard the bread immediately to stay safe. Yes, you can use different apples. I recommend using Granny Smith and Honeycrisp apples. These varieties give the best balance of sweet and tart flavors. Granny Smith adds a nice zing, while Honeycrisp brings sweetness. You can also try Fuji or Braeburn for a twist. Just make sure to peel, core, and dice them before adding to the batter. If the top of your bread browns too fast, cover it with aluminum foil. This will help prevent burning while the inside cooks. You can do this for the last 10-15 minutes of baking. Keep an eye on the bread during baking. Every oven is different, so adjust the time as needed. To keep your bread moist, use fresh apples. The diced apples help add moisture. Also, make sure not to overmix the batter. Overmixing can lead to a dry texture. Use room temperature ingredients like milk and egg for better mixing. Finally, check for doneness with a toothpick; it should come out clean. Yes, you can make this bread ahead of time. Bake it and let it cool completely. Then wrap it tightly in plastic wrap or foil. Store it at room temperature for up to three days. If you want to keep it longer, freeze it for up to three months. Just thaw it at room temperature when ready to enjoy. In this blog post, we covered how to make delicious apple bread. We began with essential ingredients, from dry to wet components, and then explored the apple preparation. I provided step-by-step instructions, tips for the best texture and flavor, and even variations for different diets. Finally, I shared storage insights and answered common questions. Baking can be fun and rewarding. Use these tips to create your perfect apple bread! Enjoy every moment and every bite.

If you love sweet, warm aromas wafting from the kitchen, you’ll adore bakery-style apple fritter bread. This delightful loaf combines tender bits of apple, warm spices, and a shiny glaze …

Read more

Categories Desserts Tags NO-ING-IMG

One Pot Creamy Lemon Dill Salmon Pasta Delight

January 14, 2026October 2, 2025 by Chef Tavio
- Pasta options: Use 8 oz of fettuccine or linguine for the best taste. - Salmon fillets: Choose two salmon fillets, around 6 oz each. - Broth varieties: Use 4 cups of vegetable or chicken broth. Each adds a unique flavor. - Cream and seasoning details: You need 1 cup of heavy cream, lemon juice, zest, and dill. Add salt and black pepper to taste. These ingredients work together to create a rich and creamy dish. The pasta absorbs the broth, while the salmon provides a fresh taste. The lemon and dill add bright notes that make each bite special. To start, you need to prepare the salmon. First, heat olive oil in a deep pot over medium heat. Season both sides of the salmon fillets with salt and black pepper. This step is key for flavor. Once the oil is shimmering, place the salmon in the pot. Sear each side for about 3 to 4 minutes. You want the salmon to turn golden brown and cook through. After searing, take the salmon out and set it aside on a plate. This keeps it warm while you cook the pasta. Next, it's time to cook the pasta. In the same pot, add minced garlic and sauté for 1 to 2 minutes until it smells good. Now, pour in the vegetable or chicken broth and increase the heat to boil it. Once boiling, add the pasta. Cook according to the package instructions. Stir it occasionally to stop it from sticking. Aim for an al dente texture, which means the pasta should still have a slight bite to it. After the pasta is cooked, lower the heat. Stir in the heavy cream, lemon juice, lemon zest, and dill. This mix brings great flavor. Let it simmer for 2 to 3 minutes to thicken the sauce. Now, flake the cooked salmon into bite-sized pieces. Gently fold this into your creamy pasta mixture. Be careful not to break up the salmon too much. Taste the dish and add more salt and pepper if needed. This step creates a rich, creamy meal that is sure to impress! To cook salmon well, avoid these common mistakes: - Overcooking: Keep an eye on the salmon. Cook it for about 3-4 minutes on each side. Look for a golden brown crust. - Not seasoning enough: Season both sides with salt and pepper before cooking. This step boosts flavor. For sauce consistency, follow these tips: - Thicken slowly: After adding cream and lemon juice, let it simmer. This helps the sauce thicken nicely. - Stir gently: When adding the salmon back to the pot, fold it in carefully. This keeps the salmon from breaking apart. To make your dish even tastier, try these optional ingredients: - Capers: Add a tablespoon of capers for a briny punch that pairs well with salmon. - Fresh herbs: Basil or chives can add a fresh twist to the dish. Adjust seasoning to fit your taste: - Lemon zest: If you love lemon, add extra zest for more zing. - Spice it up: A pinch of red pepper flakes can bring a nice heat to the creamy sauce. These tips can elevate your One Pot Creamy Lemon Dill Salmon Pasta, making it a meal you’ll love to share! {{image_4}} You can switch up the protein in this dish. Salmon shines, but other fish work too. Cod, tilapia, or trout can be used. Just adjust your cooking times. For vegetarians, chickpeas or tofu make good swaps. Both add protein and soak up flavor. Use firm tofu for a nice texture. Cook it until golden for the best taste. Feel free to play with the sauce. You can try lighter cream options like half-and-half. This keeps it creamy but less rich. Add vegetables for extra nutrition. Spinach, peas, or cherry tomatoes blend well. Toss them in when you add the cream. They cook quickly and add color. Mixing in some cheese can also enhance the flavor. Parmesan or feta can make it even tastier. Just sprinkle it in before serving for a creamy finish. To keep your One Pot Creamy Lemon Dill Salmon Pasta fresh, follow these tips: - Refrigerating Leftovers: Allow the pasta to cool first. Store it in an airtight container. This helps keep it moist. It will last for up to three days in the fridge. - Freezing Guidelines: You can freeze this dish, but it’s best to do so without the salmon. The pasta sauce may change texture once frozen. Store in freezer-safe containers. It can last for up to three months in the freezer. When reheating, you want to keep the creamy texture. Here’s how: - Stove-top Method: This method works best. Place the pasta in a pot over low heat. Add a splash of broth or cream to help it warm up nicely. Keep stirring until hot. - Microwave Method: If you’re short on time, use the microwave. Place the pasta in a microwave-safe bowl. Cover it loosely to prevent splattering. Heat in short bursts, stirring in between until it’s warm. Following these steps will help you enjoy your delicious pasta again! Yes, you can use frozen salmon. Just remember to thaw it first. The best way to thaw salmon is to place it in the fridge overnight. If you're short on time, you can put it in a sealed bag and submerge it in cold water for about an hour. This keeps the fish juicy and fresh for your dish. This dish pairs well with several sides. You could serve a simple green salad with a light vinaigrette. Garlic bread also adds a nice crunchy touch. For a heartier option, roasted vegetables like asparagus or broccoli work great too. These sides complement the creamy pasta and enhance the meal. You can easily make this meal gluten-free. Simply swap regular pasta for gluten-free pasta. There are many types available, such as rice or chickpea pasta. Just be sure to check the cooking times, as gluten-free pasta may cook faster or slower than regular pasta. This way, everyone can enjoy this creamy delight! In this blog post, we explored how to make One Pot Creamy Lemon Dill Salmon Pasta using simple ingredients and techniques. You learned about pasta choices, salmon prep, and broth types that enhance flavor. I shared tips for perfecting the cooking process and suggested variations for different diets. Proper storage and reheating techniques help keep leftovers tasty. Remember, cooking is fun and a chance to be creative. Try these ideas and make the dish your own! Enjoy every bite of your delicious meal.

If you crave a quick, delicious meal, I have just the dish for you: One Pot Creamy Lemon Dill Salmon Pasta Delight. This simple recipe combines tender salmon with creamy …

Read more

Categories Dinner Tags NO-ING-IMG

Slow Cooker Beef Stroganoff with Egg Noodles Delight

January 14, 2026October 2, 2025 by Chef Tavio
- 1.5 lbs beef stew meat - 8 oz mushrooms - 1 medium onion - 3 cloves garlic - 1 cup beef broth - 1 tablespoon Worcestershire sauce - 2 teaspoons Dijon mustard - 1 teaspoon dried thyme - Salt and pepper to taste - 1 cup sour cream - 2 tablespoons all-purpose flour (optional) - 12 oz egg noodles - Fresh parsley for garnish For a tasty beef stroganoff, you need specific ingredients. First, the beef stew meat is key. I recommend using 1.5 lbs, cut into bite-sized pieces. This meat cooks well and becomes tender. Next, you’ll want 8 oz of mushrooms. Both button and cremini work great, adding a nice earthy flavor. Onions and garlic bring depth to your dish. Use one medium onion, finely chopped, and three cloves of minced garlic. This combo creates an aromatic base. Don’t forget the beef broth! One cup will help make your sauce rich and savory. Now for seasoning, one tablespoon of Worcestershire sauce adds a savory kick. Two teaspoons of Dijon mustard give it a bit of tang. You’ll also need one teaspoon of dried thyme. Adjust salt and pepper to your taste. For a creamy finish, one cup of sour cream is essential. If you want a thicker sauce, use two tablespoons of all-purpose flour. Finally, cook 12 oz of egg noodles. They will soak up the sauce and make the meal hearty. Top it all with fresh parsley for that perfect touch. - Prepare the beef and vegetables Start with 1.5 lbs of beef stew meat. Cut it into bite-sized pieces. This will form the heart of your dish. Next, chop 1 medium onion and mince 3 cloves of garlic. Slice 8 oz of mushrooms, either button or cremini. These veggies boost flavor and texture. - Mix broth and seasonings In a bowl, mix 1 cup of beef broth with 1 tablespoon of Worcestershire sauce. Add 2 teaspoons of Dijon mustard, 1 teaspoon of dried thyme, and salt and pepper to taste. Stir until everything is blended well. This mixture adds rich flavor to your stroganoff. - Layer ingredients in the slow cooker Place the beef stew meat at the bottom of your slow cooker. Next, layer the chopped onion, minced garlic, and sliced mushrooms on top. Finally, pour the broth mixture over everything. This keeps your beef tender while it cooks. - Cooking times for low and high settings Cover the slow cooker. Set it to cook on low for 7-8 hours or on high for 4-5 hours. The goal is fork-tender beef, soaking up all the savory goodness. Check the meat at the end of the cooking time to ensure it's perfectly tender. - Cooking egg noodles separately About 30 minutes before serving, boil a pot of water. Cook 12 oz of egg noodles according to the package instructions. Once done, drain them and set aside. Cooking them separately keeps the noodles from getting mushy. - Thickening the sauce before serving If you want a thicker sauce, mix 2 tablespoons of all-purpose flour with a small amount of water. Stir this slurry into the slow cooker along with 1 cup of sour cream. Let it cook for an additional 10-15 minutes. This gives your stroganoff a creamy texture. - Combining noodles with the stroganoff Once everything is ready, gently fold the cooked egg noodles into the beef stroganoff mixture. Make sure the noodles are well coated in the rich sauce. Taste and adjust seasoning with more salt or pepper if needed. Enjoy the comfort of this classic dish! To get fork-tender beef, choose the right cut. I recommend beef stew meat. Sear the meat briefly before adding it to the slow cooker. This helps lock in flavors. Cook it low and slow for the best results. Aim for 7-8 hours on low or 4-5 hours on high. For the right sauce consistency, you can adjust it easily. If you want a thicker sauce, mix 2 tablespoons of flour with water to make a slurry. Stir this into the slow cooker along with the sour cream about 30 minutes before serving. This will give you a creamy, rich sauce. Want to boost the flavor? Adding herbs makes a big difference. Try fresh parsley or thyme for extra aroma. You can also add paprika for a hint of warmth. Just sprinkle it in before serving. For optional toppings, think about adding a dollop of sour cream or a sprinkle of cheese. This adds richness and makes each bowl special. Some fresh chives or crispy onions can also add a nice crunch. You can change the meat for variety. Try chicken or pork for a different flavor. If you're looking for plant-based options, use mushrooms or lentils instead. They work well in this dish. If you need gluten-free options, use gluten-free noodles. You can also replace flour with cornstarch for thickening. This way, everyone can enjoy the dish without worry. {{image_4}} You can change the taste of beef stroganoff by using different mushrooms. Try shiitake or portobello for a rich flavor. You can also switch the beef stew meat for sirloin or even chicken. For a vegetarian or vegan twist, use mushrooms and tempeh instead of beef. Replace sour cream with cashew cream or coconut yogurt for a creamy finish. To make your meal complete, consider serving your beef stroganoff with some tasty sides. A fresh green salad works well. Roasted vegetables also add a nice touch. For a fun twist, serve the stroganoff in a bread bowl. You can even top it with crispy onions for extra crunch. Beef stroganoff has many international versions. In Hungary, you might find paprika added for a smoky flavor. In Germany, they often include mustard for a tangy taste. You can also add local herbs or spices to make the dish your own. If you like, try adding a splash of red wine for depth. To store your leftover beef stroganoff, let it cool first. Place it in an airtight container. This keeps it fresh and tasty. You can store it in the fridge for about 3 to 4 days. If you want to keep it longer, freezing is a great option. To freeze beef stroganoff, use a freezer-safe container. Make sure to leave some space for expansion. It can last up to 3 months in the freezer. When you’re ready to eat it, thaw it in the fridge overnight. For quick thawing, you can use the microwave. To reheat, warm it on the stove over low heat. Stir occasionally to keep it from sticking. You can also use the microwave for quick meals. Just be sure to stir every minute for even heating. You can prepare some ingredients ahead of time. Chop your onion, garlic, and mushrooms the night before. Store them in the fridge for easy access. You can also cut the beef into pieces in advance. For busy days, consider making a big batch. Cook a double recipe and freeze half. This way, you’ll have a delicious meal ready to go. Just follow the freezing instructions above. Yes, you can! While beef stew meat works great, you can try other cuts too. - Chuck roast: This cut has a lot of flavor and becomes very tender. - Sirloin: A leaner option, still tender when cooked right. - Pork: Pork shoulder can also be a tasty swap. - Chicken: For a lighter dish, use chicken thighs. Each meat brings its own flavor. Adjust your cooking time based on the meat you choose. Cooking time depends on your slow cooker setting. - Low setting: Cook for 7-8 hours. This gives the beef time to get tender. - High setting: Cook for 4-5 hours. This is faster but still works well. Keep an eye on the beef. It should be fork-tender when done. Yes, you can make beef stroganoff on the stovetop! - Start by browning the beef in a large pot. - After that, add the onions, garlic, and mushrooms. Cook until soft. - Then, add the broth and seasonings. - Let it simmer for about 30-40 minutes. This helps the flavors blend well. This method is faster, but you miss the slow-cooked flavor. This blog post detailed a delicious beef stroganoff recipe from start to finish. You learned about the main ingredients, step-by-step cooking methods, and various tips to enhance your dish. We also explored storage options and addressed common questions to help you troubleshoot. As you prepare this meal, remember that every tweak can make it your own. Enjoy the process and share this comforting dish with friends and family. With a bit of creativity, you’ll create a hearty meal everyone will love.

Get ready to savor a classic comfort dish like never before! In this blog post, I’ll show you how to make Slow Cooker Beef Stroganoff with Egg Noodles that’s easy …

Read more

Categories Dinner Tags NO-ING-IMG

Air Fryer Garlic Parmesan Chicken Wings Delight

January 14, 2026October 2, 2025 by Chef Tavio
- 2 pounds chicken wings - 1 tablespoon olive oil - 1 teaspoon garlic powder - 1 teaspoon onion powder - 1 teaspoon smoked paprika - ½ teaspoon black pepper - 1 teaspoon salt - ½ cup grated Parmesan cheese - 2 tablespoons fresh parsley (for garnish) - Optional: lemon wedges for serving - Air fryer - Mixing bowl - Measuring spoons - Paper towels - Serving platter Gather these ingredients before you start. Fresh chicken wings are key to great taste. I always use high-quality olive oil for flavor. The garlic powder and onion powder give depth. Smoked paprika adds a nice touch. Don't forget the salt and pepper for balance. Grated Parmesan is a game-changer. It melts into a cheesy crust that everyone loves. Fresh parsley brightens the dish and adds color. Lemon wedges are optional but add zest. You will need an air fryer for cooking. A mixing bowl helps mix the spices and oil. Measuring spoons ensure you use the right amounts. Paper towels help dry the wings for crispiness. Finally, a serving platter makes for a beautiful presentation. Pat the chicken wings dry with paper towels. This step is very important. Removing moisture helps the wings get nice and crispy. If the wings are wet, they will steam, not fry. Crispy wings are what we want! In a large mixing bowl, mix the olive oil, garlic powder, onion powder, smoked paprika, black pepper, and salt. Use a whisk to combine everything well. Add the chicken wings to the bowl and toss them. Make sure each wing gets a good coat of seasoning. This blend gives great flavor! Set your air fryer to preheat at 400°F (200°C). This takes about 5 minutes. Preheating helps the wings cook evenly and turn out crispy. Place the wings in the air fryer basket in a single layer. Do not overcrowd them. Cook the wings for 25-30 minutes. Flip them halfway through for even cooking. In the last 5 minutes, sprinkle the grated Parmesan cheese over the wings. This makes a tasty, cheesy crust. Enjoy those wings! To get crispy wings, start by patting them dry with paper towels. This step is key. It removes moisture, helping the skin crisp up in the air fryer. If the wings are wet, they won’t get that nice crunch. Cook wings in batches for even results. If you crowd the basket, some wings may cook unevenly. Give each wing space to breathe. This way, all of them will be golden and crispy. You can add more flavor with extra seasonings. Try adding cayenne pepper for heat or herbs like thyme for a fresh twist. Adjust spice levels by adding or reducing seasonings to fit your taste. If you like it spicy, go for more pepper. If you prefer it mild, hold back. For a beautiful plate, garnish wings with fresh parsley. It adds color and freshness. Serve with lemon wedges to squeeze over the wings. This adds a nice zesty kick. Pair the wings with dips like ranch or blue cheese. They make great sides for extra flavor. {{image_4}} You can give your wings a new twist. Here are two tasty ideas: - Spicy garlic Parmesan wings: Add 1 teaspoon of cayenne pepper to the seasoning mix. This will give your wings a fiery kick while keeping that classic garlic and cheese flavor. - Asian-inspired garlic wings: Swap the garlic powder for 1 tablespoon of soy sauce and add 1 teaspoon of ginger powder. This will give your wings a savory, umami taste that pairs well with a hint of sweetness. You don't have to stick to the air fryer. Here are some other ways to cook your wings: - Oven-baking method: Preheat your oven to 425°F (220°C). Place seasoned wings on a baking sheet lined with parchment paper. Bake for 40-45 minutes, flipping halfway for even cooking. - Grilling method: Preheat your grill. Cook the wings over medium heat for about 20-25 minutes, turning often to avoid burning. This method adds a nice smoky flavor. Wings taste great with tasty sides. Here are some ideas: - Ideal sides for serving with wings: Serve with celery sticks, carrot sticks, or a fresh salad. These sides provide a nice crunch and balance the rich flavors of the wings. - Suggested drinks to pair: Pair your wings with a cold lager or a refreshing lemonade. Both options complement the savory garlic and cheese flavor nicely. To keep your wings fresh, let them cool down first. You want to avoid trapping steam, which makes the wings soggy. Use an airtight container to store them. Glass or plastic containers both work well. If you have a lot of wings, consider using freezer bags. Remove as much air as you can before sealing the bags. This helps prevent freezer burn if you plan to freeze them. The best way to reheat wings is in the air fryer. Set it to 350°F (175°C) and cook for about 5 to 7 minutes. This method keeps them crispy. If you don’t have an air fryer, you can use the oven. Preheat the oven to 350°F (175°C) and place the wings on a baking sheet. Heat for about 10 to 15 minutes. This method works, but they might not be as crispy as when you use the air fryer. You can also use the microwave, but this method can make them soft. If you choose this method, heat in short bursts of 30 seconds. Yes, you can use frozen chicken wings. First, thaw them in the fridge overnight. This helps them cook evenly. If you don’t have time, you can run them under cold water for about 30 minutes. When cooking, add about 5 more minutes to the cooking time. Keep an eye on them to make sure they are fully cooked. You can store leftover wings for up to three days in the fridge. Place them in an airtight container to keep them fresh. If you want to keep them longer, freeze the wings. They can last for up to four months in the freezer. Just make sure to wrap them well to avoid freezer burn. Several dipping sauces work great with garlic Parmesan wings. Popular choices include: - Ranch - Blue cheese - Hot sauce - Garlic aioli - Honey mustard These sauces add extra flavor and fun. You can mix and match to find your favorite! You now know how to make crispy garlic Parmesan chicken wings using an air fryer. We covered the key ingredients, tools needed, and step-by-step instructions. I shared tips for perfect texture and flavor, plus some fun variations to try. Remember to store leftovers properly and consider great dipping sauces for serving. Enjoy your delicious wings with friends and family. Cooking can be simple and rewarding!

Craving a tasty snack? Try my Air Fryer Garlic Parmesan Chicken Wings! These wings are crispy, packed with flavor, and super easy to make. With just a few simple ingredients, …

Read more

Categories Appetizers Tags NO-ING-IMG

No Bake Gingerbread Cheesecake Bars Delightful Treat

January 14, 2026October 2, 2025 by Chef Tavio
To make these tasty no bake gingerbread cheesecake bars, gather these ingredients: - 1 ½ cups crushed gingerbread cookies - ½ cup unsalted butter, melted - 16 oz cream cheese, softened at room temperature - 1 cup powdered sugar - 1 teaspoon vanilla extract - 1 teaspoon ground ginger - 1 teaspoon ground cinnamon - ½ teaspoon ground nutmeg - 1 cup heavy whipping cream, chilled - ¼ cup molasses - Optional: Whipped cream and extra crushed gingerbread cookies for garnish You can swap some ingredients if needed: - Use graham cracker crumbs instead of gingerbread cookies for a different base. - Swap unsalted butter with coconut oil for a dairy-free option. - Use low-fat cream cheese if you want to cut calories. - For a sweeter taste, you can replace powdered sugar with maple syrup. Garnishes can make your bars look great and taste better. Consider these options: - Top each bar with a dollop of whipped cream. - Sprinkle crushed gingerbread cookies for extra crunch. - Add a drizzle of molasses over the top for a sweet finish. These simple touches can add charm to your dessert and make it festive! To make the crust, start with crushed gingerbread cookies. You need 1 ½ cups of them. Mix these crumbs with ½ cup of melted unsalted butter in a bowl. Stir well until all the crumbs are coated. This mixture should form a wet sand-like texture. Next, press this mixture firmly into the bottom of a lined 9x9 inch baking pan. Make sure it is flat and solid. Then, refrigerate for about 10 minutes. This helps the crust set up nicely. Now, focus on the creamy filling. In a large bowl, add 16 oz of softened cream cheese. Use an electric mixer to beat it on medium speed. Mix until it is smooth and creamy. Gradually add in 1 cup of powdered sugar. Then, stir in 1 teaspoon of vanilla extract, 1 teaspoon of ground ginger, 1 teaspoon of ground cinnamon, and ½ teaspoon of ground nutmeg. Keep mixing until the filling is silky smooth. This mixture will be the star of your cheesecake bars. Next, we need to make it light and fluffy. In another bowl, whip 1 cup of chilled heavy cream. Use the electric mixer until stiff peaks form. This step is key for a light texture. Gently fold the whipped cream into the cream cheese mixture with a spatula. Do this carefully to keep the air in the whipped cream. Once mixed, drizzle ¼ cup of molasses over the top. Give it a gentle stir to create a marbled look. Finally, pour this creamy mixture over the chilled crust. Spread it evenly using a spatula for a smooth top. - Use Room Temperature Cream Cheese: This helps the cream cheese blend smoothly. Cold cream cheese can cause lumps. - Chill Your Mixing Bowls: A cold bowl can help keep the whipped cream light and fluffy. - Press the Crust Firmly: Make sure your crust is tight in the pan. This keeps the bars from falling apart. - Don’t Overmix: When folding in the whipped cream, be gentle. This keeps the mixture airy and light. - Skipping the Chill Time: Don't rush the chilling process. The bars need time to set properly. - Using Too Much Liquid: Be careful with the molasses. Too much can make your filling runny. - Not Tasting as You Go: Always taste your mixture! Adjust spices to your liking for the best flavor. - Cutting Too Soon: Wait until the bars are fully chilled before cutting. This ensures clean edges. - Whip the Cream to Stiff Peaks: This is key for a light texture. It adds air and keeps the filling fluffy. - Fold Gently: When mixing the whipped cream into the cream cheese, use a spatula. Fold slowly to keep the volume. - Use Good Quality Ingredients: Fresh, high-quality cream cheese and spices make a big difference in flavor and texture. - Let It Set Fully: The longer it chills, the firmer and better it becomes. Aim for at least four hours. {{image_4}} If you want to mix things up, try different flavors. You can use chocolate cookies instead of gingerbread for a rich twist. A pumpkin spice version is also fun and festive. Just swap some spices and add pureed pumpkin for a creamy filling. Crushed Oreos can give you a cookies-and-cream style bar. The sky is the limit with flavors! You can easily make these bars gluten-free. Just use gluten-free gingerbread cookies in the crust. For a dairy-free version, use coconut cream instead of cream cheese. You can also use dairy-free whipped cream. These simple swaps keep the treat tasty for everyone. You can add seasonal flavors to make these bars even more special. Try adding peppermint extract for a holiday vibe. Chopped nuts, like pecans or walnuts, can give a nice crunch. Top with festive sprinkles or edible glitter to make them pop at parties. These little changes can make your cheesecake bars stand out! To keep your No Bake Gingerbread Cheesecake Bars fresh, store them correctly. Place the bars in an airtight container. This prevents them from drying out. Make sure to keep them in the fridge. Lining the container with parchment paper helps avoid sticking. You can also cover the pan with plastic wrap. If you want to save some bars for later, freezing is a great option. First, let the bars chill completely in the fridge. Then, cut them into squares or bars. Wrap each piece in plastic wrap tightly. Place the wrapped bars in a freezer-safe bag or container. This keeps them safe from freezer burn. You can freeze them for up to three months. When ready to eat, thaw them in the fridge overnight. These cheesecake bars last well in the fridge. When stored properly, they stay fresh for about five days. After that, the texture may change, and they may lose flavor. Always check for any signs of spoilage before eating. If they smell off or look different, it's best to discard them. Enjoy your festive treat while it's at its best! Yes, you can use store-bought gingerbread cookies. They save time and still taste great. Choose a brand that you enjoy. Just crush them and mix with melted butter as the recipe suggests. This makes a quick and easy crust. The cheesecake bars need at least four hours to set. If you can, let them chill overnight. This helps the flavors blend well and makes for a firmer texture. A longer chill time means a more enjoyable treat. If your cheesecake mixture is too runny, the cream cheese might not be soft enough. Make sure to use room-temperature cream cheese. If it’s still runny, try adding a bit more powdered sugar to thicken it. Whipping the cream longer can also help firm it up. In this blog post, I shared my recipe for no-bake gingerbread cheesecake bars. We covered the ingredients, tips, and variations to make your bars unique. Remember, you can adjust flavors and textures to fit your taste. Storing your bars correctly will keep them fresh longer. Don't forget to try the optional garnishes for extra flair. Enjoy making this delightful treat, and impress your friends and family with your skills. You’ll love how simple, yet tasty, these cheesecake bars are!

If you love rich flavors and festive treats, you’ll adore my No Bake Gingerbread Cheesecake Bars! These bars mix creamy cheesecake with warm gingerbread spices to create a delightful dessert. …

Read more

Categories Desserts Tags NO-ING-IMG

Minute Egg White Breakfast Wraps Quick and Easy Meal

January 14, 2026October 2, 2025 by Chef Tavio
- 1 cup liquid egg whites - 1/4 cup bell peppers, finely chopped - 1/4 cup fresh spinach, chopped - 1/4 cup cherry tomatoes, halved - 1/4 teaspoon garlic powder - 2 whole wheat tortillas (8-inch diameter) - 1/4 cup shredded low-fat cheese (optional) - Salt and black pepper, to taste - Fresh herbs (like chives or parsley) I love using liquid egg whites for this recipe. They are quick and easy. You can also use whole eggs, but egg whites keep it lighter. Bell peppers add color and crunch. I often pick red or yellow for their sweetness. Fresh spinach gives a healthy touch. It’s mild and blends well with the eggs. Cherry tomatoes are a must for a burst of flavor. They add sweetness when warmed. Garlic powder brings depth to the dish. You can also use fresh minced garlic for more punch. Whole wheat tortillas are my go-to for wrapping. They are filling and healthy. Shredded low-fat cheese is optional. I like adding it for creaminess. Feta or cheddar works great here. For seasoning, a pinch of salt and black pepper enhance all the flavors. Fresh herbs add a nice finish. They give a pop of color and taste to your wraps. Start by whisking 1 cup of liquid egg whites in a bowl. Add garlic powder, salt, and pepper. Whisk until the mixture is frothy. This step is key for fluffy wraps. Next, heat a non-stick skillet over medium heat. Add 1/4 cup chopped bell peppers and 1/4 cup chopped spinach. Sauté for 2-3 minutes. The veggies should soften and smell good. This means they are ready for the egg mixture. Pour the frothy egg whites into the skillet with veggies. Cook for 3-4 minutes while gently stirring. This keeps the egg whites fluffy. Add the halved cherry tomatoes during the last minute. Let them warm through for extra flavor. While the egg cooks, warm 2 whole wheat tortillas. You can heat them in a skillet for about 20-30 seconds on each side. Alternatively, wrap them in a damp paper towel and microwave for 15 seconds. This makes them soft and easy to roll. Once the egg mixture is done, divide it between the two warm tortillas. If you like, sprinkle some shredded low-fat cheese on top. Roll each tortilla tightly, tucking in the sides as you go. Finally, slice each wrap in half diagonally. Garnish with fresh herbs for a lovely touch. To make your Minute Egg White Breakfast Wraps pop, try different herbs and spices. Fresh chives or parsley add a nice green touch. You can also use oregano or basil for a classic Italian twist. If you want a kick, add a pinch of cayenne pepper or smoked paprika. Cheese is another easy way to change the flavor. Low-fat cheddar gives a sharp taste, while feta offers a tangy punch. You can mix and match to find your favorite combination. Busy mornings need quick methods. Whisk the egg whites and seasonings the night before. Store them in the fridge for easy use in the morning. You can chop the veggies ahead of time too. Keep them in a container for quick access. If you warm the tortillas in a skillet, do it while cooking the veggies. This saves time and keeps everything hot. Rolling and cutting wraps can be tricky. Start rolling from one side, tucking in the ends as you go. This helps keep the filling inside. Use a sharp knife to cut each wrap in half. Diagonal cuts show off the colorful filling. For a neat look, place the wrap seam-side down on the plate. Garnish with fresh herbs to make your meal pop. A little extra care goes a long way in presentation! {{image_4}} You can easily change the veggies in your wraps. Try adding mushrooms, zucchini, or kale. These swaps give you a new flavor and texture. If you have dietary needs, you can use tofu or chickpea flour instead of egg whites. Both options are great for plant-based diets. Want to spice things up? Make a Mexican twist! Add salsa or fresh avocado for a creamy touch. You can also sprinkle in some jalapeños for heat. For a Mediterranean vibe, add olives or crumbled feta cheese. These options add rich flavors and a new flair to your wraps. These wraps are not just for breakfast. You can serve them for lunch or dinner too. Pair them with a side salad or fresh fruit for a balanced meal. They also work great with yogurt or a light soup. Get creative and enjoy them any time of the day! To keep your wraps fresh, place them in an airtight container. Refrigerate them within two hours of cooking. This helps keep them from drying out. If you want to reheat, use a skillet over low heat. This method keeps the wrap soft and prevents it from becoming tough. You can freeze these wraps for later meals. First, let them cool completely. Then, wrap each one in plastic wrap. After that, store them in a freezer bag or container. Make sure to label the bag with the date. When you are ready to eat, defrost them in the fridge overnight. For best results, reheat in a skillet or microwave until hot. Stored wraps last about 3 to 4 days in the fridge. If frozen, they can last for up to 3 months. Check for signs of spoilage, like an off smell or mold. If anything seems off, it's best to toss them. Enjoy your wraps while they're still fresh! It takes about 10 minutes to prep and 15 minutes to cook. So, in just 25 minutes, you can enjoy a warm and tasty breakfast. This quick time makes it easy to fit into a busy morning routine. Yes, you can use whole eggs if you prefer. Whole eggs add more flavor and richness. However, keep in mind that they also add more fat and calories. Adjust the number of eggs to your taste. For this recipe, use about 3 whole eggs to replace the 1 cup of liquid egg whites. You can add many tasty toppings to make your wrap special. Here are some ideas: - Avocado slices for creaminess - Salsa for a spicy kick - Fresh herbs like cilantro or basil for added flavor - Hot sauce for heat - Greek yogurt for creaminess and tang These toppings can brighten your breakfast and add extra nutrition. Yes, these wraps are great for meal prep! You can make a batch ahead of time and store them. Here are some tips: - Cook multiple wraps at once and let them cool. - Wrap each one in foil or parchment paper. - Store them in the fridge for up to 3 days or freeze them for a month. - To reheat, microwave for about 1-2 minutes or bake at 350°F until warm. This way, you can have a quick breakfast ready whenever you want! This blog post guided you through making Minute Egg White Breakfast Wraps. We covered key ingredients like liquid egg whites, bell peppers, and spinach. You learned step-by-step instructions for cooking, assembling, and perfecting your wraps. I shared tips to enhance flavor and options for variations. In closing, these wraps suit any meal and can fit your busy life. Enjoy experimenting with different flavors and ingredients to make them your own!

Looking for a quick and healthy breakfast? Minute Egg White Breakfast Wraps are your answer! With simple ingredients like liquid egg whites, fresh veggies, and whole wheat tortillas, you can …

Read more

Categories Breakfast Tags NO-ING-IMG

Caramel Pecan Turtle Brownie Bars Irresistible Treat

January 14, 2026October 2, 2025 by Chef Tavio
- Unsalted butter - Granulated sugar - Large eggs - Vanilla extract - All-purpose flour - Unsweetened cocoa powder - Salt - Semi-sweet chocolate chips - Chopped pecans - Caramel sauce - 1 cup unsalted butter, melted - 2 cups granulated sugar - 4 large eggs - 1 teaspoon vanilla extract - 1 cup all-purpose flour - 1/2 cup unsweetened cocoa powder - 1/2 teaspoon salt - 1 cup semi-sweet chocolate chips - 1 cup chopped pecans - 1 cup caramel sauce (store-bought or homemade) For the best results, use high-quality ingredients. Fresh eggs help the batter rise and add richness. Choose a good brand of cocoa powder for a deep chocolate flavor. If you can, make caramel sauce from scratch for an extra touch. This will elevate your bars. I love using chopped pecans. They add a great crunch and nutty taste to the brownies. The semi-sweet chocolate chips melt beautifully, creating gooey pockets of chocolate. When mixed with caramel, it’s pure bliss. This combination of flavors and textures makes these bars a favorite. Each bite is rich, sweet, and simply irresistible. Enjoy making these delightful treats! 1. Preheat the oven: Start by preheating your oven to 350°F (175°C). This step is key for even baking. 2. Prepare the baking pan: Use a 9x13-inch baking pan. Lightly grease it with butter or line it with parchment paper. This makes for easy removal later. 3. Mix butter and sugar: In a large bowl, pour in 1 cup of melted unsalted butter. Add 2 cups of granulated sugar next. Whisk them together until smooth. 4. Incorporate eggs: Add 4 large eggs to the bowl, one at a time. Mix well after each egg. This makes the batter rich and fluffy. 5. Add vanilla extract: Stir in 1 teaspoon of vanilla extract. This adds a lovely flavor to the brownies. 6. Add dry ingredients: Gradually sift in 1 cup of all-purpose flour, 1/2 cup of unsweetened cocoa powder, and 1/2 teaspoon of salt. Use a spatula to fold the mixture gently. Be careful not to overmix. 7. Mix in chocolate and pecans: Fold in 1 cup of semi-sweet chocolate chips and 1 cup of chopped pecans. Make sure they are evenly spread throughout the batter. 8. Layer the batter: Pour half of the brownie batter into the prepared baking pan. Spread it evenly across the bottom. 9. Add caramel sauce: Drizzle half of the caramel sauce over the brownie layer. Use a spatula to swirl it gently for a marbled look. 10. Top with remaining batter: Pour the rest of the brownie batter over the caramel layer. Spread it out evenly to cover. 11. Final layer of caramel: Drizzle the rest of the caramel sauce on top. Swirl it into the batter with a knife for a stunning effect. 12. Bake: Place the pan in the oven and bake for 25-30 minutes. Check for doneness by inserting a toothpick. It should come out with moist crumbs. 13. Cooling down: Let the brownies cool in the pan for about 15 minutes. Then, transfer them to a wire rack to cool completely. 14. Serve: Once cooled, slice the brownies into bars. Enjoy your delicious treat! To get the best brownie texture, avoid overmixing the batter. Mix just until combined. If you stir too much, your brownies can turn out dense and tough. For baking time, check your brownies a few minutes early. Every oven is different. Use a toothpick to test for doneness. It should come out with a few moist crumbs. Want to add more flavor? You can sprinkle some sea salt on top. It gives a nice contrast to the sweet caramel. You might also add chocolate chips or even crushed toffee bits. When it comes to caramel sauce, homemade is best. It has a richer taste. However, store-bought works just fine when you’re short on time. To make your brownies look fancy, dust them with powdered sugar. This makes them look like a treat from a bakery. You can also drizzle extra caramel on top for a stunning finish. Serve them on a nice platter to impress your guests. For a fun touch, cut them into fun shapes using cookie cutters. {{image_4}} You can change the nuts in your caramel pecan turtle brownie bars. If you like, try walnuts or hazelnuts. These nuts bring a different taste and crunch. Simply swap them in for pecans in the recipe. If you want a nut-free treat, use seeds like pumpkin or sunflower. They add a nice crunch without the nuts. You can also skip the nuts altogether for a smooth texture. Mixing flavors can make these brownie bars even better. Consider adding mint or orange zest to the batter. Mint adds a fresh taste, while orange zest gives a bright, fruity twist. Just a little will go a long way. You can also swap the chocolate types. Use dark chocolate for a richer flavor or white chocolate for sweetness. Each type will change the bar’s taste, so feel free to experiment. If you need gluten-free options, use almond flour or gluten-free flour blends. These work well in the recipe and keep the brownies soft. Make sure to check the labels for any hidden gluten. For a vegan version, replace the eggs with flaxseed meal or applesauce. Use dairy-free butter and chocolate chips to keep that rich flavor. These swaps help everyone enjoy this delicious dessert. To keep your Caramel Pecan Turtle Brownie Bars fresh, use airtight containers. Glass or plastic containers work well. If you use plastic wrap, make sure it’s tight. Room temperature is fine for short-term storage. If you want to keep them longer, put them in the fridge. These bars stay fresh for about 3 to 5 days at room temperature. If you refrigerate them, they may last up to a week. For longer storage, freeze the bars. Wrap each piece well in plastic wrap, then place them in a freezer bag. They can last for up to 3 months in the freezer. To enjoy these bars warm, you can reheat them. Use a microwave for quick warming. Heat in short bursts, about 10 to 15 seconds. This helps maintain their soft texture. If they were frozen, let them thaw in the fridge first. Avoid reheating too long, or they might dry out. How do I know when the brownies are done? Check the edges for firmness. Insert a toothpick into the center. It should come out with a few moist crumbs. If it comes out clean, the brownies may be overbaked. Can I use a different size pan for this recipe? Yes, you can use a different pan. Just remember, baking time may change. A larger pan will bake faster, while a smaller pan will take longer. What can I do if I don’t have caramel sauce on hand? You can make quick caramel sauce with sugar and cream. Cook sugar on low heat until it melts, then stir in heavy cream. For a short cut, use sweetened condensed milk. How can I make these bars less sweet? You can reduce the sugar in the brownie mix. Use dark chocolate chips instead of semi-sweet. You can also use less caramel sauce on top for a balanced taste. This blog post covered how to make delicious caramel pecan turtle brownie bars. We explored the key ingredients, provided precise measurements, and outlined the steps for perfect preparation. I shared tips to enhance texture and flavor, along with fun variations to try. In conclusion, these brownie bars are easy to make and delightfully tasty. You can store them well and enjoy them later, too! So, roll up your sleeves and give this recipe a try. Your taste buds will thank you!

Get ready to dive into a world of rich flavors with my Caramel Pecan Turtle Brownie Bars! These bars blend fudgy brownies, creamy caramel, and crunchy pecans for an unforgettable …

Read more

Categories Desserts Tags NO-ING-IMG

One-Pan Creamy Lemon Parmesan Orzo Delight Recipe

January 14, 2026October 1, 2025 by Chef Tavio
For this dish, you need: - 1 cup orzo pasta - 2 tablespoons extra virgin olive oil - 1 small onion, finely diced - 3 cloves garlic, minced - 2 cups vegetable broth - 1 cup heavy cream - 1 cup freshly grated Parmesan cheese - Zest of 1 lemon - Juice of 1 lemon - Salt and freshly ground pepper, to taste - 1 cup fresh spinach, coarsely chopped These ingredients create a creamy, zesty, and savory flavor that makes every bite delightful. To add a fresh touch, you can use: - 1/4 cup fresh parsley, finely chopped - Lemon slices These garnishes not only enhance the dish's look but also add extra flavor. If you want to change things up, consider these swaps: - Use chicken broth instead of vegetable broth for a richer taste. - Swap heavy cream with coconut milk for a dairy-free option. - Try nutritional yeast instead of Parmesan cheese for a vegan version. These alternatives keep the dish tasty while catering to different diets. First, take a large skillet and add two tablespoons of extra virgin olive oil. Heat it over medium heat. Once the oil is hot, add one small onion, finely diced. Sauté for about three to four minutes. Keep stirring until the onion is soft and clear. Next, add three cloves of minced garlic. Sauté for one more minute. The garlic should smell great but not burn. Now it’s time to cook the orzo. Add one cup of orzo pasta to the skillet. Stir it well to coat it in olive oil. Sauté the orzo for about two minutes. This step toasts the pasta and adds flavor. Then, slowly pour in two cups of vegetable broth. Bring the mix to a gentle simmer. Cook for eight to ten minutes. Stir it now and then until the orzo is al dente and most of the liquid is gone. Reduce the heat to low. Stir in one cup of heavy cream and one cup of freshly grated Parmesan cheese. Mix until the cheese melts and the sauce is creamy. Add the zest and juice of one lemon for bright flavor. Season with salt and freshly ground pepper to taste. Gently fold in one cup of coarsely chopped spinach. Let it wilt for about one to two minutes. This adds color and nutrients. Finally, take the pan off the heat and let it sit for a minute. This helps the dish thicken. Serve hot, garnishing with fresh parsley and a slice of lemon. - Use fresh lemon juice and zest for bright flavor. - Stir the orzo often while cooking to prevent sticking. - Cook the orzo until it’s al dente for the best texture. - Add cream and cheese slowly to achieve a smooth sauce. - Always taste and adjust seasoning before serving. - Don’t rush the sautéing of onion and garlic; they need time to develop flavor. - Avoid adding too much broth at once; this can make the orzo soggy. - Skipping the resting time can lead to a runny dish. - Forgetting to fold in the spinach can miss out on nutrition and color. - Don’t skip the garnish; it adds a fresh touch to the dish. - Use a large skillet with a heavy bottom for even cooking. - Non-stick pans help prevent sticking and make cleanup easy. - A deep skillet can hold more liquid for better simmering. - Look for pans that are oven-safe in case you want to broil the dish. - Always choose cookware that heats evenly for best results. {{image_4}} You can boost the protein in this dish easily. For chicken, use diced breast or thigh. Cook the chicken in the pan first, then set it aside. Add it back when you mix in the cream and cheese. For shrimp, just toss them in when the orzo is almost done cooking. They only need a few minutes to cook through. If you prefer a plant-based option, tofu works well too. Cube firm tofu and sauté it until golden. It adds a nice texture and protein punch. If you want to keep it vegetarian, just skip the meat. Use vegetable broth as in the recipe. For a vegan version, swap the heavy cream for coconut milk. Use nutritional yeast instead of Parmesan for a cheesy flavor. You can also add more veggies. Try bell peppers, zucchini, or mushrooms for extra taste and nutrients. Enhance the flavor with fresh herbs and spices. Basil and thyme pair nicely with the lemon. Add them in when you mix the cream and cheese. For a kick, try a pinch of red pepper flakes. They give a nice warmth without overpowering the dish. Lemon zest adds a fresh brightness, so don’t skip it! You can even add a splash of white wine for depth before the broth. It adds a lovely layer of flavor. To keep your orzo fresh, let it cool first. Place it in an airtight container. Store it in the fridge for up to three days. This helps maintain the flavor and creaminess. When you are ready to enjoy leftovers, use low heat. Add a splash of water or cream to keep it smooth. Stir often to heat it evenly. This way, the orzo stays creamy and delicious. You can freeze orzo, but it may change texture. Allow it to cool completely. Place it in a freezer-safe container. It can last for up to three months. When ready to eat, thaw overnight in the fridge before reheating. Yes, you can make One-Pan Creamy Lemon Parmesan Orzo ahead of time. Prepare it, then cool it down. Store it in an airtight container in the fridge for up to three days. When you're ready to serve, you can reheat it on the stove. Add a splash of broth or cream to keep it creamy. You can add many tasty items to this orzo. Here are some ideas: - Cooked chicken: Shred or dice it for added protein. - Shrimp: Sauté shrimp and mix them in for a seafood twist. - Vegetables: Add bell peppers, peas, or sun-dried tomatoes for extra color and taste. - Herbs: Fresh basil or thyme can enhance the flavor. Feel free to mix and match to suit your taste. Orzo is not gluten-free. It is made from wheat and is similar to pasta. If you need a gluten-free option, look for gluten-free orzo made from rice or other grains. Always check the label to make sure it fits your diet. This blog post covered everything you need for One-Pan Creamy Lemon Parmesan Orzo. You learned the key ingredients, step-by-step cooking methods, and helpful tips. I've also shared storage info and answered common questions. My final thoughts are simple: this dish is easy and fun to make. With the right ingredients and a few tricks, you can enjoy a tasty meal. Try your own variations to make it special for you. Happy cooking!

Are you ready to whip up a delicious meal with minimal cleanup? This One-Pan Creamy Lemon Parmesan Orzo Delight is your answer. With just a few simple ingredients and one …

Read more

Categories Dinner Tags NO-ING-IMG
Older posts
Newer posts
← Previous Page1 … Page15 Page16 Page17 … Page73 Next →

TASTED NEST

Where Flavor Finds a Home 🍳🏡 — warm, simple, and crave-worthy recipes made for real life, from stovetop mornings to backyard dinners.

PAGES

Home About Contact Privacy Policy Terms & Conditions Cookie Policy GDPR Policy Copyright Policy Disclaimer

CATEGORIES

Appetizers Desserts Salads Breakfast Dinner
Copyright © 2026 Tasted Nest. All rights reserved.