Skip to content
  • GDPR Privacy Policy
  • Copyright Policy
  • Disclaimer
  • Terms & Conditions
Tasted Nest
  • Home
  • Appetizers
  • Desserts
  • Salads
  • Breakfast
  • Dinner
  • Privacy Policy
  • Contact
  • About

NO-ING-IMG

Crispy Parmesan Crusted Eggplant Fries Delight Recipe

January 14, 2026October 20, 2025 by Chef Tavio
- 1 large eggplant, sliced into fries approximately 1/2 inch thick - 1 cup all-purpose flour - 2 large eggs, beaten - 1 cup panko breadcrumbs (for extra crunch) - 1/2 cup grated Parmesan cheese - 1 teaspoon garlic powder - 1 teaspoon onion powder - 1/2 teaspoon smoked paprika - Salt and pepper, to taste - Olive oil spray Using fresh ingredients makes a big difference. Fresh eggplants taste better and have a nice texture. They hold moisture well, which helps your fries stay juicy inside. Panko breadcrumbs add crunch and lightness. Fresh Parmesan gives a rich flavor that enhances the dish. Quality ingredients mean great taste and better nutrition. If you don't have some ingredients, you can still make this dish. Here are some good swaps: - Eggplant: Try zucchini or sweet potatoes for a different flavor. - Panko breadcrumbs: Use regular breadcrumbs, but they may not be as crunchy. - Parmesan cheese: Grated pecorino or nutritional yeast can work for a twist. - Spices: Use your favorite spices. Italian seasoning or chili powder can add a kick. These options let you customize your fries while keeping them tasty! Start with one large eggplant. Slice it into fries that are about 1/2 inch thick. This size helps them cook evenly and stay crispy. After cutting, sprinkle some salt on the fries. This helps draw out moisture, making them less soggy. Let them sit for about 10 minutes. You will see water on the surface. Pat them dry with a paper towel before you bread them. This step is key for that perfect crunch. Now, set up your breading station. You need three shallow bowls. In the first bowl, add 1 cup of all-purpose flour. Season this flour well with salt and pepper. In the second bowl, beat 2 large eggs until mixed. Set this aside. In the third bowl, combine 1 cup of panko breadcrumbs with 1/2 cup of grated Parmesan cheese. Add 1 teaspoon of garlic powder, 1 teaspoon of onion powder, and 1/2 teaspoon of smoked paprika. Mix these well. This will give your fries amazing flavor. Preheat your oven to 425°F (220°C). Line a baking sheet with parchment paper and spray it lightly with olive oil. Now, bread the eggplant fries. Take each fry and first coat it in the seasoned flour. Shake off any extra flour. Next, dip it in the egg wash, ensuring it's fully covered. Finally, press it into the breadcrumb mix, making sure the crumbs stick well. Place the coated fries on the prepared baking sheet. Once they are all ready, mist the tops lightly with olive oil. Bake the fries in the oven for about 25-30 minutes. Halfway through, turn them over for even cooking. You want them to be golden brown and crispy. After baking, let them cool for a few minutes. This helps keep them crunchy. Enjoy these delicious fries with your favorite dipping sauce! To get crispy Parmesan crusted eggplant fries, follow these tips. First, cut your eggplant into even fries. This helps them cook evenly. Use a large eggplant for the best results. Second, make sure to salt the eggplant slices for about 30 minutes. This draws out moisture and makes them less bitter. Rinse and pat them dry before breading. It’s key for a crunchy texture. Lastly, mist the fries with olive oil before baking. This helps them crisp up nicely. Avoid these common mistakes for the best fries. Don’t skip salting the eggplant. It removes bitterness and enhances flavor. Another mistake is using too much egg wash. Make sure to shake off the excess. If the fries are too wet, the breading won’t stick well. Also, don’t crowd the baking sheet. Leave space between each fry to ensure even cooking. Lastly, resist the urge to skip flipping them halfway. This helps them brown on all sides. To serve your crispy eggplant fries with flair, try these ideas. Serve them in a stylish cone or on a rustic wooden platter. This makes them look gourmet. Pair the fries with dipping sauces for extra flavor. Marinara sauce adds a classic touch, while ranch dressing offers a creamy contrast. For a fresh twist, sprinkle chopped parsley on top. This brightens the dish and adds color. Enjoy these fries as a snack, side dish, or appetizer! {{image_4}} To add heat, try spicy eggplant fries. Mix cayenne pepper or red pepper flakes into the breadcrumb mix. Start with a small amount. You can always add more if you want extra spice. This gives a nice kick that makes them even more fun to eat. Serve with a cooling dip like ranch or yogurt. If you need gluten-free eggplant fries, use gluten-free flour and breadcrumbs. Almond flour works great too. It gives a nice nutty flavor and crispy texture. Ensure all your ingredients are labeled gluten-free. This way, everyone can enjoy the tasty fries without worry. You can boost the flavor of your eggplant fries using herbs and spices. Try adding Italian seasoning, or fresh herbs like basil or rosemary. You can also sprinkle some lemon zest for a fresh twist. Experimenting with flavors makes the dish your own. Just remember to keep the balance right, so the eggplant shines through. To keep your crispy eggplant fries fresh, store them in an airtight container. Place a paper towel at the bottom of the container. This will absorb any moisture. You can keep them in the fridge for up to three days. If you want to save them longer, consider freezing. To reheat your eggplant fries, the oven is your best friend. Preheat your oven to 400°F (200°C). Spread the fries on a baking sheet. Bake them for about 10-15 minutes. This will help restore their crunch. Avoid using a microwave, as it can make them soggy. If you want to freeze the fries, do it before cooking. After breading, place them on a baking sheet in a single layer. Freeze them for about two hours until firm. Once frozen, transfer them to a freezer bag. They can stay frozen for up to three months. When ready to eat, bake them directly from frozen, adding a few extra minutes to the cooking time. Yes, you can use regular breadcrumbs instead of panko. However, panko gives a better crunch. Regular breadcrumbs may not be as crispy. If you only have regular breadcrumbs, make sure to season them well. Add some garlic powder or herbs for extra flavor. You will know the eggplant fries are fully cooked when they turn golden brown. They should also feel crispy to the touch. Baking them for 25-30 minutes usually does the trick. Remember to flip them halfway through. This helps them cook evenly. Eggplant fries taste great with many dipping sauces. Marinara sauce is a classic choice. Ranch dressing also works well for a creamy option. You can even try spicy mayo or aioli for a twist. Feel free to get creative and mix flavors! This blog post explored how to make delicious eggplant fries. We covered the right ingredients, fresh options, and tasty substitutes. I shared step-by-step instructions, so you can achieve that perfect crisp. We also discussed helpful tips and common mistakes to avoid. Finally, I offered fun variations and storage tips to keep your fries tasty. Remember, using fresh ingredients makes a big difference. Enjoy experimenting with flavors and serving these fries to friends. You'll impress everyone with your cooking skill!

Get ready to sink your teeth into a crispy delight! My Crispy Parmesan Crusted Eggplant Fries are not just a tasty snack; they’re a healthy twist on fries you’ll love. …

Read more

Categories Appetizers Tags NO-ING-IMG

Strawberry Shortcake Overnight Oats Tasty Breakfast Idea

January 14, 2026October 20, 2025 by Chef Tavio
- 1 cup rolled oats - 1 ½ cups unsweetened almond milk (or your preferred milk) - 1 cup fresh strawberries, hulled and sliced - 2 tablespoons Greek yogurt (or dairy-free yogurt for a vegan option) - 1 tablespoon honey or maple syrup (adjustable based on your sweetness preference) - ½ teaspoon vanilla extract - ¼ teaspoon almond extract - 1 tablespoon chia seeds - Crushed graham crackers for topping (optional) - Fresh mint leaves for garnish (optional) To make the perfect strawberry shortcake overnight oats, you need just a few key items. First, rolled oats form the base. They soak up the almond milk, which keeps everything moist. I love using almond milk, but you can pick any milk you like. Next, fresh strawberries are a must. They add sweetness and flavor to each bite. You’ll want to slice them so they mix in well. Greek yogurt adds creaminess and protein. If you want a vegan option, use dairy-free yogurt. Sweetener is up to you; honey or maple syrup works great. Don’t forget some flavor! A little vanilla and almond extract make a big difference. For a fun twist, you can add optional toppings. Chia seeds boost nutrition, and crushed graham crackers add crunch. Fresh mint leaves brighten the dish and look lovely. Gather these ingredients, and you’re ready for a tasty breakfast! Start by mixing the rolled oats with almond milk and Greek yogurt. Add honey or maple syrup for sweetness. Include vanilla and almond extracts for extra flavor. Stir in chia seeds and a pinch of salt. Make sure everything blends well. Gently fold in the sliced strawberries. Remember to save some for later use as garnish. This adds a fresh touch when serving. Evenly distribute the mixture into two jars. Seal the jars tightly to keep the mix fresh. Place them in the fridge overnight. This soaking time helps the oats become soft and tasty. When you wake up, stir the oats well. Adjust the consistency by adding more milk if needed. Top with your reserved strawberry slices. Sprinkle crushed graham crackers for crunch. Add fresh mint leaves for a pop of color. Serve and enjoy the delightful flavors! - Make sure your oats are fully submerged in the almond milk. This helps them soften well. - If you want them creamier, soak them longer than four hours. Overnight is best. - To make this vegan, swap Greek yogurt for dairy-free yogurt. - Adjust the sweetness by using more or less honey or maple syrup. Tasting as you go is key! - You can serve the oats in cute mason jars for fun. - If you prefer, transfer them to bowls for a more classic look. - Top with reserved strawberries, crushed graham crackers, and mint leaves for color. {{image_4}} You can easily switch up the berries in your overnight oats. Instead of strawberries, try blueberries, raspberries, or blackberries. Each berry brings a unique taste. You can even mix berries for a fun twist. A blend of strawberries and blueberries adds color and flavor. This way, you create a fresh berry medley that excites the palate. Adding spices can change the whole vibe of your oats. A pinch of cinnamon or nutmeg can warm your dish. These spices give a cozy feel that pairs well with fruit. You can also add extracts like coconut or hazelnut. These flavors complement the oats and fruit, making each bite special. Playing with textures makes your oats even more fun. Try mixing in nut butters like almond or peanut. They add creaminess and richness. Adding seeds or nuts gives a satisfying crunch. Chia seeds or walnuts can provide a delightful contrast to the soft oats. Each variation brings a new experience to your breakfast! To keep your strawberry shortcake overnight oats fresh, store them in airtight containers. This helps maintain the flavor and texture. When placed in the refrigerator, they last up to five days. Just make sure to seal them well to avoid any odors from other foods. Can overnight oats be frozen? Yes, you can freeze overnight oats. They freeze well and can last up to three months. How to thaw and reheat? To thaw, place your oats in the fridge overnight. If you want to reheat, use the microwave. Add a splash of milk to keep them creamy. Ideas for using leftover oats: You can enjoy them cold or warm them up. Add nuts, seeds, or more fruit for variety. Recreating flavors for fresh servings: Mix in different fruits or sweeteners. You can also top them with yogurt or granola for added texture. Overnight oats can last up to five days in the fridge. This makes them great for meal prep. Just store them in airtight containers. These oats taste best within the first three days for freshness. You can use quick oats, but the texture will change. Quick oats absorb liquid faster. This may lead to a mushier result. If you prefer a heartier bite, stick to rolled oats. If you want a dairy-free option, use coconut yogurt or almond yogurt. You can also try silken tofu for a creamy texture. These substitutes work well and keep the oats tasty. Yes, you can use gluten-free rolled oats. Make sure the oats are certified gluten-free. This way, you enjoy the recipe without any gluten worries. Absolutely! Adding protein powder boosts nutrition. Mix a scoop into the base before refrigerating. This makes your breakfast even more filling and supports your health goals. You can create tasty overnight oats with simple steps. Start with rolled oats, almond milk, and strawberries. Customize with yogurt, sweeteners, and favorite flavors. Chill overnight for a hassle-free breakfast. Make it yours with toppings and variations. When you follow these tips, you'll enjoy healthy, easy meals. Don’t hesitate to explore substitutions and experiment with flavors. With these ideas, your oatmeal will be fun and satisfying. Try it today, and enjoy every delicious bite!

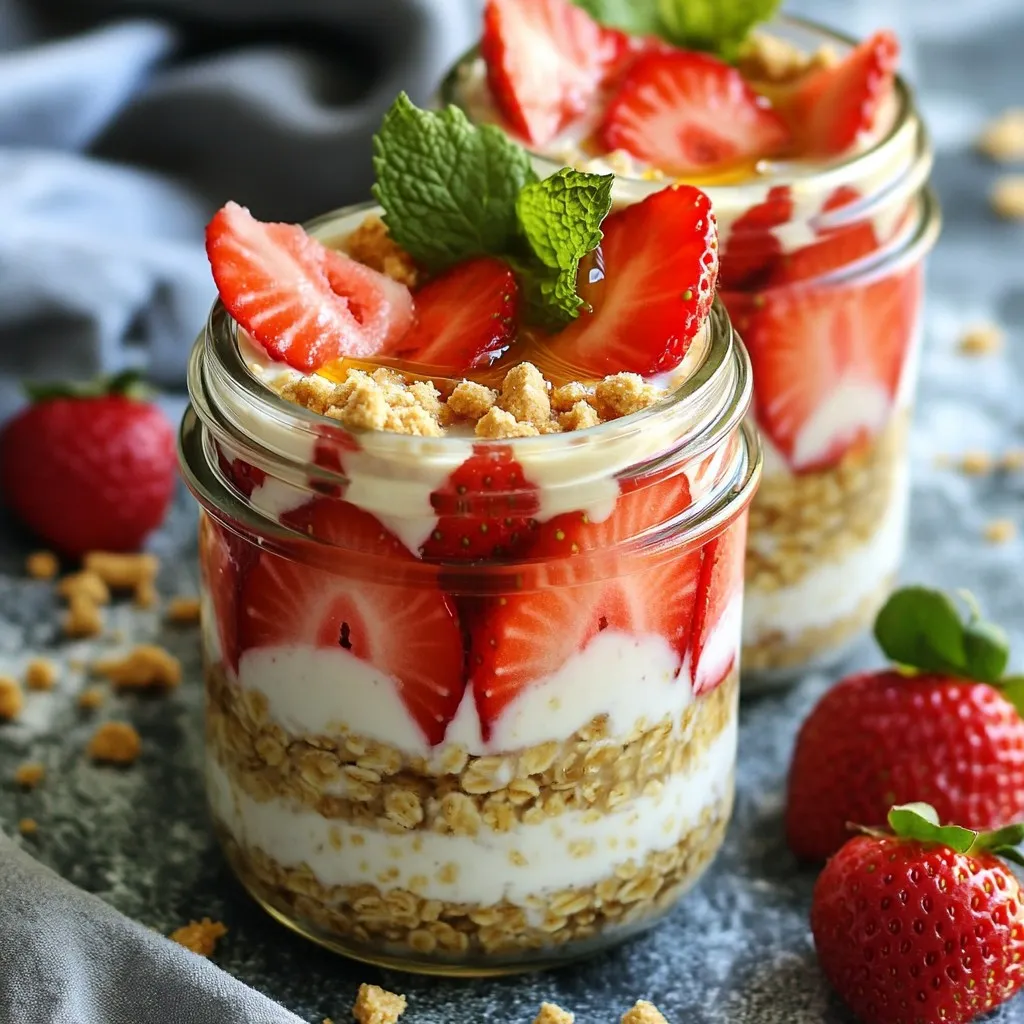
Ready for a breakfast that’s both tasty and easy to make? Strawberry Shortcake Overnight Oats can be your new morning hero! Packed with fresh strawberries and creamy yogurt, this meal …

Read more

Categories Breakfast Tags NO-ING-IMG

Caramelized Onion & Gruyère Pull-Apart Bread Delight

January 14, 2026October 20, 2025 by Chef Tavio
- Crusty loaf of bread (French or Italian): A good bread is key. It holds the filling well. Choose a loaf that has a nice crust. This adds texture. - Yellow onions: These are vital for flavor. They become sweet and rich when caramelized. Their natural sugars enhance the taste of the bread. - Gruyère cheese: This cheese melts beautifully. It has a nutty flavor that pairs well with onions. Gruyère creates a creamy texture that makes each bite a delight. - Unsalted butter and olive oil: These fats help caramelize the onions. They add richness and depth to the flavor. - Thyme, garlic powder, and optional spices: Thyme adds a warm, earthy taste. Garlic powder boosts the flavor without being overpowering. You can add crushed red pepper for a kick. - Fresh parsley: This herb adds color and freshness. It makes the bread look appealing on the table. - Optional toppings: Consider adding more cheese on top or a sprinkle of sea salt. These can elevate the flavor and make it even more tempting. Preheating your oven is key for great baking. An even temperature helps the bread rise and cook well. Set your oven to 375°F (190°C) before starting the other steps. This way, the oven is hot and ready when you are. To caramelize the onions, start with a large skillet over medium heat. Add three tablespoons of unsalted butter and two tablespoons of olive oil. Wait until they melt together. Then, add two thinly sliced large yellow onions, one teaspoon of granulated sugar, a pinch of salt, and some freshly ground black pepper. Stir the onions for about 15-20 minutes. They should turn golden brown and soft. In the last two minutes, mix in a teaspoon of thyme leaves and half a teaspoon of garlic powder. If you like spice, add a pinch of crushed red pepper flakes. This mix adds rich flavor and a good texture. Next, take your crusty loaf of bread. Make deep cuts in a crisscross pattern on the top. Be careful not to cut all the way through the bottom. You want to create pockets for the filling. Handle the bread gently so it stays intact. Once your onions are ready, it’s time to stuff the bread. Open the cut sections carefully, and fill each pocket with caramelized onions. Be sure to add a generous amount of shredded Gruyère cheese. This helps ensure an even distribution. For a nice melt, try to stuff it well. Wrap the stuffed bread in aluminum foil and place it on a baking sheet. Bake in your preheated oven for about 15-20 minutes. This allows the cheese to melt and the bread to warm up. To make the top crispy, uncover the foil for the last five minutes of baking. After baking, take the bread out and let it cool for a few minutes. Before serving, sprinkle some chopped fresh parsley on top. This adds color and freshness. You can present the bread on a wooden board for a rustic look. Offer small bowls of extra caramelized onions or a garlic dip on the side for added flavor and fun. To enhance onion flavor, start with low heat. This helps the onions cook slowly and become sweet. Use a large skillet for even heat distribution. Stir the onions often to keep them from sticking. Adding a bit of sugar helps them caramelize faster. A pinch of salt draws out moisture and boosts flavor. For tools, a sturdy wooden spoon works great for stirring. A non-stick skillet can help prevent burning. If you're feeling fancy, a cast iron skillet adds a nice touch. For pull-apart bread, a crusty loaf is key. French or Italian bread works best. These breads hold their shape and have a lovely crust. You want something with a chewy texture. If you're looking for gluten-free options, try gluten-free baguettes. They won't be as crispy but can still be tasty. Gruyère is perfect for this recipe, but you can switch it up. Aged cheddar can add a sharp taste. Fontina melts well and has a creamy flavor. Mixing different cheeses can also be fun. Combine Gruyère with mozzarella for added stretch. Or blend it with goat cheese for a tangy kick. {{image_4}} You can enhance your Caramelized Onion & Gruyère Pull-Apart Bread by adding protein. One tasty option is bacon. Cook the bacon until crispy, then chop it into small pieces. Mix it in with the caramelized onions before stuffing the bread. Ham is another great choice. It adds a nice salty flavor. For a vegetarian twist, consider using cooked lentils or chickpeas. Both options provide protein without meat. Changing the herbs and spices can give your bread a new flavor. Try adding rosemary or oregano for a different taste. You can also add vegetables like spinach or mushrooms. Sauté them with the onions to infuse their flavor. This twist makes the bread even more delicious and colorful. While Gruyère is fantastic, other cheeses can also shine here. Consider using mozzarella for a gooey texture. Cheddar adds a sharp flavor, while fontina melts beautifully. Mixing different cheeses can create a rich taste. Pair mild cheeses with stronger ones for a balanced flavor profile. This way, each bite bursts with unique cheese goodness. To keep your bread fresh, place leftover pull-apart bread in an airtight container. This prevents air from getting in and drying out the bread. You can also wrap it tightly in plastic wrap. If you use aluminum foil, it may trap moisture, causing sogginess. Store it at room temperature for up to two days. When reheating, you want to maintain that crispy outer layer. Preheat your oven to 350°F (175°C). Wrap the bread in foil to keep it moist while it warms up. Heat for about 10-15 minutes. If you want a crispy top, remove the foil for the last 5 minutes. Avoid using a microwave. It makes the bread chewy and soggy. Freezing is a great way to save extra bread. First, let the bread cool completely. Wrap it tightly in plastic wrap, then in aluminum foil. This double layer helps prevent freezer burn. You can store it in the freezer for up to three months. To defrost, place the wrapped bread in the fridge overnight. For quick defrosting, use the microwave on the defrost setting for a few minutes. After defrosting, reheat it in the oven for the best taste and texture. To keep your bread crispy, manage moisture well. Here are some tips: - Cool the onions: Let caramelized onions cool before stuffing the bread. This reduces steam. - Avoid excess butter: Use just enough oil and butter for flavor, but don’t overdo it. - Serve right away: Enjoy the bread fresh from the oven for the best texture. Yes, you can make this bread ahead of time. Here’s how: - Caramelize onions first: You can cook the onions a day before. Store them in the fridge. - Assemble before baking: Stuff the bread with onions and cheese. Wrap it tightly in plastic wrap. - Bake when ready: Just pop it in the oven when you want to serve it. Absolutely! Here’s how to freeze the bread effectively: - Freeze before baking: After stuffing, wrap the bread in foil and place it in a freezer bag. - Thaw before baking: When ready, let it thaw in the fridge overnight before baking. - Bake as usual: This keeps the bread fresh and tasty. This bread pairs well with many dishes. Here are some ideas: - Soups: Serve with tomato soup or creamy potato soup for a cozy meal. - Dips: Try garlic butter or a creamy cheese dip on the side. - Salads: A fresh green salad balances the rich flavors of the bread. You can store leftovers to enjoy later. Here’s how long they last: - In the fridge: Keep it in an airtight container for up to 3 days. - Freezing: For longer storage, freeze it in a bag for up to 2 months. - Reheat carefully: Warm it in the oven to keep the bread crispy. Pull-apart bread is a delightful treat that combines simple ingredients. You need crusty bread, flavorful onions, and rich Gruyère cheese for the best results. Follow the steps carefully to caramelize onions and stuff the bread well. With tips on storage and serving, this recipe has everything you need. Experiment with flavors and toppings to make the bread unique. Enjoy making this fantastic dish that friends and family will love!

If you’re craving comfort food that brings friends and family together, look no further! My Caramelized Onion & Gruyère Pull-Apart Bread Delight is the answer. This recipe is simple yet …

Read more

Categories Appetizers Tags NO-ING-IMG

Spicy Garlic Butter Shrimp Tacos Flavorful Delight

January 14, 2026October 20, 2025 by Chef Tavio
- 1 lb large shrimp, peeled and deveined - 4 tablespoons unsalted butter - 4 cloves garlic, finely minced - 1 teaspoon chili powder - 1/2 teaspoon cayenne pepper - Salt and freshly cracked black pepper - 1 tablespoon fresh lemon juice - 8 small corn tortillas - 1 cup red cabbage, thinly shredded - 1/2 cup ripe avocado, diced - Fresh cilantro, chopped, for garnish - Lime wedges, for serving I love using fresh shrimp when making these tacos. The shrimp should be large, peeled, and deveined. This makes them easy to cook and eat. Butter is key for flavor. It adds richness and makes everything taste better. I use unsalted butter to control the saltiness. Garlic gives a great aroma and taste. Minced garlic cooks quickly, so watch it closely. The spices really kick things up a notch. Chili powder gives warmth, while cayenne adds heat. You can adjust the cayenne based on your taste. Fresh ingredients make these tacos pop. Lemon juice adds brightness. The red cabbage gives crunch and color. Avocado adds creaminess, which balances the spice. I love sprinkling fresh cilantro on top. It adds a lovely herbal note. Don't forget lime wedges for serving! A squeeze of lime brings all the flavors together. - Melt the Butter Start by melting the unsalted butter in a large skillet. Heat it over medium until it bubbles gently. The butter gives the shrimp a rich flavor. - Sauté the Garlic Next, add the finely minced garlic to the hot butter. Sauté it for about one minute. Stir often to avoid browning. The garlic will become fragrant, making your kitchen smell amazing. - Spice It Up Now, stir in the chili powder and cayenne pepper. Add a pinch of salt and fresh black pepper. Mix well to combine the spices into the butter. This step adds a nice kick to your shrimp. - Add the Shrimp Place the shrimp in the skillet in a single layer. Make sure they are not crowded. This helps them cook evenly. - Cook for 2-3 Minutes Cook the shrimp for about 2-3 minutes on each side. Watch for them to turn bright pink and opaque. You want them tender, not overcooked. - Squeeze Lemon Juice Once the shrimp are ready, squeeze fresh lemon juice over them. Toss gently to coat the shrimp. This adds a zesty flavor. - Prepare the Tortillas In another skillet or microwave, warm the corn tortillas. You want them soft and easy to fold. - Layer Ingredients On each tortilla, layer a good amount of shredded red cabbage. Then, top it with the spicy garlic butter shrimp. - Finish with Freshness Add diced avocado on top of the shrimp. Sprinkle chopped cilantro over everything for a fresh touch. - Serve & Enjoy Serve the tacos right away. Add lime wedges on the side. A squeeze of lime will brighten the flavors. Enjoy each bite of this tasty dish! - To cook shrimp to tender perfection, avoid overcooking them. - Cook shrimp for just 2-3 minutes on each side. They turn bright pink and opaque when done. - To avoid burning garlic, sauté it on low heat. - Stir frequently to keep it from browning. - Arrange tacos on a vibrant platter. Use colorful ingredients to create a feast for the eyes. - Garnish your dish with lime wedges and fresh cilantro. This adds a bright touch and enhances flavor. - Pair your tacos with fresh sides like corn salad or black beans. - For drinks, try a light beer or a refreshing margarita. Both complement the spicy shrimp well. {{image_4}} You can switch the shrimp for other proteins. Chicken works well; it adds a juicy bite. If you like fish, try tilapia or cod. For a plant-based option, use tofu. Each protein brings its own flavor. Tortillas are not one-size-fits-all. Try flour tortillas for a softer touch or lettuce wraps for a low-carb choice. Both options give a nice twist to your tacos. Want to boost flavor? Add fresh herbs like cilantro or parsley. You can also sprinkle in some smoked paprika for a smoky kick. Chopped jalapeños can bring extra heat if you like spice. Consider topping your tacos with salsa, guacamole, or a drizzle of creamy sauce. A tangy yogurt sauce pairs nicely. These additions create layers of flavor that make each bite exciting. For gluten-free tacos, use corn tortillas. They taste great and keep the dish safe for gluten-sensitive guests. You can also make the filling with veggies instead of shrimp for a satisfying meal. If you want low-carb tacos, use zucchini or bell peppers instead of tortillas. They hold the filling well and add crunch. These swaps keep your meal light but full of flavor. To keep your spicy garlic butter shrimp tacos fresh, store leftovers properly. Place the shrimp in an airtight container. You can stack the cabbage and avocado in separate containers. This keeps them from getting soggy. Make sure to add a squeeze of lemon juice on the avocado to stop it from browning. Store everything in the fridge. For the best taste, reheat shrimp in a skillet. Heat it over medium-low heat for a few minutes. Stir gently to avoid overcooking. You can also microwave the tortillas briefly. Wrap them in a damp paper towel before microwaving for about 15 seconds. This keeps them soft and warm. Cooked shrimp lasts about 2 to 3 days in the fridge. If you freeze the shrimp, it can last up to 3 months. Just make sure to seal it well in a freezer-safe bag. When you're ready to eat, thaw it in the fridge overnight before reheating. You can use many great options if you don't want shrimp. For seafood lovers, try scallops or fish like tilapia. They cook quickly and taste great with garlic butter. For non-seafood options, grilled chicken or sautéed mushrooms work well. You can also use tofu for a plant-based choice. Just ensure to cook your substitute with the same spices for the best flavor. Yes, you can prepare some parts ahead of time. Cook the shrimp and store it in an airtight container in the fridge. You can also shred the cabbage and dice the avocado in advance. Just keep the avocado in lemon juice to prevent browning. Warm the tortillas just before serving for the best taste. To adjust the spice level, change the cayenne pepper amount. Add more for extra heat or reduce it for a milder taco. You can also use hot sauce or jalapeños for more spice. If you want a milder taste, add more avocado or sour cream to balance the heat. Absolutely! These tacos are great for meal prep. Cook a larger batch of shrimp and store it in portions. Keep the toppings like cabbage and avocado ready in separate containers. This way, you can quickly assemble fresh tacos whenever you want a tasty meal. This blog post outlined a tasty shrimp taco recipe from ingredients to tips. You learned how to prepare shrimp, create garlic butter, and layer fresh toppings for the best flavor. Remember, you can swap ingredients or adjust spice levels to fit your taste. Enjoy these tacos fresh or store them for later. With simple steps, you’ll impress friends and family. Dive into this fun cooking adventure and savor the result!

Craving a burst of flavor? Dive into my Spicy Garlic Butter Shrimp Tacos! These tasty tacos blend juicy shrimp with rich garlic butter, creating a punchy delight. With crisp cabbage, …

Read more

Categories Dinner Tags NO-ING-IMG

Minute Thai Peanut Ramen Stir-Fry Quick and Easy Meal

January 14, 2026October 20, 2025 by Chef Tavio
To make the Minute Thai Peanut Ramen Stir-Fry, you need these ingredients: - 2 packs of instant ramen noodles (discard the seasoning packets) - 1 tablespoon vegetable oil - 1 small onion, thinly sliced - 2 garlic cloves, minced - 1 red bell pepper, julienned - 1 cup snap peas, trimmed - 1 cup shredded carrots - 1/2 cup green onions, sliced - 1/3 cup creamy peanut butter - 3 tablespoons soy sauce - 2 tablespoons fresh lime juice - 1 tablespoon sesame oil - 1 tablespoon sriracha (adjust to taste) - Salt and pepper to taste - Fresh cilantro, chopped, for garnish You can easily swap some ingredients if needed. Here are some ideas: - Use olive oil instead of vegetable oil for a different flavor. - Try using shallots instead of onion for a milder taste. - If you don’t have snap peas, use broccoli or bell pepper. - Replace creamy peanut butter with almond butter for a nut-free option. - Use tamari or coconut aminos instead of soy sauce for a gluten-free meal. Garnishing makes your dish look special and tasty. Here are great options: - Sliced green onions add a nice crunch. - Fresh cilantro brings a burst of flavor. - Lime wedges offer a zesty kick when squeezed over the top. - Crushed peanuts add a crunchy texture and peanut flavor. Start by boiling water in a pot. Once it boils, add the instant ramen noodles. Cook them for 1-2 minutes less than the package says. This helps keep them firm. After cooking, drain the noodles and set them aside in a large bowl. Next, heat the vegetable oil in a large skillet over medium-high heat. Add the thinly sliced onion. Sauté it for about 2 minutes. You want the onion to soften and look a bit clear. Now, add the minced garlic. Sauté it for 1 more minute. This will make your kitchen smell great! Toss in the julienned red bell pepper, snap peas, and shredded carrots. Stir-fry these for 3-4 minutes. You want them to stay crisp and bright. In a small bowl, whisk together the creamy peanut butter, soy sauce, fresh lime juice, sesame oil, and sriracha. Mix until it is smooth and well-combined. This sauce adds a rich flavor to your dish. Pour the cooked ramen noodles into the skillet with the veggies. Drizzle the peanut sauce over everything. Gently toss all the ingredients together for 2-3 minutes. Make sure the noodles are well-coated. Taste the stir-fry and season with salt and pepper as needed. Plate the stir-fry right away. Garnish with sliced green onions and fresh cilantro. This adds color and freshness. You can also add a lime wedge on the side. A squeeze of lime juice will boost the flavors. Enjoy your tasty Thai peanut ramen stir-fry! To cook ramen noodles just right, follow these steps: - Bring a pot of water to a boil. - Add the ramen noodles and cook for 2-3 minutes less than the package says. This keeps them firm. - Drain the noodles and set them aside in a bowl. Cooking them this way helps them hold up in the stir-fry. If they get too soft, they won’t mix well with the veggies and sauce. To add extra creaminess to your dish, use more peanut butter. Here’s how: - Start with 1/3 cup of creamy peanut butter. - After mixing the sauce, taste it. If you'd like it creamier, add another tablespoon or two. The creamy texture makes the dish rich and smooth. It also helps coat the veggies and noodles well, making every bite delicious. If you like spice, add more sriracha. Here’s how to adjust it: - Start with 1 tablespoon of sriracha. - Taste the dish after mixing. If you want more heat, add another teaspoon. If you prefer less spice, cut the sriracha in half. This way, you can enjoy the flavors without too much heat. Remember, you can always add more, but you can't take it out once it's in! {{image_4}} You can easily make this dish vegetarian or vegan. Simply skip the meat. Use extra veggies instead. Add mushrooms, zucchini, or broccoli for more flavor. Replace the sriracha with a vegan hot sauce if needed. Most brands of soy sauce are vegan, but check the label. Want to add protein? Chicken, tofu, and shrimp work well. For chicken, cut it into bite-sized pieces. Sauté it in the pan before the veggies. Cook until it's no longer pink. For tofu, use firm or extra-firm. Cut it into cubes and pan-fry until golden. Shrimp cooks fast, so add it right after the veggies. Stir-fry until they turn pink and opaque. If you need a nut-free option, swap the peanut butter. Use sunflower seed butter instead. It gives a nice flavor without nuts. You can also try tahini paste, made from sesame seeds. It has a different taste but still adds creaminess. Make sure to check other ingredients too, like sauces, for hidden nuts. After making your Minute Thai Peanut Ramen Stir-Fry, let it cool down. Place any leftovers in an airtight container. This keeps the flavors fresh and prevents spills. Store the container in the fridge. It can last up to three days. If you want to keep it longer, consider freezing it. To reheat your stir-fry, you can use the microwave or a skillet. For the microwave, place your portion in a bowl. Heat it for one to two minutes. Stir halfway to ensure even heating. If using a skillet, add a splash of water or oil to keep it moist. Heat over medium heat for about five minutes, stirring often. If you want to freeze your stir-fry, make sure it is cool first. Transfer it to a freezer-safe container. Label it with the date. You can freeze it for up to three months. When you're ready to eat, thaw it overnight in the fridge. Reheat as mentioned above. This way, you can enjoy a quick meal anytime! Yes, you can use other noodles. Try rice noodles, udon, or soba noodles. Each will add its flavor and texture. Just be sure to cook them according to their package instructions. This keeps your stir-fry tasty and fun. To make this dish gluten-free, choose gluten-free ramen or substitute with rice noodles. Use gluten-free soy sauce or tamari instead of regular soy sauce. These small changes keep the flavors while making the meal safe for those with gluten sensitivities. Peanut butter adds creaminess and flavor, but you can skip it if needed. Try almond butter or sunflower seed butter for a different taste. You can also use a mix of tahini and a little sweetener as a substitute. You can explore many sauces in this stir-fry. Consider using hoisin sauce, teriyaki sauce, or even a spicy chili sauce. Each sauce gives the dish a unique twist and lets you customize the flavor to your liking. The stir-fry lasts about 3 to 5 days in the fridge. Store it in an airtight container to keep it fresh. Just reheat it on the stove or in the microwave when you're ready to enjoy it again. This post covered key ingredients, step-by-step instructions, and handy tips for making ramen. You learned about substitutions, cooking tips, and variations like vegetarian or nut-free options. Remember to store your dish properly for later use. Ramen is easy to adapt and delicious to enjoy. With these insights, you can create your perfect bowl today. Dive into this yummy dish and make it your own!

Craving a meal that’s fast, tasty, and packed with flavor? You’re in the right place! This Minute Thai Peanut Ramen Stir-Fry is your solution for busy days. With just a …

Read more

Categories Dinner Tags NO-ING-IMG

Air Fryer Everything Bagel Salmon Simple and Tasty

January 14, 2026October 20, 2025 by Chef Tavio
- 2 salmon fillets (approximately 6 oz each) - 2 tablespoons everything bagel seasoning - 1 tablespoon olive oil - Salt and freshly cracked pepper to taste - 1 lemon, sliced (for serving) - Fresh dill, for garnish (optional) For this dish, I choose fresh salmon fillets. They offer a rich flavor and a tender texture. The everything bagel seasoning adds a tasty crunch and depth. I like to use good quality olive oil for a rich taste. You can find everything bagel seasoning at most stores. For seasoning, salt and freshly cracked pepper enhance the salmon. A fresh lemon slice adds a zesty touch. I often use lemon for brightness in fish dishes. Fresh dill is optional but gives a nice presentation and flavor. Gather all your ingredients before you start. This helps keep things organized and fun. Enjoy this simple and tasty dish! Start by preheating your air fryer to 400°F (200°C). This step is key for cooking salmon evenly. Preheating takes about 5 minutes. It helps the salmon cook just right, preventing it from being soggy. Next, take your salmon fillets and dry them well. Use a paper towel to gently pat them dry. This step removes extra moisture. Place the fillets skin-side down on a cutting board. Drizzle 1 tablespoon of olive oil over each fillet. Use your fingers to rub the oil in well. This helps the seasoning stick better. Then, sprinkle salt and freshly cracked pepper on top. Now, grab your everything bagel seasoning. Generously sprinkle it over the salmon fillets. Press it down lightly to make sure it sticks. Carefully place the seasoned salmon into the air fryer basket. Make sure the fillets do not touch. This allows hot air to flow around them for even cooking. Air fry the salmon for about 8-10 minutes. The cooking time can change based on the thickness of your fillets. Check for doneness by seeing if it's opaque and flakes easily with a fork. Once cooked, gently take the salmon out of the air fryer. Let it rest on a plate for a couple of minutes. This helps the juices settle back into the fish. Serve the salmon warm with lemon slices for a fresh touch. You can add fresh dill for a nice garnish if you want. To coat your salmon with olive oil, use a tablespoon. Drizzle the oil over the fillets. Then, rub it in gently with your fingers. This ensures an even spread. It helps the seasoning stick too. Seasoning adherence is key. After sprinkling the everything bagel seasoning, press it down lightly. This helps it cling to the fish. You want every bite to burst with flavor. Garnishing with fresh dill adds a nice pop of color. Place a few sprigs on top of the salmon before serving. It also enhances the taste. For serving, lemon slices elevate the dish. Squeeze fresh lemon juice over the salmon for a bright kick. This adds a zesty flavor that pairs well with the seasoning. Cleaning your air fryer is simple. After cooking, let it cool down. Use a damp cloth to wipe the basket. If needed, soak it in warm, soapy water. Avoid using harsh scrubbers to protect the surface. For longevity, check the heating element. Keep it free from food debris. Regular cleaning helps maintain performance and ensures tasty meals every time. {{image_4}} You can switch up the flavor by using different seasonings. Try a lemon pepper blend for a fresh zing. A garlic and herb mix adds a nice depth too. For a bold taste, use a Cajun seasoning. If you like heat, add crushed red pepper to your bagel seasoning. This will give your salmon a spicy kick. You don’t have to stick to salmon. Other fish fillets work well too. Tilapia and cod are great choices. They have mild flavors and cook quickly. If you find salmon isn’t available, look for these alternatives. They will still taste delicious with the everything bagel seasoning. Want to make this dish gluten-free? Just check the seasoning. Some bagel seasonings contain gluten. Find one that is labeled gluten-free. You can also make this meal low-carb. Skip the bagel and serve the salmon with a salad or steamed veggies. This keeps it light and healthy while still being tasty. To keep your leftover salmon fresh, store it in the fridge. Wrap it tightly in plastic wrap or place it in an airtight container. This helps prevent it from drying out. Aim to eat your leftovers within two days for the best taste. When reheating salmon, keep it moist. The best way is to use the air fryer. Set it to 300°F (150°C) and heat for about 5 minutes. Check to avoid overcooking. Another method is to use a microwave. Cover the salmon with a damp paper towel to keep it juicy. If you want to freeze cooked salmon, let it cool first. Wrap each fillet in plastic wrap, then place them in a freezer bag. Make sure to remove as much air as possible. For the best texture, thaw salmon overnight in the fridge before reheating. Avoid thawing at room temperature to keep it safe. Cooking salmon in an air fryer takes about 8 to 10 minutes. This time can change based on the thickness of your fillets. Thicker pieces may need a bit more time. Always check for doneness. The salmon should be opaque and flake easily with a fork when done. Yes, you can cook frozen salmon in the air fryer. Just add a few extra minutes to the cooking time. Start with 10 to 12 minutes at 400°F (200°C). Make sure to check the salmon for doneness. If it needs more time, air fry for an additional 2 to 3 minutes. Several sides go well with everything bagel salmon. Here are some tasty options: - A light mixed salad with greens and citrus dressing - Steamed broccoli or asparagus - Roasted sweet potatoes or carrots - Quinoa or couscous for a hearty touch These sides add color and nutrition to your meal. Enjoy experimenting with flavors! This blog post covered making delicious everything bagel salmon in an air fryer. You learned about the key ingredients, step-by-step preparation, and cooking tips. We also explored storage methods and variations to suit your taste. Cooking salmon this way is easy and fun. With practice, you'll enjoy tasty meals while saving time. Remember to try out different seasonings and sides. Let your creativity shine in the kitchen with this recipe!

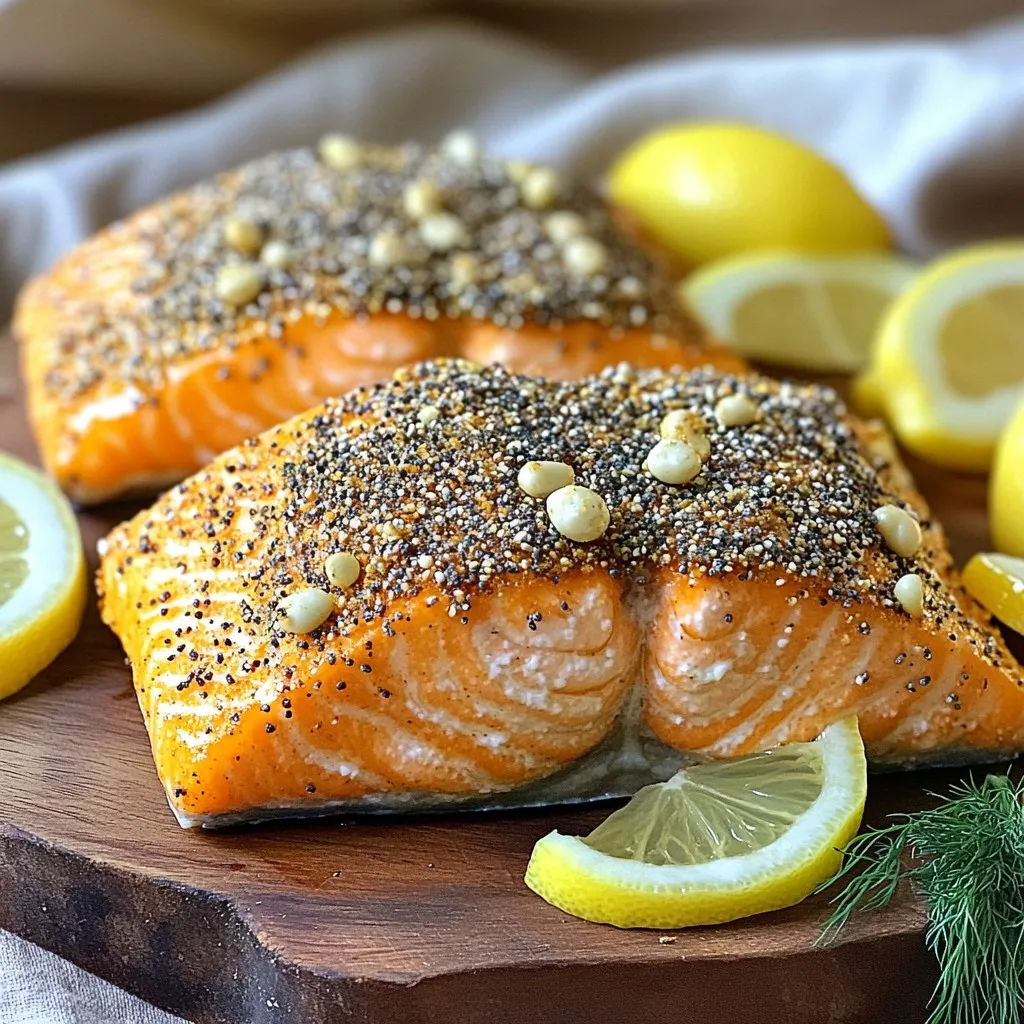
Get ready to elevate your dinner with a dish that’s both simple and delicious. In this post, I’ll show you how to make Air Fryer Everything Bagel Salmon. This recipe …

Read more

Categories Dinner Tags NO-ING-IMG

One-Pan Honey Sriracha Chicken & Broccoli Delight

January 14, 2026October 20, 2025 by Chef Tavio
To make One-Pan Honey Sriracha Chicken & Broccoli, you need fresh and simple ingredients. Here’s what you’ll need: - 2 boneless, skinless chicken breasts, cut into bite-sized pieces - 2 cups fresh broccoli florets - 1/4 cup honey - 2 tablespoons Sriracha sauce (adjust to your spice preference) - 1 tablespoon soy sauce - 1 tablespoon olive oil - 3 cloves garlic, minced - 1 teaspoon fresh ginger, minced - Salt and pepper, to taste - 2 green onions, chopped (for garnish) - 1 tablespoon sesame seeds (for garnish) Each item plays a key role in flavor. The chicken gives you protein and substance. Broccoli adds color and crunch. Honey brings sweetness, while Sriracha adds heat. Soy sauce ties it all together with its umami flavor. When you prepare this dish, make sure to use fresh ingredients. Fresh broccoli looks vibrant and tastes better. The same goes for garlic and ginger. Fresh versions have more flavor than dried ones. Gather everything before you start. This makes cooking easier and fun. You will mix, cook, and serve all in one pan, making cleanup a breeze. Enjoy the process of creating this tasty meal! - Mixing the Honey-Sriracha Sauce In a medium bowl, combine 1/4 cup honey, 2 tablespoons Sriracha sauce, and 1 tablespoon soy sauce. Add 3 minced garlic cloves and 1 teaspoon minced ginger. Whisk all these together until they blend well. This sauce will be your marinade and later, the sauce for the chicken. - Importance of Whisking Ingredients Together Whisking helps to mix the flavors. It ensures that each bite will taste great. A good mix means you enjoy the sweet and spicy taste in every piece of chicken. - Heating the Olive Oil First, heat 1 tablespoon of olive oil in a large skillet over medium-high heat. Make sure the oil gets hot before adding the chicken. This step helps the chicken to brown nicely. - Cooking Time and Temperature Add the chicken pieces to the skillet. Cook them for about 5 to 7 minutes. Stir the chicken occasionally. Look for a golden-brown color, and check that the chicken reaches 165°F (75°C) to know it is safe to eat. - Adding the Sauce to the Chicken Once the chicken is cooked, pour the honey-Sriracha sauce over it. Toss the chicken gently in the sauce. Let it simmer for 2 to 3 minutes. This helps the sauce thicken and stick to the chicken. - Incorporating the Broccoli Next, add 2 cups of fresh broccoli florets to the skillet. Toss them with the chicken and sauce. Stir well to coat the broccoli. - Cooking Times for Perfect Texture Cook the broccoli for about 4 to 5 minutes. Stir often until the broccoli turns bright green and is tender-crisp. This way, it stays fresh and crunchy. Adjust the seasoning if needed, adding more Sriracha for heat or honey for sweetness. Checking Internal Temperature To ensure safe eating, cook chicken to an internal temperature of 165°F (75°C). Use a meat thermometer for accuracy. Insert it into the thickest part of the chicken. This step ensures it is fully cooked and safe. Tips for Even Cooking To cook chicken evenly, cut pieces into similar sizes. Spread them in a single layer in the skillet. Avoid crowding the pan, as this can lead to uneven cooking. Stir occasionally to brown all sides. How to Thicken the Sauce If your sauce is too thin, simmer it longer. The heat will reduce the liquid and thicken the sauce. You can also stir in a cornstarch slurry for a quick fix. Mix one tablespoon of cornstarch with two tablespoons of water, then add it to the sauce. Adjusting Flavor Intensity Taste your sauce as it cooks. If you want more heat, add extra Sriracha. For sweetness, drizzle in more honey. Adjust the flavors to suit your taste and enjoy the perfect balance. Serving Styles For a rustic look, serve the chicken and broccoli directly from the skillet. If you prefer a neater setup, plate the dish on individual plates. This adds a touch of elegance to your meal. Enhancements for Visual Appeal To make your dish pop, drizzle a little honey on top. Add a colorful sprinkle of chopped green onions and sesame seeds. This not only enhances the look but also adds flavor and crunch. {{image_4}} Adding More Sriracha If you love heat, add more Sriracha. Start with a teaspoon more. Taste it, and keep adding until it’s just right for you. This gives your dish an extra kick. Alternatives for Heat If Sriracha is too spicy, try other sauces. You can use sweet chili sauce for a milder flavor. Another option is to add crushed red pepper flakes. They bring heat without overpowering the dish. Alternatives for Broccoli Broccoli is a great choice, but you can switch it up. Try snap peas or green beans instead. Cauliflower also works well and soaks up the sauce nicely. Other Protein Options Chicken is tasty, but other proteins shine, too. Use shrimp for a quick cook. Tofu is a great plant-based option that absorbs flavors well. You can even try beef or pork for a new twist. Oven-Baked Version You can bake this dish instead of using a skillet. Preheat your oven to 400°F (200°C). Spread the chicken and broccoli on a baking sheet. Drizzle with the sauce and bake for about 20 minutes. This method gives a nice roasted flavor. Grilling Techniques Grilling adds a smoky touch. Marinate your chicken and broccoli in the sauce. Place them on the grill over medium heat. Grill for about 6-8 minutes, turning once. This gives a delicious char and depth to the dish. To keep your One-Pan Honey Sriracha Chicken & Broccoli fresh, follow these steps: - Refrigeration Tips: Let the dish cool to room temperature. Transfer it to an airtight container. It will stay good in the fridge for up to three days. Make sure to label the container with the date. - Freezing Guidelines: You can freeze this dish for longer storage. Use a freezer-safe container or bag. It will last for about three months. Thaw it in the fridge overnight before reheating. To enjoy your dish again, follow these simple methods: - Best Methods for Maintaining Flavor: The best way to reheat it is on the stove. Pour the chicken and broccoli into a skillet and add a splash of water. This helps keep everything moist. Stir it over medium heat until heated through. - Time and Temperature Guidelines: Heat the dish for about 5-7 minutes. Check that the internal temperature reaches 165°F (75°C) for safe eating. If using a microwave, heat in 30-second bursts, stirring in between until it's hot. - Side Dish Recommendations: You can serve rice or quinoa with this dish. Both options soak up the sauce well. You might also enjoy a simple salad or steamed rice noodles on the side. - Complete Meal Ideas: Pair the chicken with a vegetable stir-fry for extra crunch. A fruit salad adds a sweet touch to balance the heat. You can also serve it with spring rolls for a fun twist. - Meal Prep Tips: Yes, you can prepare the chicken and broccoli ahead of time. Just marinate the chicken and store it in the fridge. Cook the broccoli fresh when ready to eat for the best taste. - Storage Duration: Cooked Honey Sriracha Chicken & Broccoli lasts about three to four days in the fridge. Keep it in an airtight container to maintain freshness. - Portions and Reheating: This dish is great for meal prep. You can easily divide it into portions. Reheat in the microwave or on the stove until hot, but avoid overcooking it. - Container Suggestions: Use glass or BPA-free plastic containers for easy storage. Choose containers with tight lids to keep the meal fresh longer. This blog post covered a delicious recipe for One-Pan Honey Sriracha Chicken & Broccoli. We discussed the key ingredients, step-by-step instructions, and tips for perfecting the dish. I shared how to ensure the chicken cooks well and how to adjust the sauce’s thickness. Plus, I included variations and storage tips for maximum flavor. This meal is not just easy to make, but it also offers flexibility. By trying different ingredients or cooking methods, you can make it your own. Enjoy cooking and impressing others with this tasty dish!

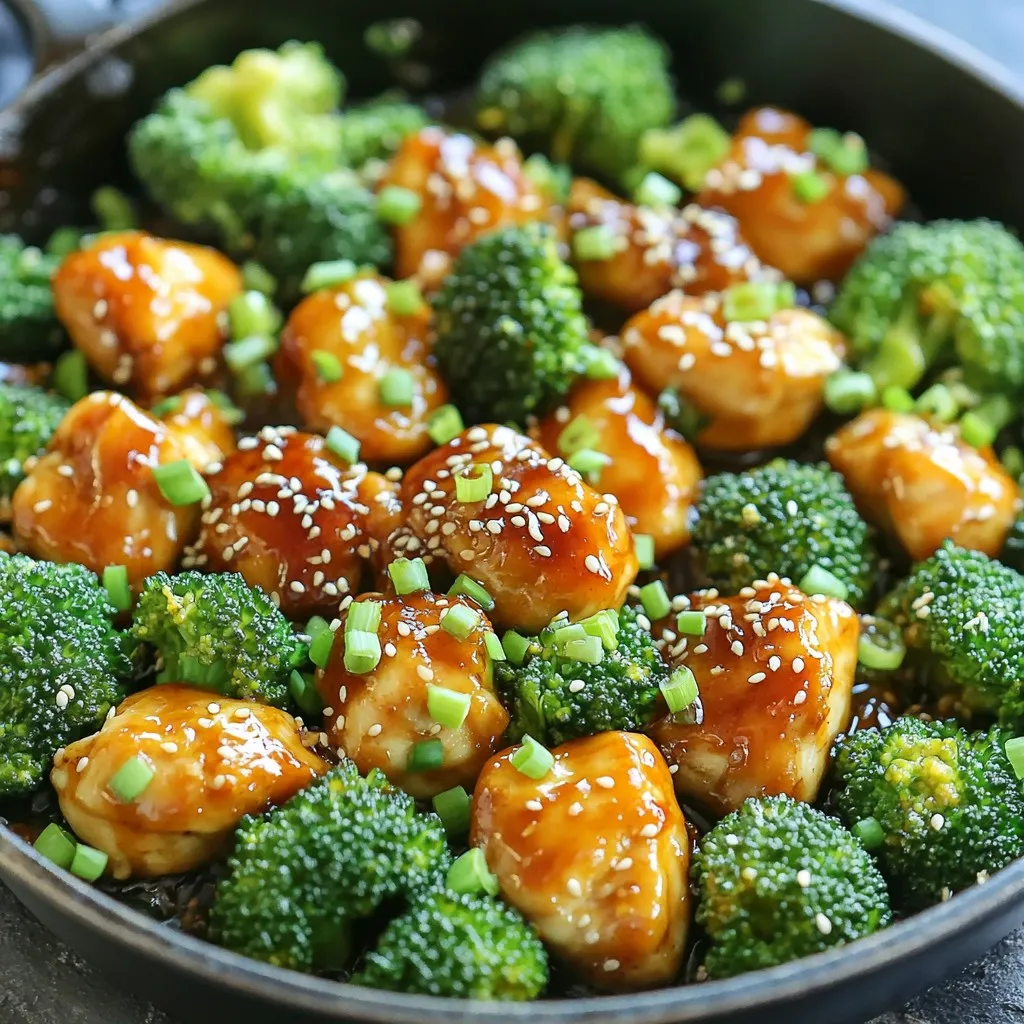
Looking for a quick and tasty dinner? My One-Pan Honey Sriracha Chicken & Broccoli is perfect for you! This easy recipe blends sweet and spicy flavors, all in one pan. …

Read more

Categories Dinner Tags NO-ING-IMG

Salted Caramel Pretzel Brownie Bars Irresistible Treat

January 14, 2026October 18, 2025 by Chef Tavio
- 1 cup unsalted butter - 2 cups granulated sugar - 1 cup packed brown sugar - 4 large eggs - 1 teaspoon vanilla extract - 1 cup all-purpose flour - 1 cup unsweetened cocoa powder - 1 teaspoon baking powder - 1/2 teaspoon salt - 1 cup pretzel sticks, crushed - 1 cup semi-sweet chocolate chips - 1 cup caramel sauce (store-bought or homemade) - Flaky sea salt, for garnish These ingredients create a rich and chewy brownie base. The pretzels add crunch. The caramel brings sweetness. Together they make a perfect treat. - Nuts (like pecans or walnuts) for added texture - Different chocolate types, like dark or milk, for varied flavor - Sea salt caramel instead of regular caramel for a salty twist These optional ingredients can make your bars even better. You can mix and match to suit your taste. - 9x13 inch baking pan - Parchment paper or cooking spray for easy removal - Medium saucepan for melting butter - Mixing bowls for dry and wet ingredients - Whisk for eggs and vanilla - Rubber spatula or wooden spoon for mixing Having the right tools makes the cooking process smoother. It helps you create the best Salted Caramel Pretzel Brownie Bars. Enjoy the fun of baking these delicious treats! First, set your oven to 350°F (175°C). This helps the brownies bake evenly. Next, grab a 9x13 inch baking pan. You can grease it with butter or line it with parchment paper. This makes it easy to take the brownies out later. In a medium saucepan, melt 1 cup of unsalted butter over low heat. Once melted, remove it from heat. Stir in 2 cups of granulated sugar and 1 cup of packed brown sugar. Mix well until it looks smooth. Let it cool for about 5-10 minutes. Now it’s time to add the eggs. Whisk in 4 large eggs, one at a time. Make sure each egg mixes in well before adding the next. Then, stir in 1 teaspoon of vanilla extract. This gives the brownies a nice flavor. Next, in a different bowl, sift together 1 cup of all-purpose flour, 1 cup of unsweetened cocoa powder, 1 teaspoon of baking powder, and 1/2 teaspoon of salt. Gradually combine this dry mix into the wet ingredients. Use a rubber spatula to mix gently. Avoid overmixing to keep the brownies soft. Carefully fold in 1 cup of crushed pretzel sticks and 1 cup of semi-sweet chocolate chips. This adds a fun crunch and rich flavor. Pour the batter into your prepared pan, spreading it out evenly. Bake for 25-30 minutes. To check if they are done, insert a toothpick. It should come out with a few moist crumbs. Once the brownies are baked, remove them from the oven. Drizzle 1 cup of caramel sauce over the warm brownies. Use a spatula to spread it out if needed. Let them sit for about 10 minutes. This allows the caramel to soak in. After the brownies cool to room temperature, chill them in the fridge for at least 1 hour. This helps the caramel set. When ready, lift the brownies out using the parchment paper and cut them into bars. Just before serving, sprinkle some flaky sea salt on top. This adds a nice touch and makes them even tastier! To get that chewy, fudgy brownie, watch your mixing. When you combine the dry and wet ingredients, mix just until you see no flour. Overmixing can make brownies tough. Use a rubber spatula for gentle folding. This keeps the air in and gives a soft texture. When baking, check for doneness with a toothpick after 25 minutes. It should have a few moist crumbs. If you're using store-bought caramel, warm it slightly. This makes it easier to drizzle. If you prefer homemade, cook it slowly to avoid burning. Stir it often for a smooth sauce. Pour it over warm brownies right after baking. This helps it spread evenly and soak in. Let it set for about 10 minutes before chilling. You can easily change these bars to fit your taste. Want a nutty crunch? Add chopped pecans or walnuts. For a bit of spice, mix in a touch of cinnamon. You can swap semi-sweet chocolate chips for dark chocolate or even white chocolate. If you love caramel, drizzle more on top before serving. Feel free to get creative! {{image_4}} You can make these brownie bars nut-free. Simply skip any nuts in the recipe. The pretzels add the crunch you need. You can also use sunflower seed butter for a nut-free twist. Want to spice things up? Add some peanut butter! Mix in 1/2 cup of creamy peanut butter into the brownie batter. This gives a rich, nutty flavor that pairs well with the caramel. To make these brownie bars gluten-free, use a gluten-free flour blend. Replace the all-purpose flour with one that works well in baking. This way, everyone can enjoy these treats without worries! Store your salted caramel pretzel brownie bars in an airtight container. This keeps them fresh and chewy. If you stack them, place parchment paper between layers. This helps to avoid sticking. They taste best at room temperature, but you can keep them in the fridge for longer freshness. You can freeze these brownie bars for up to three months. Cut them into bars first. Wrap each one tightly in plastic wrap, then place them in a freezer bag. Make sure to squeeze out air to prevent freezer burn. When you want to enjoy them, just thaw at room temperature. To warm up your brownie bars, preheat your oven to 350°F (175°C). Place the bars on a baking sheet and reheat for about 10 minutes. This brings back their gooey center and makes the caramel warm again. You can also use a microwave. Heat for about 15-20 seconds. Enjoy them warm for a delightful treat! Check the brownies after 25 minutes of baking. Insert a toothpick into the center. If it comes out with a few moist crumbs, they are ready. If it has wet batter, bake for a few more minutes. The edges should look set, while the center may still be a bit soft. Yes, you can! Here are some swaps: - Use coconut oil instead of butter for a dairy-free version. - Replace granulated sugar with brown sugar for more moisture. - Use dark chocolate chips instead of semi-sweet for a richer taste. Just keep in mind that changes may affect the final texture and flavor. If you lack caramel sauce, try these options: - Melt some sugar until it turns golden for a simple caramel. - Use store-bought butterscotch sauce as a tasty alternative. - Make a quick version by mixing sweetened condensed milk with butter. These brownie bars stay fresh for about 5 days at room temperature in an airtight container. If you want to keep them longer, refrigerate them for up to 2 weeks. For best quality, freeze them for up to 3 months. Just ensure to wrap them tightly! This blog post covered how to make delicious brownie bars. We discussed essential ingredients and tools, plus steps for baking and cooling. Tips helped you achieve the perfect texture and personalize flavors. You learned about nut-free and gluten-free variations too. In the end, baking brownies can be fun and rewarding. Enjoy your treats, share them with others, and experiment with new flavors!

Are you ready for a treat that combines rich brownies, sweet caramel, and a salty crunch? Salted Caramel Pretzel Brownie Bars are an absolute delight for your taste buds. They …

Read more

Categories Desserts Tags NO-ING-IMG

One-Pot Sun-Dried Tomato Orzo Flavorful Meal Idea

January 14, 2026October 18, 2025 by Chef Tavio
- 1 cup orzo pasta - 1 cup sun-dried tomatoes in oil, finely chopped - 1 medium onion, diced - 3 cloves garlic, minced - 3 cups vegetable broth - 1 teaspoon dried basil - 1 teaspoon dried oregano - Salt and freshly ground black pepper to taste - 2 tablespoons extra virgin olive oil The main ingredients form the base of the dish. Orzo pasta is small and cooks quickly. Sun-dried tomatoes bring a rich, tangy flavor. Dice a medium onion and mince three cloves of garlic. These add aromatic depth. Use three cups of vegetable broth as the cooking liquid. Dried basil and oregano give warm herbal notes. Don't forget salt and pepper to taste. Finally, two tablespoons of olive oil bring everything together. - 1/2 cup feta cheese, crumbled (optional) - 1 cup baby spinach, roughly chopped - Fresh basil leaves for garnish Adding feta cheese can make it richer and creamier. If you like greens, toss in one cup of chopped baby spinach. The spinach wilts nicely into the warm orzo. For a fresh touch, garnish with basil leaves. This adds color and bright flavor. These optional ingredients enhance your dish and make it special. - Start by dicing one medium onion. Use a sharp knife for clean cuts. - Mince three cloves of garlic. A garlic press makes this easy. - Heat two tablespoons of extra virgin olive oil in a large pot over medium heat. - Add the diced onion. Cook for 3-4 minutes until it turns soft and clear. - Stir often to keep the onion from burning. - Next, add the minced garlic. Cook for one more minute until it smells great. - Now, add one cup of finely chopped sun-dried tomatoes, one cup of orzo pasta, one teaspoon of dried basil, and one teaspoon of dried oregano. - Mix all the ingredients well until they are coated in oil. - Carefully pour in three cups of vegetable broth. Bring it to a boil. - Once it boils, lower the heat to simmer. Cover the pot and let it cook for 10-12 minutes. - Stir occasionally until the orzo is soft and absorbs most of the liquid. - After cooking, remove the pot from heat. Add one cup of roughly chopped baby spinach and mix gently until it wilts. - Season with salt and freshly ground black pepper to taste. - If you enjoy cheese, sprinkle half a cup of crumbled feta cheese on top. - Stir gently to mix the feta into the orzo. - Serve the dish warm. Garnish with fresh basil leaves for a pop of color and flavor. - Avoiding overcooking: To prevent mushy orzo, cook it just until tender. Stir often and check for doneness at 10 minutes. - Ensuring even flavor distribution: Mix the orzo with oil and spices before adding broth. This helps each piece soak up flavor. - Alternatives to sun-dried tomatoes: You can use fresh tomatoes or roasted peppers. Both add a nice flavor and color. - Non-dairy options for feta cheese: Try using tofu or cashew cheese. They provide a creamy texture without dairy. - Adding spices or herbs: Consider adding red pepper flakes for heat. Fresh parsley or thyme can add a fragrant touch. - Suggested toppings and sides: Serve with a side salad or crusty bread. A sprinkle of lemon juice brightens the dish. {{image_4}} You can add protein to your One-Pot Sun-Dried Tomato Orzo for a heartier meal. Chicken is a great choice. Simply dice and cook it with the onions. Shrimp also works well. Add it when you mix in the broth. For a vegetarian or vegan twist, skip the cheese and add chickpeas. They add protein and texture. Changing the cheese can make a big difference. Try goat cheese for a tangy flavor. Parmesan also adds a nice touch. Seasonal vegetables can enhance the dish. In spring, add asparagus or peas. In fall, roasted butternut squash brightens the meal. You can turn this dish into a salad. Let the orzo cool, then mix in fresh greens and a light dressing. For a baked version, transfer the orzo to a baking dish. Top it with breadcrumbs and cheese, then bake until golden. This adds a crunchy texture, making it even more delightful. To keep your One-Pot Sun-Dried Tomato Orzo fresh, place it in an airtight container. Make sure to cool the dish to room temperature before sealing it. This helps avoid condensation, which can make your orzo soggy. Store it in the fridge for up to three days. If you want to keep it longer, try freezing it. Portion the orzo into smaller containers, and freeze for up to three months. Just remember to label them with the date! When you're ready to enjoy your leftovers, the best way to reheat them is on the stove. Add a splash of vegetable broth or water to help regain moisture. Heat it over medium-low until warmed through. Stir it often to keep the texture just right. You can also use the microwave. Just cover the dish with a microwave-safe lid or wrap. Heat in short bursts, stirring in between, until hot. If stored properly, your One-Pot Sun-Dried Tomato Orzo lasts in the fridge for about three days. In the freezer, it can stay good for three months. After that, the flavor and texture may start to fade. Always check for signs of spoilage before consuming. If it smells off or looks strange, it’s best to toss it. Enjoy your cooking! Can I make this recipe ahead of time? Yes, you can make this dish early. Store it in the fridge. Reheat it on the stove or in the microwave. What can I serve with this dish? This orzo pairs well with a fresh salad, grilled chicken, or crusty bread. You can also add a side of roasted vegetables for extra taste. Is this dish healthy? Yes! This dish has good nutrients. It includes vegetables, healthy fats, and whole grains. The spinach adds vitamins, and the sun-dried tomatoes offer antioxidants. How many calories per serving? Each serving has about 300 calories. This may vary based on added ingredients like feta cheese. Can I use other types of pasta? Yes, you can use other pasta types. Small shapes like couscous or small shells work well. Just adjust the cooking time according to the pasta you choose. What is the best broth to use? Vegetable broth is great for flavor. You can also use chicken broth for a richer taste. Just pick a broth that fits your diet. This blog post covered how to make a delicious one-pot sun-dried tomato orzo. We explored the main ingredients, the cooking process, and helpful tips. You learned how to enhance flavors and add optional ingredients. Variations give you options to mix things up. Proper storage and reheating keep leftovers tasty. This dish is healthy, easy to make, and great for sharing. Try it out and enjoy your meal!

Looking for a quick and tasty dinner? You’ve hit the jackpot with One-Pot Sun-Dried Tomato Orzo! This flavorful meal idea combines orzo pasta, sun-dried tomatoes, and fresh veggies—all in one …

Read more

Categories Dinner Tags NO-ING-IMG

Air Fryer Everything Bagel Chicken Bites Flavorful Treat

January 14, 2026October 18, 2025 by Chef Tavio
- 1 lb boneless chicken breast - 1 cup buttermilk or plain yogurt - 1 cup all-purpose flour - 2 teaspoons garlic powder - 1 teaspoon onion powder - 1 teaspoon paprika - 1 teaspoon black pepper - ½ cup everything bagel seasoning - Salt to taste - Cooking spray Gathering the right ingredients is key to making Air Fryer Everything Bagel Chicken Bites. Start with boneless chicken breast. This choice keeps your bites tender and juicy. You can use buttermilk or plain yogurt for marinating. Both create a tasty base that adds moisture. Next, you’ll need all-purpose flour. This will help your chicken get a nice crust. For seasoning, garlic powder and onion powder bring a savory kick. Paprika adds a hint of warmth, and black pepper gives a gentle spice. Everything bagel seasoning is the star here. It brings all those delicious flavors together. You might also want to add salt to taste. A little cooking spray helps to prevent sticking in the air fryer. When you have all these ingredients, you are ready to make a flavorful treat that everyone will love. Start by placing the chicken pieces in a large bowl. Pour 1 cup of buttermilk over the chicken. Make sure each piece is well coated. Cover the bowl with plastic wrap or a lid. Let it marinate in the fridge for at least 30 minutes. For the best flavor, try marinating overnight. This helps the chicken become tender and juicy. In another bowl, mix 1 cup of all-purpose flour, 2 teaspoons of garlic powder, 1 teaspoon of onion powder, 1 teaspoon of paprika, and 1 teaspoon of black pepper. Add a pinch of salt to this mix. Stir well until the mixture looks uniform. This step is key for an even coating on the chicken. The better the coating, the tastier the final bites. Preheat your air fryer to 400°F (200°C) for about 5 minutes. This ensures your chicken cooks evenly. After marinating, take the chicken out of the buttermilk. Gently shake off any extra liquid. Dredge each piece in the flour mix. Make sure to coat every surface. Then, dip the chicken in the everything bagel seasoning. Press down lightly so it sticks well. Spray the air fryer basket with cooking spray to avoid sticking. Place the chicken bites in a single layer. Avoid overlapping to allow even cooking. Cook the chicken bites for 10-12 minutes. Flip them halfway through for even browning. The chicken should be golden brown and reach 165°F (74°C) inside. This ensures your chicken is safe to eat. Once done, carefully remove the chicken bites. Let them rest for a few minutes before serving. This helps the juices settle, making each bite even tastier. To get the perfect crispiness, preheat your air fryer to 400°F (200°C) for about 5 minutes. This step is key for even cooking. Make sure to arrange the chicken bites in a single layer. Avoid overlapping; this allows hot air to circulate freely. When cooking, flip the bites halfway through. This helps both sides get that golden crunch. Keep an eye on the timer, as cooking takes around 10-12 minutes. You want them to be golden brown and reach an internal temperature of 165°F (74°C). For the best flavor, marinate the chicken in buttermilk for at least 30 minutes. If you have time, overnight marination works wonders. This lets the flavors seep in deeply and tenderizes the meat. Always cover the bowl with plastic wrap or a lid to keep the chicken fresh. Ensure every piece of chicken is well-coated in buttermilk. This helps the flour and seasoning stick better. For dipping sauces, creamy ranch or Greek yogurt work great. These add a cool contrast to the warm, crispy chicken. You can also serve them with a spicy sauce if you like a kick. To make your dish pop, garnish with chopped parsley. A sprinkle of extra everything bagel seasoning on top also enhances both flavor and presentation. Serve on an elegant platter to impress your guests! {{image_4}} You can use different proteins for this recipe. Turkey works great and is leaner. Tofu is perfect for a vegetarian option. Just ensure you press it well to remove extra moisture. For gluten-free options, swap all-purpose flour with a gluten-free blend. Many brands create mixes that work well. This keeps the bites tasty and safe for those with gluten allergies. Want to boost flavor? Try adding spices like smoked paprika or cayenne pepper for heat. A pinch of cumin can also add a nice twist. You can customize the everything bagel seasoning too. Add a bit of dried dill or crushed red pepper for more flavor. Feel free to play with the mix until you find your favorite blend. You can also bake these bites in the oven. Preheat it to 425°F (220°C) and bake for about 15-20 minutes. Be sure to flip them halfway for even cooking. If you prefer frying, use a deep fryer. Heat oil to 350°F (175°C) and fry until golden brown. This method adds a different texture but can be less healthy than air frying. Each method offers a unique taste and texture. To keep your chicken bites fresh, refrigerate them right away. Place them in an airtight container. This helps prevent moisture loss and keeps them tasty. Make sure to eat them within three days for the best flavor. If you want, you can also wrap them tightly in plastic wrap before placing them in the container. To enjoy these chicken bites again, use your air fryer for reheating. Set it to 350°F (175°C) for about 5-7 minutes. This way, you keep them crispy. Avoid using the microwave, as it can make them soggy. Always check that the internal temperature reaches 165°F (74°C) to ensure they are safe to eat. If you want to freeze your chicken bites, let them cool completely first. Then, place them in a single layer on a baking sheet. Freeze them for about an hour. Once frozen, move them to a freezer-safe bag or container. They can stay fresh for up to two months. When ready to eat, thaw them overnight in the fridge. Cook them straight from the freezer at 400°F (200°C) for 15-18 minutes. This keeps them crispy and delicious. Yes, you can use skin-on chicken. Skin adds extra flavor and moisture. However, it may not get as crispy as skinless chicken when air-fried. The skin may also add more fat, which can make the bites richer. If you want a healthier option, stick to skinless chicken. To check if the chicken is fully cooked, use a meat thermometer. The internal temperature should reach 165°F (74°C). This ensures that the chicken is safe to eat. You can also cut into a piece. It should be white and the juices should run clear, not pink. Yes, you can make these chicken bites ahead of time. Marinate the chicken and coat it in flour and seasoning. Cover and store it in the fridge for up to 24 hours. When ready to cook, just follow the air frying steps. For best results, reheat in the air fryer to keep them crispy. These chicken bites pair well with many sides. You can serve them with: - Fresh salad - Veggie sticks with dip - Mashed potatoes - Rice or quinoa - A creamy ranch or yogurt sauce for dipping These sides will complement the flavors of the chicken bites perfectly. In this blog post, we explored how to make delicious Air Fryer Everything Bagel Chicken Bites. We covered key ingredients like chicken, buttermilk, and flour. You learned the marination process and how to achieve a crispy coating. Tips for perfect cooking and storage were also shared. Remember, the right spices and techniques make all the difference. Enjoy experimenting with flavors and variations! Perfecting these chicken bites can lead to a fun meal at any time.

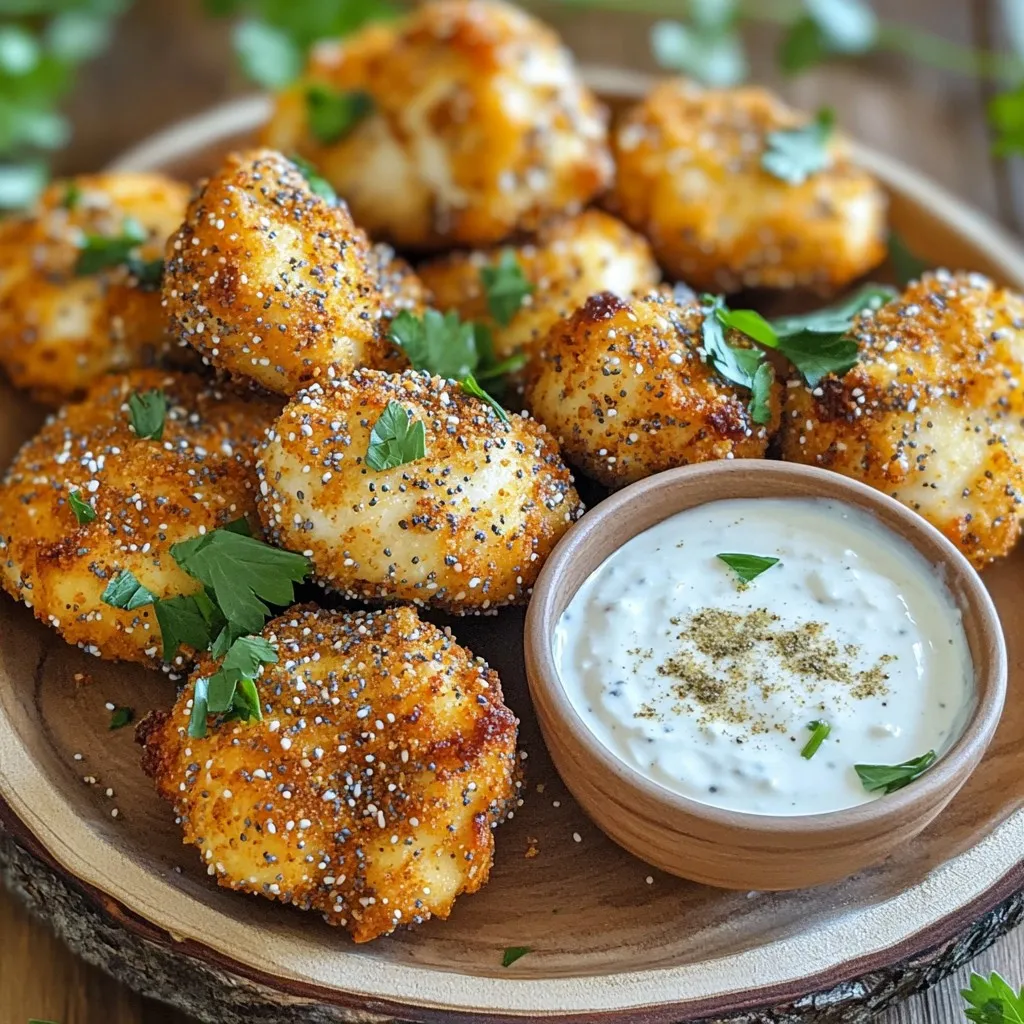
Looking for a quick and tasty meal? Try my Air Fryer Everything Bagel Chicken Bites! This dish packs flavor into every bite, making it perfect for lunch, dinner, or snacks. …

Read more

Categories Appetizers Tags NO-ING-IMG
Older posts
Newer posts
← Previous Page1 … Page5 Page6 Page7 … Page73 Next →

TASTED NEST

Where Flavor Finds a Home 🍳🏡 — warm, simple, and crave-worthy recipes made for real life, from stovetop mornings to backyard dinners.

PAGES

Home About Contact Privacy Policy Terms & Conditions Cookie Policy GDPR Policy Copyright Policy Disclaimer

CATEGORIES

Appetizers Desserts Salads Breakfast Dinner
Copyright © 2026 Tasted Nest. All rights reserved.