Skip to content
  • GDPR Privacy Policy
  • Copyright Policy
  • Disclaimer
  • Terms & Conditions
Tasted Nest
  • Home
  • Appetizers
  • Desserts
  • Salads
  • Breakfast
  • Dinner
  • Privacy Policy
  • Contact
  • About

NO-ING-IMG

Mediterranean Chicken Tacos Flavorful and Simple Meal

January 14, 2026July 18, 2025 by Chef Tavio
- 2 boneless, skinless chicken breasts - 1 tablespoon extra virgin olive oil - 1 teaspoon garlic powder - 1 teaspoon onion powder - 1 teaspoon smoked paprika - 1 teaspoon dried oregano - Salt and freshly ground black pepper, to taste - 1 cup cherry tomatoes, halved - 1 medium cucumber, diced into small cubes - ½ red onion, finely chopped - ½ cup feta cheese, crumbled - 1 cup plain Greek yogurt - 1 tablespoon freshly squeezed lemon juice - 6 small whole wheat or corn tortillas - Fresh parsley, chopped (for garnish) - Serving size: 4 tacos - Caloric content: Approximately 350 calories per serving The chicken breasts are the star here. They soak up the olive oil and spices well. The spices add great flavor without being too heavy. Fresh vegetables bring crunch and brightness. The cherry tomatoes and cucumber are refreshing. Feta cheese adds a salty kick. Greek yogurt is creamy and balances the dish. This recipe is simple and flexible. You can add more toppings if you like. Try avocado or olives for a twist. Enjoy these Mediterranean chicken tacos as a light meal or a fun dinner. For the complete steps, check out the Full Recipe. To start, we need to marinate the chicken. In a small bowl, mix 1 tablespoon of olive oil, 1 teaspoon of garlic powder, 1 teaspoon of onion powder, 1 teaspoon of smoked paprika, and 1 teaspoon of dried oregano. Add salt and pepper to taste. This mix will make your chicken tasty and juicy. Brush this mixture on both sides of 2 boneless, skinless chicken breasts. Let it sit for a few minutes. Next, we move to grilling. Preheat your grill or grill pan to medium-high heat. Place the marinated chicken on the grill. Grill for about 6-7 minutes on each side. The chicken should have nice grill marks and reach 165°F (75°C) inside. Once done, take the chicken off the grill. Let it rest for 5 minutes to keep it juicy. After resting, slice the chicken thinly against the grain. Now, let's prepare the toppings. In a bowl, combine 1 cup of halved cherry tomatoes, 1 medium diced cucumber, ½ finely chopped red onion, and ½ cup of crumbled feta cheese. Squeeze in 1 tablespoon of fresh lemon juice. Mix gently and season with salt and pepper. This salad adds a fresh crunch to your tacos. For the sauce, take 1 cup of plain Greek yogurt. Stir it until smooth. You can add a pinch of salt for extra flavor. This creamy sauce pairs perfectly with the other toppings. It's time to assemble the tacos. First, heat 6 small whole wheat or corn tortillas on the grill for about 30 seconds on each side. This step makes them warm and soft. Now, layer the ingredients. Place a few slices of grilled chicken on each tortilla. Top with a generous spoonful of the tomato-cucumber salad. Finally, drizzle the smooth Greek yogurt sauce over everything. Add some chopped fresh parsley for color. Your Mediterranean Chicken Tacos are now ready! For the full recipe, check the link provided. Enjoy your meal! To get the best grill marks, preheat your grill well. Aim for medium-high heat, around 375°F to 450°F. This helps cook the chicken evenly and keeps it juicy. Always check the temperature with a grill thermometer for accuracy. For juicy chicken, marinate it well. Let it sit in the marinade for at least 30 minutes. This adds flavor and moisture. After grilling, let the chicken rest for five minutes. This helps the juices stay inside the meat, making each bite tender. To make your tacos pop, use bold spices. I recommend garlic powder, onion powder, smoked paprika, and dried oregano. These spices bring out the Mediterranean flavor. Feel free to adjust the amounts to your taste. You can add other toppings to boost flavor. Consider avocado slices or spicy jalapeños. Fresh herbs like mint or dill can make your dish vibrant. Try adding a squeeze of lemon juice for a zesty kick. Serve your tacos on a bright platter. This makes the colors of your ingredients stand out. Line the platter with fresh parsley and lemon wedges for a lively touch. For garnishing, sprinkle chopped parsley on top. You can also add a drizzle of Greek yogurt for creaminess. This not only adds flavor but also looks beautiful. Enjoy your Mediterranean Chicken Tacos with pride! {{image_4}} You can switch up the protein in your Mediterranean chicken tacos. Grilled shrimp or fish works well and adds a fresh flavor. If you want a vegetarian option, try using chickpeas or grilled vegetables. These choices keep the meal light and tasty while still feeling special. Tortillas can add fun to your meal. You can choose gluten-free tortillas for a healthier twist. For something different, use lettuce leaves as wraps. These options make the tacos feel fresh and vibrant. You can play with flavor profiles too! Add some Mexican-inspired items like jalapeños or salsa for a kick. For a deeper Mediterranean flair, try using olives or artichokes. Mixing these flavors keeps your tacos exciting and unique. For the full recipe, check out the Mediterranean Chicken Tacos section. To keep your Mediterranean chicken tacos fresh, wrap them well. Use plastic wrap or aluminum foil. Store the leftovers in a container with a tight lid. They stay good in the fridge for up to three days. After that, the flavors can fade, and the texture may change. You can reheat the tacos safely in the microwave. Place the tacos on a microwave-safe plate. Cover them with a damp paper towel. Heat for about 30 seconds. Check if they are warm enough. If not, heat them for another 10-15 seconds. For oven reheating, preheat the oven to 350°F (175°C). Place the tacos on a baking sheet. Heat for about 10 minutes, or until warm. You can also use a stovetop. Just warm a skillet over medium heat. Place the tacos in the skillet for about 2-3 minutes on each side. You can freeze the chicken and toppings separately. Wrap the grilled chicken in plastic wrap. Then place it in a freezer bag. For the toppings, keep them in a separate container. They can stay fresh in the freezer for up to three months. When you’re ready to eat, transfer the chicken to the fridge overnight to thaw. For quick thawing, place the sealed bag in cold water for about an hour. After thawing, reheat the chicken and toppings before serving. Enjoy your Mediterranean chicken tacos anytime! For the full recipe, check out the details above. You can try many alternatives to chicken. Here are some ideas: - Grilled shrimp adds a nice seafood twist. - Sliced steak brings rich flavor to the tacos. - Tofu absorbs spices well for a plant-based option. - Chickpeas give a hearty, protein-rich vegetarian choice. - Grilled vegetables like zucchini or bell peppers also work well. If you want more heat, here are some tips: - Add diced jalapeños to the tomato-cucumber salad. - Use a spicy yogurt sauce by mixing in some hot sauce. - Sprinkle red pepper flakes over the grilled chicken before serving. - Incorporate chipotle powder into the marinade for a smoky heat. Yes, you can prep this recipe ahead of time. Here’s how: - Marinate the chicken a few hours before grilling for more flavor. - Chop the veggies and mix the salad a day in advance. - Store the salad in an airtight container in the fridge. - Warm the tortillas just before serving for the best texture. - You can also grill the chicken and store it in the fridge. For the full recipe, check out the Mediterranean Chicken Tacos preparation details. This blog post covered how to prepare tasty chicken tacos. You learned about key ingredients like chicken, fresh veggies, and tortillas. Follow the step-by-step instructions for marinating and grilling the chicken. Use tips to enhance flavor and serve your tacos well. Don't forget to store leftovers properly and reheat using safe methods. You can make these tacos your own with variations like different proteins or flavors. Try these ideas for a satisfying meal that fits your taste. Enjoy making these tacos for friends and family!

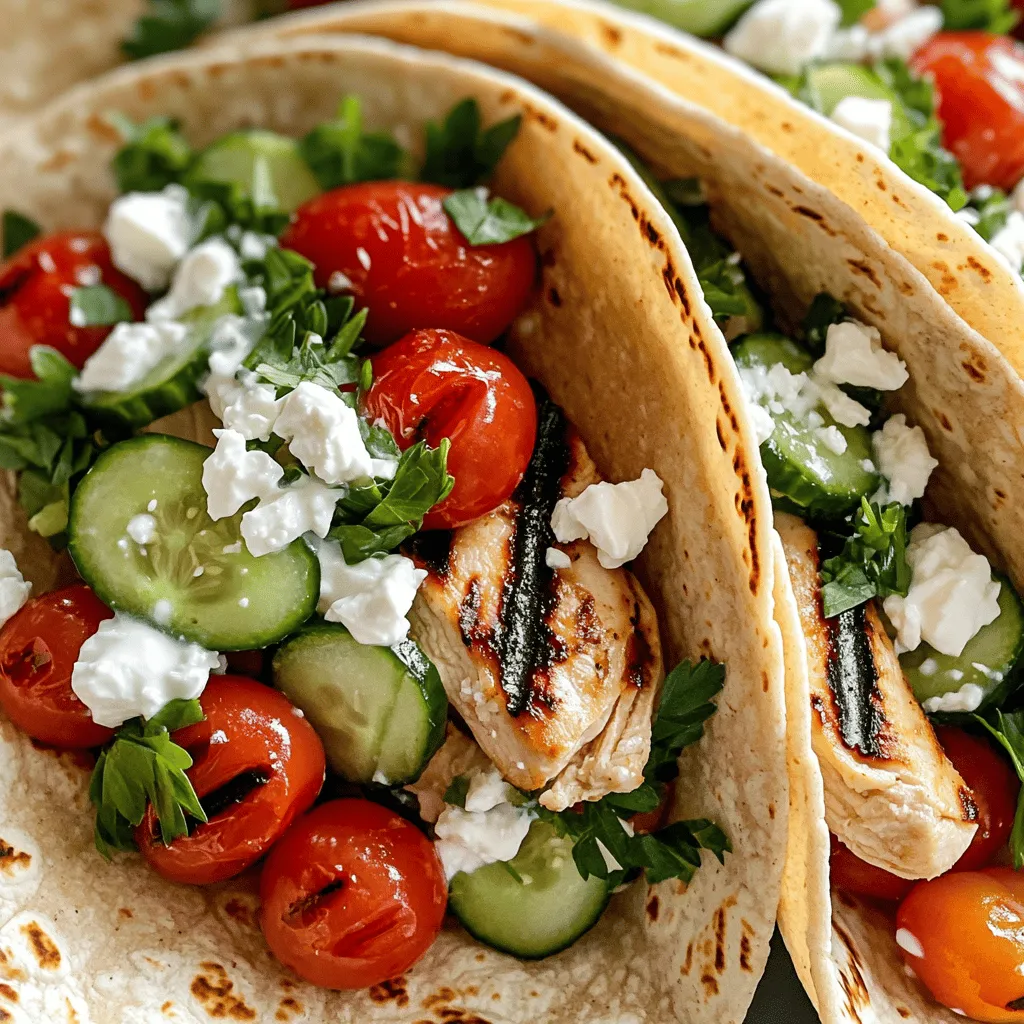
Looking for a simple yet flavorful meal? Mediterranean Chicken Tacos are a perfect fit. With juicy grilled chicken, fresh vegetables, and zesty toppings, this dish will impress your taste buds. …

Read more

Categories Dinner Tags NO-ING-IMG

German Cucumber Salad Fresh and Flavorful Recipe

January 14, 2026July 18, 2025 by Chef Tavio
- 2 large cucumbers, thinly sliced - 1 teaspoon sea salt - 1/2 cup creamy Greek yogurt - 2 tablespoons apple cider vinegar - 1 tablespoon fresh dill, finely chopped - 1 tablespoon fresh parsley, finely chopped - Optional: granulated sugar and black pepper - 1/4 cup red onion, thinly sliced - 1 tablespoon extra virgin olive oil - Optional: Toasted sunflower seeds for garnish Gathering the right ingredients is key for a great German cucumber salad. Start with fresh cucumbers. They should be firm and crisp. The sea salt helps to draw out moisture. This keeps your salad crunchy. Creamy Greek yogurt gives the salad its rich base. It adds a nice tang, too. The apple cider vinegar adds acidity. This balances the creamy yogurt. Fresh dill and parsley bring flavor and color. You can adjust the dressing to your taste. If you like it sweeter, add a little sugar. Black pepper gives a hint of spice. For garnishes, thinly sliced red onion adds a bite. Extra virgin olive oil can enhance the flavor. If you want a crunchy top, sprinkle toasted sunflower seeds. These ingredients will come together to create a fresh and flavorful dish. For the full recipe, check out the details provided. 1. First, slice the two large cucumbers thinly. 2. Place the slices in a colander and sprinkle with 1 teaspoon of sea salt. 3. Let the cucumbers rest for about 15 minutes. This draws out excess water. 4. Rinse the cucumbers under cold water. This removes the salt. 5. Pat them dry with a clean towel. This keeps the salad crisp. 1. In a mixing bowl, add 1/2 cup of creamy Greek yogurt. 2. Pour in 2 tablespoons of apple cider vinegar. 3. Add 1 tablespoon of finely chopped dill and 1 tablespoon of parsley. 4. Mix in 1 teaspoon of granulated sugar and 1/4 teaspoon of black pepper. 5. Drizzle in 1 tablespoon of extra virgin olive oil. 6. Whisk everything until you have a smooth and creamy dressing. 1. In a large bowl, combine the dried cucumber slices and 1/4 cup of thinly sliced red onion. 2. Pour the creamy dressing over the cucumbers and onion. 3. Gently toss the salad to coat everything well. Avoid crushing the cucumbers. 4. Cover the bowl and chill in the fridge for about 30 minutes. 5. This helps the flavors mix and taste great together. 6. Before serving, toss the salad again gently. 7. If you like, top it with toasted sunflower seeds for extra flavor. You can find the full recipe [Full Recipe]. To keep your cucumbers crisp, start by salting them well. Slice the cucumbers and place them in a colander. Sprinkle 1 teaspoon of sea salt over them. This draws out water and keeps the salad crunchy. Let them rest for about 15 minutes. Afterward, rinse them under cold water to remove excess salt. Pat them dry with a clean towel. This step is key to avoiding a soggy salad. You can change the flavor of the dressing easily. Instead of Greek yogurt, try sour cream for a tangy twist. To make the dressing lighter, use a mix of yogurt and lemon juice. You can also add a bit of mustard for extra zing. Adjust the amount of apple cider vinegar for more or less acidity. This lets you control the taste to your liking. German Cucumber Salad pairs well with grilled meats or fish. It also goes nicely with sausages or as a side for potato dishes. For garnish, sprinkle fresh herbs like dill or parsley on top. A drizzle of olive oil adds shine and flavor. Serve in a clear bowl to show off the vibrant colors! {{image_4}} You can use different types of cucumbers for this salad. Pickling cucumbers work well. They are smaller and crunchier. English cucumbers are also great. They have fewer seeds and are longer. You can even try other crunchy veggies, like radishes or bell peppers. These add fun colors and textures. Try using fresh herbs like basil or mint. They give a unique twist to your salad. If you want a quick option, mix in dried herbs. They are easy to use and still bring flavor. Thyme or oregano can work well too. Just remember, dried herbs are stronger. Use less than you would with fresh ones. To make a vegan version, swap out Greek yogurt with plant-based yogurt. There are many tasty options available now. You can also use tahini or avocado for a creamy dressing. If you want a tangy kick, mix in lemon juice or vinegar. These ideas help keep the salad fresh and light. For the full recipe, check the section above. To keep your German cucumber salad fresh, store any leftovers in an airtight container. This helps prevent the salad from becoming soggy. Try to eat the salad within two days for the best taste and texture. The cucumbers lose crunchiness over time, so it's best to enjoy them soon! You can prep some parts of this salad ahead of time. Slice the cucumbers and onions, but wait to mix them with the dressing. The dressing can be made a day before. Keep it in the fridge in a sealed jar. This way, the salad stays crisp and tasty when you are ready to serve. Can you freeze German cucumber salad? No, it's not recommended. The cucumbers will become mushy when thawed. If you wish to freeze, do it in parts. Slice the cucumbers and freeze them without dressing. You can freeze the dressing separately too. Just mix them fresh when you are ready to enjoy the salad! You should use cucumbers that are firm and fresh. English cucumbers are great. They have fewer seeds and a thin skin. Regular slicing cucumbers work well too. Just ensure they are crisp for a nice crunch. You can store it in the fridge for up to three days. Keep it in an airtight container. The flavors will blend and taste even better. However, the cucumbers may lose some crunch over time. Yes, you can! Try adding cherry tomatoes for color and sweetness. Radishes can add a nice crunch too. You might enjoy adding bell peppers or even feta cheese. Mix it up to suit your taste! Yes, this salad is gluten-free. The ingredients like cucumbers, yogurt, and herbs do not contain gluten. Always check for any added ingredients if you use pre-made items. This salad is perfect for summer barbecues and picnics. It pairs well with grilled meats and fish. It also shines at family gatherings. Serve it alongside hearty dishes for a refreshing side. To add some heat, you can include chili flakes or fresh jalapeños. A dash of hot sauce can also do the trick. Start with a little and taste as you go for the right level of spice. In this section, I will break down the ingredients needed for a tasty German cucumber salad. You will find everything you need to create this fresh and flavorful dish. - 2 large cucumbers, thinly sliced - 1 teaspoon sea salt - 1/2 cup creamy Greek yogurt - 2 tablespoons apple cider vinegar - 1 tablespoon fresh dill, finely chopped - 1 tablespoon fresh parsley, finely chopped - Optional: 1 teaspoon granulated sugar and 1/4 teaspoon ground black pepper - 1/4 cup red onion, thinly sliced - 1 tablespoon extra virgin olive oil - Optional: Toasted sunflower seeds for garnish To make this salad, start with fresh cucumbers. They add a nice crunch. The sea salt helps remove excess water. Greek yogurt gives it a creamy texture. The apple cider vinegar adds a tangy taste. Dill and parsley bring a fresh flavor. You can add sugar and black pepper for balance. Red onion adds a bite and extra color. Olive oil ties it all together. If you want, sprinkle sunflower seeds on top for crunch. This list covers all you need for a delicious dish. For the full recipe, check the details above. This blog post covered how to make a fresh German Cucumber Salad. I shared the main ingredients, dressing options, and tips for crispness. You learned how to prepare, mix, and store your salad for the best flavor and texture. Remember, you can play with different cucumbers and herbs to fit your taste. Whether for a meal or a side dish, this salad is refreshing and easy to make. Enjoy crafting your own version with your favorite twists!

Are you ready to elevate your salad game? This German Cucumber Salad is fresh, flavorful, and easy to make! Packed with crunchy cucumbers and a creamy dressing, it’s the perfect …

Read more

Categories Salads Tags NO-ING-IMG

Hidden Veggie Chocolate Muffins Healthy and Tasty Treat

January 14, 2026July 18, 2025 by Chef Tavio
To make Hidden Veggie Chocolate Muffins, you need these key ingredients: - 1 cup all-purpose flour - 1/2 cup unsweetened cocoa powder - 1 teaspoon baking powder - 1/2 teaspoon baking soda - 1/4 teaspoon salt - 1/2 cup granulated sugar (or substitute with coconut sugar for a healthier option) - 1/2 cup unsweetened applesauce - 1/4 cup neutral vegetable oil - 1 teaspoon pure vanilla extract - 1/2 cup finely grated zucchini (drained of excess moisture) - 1/2 cup finely grated carrot - 2 large eggs, lightly beaten - 1/2 cup semi-sweet chocolate chips (optional for extra indulgence) These ingredients blend to create a moist and rich muffin that hides veggies well. You can swap out some ingredients for healthier choices: - Use whole wheat flour instead of all-purpose flour for added fiber. - Replace granulated sugar with honey or maple syrup. - Use Greek yogurt instead of vegetable oil for a creamy texture. - Opt for dark chocolate chips for a richer taste and less sugar. These substitutions maintain flavor while making the muffins even healthier. Add-ins make muffins fun and unique. Here are some great options: - Chocolate chips for a sweeter treat. - Chopped nuts for a crunchy texture. - Dried fruit like raisins or cranberries for natural sweetness. - Spices like cinnamon or nutmeg for extra warmth. Feel free to mix and match these add-ins to find your favorite combination. Check out the Full Recipe for all the steps! First, I set my oven to 350°F (175°C). This step is key for the muffins to rise. I prepare a muffin tin by adding paper liners. If I don't have those, I spray the tin lightly with non-stick spray. Next, I grab a big bowl for the dry stuff. I combine 1 cup of all-purpose flour, 1/2 cup of cocoa powder, 1 teaspoon of baking powder, 1/2 teaspoon of baking soda, 1/4 teaspoon of salt, and 1/2 cup of sugar. I whisk these together. This makes sure the dry ingredients mix well. In another bowl, I mix the wet ingredients. I whisk together 1/2 cup of applesauce, 1/4 cup of vegetable oil, 1 teaspoon of vanilla extract, and 2 beaten eggs. I want this mix to be smooth. It helps to blend the flavors in the muffins. Now comes the fun part! I slowly pour the wet mix into the dry mix. I stir gently until they just blend. Then, I fold in 1/2 cup of grated zucchini and 1/2 cup of grated carrot. If I want extra sweetness, I add chocolate chips. This is where the hidden veggies come in! With a spoon, I fill each muffin cup about two-thirds full. This gives them room to rise. I bake them for 15-18 minutes. I check if they are done by poking a toothpick in the center. If it comes out clean, they are ready! I let them cool for about 5 minutes in the pan. Then, I transfer them to a wire rack to cool completely. For the full recipe, check out the details above. Enjoy these tasty treats! I love using zucchini and carrots in my muffins. They add moisture and nutrients without changing the taste much. Finely grating them makes it easier to hide. You can also try spinach or pumpkin for more options. Just make sure to drain any excess moisture to keep muffins fluffy. To keep muffins soft, use applesauce. It adds moisture and flavor. You can also add a little yogurt or sour cream. These ingredients work well with the chocolate flavor, making each bite tender. If you want to keep it lighter, stick to oil instead of butter. Overmixing is a big no-no. Mix until just combined to keep muffins fluffy. Also, make sure your oven is preheated. An oven that isn’t hot enough can lead to flat muffins. Lastly, don’t skip the cooling time. Let them cool in the pan for a few minutes before moving them to a wire rack. This helps them set properly. For the full recipe, check out the details above! {{image_4}} You can mix and match veggies in these muffins. Zucchini and carrots work well, but try others too. Sweet potato adds a creamy texture, while spinach gives a nice green boost. You can also use mashed bananas for added sweetness. Just make sure to drain any excess moisture from the veggies. This keeps the muffins from getting soggy. Experiment with different combinations to find your favorite mix! Spices can add depth to your muffins. A pinch of cinnamon or nutmeg enhances the chocolate flavor. You might even consider a dash of cayenne for a subtle heat. Using pure vanilla extract is key for a rich taste. Almond extract can also give a nice twist. Don’t forget to play with your favorite spices. They can take the flavor to the next level. If you want gluten-free muffins, swap the all-purpose flour for a gluten-free blend. Many brands work well in baking. For a dairy-free option, use almond milk or oat milk instead of regular milk. You can replace eggs with flax eggs or applesauce if needed. This keeps the muffins moist and tasty. These simple changes allow everyone to enjoy these hidden veggie chocolate muffins. For the full recipe, check back for more details. To keep your muffins fresh, place them in an airtight container. They can last at room temperature for up to three days. If your kitchen is warm, refrigerate them to avoid spoilage. Just remember to let them cool completely before sealing them up. For longer storage, freezing is your best bet. Wrap each muffin in plastic wrap. Then place them in a freezer-safe bag or container. They can last up to three months in the freezer. When you’re ready to enjoy them, just pull out what you need. Reheating muffins is easy. You can use the microwave for a quick fix. Heat for about 10 to 15 seconds. If you want them warm and crispy, use an oven. Preheat it to 350°F (175°C) and bake for about 5 to 10 minutes. Enjoy your Hidden Veggie Chocolate Muffins warm and tasty! For the full recipe, check out the earlier section. Adding vegetables to muffins boosts their nutrition. You get extra vitamins and fiber. For example, zucchini adds moisture without changing the taste. Carrots give a natural sweetness. This makes your snack healthier. You can feel good about eating them. Plus, it helps you sneak in veggies for picky eaters. No, you cannot taste the hidden veggies. The cocoa powder and sugar mask their flavors. The muffins taste rich and chocolatey. The texture stays moist and soft. This means kids and adults enjoy them alike. You can savor the chocolate without noticing the veggies. To make the muffins sugar-free, use ripe bananas or applesauce. They add sweetness without added sugar. You can also use stevia or monk fruit. These options keep the muffins tasty. Just make sure to adjust the wet ingredients slightly. This way, the muffins stay fluffy and delicious. Serve these muffins warm for the best flavor. You can dust them with powdered sugar. A dollop of yogurt on top adds creaminess. Pair them with fresh fruit for a balanced snack. Arrange them nicely on a wooden board to impress your guests. To get kids to enjoy these muffins, involve them in baking. Let them mix ingredients or add chocolate chips. Talk about how these muffins are a fun treat. You can also shape them into fun designs. When they help, they feel proud and want to eat them. In this post, we covered how to make healthy muffins packed with hidden veggies. You learned essential ingredients, helpful tips, and easy steps. We explored substitutions, variations, and storage methods to keep your muffins fresh. Hidden veggies add nutrition without dominating flavor. This simple recipe can surprise picky eaters. Enjoy making muffins that are tasty and good for you. Baking is fun, and these muffins are a great way to get creative in the kitchen.

If you think muffins can’t be both delicious and healthy, think again! My Hidden Veggie Chocolate Muffins prove that you can enjoy a sweet treat while sneaking in some nutritious …

Read more

Categories Desserts Tags NO-ING-IMG

3 Ingredient Banana Oatmeal Pancakes Quick and Easy

January 14, 2026July 18, 2025 by Chef Tavio
- Ripe banana - Rolled oats - Large eggs You need just three main items to make these pancakes. A ripe banana gives sweetness and moisture. This banana should be soft and spotty for the best flavor. Next, you will use rolled oats. These oats are the base of our pancake mix. Lastly, you will add large eggs. They help bind everything together and add protein. - Maple syrup - Honey - Fresh fruit - Yogurt Toppings can take your pancakes to the next level. Maple syrup adds a sweet touch that many love. Honey is another option for sweetness. Fresh fruit like berries or banana slices adds flavor and color. Lastly, a dollop of yogurt can add creaminess and a tangy taste. You can mix and match these toppings based on what you like. For the full recipe, check out the details above. First, place rolled oats in a blender or food processor. Blend them on high until they turn into a fine flour. This usually takes about 30 seconds to 1 minute. Make sure there are no large chunks left. This oat flour is the base for your pancakes. Next, take a ripe banana and place it in a mixing bowl. Use a fork or potato masher to crush it. Aim for a smooth texture. This creamy banana helps bind the pancakes together and adds natural sweetness. Now, add the oat flour and two large eggs to the mashed banana. Mix everything together until smooth. Stir vigorously to ensure all ingredients blend well. Let the batter rest for 5 minutes. This helps thicken it a bit, making your pancakes fluffier. While the batter rests, preheat your non-stick skillet over medium heat. Lightly grease it with a small amount of oil or cooking spray. This prevents pancakes from sticking and helps them cook evenly. After the skillet is hot, pour about 1/4 cup of batter for each pancake. Cook for 2-3 minutes until bubbles form on the surface. You’ll notice the edges start to set. This is a good sign that it’s time to flip. Carefully flip the pancakes using a spatula. Cook for another 2-3 minutes until both sides are golden brown. Once done, stack the pancakes on a plate. You can add your choice of toppings, like maple syrup or fresh fruit. Enjoy your delicious breakfast! For the full recipe, check out the details above. Letting the batter rest is key for fluffy pancakes. When you allow the batter to sit for 5 minutes, it thickens. This helps create a lighter texture. The oats soak up some moisture, which makes the pancakes rise better when cooked. Getting the heat just right is crucial. I recommend using medium heat. If the skillet is too hot, the pancakes may burn on the outside and stay raw inside. If it's too low, the pancakes will cook slowly and may not brown nicely. A good test is to sprinkle a few drops of water on the skillet. If they dance and evaporate quickly, the heat is perfect. To prevent sticking, grease the skillet well. I use a small amount of oil or cooking spray. Make sure to coat the surface evenly. This simple step helps the pancakes flip easily and stay intact. You can also use a non-stick skillet for even better results. For the full recipe, you can refer to the detailed instructions provided earlier. {{image_4}} You can easily change the taste of your pancakes. Try adding spices like cinnamon or nutmeg. These spices add warmth and depth. Just a pinch can make a big difference. Mix in half a teaspoon of cinnamon for a cozy touch. If you want a bit more zing, try nutmeg. It adds a unique flavor that pairs well with bananas. If you need a gluten-free option, you can substitute oats. Use gluten-free rolled oats or oat flour. Both options work well and keep the pancakes light. If you want to try something different, consider using almond flour. It gives the pancakes a nutty flavor and is great for gluten-free diets. For added texture, think about mix-ins. You can toss in chocolate chips or nuts. Chocolate chips make for a sweet treat that kids love. Nuts add a crunchy element that can enhance the flavor. Try walnuts or pecans for a nice twist. Just remember to fold them into the batter gently, so they mix well without breaking apart the pancake. For the full recipe, check out the [Full Recipe]. To store leftovers in the refrigerator, wait for the pancakes to cool. Place them in an airtight container. This keeps them fresh for 2 to 3 days. You can also use parchment paper between pancakes to prevent sticking. When you're ready to eat, just take out what you need. To freeze pancakes, stack them with parchment paper in between. Place the stack in a freezer-safe bag or container. Squeeze out the air to avoid freezer burn. You can freeze them for up to 3 months. This way, you always have a quick breakfast option ready. To reheat pancakes, you can use a microwave or a skillet. In the microwave, place a pancake on a plate and cover it with a damp paper towel. Heat for about 20 seconds. If using a skillet, warm it on low heat for 1-2 minutes on each side. This keeps the pancakes fluffy and soft. Enjoy them warm, just like fresh! You can use instant oats, but the texture will change. Instant oats are finer and can make the pancakes less fluffy. If you want a thicker pancake, stick with rolled oats. They provide a chewier texture that feels great in each bite. If you have no rolled oats, you can use instant oats. Just be aware that they may not give you the same fluffiness. To keep your pancakes fresh, place them in an airtight container. This helps prevent them from drying out. You can store them in the fridge for about 3 days. If you want to keep them longer, freeze them. Layer the pancakes with parchment paper to avoid sticking. They can last up to 2 months in the freezer. Yes, you can make these pancakes vegan! Instead of eggs, you can use flaxseed meal or applesauce. For flaxseed, mix 1 tablespoon with 2.5 tablespoons of water. Let it sit for about 5 minutes until thick. For applesauce, use 1/4 cup to replace both eggs. This makes the pancakes moist and delicious. To boost the nutrition, you can add extras like chia seeds or ground flaxseed. These add fiber and healthy fats. You could also mix in some spinach or grated carrots for more vitamins. If you want protein, consider adding a scoop of protein powder. These small changes can make your pancakes even better for you! These pancakes are great on their own, but you can add a few sides. Sliced fruit like strawberries or blueberries enhances the flavor. A drizzle of maple syrup or honey adds sweetness. For a protein kick, serve with Greek yogurt. You might also enjoy a glass of fresh orange juice or a hot cup of coffee with your meal. Banana oatmeal pancakes are easy and healthy. You learned about the main ingredients and how to make them step by step. We covered tips for fluffiness and variations to keep things fun. Don’t forget proper storage to enjoy them later. You can also ask questions to improve your pancakes. With this guide, you're ready to start cooking. Enjoy your pancakes and make them your own!

Are you craving a quick and healthy breakfast? Look no further! In this post, I’ll share how to whip up 3 Ingredient Banana Oatmeal Pancakes. With ripe bananas, rolled oats, …

Read more

Categories Breakfast Tags NO-ING-IMG

Easy One-Pan Balsamic Chicken Simple and Delicious Meal

January 14, 2026July 18, 2025 by Chef Tavio
- 4 boneless, skinless chicken breasts - 1 cup cherry tomatoes, halved - 2 cups fresh spinach, packed - 1/3 cup balsamic vinegar - 2 tablespoons honey - 2 tablespoons extra virgin olive oil, plus more for cooking - 3 cloves garlic, finely minced - 1 teaspoon dried oregano - Salt and freshly cracked black pepper to taste - Fresh basil leaves, torn, for garnish - Add sliced bell peppers for extra crunch. - Mix in mushrooms for an earthy flavor. - Use different greens like kale or arugula. - You can swap chicken breasts for thighs if you prefer dark meat. - Maple syrup works well in place of honey for a vegan option. - If you lack balsamic vinegar, try red wine vinegar mixed with a bit of sugar. - Fresh herbs like thyme or rosemary can replace dried oregano for a fresh taste. Using these ingredients, you can create a meal that is simple and packed with flavor. This recipe is flexible, so feel free to make it your own! For the complete recipe, check out the Full Recipe. To start, gather your mixing bowl and the marinade ingredients. You need balsamic vinegar, honey, olive oil, garlic, oregano, salt, and pepper. Pour the balsamic vinegar into the bowl first. Then, add honey and olive oil. Use a whisk to mix them well. Next, add the minced garlic and oregano. Finally, sprinkle in salt and pepper to taste. Whisk until everything blends nicely. This marinade brings a sweet and tangy flavor to your chicken. Now, it’s time to marinate the chicken. Place the chicken breasts in a resealable bag or a shallow dish. Pour in your prepared marinade, making sure every piece is coated. Seal the bag tightly or cover the dish. Refrigerate for at least 30 minutes. You can marinate for up to 2 hours for more flavor. This step is key. It helps the chicken absorb all those tasty flavors. After marinating, it’s cooking time! Heat a large skillet over medium heat. Add a drizzle of olive oil to coat the bottom. Once the skillet is hot, take the chicken out of the marinade. Place the chicken in the skillet without moving it for about 6-7 minutes. This helps create a nice crust. Flip the chicken carefully using tongs. Add halved cherry tomatoes and fresh spinach around the chicken. Pour the reserved marinade over everything. Cover the skillet with a lid and let it simmer for 8-10 minutes. Cook until the chicken reaches 165°F (75°C). The spinach should wilt and the tomatoes should soften. This easy one-pan balsamic chicken recipe is not only simple but also full of flavor. For the full recipe, check the beginning of the article. Enjoy! To cook chicken just right, start with even thickness. Pound the chicken breasts to about half an inch. This helps them cook evenly and stay juicy. Always check the internal temperature. It should reach 165°F (75°C) for safe eating. Let the chicken rest after cooking. This keeps the juices locked in for a tender bite. This dish pairs well with rice or crusty bread. Try serving it with a side salad too. A fresh green salad adds crunch and brightness. If you want extra flavor, drizzle some extra balsamic glaze over the top. Fresh herbs like parsley or basil enhance the dish’s taste and look. Cleaning up is easy with this one-pan recipe. Soak the pan in warm, soapy water right after cooking. For stubborn bits, use a non-scratch scrubber. Store leftover chicken in an airtight container in the fridge. It stays fresh for up to three days. Keeping your kitchen tidy makes cooking more fun! {{image_4}} You can swap chicken for other proteins. Try turkey breast or pork tenderloin. Both options cook well with balsamic flavors. For a quicker meal, use shrimp. Just adjust cooking time. Shrimp cooks fast, so watch closely. If you prefer a vegetarian dish, replace chicken with hearty vegetables. Eggplant, zucchini, or portobello mushrooms work great. They soak up the marinade and add rich flavor. You can also use firm tofu. Cut it into cubes and marinate just like the chicken. Feel free to mix up the flavors! Add a pinch of red pepper flakes for heat. Try fresh herbs like thyme or rosemary for a new taste. You can also switch balsamic vinegar with apple cider vinegar for a lighter flavor. If you like sweet dishes, add more honey. Each twist gives you a new dish to enjoy. For the full recipe, check out Savory One-Pan Balsamic Chicken Delight . After enjoying your one-pan balsamic chicken, store leftovers in an airtight container. This keeps the chicken and veggies fresh. You can store them in the fridge for up to three days. Make sure to let them cool down before sealing the container. This helps prevent moisture buildup, which can lead to soggy food. To reheat, simply place the chicken and vegetables in a skillet over medium heat. Add a splash of water or extra balsamic vinegar to keep things moist. Stir occasionally for about 5-7 minutes until warmed through. You can also use a microwave. Place the food in a microwave-safe dish and cover it. Heat for 1-2 minutes, checking halfway. If you want to save some for later, you can freeze the chicken. Place it in a freezer-safe bag or container. Remove as much air as possible. It can last up to three months in the freezer. To defrost, move it to the fridge overnight before reheating. This way, you keep the flavor and texture intact. For the full recipe, check out Savory One-Pan Balsamic Chicken Delight. You can marinate the chicken for 30 minutes to 2 hours. A longer marinating time helps the chicken soak up more flavor. The acid in the balsamic vinegar tenderizes the meat, making it juicy and tasty. Yes, you can prepare this dish ahead of time. Marinate the chicken and store it in the fridge for up to 2 hours. You can also cook the chicken and store it in the fridge for later. Just reheat it gently. If you don’t have balsamic vinegar, you can use red wine vinegar or apple cider vinegar. These options will give a different flavor but still work well in this dish. You might want to add a little honey for sweetness. Absolutely! This dish is great for meal prep. You can make a big batch and divide it into containers. It keeps well in the fridge and is easy to reheat. Pair it with rice or quinoa for a complete meal. Yes, you can cook this recipe in the oven. Preheat your oven to 400°F (200°C). After marinating, place the chicken in a baking dish with the veggies and marinade. Bake for about 25-30 minutes until the chicken is cooked through. For detailed instructions and ingredients, check out the Full Recipe. This blog post shared everything you need to know about making balsamic chicken. We covered the key ingredients and optional ones, plus tips for swaps. You learned the marinating steps and how to cook it to perfection. We also discussed variations and storage tips. Cooking can be fun, and making this dish fits into any meal plan. By following these steps and using the tips, you’ll have a tasty meal ready in no time. Enjoy your cooking journey!

Are you looking for a quick and tasty dinner idea? This Easy One-Pan Balsamic Chicken brings simple flavors to life with just one pan. You’ll enjoy tender chicken coated in …

Read more

Categories Dinner Tags NO-ING-IMG

Balsamic Brussels Sprout Salad Fresh and Flavorful Dish

January 14, 2026July 18, 2025 by Chef Tavio
- 1 pound Brussels sprouts - 2 tablespoons extra-virgin olive oil - 1/4 cup crumbled feta cheese - 1/4 cup dried cranberries - 1/4 cup chopped walnuts - 1/4 cup pomegranate seeds - 3 tablespoons balsamic vinegar - 1 tablespoon honey - 1 teaspoon Dijon mustard - Fresh parsley for garnish The main ingredients for this salad are fresh and simple. Brussels sprouts form the base. I love using Brussels sprouts because they offer a lovely crunch. The olive oil helps them roast well. It adds a nice flavor too. Feta cheese gives a creamy texture that blends well with the sprouts. Dried cranberries add sweetness. They contrast nicely with the salty feta. I enjoy the crunch of walnuts in this salad. They add a satisfying bite. Pomegranate seeds give a burst of flavor and color. They make the dish look vibrant. Finally, the balsamic vinegar, honey, and Dijon mustard create a tangy dressing. This dressing ties everything together. It balances the sweet and savory flavors beautifully. - Sea salt and freshly cracked black pepper - Goat cheese as an alternative - Pecans instead of walnuts - Cherries for variation in dried fruit Seasoning is key for any salad. I always use sea salt and fresh black pepper for taste. If you want to change things up, try goat cheese instead of feta. It adds a nice tang. You can switch walnuts for pecans for a sweeter crunch. If you want a bolder flavor, use cherries in place of cranberries. The mix of flavors will surprise you. Each of these options makes the salad your own. For the full recipe, check the details above. - Preheat oven to 400°F (200°C). - Combine Brussels sprouts with olive oil and season with salt and pepper. - Transfer to a baking sheet for roasting. To start, heat your oven to 400°F. This temperature helps the Brussels sprouts roast well. In a big bowl, mix the halved Brussels sprouts with two tablespoons of olive oil. Make sure every piece is coated. Then, add sea salt and freshly cracked black pepper to taste. Next, spread the seasoned Brussels sprouts out on a baking sheet. Place them in a single layer. This allows them to roast evenly. - Roast Brussels sprouts for 20-25 minutes. - Stir halfway through for even cooking. Now, roast the Brussels sprouts for 20 to 25 minutes. You want them to be tender and a bit brown. Stir them halfway through cooking. This step ensures they cook evenly and develop a nice caramelized look. - Whisk together balsamic vinegar, honey, and Dijon mustard. - Ensure dressing is smooth and well combined. While the Brussels sprouts roast, let's make the dressing. In a small bowl, whisk together three tablespoons of balsamic vinegar, one tablespoon of honey, and one teaspoon of Dijon mustard. Whisk until the mixture is smooth and well combined. This dressing adds a delightful tangy flavor to the salad. After roasting, let the Brussels sprouts cool for a few minutes. Then, you can combine everything for a delicious Balsamic Brussels Sprout Salad. You can check the Full Recipe for more details. To get the best caramelization on Brussels sprouts, start with high heat. Roasting at 400°F (200°C) works wonders. Cut them in half to expose more surface area, which helps them brown beautifully. Toss them with olive oil, salt, and pepper for flavor. Stir halfway through roasting to ensure even cooking. This results in a crispy outside and tender inside. Balancing flavors in the salad is key. The sweetness from honey or maple syrup pairs well with the tang of balsamic vinegar. This mix creates a lovely contrast. You can also add dried cranberries for a sweet burst that complements the tangy dressing. For an eye-catching display, serve your salad in a large, shallow bowl. This allows the colors to shine. Pomegranate seeds add a pop of red, making the dish more appealing. Scatter some extra seeds on top just before serving. They not only look great, but they also bring a delightful crunch. When choosing cheese, crumbled feta is a great choice. It adds creaminess and tang. You can also try goat cheese for a bolder flavor. If you want a richer taste, use aged cheese like Parmesan. Adding nuts will elevate the texture. Chopped walnuts or pecans provide a satisfying crunch. They also bring extra nutrients and flavor. This combination of creamy cheese, crunchy nuts, and tender Brussels sprouts makes every bite exciting. For the full recipe, check out the Balsamic Brussels Sprout Salad! {{image_4}} You can easily make this dish vegan. Just swap honey for maple syrup. This small change keeps the flavor rich and sweet. For those with gluten issues, rest assured. This salad is naturally gluten-free. Just check your dressing and toppings for hidden gluten. Add a burst of flavor with citrus fruits. Oranges and lemons work well to brighten the dish. You can also spice things up. A pinch of cayenne adds heat, while smoked paprika gives depth. These options cater to your taste and mood. Feel free to get creative with your greens. Instead of Brussels sprouts, use kale or spinach. Both add a fresh, vibrant taste. You can also play with dressings. Try a creamy tahini or a zesty lemon vinaigrette. This will give your salad a new twist. For the full recipe, check out the details above. To keep your Balsamic Brussels Sprout Salad fresh, choose airtight containers. Glass containers work best because they are easy to clean and do not retain odors. You can also use plastic containers, but make sure they seal well. Store your salad in the fridge for up to three days. After that, the ingredients may lose their crunch and flavor. If you want to enjoy the salad warm, heat the roasted Brussels sprouts in the oven. Set your oven to 350°F (175°C) and heat for about 10 minutes. Stir them once to ensure even warming. If you like your salad cold, serve it right from the fridge. Cold salads retain their crispness and refreshing taste. For meal prep, keep the ingredients separate until you are ready to serve. Store the roasted Brussels sprouts in one container. Place the feta cheese, dried cranberries, walnuts, and pomegranate seeds in separate containers. This will help keep everything fresh. When it’s time to eat, simply mix everything together. This way, you’ll have a quick and delicious meal ready in no time! For the full recipe, check out the details above. Yes, you can make this salad ahead of time. To prep in advance, roast the Brussels sprouts and store them in the fridge. Keep the dressing separate until you are ready to serve. This keeps the salad fresh and crisp. You can mix it all together about an hour before serving. This way, the flavors meld without making the greens soggy. You can get creative with this salad. Here are some ideas: - Substitute feta with goat cheese for a creamier taste. - Add sliced apples or pears for sweetness. - Toss in some cooked quinoa for added protein. - Use different nuts like pecans or almonds for crunch. - Try adding citrus fruits like oranges for a zesty twist. These additions can enhance the flavor and texture, making it your own. This salad can last about 3 days in the fridge. Ensure you store it in an airtight container to keep it fresh. If you mixed in the dressing, consume it within 1-2 days. Always check for freshness before eating. If it smells off or looks wilted, it's best to toss it. Yes, this salad is great for meal prep! To make it a week-long staple: - Roast the Brussels sprouts on the weekend. - Make the dressing and store it separately. - Keep all other ingredients ready to mix. This way, you can enjoy fresh, tasty meals throughout the week without much fuss. For the full recipe, check out the provided link. This Balsamic Brussels Sprout Salad is full of great flavors and textures. You learned about the key ingredients and steps needed to prepare it. I shared tips for perfecting the dish and variations to suit your taste. You can feel confident in customizing your salad to fit your needs. Proper storage and meal prep tips will help keep it fresh. Enjoy making this salad, and share it with friends and family for a healthy treat!

Looking for a salad that’s both fresh and full of flavor? My Balsamic Brussels Sprout Salad is just the thing! With crispy roasted sprouts, tangy dressing, and a mix of …

Read more

Categories Salads Tags NO-ING-IMG

Basil Vinaigrette Simple and Flavorful Dressing Recipe

January 14, 2026July 18, 2025 by Chef Tavio
Fresh basil leaves are the star of this vinaigrette. They bring a bright and fragrant flavor. You want about 1 cup of tightly packed leaves. Use young leaves for a milder taste. Make sure they are fresh and vibrant in color. Avoid any yellow or wilted leaves. The oil and vinegar make this dressing smooth and tangy. Use extra virgin olive oil for rich flavor. About 1/4 cup is perfect. For vinegar, I like apple cider vinegar, about 2 tablespoons. It adds sweetness and tang. You can also try white wine vinegar if you want a different twist. To boost the taste, add a few simple ingredients. Dijon mustard (1 teaspoon) gives a nice kick. One garlic clove, finely chopped, adds depth. Finally, sweeten it with 1 tablespoon of honey or agave syrup. This balances the acidity of the vinegar. Don't forget salt and pepper to taste. For the full recipe, check out the details above. This vinaigrette is not just simple but also very tasty! To start, wash your fresh basil leaves well. I like to use cold water to clean them. After washing, gently pat them dry with a kitchen towel. This step is key to removing any dirt or grit. Next, gather your other ingredients: olive oil, apple cider vinegar, Dijon mustard, garlic, honey, salt, and pepper. Having everything ready makes the process smooth and fun. Now, it’s time to blend. In a blender or food processor, place the packed basil leaves, chopped garlic, apple cider vinegar, and Dijon mustard. Blend these ingredients until you have a smooth mix. This may take about 30 seconds. Then, while the blender runs, slowly add the olive oil. This helps the dressing become creamy and thick. It’s important to pour it slowly for the best texture. After blending, taste your vinaigrette. Add honey or agave syrup for sweetness. Blend again for a few seconds. Next, season it with salt and pepper. If the dressing feels too thick, add a splash of water. Blend once more to reach the right consistency. This simple process ensures a basil vinaigrette that’s full of flavor and perfect for salads or grilled veggies. Enjoy crafting this delightful dressing! For the complete recipe, check out the [Full Recipe]. To make your basil vinaigrette shine, focus on quality ingredients. Use fresh basil leaves; they bring out the best flavor. Add a squeeze of lemon juice for zing. You can also experiment with different vinegars. Try red wine vinegar for a bolder taste. If you want a spicy kick, add a pinch of red pepper flakes. The right texture is key for a great vinaigrette. If your mixture is too thick, add water. Start with one teaspoon and blend again. You should look for a smooth, pourable consistency. If it’s too thin, add more olive oil. Blend until it reaches the desired thickness. Using the right tools makes a big difference. A high-speed blender or food processor works best for blending. This helps to emulsify the dressing. A whisk can also do the job, but it takes more effort. Always use a sharp knife for chopping garlic. This ensures a fine mince, enhancing the flavor. For easy storage, keep a glass jar handy. You'll love how easy it is to pour and store your basil vinaigrette. {{image_4}} You can add other herbs to your basil vinaigrette. Try parsley, mint, or cilantro. Each herb gives a new taste. Mix them with basil for a fresh twist. Use equal parts of each herb for balance. This makes your dressing unique and fun! If you want to change the sweetener, use maple syrup or agave. Honey adds a rich taste, but maple gives a warm flavor. Agave is great for a vegan option. Just remember, sweeteners change the flavor. Adjust the amount based on your taste! You can change how tart your vinaigrette tastes. Add more vinegar for a sharper bite. If you want it milder, use less vinegar. You can also add lemon juice for a fresh twist. Balancing acidity is key. Taste as you go to find what you love! To keep your basil vinaigrette fresh, store it in a glass jar. Make sure the jar has a tight lid. Always keep it in the fridge after you make it. Avoid letting it sit out at room temperature. This will keep the flavors bright and the ingredients safe. Basil vinaigrette lasts about one week in the fridge. After that, the fresh herbs lose their flavor. You might notice the vinaigrette looks different or smells off. If that happens, it’s best to toss it. Always give it a good shake before using. This helps mix the ingredients well again. Yes, you can freeze basil vinaigrette! Use an ice cube tray for easy portions. Pour the vinaigrette into the tray and freeze it. Once frozen, pop out the cubes and store them in a freezer bag. This way, you can thaw just what you need later. It keeps for about three months in the freezer. When ready to use, place a cube in the fridge overnight to thaw. Enjoy a taste of summer even in winter! To make basil vinaigrette, gather fresh basil, olive oil, apple cider vinegar, Dijon mustard, garlic, honey, salt, and pepper. First, wash the basil leaves and dry them. Next, place the basil, garlic, vinegar, and mustard in a blender. Blend until smooth. While blending, slowly add olive oil until it’s creamy. Then, mix in honey and blend again. Finally, taste and add salt and pepper. If it’s too thick, add a splash of water and blend again. You can find the full recipe above for a detailed guide. Basil vinaigrette works well on many dishes. Use it to dress fresh salads. It adds bright flavor to grilled vegetables. Drizzle it over fish or chicken for a tasty touch. You can also use it as a dip for bread. It enhances pasta salads or grain bowls too. This dressing is versatile and boosts any meal's flavor. Yes, you can make basil vinaigrette in advance. Just store it in an airtight container in the fridge. It stays fresh for about one week. Before using, shake or stir it well. You might need to add a little water if it thickens. Making it ahead saves time and adds flavor to your meals. In this blog post, we explored how to make a delicious basil vinaigrette. We covered the key ingredients like fresh basil, olive oil, and flavor enhancers. I shared step-by-step instructions on preparing and blending these elements. Tips for the best flavor and consistency were also included. You learned about fun variations and smart storage methods to keep your vinaigrette fresh. With these insights, you can create a tasty dressing that brightens any dish. Enjoy the process and make it your own!

If you love bold flavors, you need to try my Basil Vinaigrette! This recipe packs fresh basil, rich olive oil, and tangy vinegar into a simple dressing. It’s perfect for …

Read more

Categories Salads Tags NO-ING-IMG

Sheet Pan Salmon and Vegetables Quick and Tasty Meal

January 14, 2026July 18, 2025 by Chef Tavio
- 4 salmon fillets (approximately 6 ounces each) - 2 cups fresh broccoli florets - 1 cup cherry tomatoes, halved - 1 bell pepper (red or yellow), sliced into thin strips - 1 medium zucchini, cut into half-moons - 3 tablespoons extra virgin olive oil - 2 teaspoons garlic powder - 1 teaspoon smoked paprika - 1 teaspoon dried oregano - Salt and freshly ground black pepper, to taste The main ingredients are simple, fresh, and full of flavor. Salmon is rich in protein and omega-3 fatty acids. The assorted vegetables add color and vitamins. Broccoli brings crunch, while cherry tomatoes add sweetness. Bell peppers enhance the dish with their crisp texture. Zucchini provides a nice balance with its mild taste. - Fresh lemon wedges - Herbs like parsley Lemon wedges brighten the dish and add a fresh zing. Parsley adds a pop of green and fresh flavor. You can mix these garnishes to make your meal look and taste even better. Try squeezing lemon juice over the salmon and veggies just before serving for extra flavor. For the full recipe, check out the instructions that guide you step by step through this easy and tasty meal. 1. First, preheat your oven to 425°F (220°C). This heat will cook the salmon and veggies just right. 2. Next, line a large baking sheet with parchment paper. This helps with easy cleanup later. 3. In a large bowl, mix the broccoli florets, cherry tomatoes, sliced bell pepper, and zucchini. 4. Drizzle 2 tablespoons of olive oil over the veggies. Add garlic powder, smoked paprika, oregano, salt, and pepper. 5. Toss everything well. You want each piece coated with oil and spices. 1. Spread the seasoned veggies on one half of the sheet pan. Make sure they have space to roast evenly. 2. Pat the salmon fillets dry with a paper towel. Place them on the other half of the pan. 3. Drizzle the remaining olive oil over the salmon. Season it with salt and pepper. 4. Bake in the preheated oven for 15-20 minutes. The salmon should look opaque and flake easily with a fork. 5. The veggies need to be tender with a bit of caramelization. 6. When done, take the pan out and let it cool for a minute. 7. For a fresh twist, squeeze lemon juice over the salmon and veggies right before you serve. This method gives you a quick and tasty meal that’s easy to prepare. For the full recipe, check out Sheet Pan Salmon Delight with Veggies. Choosing the best salmon fillets When picking salmon, look for bright, shiny skin. The flesh should feel firm and spring back when you press it. Fresh salmon has a clean scent, not fishy. I prefer wild-caught salmon when possible. It often tastes better and has more nutrients. If you can’t find wild salmon, farmed salmon works too. Just choose fillets that look fresh and vibrant. Selecting fresh vegetables Fresh vegetables make this dish pop. Look for broccoli with bright green florets and no yellowing. Choose cherry tomatoes that are plump and firm. For bell peppers, select ones that feel heavy for their size. Zucchini should be smooth and free from blemishes. Fresh veggies add flavor and color to your meal. Ensuring even cooking and flavor enhancement To ensure even cooking, cut your veggies into uniform sizes. This way, they all cook at the same rate. Spread them out on the pan. Don’t crowd them; they need room to roast. Seasoning is key. Use olive oil and spices to enhance the flavor of both the salmon and veggies. How to achieve a perfect roast Roasting at 425°F is ideal for this meal. It cooks the salmon quickly while caramelizing the veggies. Keep an eye on your food. Salmon is done when it flakes easily with a fork. The veggies should be tender with a bit of char. For a finishing touch, squeeze fresh lemon juice over everything before serving. This adds brightness and freshness. For the complete recipe, visit the [Full Recipe]. {{image_4}} You can switch up the veggies based on the season. In spring, try asparagus or peas. In fall, use carrots or sweet potatoes. Mixing colors and textures adds fun. You can also add other proteins. Consider shrimp or chicken for variety. Just remember to adjust cooking times. Shrimp cooks faster than salmon. Chicken may need extra time. Adding marinades can boost flavor. A simple mix of lemon juice, honey, and soy sauce works great. Just marinate the salmon for 30 minutes before cooking. This gives it a tasty glaze. You can also try different seasoning blends. Cajun spices or Italian herbs can change the dish completely. Feel free to get creative! Adding spices can bring new life to your meal. To store leftovers, let the salmon and veggies cool down first. Place them in airtight containers. This keeps them fresh and safe. I recommend using glass or BPA-free plastic containers. They help prevent odors and keep your food tasty. You can store leftovers in the fridge for up to three days. If you plan to keep them longer, consider freezing them. When reheating salmon and vegetables, use the oven for the best results. Preheat your oven to 350°F (175°C). Place your leftovers on a baking sheet. Cover them with foil to keep moisture in. Heat for about 10-15 minutes, or until hot. You can also use a microwave, but be careful. Microwaving can make the salmon dry. If you choose this method, heat in short bursts. Check often to keep the flavor and texture intact. A splash of water or a drizzle of olive oil can help keep things moist. For a quick fix, you can also pan-sear the salmon for a minute on each side. This adds a nice crispness back to the fish. How long should I bake salmon at 425°F? You should bake salmon at 425°F for about 15 to 20 minutes. The salmon is ready when it turns opaque and flakes easily with a fork. Cooking time may vary based on the thickness of the fillets. Always check for doneness to ensure the best taste and texture. Can I use frozen salmon? Yes, you can use frozen salmon. Just make sure to thaw it first. Place the frozen fillet in the fridge overnight or submerge it in cold water for 30 minutes. Thawed salmon cooks evenly and tastes better. It’s a great way to save time while still enjoying this tasty dish. Is sheet pan cooking healthy? Yes, sheet pan cooking is healthy. It allows you to use fresh ingredients with less fat. You can pack your meal with veggies, which adds fiber and vitamins. This style of cooking also keeps cleanup easy, making healthy eating more convenient. Nutritional benefits of salmon and vegetables Salmon is rich in omega-3 fatty acids, great for your heart and brain. It also provides protein, which helps build muscle. The vegetables add essential nutrients. Broccoli offers vitamins C and K, while bell peppers deliver antioxidants. Zucchini and tomatoes bring hydration and flavor. Together, they create a balanced meal that’s both tasty and nutritious. This guide showed you how to create a tasty sheet pan meal with salmon and vegetables. You learned to choose fresh ingredients and prepare them for baking. Cooking tips helped ensure everything cooks evenly, and variations let you customize flavors. Remember to store leftovers properly and reheat them for the best taste. I hope you feel inspired to try this simple and healthy recipe at home. Enjoy your delicious meal!

Are you looking for a quick, tasty meal that’s easy to make? Sheet pan salmon and vegetables check all the boxes! You can whip this up in under 30 minutes, …

Read more

Categories Dinner Tags NO-ING-IMG

Healthy Zucchini Brownies Simple and Delicious Recipe

January 14, 2026July 18, 2025 by Chef Tavio
- 1 cup grated zucchini, squeezed dry - 1/2 cup whole wheat flour - 1/4 cup unsweetened cocoa powder - 1/2 cup honey or maple syrup - 2 large eggs - 1/4 cup unsweetened applesauce - 1 teaspoon pure vanilla extract - 1/2 teaspoon baking soda - 1/4 teaspoon sea salt - 1/2 cup dark chocolate chips - Optional: 1/4 cup chopped nuts When making healthy zucchini brownies, you need fresh ingredients. Grated zucchini brings moisture and nutrients. Whole wheat flour adds fiber and a nutty taste. Cocoa powder gives that rich chocolate flavor. You can use honey or maple syrup as sweeteners. Eggs bind everything together, while applesauce keeps the brownies moist. Dark chocolate chips add a delightful touch. If you want crunch, nuts are a great option. You can even mix in different types of sweeteners or flours. The Full Recipe provides detailed instructions on how to combine these ingredients perfectly. - Use agave or coconut sugar instead of honey. - Make it gluten-free with almond flour or oat flour. - For a vegan option, swap eggs with flax eggs or applesauce. - Zucchini is low in calories and high in fiber. - It offers vitamins A, C, and K. - Zucchini has antioxidants that protect your cells. Zucchini helps keep these brownies healthy. It adds moisture without extra fat. This veggie blends well into the batter, making it a secret ingredient. Eating these brownies gives you a tasty treat and health benefits. 1. First, preheat your oven to 350°F (175°C). This heat is perfect for baking. 2. Next, prepare a 9x9 inch baking dish. You can grease it lightly or use parchment paper. This helps the brownies come out easily later. 1. In a large mixing bowl, combine the wet ingredients. Mix together honey (or maple syrup), eggs, applesauce, and vanilla extract. Whisk until smooth. 2. Now, fold in the grated zucchini. Make sure it is evenly mixed with the wet ingredients. 1. In a separate bowl, mix the dry ingredients. Whisk together whole wheat flour, cocoa powder, baking soda, and sea salt. This helps blend them well. 2. Gradually add the dry mix to the wet ingredients. Stir gently until just combined. Be careful not to overmix, as this can change the texture of your brownies. 1. Pour the brownie batter into your prepared dish. Use a spatula to spread it evenly. 2. Place the dish in the oven and bake for 20-25 minutes. To check if they are done, insert a toothpick into the center. It should come out mostly clean, with a few moist crumbs. Enjoy your delicious Healthy Zucchini Brownies! For more details on making these, check the Full Recipe. To keep your brownies soft, squeeze the grated zucchini well. This step removes excess water. Too much moisture can make your brownies soggy. Using unsweetened applesauce adds moisture too. It also gives a nice sweetness without extra sugar. Mix the batter gently. Overmixing can lead to tough brownies. Stir just until the dry ingredients are combined. Baking time is key. Check your brownies at 20 minutes. Insert a toothpick in the center. If it comes out with a few moist crumbs, they’re done! Cut the brownies into squares after they cool. This helps keep the edges neat and tidy. For a pretty touch, dust cocoa powder on top. Fresh mint leaves also make a lovely garnish. They add color and a hint of flavor. Enjoy your beautifully presented brownies! {{image_4}} You can make these brownies even tastier with a few simple tweaks. Adding spices like cinnamon or nutmeg can give your brownies a warm, inviting flavor. Just a pinch will do! You can also mix in nut butter, like almond or peanut butter, to add richness. It enhances the texture and flavor, making the brownies even more delicious. If you want to adjust for specific diets, here are some ideas. For a vegan version, swap the eggs with flax eggs. Just mix one tablespoon of ground flaxseed with three tablespoons of water. Let it sit for a few minutes to thicken. For gluten-free brownies, you can use almond flour or a gluten-free flour blend instead of whole wheat flour. Both options work well! These brownies shine when paired with other treats. Serve them warm with a scoop of ice cream or a dollop of yogurt for a sweet delight. You can also create a dessert platter. Arrange the brownies with fresh fruits, nuts, or even a drizzle of chocolate sauce. It makes a fun presentation for gatherings! To keep your brownies fresh, store them in an airtight container. Place a piece of parchment paper between layers to prevent sticking. You can keep them at room temperature for up to four days. If you want to keep them longer, refrigerate for up to a week. Freezing brownies is easy and keeps them fresh. Cut the brownies into squares. Wrap each piece tightly in plastic wrap. Then, place them in a freezer-safe bag. They will stay good for about three months. To thaw, take them out and leave them at room temperature for a few hours. Do not let leftover brownies go to waste! You can chop them up and use them in new recipes. Try making a trifle with layers of brownies, whipped cream, and fruit. Another fun idea is to create parfaits by layering brownies with yogurt and berries. These options make tasty treats that are fun to share! No, you cannot taste the zucchini. Zucchini adds moisture and makes the brownies soft. The cocoa powder and chocolate chips mask any veggie flavor. You get rich chocolate goodness without the veggie taste. These healthy brownies can last up to five days at room temperature. Store them in an airtight container. For longer storage, keep them in the fridge for about a week. They can also freeze well for up to three months. You can replace honey or maple syrup with sugar, but it will change the texture. Sugar makes the brownies more cake-like and less moist. You may need to add a bit of liquid if you switch. To cut brownies cleanly, use a sharp knife. Make sure the brownies are cool before cutting. Dip the knife in hot water and dry it first. This method helps get neat, straight lines. You can add nuts or seeds for extra crunch and nutrients. Try using nut butter for creaminess or substituting some flour with oats. You can also reduce the sweetener or use ripe bananas for natural sweetness. For the full recipe, check out the section above. These healthy brownies are easy to make and delicious. You learned about key ingredients, like zucchini and cocoa powder, for taste and nutrition. Substitutions allow flexibility for dietary needs. The step-by-step instructions guide you through mixing, baking, and storing your brownies. In the end, feel free to experiment with flavors and toppings. Enjoy your baking journey and share your tasty results!

If you think healthy brownies are bland, think again! Today, I’ll show you how to make delicious, fudgy Healthy Zucchini Brownies that are simple to prepare. With just a few …

Read more

Categories Desserts Tags NO-ING-IMG

Keto Zucchini Brownie Recipe for Delightful Indulgence

January 14, 2026July 18, 2025 by Chef Tavio
- 1 medium zucchini, grated and moisture squeezed out - 1 cup almond flour, finely ground - 1/2 cup unsweetened cocoa powder, high-quality - 1/2 cup Erythritol or low-carb sweetener of choice - 1/4 cup coconut oil, melted - 2 large eggs, at room temperature - 1 teaspoon pure vanilla extract - 1/2 teaspoon baking soda, aluminum-free - 1/4 teaspoon fine sea salt - 1/2 cup sugar-free dark chocolate chips (optional) Zucchini is a key ingredient in my keto brownie recipe. It gives these brownies a rich texture while keeping them low in carbs. Remember to squeeze out excess moisture from the grated zucchini. This step is vital. Too much moisture can make your brownies too soft. Almond flour is my choice for a great base. It adds a nice nutty flavor. Make sure it's finely ground for a smooth batter. The cocoa powder must be high-quality. It enhances the chocolate flavor. Unsweetened cocoa powder keeps the brownies keto-friendly. I use Erythritol as the sweetener here. It has zero calories and doesn’t raise blood sugar. You can pick another low-carb sweetener if you prefer. Coconut oil adds moisture and a hint of coconut flavor. I always melt it first to combine it easily. The eggs must be at room temperature. This helps blend the ingredients better. Pure vanilla extract adds a wonderful aroma. Baking soda helps the brownies rise, while sea salt balances the sweetness. If you love chocolate, add sugar-free dark chocolate chips. They give extra flavor and texture. One serving has about 120 calories. Each brownie has around 5 grams of total carbs. This is great for a keto diet! The almond flour adds healthy fats and protein. The zucchini provides fiber without many carbs. Each ingredient plays a role in keeping the brownies healthy yet tasty. When selecting cocoa powder, look for a high-quality brand. It makes a big difference in flavor. The right low-carb sweetener is key too. Some sweeteners may taste different. Test a few to find your favorite. First, preheat your oven to 350°F (175°C). This step is key for a perfect bake. Next, grab an 8x8 inch baking dish. You can grease it lightly or line it with parchment paper. Lining makes it easier to lift out the brownies later. In a large bowl, combine the grated zucchini, melted coconut oil, and eggs. Make sure your eggs are at room temperature. This helps the mixture blend better. Use a whisk or fork to blend everything until smooth. The zucchini adds moisture and keeps the brownies soft. Now, take a separate bowl. Sift together the almond flour, cocoa powder, Erythritol, baking soda, and salt. Whisk these dry ingredients well to remove lumps. Slowly add this dry mixture to your wet ingredients. Gently stir until just combined. Be careful not to overmix; this keeps your brownies tender. Pour the brownie batter into your prepared dish. Spread it evenly with a spatula. Bake in the preheated oven for 25-30 minutes. To check for doneness, insert a toothpick into the center. It should come out mostly clean, with a few moist crumbs. Once baked, let the brownies cool in the pan for about 10 minutes. Then, transfer them to a wire rack to cool completely. This step is important for easier slicing. Enjoy your delicious Keto Zucchini Brownies! For the full recipe, refer to the section above. To make your brownies soft, avoid overmixing. Mix just until wet and dry ingredients blend. Overmixing can lead to tough brownies. For fudgier brownies, adjust the baking time. Start checking at 25 minutes. If a toothpick shows a few moist crumbs, they are done. Using zucchini adds moisture and fiber. Squeeze the grated zucchini to remove extra water. This step keeps the brownies from being too wet. You can also boost flavor by adding spices like cinnamon or nutmeg. A pinch of sea salt can enhance the chocolate taste too. For a beautiful presentation, serve brownies on a nice plate. Dust the top lightly with cocoa powder. Add fresh mint leaves for a pop of color. You can even place edible flowers around the brownies for a special touch. These small details can impress your guests! {{image_4}} If you want to switch things up, you can use other flours instead of almond flour. Coconut flour is a good choice, but you need less of it. Use about one-fourth of what the recipe calls for. Always add more eggs to help bind it. For sweeteners, you have options. Erythritol works well, but you can try monk fruit or stevia too. Each sweetener has a unique flavor. Adjust the amount based on how sweet you like your brownies. Adding nuts can make your brownies more exciting. Walnuts or pecans add a nice crunch. You can also stir in flavors like peppermint or orange zest for a unique twist. Spices can enhance the taste too. A pinch of cinnamon or a dash of chili powder can bring warmth. Don't be afraid to experiment; you might find a new favorite flavor! If you need nut-free options, try sunflower seed flour instead of almond flour. This keeps the recipe safe for those with nut allergies. For dairy-free brownies, use coconut oil and dairy-free chocolate chips. You can also use applesauce as a substitute for eggs if you're vegan. Always check labels to ensure all ingredients meet your dietary needs. Feel free to explore these variations to make the keto zucchini brownies truly yours. For the full recipe, check the earlier sections and enjoy your baking! To keep your brownies fresh, use an airtight container. Glass or plastic containers work well. You can also wrap them tightly in plastic wrap. Store them in the fridge for up to one week. If you want to keep them longer, they can last in the freezer for up to three months. Just remember to label your container with the date. When you're ready to enjoy your leftover brownies, avoid drying them out. Place them on a microwave-safe plate. Heat them for about 10 to 15 seconds at a time. Check each time to ensure they stay moist. Another great way is to warm them in an oven set to 350°F for about 5 minutes. Enjoy them warm for a chocolatey treat! To freeze brownies effectively, let them cool completely first. Then, slice them into squares. Wrap each square in plastic wrap, then place them in a freezer bag. Squeeze out as much air as you can before sealing. For best results, thaw them in the refrigerator overnight when you want to eat them. This keeps them moist and tasty. Yes, you can make these brownies vegan! To replace eggs, use flax eggs. Mix 1 tablespoon of ground flaxseed with 2.5 tablespoons of water. Let it sit for a few minutes until it thickens. You can also use applesauce or mashed bananas. Each replaces one egg and adds moisture. Yes, these brownies are low-carb! The net carbs come mainly from the almond flour and the zucchini. Each serving has about 3 grams of net carbs. This makes them a great treat for those on a keto diet. You can adjust the sweetness easily! If you like it sweeter, add more Erythritol or try stevia. For less sweetness, reduce the sweetener. Taste the batter before baking to find your perfect level. Check the brownies by looking for a firm top. Insert a toothpick in the center. If it comes out with a few moist crumbs, they are done. If it comes out wet, give them more time. Pair these brownies with whipped cream or sugar-free ice cream. Fresh berries add a nice touch too. A drizzle of melted dark chocolate can enhance the flavor. You can also serve them with a sprinkle of sea salt for contrast. For the full recipe, see above. This recipe shows how to make delicious keto brownies. You learned about the key ingredients, mixing methods, baking tips, and storage options. Each step helps you create a tasty treat while staying low-carb. Experimenting with flavors and adjustments makes it fun! Remember, quality ingredients lead to better brownies. Enjoy trying these tips while you bake. Eating well can be easy and enjoyable. Savor the rewards of your hard work and share the brownies with friends!

Are you ready to indulge in a tasty treat without the guilt? This Keto Zucchini Brownie Recipe combines rich chocolate flavor with healthy zucchini for an amazing dessert. You won’t …

Read more

Categories Desserts Tags NO-ING-IMG
Older posts
Newer posts
← Previous Page1 … Page67 Page68 Page69 … Page73 Next →

TASTED NEST

Where Flavor Finds a Home 🍳🏡 — warm, simple, and crave-worthy recipes made for real life, from stovetop mornings to backyard dinners.

PAGES

Home About Contact Privacy Policy Terms & Conditions Cookie Policy GDPR Policy Copyright Policy Disclaimer

CATEGORIES

Appetizers Desserts Salads Breakfast Dinner
Copyright © 2026 Tasted Nest. All rights reserved.