Neapolitan Ice Cream Sandwich Cake Tasty Delight
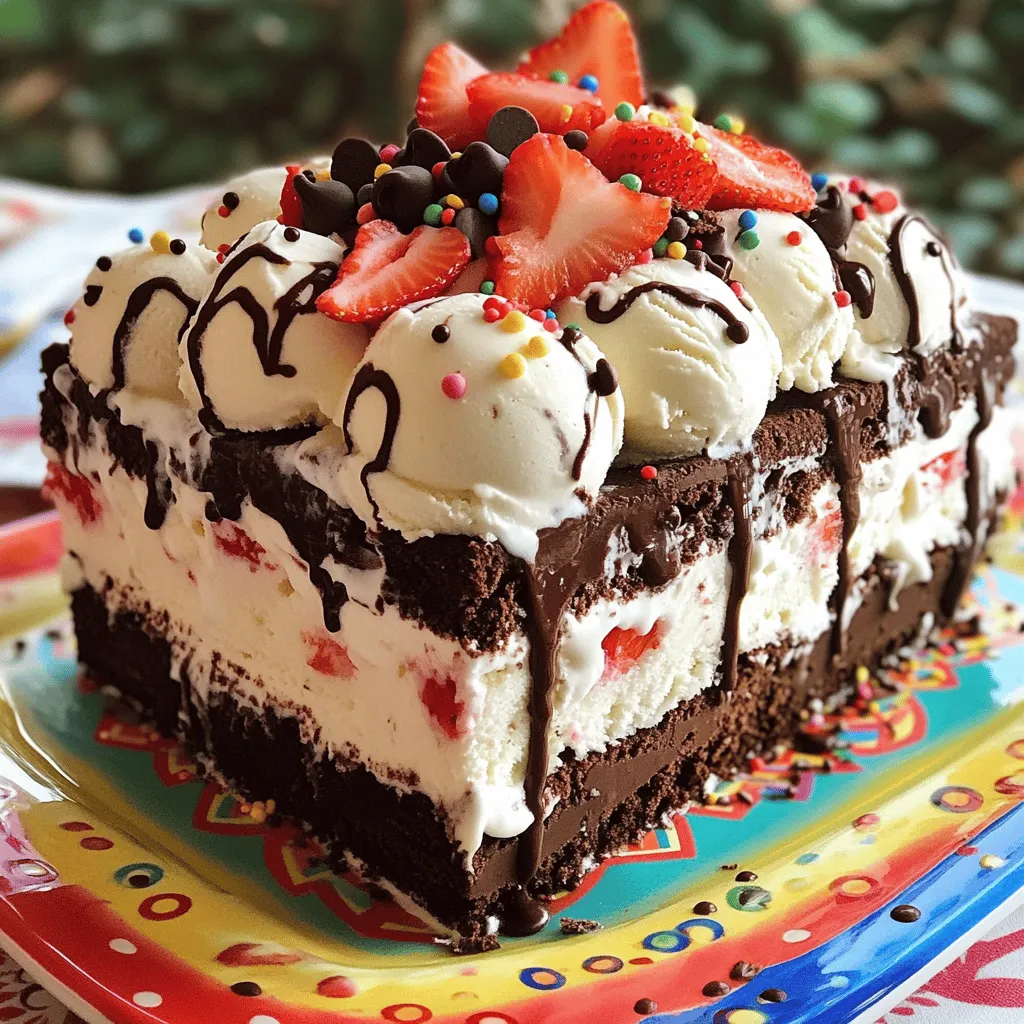
Prepare to indulge in an amazing treat that everyone will love: Neapolitan Ice Cream Sandwich Cake! This fun dessert blends classic ice cream flavors with the ease of sandwiching goodies …
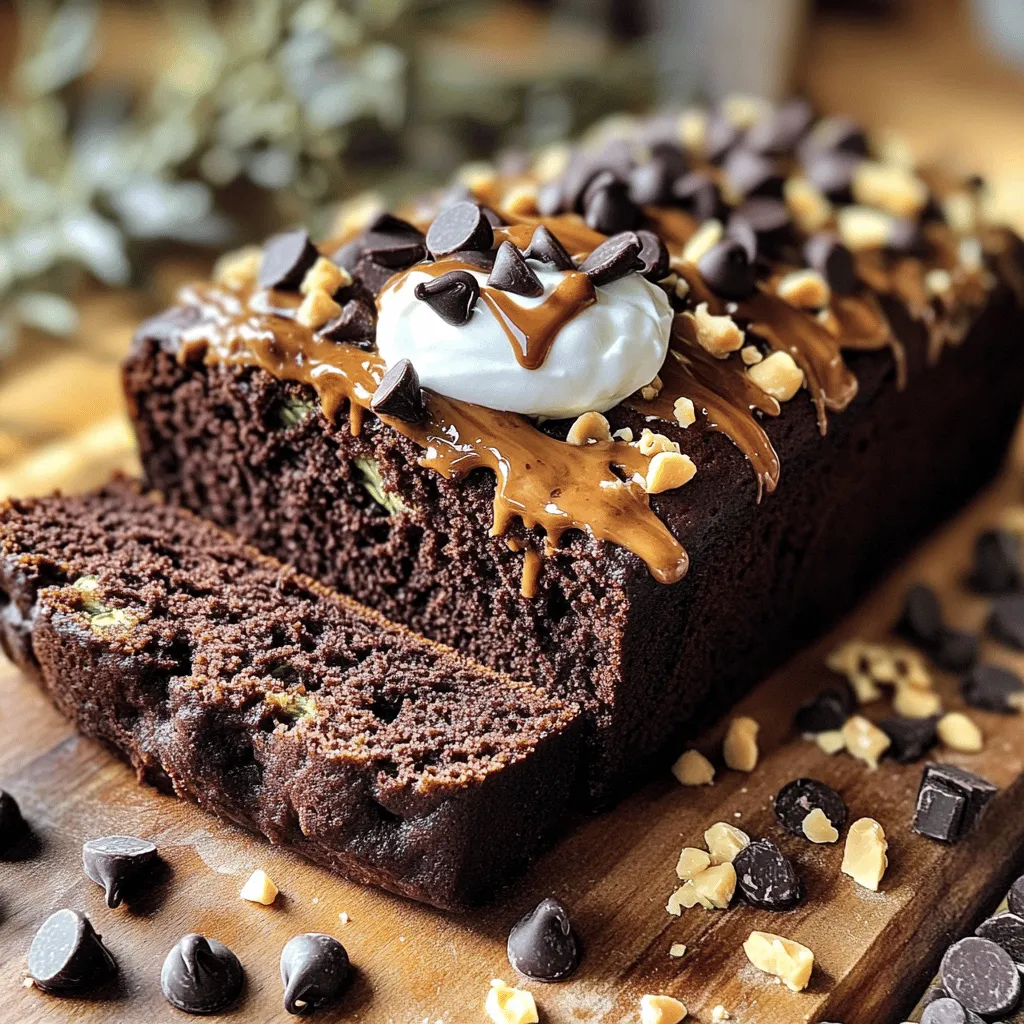
![- Zucchini and Chocolate Proportions - 1 medium zucchini (about 1 cup grated) - 1/2 cup dark chocolate chips (semisweet or bittersweet) - Essential Baking Ingredients - 3/4 cup all-purpose flour - 1/2 cup unsweetened cocoa powder - 1 teaspoon baking soda - 1/2 teaspoon baking powder - 1/4 teaspoon salt - 1/2 cup granulated sugar - 1/4 cup packed brown sugar - 1/2 cup vegetable oil - 2 large eggs - 1 teaspoon pure vanilla extract - Optional Ingredients for Decoration - Powdered sugar for dusting Each ingredient plays a key role in making the cake delightful and moist. The zucchini adds moisture without changing the taste. Dark chocolate chips bring rich flavor and texture. The mix of sugars ensures a sweet balance, while eggs and oil create a soft crumb. This combination works wonders! For the full details of the recipe, check out the [Full Recipe]. - Prepping the Zucchini Start by washing your zucchini. A medium zucchini gives about one cup when grated. Use a box grater or a food processor for this. Once grated, place it in a clean kitchen towel. Gently press to remove some moisture. This step is key to keep your cake moist. - Mixing the Dry Ingredients In a medium bowl, whisk together the all-purpose flour, cocoa powder, baking soda, baking powder, and salt. Mix until these dry ingredients are evenly combined. This helps with the cake's rise and flavor. Set this bowl aside for now. - Combining Wet Ingredients Grab a large mixing bowl. Combine the granulated sugar, brown sugar, and vegetable oil. You can use a hand mixer or whisk to blend this mixture until it is smooth and creamy. This takes about two minutes. Next, add the eggs one at a time, mixing well after each. Stir in the pure vanilla extract, which adds great flavor. - Pouring and Smoothing the Batter Gradually add your dry mix to the wet mix, stirring gently. Be careful not to overmix. Overmixing can make the cake dense. Once combined, fold in the grated zucchini and dark chocolate chips. This creates a rich batter. Pour this luscious batter into your prepared cake pan. Use a spatula to smooth the top. - Baking Time and Temperature Preheat your oven to 350°F (175°C). Bake the cake for 30 to 35 minutes. It’s done when a toothpick inserted in the center comes out clean or with a few moist crumbs. This timing may vary slightly based on your oven. - Cooling Method Once baked, let the cake cool in the pan for about 10 minutes. After that, gently transfer it to a wire rack. Letting it cool completely helps keep the cake moist. When cool, you can dust it with powdered sugar if you like. Now, it’s ready to slice and serve. Enjoy your delightful dark chocolate zucchini cake! For the full recipe, check out the recipe section above. - Ensuring a Moist Cake To keep your cake moist, use fresh zucchini. Grate it finely and squeeze out excess water. This step adds moisture without making the cake soggy. - Importance of Mixing Techniques Be gentle when mixing the batter. Overmixing can lead to a tough cake. Stir just until you see no flour. Fold in the zucchini and chocolate chips carefully for a light texture. - Checking for Doneness To check if the cake is done, insert a toothpick into the center. If it comes out clean or with a few moist crumbs, your cake is ready. Avoid opening the oven too soon; this can cause the cake to sink. - Presentation Ideas For a beautiful presentation, serve slices on colorful plates. A sprinkle of powdered sugar adds a nice touch. Fresh mint leaves can brighten the plate and enhance the look. - Pairing Options Dark chocolate zucchini cake pairs well with whipped cream or vanilla ice cream. Both add a creamy contrast to the rich chocolate. A scoop of ice cream can make each bite feel special. - Ideal Serving Temperature Serve the cake at room temperature for the best flavor. This allows the chocolate to shine. If you prefer it warm, a quick 10-second zap in the microwave works wonders. {{image_4}} - Alternative Sweeteners: You can swap sugar for honey, maple syrup, or stevia. Each sweetener will change the taste slightly, but they all work well. Just remember to adjust liquid ingredients if needed. - Gluten-Free Options: To make this cake gluten-free, use a gluten-free flour blend. You can also try almond flour or coconut flour. Each option gives the cake a unique texture. - Adding Nuts or Other Mix-Ins: Chopped walnuts or pecans add a nice crunch. You can also try adding dried fruit like raisins or cherries for a sweet twist. Mix in about half a cup for extra flavor. - Vanilla or Coffee Enhancements: Add a teaspoon of instant coffee or espresso powder to deepen the chocolate flavor. Vanilla extract also adds warmth. Try both for a rich, complex taste. - Spices to Consider: Cinnamon or nutmeg can add warmth and depth. Sprinkle in about a teaspoon of either spice to the dry ingredients. This small change makes a big difference in flavor. - Frosting or Glaze Ideas: For a simple finish, top the cake with a chocolate ganache. Melt dark chocolate with cream for a rich glaze. For something lighter, a cream cheese frosting pairs well with chocolate. Dust with powdered sugar for a classic touch. Explore these variations to make your dark chocolate zucchini cake your own! For the full recipe, check the complete steps above. You can store the dark chocolate zucchini cake in two main ways: at room temperature or in the fridge. If you keep it at room temperature, place it in an airtight container. This keeps it fresh and moist for up to three days. However, if you live in a warm area or it is very humid, refrigeration is a better option. Just remember, it may lose some of its moist texture when chilled. When wrapping the cake, use plastic wrap or aluminum foil. Make sure to cover it tightly. This helps keep the cake from drying out or absorbing any fridge odors. If you have leftover slices, try to wrap them individually. This way, you can grab a piece whenever you want! If you want to enjoy this cake later, freezing is a great option. To freeze the cake properly, let it cool completely first. Then, wrap it tightly in plastic wrap. After that, place it in a freezer-safe bag or container. This can keep the cake fresh for up to three months. To thaw the cake, take it out of the freezer and leave it in the fridge overnight. If you’re in a hurry, you can also leave it at room temperature for a few hours. Once thawed, you can enjoy it as is or add a dusting of powdered sugar for a lovely touch. For the full recipe, check out the details above! Can I use other types of chocolate? Yes, you can use other types of chocolate. Milk chocolate works well if you prefer a sweeter taste. You can also try white chocolate for a different flavor. Adjust the sugar if you choose a sweeter chocolate. How does zucchini affect the texture? Zucchini keeps the cake moist and soft. When grated, it blends well into the batter. This veggie adds moisture without changing the taste. You can enjoy a rich chocolate flavor with a light texture. Can I make this cake a day in advance? Absolutely! Making the cake a day before can enhance its flavor. Store it in an airtight container at room temperature. This allows the flavors to meld, making each bite even tastier. Calories and Nutritional Benefits This cake has about 220 calories per slice. It provides some fiber and vitamins from the zucchini. Dark chocolate adds antioxidants that are good for your heart. Healthier Ingredient Options You can use whole wheat flour instead of all-purpose flour. This will increase the fiber content. You may also substitute applesauce for some oil to cut calories. Dietary Restrictions Considerations This cake can be made gluten-free by using a gluten-free flour blend. Use dairy-free chocolate chips for a vegan option. Always check labels for allergens in your ingredients. Where to find more recipes? Check out food blogs or cooking sites for more creative ideas. Many platforms offer user-generated recipes that are fun to explore. You can also join cooking groups on social media for inspiration. Best types of chocolate for baking? Semi-sweet or bittersweet chocolate is best for baking. These chocolates have a balanced flavor that works well in desserts. You can also use dark chocolate for a richer taste. How to incorporate more vegetables in desserts? Try adding carrots or sweet potatoes to cakes. You can also use beets in brownies for added moisture. Experiment with pureed fruits for sweetness in pies and muffins. For a complete guide on how to make this delicious cake, check the Full Recipe. In this article, we explored the delightful world of zucchini chocolate cake. You learned about the key ingredients, from zucchini to optional decorations, and the step-by-step preparation. We shared tips for moisture and doneness, plus variations to fit your taste. Proper storage methods ensure your cake stays fresh. Now you can enjoy a delicious dessert packed with nutrients. Experiment with flavors and enjoy every bite of this unique treat. Happy baking!](https://tastednest.com/wp-content/uploads/2025/07/2991e535-b6e5-4451-8d1f-ff4b21b07816.webp)
![To make these delightful bars, gather the following main ingredients: - 1 cup finely grated zucchini (about 1 medium-sized zucchini, excess moisture squeezed out) - 1/2 cup unsweetened applesauce - 1/2 cup packed brown sugar - 1/4 cup granulated sugar - 1/3 cup vegetable oil - 1 teaspoon pure vanilla extract - 1 cup all-purpose flour - 1/2 cup unsweetened cocoa powder - 1/2 teaspoon baking soda - 1/2 teaspoon baking powder - 1/4 teaspoon sea salt - 1 cup semi-sweet chocolate chips These ingredients create a rich and moist base for the bars. The zucchini adds moisture without a strong taste. You won't even know it's there! If you want to add some crunch, consider these options: - 1/2 cup chopped walnuts - 1/2 cup chocolate chunks - 1/2 cup shredded coconut These add-ins can enhance the texture and flavor. They also make the bars more fun to eat! You can easily swap out some ingredients if needed. For applesauce, use: - 1/2 cup mashed bananas - 1/2 cup plain yogurt If you want a gluten-free option, substitute the all-purpose flour with: - 1 cup gluten-free flour blend These substitutions keep the bars delicious. You can still enjoy the rich chocolate flavor! For the full recipe, check out the complete steps to prepare these decadent double chocolate zucchini bars. First, preheat your oven to 350°F (175°C). Take an 8x8 inch baking dish and lightly grease it with cooking spray. You can also line it with parchment paper for easy removal later. This step makes it easier to serve your bars without sticking. In a large bowl, add the finely grated zucchini. Make sure to squeeze out extra moisture first. Then, mix in the unsweetened applesauce, brown sugar, granulated sugar, vegetable oil, and vanilla extract. Use a whisk or spatula to blend until smooth. In a separate bowl, sift the flour, cocoa powder, baking soda, baking powder, and sea salt. This helps combine the dry ingredients evenly. Gradually add this mix to the wet ingredients. Stir gently until just combined. A few lumps are okay; don’t overmix. Next, fold in the semi-sweet chocolate chips and chopped walnuts if you want that extra crunch. This adds great texture to your bars. Now, pour the rich batter into your prepared baking dish. Use a spatula to spread it evenly across the dish. Bake in your preheated oven for about 25-30 minutes. To check if they are done, insert a toothpick in the center. It should come out clean or with a few moist crumbs. If you see wet batter, bake a bit longer. Once baked, take the dish out of the oven. Allow the bars to cool in the pan for about 10 minutes. After that, carefully transfer them to a wire rack to cool completely. This step is key for proper texture. When the bars are completely cool, use a sharp knife to cut them into squares. For a fun touch, serve them with a glass of milk or a cup of coffee. You can also dust the cooled bars with powdered sugar for an elegant finish. Want to impress? Arrange the bars on a vibrant plate and sprinkle some extra chocolate chips on top. Enjoy your decadent double chocolate zucchini bars! For the complete recipe, check the [Full Recipe]. To get the best texture in your bars, start with fresh zucchini. Grate it finely and squeeze out extra moisture. This step ensures the bars stay moist without being soggy. Mix the wet and dry ingredients just until blended. Overmixing can create tough bars. Use semi-sweet chocolate chips for a rich taste. If you want more crunch, add chopped walnuts. They add a nice texture contrast. Store your bars in an airtight container. Place a piece of parchment paper between layers to avoid sticking. This keeps them fresh and soft. You can keep them at room temperature for up to four days. For longer storage, place them in the fridge. They can last up to a week when chilled. If you want to keep them longer, freeze them for up to three months. Just wrap each bar in plastic wrap before freezing. To boost the flavor, try adding a pinch of cinnamon or a splash of espresso. These will deepen the chocolate taste. For a beautiful presentation, dust the cooled bars with powdered sugar. Arrange them on a colorful plate to make them pop. You can even sprinkle extra chocolate chips on top for an added touch. This not only looks good but also adds to that decadent chocolate experience. For the full recipe, check out the detailed instructions above. {{image_4}} You can easily make these bars gluten-free. Start by using a gluten-free all-purpose flour blend. Many brands offer blends that work well in baking. Look for one that includes xanthan gum. This helps mimic the texture of regular flour. You can also try almond flour for a nutty flavor. Just remember, it can be denser, so adjust the liquid slightly. If you want to make these bars vegan, swap out a few ingredients. Replace the eggs with flaxseed meal. Mix one tablespoon of flaxseed meal with three tablespoons of water. Let it sit for five minutes to thicken. For the applesauce, ensure it is unsweetened to keep the bars moist. Use plant-based chocolate chips instead of semi-sweet ones. This keeps the bars rich and chocolatey without dairy. You can boost the flavor of your bars with some simple additions. Consider adding spices like cinnamon or nutmeg for warmth. A teaspoon of espresso powder can enhance the chocolate flavor too. If you enjoy citrus, add a bit of orange zest for a fresh twist. You can also try different extracts, like almond or peppermint, to give a unique taste. Experiment with these ideas to create your perfect treat. For the complete recipe, check the full recipe link. To keep your decadent double chocolate zucchini bars fresh, store them in an airtight container. This method keeps moisture in and helps the bars stay soft. Place parchment paper between layers to avoid sticking. If you leave them at room temperature, they last about 3 days. For longer freshness, refrigerate them for up to a week. You can freeze these bars for later treats. First, let them cool completely. Then, cut them into squares. Wrap each square in plastic wrap and place them in a freezer-safe bag or container. Be sure to label it with the date. They will maintain their quality for up to 3 months in the freezer. When you are ready to enjoy, thaw them in the fridge or on the counter. These bars taste best within the first few days. If stored properly, you can enjoy them for up to a week in the fridge. Watch for signs of spoilage, like an off smell or mold. If you see any, it’s best to discard them. For the best texture, eat them at room temperature or warm them slightly in the microwave. Enjoy your delicious bars with your favorite drink! For the full recipe, check out the earlier sections. Yes, you can freeze these bars. First, let them cool completely. Then, wrap them tightly in plastic wrap. Place the wrapped bars in a freezer-safe bag. They can stay fresh for up to three months. When you’re ready to enjoy them, just thaw them in the fridge overnight. You can make simple swaps to improve the health of these bars. Try using whole wheat flour instead of all-purpose flour. You can also reduce the sugar by using stevia or a similar sweetener. Adding nuts boosts protein and healthy fats. Using dark chocolate chips can add more nutrients too. Yes, you can! Carrots are a great option. Grate them finely, just like the zucchini. You could also use apples or even sweet potatoes, but keep in mind the flavor will change. Each of these will add their own unique taste and moisture. To check if the bars are done, insert a toothpick into the center. If it comes out clean or with a few crumbs, they are ready. If the toothpick has wet batter on it, bake for another few minutes. Always remember to check early to avoid overbaking. Decadent double chocolate zucchini bars are a delightful treat. I covered the main ingredients, and optional add-ins, and even suggested substitutes. I also provided clear preparation steps and baking tips for success. You can explore variations for gluten-free or vegan options, along with ways to store and freeze. These bars offer great flavor and texture. With this guide, you can easily make and enjoy them. You can feel confident in creating a tasty dessert that everyone will love.](https://tastednest.com/wp-content/uploads/2025/07/c6aed100-5e0e-4f5e-bab5-35f60bee4a9e.webp)

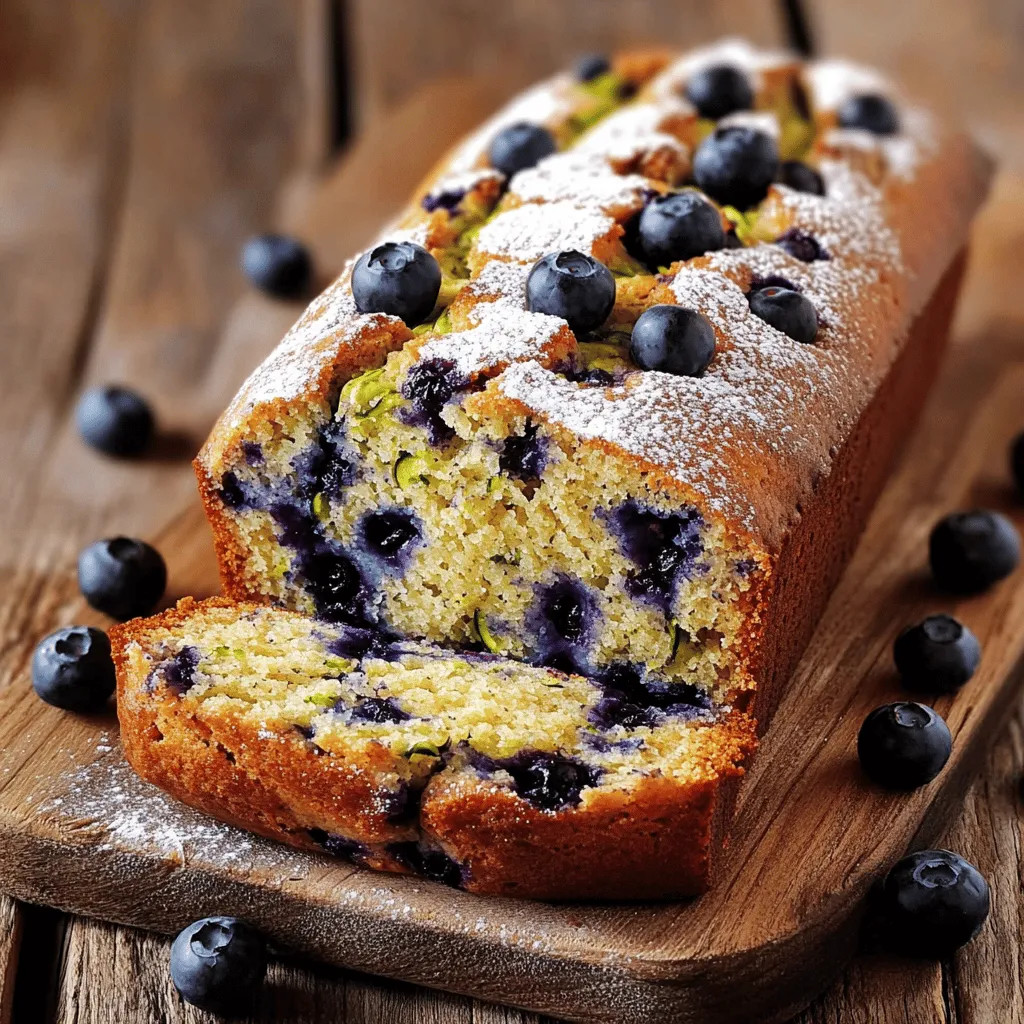
![- 1 cup finely grated zucchini (from about 1 medium zucchini, with excess moisture removed) - 1 cup all-purpose flour - 1/2 cup unsweetened cocoa powder - 1/2 cup granulated sugar - 1/2 cup packed brown sugar - 1/2 teaspoon baking soda - 1/2 teaspoon baking powder - 1/4 teaspoon salt - 1/2 cup vegetable oil or melted coconut oil - 2 large eggs - 1 teaspoon vanilla extract - 1/2 cup semi-sweet chocolate chips (plus additional for topping) Selecting fresh zucchini is key. Look for small to medium-sized zucchinis. They should feel firm and have shiny skin. Avoid any with soft spots or blemishes. When you grate your zucchini, make sure to squeeze out excess moisture. This keeps your muffins from getting soggy. If you need substitutions, you can replace all-purpose flour with whole wheat flour. For a lower sugar option, try using coconut sugar or a sugar substitute. You can also swap vegetable oil with applesauce for a lighter version. These swaps still deliver that rich chocolate flavor and moist texture. Check out the Full Recipe for more details on making these tasty treats! 1. Preheating the oven and preparing the muffin tin Start by preheating your oven to 350°F (175°C). This is key for even baking. Next, grab a muffin tin. Line it with paper liners or lightly grease each cup with cooking spray. This helps the muffins come out easily. 2. Mixing dry ingredients In a big bowl, sift together the all-purpose flour, unsweetened cocoa powder, granulated sugar, brown sugar, baking soda, baking powder, and salt. Use a whisk to mix them well. This step ensures your muffins are fluffy and free of lumps. 3. Combining wet ingredients Take a separate bowl. Crack the two large eggs inside and beat them lightly. Then, add the vegetable oil and vanilla extract. Whisk this mixture until it looks smooth and even. This blend adds moisture and flavor. 4. Incorporating zucchini and chocolate chips Gradually pour the wet mixture into the dry ingredients. Gently stir until the batter is just combined. Be cautious not to over-mix; this keeps the muffins light. Now, fold in the finely grated zucchini and chocolate chips. Mix them until they’re spread out evenly. These steps will help you create delightful, moist double chocolate zucchini muffins that everyone will enjoy! For the complete recipe, check out the Full Recipe section. To make sure your muffins stay moist, squeeze the zucchini to remove excess liquid. This step keeps the muffins soft and tender. Avoid over-mixing when you combine the wet and dry ingredients. Stir gently until just combined; lumps are okay. Over-mixing can make the muffins tough. For perfect baking time, set your timer for 18-20 minutes. Check doneness by inserting a toothpick into the center. If it comes out with a few moist crumbs, your muffins are ready. After your muffins cool, dust them lightly with powdered sugar. This adds a nice touch. Serve them alongside fresh berries for a pop of color and flavor. For storage, place muffins in an airtight container at room temperature. They stay fresh for about three days. If you want to save them for longer, freeze them. Just wrap each muffin well in plastic wrap. When you're ready to eat, reheat them in the microwave or oven to restore their moist texture. {{image_4}} You can tweak the ingredients in many ways. - Using whole wheat flour: This adds fiber and a nutty flavor. Replace all-purpose flour with whole wheat flour in a 1:1 ratio. The muffins will still be soft and delicious. - Alternative sweeteners: If you want to cut down on sugar, use maple syrup or honey. You can also try stevia or monk fruit. Just remember to adjust the liquid in your recipe. - Adding nuts or different types of chocolate: For a crunchy texture, add chopped nuts like walnuts or pecans. You can also mix in dark chocolate chips or white chocolate for a fun twist. You can make these muffins fit many diets. - Gluten-free options: To make this recipe gluten-free, substitute the all-purpose flour with a gluten-free blend. This works well for muffins and keeps them fluffy. - Vegan modifications: Replace the eggs with flax eggs or applesauce. Use plant-based oil and dairy-free chocolate chips for a vegan treat. - Low-sugar adaptations: Use less sugar or try unsweetened applesauce. This will keep your muffins sweet without too many calories. These variations make double chocolate zucchini muffins fun and adaptable. You can create a treat that fits your taste or diet! Check out the Full Recipe for more details. To keep your double chocolate zucchini muffins fresh, use a tight container. A plastic or glass container works well. You can also wrap them in plastic wrap. This helps keep out air and moisture. Store them at room temperature for up to three days. If you want to keep them longer, consider freezing them. To freeze muffins, let them cool completely first. Then, wrap each muffin in plastic wrap. Place them in a freezer-safe bag or container. They can last up to three months in the freezer. When ready to eat, just thaw them overnight in the fridge or at room temperature. You can reheat muffins in two simple ways: the microwave or oven. - Microwave: Put a muffin on a plate. Heat it for about 15-20 seconds. Check if it is warm enough. If not, heat it in short bursts. - Oven: Preheat your oven to 350°F (175°C). Wrap the muffin in foil to keep it moist. Heat for about 10-15 minutes. This method keeps the muffin soft and warm. Both methods work well, but the oven keeps them fresher. Enjoy your tasty muffins warm and moist! For the full recipe, check out the link provided. Can I use frozen zucchini? Yes, you can use frozen zucchini. Just thaw it first and squeeze out extra moisture. This helps keep your muffins light and fluffy. How can I tell when the muffins are done? Check them at 18 minutes. Insert a toothpick in the center. If it comes out clean or with a few crumbs, your muffins are done. What can I serve with double chocolate zucchini muffins? These muffins pair well with fresh fruit or a scoop of yogurt. You can also enjoy them with a cup of coffee or tea. Can I make these muffins ahead of time? Yes, you can! Make them a day before and store them in an airtight container. They taste great the next day. What are the nutritional benefits of zucchini in baking? Zucchini adds moisture without many calories. It's rich in vitamins A and C. It also provides fiber, which is good for digestion. How to make double chocolate zucchini muffins? To make these muffins, follow the [Full Recipe]. Mix your dry ingredients first, then add wet ones. Fold in zucchini and chocolate chips for the best results. What is the best way to incorporate zucchini into baked goods? Grate the zucchini finely and remove excess moisture. This helps it blend well without altering the texture of your baked goods. Are these muffins kid-friendly? Yes, kids love these muffins! They taste like a treat but have hidden veggies. It's a sneaky way to get them to eat more vegetables. In this blog post, we explored how to make double chocolate zucchini muffins. You learned about selecting fresh zucchini and the right ingredients. I shared step-by-step instructions for mixing and baking. Tips for moist muffins and presentation enhance your baking experience. Variations allow for dietary needs, while storage info ensures freshness. Remember, these muffins are not just tasty; they can fit many diets. Enjoy baking and share your creations!](https://tastednest.com/wp-content/uploads/2025/07/d69d4ef4-695e-41f1-aeff-ae346766d3cd.webp)