Earl Grey Blueberry Cake Delightful and Easy Recipe
. This cake combines the unique taste of Earl Grey tea with fresh blueberries. It's simple and perfect for any occasion. Enjoy making this delightful treat! Baking an Earl Grey Blueberry Cake is a fun project. You learned about ingredients, substitutions, and garnishes. We covered steps for mixing and baking, plus tips for a perfect texture. Variations allow you to create your own twist. Storing leftovers and reheating tips ensure you enjoy it longer. Remember, baking is about playing with flavors and techniques. Have fun and make this cake your own!](https://tastednest.com/wp-content/uploads/2025/07/63018e3f-5b8f-40d0-bee7-7f0d971ba92c.webp)
Are you ready to delight your taste buds with a unique twist on a classic cake? This Earl Grey Blueberry Cake blends the fragrant notes of tea with sweet blueberries …
Are you ready to delight your taste buds with a unique twist on a classic cake? This Earl Grey Blueberry Cake blends the fragrant notes of tea with sweet blueberries …
![The best strawberry feta salad needs fresh, vibrant ingredients. Here’s what you'll use: - 4 cups mixed greens (spinach, arugula, or spring mix) - 1 cup fresh strawberries (hulled and sliced) - 1/2 cup crumbled feta cheese (aged is best for flavor) - 1/4 cup sliced almonds (lightly toasted) - 1/4 small red onion (thinly sliced) - 1/4 cup balsamic glaze (store-bought or homemade) - 2 tablespoons extra virgin olive oil - Sea salt and black pepper (to taste) - Fresh mint leaves (optional for garnish) These ingredients create a colorful, tasty salad. The mixed greens provide crunch and nutrients. The strawberries add natural sweetness. Feta cheese brings creaminess and a salty kick. Almonds offer a nice crunch, and red onion gives a mild bite. You can customize your salad with these fun extras: - Avocado slices for creaminess - Grilled chicken or shrimp for protein - Blueberries or raspberries for mixed berry goodness - Cucumber slices for a refreshing crunch These additions can change the flavor and texture. Feel free to experiment based on what you like! While the balsamic glaze is delicious, you can try these dressings too: - Lemon vinaigrette for a zesty touch - Honey mustard for sweetness - Poppy seed dressing for a nutty twist Switching up the dressing can keep your salad exciting. Each option brings its unique flair. You can find the full recipe in the "Full Recipe" section. Enjoy making your salad! Start by gathering your main ingredients. You need mixed greens, fresh strawberries, feta cheese, sliced almonds, and red onion. Begin by washing the greens under cold water. Dry them gently with a clean towel or a salad spinner. Next, hull the strawberries and slice them into thin rounds. The thin slices will blend well with the greens. In a large salad bowl, add the mixed greens, sliced strawberries, and red onion. This colorful mix forms the base of your salad. The greens provide crunch, while the strawberries add sweetness and juiciness. For the dressing, you will need balsamic glaze and olive oil. Pour the balsamic glaze into a small bowl. Add the extra virgin olive oil. Whisk these together until they mix well. This creates a rich, flavorful dressing that enhances the salad. You can adjust the amounts to suit your taste. If you like it sweeter, add more glaze. For a lighter touch, increase the olive oil. Once your base ingredients and dressing are ready, it’s time to combine them. Drizzle the balsamic dressing evenly over the salad mix. Gently toss the salad with your hands or a large spoon. This helps coat every piece without crushing the strawberries. Season the salad with sea salt and freshly cracked black pepper to your liking. Let the salad sit for about five minutes. This resting time allows the flavors to meld beautifully. Just before serving, add the crumbled feta cheese and toasted almonds on top. These add creaminess and crunch. If you want, garnish with fresh mint leaves for a refreshing finish. You can find the full recipe for this delightful Strawberry Feta Salad at [Full Recipe]. To make your strawberry feta salad pop, use ripe strawberries. Their sweetness adds joy to each bite. Crumbled feta cheese should be aged. This gives a sharp taste that mixes well with the berries. Add a pinch of sea salt to boost flavors. Toasted almonds provide a nice crunch and a nutty flavor. Lastly, fresh mint leaves can brighten the dish. They add a refreshing twist that complements the strawberries. Serve your salad in a large, shallow bowl. This allows the colors to shine. Layer the greens first, then add the strawberries and onion. Sprinkle the feta and almonds on top for a beautiful look. For extra flair, place whole strawberries and mint sprigs on the salad. A drizzle of balsamic glaze over the top makes it inviting and delicious. Make your salad right before serving. This keeps the greens crisp and bright. If you need to prepare ahead, store the dressing separately. Add it just before serving for the best taste. Allow the salad to rest for about five minutes before serving. This lets the flavors blend nicely, enhancing the overall experience. For the full recipe, check out The Ultimate Strawberry Feta Salad. {{image_4}} You can mix and match greens in this salad. Try baby spinach, arugula, or even kale. Each green brings a unique flavor and texture. For fruits, other berries like blueberries or raspberries work well. You might also add diced apples or peaches for a sweet twist. Experimenting with different greens and fruits lets you create your perfect mix. To turn this strawberry feta salad into a meal, add some protein. Grilled chicken or shrimp pairs nicely with the salad. You can also use chickpeas or black beans for a plant-based option. Adding nuts like walnuts or pecans boosts the protein too. These additions make the salad filling and satisfying. If you want a vegan version, skip the feta cheese. Instead, use avocado for creaminess. You can also add nutritional yeast for a cheesy flavor. For dressing, use a simple mix of olive oil and vinegar. This keeps the salad fresh and tasty while fitting a vegan diet. Enjoy the same great flavors without dairy! To keep your strawberry feta salad fresh, store it in an airtight container. This will prevent moisture loss and keep the salad crisp. Avoid dressing the salad until you're ready to eat. Dressing can make greens soggy and limp. Store mixed greens in a damp paper towel inside a plastic bag. This method helps maintain their crispness. For strawberries, keep them in the fridge but do not wash them until you're ready to use them. This keeps them from getting mushy. Feta cheese should stay in its brine or in a sealed container to prevent it from drying out. You can enjoy your salad leftovers for up to two days. However, the taste and texture will be best within the first day. After that, the greens may wilt, and the strawberries may lose their firmness. Always check for freshness before eating! Yes, you can use frozen strawberries. However, fresh strawberries provide the best taste and texture. If you choose frozen, thaw them first. Drain excess water to keep the salad crisp. If you need a feta substitute, try goat cheese or ricotta. These cheeses add creaminess. You can also use a dairy-free cheese for a vegan option. Adjust the amount to your taste. To prep ahead, wash and slice the strawberries and onions. Store them in separate containers. Keep the dressing in a jar. Combine everything just before serving to keep it fresh and crunchy. For the full recipe, check [Full Recipe]. You learned about key ingredients, steps, and tips to make a great salad. Remember, fresh ingredients and the right dressing can boost flavor. Try different greens, fruits, and proteins for variety. Proper storage keeps your salad fresh longer. Use what you learned to create your own unique versions. Enjoy making delicious salads and sharing them with friends and family!](https://tastednest.com/wp-content/uploads/2025/07/2207ac8e-d73a-40e3-98a1-52a39c3a0c4f.webp)
Looking for a fresh and vibrant dish that impresses? You’ll love my Best Strawberry Feta Salad! This salad is packed with sweet strawberries, creamy feta, and a tangy dressing. Whether …
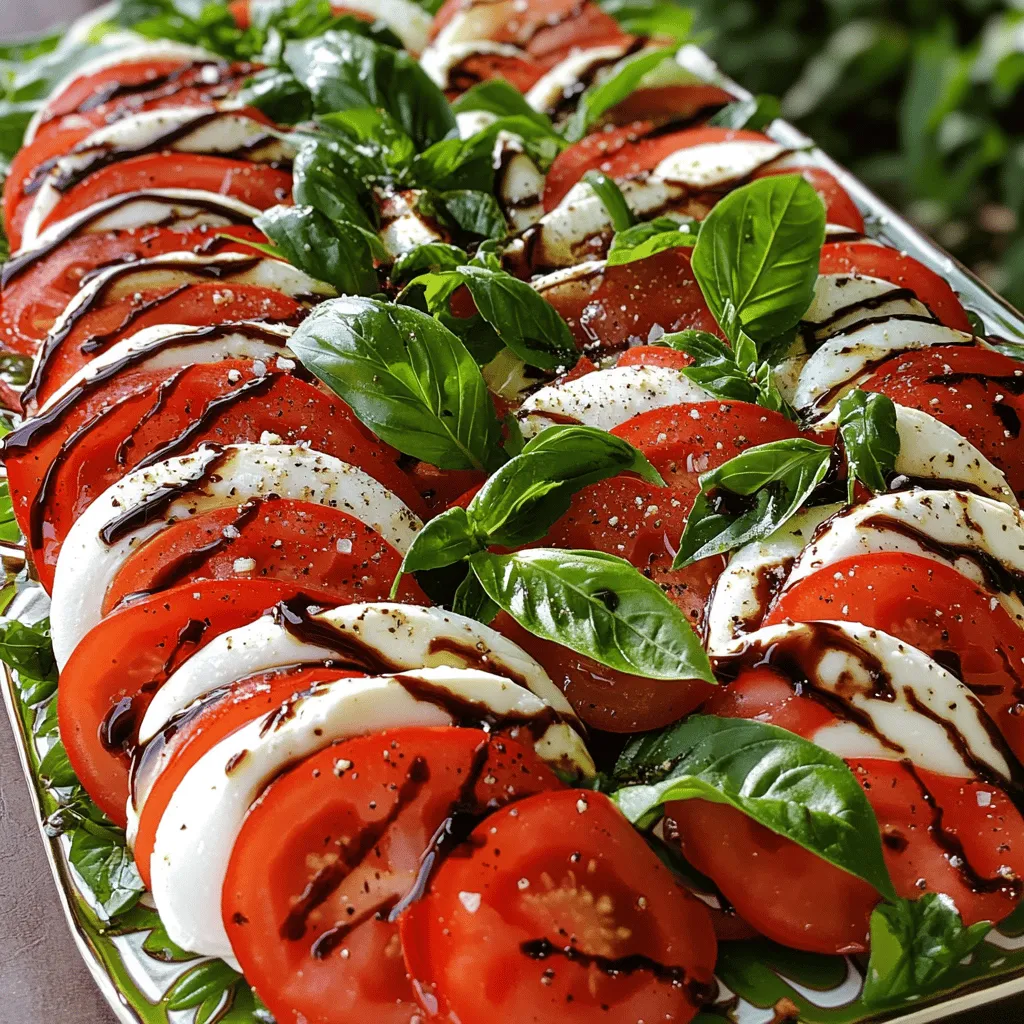
If you want a fresh and simple dish, try Caprese salad with balsamic glaze. This classic Italian salad bursts with flavor from ripe tomatoes, creamy mozzarella, and fragrant basil. I’ll …
![- 1 cup finely grated zucchini - 1/2 cup unsweetened cocoa powder - 1 cup all-purpose flour These main ingredients form the base of your brownies. The zucchini adds moisture and nutrients. Cocoa powder gives that rich chocolate flavor. All-purpose flour binds everything together, creating a delicious texture. - 1/2 cup granulated sugar - 1/2 cup packed brown sugar - 1/2 cup vegetable oil (or melted coconut oil) For sweetness, we use both granulated and brown sugars. The granulated sugar gives a sweet lift. Brown sugar adds depth and a hint of caramel. The oil keeps the brownies moist. You can use vegetable oil or coconut oil for a richer taste. - 2 large eggs, at room temperature - 1 teaspoon pure vanilla extract - Optional: 1/4 cup chopped walnuts or pecans The eggs help bind everything and add structure. They also create a nice rise. Pure vanilla extract enhances the chocolate flavor. If you like crunch, add walnuts or pecans for texture. For the full recipe, check out the detailed instructions above. Enjoy your baking! - Preheat your oven to 350°F (175°C) and prepare a baking pan. - In a medium bowl, combine 1 cup of finely grated zucchini, 1/2 cup of vegetable oil, 1/2 cup of granulated sugar, 1/2 cup of packed brown sugar, 2 large eggs, and 1 teaspoon of pure vanilla extract. Whisk until smooth. - In another large bowl, sift together 1/2 cup of unsweetened cocoa powder, 1 cup of all-purpose flour, 1/2 teaspoon of baking soda, and 1/4 teaspoon of sea salt. This step helps avoid lumps. - Gently pour the wet ingredients into the dry ingredients. Use a rubber spatula to fold them together. Do this until just combined. Be careful not to overmix; this keeps your brownies nice and fudgy. - Add 1/2 cup of chocolate chips to the batter. If you like nuts, you can also fold in 1/4 cup of chopped walnuts or pecans. - Pour the rich batter into your prepared baking pan. Use a spatula to spread it evenly and smooth the top. - Place the pan in the preheated oven and bake for 25-30 minutes. To check if they are done, insert a toothpick into the center. It should come out with a few moist crumbs but no wet batter. To make your brownies fudgy, avoid overmixing the batter. When you combine the wet and dry ingredients, mix just until you see no dry flour. This keeps your brownies soft and chewy. To check if they are done, use a toothpick. Insert it into the center of the brownies. It should come out with a few moist crumbs but no wet batter. This test helps you bake brownies perfectly every time. Using high-quality cocoa powder is key. It boosts the chocolate taste and makes your brownies rich. Look for brands that are pure and unsweetened. If you want to adjust sweetness, you can play with the sugar levels. You can reduce the granulated sugar slightly if you prefer a less sweet treat. Remember, the chocolate chips add extra sweetness, so balance is important. To make your brownies look even more tempting, dust them with powdered sugar. It adds a nice touch and makes them pretty. You can also serve them with a scoop of ice cream. The cold ice cream pairs well with the warm brownies and creates a delightful contrast. These simple steps make your brownies not only taste good but also look great. Check out the Full Recipe for more details! {{image_4}} You can make these brownies gluten-free! Just swap the all-purpose flour with a gluten-free blend. Many brands offer mixes that work well in baking. Look for one that has a good mix of flours, starches, and xanthan gum. This way, you keep the texture and taste while avoiding gluten. Want to make these brownies vegan? It's simple! Replace the two eggs with flaxseed meal or applesauce. For flaxseed, mix one tablespoon of flaxseed meal with three tablespoons of water. Let it sit for a few minutes until it gets thick. For applesauce, use 1/2 cup. Both options keep the brownies moist and delicious without any eggs. Add fun flavors to your brownies! You can mix in spices like cinnamon or nutmeg. These spices give a warm taste that pairs well with chocolate. Try adding a teaspoon of cinnamon for a sweet twist. You can also experiment with different chocolate chips. Use dark, semi-sweet, or even white chocolate chips. This adds a new layer of flavor and makes each bite exciting. For the complete recipe, see the [Full Recipe]. You can store brownies at room temperature or in the fridge. Keeping them at room temperature works best for a soft, fudgy texture. Place them in an airtight container. If you want to store them longer, put them in the fridge. This will help keep them fresh for up to a week. Just remember to let them come to room temperature before serving. To freeze brownies, first, let them cool completely. Then, cut them into squares. Wrap each square tightly in plastic wrap, then place them in a freezer bag. This method helps to keep them fresh. When you're ready to eat one, take it out and let it thaw in the fridge or at room temperature. You can also reheat them in the microwave for about 10-15 seconds for a warm treat. Brownies stored in an airtight container can last about a week at room temperature. In the fridge, they can stay fresh for up to two weeks. If you freeze them, they can last for up to three months. Just be sure to label your containers. This will help you keep track of their freshness. The taste and texture will remain great if stored properly. For the full recipe, check the Decadent Chocolate Zucchini Brownies section above. Yes, you can use different types of zucchini. You can try yellow squash or even pattypan squash. Each type brings a unique flavor and texture. They all add moisture to the brownies. Just make sure to grate them finely, so they blend well. To check if your brownies are done, use the toothpick test. Insert a toothpick into the center. If it comes out with a few moist crumbs, your brownies are ready. If it comes out wet with batter, they need more time. You should also look for a firm top and slightly pulled edges. One common mistake is overmixing the batter. This can make your brownies tough instead of fudgy. Another mistake is not checking the oven temperature. If it’s too hot, your brownies might burn. Lastly, don’t skip the cooling time. Cutting them too soon can make them fall apart. To cut brownies neatly, use a sharp knife. Dip it in hot water and wipe it dry before cutting. This helps achieve clean edges. Make sure to let the brownies cool completely before cutting. You can cut them into squares or rectangles, depending on your preference. You now have a complete guide to making delicious zucchini brownies. We covered key ingredients, step-by-step instructions, and tips for the best results. With options for gluten-free and vegan brownies, there's a recipe for everyone. Remember to store them properly to keep them fresh. Enjoy experimenting with flavors and presentations to make these brownies your own. Happy baking!](https://tastednest.com/wp-content/uploads/2025/07/4c757f7e-49f7-43c0-a579-361ac5649947.webp)
Indulge your sweet tooth with my Decadent Chocolate Zucchini Brownies! These fudgy treats blend rich chocolate flavor and moist zucchini for an irresistible dessert. You won’t believe how simple they …

Are you ready to discover a dish that warms the heart and delights the senses? In this article, I’ll share my easy and delicious Southern Butter Beans Recipe that’s perfect …

If you’re looking for a warm and comforting dish, let me introduce you to my Creamy Crockpot White Chicken Chili. This delightful chili isn’t just tasty; it’s also simple to …
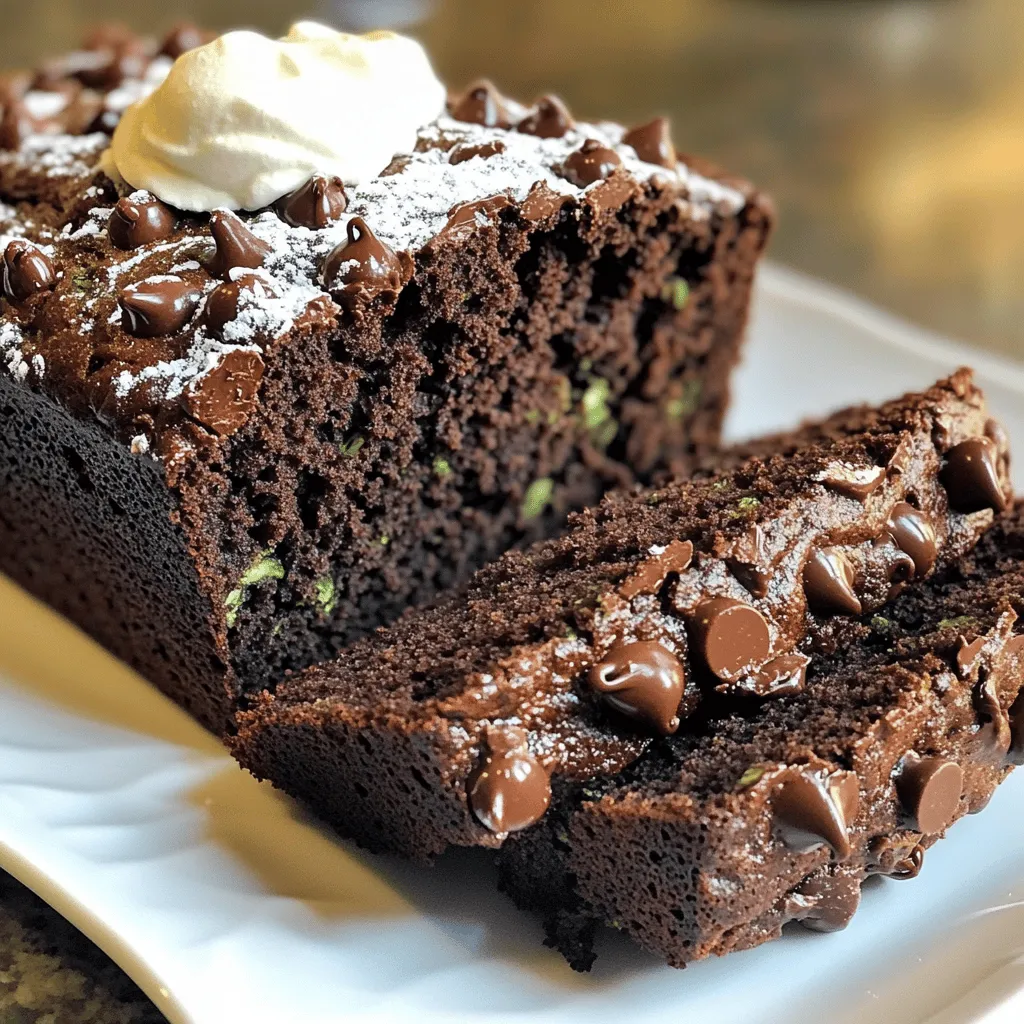
Are you ready to try a treat that combines rich chocolate with hidden veggies? This Classic Chocolate Zucchini Bread is not only tempting but also moist and delightful. Perfect for …
![- 3 lbs beef chuck roast - 4 tablespoons unsalted butter, softened - 4 cloves garlic, finely minced - 1 tablespoon fresh rosemary, finely chopped - 1 tablespoon fresh thyme, finely chopped - 2 cups beef broth - 1 large onion, cut into quarters - 4 medium carrots, cut into 1-inch chunks - 4 medium potatoes, peeled and cut into cubes - 1 tablespoon olive oil - Sea salt and freshly cracked black pepper, to taste - 1 cup heavy cream - 1 tablespoon all-purpose flour (optional, for thickening) How do you properly measure liquids and solids? To measure liquids, use a clear measuring cup. Fill it to the desired line. For solids, use dry measuring cups. Scoop the ingredient, then level it off with a knife for accuracy. Why are fresh herbs important for flavor? Fresh herbs add bright and vivid flavors. They make each bite more aromatic and enjoyable. Dried herbs can work, but they lack the same punch. Always choose fresh when you can. You can find the full recipe for Creamy Garlic-Herb Butter Pot Roast in the detailed instructions above. - Preheat your oven to 325°F (165°C). - Season the beef chuck roast with sea salt and black pepper on all sides. This step adds great flavor. - Sear the roast in a large, heavy pot. Heat olive oil over medium-high heat. Once hot, add the roast. Sear it for about 3-4 minutes on each side until brown. - Next, sauté the onion, carrots, and potatoes in the same pot. Cook them for about 5 minutes. This softens the veggies and brings out their flavors. - Now, let's craft the garlic-herb butter. In a bowl, mix the softened butter, minced garlic, chopped rosemary, and thyme. This fragrant blend adds a rich taste. - Coat the seared roast with the garlic-herb butter. Ensure every side is covered. Place the roast back in the pot with the veggies. - Pour the beef broth around the roast and vegetables. Make sure the veggies are submerged. - Cover the pot tightly and roast in the oven for 3 hours. The roast is done when it's fork-tender. - For a thick sauce, mix flour with cold water until smooth. Stir this blend into the pot juices after roasting. - Lastly, stir in the heavy cream to the sauce. Simmer for another 15-20 minutes, stirring often. Adjust the seasoning as needed. Follow these steps for a delicious Creamy Garlic-Herb Butter Pot Roast. You can find the complete recipe in the Full Recipe section. To boost flavor, fresh herbs are a must. I use rosemary and thyme in this pot roast. Both herbs add depth and a lovely aroma. You can also try parsley or sage for a twist. Seasoning is key. Start with salt and pepper on the beef. Don't skip this step! Add seasoning to the vegetables too. This helps every part of the dish taste great. Searing is crucial. It locks in juices and adds a rich flavor. I always sear the roast until it has a nice brown crust. This step makes a big difference in taste. Always use high heat, and don’t rush it. A Dutch oven is my favorite tool for this recipe. It holds heat well and keeps moisture in. If you use a regular pot, ensure it has a tight lid. This helps the roast cook evenly. Prep time is quick, just about 20 minutes. While the roast cooks for three hours, you can relax or clean up. If you want to make this dish ahead, you can. Prepare the roast and veggies, then refrigerate them. When you're ready, just add broth and bake. It saves time and still tastes amazing. For the full recipe, check the recipe section. Enjoy cooking! {{image_4}} You can easily swap out the beef for other cuts. A brisket or a round roast works well. These cuts also give great flavor. If you want a leaner option, try turkey or chicken. You can replace the vegetables too. Use what’s in season or what you love. Sweet potatoes add a nice touch. Cauliflower can be a great alternative to potatoes. To make this dish gluten-free, skip the flour or use a gluten-free mix. The sauce will still taste great without it. Just let it simmer longer to thicken. If you want a vegan option, use jackfruit or mushrooms as the main ingredient. Replace beef broth with vegetable broth. Use plant-based butter for the garlic-herb mix. This way, you keep the creamy flavor without meat or dairy. Adding a cup of red wine to the pot gives a rich depth. It pairs well with the beef and enhances the sauce. Feel free to play with herbs and spices. Try adding sage or oregano for a new twist. A pinch of smoked paprika can add a hint of warmth. Experiment and find what flavors you enjoy most. For the full recipe, check out the recipe section above. To store leftover pot roast, let it cool to room temperature. Place it in an airtight container. The pot roast stays good in the fridge for up to four days. Always check for any strange smells or colors before eating leftovers. To freeze the pot roast, cut it into smaller pieces and wrap them tightly in plastic wrap. Then, place the wrapped portions in a freezer bag or airtight container. This way, it will keep well for up to three months. To thaw, move the pot roast to the fridge a day before you want to eat it. Reheat it gently on the stove or in the oven to keep it juicy. You can get creative with leftover pot roast. Try making pot roast tacos or sandwiches. You can also chop it up and add it to soups or stews. Another fun idea is to use it in a hearty pot roast hash with potatoes and eggs. Explore these options to enjoy your pot roast in new ways! For the [Full Recipe], check back at the beginning of the article. How do I know when the pot roast is done? You know the pot roast is done when it is fork-tender. This means a fork should easily slide into the meat. Check the internal temperature, too. It should reach 195°F (90°C) for the best results. Resting the meat for 15 minutes before slicing helps keep it juicy. Can I cook this pot roast in a slow cooker? Yes, you can use a slow cooker. Sear the roast first for extra flavor. Then, add all the ingredients to the slow cooker. Cook on low for 6-8 hours or high for 4-5 hours. This method makes a tender and tasty pot roast. What side dishes pair well with Creamy Garlic-Herb Butter Pot Roast? Great side dishes include mashed potatoes, steamed green beans, or a fresh salad. You can also serve it with crusty bread to soak up the creamy sauce. These sides enhance the overall meal. What is the best way to ensure a tender pot roast? To ensure a tender pot roast, use a cut like beef chuck. This cut has fat, making it juicy. Searing the meat before cooking adds flavor. Low and slow cooking allows the meat to break down, resulting in tenderness. How can I adjust the recipe for a larger or smaller roast? To adjust the recipe, change the amount of beef and seasonings. For a larger roast, increase the broth and vegetables. For a smaller roast, reduce the ingredients proportionally. Keep the cooking time consistent for best results. What type of butter is best for this recipe? Unsalted butter works best for this recipe. It allows you to control the saltiness. This butter blends well with the herbs and garlic. It creates a rich and creamy flavor that enhances the roast. Can I use dried herbs instead of fresh for the garlic-herb butter? Yes, you can use dried herbs instead of fresh. Use about one-third of the amount needed for fresh herbs. Dried herbs are more concentrated. They can still add great flavor to your garlic-herb butter. This blog post covered everything you need for a delicious pot roast. We discussed the key ingredients, cooking steps, and how to enhance flavor. You learned tips for managing time and storage, plus ways to adjust the recipe. I hope these insights inspire you to create your perfect pot roast. Remember, cooking is all about experimenting and enjoying the process. With these tools in hand, you’ll make a meal your family loves. Enjoy every bite!](https://tastednest.com/wp-content/uploads/2025/07/c95caa0b-d1fc-4c93-ad95-2a2c2e71b9d3.webp)
Are you ready to impress your dinner guests with a dish that sings comfort? This Creamy Garlic-Herb Butter Pot Roast is not just your average roast; it’s a savory delight …
![To create Chicken Tzatziki Bowls, you'll need fresh and simple ingredients that pack a lot of flavor. Here’s what you’ll need: - 2 boneless, skinless chicken breasts - Seasonings (paprika, garlic powder, onion powder, salt, and pepper) - Olive oil (for chicken and tzatziki) - 1 cup quinoa (cooked, fluffy, and warm) - 1 cucumber, diced into small cubes - 1 cup cherry tomatoes, halved - 1/4 red onion, thinly sliced - 1/2 cup plain Greek yogurt - 1 tablespoon fresh dill, finely chopped - 1 tablespoon lemon juice - 1 tablespoon olive oil (for tzatziki) - Pita bread, for serving (optional) These ingredients come together to create a wholesome meal that is not only tasty but also colorful. The chicken offers protein, while quinoa adds healthy carbs. Fresh veggies bring crunch and nutrients. The tzatziki sauce adds a refreshing touch that ties everything together. For the full recipe, check out the Chicken Tzatziki Bowls 🥒. To start, you need to prepare the marinade. In a medium bowl, mix together paprika, garlic powder, onion powder, salt, and pepper. Add one tablespoon of olive oil to this mix. Take your chicken breasts and coat them well in the marinade. Once coated, cover the bowl and place it in the fridge. I recommend marinating the chicken for at least 30 minutes. This time allows the flavors to soak into the meat, giving you juicy, tasty chicken. Now, let's cook the chicken. First, preheat your grill or grill pan to medium-high heat. Once it's hot, place the marinated chicken breasts on the grill. Cook them for about 6-7 minutes on each side. You want the internal temperature to reach 165°F (75°C). After cooking, take the chicken off the grill and let it rest for about 5 minutes. This step keeps the chicken moist. Then, slice it into strips for your bowls. Next, we prepare the tzatziki. In a small mixing bowl, combine plain Greek yogurt, diced cucumber, chopped fresh dill, lemon juice, and olive oil. Don't forget a pinch of salt! Mix all the ingredients together until they are well blended. Letting the tzatziki sit for a bit allows the flavors to meld, enhancing the taste. Now it’s time to assemble your bowls. Start with a generous scoop of warm quinoa as the base. Then, layer the sliced grilled chicken on top. Follow this with diced cucumber, halved cherry tomatoes, and thinly sliced red onion. This colorful mix not only looks great but also adds fresh flavors. For a complete meal, serve your Chicken Tzatziki Bowls with warmed pita bread on the side. The pita is perfect for scooping up all the tasty ingredients. To make your dish even more appealing, garnish with a sprig of fresh dill and add a lemon wedge. This small touch brightens the dish and makes it look extra special. Enjoy your flavorful creation! - To ensure juicy chicken, always marinate it for at least 30 minutes. This helps the flavors soak in. - You can cook chicken in different ways. If you don’t have a grill, use your oven or stovetop. For oven cooking, bake at 400°F for 20-25 minutes. For stovetop, sear in a pan for about 7-8 minutes on each side. - Customizing tzatziki is fun! You can add more herbs like mint or parsley for extra flavor. Add garlic for a kick. - Chill your tzatziki for at least 20 minutes before serving. This allows the flavors to blend nicely. - For perfect quinoa, rinse it well before cooking. Use two cups of water for every cup of quinoa. Cook it until it’s fluffy and the grains separate. - If you want to try other grains, consider bulgur or farro. They make great bases too. For the full recipe, check out the [Full Recipe] section. {{image_4}} You can switch up the protein in your Chicken Tzatziki Bowl. Try shrimp for a light and tasty option. Beef adds a rich flavor and works well with the tzatziki. If you prefer plant-based meals, use tofu or chickpeas. These options still give you great taste and texture. Think about adding different veggies to your bowl. Bell peppers add a sweet crunch, while spinach brings a nice pop of color. You can also try toppings like feta cheese for creaminess or olives for a briny kick. These small changes can make a big difference in flavor. If you need gluten-free options, skip the pita bread. Instead, focus on the quinoa and veggies. For a low-carb choice, use cauliflower rice instead of quinoa. This twist keeps the bowl light yet filling, perfect for anyone watching their carbs. For the full recipe, check out the complete guide to make your own Chicken Tzatziki Bowls! To keep your Chicken Tzatziki Bowls fresh, store leftovers in the fridge. Place the chicken, quinoa, and veggies in separate containers. This helps each part stay fresh. Use airtight containers to keep moisture in and air out. Glass or BPA-free plastic containers work best. They help to avoid any weird smells or flavors. When you are ready to eat, you can easily reheat the chicken and quinoa. Use a microwave-safe dish. Heat the chicken for one to two minutes, checking to make sure it warms evenly. If you want to keep the chicken moist, add a splash of water or broth. For quinoa, heat for about 30 seconds. Stir it and check if it’s warm. If it seems dry, add a little water or broth, too. You can freeze chicken and tzatziki for meal prep. For the chicken, slice it before freezing. Place it in a freezer bag, remove as much air as possible, and seal it tight. For tzatziki, use a small container. Leave a little space at the top for expansion. When you are ready to use them, thaw overnight in the fridge. This keeps your meal ready and tasty whenever you want it. To make Chicken Tzatziki Bowls, follow these basic steps. First, marinate the chicken. Mix paprika, garlic powder, onion powder, olive oil, salt, and pepper in a bowl. Coat the chicken breasts and refrigerate for 30 minutes. Next, cook the chicken on a grill for 6-7 minutes per side until it reaches 165°F (75°C). While that cooks, prepare the tzatziki. Combine Greek yogurt, diced cucumber, dill, lemon juice, olive oil, and salt in a bowl. Mix well. For the bowls, layer warm quinoa, sliced chicken, diced cucumber, cherry tomatoes, and red onion. Finally, add the tzatziki on top. Serve with pita if you like. For the full recipe, refer to the previous section. Yes, you can prepare tzatziki ahead of time. I recommend chilling it for at least 30 minutes. This allows the flavors to blend well. Store it in an airtight container in the fridge. It can last for up to three days. Just give it a stir before serving to mix everything again. Many sides go well with Chicken Tzatziki Bowls. Consider a simple Greek salad with lettuce, olives, and feta cheese. Roasted vegetables like zucchini and bell peppers add color and flavor. You may also enjoy pita chips or a side of hummus for dipping. These sides enhance the meal and add variety. To boost nutrition, think about adding superfoods. You can include spinach or kale for extra vitamins. Swap quinoa for farro or brown rice for more fiber. Adding nuts, like walnuts or almonds, can give healthy fats and crunch. Use olive oil in moderation for heart health. These little swaps can make a big difference. Grilling is my favorite way to cook chicken for this recipe. It gives a nice, smoky flavor. Baking in the oven is another option, but it can be less juicy. If you pan-sear, use medium heat for even cooking. Each method works well; just ensure the chicken reaches the proper temperature. This blog post covered how to make tasty Chicken Tzatziki Bowls. We discussed the key ingredients, marinating, and cooking steps. I shared tips for juicy chicken and creamy tzatziki. You can also customize your meal with different proteins and veggies. Proper storage and reheating tips help keep leftovers fresh. Try these bowls for a healthy, flavorful dish. You can easily adapt the recipe to fit your needs. Enjoy cooking and sharing this meal with friends or family!](https://tastednest.com/wp-content/uploads/2025/07/ad9a2242-304e-4296-bc83-289cb74355fc.webp)
Are you ready to elevate your meal game? My Chicken Tzatziki Bowls are bursting with flavor and are super easy to make. Imagine juicy chicken, creamy tzatziki, and warm quinoa, …
![To make Savory Balsamic Chicken with Burst Tomatoes, you need a few simple items. Here’s what you will need: - 4 boneless, skinless chicken breasts - 2 tablespoons olive oil - 1 cup cherry tomatoes, halved - 1/4 cup balsamic vinegar - 2 cloves garlic, minced - 1 teaspoon dried oregano - 1 teaspoon dried thyme - Salt and freshly ground pepper to taste - Fresh basil leaves, for garnish These ingredients come together to create a dish that bursts with flavor. The chicken provides a juicy base while the tomatoes add a sweet, tangy touch. Balsamic vinegar brings a rich depth that ties the dish together. You can find these ingredients at your local grocery store. For the full recipe, you can refer to the section above. Use fresh ingredients when possible. They will enhance the taste and make your dish shine. Fresh basil leaves add a pop of color and flavor, so don’t skip them! Enjoy cooking this delightful meal. - Heat the olive oil in a skillet over medium-high heat. - Season the chicken breasts on both sides with salt and freshly ground pepper. - Carefully place the chicken breasts in the hot skillet. - Sear for 5-7 minutes on each side until golden brown. - Transfer the cooked chicken to a plate and set aside. - In the same skillet, add the halved cherry tomatoes. - Sauté the tomatoes for 2-3 minutes until they start to burst. - Add minced garlic to the skillet and sauté for one more minute. - Pour in the balsamic vinegar and stir to mix well. - Simmer the sauce for about 3-4 minutes until it thickens. - Return the seared chicken to the skillet, nestling it among the tomatoes. - Cover the skillet and cook for an additional 2-3 minutes. - Let the dish rest for a couple of minutes before serving. This method makes a delicious and juicy meal. For the complete recipe, check the [Full Recipe]. To achieve a golden crust, start with a hot skillet. Heat the olive oil until it shimmers. Season both sides of the chicken breasts well with salt and pepper. When you place the chicken in the skillet, don’t overcrowd it. Give it space to sear. Cook for about 5-7 minutes on each side. This will help create that nice crust. For tender and juicy chicken, always let it rest after cooking. This helps the juices stay inside the meat. To boost flavor, you can add spices like paprika or chili flakes. Fresh herbs like rosemary or parsley work well too. If you want to change the balsamic vinegar, try apple cider vinegar or red wine vinegar. They add a nice tang to the dish and work perfectly with the tomatoes. For a beautiful plate, arrange the chicken on a serving dish. Spoon the burst tomatoes and balsamic sauce over the chicken. A sprinkle of fresh basil adds color and freshness. This dish pairs great with steamed vegetables or fluffy rice. Both options make the meal look vibrant and inviting. For a fun twist, serve it with creamy polenta or mashed potatoes for a hearty dinner. {{image_4}} You can change up the chicken in this dish. If you want to use thighs, go for it! Thighs add extra flavor and juiciness. You can also try using turkey breasts for a leaner option. Adding vegetables boosts nutrition and flavor. Try bell peppers, zucchini, or spinach. These veggies cook well with the tomatoes. They add color and vitamins to your plate. If you need a gluten-free option, this recipe works great! All the ingredients are naturally gluten-free. Just check your balsamic vinegar to ensure it’s safe. For low-carb or keto diets, skip the rice. You can serve the chicken over cauliflower rice instead. This keeps the meal light and low in carbs. You can roast the chicken in the oven for a different taste. Preheat the oven to 400°F. Place the seasoned chicken in a baking dish. Add the tomatoes and balsamic vinegar on top. Bake for about 25 minutes or until the chicken is cooked through. If you own an Instant Pot, use it for a quick meal. Add the chicken, tomatoes, garlic, and balsamic vinegar to the pot. Cook on high pressure for 10 minutes. Let the steam release naturally for best results. These variations keep the recipe fresh and fun. You can always mix and match! For the full recipe, check out the main article. To store leftovers, place the chicken and tomatoes in an airtight container. This method keeps the flavors fresh. It lasts in the fridge for up to three days. Make sure it cools completely before sealing. This helps prevent moisture build-up. To freeze this dish, first, let it cool completely. Then, transfer the chicken and sauce into a freezer-safe bag. Squeeze out the air and seal tightly. When ready to eat, thaw it in the fridge overnight. For reheating, use a skillet or microwave for best results. To maintain flavor and texture, gently reheat on the stove. Add a splash of water or broth to keep it moist. You can also microwave it for quick reheating. Use medium power to avoid overcooking the chicken. Enjoy your Savory Balsamic Chicken with Burst Tomatoes again with its rich taste! For the full recipe, check the earlier section. You can serve Savory Balsamic Chicken with many tasty sides. Here are some ideas: - Steamed green beans - Roasted broccoli - Creamy mashed potatoes - Garlic bread - A fresh garden salad These sides pair well with the rich flavors of the chicken and tomatoes. They add color and nutrients to your meal. To check if the chicken is done, use a meat thermometer. Insert it into the thickest part of the chicken. It should read 165°F (75°C). If you don’t have a thermometer, cut into the chicken. The meat should be white and juices should run clear. Always make sure the chicken is not pink inside. This helps ensure it's safe to eat. Yes, you can make Savory Balsamic Chicken ahead of time. Cook the chicken and sauce, then let it cool. Store it in an airtight container in the fridge. It will last about 3-4 days. To reheat, warm it in a skillet over low heat. You can also use the microwave, but be careful not to overcook it. This blog post shared a simple recipe for Savory Balsamic Chicken. You learned about the key ingredients and step-by-step cooking tips to ensure a tasty meal. I also covered variations and storage methods for leftovers. Remember, this dish is easy to customize to suit your tastes or diet. With a few simple steps, you can create a flavorful dish that impresses everyone. Enjoy cooking and experimenting with your own style!](https://tastednest.com/wp-content/uploads/2025/07/a7f3d517-42f7-4c74-817a-155f6fbf162f.webp)
Are you ready to impress your family with a delicious meal? This Savory Balsamic Chicken with Burst Tomatoes is the perfect dish! Its mouthwatering flavors grab your taste buds and …