Skip to content
  • GDPR Privacy Policy
  • Copyright Policy
  • Disclaimer
  • Terms & Conditions
Tasted Nest
  • Home
  • Appetizers
  • Desserts
  • Salads
  • Breakfast
  • Dinner
  • Privacy Policy
  • Contact
  • About

NO-ING-IMG

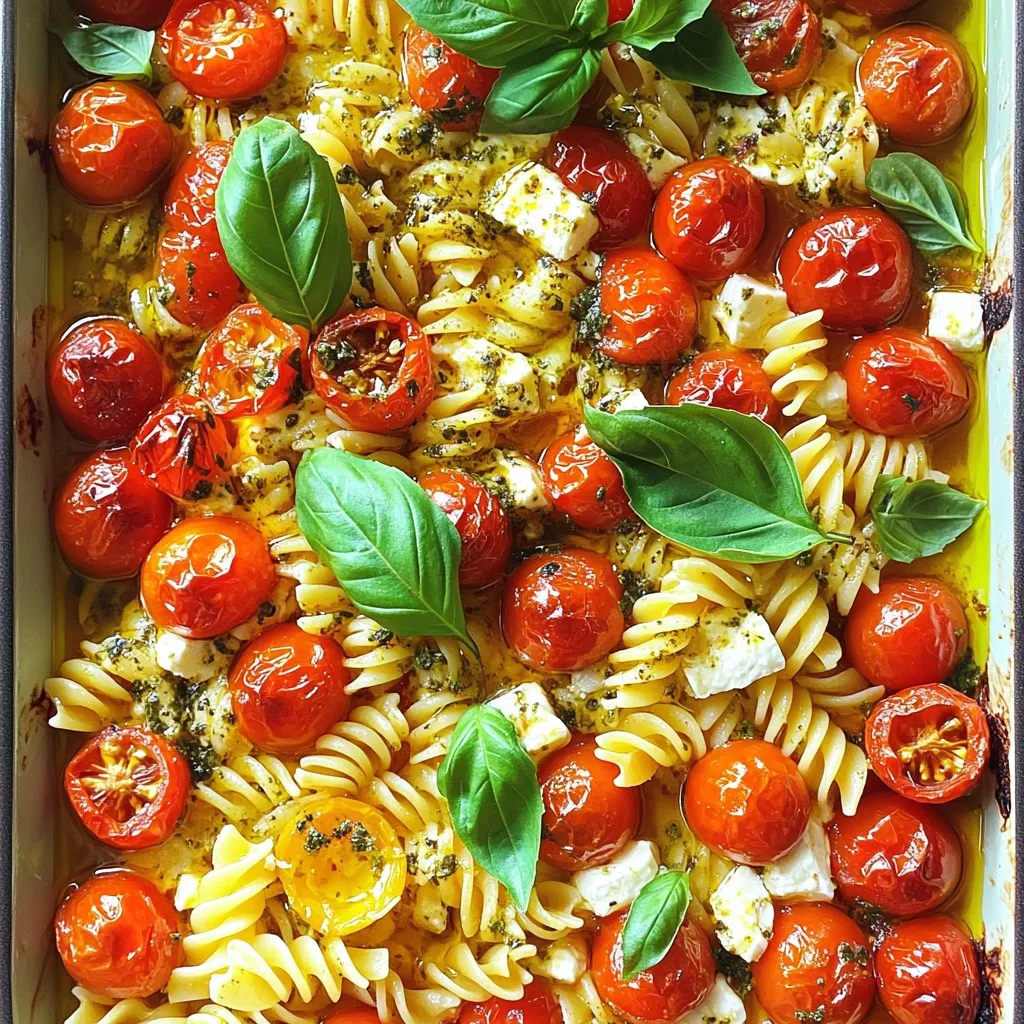
Minute Sun-Dried Tomato Gnocchi Flavorful and Easy Meal

January 14, 2026October 15, 2025 by Chef Tavio
- Gnocchi (500g, store-bought or homemade) - Sun-dried tomatoes (1 cup, chopped) - Olive oil (2 tablespoons, reserved from sun-dried tomato jar) - Garlic (2 cloves, finely minced) - Fresh spinach (1 cup, roughly torn or chopped) - Parmesan cheese (1/2 cup, freshly grated) - Red pepper flakes (1/4 teaspoon, optional) - Salt and freshly cracked black pepper - Fresh basil leaves (for garnish) Gathering the right ingredients makes cooking fun. For the gnocchi, you can choose store-bought or make your own. If you buy them, pick a brand you like. The sun-dried tomatoes bring a rich, tangy flavor. Their oil adds extra taste to your dish. Next, garlic makes everything better. It adds warmth and depth. Fresh spinach gives your meal a vibrant color and nutrients. When you add Parmesan cheese, it melts and creates a creamy texture. Finally, seasonings like red pepper flakes can add a little heat. Salt and black pepper are key for taste. Don't forget fresh basil! It adds a lovely aroma and a pop of color as a garnish. With these ingredients, you are ready to create a delicious meal. Start by bringing a large pot of salted water to a rolling boil. Carefully add the gnocchi. Cook them for about 2-3 minutes. You will know they are ready when they float to the top. Once cooked, drain the gnocchi and set them aside for later. In a big skillet, heat the olive oil from the sun-dried tomato jar over medium heat. Once the oil is hot and shimmering, add the minced garlic. Sauté the garlic for about 30 seconds until it smells good but does not brown. Next, add the chopped sun-dried tomatoes to the skillet. Let them cook for 2-3 minutes, mixing well. This helps blend their rich flavors with the garlic. Now, it’s time to add the fresh spinach to the skillet. Cook for about 2-3 minutes until the spinach wilts down. This brightens the dish and adds a nice color. Once the spinach is ready, gently fold in the cooked gnocchi. Make sure they are well coated with the sauce. Season with salt, black pepper, and red pepper flakes if you like a bit of heat. To finish, sprinkle the freshly grated Parmesan cheese over the gnocchi. Toss everything together gently until the cheese melts, creating a creamy texture. This adds a rich flavor to the dish. Serve the gnocchi on individual plates and garnish with fresh basil leaves for a lovely touch. Enjoy this flavorful and easy meal! When choosing gnocchi, you have two main options: store-bought and homemade. Store-bought gnocchi is quick and easy. You can find it in most grocery stores. Homemade gnocchi is a fun project, but it takes more time. If you go for store-bought, check the cooking times on the package. Most brands take just 2-3 minutes to cook. This quick cooking makes it a great choice for busy nights. Want to bring more flavor to your dish? Adding spices or herbs can really boost taste. Consider using fresh basil, thyme, or even a pinch of oregano. If you want a cheesy twist, you can try different cheeses. Pecorino Romano or goat cheese can add a nice touch. Each cheese brings its own flavor, so feel free to experiment! How you serve your gnocchi matters too. A beautiful plate makes the meal more inviting. Try using wide, shallow bowls. This allows the colors of the dish to shine. For the perfect finishing touch, pair it with a light white wine. A crisp Pinot Grigio works well. You can also serve it with a simple salad on the side for a fresh contrast. {{image_4}} For a fresh twist, you can swap spinach with other greens. Kale or arugula works great! They add unique flavors and textures. You can also toss in roasted vegetables like bell peppers or zucchini. This gives your dish extra color and crunch. Want to make it heartier? Add grilled chicken or shrimp to your gnocchi. Both options pair well with the sun-dried tomatoes. For a different flavor, try sausage or chickpeas. Chickpeas add protein while keeping it vegetarian. If you need gluten-free options, look for gluten-free gnocchi. They are often made from potatoes or rice flour. For vegan diets, use plant-based cheese instead of Parmesan. This way, everyone can enjoy this tasty meal! To keep your gnocchi fresh, place leftovers in a sealed container. I suggest using glass or BPA-free plastic containers. These keep flavors intact and help avoid spills. Store the gnocchi in the fridge for up to three days. If you want to eat it later, use the freezer. To reheat gnocchi, use a skillet on low heat. Add a splash of olive oil to prevent sticking. Stir gently until it warms through. This method keeps the gnocchi from becoming mushy. You can also add a bit of water to create steam. This helps maintain flavor and texture. If you want to freeze gnocchi, it's best to freeze uncooked gnocchi. Lay them flat on a baking sheet until frozen. Once frozen, transfer them to a freezer bag. For cooked gnocchi, freeze it too, but it may lose some texture. To defrost, let it sit in the fridge overnight or use the microwave. Always reheat gently to avoid mushiness. Gnocchi cooks very fast. For store-bought gnocchi, it takes about 2-3 minutes. You know they are done when they float to the top. Homemade gnocchi may take a bit longer, depending on size. Always check for doneness before draining. Yes, you can prep in advance. Cook the gnocchi and sauce separately. Store them in the fridge for up to two days. When you're ready, just reheat them together in a skillet. This makes it easy on busy days! If sun-dried tomatoes are not available, try roasted red peppers. They bring a sweet and smoky flavor. You could also use fresh tomatoes, but they will add more moisture. Always adjust cooking time and seasonings to fit the substitute. This recipe blends gnocchi with sun-dried tomatoes and spinach for a tasty dish. You learned how to cook gnocchi, prepare a flavorful sauce, and mix in delicious ingredients. Always choose fresh ingredients for the best taste. Remember, this dish is versatile, so feel free to change it up with meats or veggies. Store any leftovers well, and you can enjoy this meal again. Enjoy cooking this delightful meal!

Looking for a quick and tasty meal? Try my Minute Sun-Dried Tomato Gnocchi! This dish packs bold flavors with simple steps. In just minutes, you’ll enjoy tender gnocchi paired with …

Read more

Categories Dinner Tags NO-ING-IMG

No-Bake Strawberry Cheesecake Jars Easy Delight

January 14, 2026October 15, 2025 by Chef Tavio
- Cream Cheese and Dairy: Cream cheese forms the base of our filling. I use two cups of softened cream cheese for a rich taste. Heavy whipping cream adds a lightness. We whip one cup until stiff peaks form. This makes the filling airy and creamy. - Graham Cracker Crust: I use one cup of graham cracker crumbs mixed with four tablespoons of melted unsalted butter. This forms a crunchy, buttery crust. You can press it firmly into the jars for a solid base. - Fresh Strawberries: I love using two cups of fresh strawberries. Hulling and slicing them brings out their sweetness. These juicy strawberries add color and flavor to the dessert. - Powdered Sugar: One cup of powdered sugar sweetens the cream cheese. It blends smoothly without lumps. This gives the cheesecake its sweet, creamy taste. - Vanilla Extract: A teaspoon of pure vanilla extract adds depth. It enhances the overall flavor of the cheesecake. - Granulated Sugar for Strawberries: I sprinkle two tablespoons of granulated sugar on the strawberries. This helps them release their juices. It makes them even sweeter and more flavorful. - Fresh Mint Leaves: I like to add fresh mint leaves for garnish. They add a bright touch and fresh aroma. - Additional Strawberry Toppings: You can top the jars with extra strawberries. They create a beautiful, inviting look. You can even drizzle some juice from the macerated strawberries on top for added flavor. - Mixing Graham Cracker Crumbs and Butter To start, take 1 cup of graham cracker crumbs and mix it with 4 tablespoons of melted unsalted butter in a medium bowl. Stir well until all crumbs are coated. The mixture should look like wet sand. - Distributing and Pressing into Jars Next, take this mixture and divide it evenly among four small jars. Use the back of a spoon or your fingers to press the crumbs firmly into the bottom of each jar. This step makes a strong base for your cheesecake. - Beating Cream Cheese Mixture In a large bowl, beat together 2 cups of softened cream cheese, 1 cup of powdered sugar, and 1 teaspoon of pure vanilla extract. Mix until smooth. You want it to be creamy with no lumps. - Whipping Heavy Cream In another bowl, pour in 1 cup of heavy whipping cream. Use an electric mixer to whip it until stiff peaks form. This process takes about 3-5 minutes. The whipped cream should be light and fluffy. - Layering Cream Cheese Filling Now, spoon half of your cream cheese filling into each jar. Smooth the top with a spatula. This layer adds rich flavor to your dessert. - Adding Macerated Strawberries In a small bowl, mix 2 cups of thinly sliced fresh strawberries with 2 tablespoons of granulated sugar. Let them sit for about 10 minutes so they can release their juices. Then spoon this mixture over the cream cheese filling in each jar. - Completing the Layering Process Finally, add the rest of the cream cheese filling on top of the strawberries. Smooth the surface again. Add a final layer of the macerated strawberries on top. This makes your jars look beautiful and inviting. Chill your jars in the refrigerator for at least 4 hours. Enjoy this easy delight! To get a smooth cheesecake, start with softened cream cheese. Soft cream cheese blends well with other ingredients. If it's cold, it will clump. Let it sit at room temp for about 30 minutes before mixing. When you whip the cream, aim for stiff peaks. Stiff peaks help the filling stay light and fluffy. This process takes 3 to 5 minutes with an electric mixer. Watch closely, as over-whipping can turn it grainy. For a lovely presentation, try using clear jars. Layering the cheesecake in clear jars shows off the colors. Serve them on a rustic wooden board with whole strawberries. This adds charm and invites guests to enjoy. Pair these jars with other desserts for variety. They go well with a hot cup of coffee or tea. You can also serve them with a scoop of vanilla ice cream for a sweet twist. You can infuse different flavors into the cream cheese. Add lemon zest for a citrus kick, or try almond extract for a nutty taste. Just a small amount can change the whole dessert. If fresh strawberries aren’t available, use frozen berries instead. Thaw them and mash them lightly for a different texture. You can even try peaches or blueberries for a fresh twist. {{image_4}} Using Other Berries You can swap strawberries for other berries. Blueberries, raspberries, and blackberries work well. Just mash them a bit. Mix in sugar to bring out their natural sweetness. Layer them in the jars just like you would with strawberries. This gives you a colorful twist. Substituting with Tropical Fruits For a tropical treat, try mango or pineapple. Dice the fruit small and mix with sugar. This adds a fresh, zesty flavor. You can even add a bit of lime juice for extra zing. Layer the tropical fruit over the cream cheese. It’s fun and bright! Gluten-Free Options If you need gluten-free, use gluten-free graham crackers. You can also try crushed nuts or oats. Mix them with melted butter just like the regular crust. This way, you still enjoy a crunchy base without gluten. Using Different Cookies Feel free to experiment with cookies for the crust. Oreos or chocolate wafers add a unique flavor. Just crush them and mix with melted butter. This gives a rich, chocolatey taste that pairs well with cream cheese. Citrus-Infused Cheesecake Add lemon or orange zest to the cream cheese mixture. This brightens the flavor and makes it refreshing. You can also mix in some citrus juice for a tangy kick. It’s a great way to make your cheesecake unique and lively. Chocolate Swirl Cheesecake Jars For chocolate lovers, try adding melted chocolate to the filling. Mix it in gently to create swirls. This adds a rich, creamy flavor. Layer with chocolate shavings or mini chocolate chips for extra fun. To store your no-bake strawberry cheesecake jars, place them in the fridge. Cover each jar tightly with a lid or plastic wrap. This keeps them fresh and safe from other odors. They last for about 3 to 5 days in the fridge. Make sure to check for any signs of spoilage before serving. You can freeze cheesecake jars for later enjoyment. To freeze, let them chill first in the fridge. Once chilled, cover them well with plastic wrap and foil. This prevents freezer burn. They can stay in the freezer for up to 2 months. To thaw the jars, simply move them to the fridge. Let them thaw overnight for best results. Avoid using a microwave or hot water, as this can ruin the texture. Once thawed, check if the cheesecake is smooth. If it’s a bit watery, give it a gentle stir before serving. When serving chilled desserts, it’s best to let them sit out for a few minutes. This helps soften the cheesecake, making it creamy. You can also refresh the toppings. Add fresh strawberries or mint leaves right before serving. This will enhance the look and taste of your dessert. Enjoy the delicious layers of flavor! No-Bake Strawberry Cheesecake Jars last about 4 to 5 days in the fridge. Store them in a tight container to keep them fresh. If you notice any off smells or changes in texture, it’s best to toss them. Yes, you can make these jars ahead of time. I recommend making them a day before you serve. This way, the flavors blend well and the texture sets perfectly. Just make sure to cover the jars tightly and keep them chilled until you’re ready to enjoy. If you don’t have cream cheese, you can use Greek yogurt or mascarpone cheese. Both options create a similar creamy texture. Greek yogurt adds a tangy flavor, while mascarpone offers a rich taste. Adjust the sugar in your recipe as needed, based on how sweet your substitute is. You’ve learned how to make no-bake strawberry cheesecake jars. We covered the main ingredients, tips for texture, and fun variations. These jars offer a tasty, fresh treat for any occasion. Feel free to play with flavors and fruits. Remember, you can adjust recipes to fit your taste. Enjoy making these jars and impressing your friends and family with your dessert skills!

Are you craving a sweet treat that’s easy to make? Look no further! My No-Bake Strawberry Cheesecake Jars are the perfect dessert for any occasion. With a creamy filling, graham …

Read more

Categories Desserts Tags NO-ING-IMG

Air Fryer Everything Bagel Chicken Tenders Recipe

January 14, 2026October 15, 2025 by Chef Tavio
- 1 pound boneless, skinless chicken tenderloins - 1 cup buttermilk (or substitute with regular milk mixed with 1 tablespoon vinegar) - 1 cup all-purpose flour - 2 large eggs, beaten - 1 cup panko bread crumbs - 4 tablespoons everything bagel seasoning - Salt and freshly ground black pepper to taste - Cooking spray You will need fresh chicken tenderloins for this recipe. They are juicy and tender. Buttermilk gives a great flavor and helps the chicken stay moist. If you don't have buttermilk, just mix milk and vinegar. For the breading, you want all-purpose flour, eggs, and panko bread crumbs. I love panko because it makes the chicken crispy. Everything bagel seasoning adds a nice, savory touch. Don’t forget salt and pepper! They bring out the flavors. A light spray of cooking spray helps the tenders crisp up in the air fryer. Gather these ingredients, and you are ready to make a delicious meal! Soak your chicken tenders in buttermilk for at least 30 minutes. This step is key. The buttermilk will make the chicken juicy and tender. If you don’t have buttermilk, mix regular milk with 1 tablespoon of vinegar. This works great too! Next, set up your breading station. Use three shallow dishes. In the first dish, pour in 1 cup of all-purpose flour. In the second dish, beat 2 large eggs and set them aside. In your third dish, mix 1 cup of panko bread crumbs with 4 tablespoons of everything bagel seasoning. Add a pinch of salt and pepper to the mix. Make sure everything is well combined. After marinating, take the chicken tenders out of the buttermilk. Let the excess liquid drip off. First, dredge each tender in the flour. Shake off the extra flour. Then, dip it into the beaten eggs for a good coat. Finally, roll it in the seasoned panko mixture. Press gently so the crumbs stick well. Before cooking, preheat your air fryer to 400°F (200°C). This is important for crispy results. Lightly spray the air fryer basket with cooking spray. This prevents the chicken from sticking. Arrange the chicken tenders in a single layer. Do not overcrowd them. Now, it’s time to cook! Air fry the chicken tenders for 10 to 12 minutes. Flip them halfway through the cooking time. They are done when they look golden brown and reach an internal temperature of 165°F (74°C). Carefully remove them and let them rest for a few minutes before serving. Enjoy your crispy, flavorful chicken tenders! To get the best texture, I recommend double coating your chicken tenders. Start by dredging the chicken in flour. Next, dip it in the egg, then coat it well with the panko mixture. For that extra crunch, repeat the egg and panko steps. This gives you a thicker layer of crispy goodness that will make each bite satisfying. Air fryers work best when they have space to breathe. Arrange chicken tenders in a single layer. If you overcrowd the basket, the air won’t circulate well. This can lead to uneven cooking. If you have more tenders than fit, cook them in two or more batches. Each batch will turn out golden and crispy. Using cooking spray is key for a non-stick result. Lightly spray the air fryer basket before adding the chicken. This helps prevent sticking and makes cleanup easier. I also recommend giving the tops of the tenders a light spray before cooking. This simple step enhances browning and crispiness, making your chicken tenders look and taste amazing. {{image_4}} You can easily change the flavor of your chicken tenders. Here are some ideas: - Italian Seasoning: Use a mix of dried herbs like oregano and basil. - Spicy Cajun: Add cayenne pepper and paprika for a kick. - Lemon Pepper: Mix lemon zest with black pepper for a fresh taste. - BBQ Rub: Use your favorite BBQ spice blend for a smoky flavor. Experimenting with these seasonings can make your dish unique and fun. If you don't have an air fryer, baking or pan-frying works well too. Here’s how: - Baking: - Preheat your oven to 400°F (200°C). - Place the breaded chicken tenders on a baking sheet. - Lightly spray with cooking spray. - Bake for 15-20 minutes, flipping halfway through. - Pan-Frying: - Heat oil in a skillet over medium heat. - Cook the breaded chicken tenders for 3-5 minutes on each side. - Make sure they are golden and cooked through. Both methods give you crispy chicken tenders without an air fryer. How you serve your chicken tenders can change the meal. Here are some fun ideas: - Dipping Sauces: Try ranch, honey mustard, or buffalo sauce. Each sauce adds a new flavor. - Sides: Pair with a fresh salad, sweet potato fries, or steamed veggies for balance. - Wraps: Serve in a tortilla with lettuce, tomato, and sauce for a tasty wrap. These variations can make your meal exciting and suit different tastes. To keep your chicken tenders fresh, store them in the fridge. Place them in an airtight container. This helps prevent drying out. Ideally, eat leftovers within three days for the best taste. To reheat, I suggest using the air fryer. It keeps the tenders crispy. Set the air fryer to 350°F (175°C) and heat for about 5 minutes. Flip them halfway to warm evenly. If you use the microwave, place the chicken on a plate. Heat for 1 to 2 minutes, but it may not stay crispy. You can freeze the chicken tenders for later. First, let them cool completely. Then, wrap each tender in plastic wrap. Place the wrapped tenders in a freezer bag. Label the bag with the date. To defrost, move them to the fridge overnight. Reheat them in the air fryer for best results. Yes, you can use frozen chicken tenderloins. However, thaw them first. Thawing helps the meat cook evenly. You can thaw them overnight in the fridge or use the microwave. After thawing, follow the same marinating and breading steps. This ensures you get the best flavor and texture. If you don’t have buttermilk, mix regular milk with vinegar. Use one cup of milk and add one tablespoon of vinegar. Let it sit for five minutes to thicken. You can also use plain yogurt or sour cream mixed with water. These alternatives keep the chicken tender and flavorful. Many sauces pair well with everything bagel chicken tenders. Here are some favorites: - Honey mustard - Barbecue sauce - Ranch dressing - Buffalo sauce - Ketchup These sauces add extra flavor and make each bite even more enjoyable. This blog post shared the best ways to make crispy chicken tenders using an air fryer. We covered key ingredients, step-by-step instructions, tips for texture, and even storage methods. You now have the tools to create tasty chicken tenders at home. Try experimenting with different seasonings or dipping sauces to find your favorite flavor. With practice, you will master this simple yet delicious dish. Enjoy your chicken tenders, and don’t forget to share your success!

Looking for a tasty twist on a family favorite? Try my Air Fryer Everything Bagel Chicken Tenders! These tender, crispy bites are packed with flavor and a fun crunch. With …

Read more

Categories Appetizers Tags NO-ING-IMG

Baked Feta Tomato Pasta Simple and Flavorful Dish

January 14, 2026October 14, 2025 by Chef Tavio
- 200g of your favorite pasta (fusilli or penne) - 200g block of creamy feta cheese - 500g ripe cherry tomatoes, washed and halved - 3 cloves of garlic, finely minced - 1/4 cup extra virgin olive oil - 1 teaspoon dried oregano - 1 teaspoon chili flakes (optional, for a spicy kick) - Fresh basil leaves, for an aromatic garnish - Sea salt and freshly cracked black pepper, to taste For this baked feta tomato pasta, the main ingredients are simple yet impactful. You can use fusilli or penne pasta. Fusilli twirls the sauce perfectly, while penne gives a delightful bite. The creamy feta cheese is the star here. It melts beautifully and adds a rich flavor. Ripe cherry tomatoes bring sweetness and brightness to the dish. The garlic adds depth. It complements the tomatoes and feta. For seasoning, you need good olive oil. The oil helps in roasting the tomatoes and feta. Dried oregano adds a classic Italian touch. If you like heat, chili flakes give a warm kick. Finally, fresh basil leaves make a lovely garnish. They add a fresh aroma. Don’t forget sea salt and black pepper to enhance all the flavors. This mix of ingredients creates a dish that is simple, flavorful, and satisfying. - First, preheat your oven to 400°F (200°C). This helps the dish cook evenly. - In a large, oven-safe baking dish, spread 500g of halved cherry tomatoes evenly across the bottom. - Place a 200g block of creamy feta cheese right in the center of the tomatoes. - Drizzle 1/4 cup of extra virgin olive oil over both the tomatoes and feta. This adds rich flavor. - Next, sprinkle 3 cloves of finely minced garlic, 1 teaspoon of dried oregano, and chili flakes to taste. - Season with sea salt and freshly cracked black pepper. The spices enhance the taste. - With a spoon, gently mix the tomatoes, oil, and seasonings around the feta. This helps combine the flavors. - Place the baking dish in the preheated oven. Roast for 25-30 minutes. The tomatoes should blister, and the feta should turn golden. - While the feta and tomatoes bake, bring a large pot of salted water to a boil. - Cook 200g of pasta until al dente, following the package instructions. Drain and keep warm. - After baking, use a fork to mash the feta and mix it with the burst tomatoes. This creates a creamy sauce. - Add the cooked pasta to the baking dish. Toss everything together gently to coat the pasta in the sauce. - Serve the dish warm. Garnish with fresh basil leaves for color and added flavor. Enjoy your meal! To avoid overcooking, watch the time closely. You want the tomatoes to blister but not turn too mushy. Aim for 25 to 30 minutes at 400°F. This gives the feta a golden color and rich flavor. Check on it halfway through to ensure it’s not cooking too fast. Balancing flavors is key. The feta adds creaminess, while the tomatoes bring sweetness. Use enough olive oil to keep things moist. Don’t skip the salt and pepper; they enhance all the flavors. You can easily adapt this dish for dietary needs. For a vegan option, swap the feta cheese with a plant-based alternative. Nutritional yeast can add a cheesy flavor without dairy. Low-carb fans can use zucchini noodles instead of pasta. Feel free to add extra veggies to boost nutrition. Spinach, zucchini, or bell peppers work well. For more protein, try adding cooked chicken or chickpeas. Just toss them in before baking for a complete meal. To kick up the flavor, add spices like garlic powder or smoked paprika. A splash of balsamic vinegar can add depth and brightness. Try fresh herbs like thyme or parsley for a fresh burst. Experimenting with cheese can also change the game. Goat cheese adds a tangy twist, while ricotta gives a creamy texture. Each variation can lead to a new favorite! {{image_4}} You can swap feta cheese for other types. Goat cheese works well for a tangy flavor. Ricotta is a creamy choice that adds richness. Both options melt nicely and blend with tomatoes. Experiment with these cheeses to find your favorite twist. For a heartier meal, add proteins. Chicken or shrimp can elevate this dish. Simply bake them with the feta and tomatoes. For plant-based options, try chickpeas or tofu. These options give you more protein without losing flavor. Seasonal vegetables can change the dish's vibe. In summer, use zucchini or bell peppers. In fall, consider adding spinach or kale. This makes your meal fresh and aligned with the season. Adjust your recipe to use what’s available for a tasty twist year-round. To keep your Baked Feta Tomato Pasta fresh, store it in an airtight container. Place any leftovers in the fridge right after serving. This helps prevent the growth of bacteria. The best practice is to cool the pasta to room temperature first. Then, seal it up tight. You can freeze this dish too! Just make sure to use a freezer-safe container. The pasta will keep well for about 2-3 months in the freezer. When ready to eat, let it thaw in the fridge overnight. To reheat, you can use either a microwave or stovetop. For the microwave, place a portion in a bowl and cover it. Heat in short bursts, stirring in between. This helps it warm evenly. On the stovetop, use a non-stick pan. Add a splash of water or olive oil to help keep it moist. Heat over medium-low and stir gently. This keeps the texture nice and creamy. In the fridge, your Baked Feta Tomato Pasta will last about 3-4 days. Always check for signs of spoilage. If it smells off or looks discolored, it’s best to toss it. Look for mold or a sour smell. These are clear signs that your dish is no longer safe to eat. Always trust your senses when it comes to food safety! Yes, you can use many pasta types. Fusilli and penne are best. They catch sauce well. Other good choices are bowtie, rotini, or spaghetti. Experiment with what you have! This recipe works great for meal prep. Cook it ahead and store it in the fridge. Make sure to cool it down first. Use airtight containers for best results. It stays tasty for up to three days. Just reheat when you're ready to eat! Consider simple sides like a fresh salad. A green salad with lemon dressing works well. Garlic bread is another tasty option. You can also serve it with roasted veggies. These sides add more flavor and nutrition. Yes, you can make this dish gluten-free. Use gluten-free pasta instead of regular types. Many brands offer good options like brown rice or chickpea pasta. They taste great and keep the dish delicious. To amp up the flavor, add herbs like thyme or parsley. Fresh basil is a must for a nice touch. You can also sprinkle in more chili flakes for heat. Parmesan cheese can add a rich taste too. Mix and match to find your favorite combo! In this article, we explored the key ingredients for a delicious Baked Feta Tomato Pasta. We covered how to prepare and bake the dish, plus tips for customizing flavors. You can use different cheeses or add proteins to make it your own. Store leftovers properly, so they stay fresh. This recipe is easy to adapt and great for any meal. Enjoy trying new variations to keep it exciting!

Are you ready to experience a simple yet delicious meal? Baked Feta Tomato Pasta blends fresh flavors with ease. In just a few steps, you can enjoy a hearty dish …

Read more

Categories Dinner Tags NO-ING-IMG

Mango Coconut Chia Pudding Easy and Delicious Treat

January 14, 2026October 14, 2025 by Chef Tavio
To make Mango Coconut Chia Pudding, gather these simple ingredients: - 1 cup creamy coconut milk - 1/2 cup unsweetened almond milk - 1/3 cup chia seeds - 2 tablespoons pure maple syrup (or honey) - 1 ripe mango, diced into small cubes - 1/2 teaspoon pure vanilla extract - A pinch of Himalayan salt - Toasted coconut flakes for garnish You can swap some ingredients based on your needs: - Coconut milk: Use any nut milk for a lighter pudding. - Almond milk: Try oat milk or soy milk if you prefer. - Maple syrup: Honey works well but is not vegan. Agave syrup is a great vegan option. - Mango: Any sweet fruit, like peaches or berries, can replace mango. Here’s why each ingredient is good for you: - Coconut milk: Rich in healthy fats, it may boost energy and heart health. - Almond milk: Low in calories, it helps with weight management. - Chia seeds: Packed with fiber, protein, and omega-3s, they support heart health. - Maple syrup: Contains antioxidants and offers a natural sweet taste. - Mango: High in vitamins A and C, it boosts immunity and skin health. - Vanilla extract: Adds flavor and may help reduce stress. - Himalayan salt: Provides minerals that help balance electrolytes and hydration. - Toasted coconut flakes: Adds crunch and healthy fats to the dish. Making mango coconut chia pudding is simple and fun. You start by mixing all the base ingredients. Then, you chill the mixture to let the chia seeds do their magic. After that, you add fresh mango and toasted coconut flakes. This treat is both creamy and fruity. Begin with a large mixing bowl. Pour in 1 cup of creamy coconut milk and 1/2 cup of almond milk. Add 2 tablespoons of pure maple syrup or honey for sweetness. Then, toss in 1/2 teaspoon of pure vanilla extract and a pinch of Himalayan salt. Whisk these ingredients until they blend well. Now, slowly sprinkle in 1/3 cup of chia seeds. Stir constantly to prevent clumps. Make sure the chia seeds spread evenly in the mixture. This step is key for the right texture. Cover the bowl tightly with plastic wrap or pour the mix into jars. Refrigerate for at least 4 hours, but overnight is best. This time allows the chia seeds to soak up the liquid. After chilling, take the pudding out and stir it well. If it seems too thick, mix in a bit more almond milk. To serve, layer the pudding in small cups. Add plenty of diced mango on top for a fresh burst. Finish with toasted coconut flakes for a crunchy touch. Enjoy your delicious mango coconut chia pudding! To get the best texture in your mango coconut chia pudding, you need to mix well. Start with the coconut milk and almond milk in a bowl. Whisk until smooth. Then, add the chia seeds slowly. Stir as you sprinkle them in. This way, they won’t clump together. After chilling, if the pudding feels too thick, add a little more almond milk. This helps you find the perfect creamy feel. Always measure your chia seeds carefully. Too many seeds can make the pudding too thick. A good ratio is 1 part chia seeds to 3 parts liquid. Also, remember to let it sit for at least 4 hours. Overnight is even better! This gives chia seeds time to soak up all the liquid. It makes the pudding fluffy and fun to eat. For a beautiful look, serve your pudding in clear cups. This lets everyone see those yummy layers. Start with a layer of pudding, then add diced mango. Repeat until you fill the cup. Top it off with toasted coconut flakes for a nice crunch. You can add a mint leaf for color too. This makes your dish pop and adds a fresh touch. {{image_4}} You can change up the fruit in your Mango Coconut Chia Pudding. Try using ripe bananas, juicy strawberries, or sweet blueberries. Each fruit adds its own unique flavor and texture. You can mix and match to find your favorite combo. Just remember to cut the fruit into small pieces. This way, every bite is fun and tasty. This pudding is easy to make vegan and sugar-free. Use agave syrup or a sugar alternative like stevia instead of maple syrup. For a creamier base, stick with coconut and almond milk, which are both vegan-friendly. You can even swap in other plant-based milks like oat or soy. These choices keep your pudding rich without dairy. Want to add more flavor? Try these simple tricks. A dash of cinnamon gives warmth. A pinch of nutmeg adds a cozy touch. You can also boost the vanilla flavor with extra extract. For a tropical twist, add a hint of lime zest. Each of these additions will make your pudding even more delightful. To store leftover chia pudding, place it in the fridge. Use an airtight container to keep it fresh. Make sure to seal it well. This helps prevent any odors or flavors from other foods. I recommend using glass jars or plastic containers with lids. Glass jars allow you to see the pudding. This makes it easy to grab what you need. If you use plastic, choose BPA-free options. They are safe and great for keeping your food fresh. Your chia pudding can last about 4 to 5 days in the fridge. After that, check for signs of spoilage. Look for changes in texture or a sour smell. If you see any mold, throw it away right away. Freshness is key for the best taste and texture! Chia seeds are tiny black seeds from the Salvia hispanica plant. They are rich in fiber, protein, and omega-3 fatty acids. Eating chia seeds can help with digestion and keep you full longer. They can also support heart health and reduce inflammation. Plus, they absorb liquid and create a fun, gel-like texture in dishes like our mango coconut chia pudding! Yes! You can use any milk you like. Almond milk works well, but you can also try oat milk or soy milk. Each type of milk will give a different flavor. Coconut milk adds creaminess, while almond milk is lighter. Just remember to choose unsweetened versions if you want to control the sugar level in your pudding. You can easily prepare this mango coconut chia pudding the day before you want to serve it. Just follow the recipe and refrigerate it overnight. This allows the chia seeds to soak up the milk fully. When you're ready to serve, just give it a quick stir and add your fresh mango and toasted coconut flakes. It’s a perfect make-ahead treat! You can create delicious chia seed pudding with fresh ingredients. We explored the full ingredient list and possible substitutions. Each ingredient offers noteworthy health benefits. I provided easy step-by-step instructions for preparation and tips for the right texture. There are plenty of ways to change up flavors and add fruits. Proper storage ensures your pudding stays fresh longer. Remember, experimenting will help you find your favorite version, whether it's vegan or full of spices. Make this simple treat a regular part of your meals. Enjoy your healthy dessert!

Are you ready for a tasty treat that’s as simple as it is delicious? Enter Mango Coconut Chia Pudding, your new go-to dessert! This delightful blend combines creamy coconut and …

Read more

Categories Desserts Tags NO-ING-IMG

Instant Pot Butter Chicken Simple and Flavorful Meal

January 14, 2026October 14, 2025 by Chef Tavio
- 1.5 lbs boneless, skinless chicken thighs, cut into bite-sized pieces - 1 medium onion, finely chopped - 3 cloves garlic, minced - 1 tablespoon ginger, minced Chicken thighs are the best choice for butter chicken. They stay juicy and tender. The onion gives a sweet base. Garlic and ginger add a warm, aromatic kick. - 2 teaspoons garam masala - 1 teaspoon ground cumin - 1 teaspoon ground coriander - 1 teaspoon turmeric powder - 1/2 teaspoon chili powder (adjust based on your spice preference) Spices are crucial for flavor. Garam masala brings warmth and depth. Cumin and coriander add earthiness. Turmeric gives a golden hue, while chili powder adds heat. Adjust chili to suit your taste. - 1 cup tomato puree (preferably crushed for a smoother texture) - 1 cup coconut milk (full-fat for creaminess) - 4 tablespoons unsalted butter, divided - Salt, to taste Tomato puree creates a rich sauce. Coconut milk adds creaminess, balancing the spices. Butter adds richness and flavor. Use salt to enhance all the tastes. 1. Sautéing the butter and onions: Set your Instant Pot to 'Sauté' mode. Add 2 tablespoons of butter and let it melt. This creates a rich base for your dish. Next, add the finely chopped onion. Cook for 3 to 4 minutes until the onion is soft and clear. 2. Cooking garlic and ginger: Now, stir in the minced garlic and ginger. Cook for one more minute. This step adds a nice aroma and flavor to your meal. 3. Seasoning chicken with spices: Time to add in the chicken pieces. Sprinkle them with salt. Add garam masala, cumin, coriander, turmeric, and chili powder. Mix well so all the spices coat the chicken evenly. 4. Mixing in tomato puree and coconut milk: Pour the tomato puree and coconut milk into the pot. Stir everything together until you see a beautiful, vibrant sauce. 5. Setting the Instant Pot and cooking under pressure: Close the lid of the Instant Pot. Make sure the valve is set to 'Sealing'. Set it to 'Pressure Cook' on high for 8 minutes. 6. Releasing pressure and finishing the dish: Once the cooking time is up, let it sit for 10 minutes for a natural pressure release. After that, switch the valve to 'Venting' to release any leftover steam. Open the lid and stir in the remaining 2 tablespoons of butter until it melts. Taste and add more salt if needed. Serve hot, topped with fresh cilantro. Enjoy it with basmati rice or warm naan! How do I ensure tender chicken thighs? To keep your chicken thighs tender, use boneless, skinless pieces. Cut them into bite-sized chunks. Always season them well with salt and spices. The Instant Pot locks in moisture, so your chicken will come out juicy and tender. How can I adjust the spice levels? You can change the spice level by adjusting the chili powder. If you like it mild, use less or skip it. For more heat, add more chili powder or even fresh chili peppers. Taste the sauce before serving to find your perfect heat. What are tips for a smoother sauce? Use tomato puree instead of diced tomatoes for a smoother texture. Crushed tomatoes also work well. Blend the sauce briefly if you want it extra smooth. This step ensures every bite feels rich and creamy. How do I use coconut milk for creaminess? Coconut milk adds a nice creaminess to the dish. Use full-fat coconut milk for the best results. Stir it in after the chicken cooks to keep it thick and rich. This will make your butter chicken taste even better. What are the best sides to accompany butter chicken? Serve your butter chicken over cooked basmati rice. Warm naan is perfect for scooping up the sauce. You can also add a side salad for freshness. Choose simple sides to let the butter chicken shine. What are some garnishing ideas? Garnish your butter chicken with chopped fresh cilantro. You can also add a squeeze of lemon for brightness. A sprinkle of crushed red pepper adds color and extra heat. These small touches enhance both look and taste. {{image_4}} You can switch up the main protein in this dish. Chicken thighs work great, but chicken breasts are a lighter option. They cook faster, so reduce the cooking time to about 6 minutes under pressure. If you prefer seafood, shrimp is a fantastic choice. Add it to the pot during the last few minutes of cooking. Tofu is another great option for a plant-based meal. Use firm tofu and cube it. Cook it for about 8 minutes with the same spices. Want to make your butter chicken even better? You can add vegetables to boost nutrition. Spinach, peas, or bell peppers work well. Just toss them in when you mix the tomato puree and coconut milk. You can also experiment with spices. Try adding cinnamon for warmth or cardamom for a floral note. Adjust the chili powder to match your spice preference. A little extra heat can really elevate the dish. If you need gluten-free options, you’re in luck! This recipe is already gluten-free, so no changes are needed. For a dairy-free version, swap the butter with vegan butter and use almond milk instead of coconut milk. This still gives you a rich taste. Always read labels to ensure all ingredients fit your dietary needs. With these easy swaps, you can enjoy butter chicken no matter your dietary restrictions. To store leftovers in the fridge, let the butter chicken cool first. Then, place it in an airtight container. This keeps the flavors fresh and prevents spills. You can store it for up to four days. Remember to label the container with the date for easy tracking. To freeze butter chicken, let it cool completely. Transfer it to a freezer-safe container or bag. Squeeze out any extra air to prevent freezer burn. Butter chicken can last up to three months in the freezer. When ready to eat, thaw it overnight in the fridge. For reheating, place it in a pot over medium heat. Stir often until it warms through. When reheating, use low heat to avoid burning. If the sauce is too thick, add a splash of water or coconut milk. This helps preserve the creamy texture. Always taste and adjust the seasoning after reheating. This keeps the flavors vibrant and delicious, just like when you first made it! Yes, you can use frozen chicken. Just remember to add about 5 extra minutes to the cooking time. This ensures the chicken cooks all the way through. Always check that the internal temperature reaches 165°F for safety. To add heat, try these tips: - Increase chili powder in the recipe. - Add fresh chopped green chilies. - Stir in red pepper flakes for a kick. - Serve with a spicy hot sauce on the side. If you want a different option, use heavy cream or yogurt. Both will give a rich texture. You can also try cashew cream for a dairy-free choice. Just blend soaked cashews with water until smooth for a creamy base. In summary, we explored the key ingredients for butter chicken, including chicken thighs, spices, and sauces. I shared step-by-step instructions for preparing a delicious dish in an Instant Pot. We also discussed tips for cooking, variations with alternative proteins, and smart storage methods. Butter chicken is versatile and easy to make. Enjoy experimenting with different flavors and sides. With practice, you’ll perfect your version of this beloved dish.

If you’re craving a quick and tasty meal, Instant Pot Butter Chicken is the answer. This dish combines tender chicken thighs with fragrant spices, creamy coconut milk, and rich tomato …

Read more

Categories Dinner Tags NO-ING-IMG

Garlic Parmesan Roasted Red Potatoes Flavorful Delight

January 14, 2026October 14, 2025 by Chef Tavio
- 1.5 pounds red potatoes, cut in halves or quarters - 4 cloves fresh garlic, finely minced - 1/3 cup freshly grated Parmesan cheese - 3 tablespoons extra virgin olive oil - 1 teaspoon dried rosemary - 1 teaspoon dried thyme - 1 teaspoon paprika - Fresh parsley, finely chopped - Salt and freshly cracked black pepper Red potatoes form the base of this dish. Their smooth skin and creamy texture create a perfect canvas. Fresh garlic adds a punch of flavor that makes the dish sing. When you use freshly minced garlic, you get a stronger taste compared to jarred options. Parmesan cheese brings a rich, savory finish. It melts beautifully, creating a satisfying crust. For seasoning, I use extra virgin olive oil. It helps the potatoes roast evenly and adds a lovely depth of flavor. Dried rosemary and thyme introduce warmth and earthiness. They pair perfectly with the garlic and cheese. Paprika adds a hint of smokiness, which gives the dish character. To finish, I sprinkle chopped parsley on top. It adds a burst of color and freshness. Salt and pepper are essential for enhancing all the flavors. Each ingredient plays a role in making these Garlic Parmesan Roasted Red Potatoes a flavorful delight. - Preheat the oven to 425°F (220°C) for perfect roasting. This heat helps the potatoes cook evenly. - Cut your red potatoes in halves or quarters. This ensures they cook well and get crispy. - In a bowl, mix the potatoes with minced garlic, olive oil, dried rosemary, dried thyme, paprika, salt, and pepper. Stir until all pieces are coated. - Make sure each potato has the seasoning. This step is key for great flavors. - Place the coated potatoes on a lined baking sheet. Spread them out for even cooking. - Roast for 25 minutes. This first stage gives the potatoes a nice golden color. - Take the baking sheet out of the oven. Sprinkle freshly grated Parmesan cheese over the hot potatoes. This adds a cheesy, rich flavor. - Return the baking sheet to the oven. Roast for another 10 to 15 minutes. The potatoes should turn golden brown with crispy edges. - Once done, let the potatoes cool for about 2 minutes. This helps them set. - Before serving, sprinkle chopped parsley on top. This adds a fresh look and taste. Spacing on the baking sheet is key. If the potatoes are too close, they steam instead of roast. Aim for a single layer so heat can reach each piece. Set your oven to 425°F (220°C). This hot temperature helps the potatoes cook well, giving them a crispy outside and soft inside. Fresh herbs bring more taste than dried ones. They add a bright, fresh flavor that dried herbs can’t match. If you have fresh rosemary or thyme, use them. You can add spices like garlic powder, onion powder, or even red pepper flakes. These can give your potatoes a fun twist. Serve your roasted potatoes in a nice bowl. A drizzle of extra virgin olive oil can make them shine. You might also sprinkle more Parmesan cheese on top for a rich look. For a pop of color, add fresh parsley. This not only looks great but also adds a fresh taste. {{image_4}} You can easily change the cheese in this recipe. Try using cheddar or feta instead of Parmesan. Each cheese adds a unique taste. If you want to switch up the potatoes, use Yukon Gold or fingerling potatoes. They will give you a slightly different texture. To add extra flavor, you can mix in herbs like oregano or basil. These herbs brighten the dish and bring fun new tastes. You can also toss in veggies like bell peppers or carrots. These add color and nutrition to your meal. If you need a gluten-free option, rest easy! This dish is naturally gluten-free as long as your cheese is safe. For a vegan version, skip the cheese. Use nutritional yeast for a cheesy flavor without dairy. You can still enjoy the garlic and herbs for a tasty dish. To keep your Garlic Parmesan Roasted Red Potatoes fresh, follow these steps: - Let them cool to room temperature. - Place them in an airtight container. - Store in the fridge for up to 3 days. This method helps maintain flavor and texture. For the best reheating results, use these methods: - Oven: Preheat to 350°F (175°C). Spread the potatoes on a baking sheet. Heat for about 10-15 minutes. This keeps them crispy. - Microwave: Place the potatoes in a microwave-safe dish. Cover with a damp paper towel. Heat in short bursts until warm. This method may soften them a bit. Both methods help maintain flavor and texture. Yes, you can freeze roasted potatoes! Here’s how: - Allow the potatoes to cool completely. - Spread them on a baking sheet in a single layer. - Freeze until solid, then transfer to a freezer bag. To thaw, place them in the fridge overnight. Reheat in the oven or microwave. This helps keep them tasty and enjoyable. These tasty potatoes take about 40 minutes in total. You spend 10 minutes prepping and 30 minutes cooking. First, preheat the oven to 425°F (220°C). Then, roast the potatoes for 25 minutes. After that, add Parmesan cheese and roast for another 10 to 15 minutes. This gives you golden, crispy potatoes full of flavor. Yes, you can prepare the potatoes ahead of time. Cut and season them, then place them in the fridge for up to 24 hours. When you're ready to cook, just pop them in the oven. This keeps the taste fresh and saves you time on busy days. Garlic Parmesan Roasted Red Potatoes pair well with many dishes. Try serving them with grilled chicken or steak for a hearty meal. They also go great with roasted vegetables or a fresh salad. You can even use them as a side for fish dishes. The options are endless! Garlic Parmesan Roasted Red Potatoes are simple yet delicious. You learned about the key ingredients and how to prepare them step by step. The right seasonings make a big difference in flavor. Remember to space the potatoes well while roasting. You can even make tasty variations to suit your taste. Use these tips for storing and reheating leftovers to keep them fresh. Try this recipe for your next meal; it’s sure to impress! Enjoy the aroma and taste of these fantastic potatoes.

Garlic Parmesan Roasted Red Potatoes are a simple and tasty side dish you’ll love. These golden, crispy bites bring together the rich flavors of garlic and cheese with the comforting …

Read more

Categories Dinner Tags NO-ING-IMG

Honey Sriracha Cauliflower Bites Tasty and Crispy Snack

January 14, 2026October 14, 2025 by Chef Tavio
- 1 medium head of cauliflower - 1/2 cup all-purpose flour - 1/2 cup water - 1 teaspoon garlic powder - 1/2 teaspoon salt - 1/2 teaspoon black pepper - 1/2 cup panko breadcrumbs - 3 tablespoons honey - 3 tablespoons Sriracha sauce - 1 teaspoon soy sauce - 1 tablespoon sesame oil - Chopped green onions for garnish These ingredients are key to making your honey Sriracha cauliflower bites tasty and crispy. The cauliflower provides a great base. Use a fresh, medium head for the best flavor. The flour and water mix will create a smooth batter that coats the florets well. Seasonings like garlic powder, salt, and black pepper add depth to the bites. Panko breadcrumbs give that perfect crunch. When baked, they turn golden brown and become crispy, which makes every bite enjoyable. For the honey Sriracha sauce, honey brings sweetness. Sriracha adds heat and flavor. Soy sauce enhances the umami taste, while sesame oil gives a nutty finish. Finally, chopped green onions add a burst of color and freshness. With these ingredients in hand, you’re ready to create a delicious snack that everyone will love! - Preheat oven to 400°F (200°C). - Prepare baking sheet with parchment paper. - Combine flour, water, garlic powder, salt, and black pepper in a bowl. - Whisk until smooth and integrated. This will be your batter. - Dip each cauliflower floret in the batter. - Roll in panko breadcrumbs, making sure they are evenly coated. - Arrange the coated cauliflower on the baking sheet in a single layer. - Bake for 25-30 minutes. Flip halfway to ensure even cooking. - Mix honey, Sriracha, soy sauce, and sesame oil in a bowl. - Stir until you have a sweet and spicy glaze. - Toss the baked cauliflower in the sauce. - Return to the oven for an additional 5-7 minutes. This helps the sauce stick. To get the perfect crunch on your honey Sriracha cauliflower bites, coat them well with panko. Panko breadcrumbs are lighter and airier than regular breadcrumbs. This allows them to crisp up nicely in the oven. To ensure even coating, roll each floret thoroughly in the panko. This step makes a big difference in texture. For extra crispiness, bake the cauliflower on a wire rack. This allows hot air to circulate around each piece. If you don't have a wire rack, use parchment paper. Just make sure to space them out so they don't touch. Flip the bites halfway through cooking. This helps them brown evenly and become extra crispy. Add more flavor to your honey Sriracha cauliflower bites with extra seasonings. You can sprinkle some smoked paprika or cayenne pepper for a smoky or spicy kick. A dash of cumin adds a warm note that pairs well with the honey. For dipping sauces, you can serve them with ranch or yogurt for a cool contrast. You can also try a sweet chili sauce for added sweetness. Each dip brings out different flavors in the bites, making them even more fun to eat. Don't be shy to mix and match your dips. Enjoy exploring new tastes! {{image_4}} To make this dish vegan, you can easily substitute honey with maple syrup. Maple syrup gives a great sweetness, balancing the heat from the Sriracha. For the flour, use chickpea flour or almond flour for a gluten-free option. Both provide a nice texture and flavor. If you want more heat, add more Sriracha to the sauce. You can also mix in some cayenne pepper or chili flakes. For extra flavor, consider adding minced garlic or ginger to the sauce. These ingredients bring depth and a kick to the bites. These cauliflower bites are great as appetizers or snacks. You can serve them at parties or enjoy them while watching a movie. For drinks, pair them with a cold beer or a sweet iced tea. They also taste good with a side of ranch or yogurt for dipping. To keep your honey Sriracha cauliflower bites fresh, use an airtight container. Glass or plastic containers work well. Make sure the bites cool down before sealing. This helps avoid sogginess. Store them in the fridge for up to three days. To maintain crispiness, place a paper towel at the bottom of the container. This will absorb excess moisture. If you have more bites than you can eat, try freezing them. Use a freezer-safe bag or container. They can last for up to a month in the freezer. When reheating, the oven is the best choice. Preheat it to 375°F (190°C). Spread the cauliflower bites on a baking sheet. Bake for about 10-15 minutes. This method keeps them crispy. You can also use an air fryer. Set it to 350°F (175°C) and cook for about 5-7 minutes. Avoid using the microwave. It can make them soggy. Reheat only the amount you plan to eat. Frequent reheating can lessen flavor and texture. Enjoy your bites fresh for the best taste! Yes, you can prepare these bites in advance. You can coat the cauliflower and store it in the fridge for a few hours. Just bake them right before serving. This way, they stay fresh and crispy. If you don't have panko, you can use regular breadcrumbs. Crushed cornflakes or crushed crackers also work well. They will give a nice crunch, similar to panko. The spice level is mild to medium. Sriracha brings heat, but honey balances it with sweetness. If you prefer more spice, you can add extra Sriracha or chili flakes to the sauce. Yes, frozen cauliflower is fine to use. Just thaw it and drain any excess water. Make sure to pat it dry before coating, so the batter sticks well. These bites pair great with ranch or yogurt-based dips. You can also serve them with extra Sriracha for those who love heat. A sweet chili sauce adds a nice touch, too! This blog post covered a tasty and easy recipe for Honey Sriracha Cauliflower Bites. You learned the key ingredients, instructions, and helpful tips to make them crispy and flavorful. Don't forget the sauce that brings all the flavors together. Try variations to suit your taste, like making it vegan or adjusting the spice level. These bites are perfect for snacks or appetizers. Now, go ahead and get creative in your kitchen with this fun recipe!

Looking for a quick snack that packs a punch? Look no further! These Honey Sriracha Cauliflower Bites are crispy, sweet, and spicy. They make a perfect appetizer or party treat. …

Read more

Categories Appetizers Tags NO-ING-IMG

Strawberry Shortcake Overnight Oats Tasty and Easy Recipe

January 14, 2026October 14, 2025 by Chef Tavio
- 1 cup rolled oats - 1 cup unsweetened almond milk (or your preferred milk) - 1 cup Greek yogurt (vanilla-flavored is ideal) These ingredients form the base of your overnight oats. Rolled oats provide fiber and a chewy texture. The almond milk keeps it creamy but feel free to use any milk you like. Greek yogurt adds protein and a rich flavor, making this dish feel indulgent. - 1 tablespoon maple syrup (optional, adjust sweetness to taste) - Whipped coconut cream - Crushed graham crackers for garnish These optional ingredients can enhance your oats. Maple syrup adds sweetness and a nice flavor. Whipped coconut cream gives a rich, creamy topping. Crushed graham crackers add a fun crunch that makes it feel like dessert. Strawberry Shortcake Overnight Oats are healthy and filling. You get about 300 calories per serving, depending on your choices. This dish is high in fiber, protein, and healthy fats. The oats provide lasting energy, while strawberries add vitamins. Greek yogurt offers probiotics for gut health, making this a great breakfast choice! To start, grab a large mixing bowl. Add 1 cup rolled oats, 2 tablespoons chia seeds, and a pinch of salt. Mix these dry ingredients well. This step helps the oats and seeds blend nicely. Next, in a separate bowl, combine 1 cup unsweetened almond milk, 1 cup Greek yogurt, 1 tablespoon maple syrup, and 1 teaspoon pure vanilla extract. Whisk these until smooth. This creamy mix gives your oats a rich flavor. Now, pour the yogurt mix over the oats and chia seeds. Use a spatula to combine everything. Make sure the dry ingredients get coated well. Take 1 cup fresh strawberries, hull and quarter them. Gently fold these into the oat mixture. Save a few for topping later. This adds a sweet burst in every bite. Carefully divide the mixture into two or three jars or airtight containers. Press down slightly to remove air pockets. This helps everything mix better. Seal the jars tightly. Place them in the fridge to chill overnight or for at least 4-6 hours. This waiting time allows the oats and chia seeds to soak up the liquid. When ready, stir the oats. If they seem too thick, you can add more almond milk for your preferred texture. Enjoy your delicious Strawberry Shortcake Overnight Oats! You can adjust sweetness and creaminess easily. If you want it sweeter, add more maple syrup. For creamier oats, use more Greek yogurt or almond milk. You can also switch the yogurt flavor for variety. Try coconut or strawberry yogurt for a different twist. You can mix in nuts, seeds, or other fruit. For a crunchy bite, add some chopped almonds or walnuts. Dried fruit, like raisins or cranberries, also works well. Get creative with your toppings to find what you love! Layering makes your oats look pretty. Use clear jars to show off the colors. Start with oats at the bottom. Then add a layer of strawberries. Repeat until the jar is full. For garnish, add fresh mint or basil on top. This small touch makes your dish look fancy and inviting. You can even sprinkle some crushed graham crackers on top for added texture! Meal prep is key for busy days. Make several jars at once and store them in the fridge. This way, you have breakfast ready for the week. If you have a bigger group, double the recipe. You can keep the jars in the fridge for up to five days. Each morning, just grab one and enjoy! {{image_4}} You can switch strawberries for other fruits. Raspberries and blueberries work great. You can also add bananas or peaches for a twist. Mixing different fruits keeps breakfast exciting and tasty. Using other yogurt flavors can change your oats. Try strawberry or peach yogurt for new tastes. You can also add spices like cinnamon or nutmeg. These spices give your oats a warm, cozy flavor. If you need gluten-free options, use certified gluten-free oats. This way, you can enjoy your oats safely. For a dairy-free version, swap Greek yogurt for coconut yogurt. This keeps the recipe creamy and delicious without dairy. Store your strawberry shortcake overnight oats in airtight containers. Glass jars work well and keep the oats fresh. Make sure to seal them tightly. These oats will stay good in the fridge for up to five days. If you want to enjoy them later, choose the right containers. You can freeze your overnight oats if you need to keep them longer. To freeze, put the oats in freezer-safe jars. Leave some space at the top, as the oats will expand. They can last up to three months in the freezer. When you want to eat them, take them out and thaw in the fridge overnight. For a quick fix, place the jar in warm water until soft. If you like warm oats, you can reheat them. Use the microwave and warm in short bursts. Stir between each burst to heat evenly. If the oats feel too thick, add a splash of almond milk. This will help keep the texture creamy and delicious. Enjoy your strawberry shortcake overnight oats warm or cold! Yes, you can make these oats ahead. They taste great after a night in the fridge. I recommend refrigerating them for at least 4 to 6 hours. This time lets the oats and chia seeds soak up the flavors. You can prepare them the night before for a quick breakfast. If you need a substitute for Greek yogurt, try regular yogurt or dairy-free options. You can use coconut yogurt for a dairy-free choice. If you want a lighter option, use low-fat yogurt. Each alternative will change the taste a bit, but they work well in this recipe. To adjust sweetness, start with the maple syrup. Add one tablespoon, then taste it. If you like it sweeter, add more syrup. You can also try honey or agave syrup. If you prefer less sweetness, skip the syrup altogether. This way, you can make the oats just how you like! In this blog post, we explored how to make Strawberry Shortcake Overnight Oats. We covered the key ingredients, step-by-step instructions, and tips for customization. You can make this dish healthy by adjusting sweetness, using different fruits, or switching yogurt types. Remember to store your oats properly to keep them fresh. With these strategies, you can enjoy a tasty, nutritious breakfast any day. Now, go ahead and start your oat adventure!

Are you craving a sweet treat that’s also a healthy breakfast? Look no further! My Strawberry Shortcake Overnight Oats recipe combines creamy yogurt, rolled oats, and fresh strawberries for a …

Read more

Categories Breakfast Tags NO-ING-IMG

Flavorful One-Pot Greek Lemon Chicken Soup Recipe

January 14, 2026October 14, 2025 by Chef Tavio
To make a delicious One-Pot Greek Lemon Chicken Soup, you need simple and fresh ingredients. Here’s what you will need: - 1 tablespoon olive oil - 1 medium onion, diced - 2 cloves garlic, minced - 2 carrots, sliced - 2 celery stalks, sliced - 1 pound boneless, skinless chicken breasts - 8 cups chicken broth - 1 cup uncooked orzo pasta - 1 teaspoon dried oregano - Salt and freshly ground pepper, to taste - Juice of 2 lemons - Zest of 1 lemon - 1 bunch fresh parsley, chopped - 2 eggs (for a creamy texture, optional) These ingredients come together to create a warm and comforting soup. The olive oil brings richness while the onions and garlic add depth. Carrots and celery lend sweetness and crunch. The chicken and broth form the base, making it hearty. Orzo pasta gives it a nice texture, and lemon juice and zest brighten the flavor. Fresh parsley adds a pop of color and freshness to the dish. If you want a creamier version, the eggs are a great addition. They make the soup smooth and rich. This list of ingredients ensures you have everything you need for a delightful meal. Enjoy cooking! 1. Start by heating 1 tablespoon of olive oil in a large pot over medium heat. 2. Once hot, add 1 diced onion. Sauté it until soft and clear, about 3-5 minutes. 3. Next, add 2 minced garlic cloves, 2 sliced carrots, and 2 sliced celery stalks. Stir and cook for 5 more minutes until they smell great. 4. Now, add 1 pound of boneless, skinless chicken breasts to the pot. Pour in 8 cups of chicken broth. 5. Turn up the heat to bring the mix to a boil. When it boils, lower the heat to simmer. Cover the pot and let it cook for about 20 minutes. Chicken should be cooked through and not pink. 1. Carefully take the chicken from the pot and place it on a plate. Use two forks to shred the chicken into small pieces. 2. Put the shredded chicken back into the pot. 3. Add 1 cup of uncooked orzo pasta and 1 teaspoon of dried oregano. Stir it in well. 4. Keep simmering for another 10 minutes. This will help the orzo cook to a tender, yet firm texture. 1. Taste the soup. Add salt and freshly ground pepper as needed. 2. Squeeze the juice of 2 lemons and mix in the zest of 1 lemon. This adds a fresh flavor. 3. For a creamy finish, you can use 2 eggs. Crack them into a bowl and whisk until smooth. 4. Slowly pour in a ladle of hot soup while whisking the eggs. This warms them without cooking too fast. 5. Gradually mix this back into the pot. Stir gently until creamy. 6. Finally, sprinkle in chopped fresh parsley for color and taste. Enjoy your flavorful One-Pot Greek Lemon Chicken Soup! To ensure your chicken cooks properly, use boneless, skinless chicken breasts. Cook them until they are no longer pink inside, about 20 minutes. Always check the thickest part to be sure. If you have a meat thermometer, aim for 165°F (75°C). Adjusting seasoning is key. Start with salt and pepper, and taste as you go. Different brands of broth can change flavors, so add more lemon juice or zest if needed. A little extra can brighten the soup. For a creamy texture, use eggs. Crack them into a bowl and whisk until smooth. Slowly add a ladle of hot soup to the eggs while whisking. This helps prevent the eggs from cooking too fast. Mix this back into the pot for creaminess. If you want alternatives for creaminess, try adding a splash of heavy cream. Coconut milk is another great option for a twist. Both add rich flavors and smooth textures. For presentation, serve the soup hot in individual bowls. Garnish with fresh parsley and lemon wedges for color. This adds a fresh look and zesty flavor. Pair your soup with crusty bread or a simple salad. A slice of toasted baguette works well for dipping. Enjoy the warmth and delightful taste! {{image_4}} You can swap orzo for rice or quinoa. Both work well and add texture. Try brown rice for a nuttier flavor. If you want a lighter soup, use cauliflower rice. For veggies, feel free to add spinach or kale. Both add great nutrients and color. You can also use bell peppers or zucchini for extra crunch. To boost the flavor, add spices like cumin or coriander. These spices bring warmth and depth. Fresh herbs like dill or thyme also work wonders. They add freshness and make the soup lively. Want some heat? Sprinkle in chili flakes or diced peppers. This gives the soup a kick. Adjust the amount to suit your taste. For gluten-free options, use gluten-free pasta. Quinoa is another great choice. It keeps the soup hearty without gluten. If you want a vegan version, replace the chicken with chickpeas. Use vegetable broth instead of chicken broth. Skip the eggs to keep it vegan-friendly. You’ll still have a tasty and filling soup! To store leftovers, let the soup cool down. Pour the soup into an airtight container. Seal it well and place it in the fridge. This soup stays fresh for about 3-4 days. Always check for any off smells or changes in texture before eating. To freeze the soup, let it cool completely first. Next, pour it into freezer-safe containers. Leave some space at the top, as it will expand. You can freeze it for up to 3 months. To reheat, take the soup out of the freezer. Thaw it overnight in the fridge. Heat it on the stove over low to medium heat. Stir it often to avoid sticking. If it seems thick, add a bit of broth or water to lighten it up. How to make One-Pot Greek Lemon Chicken Soup vegetarian? To make this soup vegetarian, swap the chicken for chickpeas or tofu. Use vegetable broth instead of chicken broth. Add more veggies like zucchini or spinach for extra flavor. Can I use leftover chicken in the recipe? Yes, leftover chicken works great! Just shred it and add it to the pot after cooking the veggies. This saves time and adds a nice flavor to the soup. What to serve with One-Pot Greek Lemon Chicken Soup? This soup pairs well with crusty bread or a fresh salad. You can also serve it with a side of lemony rice for a full meal. Calories per serving Each serving of this soup has around 300 calories. This makes it a hearty yet light meal. Breakdown of macronutrients - Protein: 25g - Carbohydrates: 30g - Fats: 10g Can I reduce the cooking time? You can cut cooking time by using shredded rotisserie chicken. This will allow you to skip cooking the chicken from scratch and save about 20 minutes. Tips for quick preparations without compromising taste Prep your veggies ahead of time. Use frozen or pre-chopped vegetables to speed up cooking. This keeps the flavors intact while saving you precious time. This blog post covered the key ingredients for One-Pot Greek Lemon Chicken Soup and the step-by-step prep to make it. I shared tips and tricks for perfecting flavors and creating creamy textures. You can even customize this dish with various ingredients to suit any diet. Be sure to follow the storage guidelines to enjoy leftovers. This dish brings comfort and flavor to any meal. Dive in and make this recipe your own!

Looking for a warm, cozy dish that bursts with flavor? This one-pot Greek lemon chicken soup is your answer! With simple ingredients like chicken, orzo, and fresh lemon, you’ll whip …

Read more

Categories Dinner Tags NO-ING-IMG
Older posts
Newer posts
← Previous Page1 … Page7 Page8 Page9 … Page73 Next →

TASTED NEST

Where Flavor Finds a Home 🍳🏡 — warm, simple, and crave-worthy recipes made for real life, from stovetop mornings to backyard dinners.

PAGES

Home About Contact Privacy Policy Terms & Conditions Cookie Policy GDPR Policy Copyright Policy Disclaimer

CATEGORIES

Appetizers Desserts Salads Breakfast Dinner
Copyright © 2026 Tasted Nest. All rights reserved.