. For the best taste, coat the corn evenly with the garlic butter. This step is key. If you miss spots, some bites may taste plain. Use a brush for a smooth application. Let the butter soak in for a few minutes. This helps the flavors meld together. Make sure your grill is hot enough. If it's too cool, the corn won’t cook well. Aim for a steady heat between 375°F and 450°F. This range gives you a nice char and soft kernels. When wrapping the corn in foil, seal it tightly. This keeps the moisture in. Be careful when unwrapping it. The steam can burn you. Open it away from your body to stay safe. Garlic butter grilled corn is great with dips or toppings. Try adding crumbled feta or a sprinkle of chili powder. This gives a nice kick to each bite. Serve it with fresh salads or grilled meats for a complete meal. Pair it with a cold drink to balance the flavors. If you want a twist, check out the Full Recipe for more ideas. {{image_4}} To make your garlic butter grilled corn even better, try adding spices. Chili powder gives a nice kick. Paprika adds a smoky flavor that pairs well with the butter. You can also use herb-infused butter. Mix in fresh herbs like basil or thyme for extra taste. If you want to switch things up, try alternative grilling methods. Using a grill basket can make cooking easier. It keeps the corn from falling through the grates. If you can't grill outside, you can bake the corn in the oven. Wrap it in foil and bake at 375°F for about 25-30 minutes. For those who are vegan, you can swap out regular butter for plant-based options. Coconut oil or vegan butter works great. If you need a gluten-free option, this recipe is already safe. Just be sure to check any added ingredients for gluten. For the full recipe, check the earlier section of this article. To store leftover garlic butter grilled corn, let it cool first. Wrap each ear in plastic wrap or foil. Place them in an airtight container. This helps keep them fresh for about three to five days in the fridge. Make sure to label the container with the date. When reheating, you want to keep the corn juicy and tasty. The best way is to use your grill or stovetop. Preheat the grill to medium heat. Grill the corn for about five minutes, turning it often. If you use the stovetop, wrap the corn in foil with a bit of water. Heat it on medium until warm. You can also use a microwave, but this may change the texture. Heat on high for 1-2 minutes, checking often. Freezing grilled corn is easy and great for future meals. First, let the corn cool completely. Next, wrap each ear in plastic wrap. Then, place the wrapped corn in a freezer bag. Make sure to squeeze out as much air as possible. Label the bag and freeze for up to six months. When you are ready to eat it, thaw in the fridge overnight. Then, reheat as mentioned above for the best flavor. This way, you can enjoy that delicious garlic butter taste anytime! For more details, check the Full Recipe. You can tell corn is done when it feels tender. Use a fork to pierce a kernel. If the juice runs clear, it's ready. Another sign is the bright yellow color. The corn should look glossy and fresh after grilling. Cooking time is about 15-20 minutes on the grill. Turn it every five minutes for even cooking. Yes, you can prepare it ahead of time. Husk the corn and make the garlic butter. Coat the corn, then wrap it in foil. Store it in the fridge for up to 24 hours. When ready to cook, just place it on the grill. You can also cook it in advance. Reheat it on the grill or in the oven before serving. This corn pairs well with many sides. You can serve it with grilled meats, like chicken or steak. It also goes great with salads, like coleslaw or a fresh green salad. For a fun twist, serve it with dips like sour cream or guacamole. You can even add it to a taco bar for extra flavor. To serve more people, simply scale up the recipe. You can use more ears of corn, butter, and garlic. Just keep the same ratios. If you have a large grill, you can cook several at once. Wrap each ear in foil and place them on the grill. This method keeps them warm while you cook more. This blog post helps you master garlic butter grilled corn on the cob. We covered the key ingredients, like fresh corn and garlic. You learned how to grill it perfectly while avoiding common mistakes. Plus, we shared tricks for great flavor and storage tips. You now have ideas for serving and variations that suit your taste. Enjoy grilling delicious corn that will impress friends and family. Remember, the right preparation makes all the difference! Happy grilling!](https://tastednest.com/wp-content/uploads/2025/06/9217476a-3c26-41f1-88ef-75d06ad0ca12.webp)
Get ready to elevate your summer BBQ with my Garlic Butter Grilled Corn on the Cob! This simple yet mouthwatering dish bursts with flavor from fresh garlic, creamy butter, and a touch of sea salt. Not only is it easy to make, but it’s also the perfect side to impress your family and friends. Join me as we dive into the steps, tips, and variations for the ultimate corn experience!
Ingredients
List of Ingredients
– Fresh corn (4 ears, husked and cleaned)
– Unsalted butter (1/2 cup, softened)
– Garlic (4 cloves, finely minced)
– Sea salt (1 teaspoon)
– Black pepper (1/2 teaspoon, freshly ground)
– Fresh parsley (1 tablespoon, finely chopped)
– Grated parmesan cheese (1 tablespoon, optional)
– Lemon wedges (for serving)
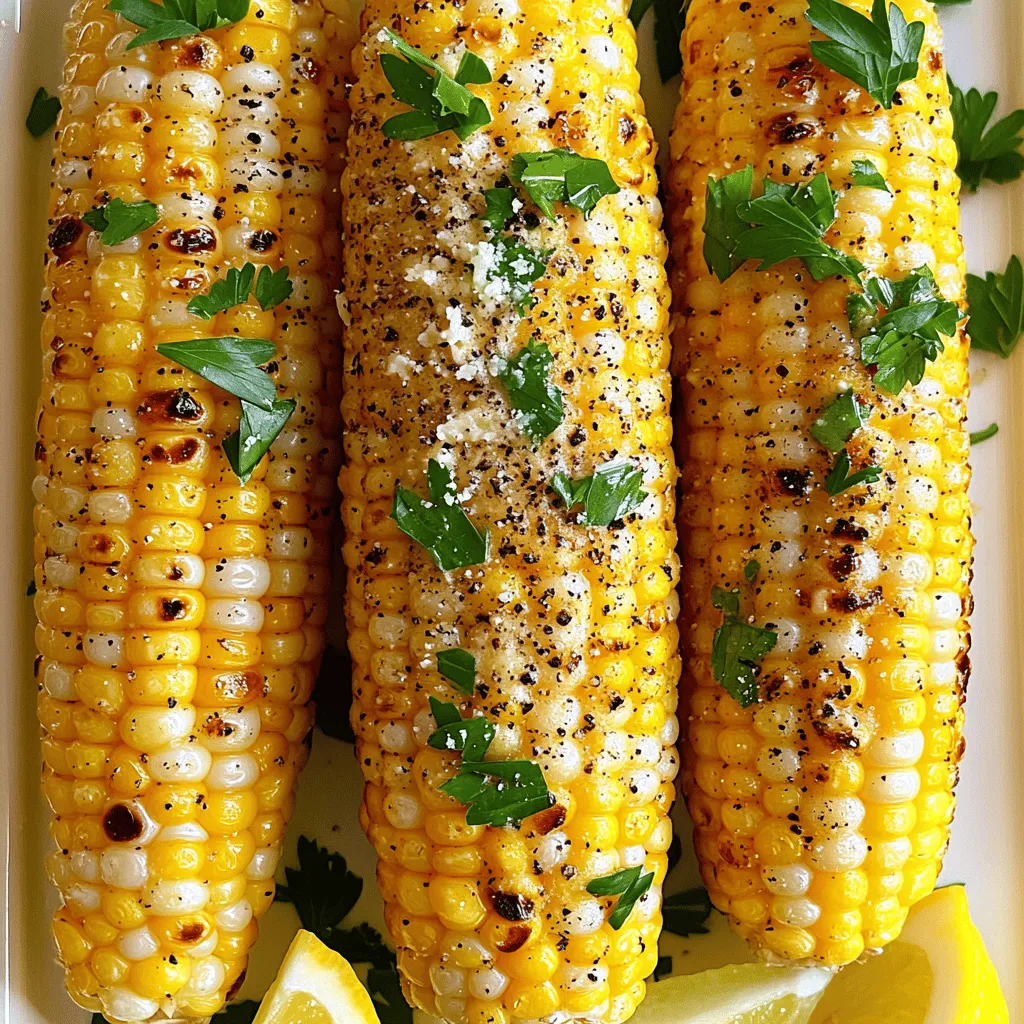
Garlic Butter Grilled Corn on the Cob is a simple dish. The fresh corn is the star here. Choose ears that are bright and firm. This makes the corn sweet and juicy. The unsalted butter gives a rich flavor. I use fresh garlic for that strong taste. The sea salt and black pepper add depth.
Fresh parsley brightens the dish and adds color. If you want more flavor, sprinkle grated parmesan on top. It melts slightly and gives a savory twist. Don’t forget the lemon wedges! They add a zesty kick when squeezed over the hot corn.
For the full recipe, check out the complete details above.
Step-by-Step Instructions
Preheating the Grill
First, set your grill to a medium-high heat. Aim for a range of 375°F to 450°F. This hot temperature helps the corn to cook evenly and develop a nice char.
Preparing the Garlic Butter
Grab a small mixing bowl. Add 1/2 cup of softened unsalted butter. Then, add 4 finely minced garlic cloves, 1 teaspoon of sea salt, and 1/2 teaspoon of freshly ground black pepper. Mix these well with a fork. You want a smooth and fragrant garlic butter.
Preparing the Corn
Next, carefully husk the corn. Remove all the silk strands to ensure clean corn. If the ears are too big for your grill, you can cut them in half. If they fit, keep them whole for juiciness.
Grilling the Corn
Take each ear of corn and coat it generously with the garlic butter. Wrap each ear tightly in aluminum foil. Make sure to seal the edges well to trap steam.
Put the wrapped corn on the grill. Grill for about 15 to 20 minutes. Turn the corn every 5 minutes for even cooking. If you want a charred flavor, unwrap the corn during the last 5 minutes. This lets the corn brown nicely.
When the corn is tender, remove it from the grill. Be careful when unwrapping the foil since hot steam will escape. For extra flavor, sprinkle grated parmesan cheese on top and add fresh parsley. Serve with lemon wedges for a zesty kick. Enjoy this tasty Garlic Butter Grilled Corn on the Cob! You can find the full recipe [here](#).
Tips & Tricks
Achieving the Best Flavor
For the best taste, coat the corn evenly with the garlic butter. This step is key. If you miss spots, some bites may taste plain. Use a brush for a smooth application. Let the butter soak in for a few minutes. This helps the flavors meld together.
Avoiding Common Mistakes
Make sure your grill is hot enough. If it’s too cool, the corn won’t cook well. Aim for a steady heat between 375°F and 450°F. This range gives you a nice char and soft kernels. When wrapping the corn in foil, seal it tightly. This keeps the moisture in. Be careful when unwrapping it. The steam can burn you. Open it away from your body to stay safe.
Serving Suggestions
Garlic butter grilled corn is great with dips or toppings. Try adding crumbled feta or a sprinkle of chili powder. This gives a nice kick to each bite. Serve it with fresh salads or grilled meats for a complete meal. Pair it with a cold drink to balance the flavors. If you want a twist, check out the Full Recipe for more ideas.
Variations
Flavor Enhancements
To make your garlic butter grilled corn even better, try adding spices. Chili powder gives a nice kick. Paprika adds a smoky flavor that pairs well with the butter. You can also use herb-infused butter. Mix in fresh herbs like basil or thyme for extra taste.
Cooking Methods
If you want to switch things up, try alternative grilling methods. Using a grill basket can make cooking easier. It keeps the corn from falling through the grates. If you can’t grill outside, you can bake the corn in the oven. Wrap it in foil and bake at 375°F for about 25-30 minutes.
Dietary Modifications
For those who are vegan, you can swap out regular butter for plant-based options. Coconut oil or vegan butter works great. If you need a gluten-free option, this recipe is already safe. Just be sure to check any added ingredients for gluten.
For the full recipe, check the earlier section of this article.
Storage Information
Storing Leftovers
To store leftover garlic butter grilled corn, let it cool first. Wrap each ear in plastic wrap or foil. Place them in an airtight container. This helps keep them fresh for about three to five days in the fridge. Make sure to label the container with the date.
Reheating Methods
When reheating, you want to keep the corn juicy and tasty. The best way is to use your grill or stovetop. Preheat the grill to medium heat. Grill the corn for about five minutes, turning it often. If you use the stovetop, wrap the corn in foil with a bit of water. Heat it on medium until warm. You can also use a microwave, but this may change the texture. Heat on high for 1-2 minutes, checking often.
Freezing Corn on the Cob
Freezing grilled corn is easy and great for future meals. First, let the corn cool completely. Next, wrap each ear in plastic wrap. Then, place the wrapped corn in a freezer bag. Make sure to squeeze out as much air as possible. Label the bag and freeze for up to six months. When you are ready to eat it, thaw in the fridge overnight. Then, reheat as mentioned above for the best flavor. This way, you can enjoy that delicious garlic butter taste anytime! For more details, check the Full Recipe.
FAQs
How do I know when corn on the cob is fully cooked?
You can tell corn is done when it feels tender. Use a fork to pierce a kernel. If the juice runs clear, it’s ready. Another sign is the bright yellow color. The corn should look glossy and fresh after grilling. Cooking time is about 15-20 minutes on the grill. Turn it every five minutes for even cooking.
Can I make Garlic Butter Grilled Corn on the Cob in advance?
Yes, you can prepare it ahead of time. Husk the corn and make the garlic butter. Coat the corn, then wrap it in foil. Store it in the fridge for up to 24 hours. When ready to cook, just place it on the grill. You can also cook it in advance. Reheat it on the grill or in the oven before serving.
What can I serve with Garlic Butter Grilled Corn on the Cob?
This corn pairs well with many sides. You can serve it with grilled meats, like chicken or steak. It also goes great with salads, like coleslaw or a fresh green salad. For a fun twist, serve it with dips like sour cream or guacamole. You can even add it to a taco bar for extra flavor.
How to make Garlic Butter Grilled Corn on the Cob suitable for a crowd?
To serve more people, simply scale up the recipe. You can use more ears of corn, butter, and garlic. Just keep the same ratios. If you have a large grill, you can cook several at once. Wrap each ear in foil and place them on the grill. This method keeps them warm while you cook more.
This blog post helps you master garlic butter grilled corn on the cob. We covered the key ingredients, like fresh corn and garlic. You learned how to grill it perfectly while avoiding common mistakes. Plus, we shared tricks for great flavor and storage tips.
You now have ideas for serving and variations that suit your taste. Enjoy grilling delicious corn that will impress friends and family. Remember, the right preparation makes all the difference! Happy grilling!
. For the best taste, coat the corn evenly with the garlic butter. This step is key. If you miss spots, some bites may taste plain. Use a brush for a smooth application. Let the butter soak in for a few minutes. This helps the flavors meld together. Make sure your grill is hot enough. If it's too cool, the corn won’t cook well. Aim for a steady heat between 375°F and 450°F. This range gives you a nice char and soft kernels. When wrapping the corn in foil, seal it tightly. This keeps the moisture in. Be careful when unwrapping it. The steam can burn you. Open it away from your body to stay safe. Garlic butter grilled corn is great with dips or toppings. Try adding crumbled feta or a sprinkle of chili powder. This gives a nice kick to each bite. Serve it with fresh salads or grilled meats for a complete meal. Pair it with a cold drink to balance the flavors. If you want a twist, check out the Full Recipe for more ideas. {{image_4}} To make your garlic butter grilled corn even better, try adding spices. Chili powder gives a nice kick. Paprika adds a smoky flavor that pairs well with the butter. You can also use herb-infused butter. Mix in fresh herbs like basil or thyme for extra taste. If you want to switch things up, try alternative grilling methods. Using a grill basket can make cooking easier. It keeps the corn from falling through the grates. If you can't grill outside, you can bake the corn in the oven. Wrap it in foil and bake at 375°F for about 25-30 minutes. For those who are vegan, you can swap out regular butter for plant-based options. Coconut oil or vegan butter works great. If you need a gluten-free option, this recipe is already safe. Just be sure to check any added ingredients for gluten. For the full recipe, check the earlier section of this article. To store leftover garlic butter grilled corn, let it cool first. Wrap each ear in plastic wrap or foil. Place them in an airtight container. This helps keep them fresh for about three to five days in the fridge. Make sure to label the container with the date. When reheating, you want to keep the corn juicy and tasty. The best way is to use your grill or stovetop. Preheat the grill to medium heat. Grill the corn for about five minutes, turning it often. If you use the stovetop, wrap the corn in foil with a bit of water. Heat it on medium until warm. You can also use a microwave, but this may change the texture. Heat on high for 1-2 minutes, checking often. Freezing grilled corn is easy and great for future meals. First, let the corn cool completely. Next, wrap each ear in plastic wrap. Then, place the wrapped corn in a freezer bag. Make sure to squeeze out as much air as possible. Label the bag and freeze for up to six months. When you are ready to eat it, thaw in the fridge overnight. Then, reheat as mentioned above for the best flavor. This way, you can enjoy that delicious garlic butter taste anytime! For more details, check the Full Recipe. You can tell corn is done when it feels tender. Use a fork to pierce a kernel. If the juice runs clear, it's ready. Another sign is the bright yellow color. The corn should look glossy and fresh after grilling. Cooking time is about 15-20 minutes on the grill. Turn it every five minutes for even cooking. Yes, you can prepare it ahead of time. Husk the corn and make the garlic butter. Coat the corn, then wrap it in foil. Store it in the fridge for up to 24 hours. When ready to cook, just place it on the grill. You can also cook it in advance. Reheat it on the grill or in the oven before serving. This corn pairs well with many sides. You can serve it with grilled meats, like chicken or steak. It also goes great with salads, like coleslaw or a fresh green salad. For a fun twist, serve it with dips like sour cream or guacamole. You can even add it to a taco bar for extra flavor. To serve more people, simply scale up the recipe. You can use more ears of corn, butter, and garlic. Just keep the same ratios. If you have a large grill, you can cook several at once. Wrap each ear in foil and place them on the grill. This method keeps them warm while you cook more. This blog post helps you master garlic butter grilled corn on the cob. We covered the key ingredients, like fresh corn and garlic. You learned how to grill it perfectly while avoiding common mistakes. Plus, we shared tricks for great flavor and storage tips. You now have ideas for serving and variations that suit your taste. Enjoy grilling delicious corn that will impress friends and family. Remember, the right preparation makes all the difference! Happy grilling!](https://tastednest.com/wp-content/uploads/2025/06/9217476a-3c26-41f1-88ef-75d06ad0ca12-300x300.webp)