
Get ready to whip up a sweet treat in just 20 minutes! These Mini Lemon Blueberry Cheesecakes are the perfect balance of tangy and sweet. With a creamy filling and fresh blueberries, they’re a delight for any gathering or a simple snack. In this guide, I’ll share the essential ingredients, easy steps, and tips to make your cheesecakes shine. Let’s get started on this delicious adventure!
Ingredients
Essential Ingredients for Mini Lemon Blueberry Cheesecakes
To make these delightful mini cheesecakes, you will need the following key ingredients:
– 1 cup graham cracker crumbs
– 4 tablespoons unsalted butter, melted
– 8 oz cream cheese, softened to room temperature
– 1/2 cup powdered sugar
– 1 teaspoon pure vanilla extract
– 1 tablespoon freshly squeezed lemon juice
– Zest of 1 fresh lemon
– 1 cup plump fresh blueberries
These ingredients work together to create a creamy, tangy filling on a buttery crust.
Optional Ingredients for Flavor and Presentation
You can elevate your mini cheesecakes with some optional ingredients:
– Fresh mint leaves for garnish
Mint adds a pop of color and freshness. It complements the lemon and blueberry flavors beautifully.
Tips for Selecting Fresh Ingredients
When making these cheesecakes, fresh ingredients matter. Here are some tips:
– Blueberries: Choose plump, firm blueberries. Look for deep blue color without blemishes.
– Lemon: Pick lemons that feel heavy for their size. This means they are juicy.
– Cream Cheese: Use full-fat cream cheese for the best flavor and texture. Make sure it is at room temperature for easy mixing.
Selecting the best ingredients ensures your mini cheesecakes taste amazing. For the full recipe, check [Full Recipe].
Step-by-Step Instructions
Preheating and Preparing the Crust
Start by preheating your oven to 350°F (175°C). This step is key for a great bake. Line a muffin tin with cupcake liners. This makes it simple to remove the mini cheesecakes later. In a medium bowl, mix 1 cup of graham cracker crumbs with 4 tablespoons of melted butter. Use a fork to blend until it looks like wet sand. Take about 1 tablespoon of this mixture and press it into the bottom of each liner. This creates a solid base for your cheesecakes. Bake the crust for 5 minutes, then let it cool in the tin.
Making the Creamy Filling
While the crust cools, let’s make the filling. In a large bowl, beat 8 oz of softened cream cheese until creamy. There should be no lumps. Gradually add 1/2 cup of powdered sugar. Keep mixing until it’s fluffy and smooth. Next, add 1 teaspoon of pure vanilla extract, 1 tablespoon of freshly squeezed lemon juice, and the zest of 1 lemon. Beat again until it’s all combined. This will give your filling a rich flavor.
Combining and Baking the Mini Cheesecakes
Now, gently fold in 1 cup of fresh blueberries using a spatula. Be careful not to crush them. Spoon the filling into the cooled crusts, filling each one close to the top. This creates a generous portion. Place the muffin tin in the refrigerator for at least 10 minutes. This helps the cheesecakes firm up. For the full recipe, check the detailed steps provided.
Tips & Tricks
Best Practices for Achieving a Smooth Filling
To get a smooth filling, start with room temperature cream cheese. Cold cream cheese can cause lumps. Use an electric mixer to beat it well. Mix until it’s creamy and fluffy. Gradually add powdered sugar, mixing as you go. This helps to blend everything evenly. Remember, a smooth filling means a better cheesecake!
How to Perfectly Fold in Blueberries
When adding blueberries, use a spatula for folding. Gently lift the filling and turn it over the berries. Be careful not to crush them. You want to keep those juicy berries whole. This adds texture and makes the cheesecake look great. A little care goes a long way in keeping your dessert pretty!
Presentation Tips for Serving
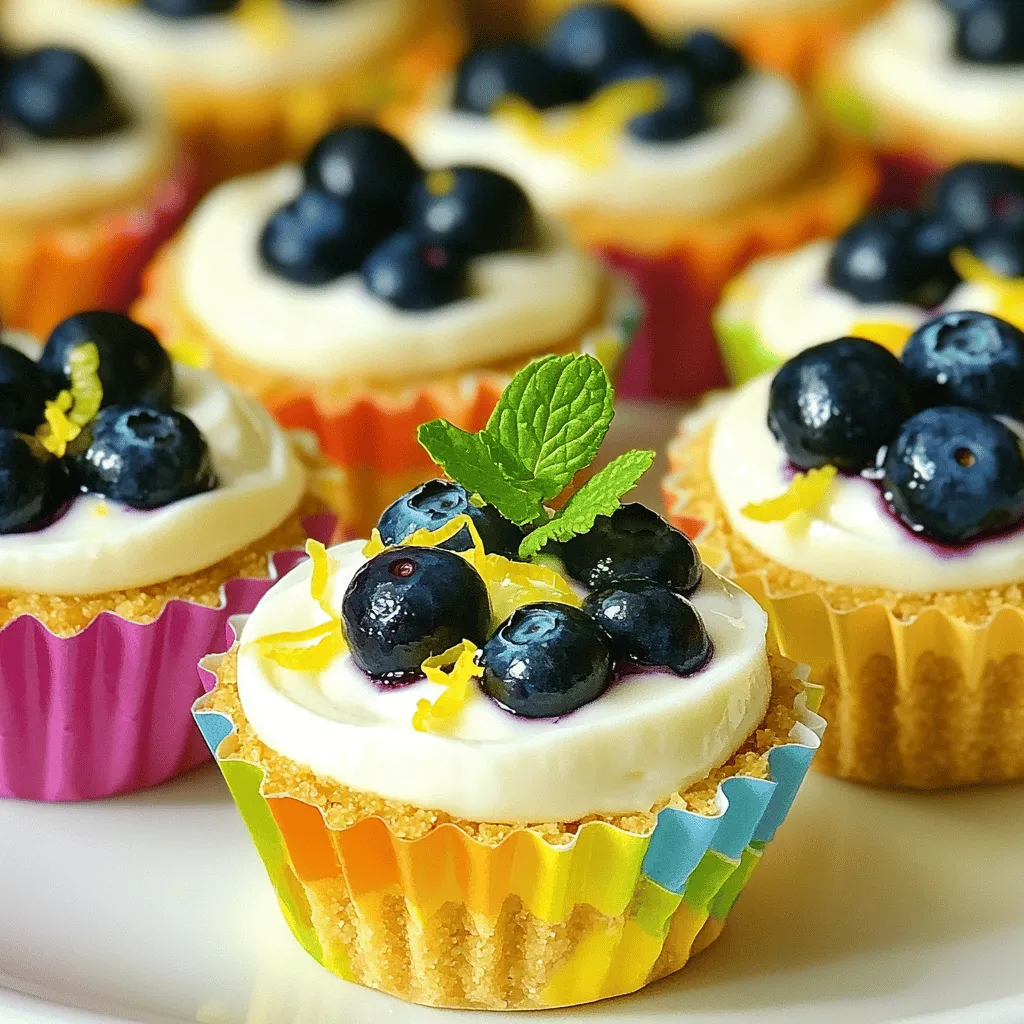
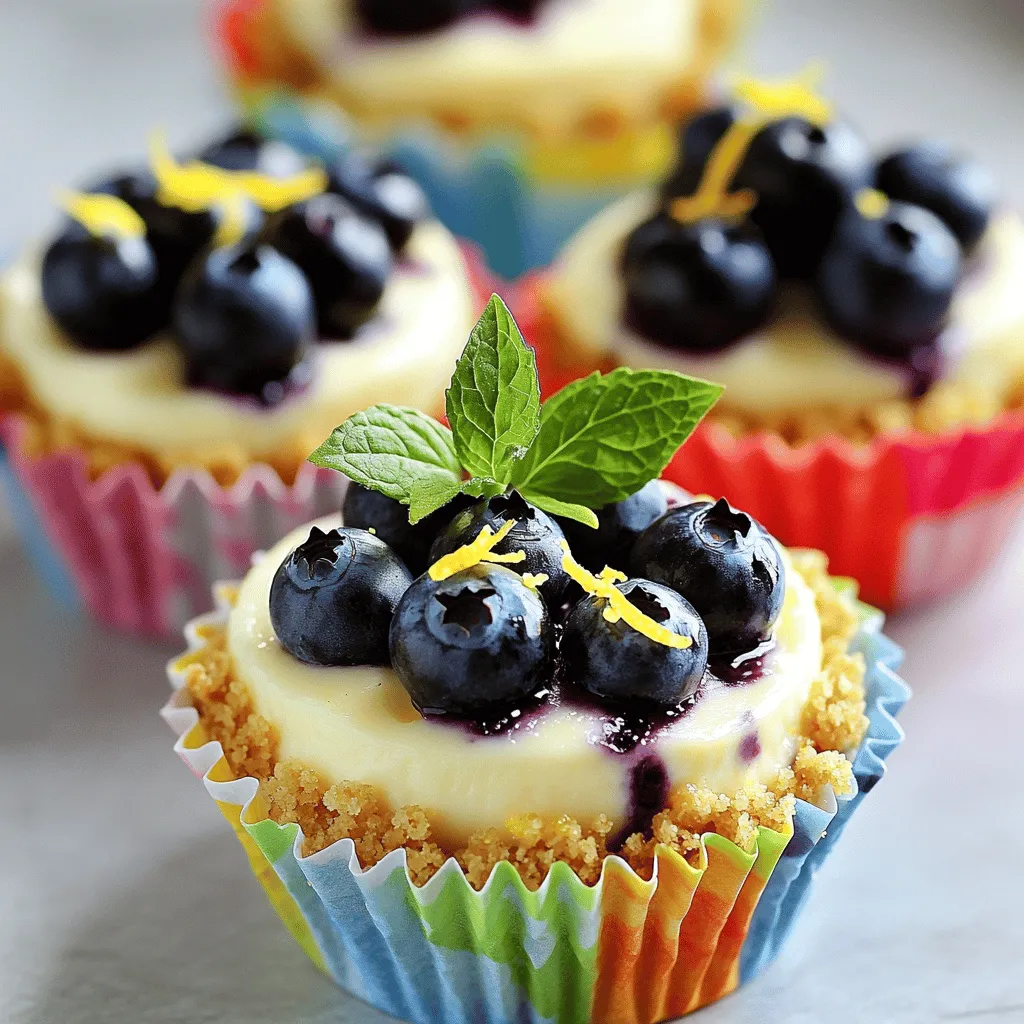
For a lovely presentation, chill your cheesecakes first. When ready to serve, add a few fresh blueberries on top. A sprig of mint adds a nice touch too. It makes each cheesecake look fancy and fresh. Arrange them on a colorful platter to impress your guests. Everyone will love the look as much as the taste! If you want more ideas, check out the Full Recipe for extra details.
Variations
Alternative Fruit Options for Cheesecake
You can mix things up by using different fruits. Strawberries, raspberries, or peaches work well. Just swap them out for blueberries in the recipe. Each fruit adds its own unique flavor. For example, strawberries give a sweet taste, while raspberries add a bit of tartness. This lets you create new mini cheesecakes every time!
Options for Gluten-Free Crust
If you need a gluten-free option, don’t worry! You can use gluten-free graham cracker crumbs. Another choice is almond flour or crushed nuts mixed with melted butter. These options will still give you that tasty crust. Just make sure to press it firmly into the cupcake liners.
Different Flavor Profiles to Experiment With
Feeling adventurous? Try adding different flavors to your cheesecake mix. You can add cocoa powder for a chocolate twist. Or, mix in some coffee for a mocha flavor. You could also use extracts like almond or coconut. Each addition can change the taste and make your cheesecakes even more special.
For the complete recipe, check out the Full Recipe link above. Enjoy exploring these variations!
Storage Info
How to Store Leftover Mini Cheesecakes
To store leftover mini cheesecakes, place them in an airtight container. Make sure they are fully cooled before sealing the container. This keeps them fresh and prevents them from drying out. You can also separate layers with parchment paper to avoid sticking. If you plan to eat them later, keep the container in the fridge.
Shelf Life and Freezing Tips
These mini cheesecakes will last in the fridge for up to five days. If you want to keep them longer, freezing is a great option. Wrap each cheesecake tightly in plastic wrap, then place them in a freezer bag. They can last up to three months in the freezer. When you’re ready to enjoy them, just thaw them in the fridge overnight.
Reheating Tips for Optimal Texture
Reheating mini cheesecakes is not necessary, but if you want them warm, do it gently. Preheat your oven to 300°F (150°C). Place the cheesecakes on a baking sheet and warm them for about 10 minutes. This method helps maintain a creamy texture. Avoid using a microwave, as it can make them rubbery. For best flavor, serve them chilled straight from the fridge. For the complete recipe, refer to the full recipe section.
FAQs
Can I make the filling ahead of time?
Yes, you can make the filling ahead of time. Mix the cream cheese, sugar, lemon juice, and zest. Store it in the fridge for up to a day. Just remember to stir it well before using. This saves time on the day you plan to serve your mini cheesecakes.
What can I substitute for cream cheese?
If you want to replace cream cheese, consider using mascarpone or Greek yogurt. Both give a creamy texture. Vegan options include cashew cream or silken tofu blended smooth. Each option changes the flavor slightly, but they all work well in this recipe.
How to know when the cheesecakes are set?
The cheesecakes will be set when they feel firm to the touch. After chilling, gently press the center. If it springs back, they are ready. If they feel too soft, give them more time in the fridge. The cold helps them firm up nicely. For the full recipe, check out the details above.
These mini lemon blueberry cheesecakes are fun to make and even better to eat. We covered essential and optional ingredients to enhance flavor and style. I shared steps for a perfect crust and a creamy filling. Plus, tips to fold in blueberries smoothly and present your treat well.
You can explore variations like different fruits or gluten-free options. Store leftovers correctly for continued freshness. With these tips, enjoy delicious treats anytime!


