Apple Crisp Mini Cheesecakes Delightful and Easy Treat

WANT TO SAVE THIS RECIPE?

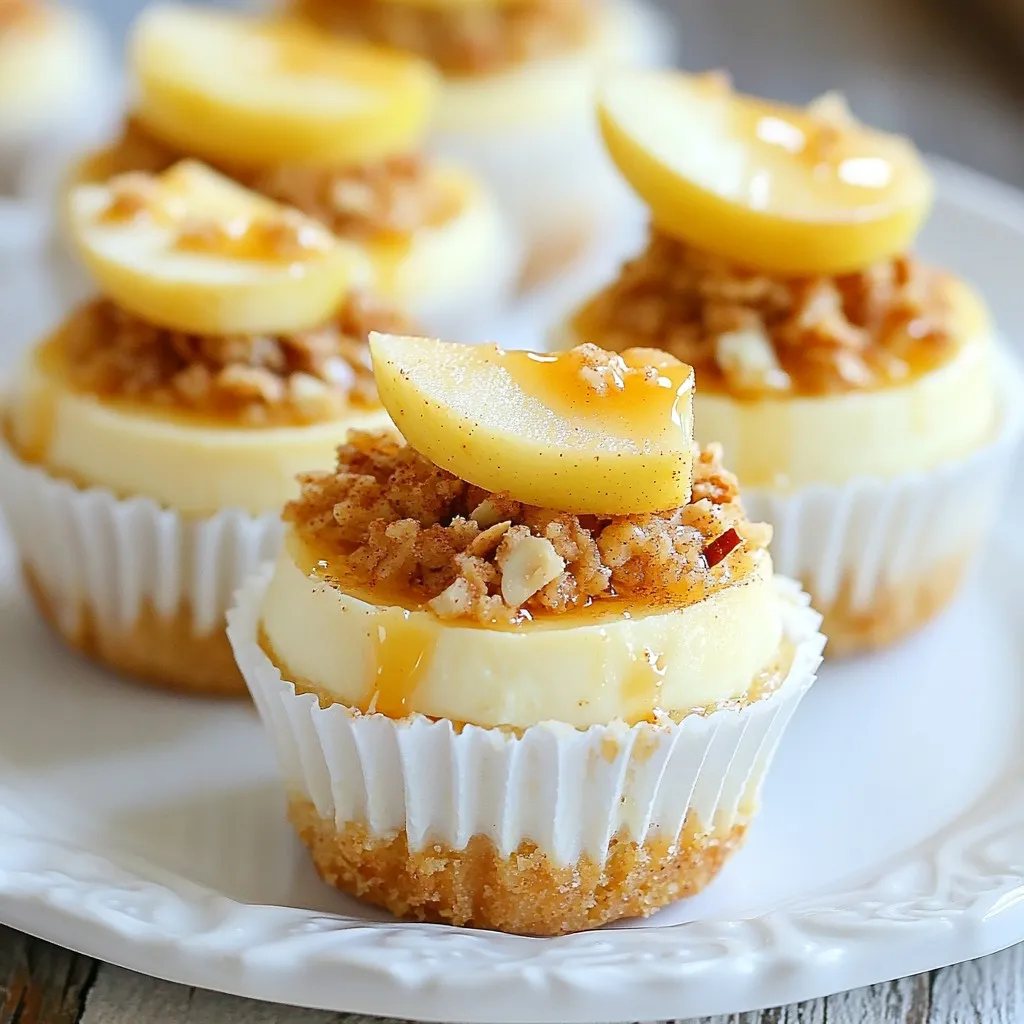
If you’re craving a sweet treat that’s both simple and delightful, you’re in the right place! Today, I’ll show you how to make Apple Crisp Mini Cheesecakes—an easy dessert that combines creamy cheesecake with a crunchy apple topping. Perfect for gatherings or a cozy night in, these mini cheesecakes will wow your taste buds. Let’s dive into the tasty details and get baking!

Why I Love This Recipe

  1. Perfect Balance of Flavors: This recipe combines the creaminess of cheesecake with the tartness of apples, creating a delightful harmony in every bite.
  2. Individual Portions: Mini cheesecakes are not only adorable but also perfect for portion control, making them great for gatherings or as a sweet treat for yourself.
  3. Easy to Make: With simple ingredients and straightforward steps, this recipe is beginner-friendly while still impressing guests with its delicious results.
  4. Versatile Topping Options: The crisp topping adds a delightful crunch, and you can easily customize it with your favorite nuts or spices for a personal touch.

Ingredients

List of Ingredients

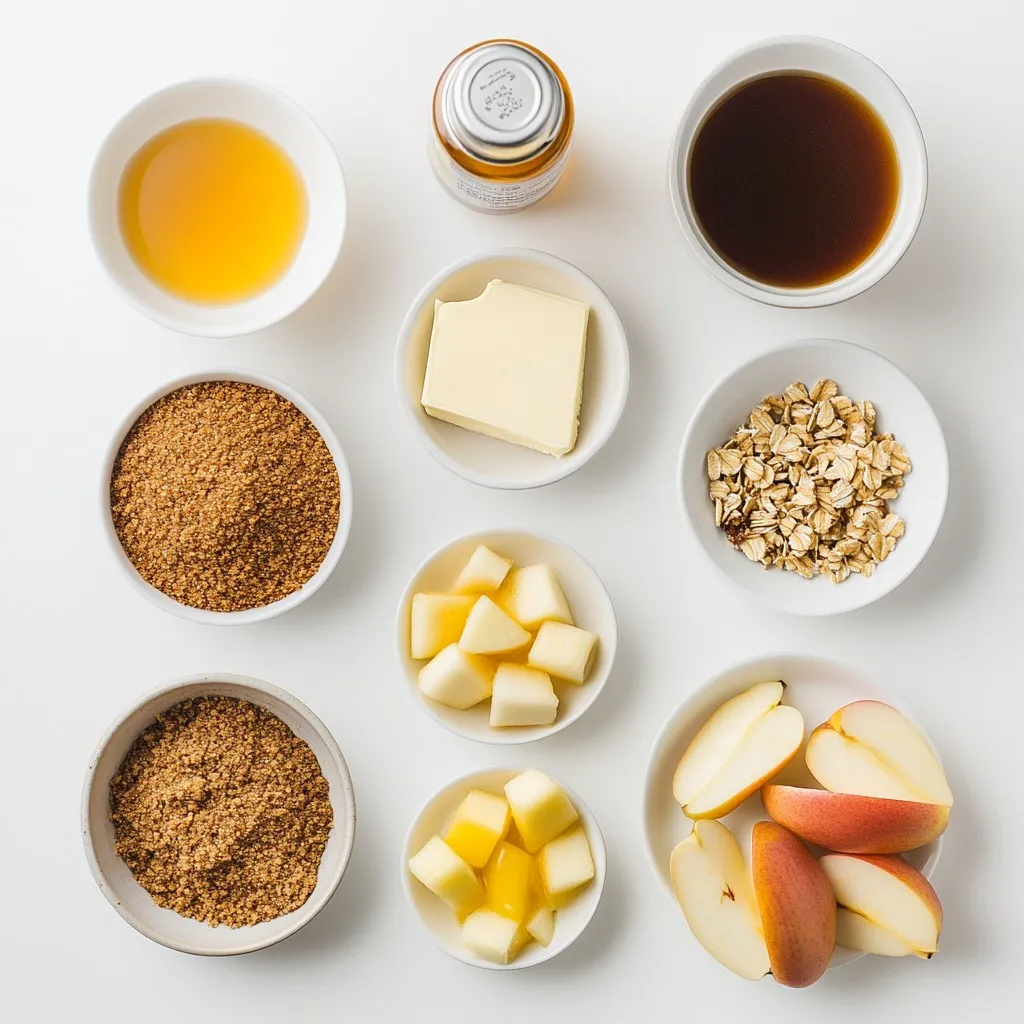
– 1 cup graham cracker crumbs

– 4 tablespoons unsalted butter, melted

– 2 tablespoons brown sugar

– 1 teaspoon ground cinnamon

– 8 oz cream cheese, softened to room temperature

– 1/2 cup granulated sugar

– 1 teaspoon pure vanilla extract

– 1 large egg, at room temperature

– 1 1/2 cups apples, peeled, cored, and diced small

– 1 tablespoon fresh lemon juice

– 1/4 cup rolled oats

– 1/4 cup chopped nuts (walnuts or pecans, your choice)

– 1 tablespoon pure maple syrup

Measurement Notes

When measuring ingredients, I recommend using dry measuring cups for solids and liquid measuring cups for liquids. This helps you get the right amounts. For the cream cheese, make sure it is softened. This makes mixing easy. If it is too cold, it will not blend well with the other ingredients.

Dietary Substitutions

You can swap cream cheese for dairy-free cream cheese if you need a dairy-free option. Use gluten-free graham crackers to make the crust gluten-free. For a vegan option, replace the egg with 1/4 cup of unsweetened applesauce. You can also skip the nuts if you have a nut allergy or dislike them.

Step-by-Step Instructions

Prepping the Oven and Muffin Tin

First, set your oven to 325°F (160°C). This is the perfect temperature for baking. Next, prepare a muffin tin with cupcake liners. This makes it easy to take out the mini cheesecakes later. Set the tin aside.

Making the Crust

In a mixing bowl, combine 1 cup of graham cracker crumbs, 4 tablespoons of melted unsalted butter, 2 tablespoons of brown sugar, and 1 teaspoon of ground cinnamon. Mix until it feels like wet sand. Spoon about 1 tablespoon of this mixture into each muffin liner. Press it down firmly to form a solid base.

Preparing the Cheesecake Mixture

In a large bowl, beat 8 ounces of softened cream cheese until smooth. Use an electric mixer on medium speed. Gradually add 1/2 cup of granulated sugar. Mix until it is fully combined. Then, blend in 1 teaspoon of pure vanilla extract and 1 large egg. Mix until smooth but do not overbeat.

Incorporating Apples

Take 1 1/2 cups of peeled, cored, and diced apples. Toss them with 1 tablespoon of fresh lemon juice in a separate bowl. This keeps the apples from browning. Gently fold the apple mixture into the cream cheese batter with a spatula until just combined.

Filling the Muffin Cups

Now, carefully spoon the cream cheese and apple mixture into each muffin liner. Fill them nearly to the top. This will give you nice, tall mini cheesecakes.

Crafting the Crisp Topping

In a small bowl, mix together 1/4 cup of rolled oats, 1/4 cup of chopped nuts (like walnuts or pecans), and 1 tablespoon of pure maple syrup. Stir until well combined. Evenly sprinkle this mixture over the cheesecakes. It adds a nice crunch.

Baking Process

Place the muffin tin in the preheated oven. Bake for 20-25 minutes. The edges should set, but the centers can still jiggle a bit. This is fine. It helps with the creamy texture.

Cooling and Chilling

Once they are baked, take the mini cheesecakes out of the oven. Let them cool on a wire rack for a bit. For the best texture, refrigerate them for at least 2 hours before serving. This chilling helps them firm up nicely.

Tips & Tricks

Perfecting the Cheesecake Texture

To get the best texture, start with room-temperature cream cheese. Cold cream cheese won’t blend well, leading to lumps. Beat it until smooth before adding sugar. Mix just until combined with the egg. Overmixing can make the cheesecake dense. After baking, the center should jiggle a bit. This means it will set nicely as it cools. Don’t skip the chilling step; it really helps the cheesecake firm up.

Common Mistakes to Avoid

One common mistake is not pressing the crust firmly enough. This can lead to a crumbly base. Make sure to pack it down well before adding the filling. Another mistake is using too many apples, which can make the cheesecake watery. Stick to the amount in the recipe. Also, remember to let the cheesecakes cool completely before chilling. This helps prevent cracks.

Serving Suggestions

When you serve these mini cheesecakes, presentation matters. Place them on a pretty platter. A light dusting of cinnamon adds a nice touch. You can also add thin apple slices on top for a pop of color. For extra sweetness, serve with a drizzle of maple syrup. Pair these treats with coffee or tea for a perfect dessert moment.

Pro Tips

  1. Use Room Temperature Ingredients: Ensuring your cream cheese is at room temperature will help create a smooth and creamy filling without lumps.
  2. Choose Firm Apples: Opt for firmer apple varieties like Granny Smith or Honeycrisp for the best texture and flavor in your mini cheesecakes.
  3. Don’t Overbake: Keep an eye on the baking time; the centers should still have a slight jiggle when you take them out, ensuring a creamy texture.
  4. Chill for Best Results: Allowing the mini cheesecakes to chill for a few hours enhances their flavor and texture, making them more enjoyable to eat.

Variations

Flavor Combinations

You can mix different flavors to change the taste of your mini cheesecakes. Try adding spices like nutmeg or ginger for a warm twist. You can also swap in different fruits like pears or berries to create unique flavors. For a fun twist, use caramel sauce drizzled on top to enhance the sweetness. Each variation can make your mini cheesecakes exciting and new.

Ingredient Swaps

Don’t worry if you lack some ingredients. You can easily make swaps. If you want a gluten-free option, use gluten-free graham cracker crumbs for the crust. You can replace cream cheese with Greek yogurt for a lighter version. For a dairy-free treat, try vegan cream cheese. These swaps keep the taste delicious while meeting your dietary needs.

Dietary Adaptations

Catering to different diets is simple with these mini cheesecakes. You can use low-sugar sweeteners if you prefer to cut sugar. For vegan options, use flax eggs instead of the regular egg. If nuts are a concern, leave them out or use seeds instead. These adaptations help everyone enjoy the treat without worry.

Storage Info

Best Storage Practices

To keep your Apple Crisp Mini Cheesecakes fresh, store them in the fridge. Use an airtight container. They will stay good for up to 5 days. If you want them to last longer, consider freezing them. Make sure they cool completely before storing. This keeps them from getting soggy.

Freezing Instructions

Freezing is a great option if you want to save some for later. Wrap each mini cheesecake in plastic wrap tightly. Then, place them in a freezer-safe bag or container. They can stay frozen for up to 2 months. When ready to eat, take them out and let them thaw in the fridge overnight.

Reheating Tips

If you want to enjoy your mini cheesecakes warm, reheat them gently. Preheat your oven to 300°F (150°C). Place the cheesecakes on a baking sheet and heat for about 10 minutes. This warms them up without drying them out. Avoid the microwave, as it can make them rubbery.

FAQs

What can I use as a substitute for cream cheese?

You can use Greek yogurt or mascarpone cheese. Both options provide a creamy texture. If you want a dairy-free choice, try silken tofu blended until smooth. These substitutes keep your mini cheesecakes rich and tasty.

How long can Apple Crisp Mini Cheesecakes be stored?

You can store these mini cheesecakes in the fridge for up to five days. Just keep them in an airtight container. This helps maintain their freshness and flavor.

Can I make these mini cheesecakes ahead of time?

Yes, you can prepare them a day or two ahead. Just bake and chill them in the fridge. This way, they are ready when you need them.

Is it possible to use different fruits in the recipe?

Absolutely! You can swap apples for pears, peaches, or berries. Each fruit brings a unique flavor and texture. Just remember to adjust the sweetness if needed.

What is the best way to serve mini cheesecakes?

Serve them chilled on a pretty platter. A sprinkle of cinnamon and a few apple slices make a lovely touch. You can also add a dollop of whipped cream for extra flair. Enjoy!

You now know how to make delicious Apple Crisp Mini Cheesecakes. We covered the key ingredients and how to measure them. You have step-by-step instructions to guide you through the baking process. Our tips and tricks will help you avoid mistakes and serve them well. Don’t forget the fun variations you can try. Finally, proper storage techniques will keep your mini cheesecakes fresh. Enjoy creating this tasty treat and share it with friends and famil

- 1 cup graham cracker crumbs - 4 tablespoons unsalted butter, melted - 2 tablespoons brown sugar - 1 teaspoon ground cinnamon - 8 oz cream cheese, softened to room temperature - 1/2 cup granulated sugar - 1 teaspoon pure vanilla extract - 1 large egg, at room temperature - 1 1/2 cups apples, peeled, cored, and diced small - 1 tablespoon fresh lemon juice - 1/4 cup rolled oats - 1/4 cup chopped nuts (walnuts or pecans, your choice) - 1 tablespoon pure maple syrup When measuring ingredients, I recommend using dry measuring cups for solids and liquid measuring cups for liquids. This helps you get the right amounts. For the cream cheese, make sure it is softened. This makes mixing easy. If it is too cold, it will not blend well with the other ingredients. You can swap cream cheese for dairy-free cream cheese if you need a dairy-free option. Use gluten-free graham crackers to make the crust gluten-free. For a vegan option, replace the egg with 1/4 cup of unsweetened applesauce. You can also skip the nuts if you have a nut allergy or dislike them. {{ingredient_image_2}} First, set your oven to 325°F (160°C). This is the perfect temperature for baking. Next, prepare a muffin tin with cupcake liners. This makes it easy to take out the mini cheesecakes later. Set the tin aside. In a mixing bowl, combine 1 cup of graham cracker crumbs, 4 tablespoons of melted unsalted butter, 2 tablespoons of brown sugar, and 1 teaspoon of ground cinnamon. Mix until it feels like wet sand. Spoon about 1 tablespoon of this mixture into each muffin liner. Press it down firmly to form a solid base. In a large bowl, beat 8 ounces of softened cream cheese until smooth. Use an electric mixer on medium speed. Gradually add 1/2 cup of granulated sugar. Mix until it is fully combined. Then, blend in 1 teaspoon of pure vanilla extract and 1 large egg. Mix until smooth but do not overbeat. Take 1 1/2 cups of peeled, cored, and diced apples. Toss them with 1 tablespoon of fresh lemon juice in a separate bowl. This keeps the apples from browning. Gently fold the apple mixture into the cream cheese batter with a spatula until just combined. Now, carefully spoon the cream cheese and apple mixture into each muffin liner. Fill them nearly to the top. This will give you nice, tall mini cheesecakes. In a small bowl, mix together 1/4 cup of rolled oats, 1/4 cup of chopped nuts (like walnuts or pecans), and 1 tablespoon of pure maple syrup. Stir until well combined. Evenly sprinkle this mixture over the cheesecakes. It adds a nice crunch. Place the muffin tin in the preheated oven. Bake for 20-25 minutes. The edges should set, but the centers can still jiggle a bit. This is fine. It helps with the creamy texture. Once they are baked, take the mini cheesecakes out of the oven. Let them cool on a wire rack for a bit. For the best texture, refrigerate them for at least 2 hours before serving. This chilling helps them firm up nicely. To get the best texture, start with room-temperature cream cheese. Cold cream cheese won't blend well, leading to lumps. Beat it until smooth before adding sugar. Mix just until combined with the egg. Overmixing can make the cheesecake dense. After baking, the center should jiggle a bit. This means it will set nicely as it cools. Don't skip the chilling step; it really helps the cheesecake firm up. One common mistake is not pressing the crust firmly enough. This can lead to a crumbly base. Make sure to pack it down well before adding the filling. Another mistake is using too many apples, which can make the cheesecake watery. Stick to the amount in the recipe. Also, remember to let the cheesecakes cool completely before chilling. This helps prevent cracks. When you serve these mini cheesecakes, presentation matters. Place them on a pretty platter. A light dusting of cinnamon adds a nice touch. You can also add thin apple slices on top for a pop of color. For extra sweetness, serve with a drizzle of maple syrup. Pair these treats with coffee or tea for a perfect dessert moment. Pro Tips Use Room Temperature Ingredients: Ensuring your cream cheese is at room temperature will help create a smooth and creamy filling without lumps. Choose Firm Apples: Opt for firmer apple varieties like Granny Smith or Honeycrisp for the best texture and flavor in your mini cheesecakes. Don’t Overbake: Keep an eye on the baking time; the centers should still have a slight jiggle when you take them out, ensuring a creamy texture. Chill for Best Results: Allowing the mini cheesecakes to chill for a few hours enhances their flavor and texture, making them more enjoyable to eat. {{image_4}} You can mix different flavors to change the taste of your mini cheesecakes. Try adding spices like nutmeg or ginger for a warm twist. You can also swap in different fruits like pears or berries to create unique flavors. For a fun twist, use caramel sauce drizzled on top to enhance the sweetness. Each variation can make your mini cheesecakes exciting and new. Don’t worry if you lack some ingredients. You can easily make swaps. If you want a gluten-free option, use gluten-free graham cracker crumbs for the crust. You can replace cream cheese with Greek yogurt for a lighter version. For a dairy-free treat, try vegan cream cheese. These swaps keep the taste delicious while meeting your dietary needs. Catering to different diets is simple with these mini cheesecakes. You can use low-sugar sweeteners if you prefer to cut sugar. For vegan options, use flax eggs instead of the regular egg. If nuts are a concern, leave them out or use seeds instead. These adaptations help everyone enjoy the treat without worry. To keep your Apple Crisp Mini Cheesecakes fresh, store them in the fridge. Use an airtight container. They will stay good for up to 5 days. If you want them to last longer, consider freezing them. Make sure they cool completely before storing. This keeps them from getting soggy. Freezing is a great option if you want to save some for later. Wrap each mini cheesecake in plastic wrap tightly. Then, place them in a freezer-safe bag or container. They can stay frozen for up to 2 months. When ready to eat, take them out and let them thaw in the fridge overnight. If you want to enjoy your mini cheesecakes warm, reheat them gently. Preheat your oven to 300°F (150°C). Place the cheesecakes on a baking sheet and heat for about 10 minutes. This warms them up without drying them out. Avoid the microwave, as it can make them rubbery. You can use Greek yogurt or mascarpone cheese. Both options provide a creamy texture. If you want a dairy-free choice, try silken tofu blended until smooth. These substitutes keep your mini cheesecakes rich and tasty. You can store these mini cheesecakes in the fridge for up to five days. Just keep them in an airtight container. This helps maintain their freshness and flavor. Yes, you can prepare them a day or two ahead. Just bake and chill them in the fridge. This way, they are ready when you need them. Absolutely! You can swap apples for pears, peaches, or berries. Each fruit brings a unique flavor and texture. Just remember to adjust the sweetness if needed. Serve them chilled on a pretty platter. A sprinkle of cinnamon and a few apple slices make a lovely touch. You can also add a dollop of whipped cream for extra flair. Enjoy! You now know how to make delicious Apple Crisp Mini Cheesecakes. We covered the key ingredients and how to measure them. You have step-by-step instructions to guide you through the baking process. Our tips and tricks will help you avoid mistakes and serve them well. Don’t forget the fun variations you can try. Finally, proper storage techniques will keep your mini cheesecakes fresh. Enjoy creating this tasty treat and share it with friends and family!

Apple Crisp Mini Cheesecakes

Delicious mini cheesecakes with a crisp apple topping.
Course Dessert
Cuisine American
Servings 12
Calories 150 kcal

Ingredients
  

  • 1 cup graham cracker crumbs
  • 4 tablespoons unsalted butter, melted
  • 2 tablespoons brown sugar
  • 1 teaspoon ground cinnamon
  • 8 oz cream cheese, softened to room temperature
  • 1 2/5 cup granulated sugar
  • 1 teaspoon pure vanilla extract
  • 1 large egg, at room temperature
  • 1.5 cups apples, peeled, cored, and diced small
  • 1 tablespoon fresh lemon juice
  • 0.25 cup rolled oats
  • 0.25 cup chopped nuts (walnuts or pecans, your choice)
  • 1 tablespoon pure maple syrup

Instructions
 

  • Preheat your oven to 325°F (160°C) and prepare a muffin tin with cupcake liners.
  • In a mixing bowl, combine the graham cracker crumbs, melted butter, brown sugar, and ground cinnamon. Stir until the mixture resembles wet sand. Spoon about 1 tablespoon into each muffin liner and press down firmly.
  • In a large mixing bowl, beat the softened cream cheese with an electric mixer on medium speed until smooth. Gradually add granulated sugar, mixing until fully incorporated. Blend in vanilla extract and then the egg, mixing until just combined.
  • In a separate bowl, toss diced apples with fresh lemon juice to prevent browning. Gently fold this apple mixture into the cream cheese batter until just combined.
  • Spoon the cream cheese and apple mixture over each prepared crust, filling each muffin liner nearly to the top.
  • In a small bowl, mix rolled oats, chopped nuts, and pure maple syrup until well combined. Evenly sprinkle this topping over the cheesecakes.
  • Bake for 20-25 minutes until the edges are set and the centers have a slight jiggle.
  • Allow the mini cheesecakes to cool on a wire rack, then refrigerate for at least 2 hours before serving.

Notes

For an elegant presentation, dust with cinnamon and add thin apple slices on top.
Keyword apple, cheesecake, crispy, dessert, mini

WANT TO SAVE THIS RECIPE?