
Craving a sweet treat that’s easy to make and sure to impress? These award-winning homemade Crunch Bars are here to satisfy your taste buds! With simple ingredients like crispy rice cereal, peanut butter, and melted chocolate, you’ll whip up this delightful snack in no time. Whether for a party or a cozy night in, join me as I share my step-by-step guide to crafting these tasty bars that everyone will love!
Why I Love This Recipe
- Simple Ingredients: This recipe uses everyday ingredients that are easy to find, making it accessible for anyone to whip up a batch.
- Customizable: Feel free to mix and match the nuts or even the sweetener, allowing you to tailor the bars to your personal taste.
- Quick Prep Time: In just 15 minutes, you can prepare a delicious and healthy snack that sets in the fridge, perfect for busy days.
- Perfect for Sharing: These bars make a fantastic treat for gatherings, and they can be individually wrapped for thoughtful gifts.
Ingredients
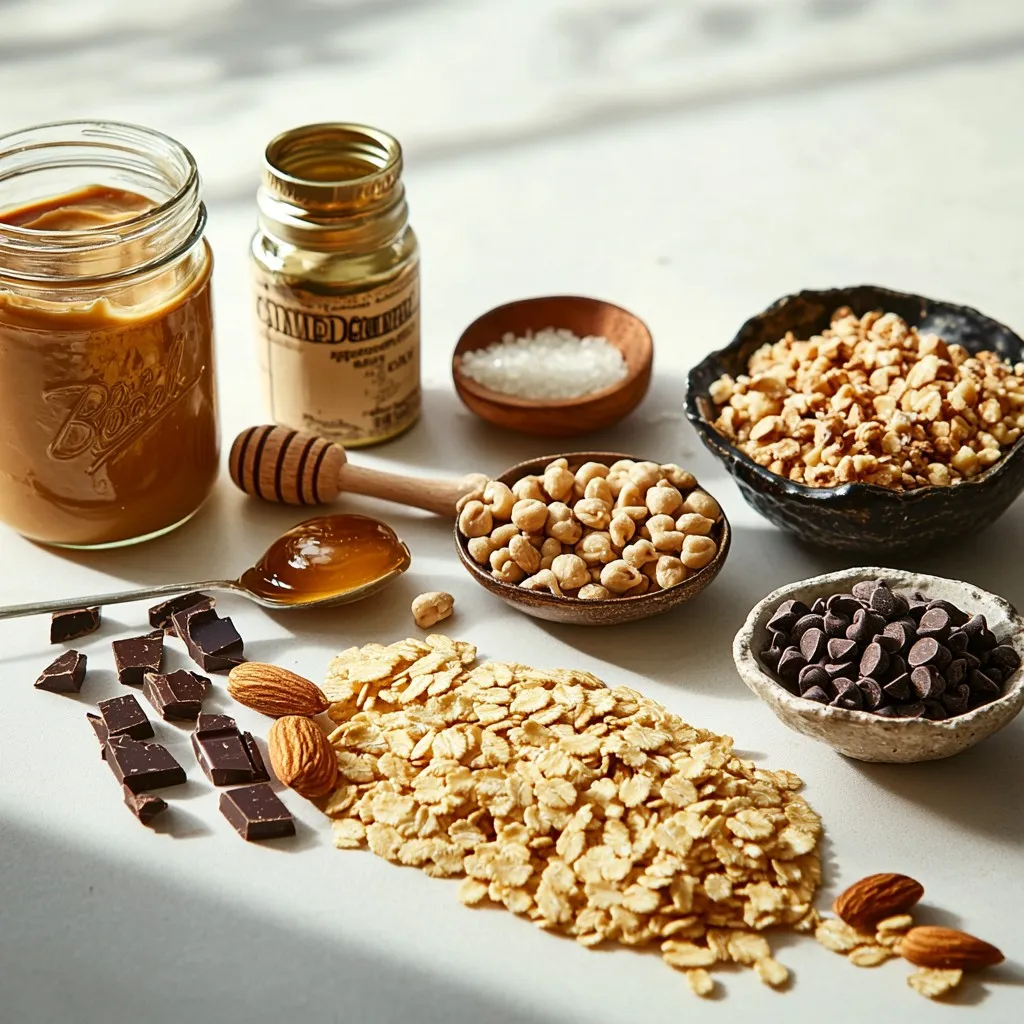
To make the Award Winning Homemade Crunch Bars, gather these simple ingredients. Each one plays a key role in the taste and texture of the bars.
– 2 cups crispy rice cereal
– 1 cup smooth peanut butter
– 1 cup natural honey (or maple syrup for a vegan option)
– 1 cup dark chocolate chips
– 1/2 cup chopped nuts (like almonds or walnuts)
– 1 tsp vanilla extract
– A pinch of fine sea salt
These ingredients are easy to find. They blend together to create a treat that is both crunchy and sweet. The crispy rice cereal adds a nice crunch, while the peanut butter provides a creamy base. Honey or maple syrup gives a touch of sweetness, and dark chocolate adds richness. Nuts bring extra texture and flavor.
Using high-quality chocolate chips makes a big difference. They melt smoothly and taste great. You can also mix in your favorite nuts for a personal touch.
Make sure you have everything ready before you start. This way, you can enjoy the process and create your delicious bars with ease.
Step-by-Step Instructions
Preparing the Baking Dish
To start, grab an 8×8 inch baking dish. Line it with parchment paper, leaving some overhang on the sides. This overhang helps you lift the bars out later. Using parchment paper is key. It prevents sticking and makes cleanup easy.
Mixing the Wet Ingredients
Next, heat the peanut butter and honey in a medium saucepan. Use low heat so it doesn’t burn. Stir consistently until the mixture is smooth. A well-combined mixture will look glossy and creamy. Once it’s ready, remove it from heat. Add the vanilla extract and a pinch of sea salt for extra flavor.
Combining Dry Ingredients
In a large mixing bowl, add the crispy rice cereal and chopped nuts. Pour the warm peanut butter mixture over this. It’s important to mix evenly. Use a spatula or wooden spoon to coat every piece of cereal. This ensures each bite is tasty.
Spreading and Pressing the Mixture
Now, transfer the mixture to your prepared baking dish. Use the back of a rubber spatula to press it down firmly. Compacting the mixture helps the bars hold together. Make sure to spread it evenly, so each bar has the same thickness.
Melting the Chocolate
For the chocolate, use a microwave-safe bowl. Add the dark chocolate chips and heat in 30-second bursts. Stir between each interval. This prevents overheating, which can ruin your chocolate. You want it to be smooth and shiny when done.
Adding the Chocolate Layer
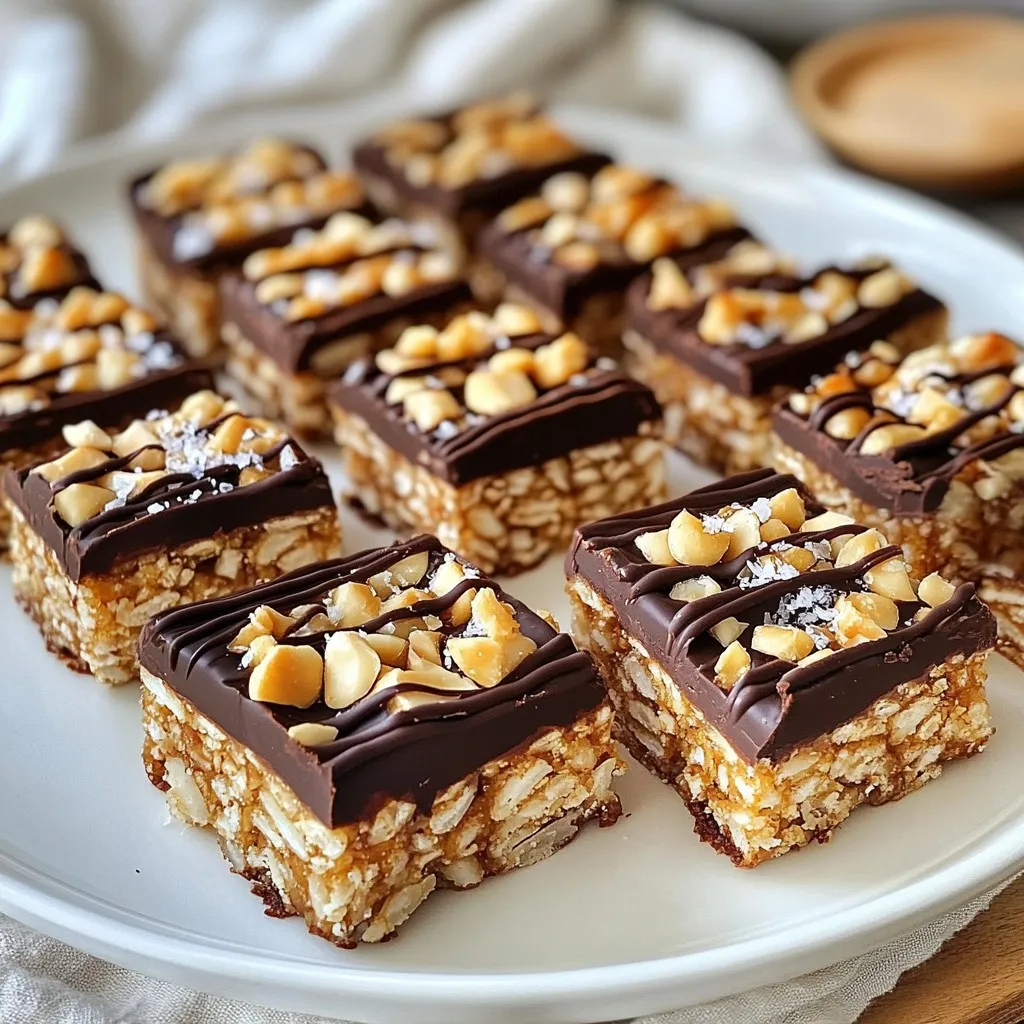
Once your chocolate is melted, pour it over the pressed rice cereal mixture. Use a spatula to spread it evenly. For an extra touch, you can sprinkle a few flakes of sea salt on top. This adds a nice contrast to the sweet chocolate.
Setting and Cutting
To let the bars set, place the baking dish in the refrigerator for at least 1 hour. This helps the chocolate harden and the bars firm up. After chilling, use the parchment overhang to lift the bars out. Cut them into squares or rectangles for serving. Make sure to use a sharp knife for clean cuts.
Tips & Tricks
Achieving the Best Texture
For award-winning crunch bars, the right ratio of ingredients matters. Use 2 cups of crispy rice cereal to 1 cup of peanut butter and honey. This blend gives you a perfect crunch. If you add too much peanut butter, your bars may crumble.
To avoid crumbling, press the mixture firmly into your baking dish. Use a spatula to pack it down well. This step helps the bars hold their shape when you cut them.
Serving Suggestions
A great way to serve your crunch bars is on a pretty platter. Drizzle melted chocolate on top for added flair. You can also sprinkle some chopped nuts for extra crunch.
If you want to package them as gifts, wrap each bar in decorative parchment paper. Tie them with a ribbon for a nice touch. This makes them perfect for birthdays or holidays.
Common Mistakes to Avoid
One common mistake is overheating the chocolate. Heat it in short bursts and stir often. This way, you get a smooth melt without burning.
Another mistake is not pressing the mixture firmly enough. If you don’t press it down, the bars may fall apart. Use the back of a rubber spatula to ensure they are compact and sturdy.
Pro Tips
- Tip 1 – Use Fresh Ingredients: Always use fresh peanut butter and high-quality chocolate chips to enhance the flavor of your crunch bars.
- Tip 2 – Customize Your Nuts: Experiment with different types of nuts or seeds to find your favorite combination, adding extra crunch and flavor.
- Tip 3 – Storage Tips: Store your crunch bars in an airtight container in the refrigerator for up to two weeks to keep them fresh.
- Tip 4 – Perfecting the Chocolate Layer: For a shiny finish, temper the chocolate before pouring it over the bars for a professional look.
Variations
Vegan Crunch Bars
To make vegan crunch bars, swap honey for maple syrup. This keeps the bars sweet and plant-based. You can also use almond butter or sunflower seed butter instead of peanut butter. Both give nice flavors. For chocolate, choose dairy-free dark chocolate chips. These changes keep your bars tasty and vegan-friendly.
Flavor Variations
You can add fun flavors to your crunch bars. Try mixing in shredded coconut for a tropical touch. A pinch of cinnamon can also add warmth and spice. For nuts, think about using pecans or hazelnuts. Each nut brings its own unique flavor. You can create a crunch bar that fits your taste perfectly.
Allergy-Friendly Options
If you need nut-free bars, simply leave out the nuts. Use pumpkin seeds or sunflower seeds for crunch. For gluten-free options, pick gluten-free crispy rice cereal. You can also use gluten-free oats. These swaps make the bars safe for those with allergies. It’s easy to adapt this recipe for everyone!
Storage Info
Best Storage Practices
To keep your crunch bars fresh, store them in an air-tight container. This prevents moisture from making them soft. I recommend using a glass or plastic container with a secure lid. Place a piece of parchment paper between the bars to avoid sticking.
For best results, keep the container in the fridge. This will help maintain texture and taste. The cool environment stops the chocolate from melting and keeps the bars firm.
Shelf Life
You can keep these bars for about two weeks in the fridge. If stored properly, they stay tasty and crunchy. Look out for signs of spoilage. If they smell off or have a change in color, it’s time to toss them.
Freezing Options
You can freeze crunch bars for longer storage. To do this, wrap each bar in plastic wrap, then place them in a freezer bag. Make sure to remove as much air as possible from the bag. They can last for up to three months in the freezer.
When you’re ready to eat, take them out and let them thaw in the fridge. This helps keep their crunchy texture. Avoid thawing them at room temperature, as this may cause them to become too soft.
FAQs
How do I make the bars less sticky?
To prevent stickiness, use cold tools and hands. Chill the peanut butter mix before adding it to the cereal. Dust your hands with a bit of powdered sugar or cornstarch when pressing the mixture into the pan. Using parchment paper also helps with easy removal later.
Can I substitute the peanut butter?
Yes, you can! Almond butter or cashew butter works well too. For a nut-free option, try sunflower seed butter. Each choice brings a unique flavor while keeping the crunch bars tasty.
What if I don’t have crunchy rice cereal?
If you lack crunchy rice cereal, you can use cornflakes or puffed quinoa. Both options give a similar crunchy texture. Even crushed graham crackers can add a fun twist to your bars.
How do I make my crunch bars more chocolatey?
To amp up the chocolate flavor, add cocoa powder to the peanut butter mix. You can also fold in mini chocolate chips with the cereal. Drizzle more melted chocolate on top for an extra chocolaty finish.
In this post, we explored how to make delicious crunch bars using simple ingredients. We covered preparation tips, mixing techniques, and common mistakes to avoid. Remember, achieving the right texture is key to success. Don’t forget to try variations like vegan options or allergy-friendly recipes. Proper storage will keep your bars fresh longer. With these tips, you can create tasty treats for yourself and others. Enjoy your cooking adventure and share these crunch bars with friends and famil


