
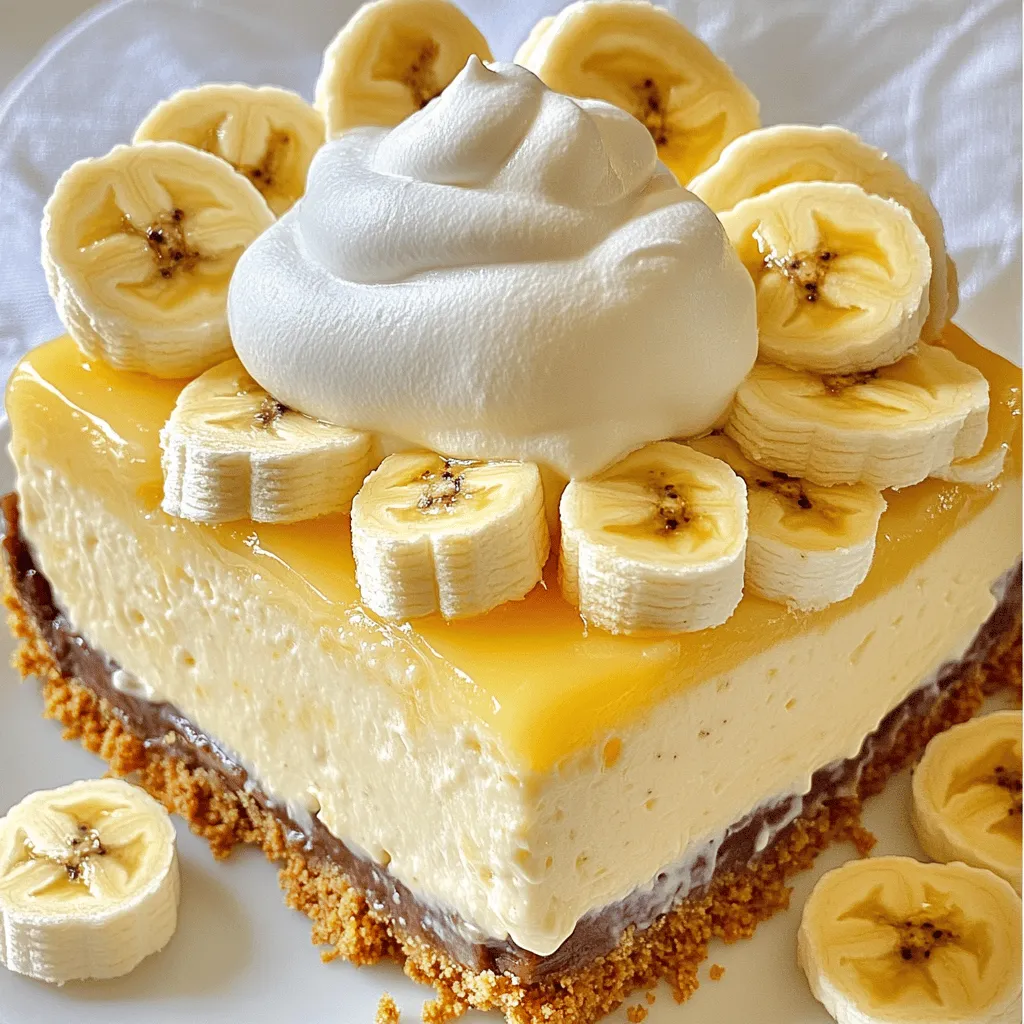
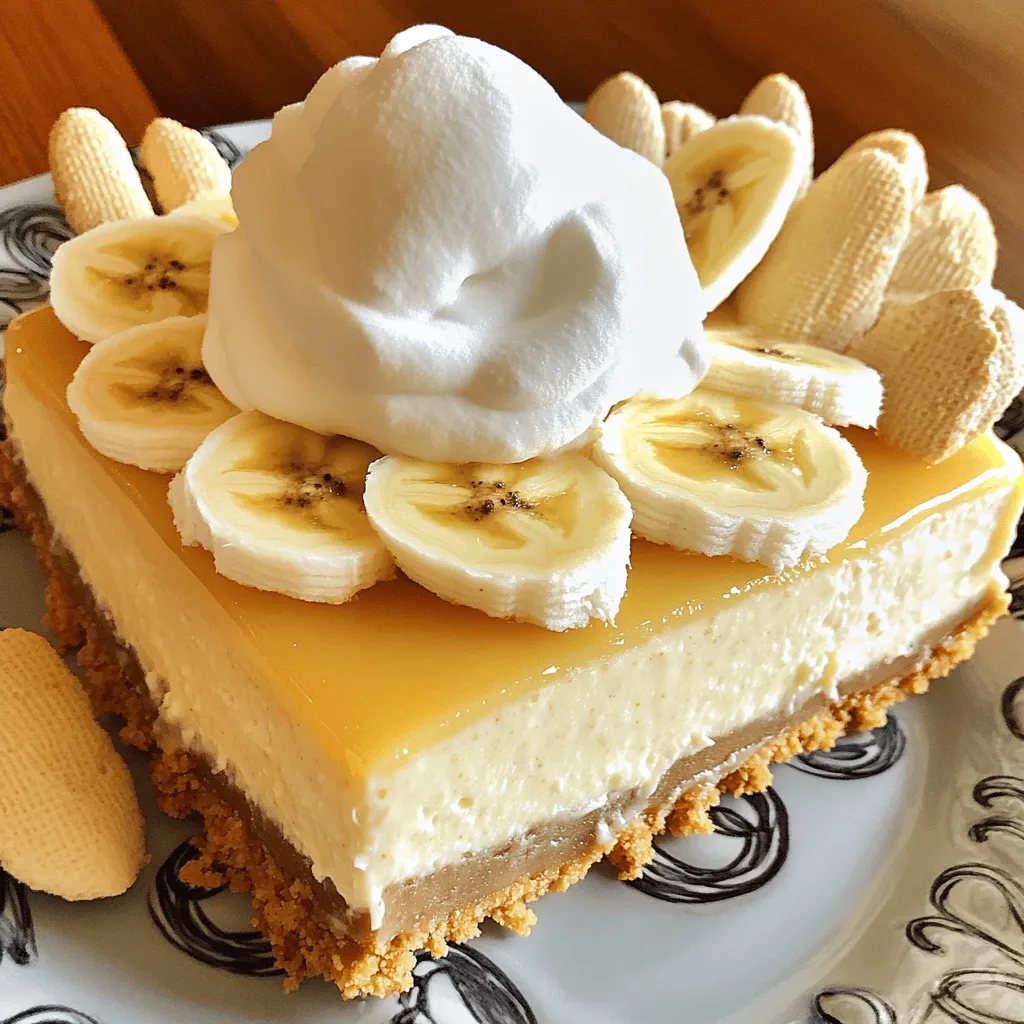
Looking for an easy, no-bake dessert that impresses? You’ve found it! This Best Recipe For No Bake Banana Pudding Cheesecake Delight combines rich flavors and creamy texture without the oven hassle. With layers of buttery graham cracker crust, smooth cream cheese filling, and fresh banana slices, it’s a crowd-pleaser. Whether it’s a special occasion or just a sweet treat, this cheesecake will satisfy your cravings. Let’s dive into the simple steps to make this delightful dessert!
Ingredients
To make the best no-bake banana pudding cheesecake delight, gather these simple ingredients:
– 1 cup graham cracker crumbs
– 1/4 cup unsalted butter, melted
– 2 cups cream cheese, softened to room temperature
– 1 cup powdered sugar
– 1 teaspoon pure vanilla extract
– 2 cups heavy whipping cream
– 2 ripe bananas, sliced into thin rounds
– 1 package (3.4 oz) instant vanilla pudding mix
– 2 cups cold milk
– 1 teaspoon fresh lemon juice (to prevent banana browning)
– Whipped cream, for topping
– Extra banana slices and vanilla wafer cookies, for garnish
These ingredients are easy to find. You can usually get them at your local grocery store. I love how each item plays a role in creating a rich and creamy dessert. The graham cracker crumbs give a nice crunch, while the cream cheese adds a smooth texture. Bananas bring sweetness, and the whipped cream tops it off perfectly.
Make sure your cream cheese is at room temperature. This helps it blend smoothly. The heavy cream must be chilled. It whips up better when it’s cold. Using fresh bananas ensures that your cheesecake will have the best flavor.
For more details on how to combine these ingredients into a delightful dessert, check out the Full Recipe.
Step-by-Step Instructions
Preparing the Crust
– Combine graham cracker crumbs and melted butter.
– Press mixture into a 9-inch springform pan.
– Chill crust in the refrigerator.
Start by mixing the graham cracker crumbs with the melted butter. This creates a rich, buttery base. Press the mixture firmly into the bottom of your springform pan. Make sure it’s even and compact. Then, pop it into the fridge to chill while you work on the filling.
Making the Cheesecake Filling
– Beat softened cream cheese until smooth.
– Mix in powdered sugar and vanilla extract.
Next, grab a large bowl and add your softened cream cheese. Beat it until it’s creamy and smooth. Then, slowly mix in the powdered sugar and vanilla extract. This will give your filling a sweet and smooth flavor.
Whipping the Cream
– Beat heavy cream until stiff peaks form.
– Carefully fold whipped cream into cream cheese mixture.
Now, take a separate bowl and pour in the heavy cream. Beat it until you see stiff peaks. This means the cream can hold its shape well. Gently fold this whipped cream into your cream cheese mixture. Be careful not to deflate the cream. This step makes your cheesecake light and fluffy.
Mixing the Pudding
– Whisk together pudding mix and cold milk.
– Let it thicken for about 5 minutes.
In another bowl, whisk together the pudding mix and cold milk. Mix until it is smooth. Let it rest for about five minutes. It will thicken as it sits, which is important for the texture of your cheesecake.
Combining Layers
– Fold thickened pudding into cream cheese mixture.
– Drizzle lemon juice over banana slices and fold in gently.
Once the pudding is thick, fold it into the cream cheese mixture. This will blend the flavors nicely. Next, slice your bananas and drizzle lemon juice over them. This keeps them from turning brown. Gently fold the banana slices into the cheesecake mixture, being careful not to break them apart.
Assembling the Cheesecake
– Pour cheesecake filling over chilled crust.
– Smooth top and refrigerate for at least 4 hours.
Finally, take your chilled crust from the fridge. Pour the cheesecake filling over it, smoothing out the top with a spatula. Cover your cheesecake and place it back in the fridge. Let it chill for at least four hours. This allows it to set properly.
You can find the Full Recipe for more detailed steps!
Tips & Tricks
Achieving the Perfect Texture
To get the best texture for your cheesecake, start with room-temperature cream cheese. This makes mixing easy and smooth. When you whip the cream, do it until you see stiff peaks. Then, fold the whipped cream into the cream cheese mixture gently. This keeps your cheesecake light and airy.
Serving Suggestions
When it’s time to serve, add a generous layer of whipped cream on top. This makes it look delicious! For extra flair, garnish with banana slices and a few vanilla wafers. They add nice color and crunch to your dessert.
Common Mistakes to Avoid
One big mistake is skipping the chilling time. Don’t rush this step. Letting the cheesecake chill helps it set properly. Another common error is overmixing the whipped cream. This can deflate the cream and make your cheesecake dense. Mix carefully to keep the fluffiness.
Variations
Flavor Variations
You can change the taste of your cheesecake easily. For a peanut butter twist, add peanut butter to the filling. This gives a rich and nutty flavor that complements the bananas well. Another fun idea is to mix in cocoa powder. This makes a chocolate banana pudding cheesecake. The chocolate adds depth, and it’s a delightful surprise.
Dietary Adjustments
If you need a gluten-free option, use gluten-free graham crackers. This keeps the crust tasty while catering to dietary needs. For those who want a dairy-free treat, you can swap coconut cream for the cream cheese. It adds a tropical note that works wonderfully with bananas.
Serving Sizes Adjustments
Want to serve a crowd? You can scale the recipe up or down. Just adjust the ingredients based on how many people you have. For a fun twist, use mini springform pans. These create individual cheesecakes, perfect for parties or special events. Everyone loves their own little dessert!
For the full recipe, check out [Full Recipe].
Storage Info
Proper Storage Techniques
To keep your no-bake banana pudding cheesecake fresh, store leftovers in an airtight container in the refrigerator. This helps seal in moisture and flavor. If you want to save some for later, you can freeze the cheesecake for up to 2 months. Just wrap it well to prevent freezer burn.
Reheating Instructions
If you freeze your cheesecake, thaw it in the refrigerator overnight. This gentle method helps maintain its creamy texture. Always serve it chilled for the best taste and enjoyment.
Shelf Life
For the best flavor and freshness, consume the cheesecake within 3-5 days. After this period, the bananas may start to brown, and the texture can change. Trust me, you want to enjoy this dessert at its peak!
FAQs
How do I prevent the bananas from browning?
To keep your bananas fresh, drizzle lemon juice over the slices. This simple step slows browning and keeps your cheesecake looking great.
Can I make this cheesecake ahead of time?
Yes! This cheesecake is great to make a day in advance. Just make sure you chill it properly.
What can I use instead of graham crackers?
If you don’t have graham crackers, use digestive biscuits or make your own cookie crumbs. Both will work well for the crust.
How long does it take to chill the cheesecake?
Let the cheesecake chill for at least 4 hours in the refrigerator. This helps it set properly for the best texture and taste.
This banana pudding cheesecake combines simple ingredients and easy steps for a tasty treat. You learned how to make the crust, filling, and layers, plus tips to avoid common mistakes. Remember, chilling the cheesecake is key to its success. Feel free to try variations to suit your taste. Enjoy making this dessert and sharing it with friends or family. It’s sure to delight everyone!


