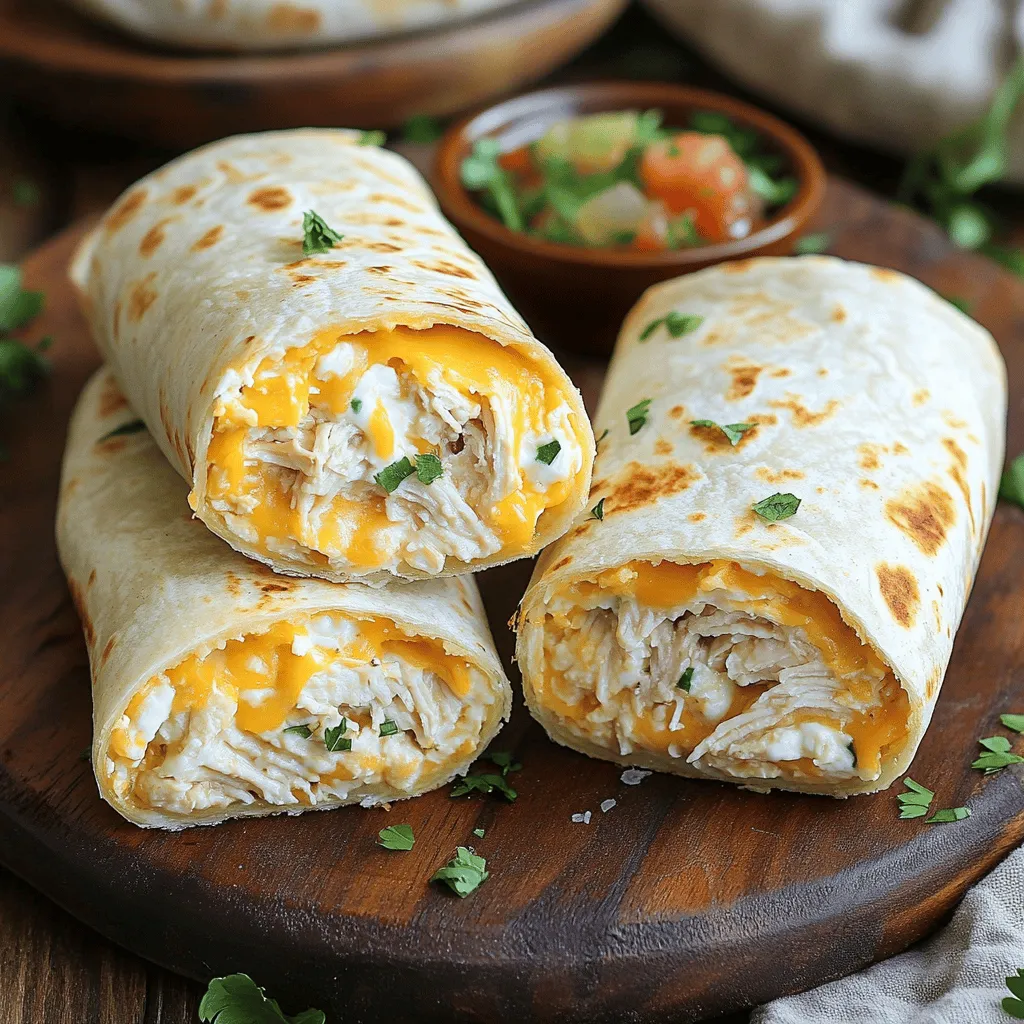
If you’re craving a quick and tasty meal, you’ll love these Cheesy Garlic Chicken Wraps! This easy recipe combines juicy chicken, rich cheese, and savory garlic all in a soft wrap. It takes just a few simple steps to create a dish that your whole family will enjoy. Let’s dive into the must-have ingredients and the straightforward process to make this delightful meal. Your taste buds will thank you!
Ingredients
Main Ingredients for Cheesy Garlic Chicken Wraps
To make Cheesy Garlic Chicken Wraps, you need simple, tasty items. Here’s the list:
– 2 cups cooked chicken, shredded or diced
– 1 cup shredded cheddar cheese
– ½ cup cream cheese, softened to room temperature
– 3 cloves garlic, finely minced
– 2 tablespoons fresh parsley, finely chopped
– 4 large flour tortillas
– 1 cup fresh baby spinach leaves
– ¼ teaspoon freshly ground black pepper
– ¼ teaspoon smoked paprika
– Olive oil, for frying
These ingredients blend well together. The chicken gives a nice base, while cheese adds creaminess. Garlic brings a bold flavor that you will love.
Optional Add-ins
You can change up the flavors with some fun add-ins. Here are some ideas:
– Sliced jalapeños for heat
– Chopped bell peppers for crunch
– Diced tomatoes for freshness
– Avocado slices for creaminess
Feel free to mix and match these options. They will add more taste and texture to your wraps.
Important Tips on Ingredient Quality
Using good ingredients makes a big difference. Here are some tips:
– Choose fresh chicken. Cook it yourself or buy rotisserie chicken for ease.
– Use real cheddar cheese. Pre-shredded cheese may have additives.
– Make sure your cream cheese is soft. This helps it mix well.
– Get fresh garlic for the best flavor. Avoid pre-minced options.
When you use quality ingredients, your wraps will taste amazing. Trust me, your taste buds will thank you! For the full recipe, check out the earlier section.
Step-by-Step Instructions
Preparing the Chicken Mixture
To start, grab a large mixing bowl. Add 2 cups of cooked chicken, shredded or diced. Then, mix in 1 cup of shredded cheddar cheese. Next, spoon in ½ cup of softened cream cheese. This gives the wrap its rich and creamy taste.
Now, finely mince 3 cloves of garlic and add them to the bowl. Garlic adds great flavor! Chop 2 tablespoons of fresh parsley and toss that in too. For a bit of spice, sprinkle ¼ teaspoon of black pepper and ¼ teaspoon of smoked paprika. Stir all the ingredients until they blend well into a creamy mixture.
Assembling the Wraps
Next, lay a large flour tortilla flat on a clean surface. Spoon a generous amount of that cheesy chicken mixture right in the center. Don’t overfill it, or it will burst!
Take a handful of fresh baby spinach and place it on top of the mixture. The spinach adds a nice crunch and color. Now, fold the sides of the tortilla inward over the filling. Roll it tightly from the bottom up. Make sure it’s snug so the filling stays inside. Repeat this with the other tortillas until you have four wraps.
Cooking the Wraps to Perfection
Now it’s time to cook the wraps! Heat a drizzle of olive oil in a non-stick skillet over medium heat. Once the oil shimmers, place the wraps seam-side down in the skillet. Cook them for about 3-4 minutes until the bottom is golden brown.
Use a spatula to gently flip the wraps. Cook the other side for another 3-4 minutes until it gets crispy and golden. After cooking, take them out and let them rest on a cutting board for a few minutes. This helps the filling settle.
Finally, slice the wraps in half diagonally for a nice look. Serve your cheesy garlic chicken wraps warm and enjoy every bite! For the full recipe, check out the provided link.
Tips & Tricks
Best Practices for a Crispy Finish
To achieve the best crispy finish on your wraps, use a non-stick skillet. Heat a small amount of olive oil until it shimmers. This step helps to get that golden brown crust. Cook each side for about 3-4 minutes. Flip carefully to prevent the filling from spilling out. Let the wraps rest for a couple of minutes after cooking. This helps the filling set and keeps it from leaking.
Ingredient Substitutions for Dietary Needs
Need to make swaps? You can use cooked turkey or tofu instead of chicken. Want a dairy-free option? Try using dairy-free cheese and cream cheese alternatives. If you need gluten-free wraps, look for gluten-free tortillas. Spinach can be replaced with kale or arugula for a twist. Always adjust seasonings to match your substitute.
Enhancing Flavor with Seasonings
Seasonings can take your wraps to the next level. Try adding a pinch of cayenne pepper for heat. Fresh herbs like basil or cilantro can brighten the dish. For a unique taste, mix in some Italian seasoning or lemon zest. The goal is to make each bite packed with flavor. Don’t be shy about experimenting!
For the full recipe, see the earlier section.

Variations
Different Cheese Options
You can change the cheese to fit your taste. Try mozzarella for a gooey texture. Swiss adds a nutty flavor. For a sharp bite, use pepper jack. Blending different cheeses can also create a fun flavor mix. Just remember to keep the cheese melty and creamy for the best wrap.
Adding Vegetables for Extra Nutrition
Adding veggies makes your wraps healthier and tastier. Spinach is a great start because it adds crunch. You can also add bell peppers for sweetness or mushrooms for an earthy taste. Grated carrots add color and a slight sweetness. Feel free to mix and match your favorite veggies.
Spicy Version: Incorporating Heat
Want some heat in your wraps? Add jalapeños for a kick or crushed red pepper flakes for warmth. A dash of hot sauce in the chicken mix can boost flavor too. Always taste as you go to find the right amount of spice. You can make these wraps as spicy or mild as you like!
For the full recipe, check out the instructions above.
Storage Info
Storing Leftover Wraps
To store leftover wraps, let them cool first. Place them in an airtight container. You can keep them in the fridge for up to three days. This helps keep the wraps fresh and tasty. If you want them to last longer, consider freezing.
Reheating Tips for Best Results
When you’re ready to enjoy the wraps again, use the skillet for reheating. Heat a non-stick skillet over medium heat. Place the wraps in, cooking each side for about three minutes. This keeps the wrap crispy and warm. You can also microwave them, but they may get soft.
Freezing for Later Use
Freezing wraps is a great option! Wrap each one tightly in plastic wrap. Then, place them in a freezer-safe bag. They can freeze for up to three months. To eat, just thaw in the fridge overnight. Reheat in the skillet for the best taste. This way, you can enjoy cheesy garlic chicken wraps anytime! For the full recipe, check out the earlier section.
FAQs
Can I use leftover rotisserie chicken?
Yes, you can use leftover rotisserie chicken. It saves time and adds great flavor. Just shred or dice the chicken into small pieces. Mix it with cheese and garlic as usual. This keeps the recipe quick and easy. You still get yummy cheesy garlic chicken wraps!
How do I avoid soggy wraps?
To avoid soggy wraps, use fresh tortillas. Heat them for a few seconds before filling. Always drain any excess liquid from the chicken. Don’t overfill your wraps, or they might leak. Cook them until they are golden brown. This keeps your wraps crisp and tasty!
What dipping sauces pair well with Cheesy Garlic Chicken Wraps?
Many sauces work well with these wraps. You can try zesty salsa for a fresh kick. Creamy guacamole adds a smooth texture. Ranch dressing is also a crowd favorite. For a spicy twist, use hot sauce or chipotle mayo. Choose a sauce that fits your taste!
For the full recipe, check the section earlier in the article.
Cheesy garlic chicken wraps are fun and easy to make. We covered key ingredients, step-by-step cooking, and tips for the best results. Don’t forget you can swap in different cheeses or add veggies to suit your taste. When done right, these wraps will impress everyone and taste great. Store extras for later and enjoy more bites at your convenience. Now it’s your turn to try making these delicious wraps! Enjoy your cooking adventure!