Are you ready to discover a tasty and fun snack? Chicken onigiri might be just what you need! These delicious rice balls are filled with shredded chicken and other yummy ingredients. They’re easy to make, perfect for lunch, or a fun treat for any time. In this guide, I’ll share step-by-step tips and creative ideas for making your own chicken onigiri. Let’s dive into the world of this delightful Japanese snack!
Why I Love This Recipe
- Delicious Flavor Combination: The savory taste of seasoned chicken blended with the tangy rice creates a delightful burst of flavors in each bite.
- Easy to Prepare: This recipe is straightforward and requires minimal cooking skills, making it perfect for both beginners and seasoned cooks.
- Customizable Ingredients: You can easily adjust the fillings or add additional toppings like avocado or pickled vegetables to suit your taste.
- Perfect for Snacking: These onigiri are great for on-the-go snacks, lunchboxes, or as a fun appetizer for gatherings.
Ingredients
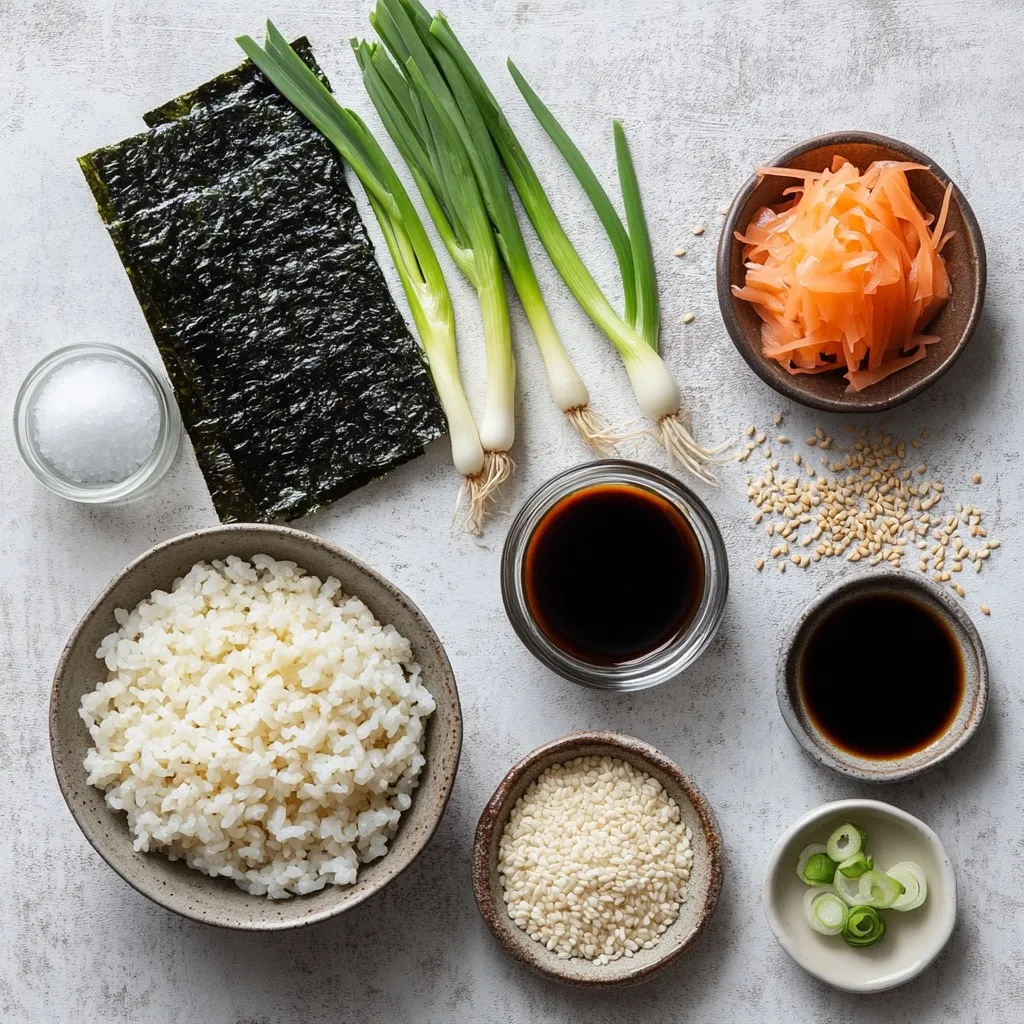
Key Ingredients for Chicken Onigiri
– 2 cups sushi rice
– 2 ½ cups water
– 1 teaspoon salt
– 1 tablespoon rice vinegar
– 1 tablespoon sugar
– 1 cup cooked chicken, shredded
– 2 tablespoons soy sauce
– 1 teaspoon sesame oil
– 1 green onion, finely chopped
– 4 sheets nori, cut into strips
Sushi rice is the star of this dish. It is short-grain rice that becomes sticky when cooked. This helps the onigiri hold together. You can use rotisserie chicken for speed. The seasoning adds great flavor and makes the chicken shine.
Optional Ingredients for Customization
– Avocado, pickled vegetables, or other fillings
– Garnishes for added flavor
Feel free to get creative! You can add avocado for a creamy texture. Pickled veggies provide a nice crunch. Sesame seeds can add a nutty taste when sprinkled on top.
Step-by-Step Instructions
Preparing the Sushi Rice
1. Rinse the sushi rice well under cold water. Keep rinsing until the water is clear. This step removes excess starch. It helps the rice cook fluffy and tender.
2. In a pot, mix the rinsed rice with 2 ½ cups of water. Place the pot on medium heat and bring it to a boil.
3. Once boiling, lower the heat to low. Cover the pot and let it simmer for about 20 minutes. The rice should be tender, and all the water should be absorbed.
4. After cooking, remove the pot from heat but leave it covered. Let the rice sit for an extra 10 minutes. This helps steam the rice, making it even better.
5. In a small bowl, mix 1 tablespoon of rice vinegar, 1 tablespoon of sugar, and 1 teaspoon of salt. Heat this mixture in the microwave for about 20 seconds. Stir until the sugar and salt dissolve.
6. Transfer the warm rice to a large bowl. Gently fold in the vinegar mixture with a spatula. Let this rice cool to room temperature.
Preparing the Chicken Filling
1. In a separate bowl, mix 1 cup of shredded chicken with 2 tablespoons of soy sauce, 1 teaspoon of sesame oil, and 1 finely chopped green onion.
2. Stir well until the chicken is evenly coated with the seasonings. This mixture brings rich flavors to your onigiri.
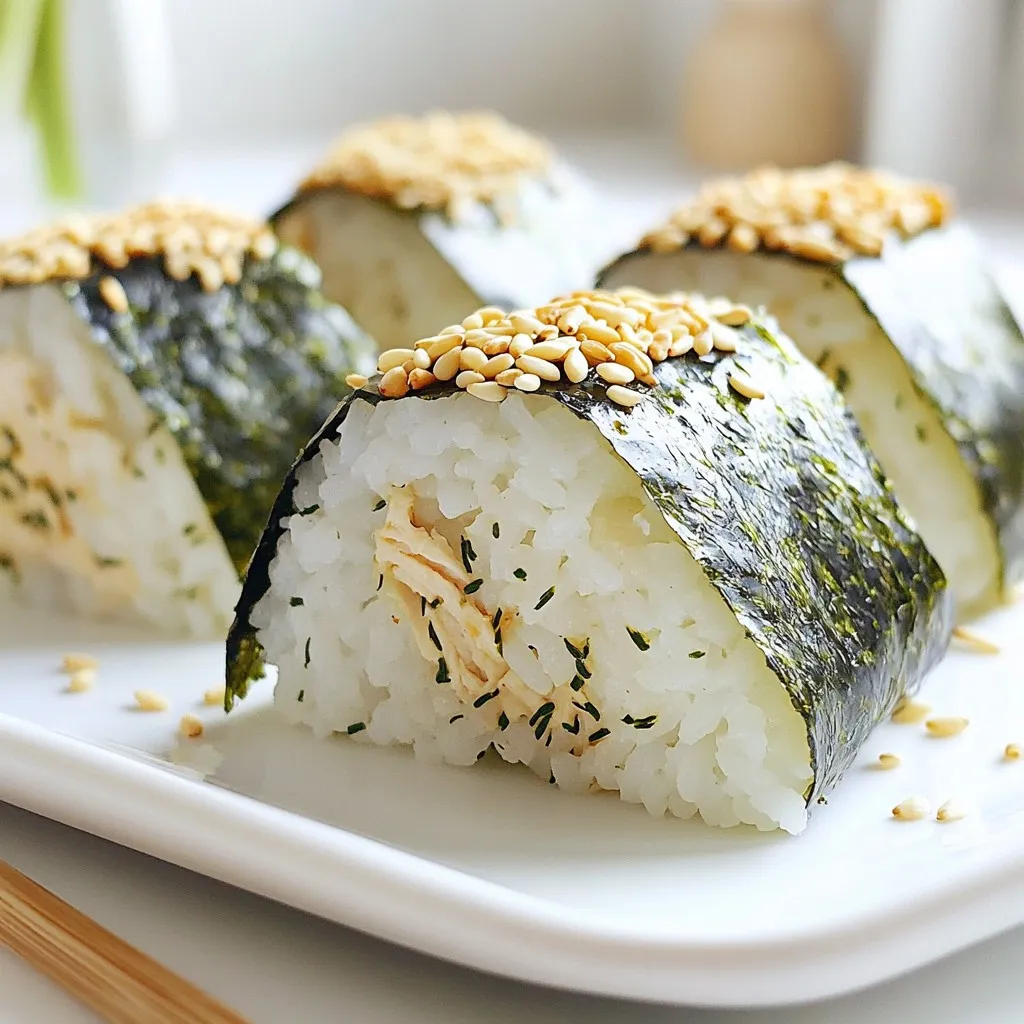
Shaping the Onigiri
1. Once the rice is cool, dampen your hands with water. This will help prevent the rice from sticking.
2. Take a handful of rice and form a small indentation in the center. Spoon about 1 tablespoon of the chicken mixture into this space.
3. Mold the rice around the filling to create a triangular shape. Make sure the filling is fully enclosed by the rice.
4. Repeat this process with the rest of the rice and chicken mixture.
5. If you like, sprinkle sesame seeds over the onigiri. Take a strip of nori and gently wrap each onigiri for extra flavor and a nice look.
Tips & Tricks
Perfecting Rice Texture
To make great onigiri, start with the right rice. Rinsing the sushi rice is key. Use cold water and rinse until the water runs clear. This removes excess starch. Less starch leads to fluffier rice.
Next, for cooking, combine rinsed rice and 2 ½ cups of water in a pot. Bring it to a boil over medium heat. Once boiling, cover the pot and reduce heat to low. Let it simmer for about 20 minutes. This helps the rice cook evenly. After cooking, let it steam with the lid on for 10 more minutes. This step makes the rice tender.
Avoiding Sticky Hands
When shaping the onigiri, sticky hands can be a problem. To avoid this, moisten your hands with water. Just a little will do. This helps the rice slide off easily. You can also use a spatula to handle the rice. This way, you can keep your hands clean while working.
Serving Suggestions
Presentation makes your onigiri more appealing. Arrange them on a nice platter. You can sprinkle extra sesame seeds on top for decoration. Serve with dipping sauces on the side. This adds flavor and makes it fun for everyone. Enjoying onigiri is not just about taste; it’s about the whole experience!
Pro Tips
- Rinse the Rice: Thoroughly rinsing the sushi rice until the water runs clear removes excess starch, resulting in a fluffier and less sticky texture.
- Cooling the Rice: Allow the rice to cool to room temperature before shaping. This helps maintain the right consistency for molding and prevents the onigiri from falling apart.
- Use Damp Hands: Dampen your hands with water before handling the rice. This prevents sticking and makes it easier to shape the onigiri.
- Experiment with Fillings: Feel free to customize the filling! Try adding vegetables, tofu, or different sauces to create your unique flavor combinations.
Variations
Alternative Fillings
You can change the filling in onigiri to fit your taste. If you prefer a vegetarian option, try using mashed avocado or pickled vegetables. Both options add great flavor and texture. For those who enjoy seafood, consider canned tuna mixed with mayonnaise. Tofu is another protein choice, and it works well with soy sauce and sesame oil for a tasty mix.
Flavor Combinations
Mixing flavors can create exciting bites. Sweet and savory pairings are perfect. Try adding a touch of sweet teriyaki sauce to your chicken filling. You can also explore regional variations. In Japan, some people use umeboshi (pickled plum) inside their onigiri, giving a tangy twist. These combinations add depth and surprise to each bite.
Creative Shapes and Sizes
Onigiri isn’t just about triangles! You can make mini onigiri for parties. These bite-sized treats are fun and easy to eat. Shape them into hearts or stars for special events. Another idea is to use cookie cutters for unique presentations. This makes your onigiri stand out, especially for kids or themed gatherings.
Storage Info
Storing Leftovers
Store your chicken onigiri in the fridge for up to three days. Use an airtight container to keep them fresh. If you want to keep them longer, freeze them for up to one month. Wrap each onigiri in plastic wrap before placing them in a freezer bag. This prevents freezer burn and keeps them tasty.
Reheating Tips
Reheat onigiri carefully to maintain their texture. The best method is using a microwave. Place the onigiri on a plate and cover it with a damp paper towel. Heat for 30 seconds. Check if they are warm, and heat more if needed. You can also reheat onigiri in a pan over low heat. This method crisps the rice and warms the filling.
Shelf Life
Onigiri can last in the fridge for about three days. If frozen, they can stay fresh for one month. However, for the best taste and texture, eat them sooner. Always check for any signs of spoilage before eating. If they smell bad or look off, it is best to throw them away.
FAQs
What is onigiri?
Onigiri is a Japanese rice ball. It is often shaped like a triangle. The rice is sticky and flavorful. You can fill it with many tasty things. Common fillings include chicken, fish, or vegetables. Onigiri is popular for lunch or snacks. Many people enjoy it for picnics too. It is simple to make and fun to eat.
Can I make onigiri ahead of time?
Yes, you can make onigiri ahead of time. It is a great meal prep option. Just follow these tips for best results:
– Use fresh ingredients to keep it tasty.
– Store onigiri in the fridge for up to two days.
– Wrap each piece in plastic wrap to keep it moist.
– Add nori just before eating to keep it crisp.
Are onigiri gluten-free?
Yes, onigiri can be gluten-free. The main ingredients are rice and fillings. Here are some options for gluten-free onigiri:
– Use gluten-free soy sauce.
– Fill with veggies or cooked meats.
– Avoid any sauces that may contain gluten.
This way, you can enjoy onigiri while meeting dietary needs.
In this article, we explored how to make tasty chicken onigiri from scratch. I shared key ingredients like sushi rice and cooked chicken, plus optional additions to make it special. You learned step-by-step instructions for making the rice and shaping the onigiri. We also discussed tips for perfect texture, serving ideas, and fun variations. Remember, onigiri offers endless possibilities for flavor and presentation. With these skills, you can create delightful bites that impress. Enjoy making your own delicious onigiri at hom