Looking for a delicious, healthy snack? You’ve come to the right place! These Crispy Baked Zucchini Chips are easy to make and perfectly seasoned for maximum flavor. With just a few fresh ingredients and simple steps, you can enjoy a crunchy treat that satisfies your cravings. Let’s dive into the recipe and make your snacking more exciting and tasty!
Ingredients
Main Ingredients for Crispy Baked Zucchini Chips
– 2 medium zucchinis
– 1 cup panko breadcrumbs
– 1/2 cup freshly grated Parmesan cheese
The main ingredients are simple yet key for flavor and texture. Zucchini gives a fresh taste. Panko breadcrumbs add the crunch we all love. Parmesan cheese brings a savory note that enhances each bite.
Seasoning and Coating Ingredients
– 1 teaspoon garlic powder
– 1 teaspoon onion powder
– 1/2 teaspoon smoked paprika
– 1/2 teaspoon fine salt
– 1/4 teaspoon ground black pepper
– 2 large eggs
– Olive oil spray
For seasoning, I love garlic and onion powders. They create a nice base flavor. Smoked paprika adds a hint of smokiness, while salt and pepper balance everything. Eggs help the crumbs stick, ensuring a crisp coating. A light spray of olive oil boosts crunchiness and flavor, making these chips irresistible.
For the full recipe, check out the detailed steps to create your perfect snack!
Step-by-Step Instructions
Preparation Steps
1. First, preheat your oven to 225°F (110°C). This low temp helps the chips get crispy.
2. Prepare two baking sheets by lining them with parchment paper. This step keeps the zucchini from sticking.
3. Now rinse the zucchinis under cold water and dry them well.
4. Using a sharp knife or mandoline slicer, slice the zucchinis into thin rounds, about 1/8 inch thick. Uniform slices ensure even cooking.
Coating the Zucchini Slices
1. In a large bowl, crack the two large eggs. Whisk them until the yolks and whites mix well.
2. In another bowl, mix the panko breadcrumbs, grated Parmesan cheese, garlic powder, onion powder, smoked paprika, salt, and black pepper. This mix adds great flavor to the chips.
Baking Process
1. Take each zucchini slice and dip it into the egg mixture. Let any extra egg drip back into the bowl.
2. Next, coat the slice in the breadcrumb mix. Press gently to help the crumbs stick.
3. Arrange the coated slices in a single layer on the prepared baking sheets. They should not overlap.
4. Lightly spray the tops of the slices with olive oil for extra crunch.
5. Bake in the oven for about 2 hours. Flip the zucchini chips halfway through for even crispiness.
6. Keep an eye on them during the last few minutes. You want them golden brown and crispy.
7. Once done, let the chips cool for a few minutes on the baking sheets before serving.
Tips & Tricks
Achieving Maximum Crispiness
To get your zucchini chips nice and crispy, slice them thin. Aim for about 1/8 inch thick. Thinner slices bake better and turn crispier. Use a mandoline slicer if you have one; it makes even slices easy. Now, let’s talk about breadcrumbs. I prefer panko breadcrumbs. They are larger and airier than regular breadcrumbs. This means they give more crunch and texture to your chips. Regular breadcrumbs can work, but they may not give that perfect crunch.
Flavor Enhancements
To boost the flavor of your zucchini chips, feel free to add different seasonings. Garlic powder and smoked paprika are great, but you can try others too. Consider adding Italian herbs like oregano or basil. Want some heat? Add red pepper flakes for a kick. You can also mix in different cheese varieties. Try cheddar or a spicy pepper jack for a fun twist. Each cheese gives a unique taste, so experiment until you find your favorite.
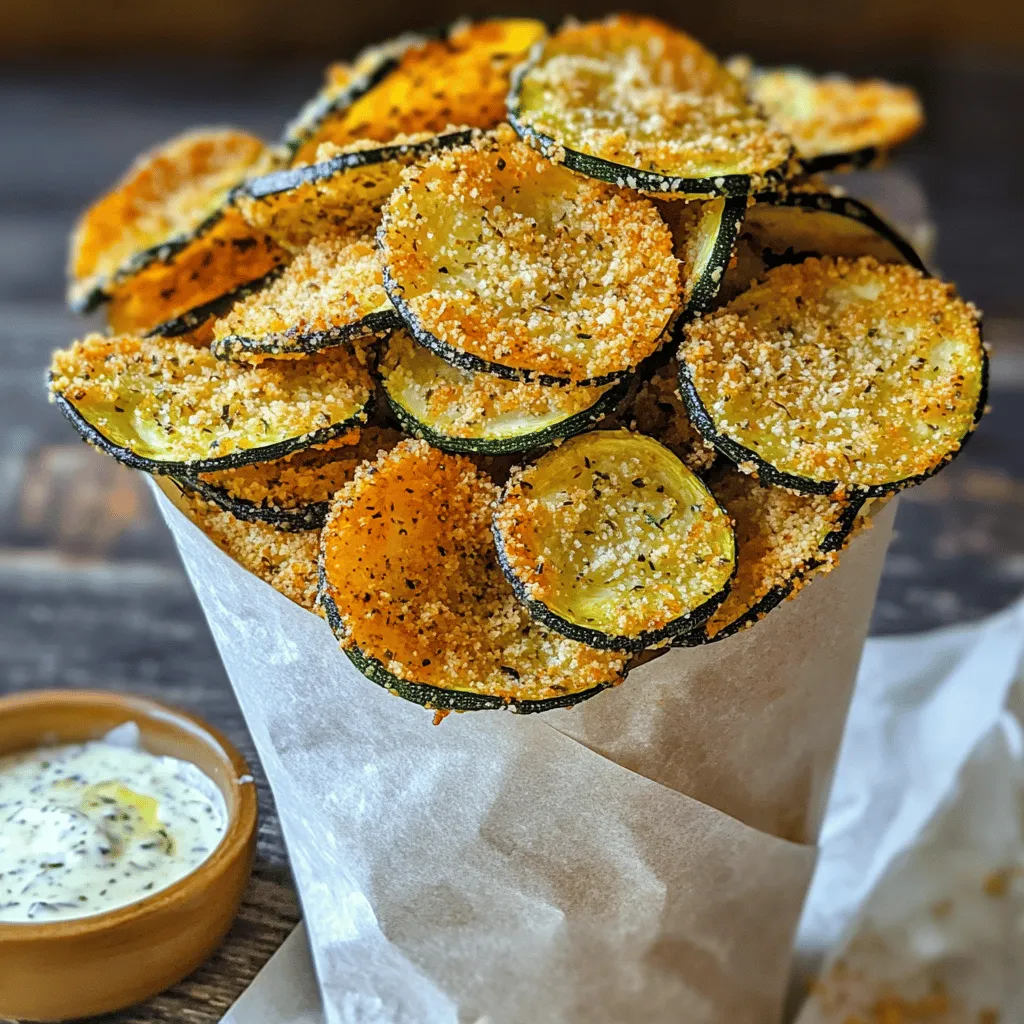
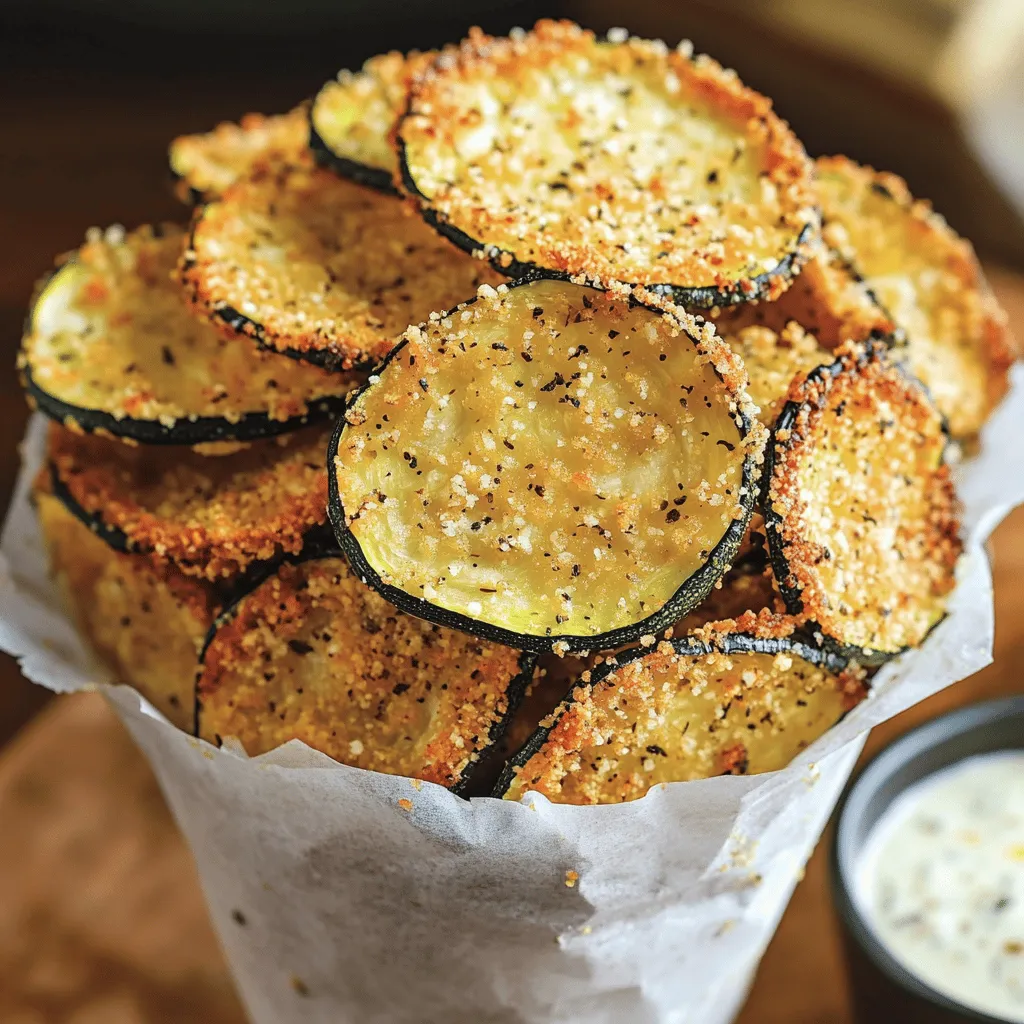
Presentation Suggestions
Presentation matters, especially for snacks. Serve your crispy zucchini chips in a cute cone made of parchment paper. This adds a fun touch to your meal. You can also use a small basket for a rustic look. Pair them with yummy dipping sauces for extra flavor. Homemade ranch or marinara sauce is a great choice. Not only do these dips taste good, but they also look great next to your chips. For the full recipe, check out the link provided!
Variations
Different Vegetable Options
You can swap zucchini for other veggies. Try carrots, sweet potatoes, or eggplant. Each one gives a unique taste and texture. When changing veggies, adjust the cooking times. Thicker veggies need more time to bake. For example, sweet potato chips might need an extra 10 to 15 minutes. Keep an eye on them to avoid burning.
Gluten-Free Adaptations
If you want a gluten-free snack, use gluten-free breadcrumbs. Many brands make tasty options. You can also use crushed nuts or seeds for a crunchy coating. Almond flour or coconut flour are great choices too. Just make sure you season them well. Flavor is key to a great snack!
Flavor Profiles
Want some spice? Add red pepper flakes to your breadcrumb mix. This gives an exciting kick to your chips. If you love herbs, try using dried oregano or thyme. You could even mix in some fresh herbs for a brighter taste. Experiment with different flavors to find your favorite combo!
For the full recipe, check out Crispy Baked Zucchini Chips.
Storage Info
How to Store Leftover Zucchini Chips
To keep your zucchini chips crisp, store them in an airtight container. Place a paper towel in the container to absorb moisture. This will help maintain their crunch. Keep the container in a cool, dry place, away from sunlight. Avoid refrigerating them, as that can cause sogginess.
Reheating Instructions
When you want to enjoy your leftover zucchini chips, reheating is key. The oven method is best for crispiness. Preheat your oven to 350°F (175°C). Spread the chips out on a baking sheet and heat for about 10 minutes. This will help restore their crispness.
If you’re in a hurry, you can use the microwave. Place the chips on a microwave-safe plate. Heat them for 30 seconds at a time until warm. However, this may not keep them as crispy.
Freezing Options
Yes, you can freeze zucchini chips! Lay them out in a single layer on a baking sheet and freeze until solid. This helps them not stick together. After freezing, transfer them to a freezer bag. Remove as much air as possible before sealing.
For successful freezing and reheating, it’s best to bake them first. When you’re ready to eat, bake from frozen at 375°F (190°C) for about 15-20 minutes. This will give them a fresh-from-the-oven taste. Enjoy your crispy baked zucchini chips anytime! For the full recipe, check out the section above.
FAQs
How do I make sure my zucchini chips are crispy?
To keep your zucchini chips crispy, moisture is the enemy. Follow these steps:
– Slice Thin: Cut zucchini into thin rounds, about 1/8 inch thick. Thin slices cook better.
– Dry Well: After washing, dry the zucchini slices thoroughly with paper towels. Moisture leads to soggy chips.
– Low Temperature: Bake at 225°F (110°C). A low heat helps remove moisture slowly.
– Flip Halfway: Turn the chips halfway through baking. This helps them crisp evenly.
– Watch Closely: Keep an eye on them during the last minutes. Ovens can vary, and you want them golden, not burnt.
Can I make these zucchini chips in an air fryer?
Yes, you can! Here’s how to adapt the recipe for an air fryer:
1. Preheat Air Fryer: Set it to 375°F (190°C).
2. Prepare Zucchini: Follow the same slicing, drying, and coating steps.
3. Air Fry: Place the zucchini chips in a single layer in the air fryer basket. Cook for 12-15 minutes, shaking halfway.
4. Check Crispiness: Make sure they are golden brown before removing.
What dipping sauces pair well with zucchini chips?
Zucchini chips taste great with many dips. Here are some popular options:
– Ranch Dressing: A classic choice for a cool, creamy dip.
– Marinara Sauce: Perfect for a tangy twist.
– Salsa: Adds a fresh and zesty flavor.
For homemade dips, try this easy ranch recipe:
– Easy Ranch Dip: Mix 1 cup of sour cream with 1 teaspoon of garlic powder, 1 teaspoon of dried dill, and a pinch of salt. Adjust to taste!
For the full recipe of crispy baked zucchini chips, check it out in the earlier sections. Enjoy your cooking!
In this blog post, I shared how to make crispy baked zucchini chips. We covered the key ingredients, the step-by-step process, and tips for the best results. You learned about seasoning options and how to store your leftover chips. Don’t forget, you can even swap zucchini with other veggies. Explore flavors and try different dips to make it fun. Enjoy making your chips crispy, tasty, and satisfying!