Want to impress your guests with a fun and tasty birthday snack board? I’ve got you covered! In this guide, I’ll show you how to create a colorful and exciting snack spread that everyone will love. From delicious cheeses to crunchy veggies and sweet treats, we’ll cover the best ingredients and easy steps. Get ready to make your next birthday party unforgettable with a simple and fun snack board setup!
Ingredients for Birthday Snack Board
Essential Ingredients
– 1 cup assorted nuts (almonds, cashews, walnuts)
– 1 cup assorted cheeses (cheddar, gouda, mozzarella)
– 1 cup fresh fruits (grapes, strawberries, apple slices)
When I create a birthday snack board, I always start with the essentials. The nuts are a great choice. Almonds, cashews, and walnuts add crunch and flavor. They also provide healthy fats that everyone will love.
Next, I pick cheeses. Cheddar gives a strong taste, while gouda is creamy. Mozzarella offers a mild flavor that kids adore. Cut them into bite-sized pieces for easy grabbing.
Fresh fruits add color and sweetness. I often use grapes, strawberries, and apple slices. They make the board look bright and inviting. Plus, they balance the savory flavors of nuts and cheese.
Additional Components
– 1 cup colorful vegetables (carrot sticks, cucumber slices, bell pepper strips)
– 1/2 cup hummus or dip (roasted red pepper hummus or tzatziki)
– 1 pack of assorted crackers
– 1/2 cup dark chocolate squares or chocolate-covered pretzels
To make the board even more fun, I add colorful veggies. Carrot sticks, cucumber slices, and bell pepper strips are perfect. They bring crunch and freshness to every bite.
Hummus or another dip is a must. I love roasted red pepper hummus for its rich taste. Tzatziki is cool and refreshing. Place a small bowl of dip in the center for easy access.
Assorted crackers add a delightful crunch. I choose a mix of flavors to keep things interesting. Finally, I sprinkle in some sweet treats. Dark chocolate squares or chocolate-covered pretzels are always a hit. They give a sweet ending to the savory snacks.
If you want the full recipe, check it out!
Step-by-Step Instructions
Preparing the Board
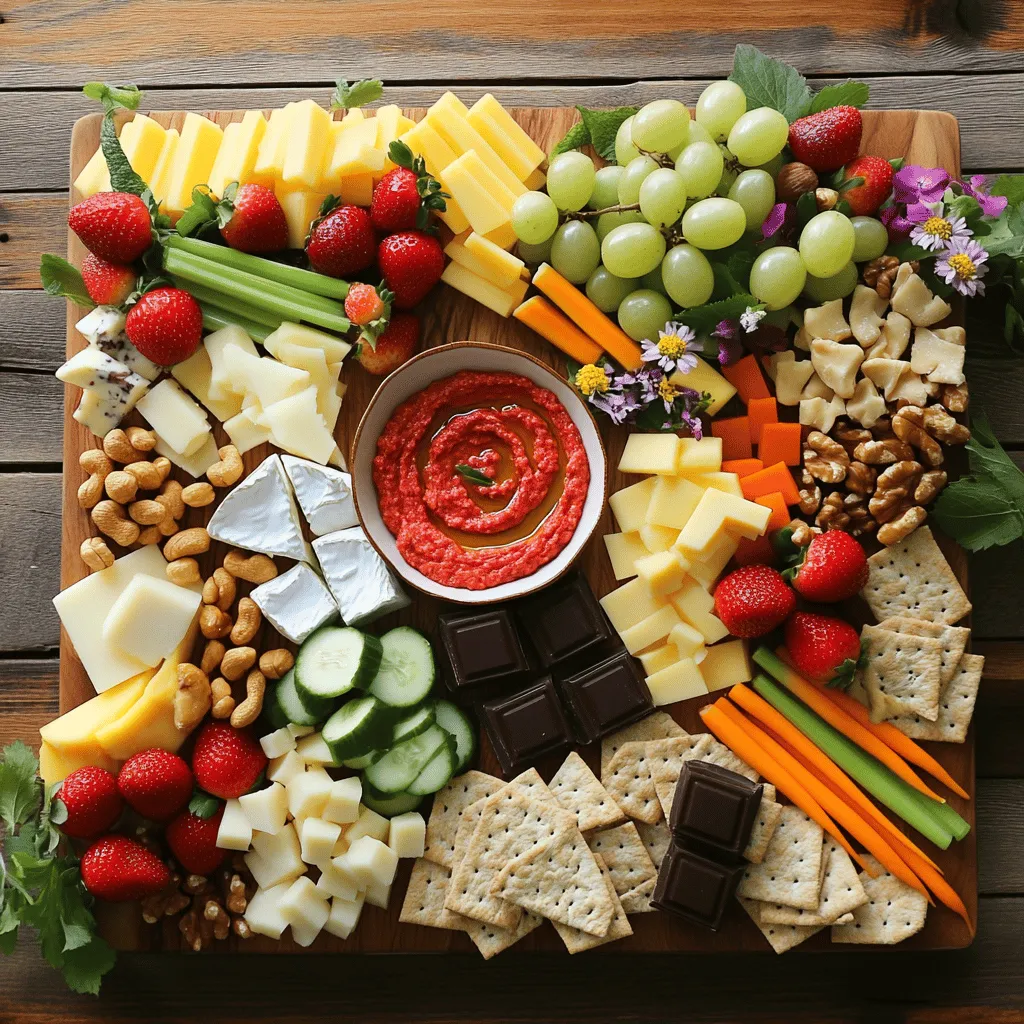
Start with a large, flat wooden or ceramic board. This will be your canvas for the snack board. Choose a surface that is easy to clean and fits your table.
Begin by clustering the bite-sized pieces of cheese around the board. Space them out evenly. This makes the board look nice and inviting. Next, fill empty spots with assorted nuts. Let some nuts spill over the edges. This gives a casual, fun vibe.
Adding Fresh Produce
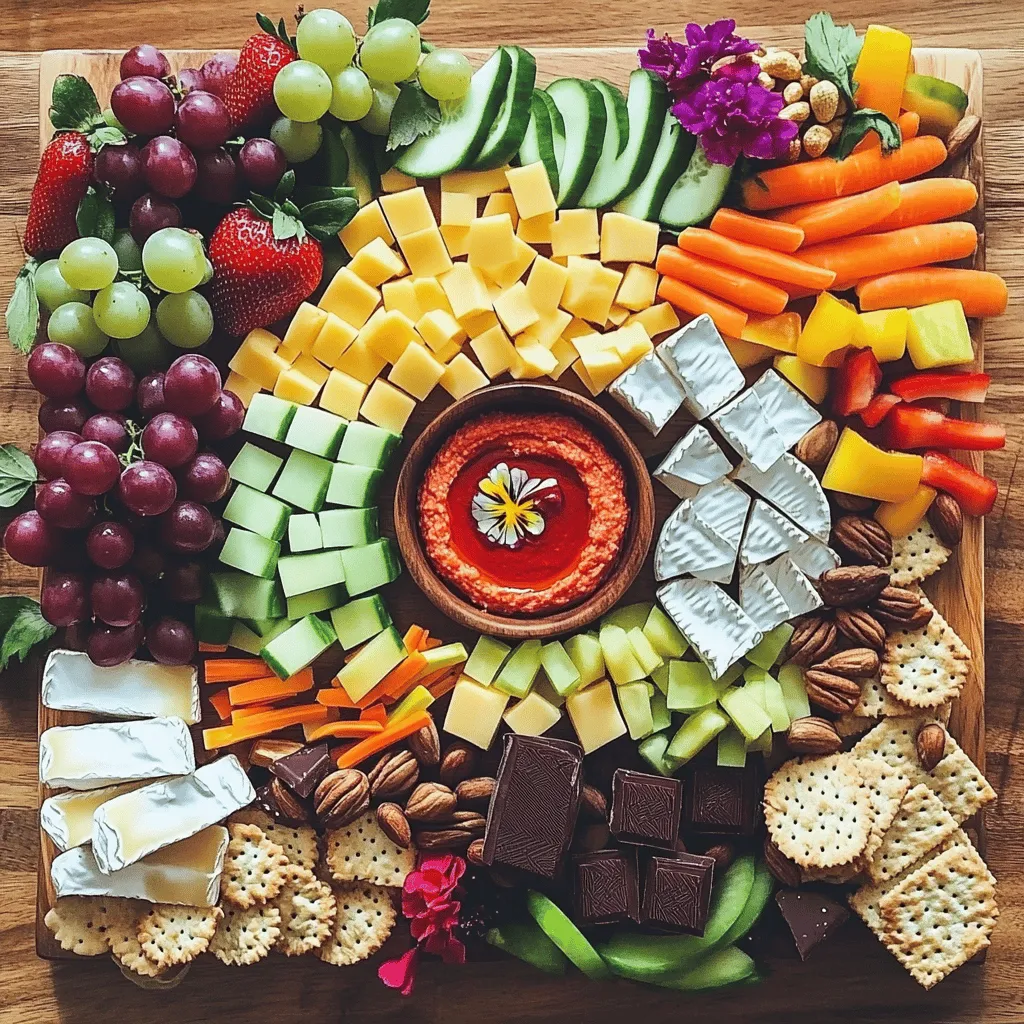
Now it’s time for the fresh fruits! Place them in small groups across the board. Tuck grapes and strawberries among the cheese and nuts. This will create a bright and colorful display.
For the veggies, arrange the colorful sticks in charming groups. You can stand them in small jars or lay them down in a fan shape. This adds interesting shapes to the board.
Assembling the Snack Components
Now, let’s add the dip! Put a small bowl of hummus or dip right in the center. This makes it easy for everyone to reach.
For the assorted crackers, stack them in little piles. Distribute them around the board. This way, every bite has a nice crunch. Finally, scatter dark chocolate squares or chocolate-covered pretzels around the edge. This creates sweet spots for dessert lovers.
To make it extra special, garnish with a few edible flowers. This adds a festive and colorful touch to your birthday snack board. You can find the Full Recipe for more details!
Tips & Tricks for an Impressive Snack Board
Presentation Techniques
To make your snack board shine, focus on color coordination. Choose items that contrast well. For example, pair bright fruits with dark cheeses. This adds life and makes your board pop. Use small bowls for dips. They create points of interest and keep things tidy. Labels for each snack help guests know what to try. This simple touch can spark conversation.
Creating Visual Appeal
Balancing colors and shapes is key. Mix round fruits with long veggie sticks. This adds variety and keeps the eye moving. Incorporate height by stacking crackers or placing jars of veggies upright. These small changes make your board more dynamic. Don’t forget to add a few edible flowers for a fun touch. They bring elegance and joy to your snack board.
For a full recipe and further details, check out the complete guide.
Variations of Birthday Snack Boards
The fun of a birthday snack board lies in its endless variations. You can create a board for any theme or event.
Themed Snack Boards
Seasonal variations are a great way to celebrate different times of the year. For a summer board, use bright fruits like watermelon and berries. In the winter, think about cozy treats like hot cocoa and gingerbread cookies.
Kid-friendly options can make your board a hit for younger guests. Use fun shapes with cookie cutters to create cheese stars or fruit hearts. Include favorite snacks like mini pretzels and gummy bears to keep kids excited.
Dietary Considerations
If you have guests with food restrictions, consider gluten-free alternatives. Use rice crackers or gluten-free pretzels. You can also add gluten-free nut mixes for added crunch.
For a vegan snack board, choose plant-based cheeses and dips. Fresh fruits and veggies are always a hit. You can even add vegan chocolate to satisfy the sweet tooth. This way, everyone can enjoy the celebration without worry.
For the full recipe, check out the complete guide on creating your delightful birthday snack board!
Storage Info for Leftovers
Proper Storage Techniques
After the party, cover your leftover snack board. Use plastic wrap or a lid. Place it in the fridge right away. This keeps snacks fresh and tasty. For cheese, wrap it in wax paper. Then, put it in a sealed bag. This helps it breathe and stay good. For fruits and veggies, store them in airtight containers. This will keep them crisp and juicy.
Reusing Ingredients
Got some snacks left? Don’t let them go to waste! Use leftover cheese in a sandwich or salad. Mix nuts into yogurt for a quick snack. Fruits can be blended into smoothies or added to oatmeal. If you have extra crackers, crush them for a crunchy topping on casseroles. Get creative! You can transform these snacks into new meals. This way, you keep enjoying the flavors from your birthday snack board. For the full recipe, check out the festive details in the main article.
FAQs about Birthday Snack Boards
How to make a birthday snack board?
To make a birthday snack board, start with a large flat board. Gather your ingredients first. Arrange cheese, nuts, fruits, and veggies in clusters. Place a dip in the center for easy access. Finally, add crackers and sweet treats around the edges. This simple process turns your snacks into a fun feast.
What snacks are best for a birthday board?
You want a mix that has textures and flavors. Here are some great options:
– Nuts: Almonds, cashews, walnuts
– Cheese: Cheddar, gouda, mozzarella
– Fruits: Grapes, strawberries, apple slices
– Vegetables: Carrot sticks, cucumber slices, bell pepper strips
– Dips: Hummus or tzatziki
– Crackers: Choose assorted flavors
– Sweet Treats: Dark chocolate squares, chocolate-covered pretzels
These snacks create a colorful and tasty board that everyone will love.
How can I make my snack board visually appealing?
To make your snack board stand out, use these tips:
– Color Scheme: Arrange snacks by color. This adds fun and cheer.
– Height and Shape: Vary heights by stacking crackers or using jars for veggies.
– Clusters: Group snacks in small clusters. This makes it easy to grab.
– Labels: Consider adding little labels for each snack. It helps guests know what they are enjoying.
These steps will make your board look great and tempting to all!
Creating a birthday snack board is fun and simple. Start with nuts, cheese, and fresh fruits for the base. Add colorful veggies, dips, and sweet treats for variety. Arrange everything well to make it look great.
Remember, presentation is key. Use themes and consider dietary needs to please everyone. After the party, store leftovers properly to keep them fresh. You can use extras in new and tasty ways.
Now you are ready to make a fantastic birthday snack board everyone will love!